Pushing Johnny’s secret buttons.
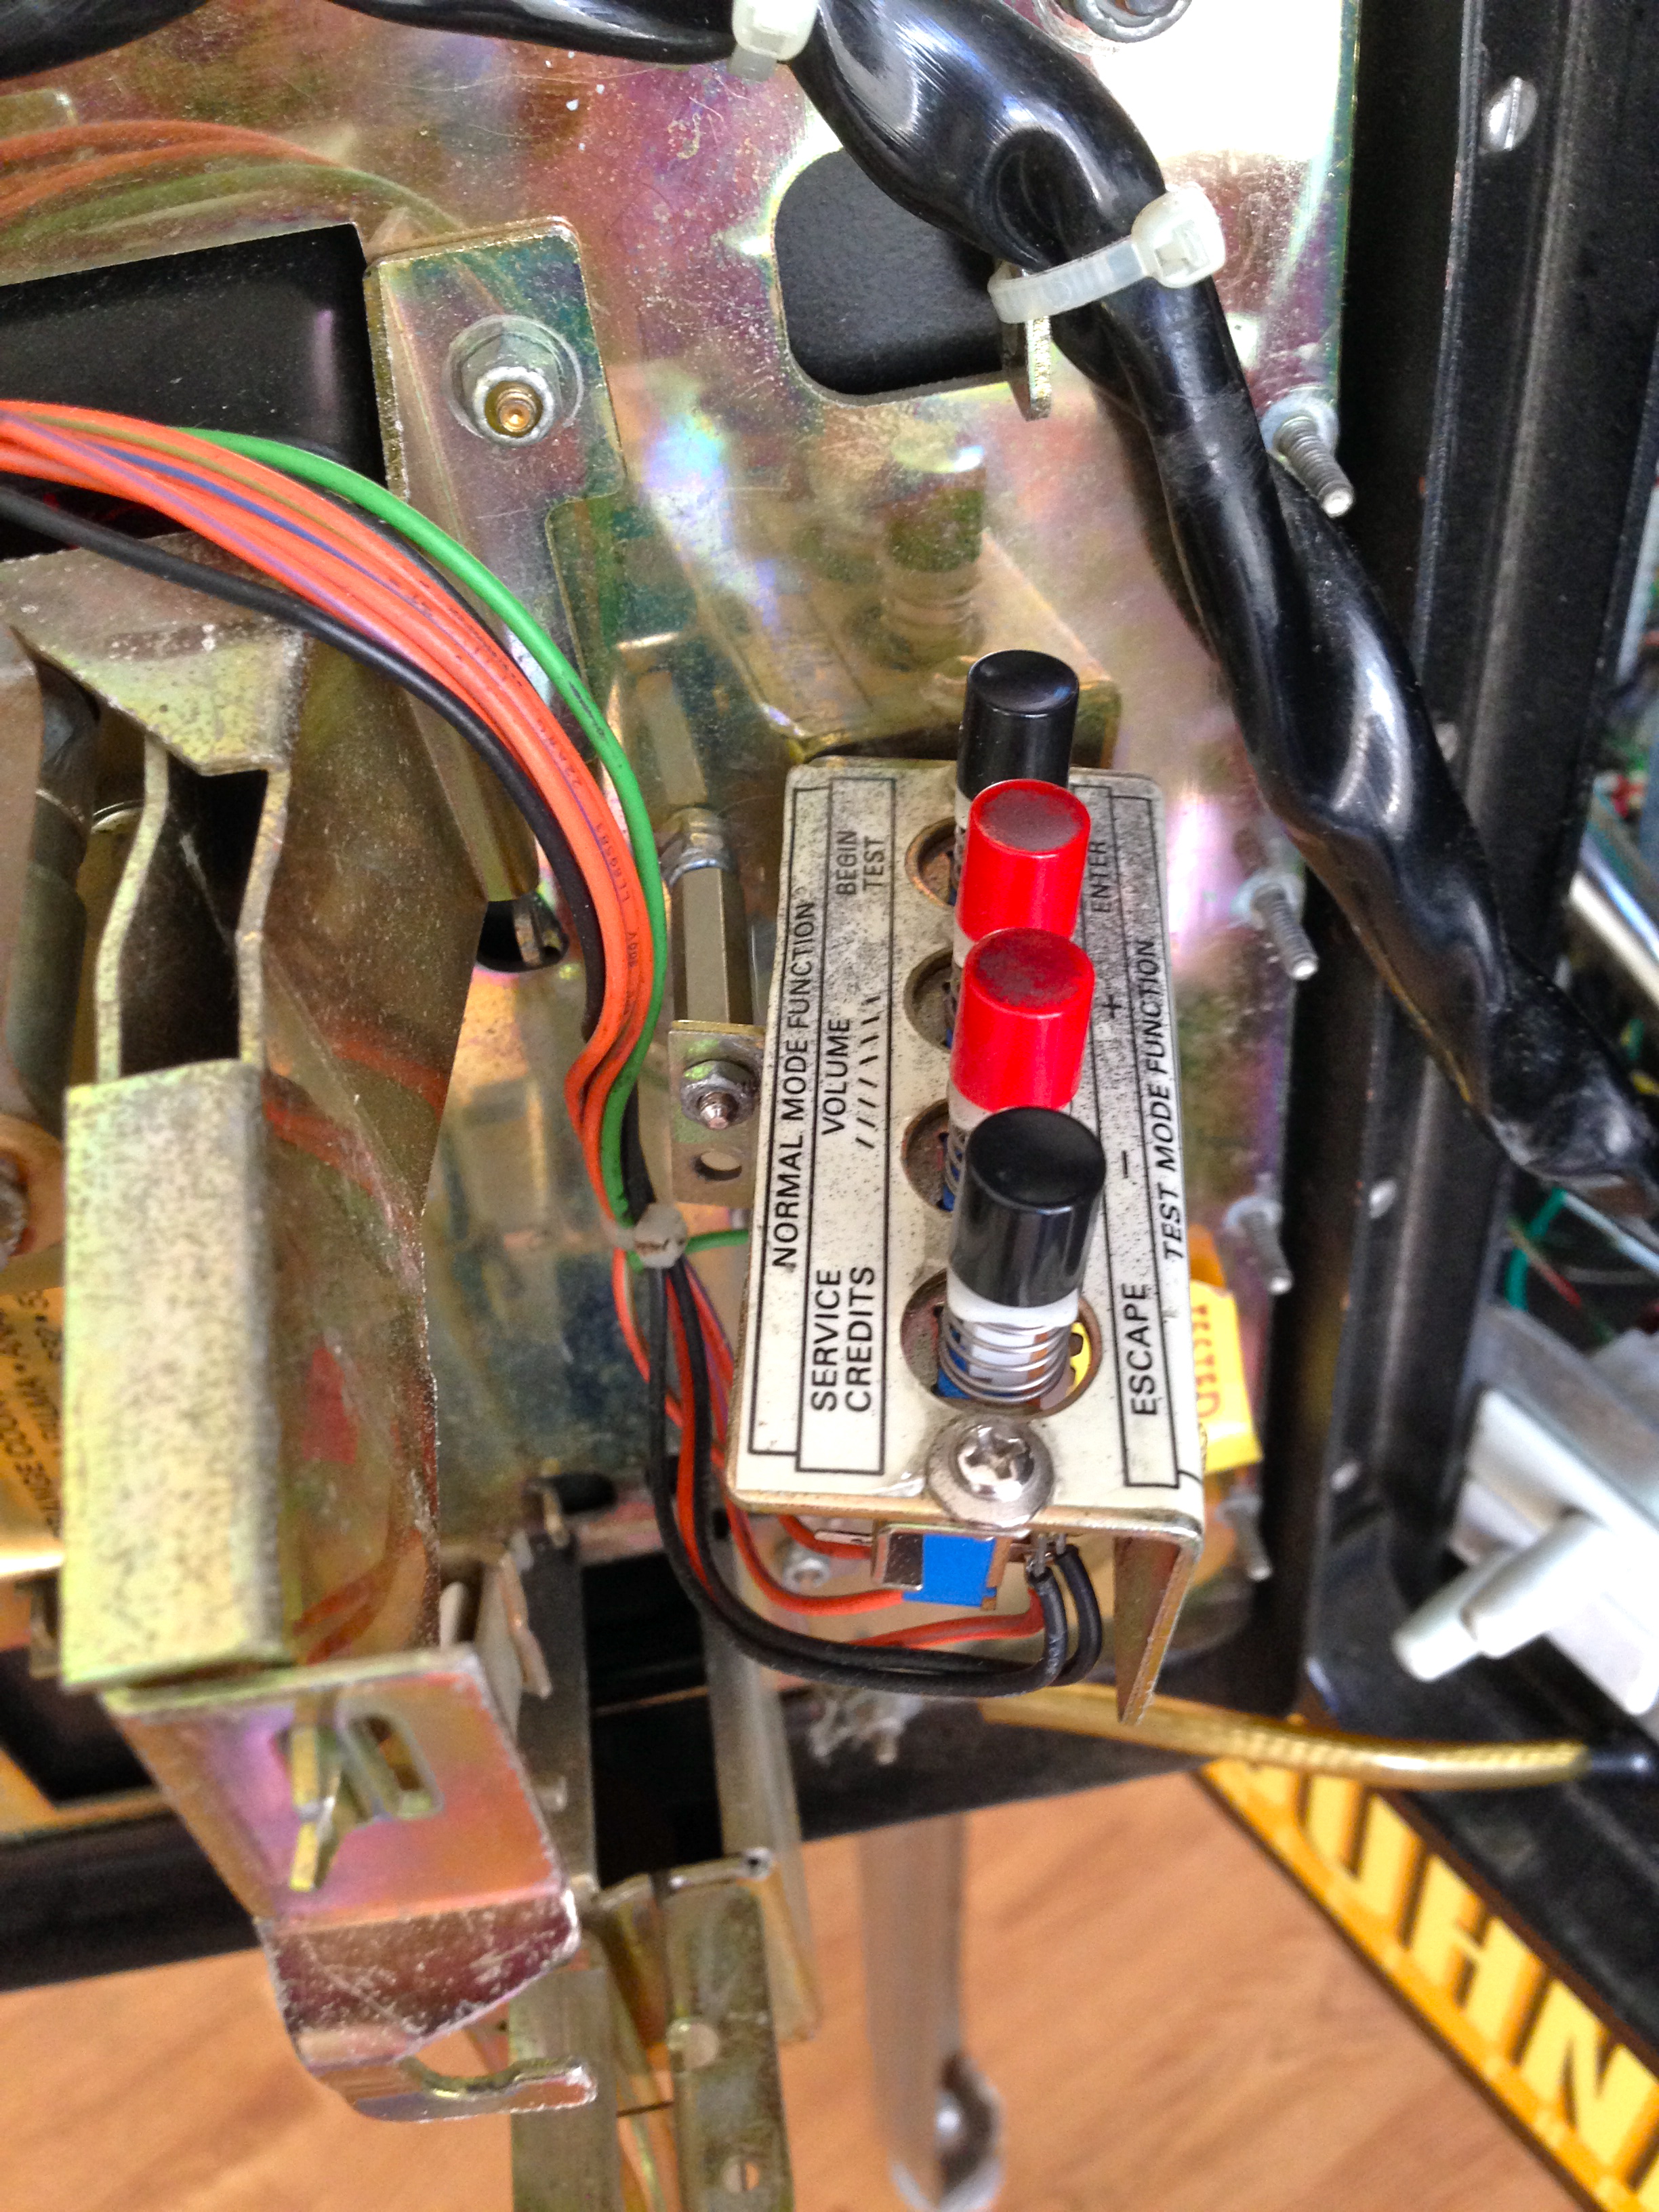
Every pinball machine from about 1980 onwards (the solid-state era) has a diagnostic control panel inside it. This is a set of buttons used to control service menus for running game tests, setting prices, gathering gameplay statistics, modifying game rules, and anything else an operator or technician might have needed to do. It has arguably become an even more important tool as these games age, because breakdowns become more frequent. Personally, I’ve probably spent as much time in those service menus as I have playing the game. At least, some days it feels like that. Johnny’s reliability is improving as I gradually fix all the stuff previous owners have neglected, but it’s a process, to be sure.
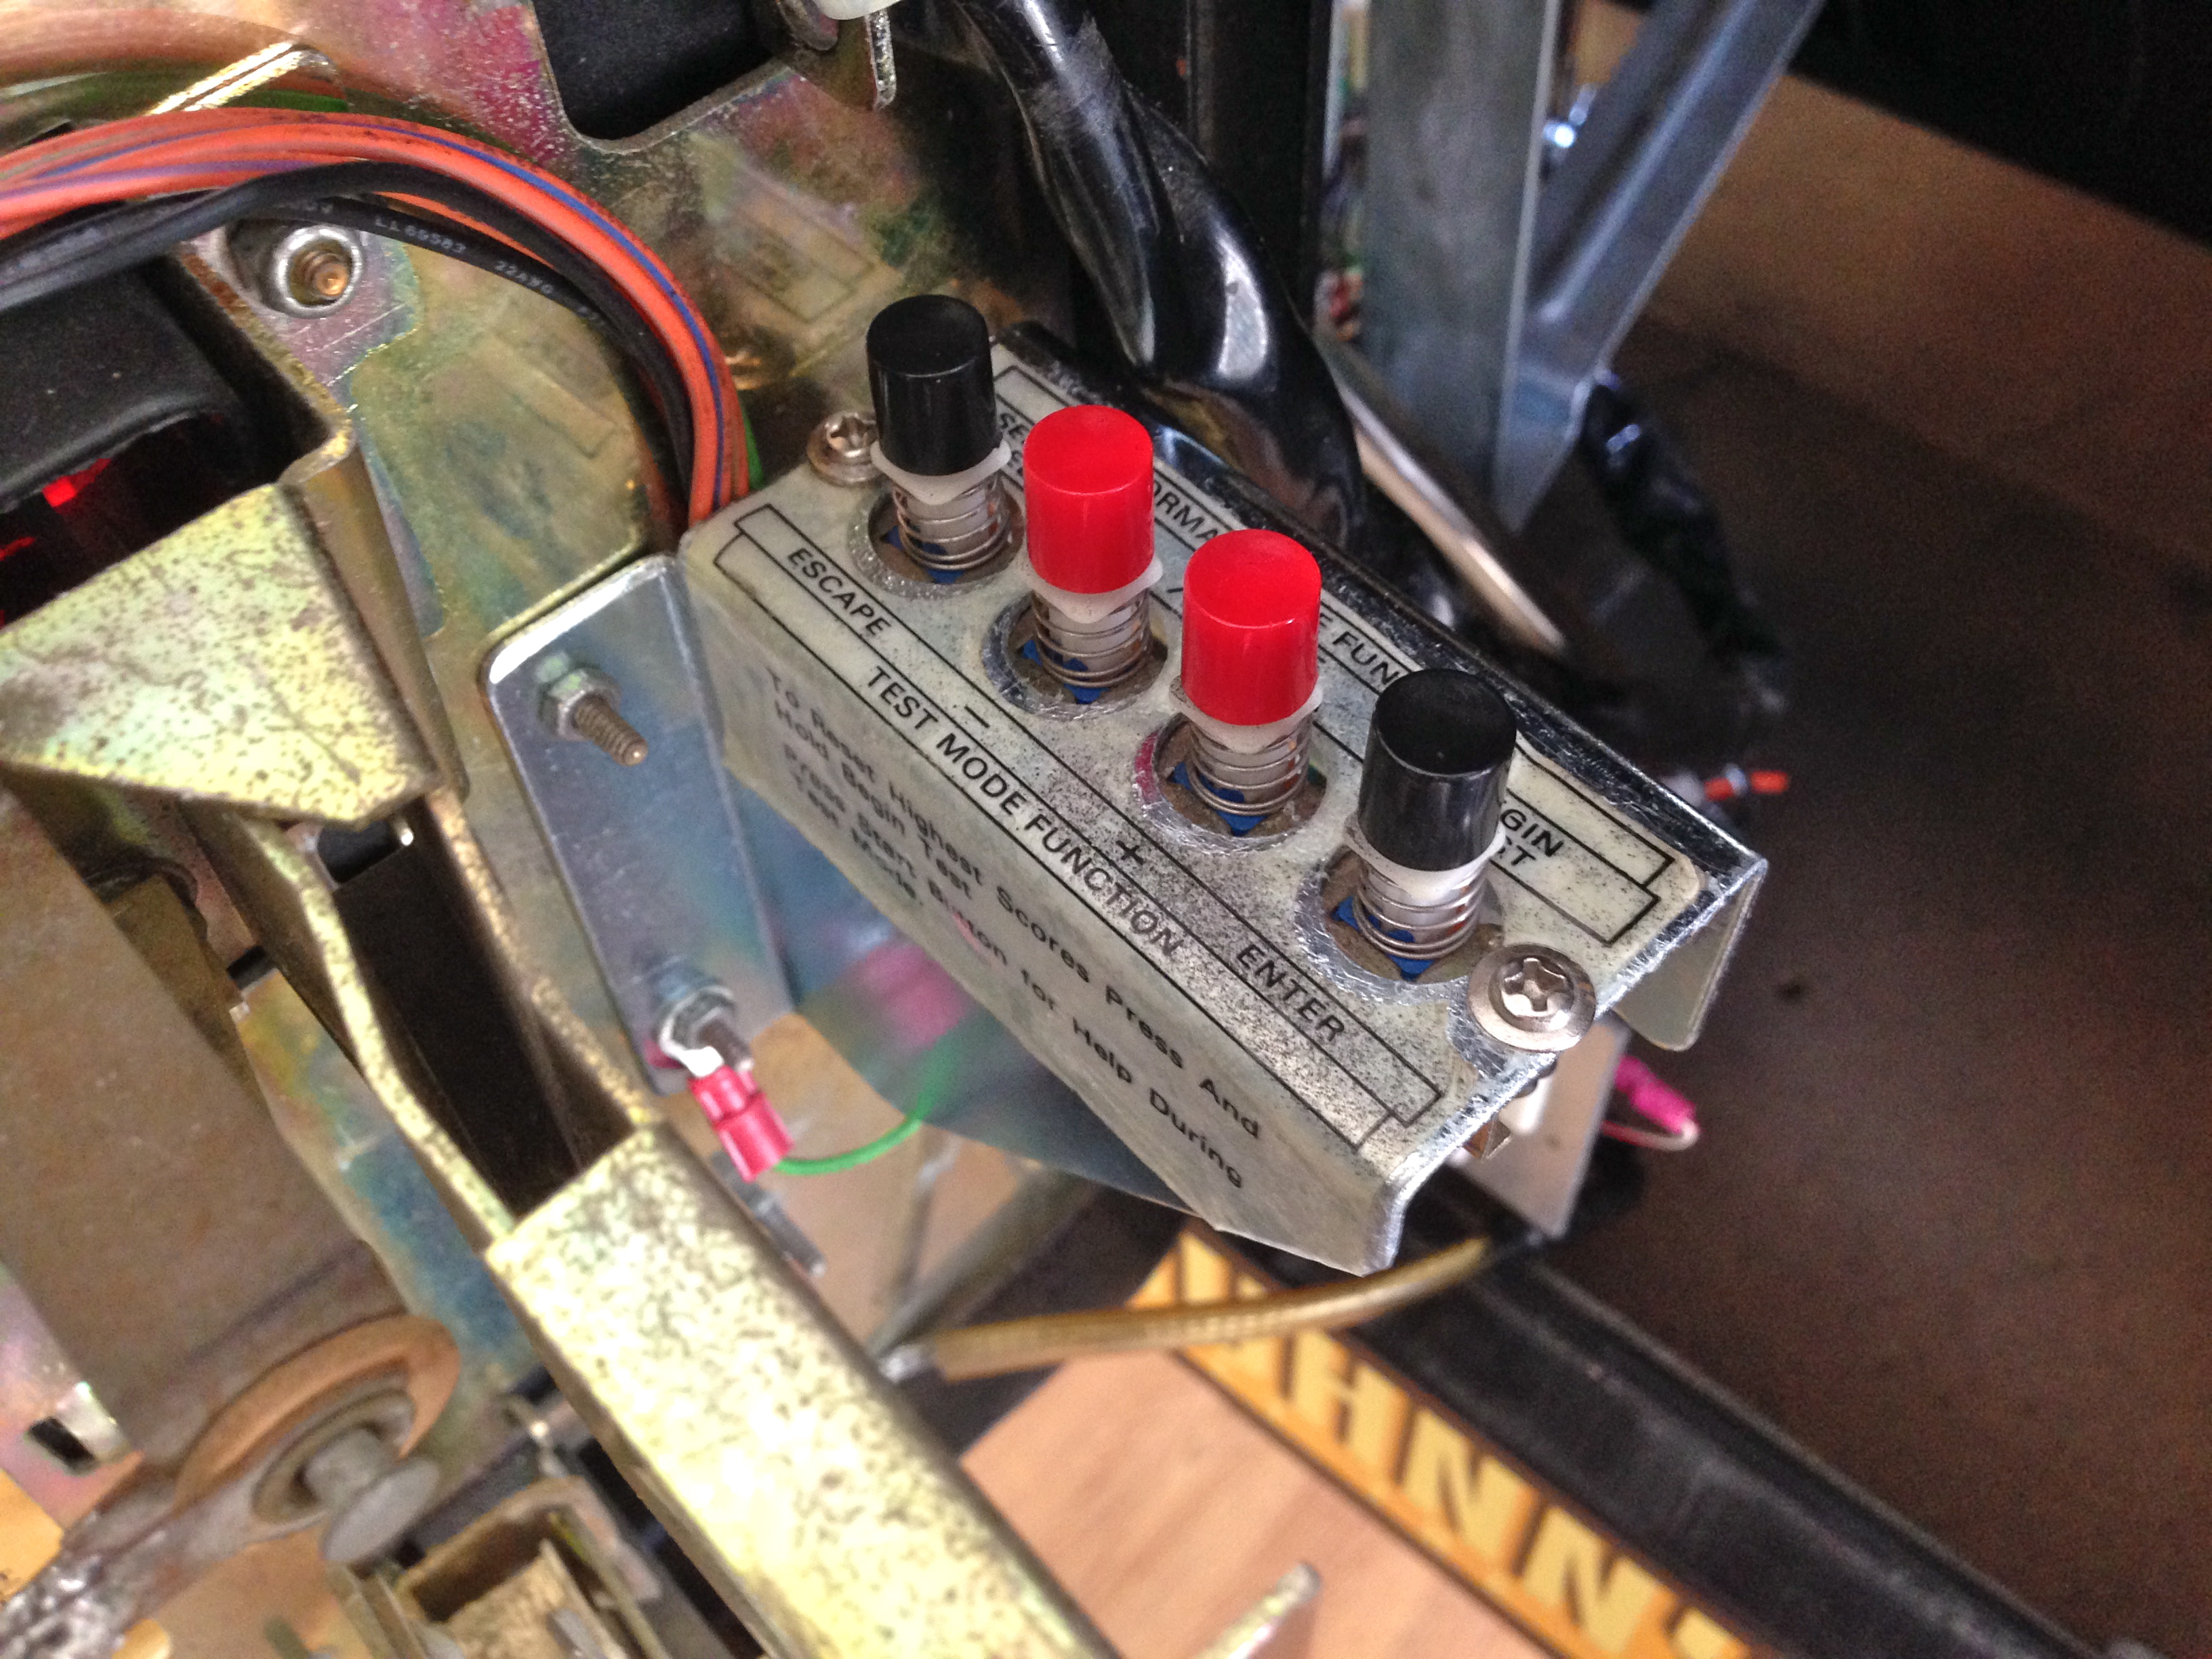
Ironically, Johnny’s diagnostic panel was itself in a very sorry state. When I first interacted with it, I thought there was something wrong with the software. None of the buttons were behaving correctly. Starting a test would reboot the game, the menus were scrolling oddly, and it was general chaos. It finally dawned on me that the buttons were installed backwards, so the labels didn’t match the functions. Once I got used to that, the panel was usable, but still awkward. The worst part is that the bracket was mounted with a makeshift arrangement of nuts and standoffs at a single point, so the whole thing was unstable. You had to brace it with one hand while pushing the buttons, and it drove me nuts. The whole thing needed a going-over.
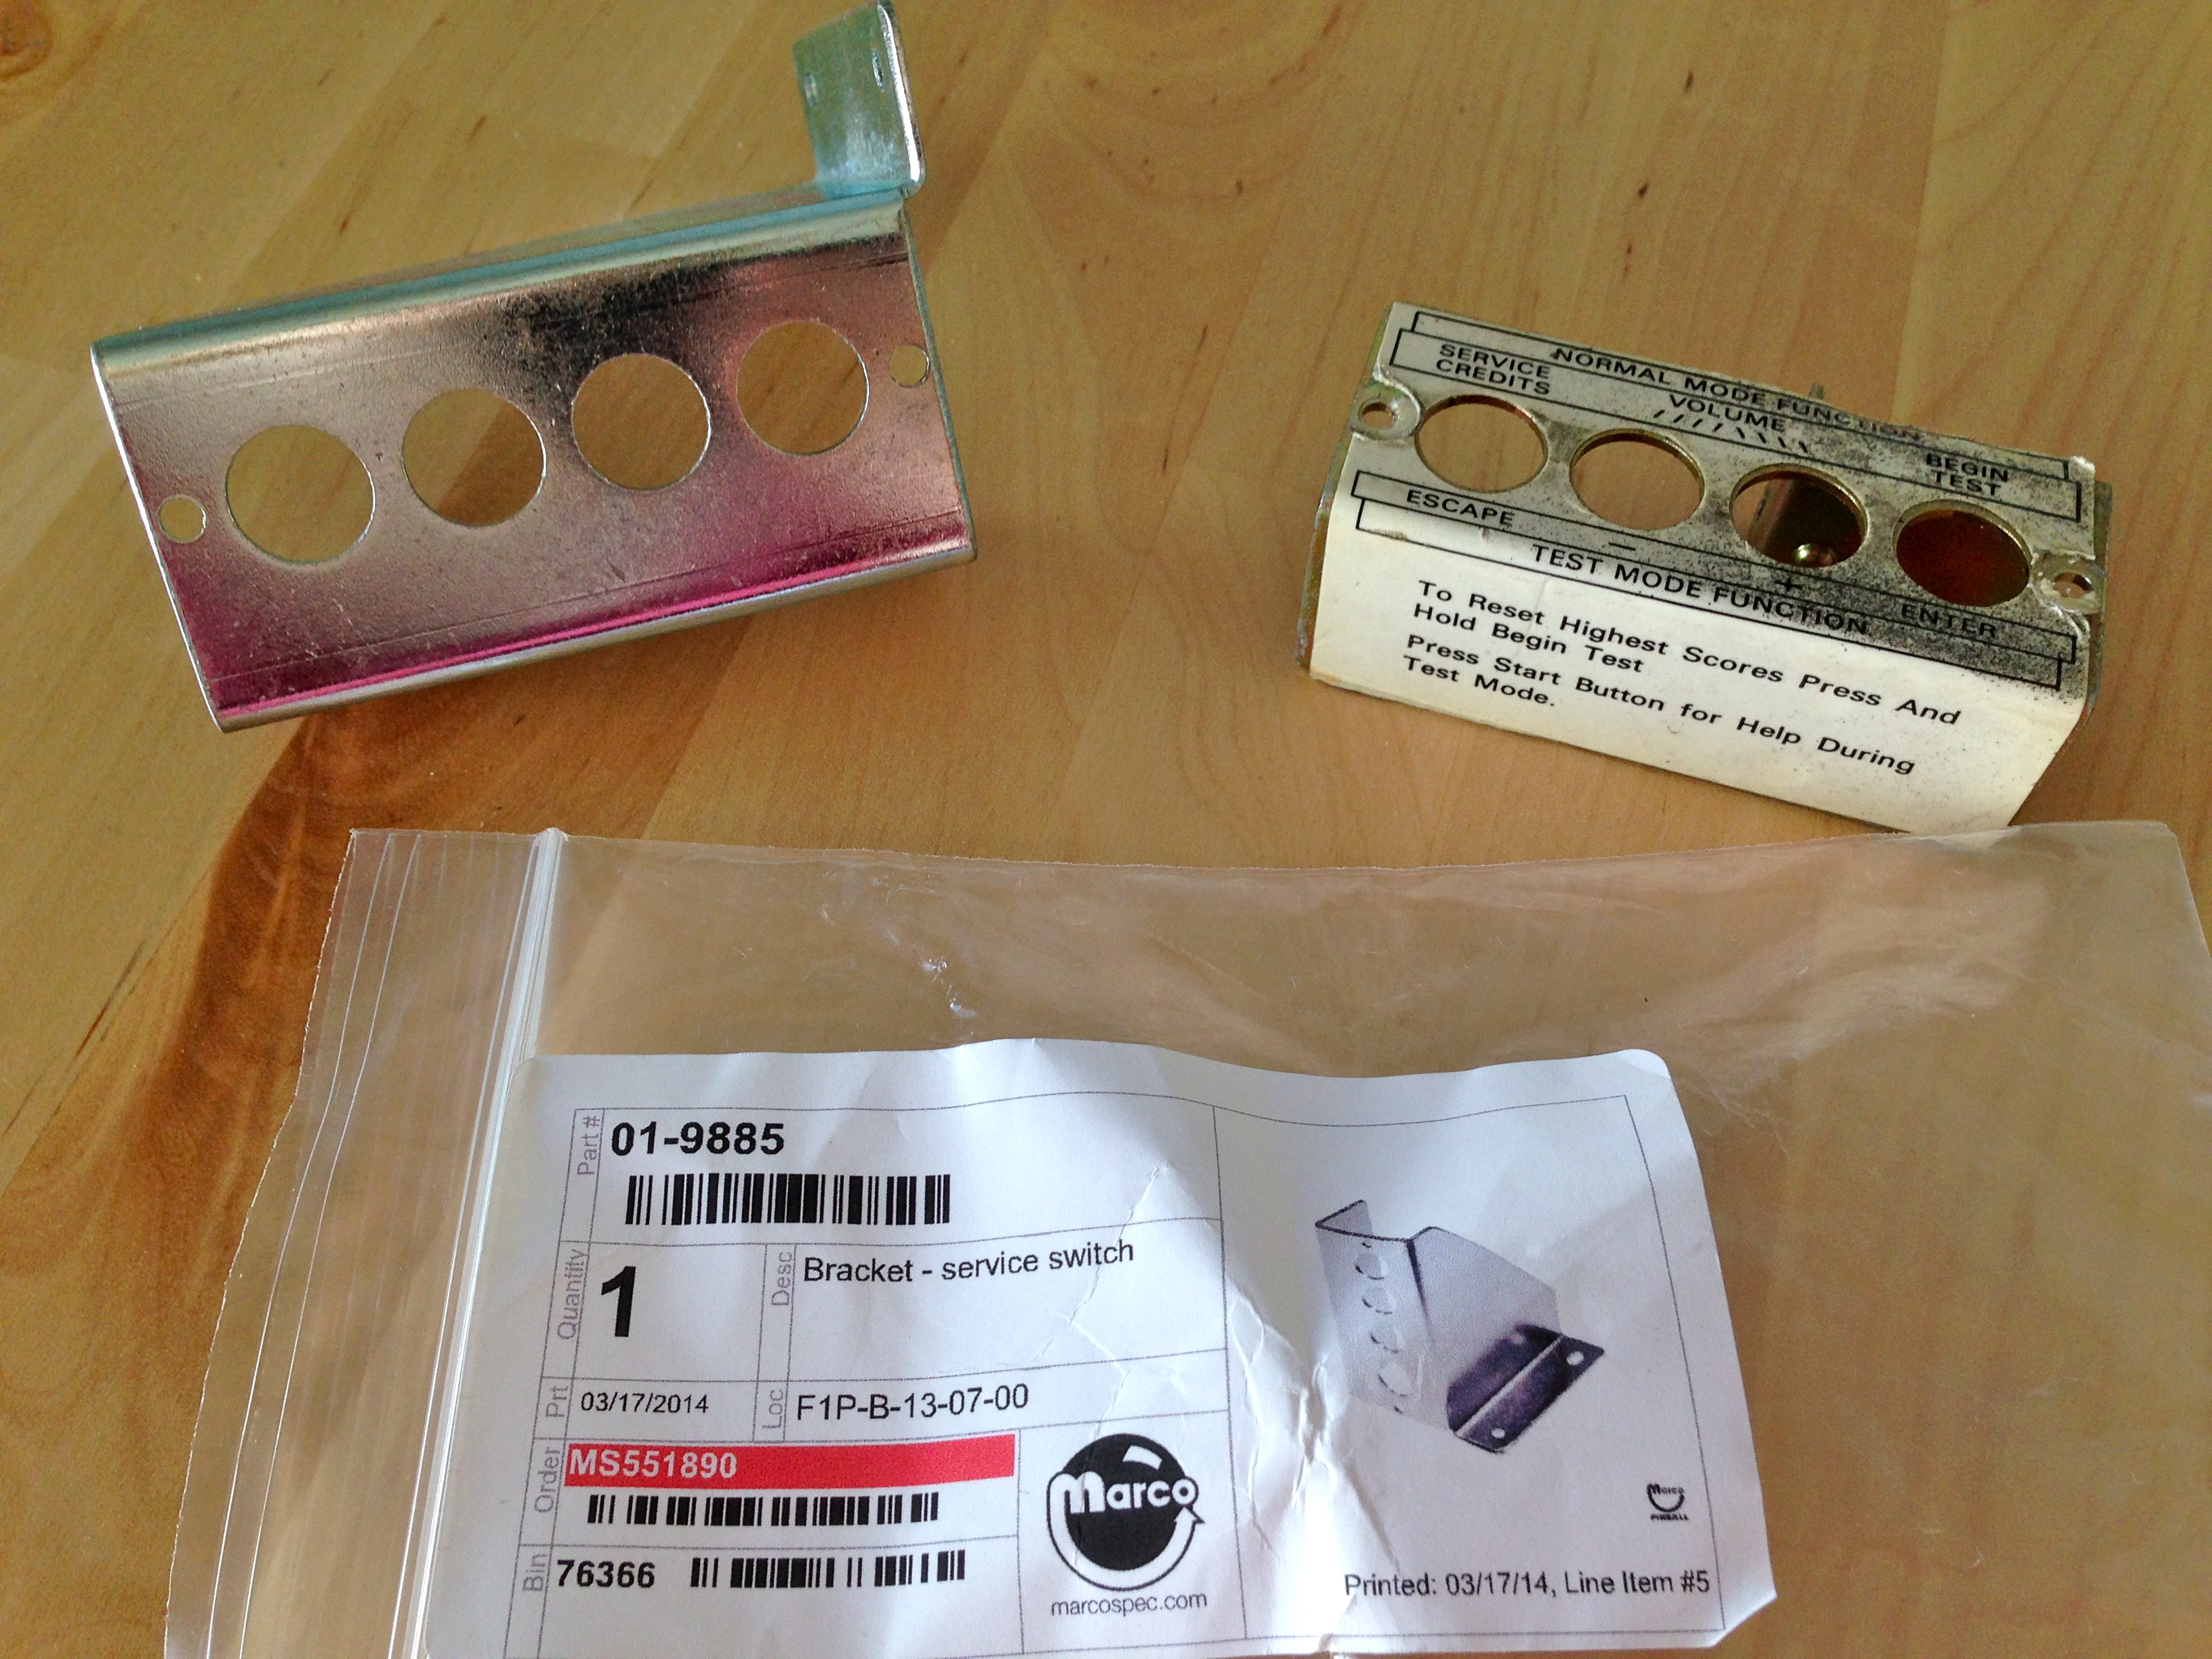
The root cause of most of these issues is that the bracket holding the buttons is actually the wrong one. Who knows where that one came from. It seems like it’s a Williams bracket because the labels are correct (despite being reversed relative to the buttons), but the mounting points aren’t even close. I thought all Williams machines used the same bracket, but perhaps not. It’s all part of the secret lives of pinball machines.
If it was as easy as bolting on a shiny new bracket, there wouldn’t be a Blondihacks post about it, so regular readers know things are about to get messy. In this case, quite literally.
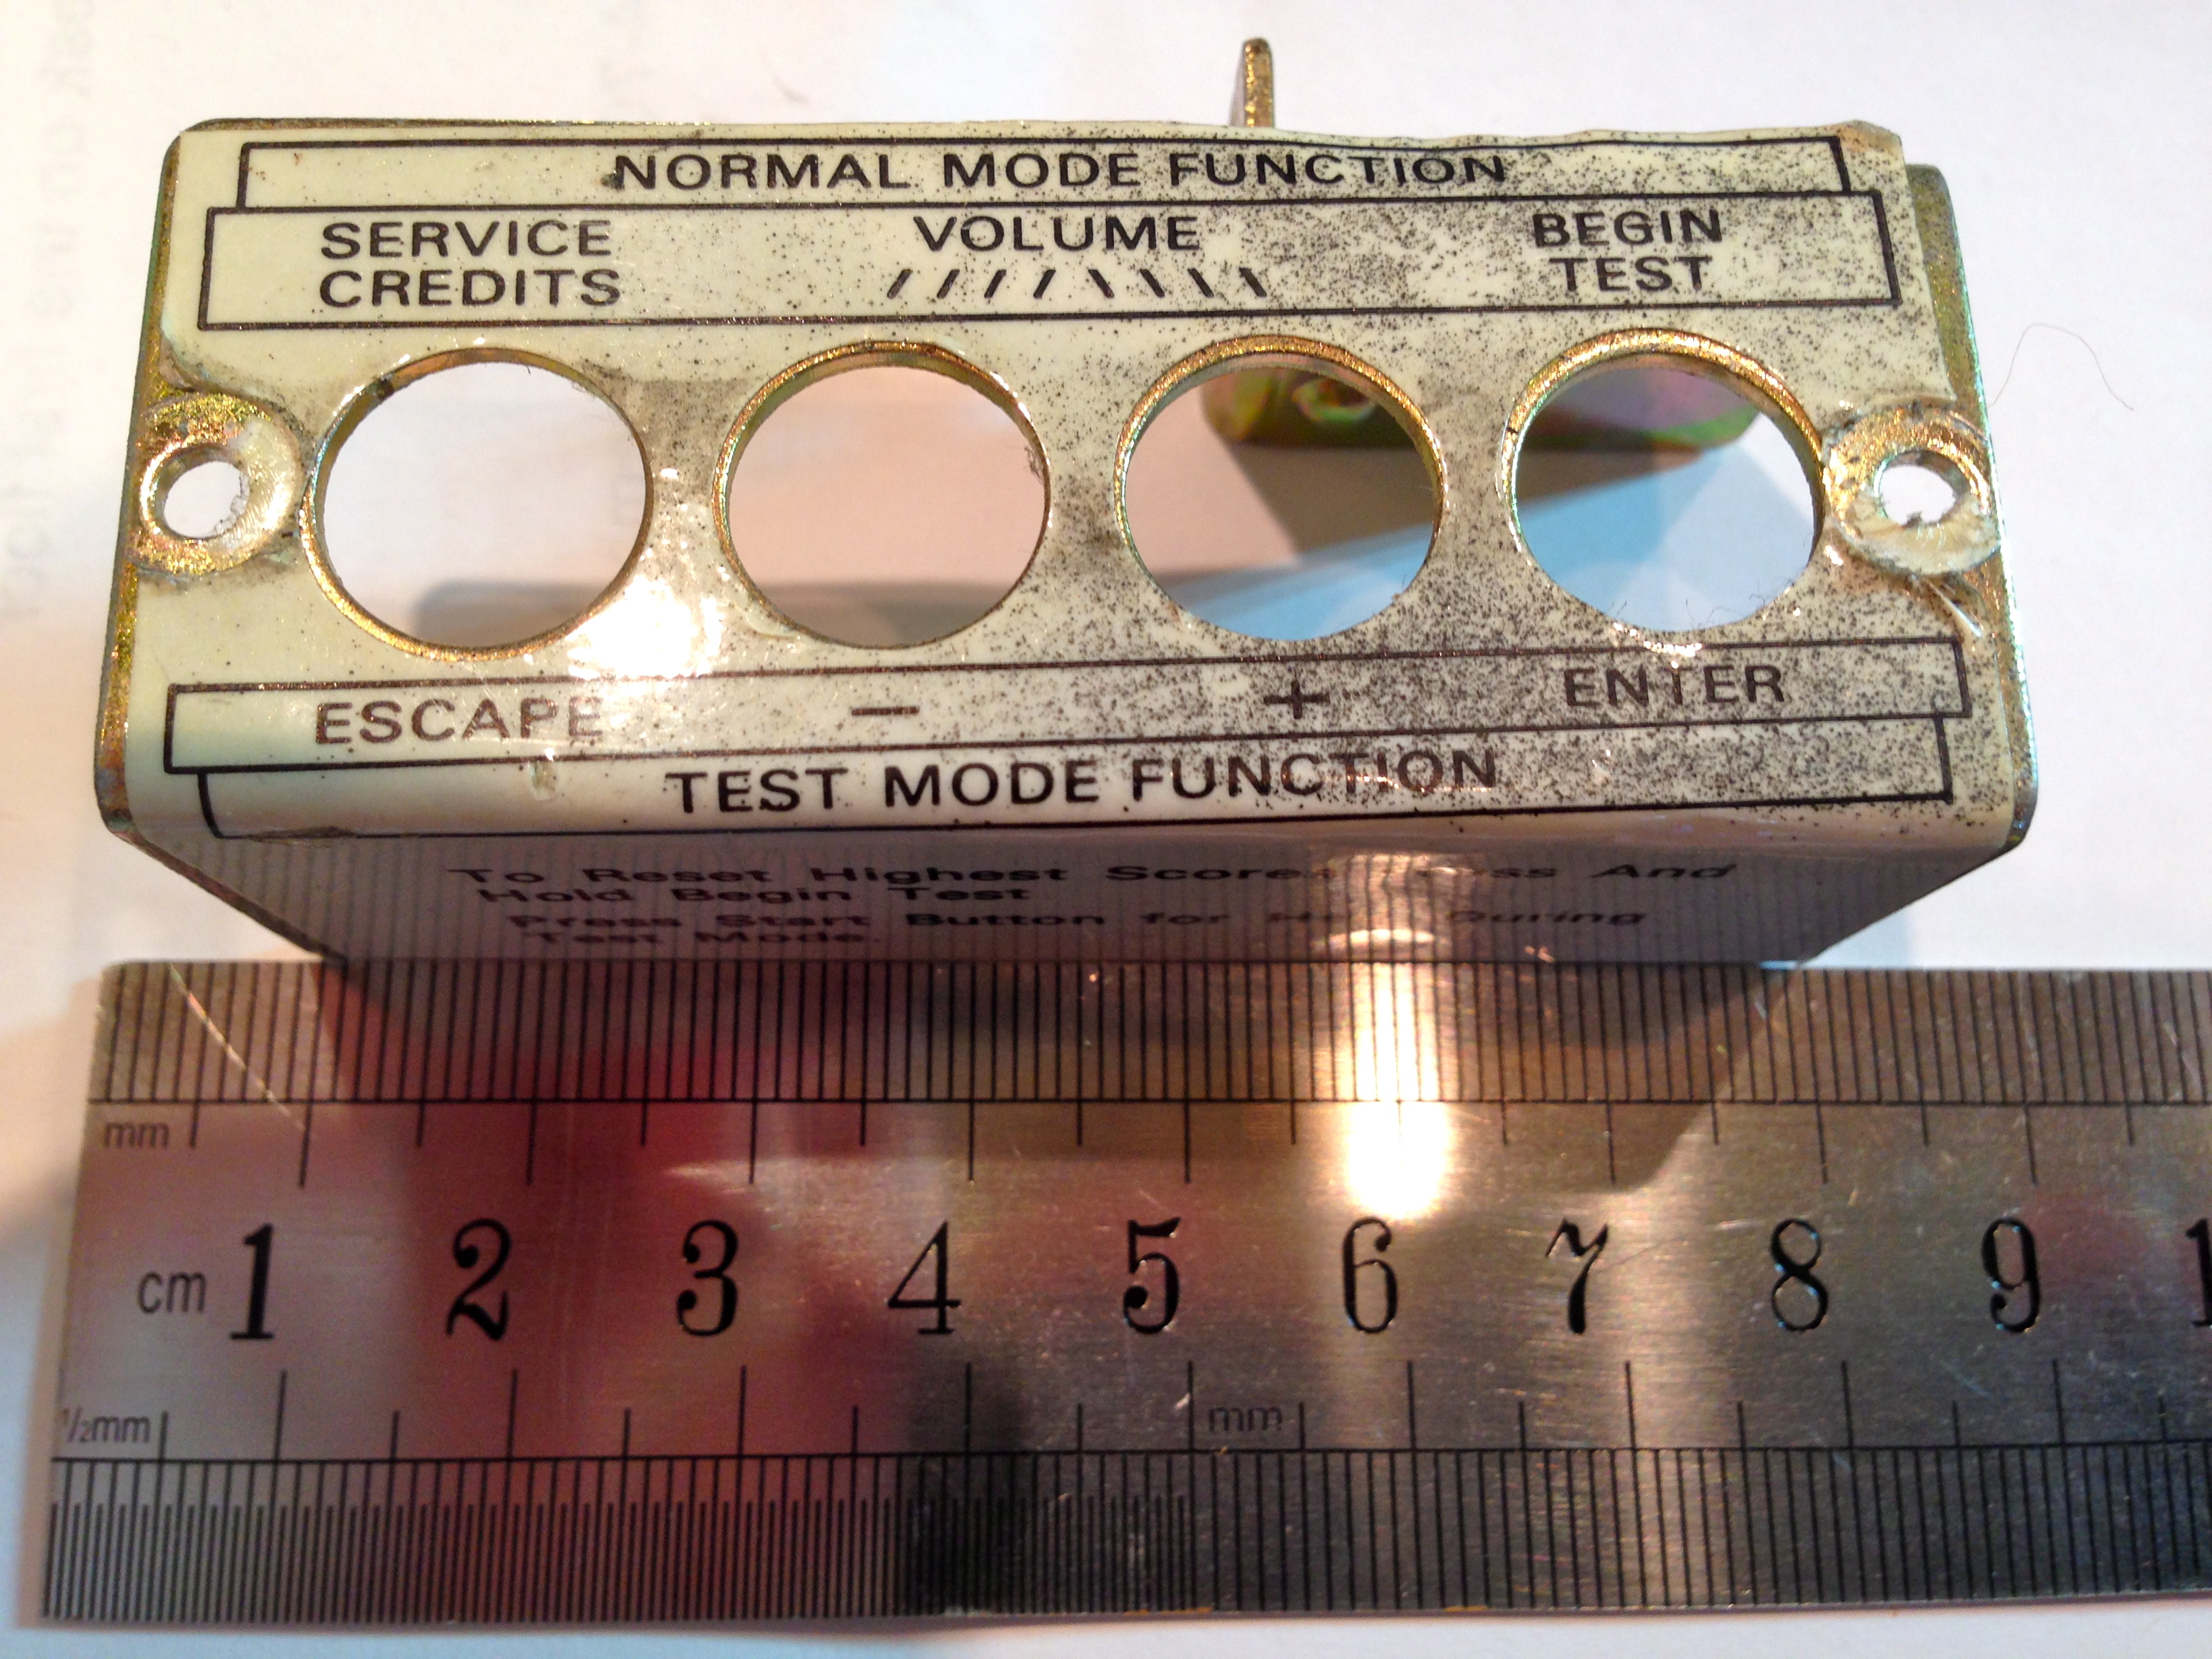
The main challenge here is, the replacement bracket doesn’t come with the artwork on it, labeling the buttons and providing instructions. I’m forgetful, so I want this labeling. I also just think it’s neat. I wasn’t able to find a replacement label anywhere, so I had two choices: move the existing label over somehow, or reproduce the artwork myself. The former seemed worth a shot, and easier if it works, so that’s what I tried. I figured I had nothing to lose. I took lots of pictures of it first, in case I destroyed it and end up needing to reproduce it after all.

The challenge here is dissolving the glue under the label, without ruining the label itself. There are lots of products that work great for removing labels from things, such as naphtha (aka lighter fluid) or Goof Off. Most of those techniques are for when you don’t care what happens to the label, however.
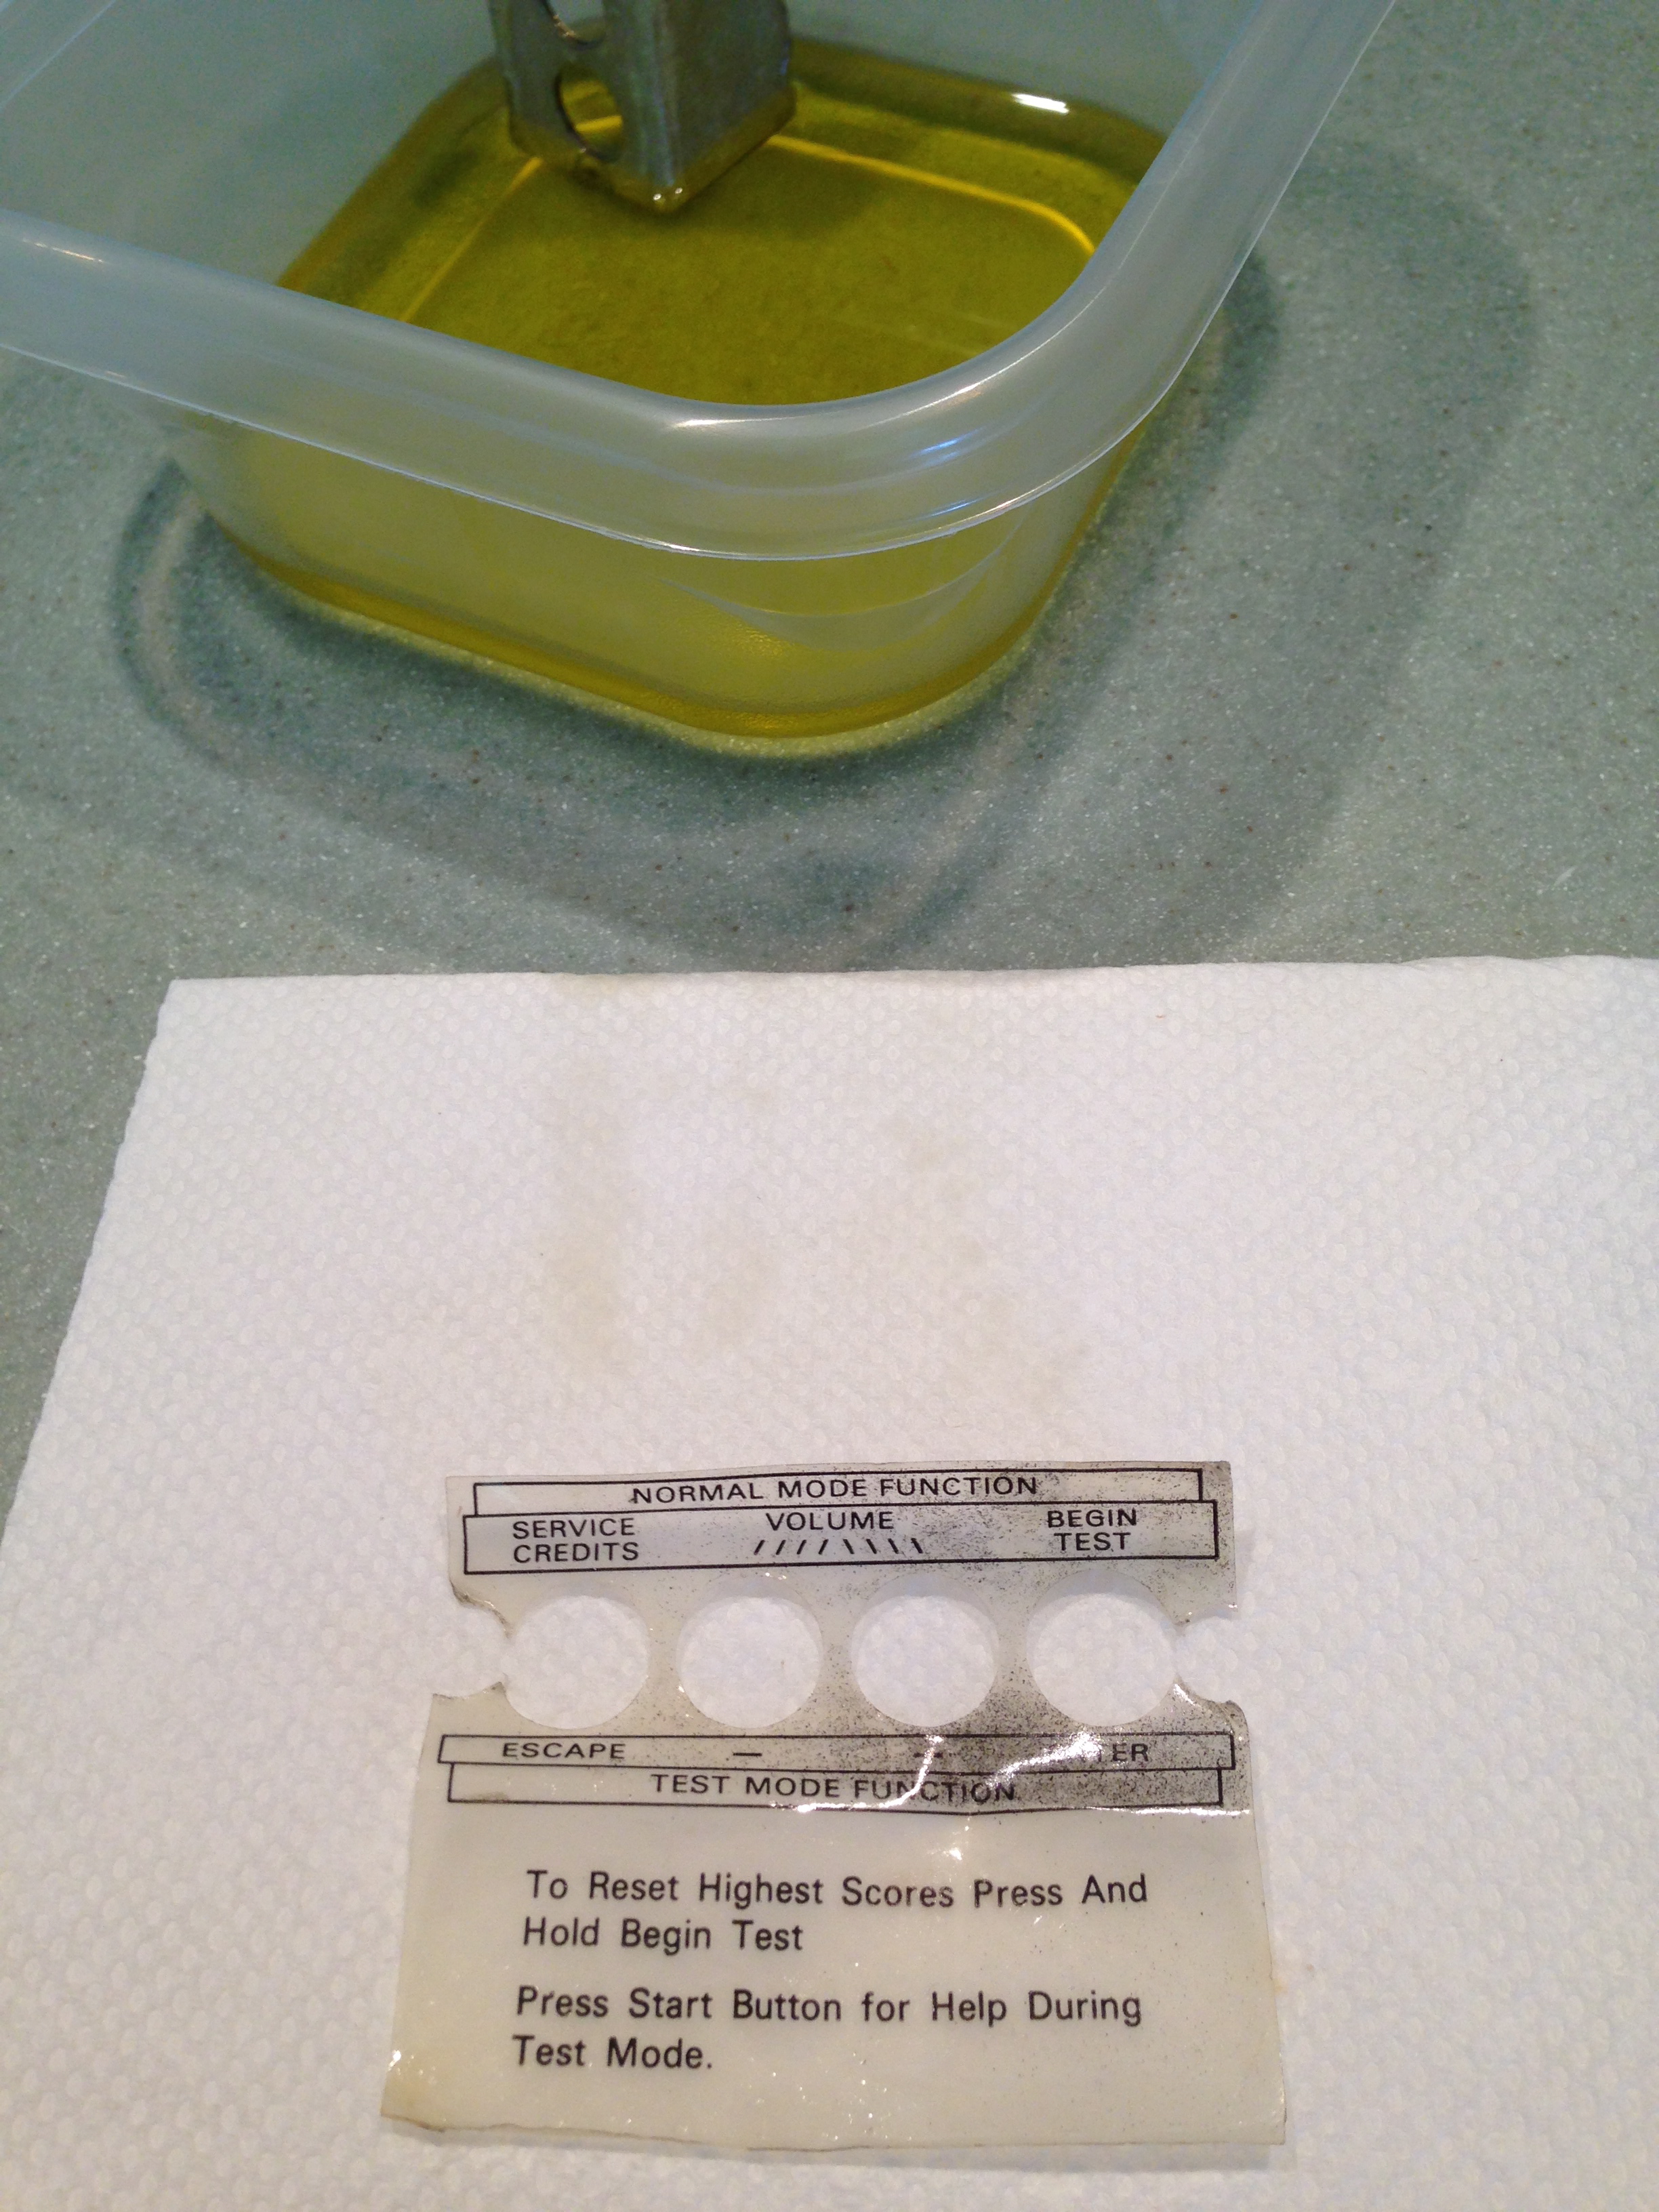
Instead, I fell back on an old trick from my days in the AFOL (Adult Fan of Lego) community. A common problem with Lego collections is gunky old stickers messing up pieces. Most glue solvents would also destroy the plastic, so another technique is commonly used- olive oil. Yep, believe it or not, olive oil is a functional solvent for most kinds of glue used on paper products. It’s messy and slow, but it is gentle, and generally doesn’t hurt the label itself.
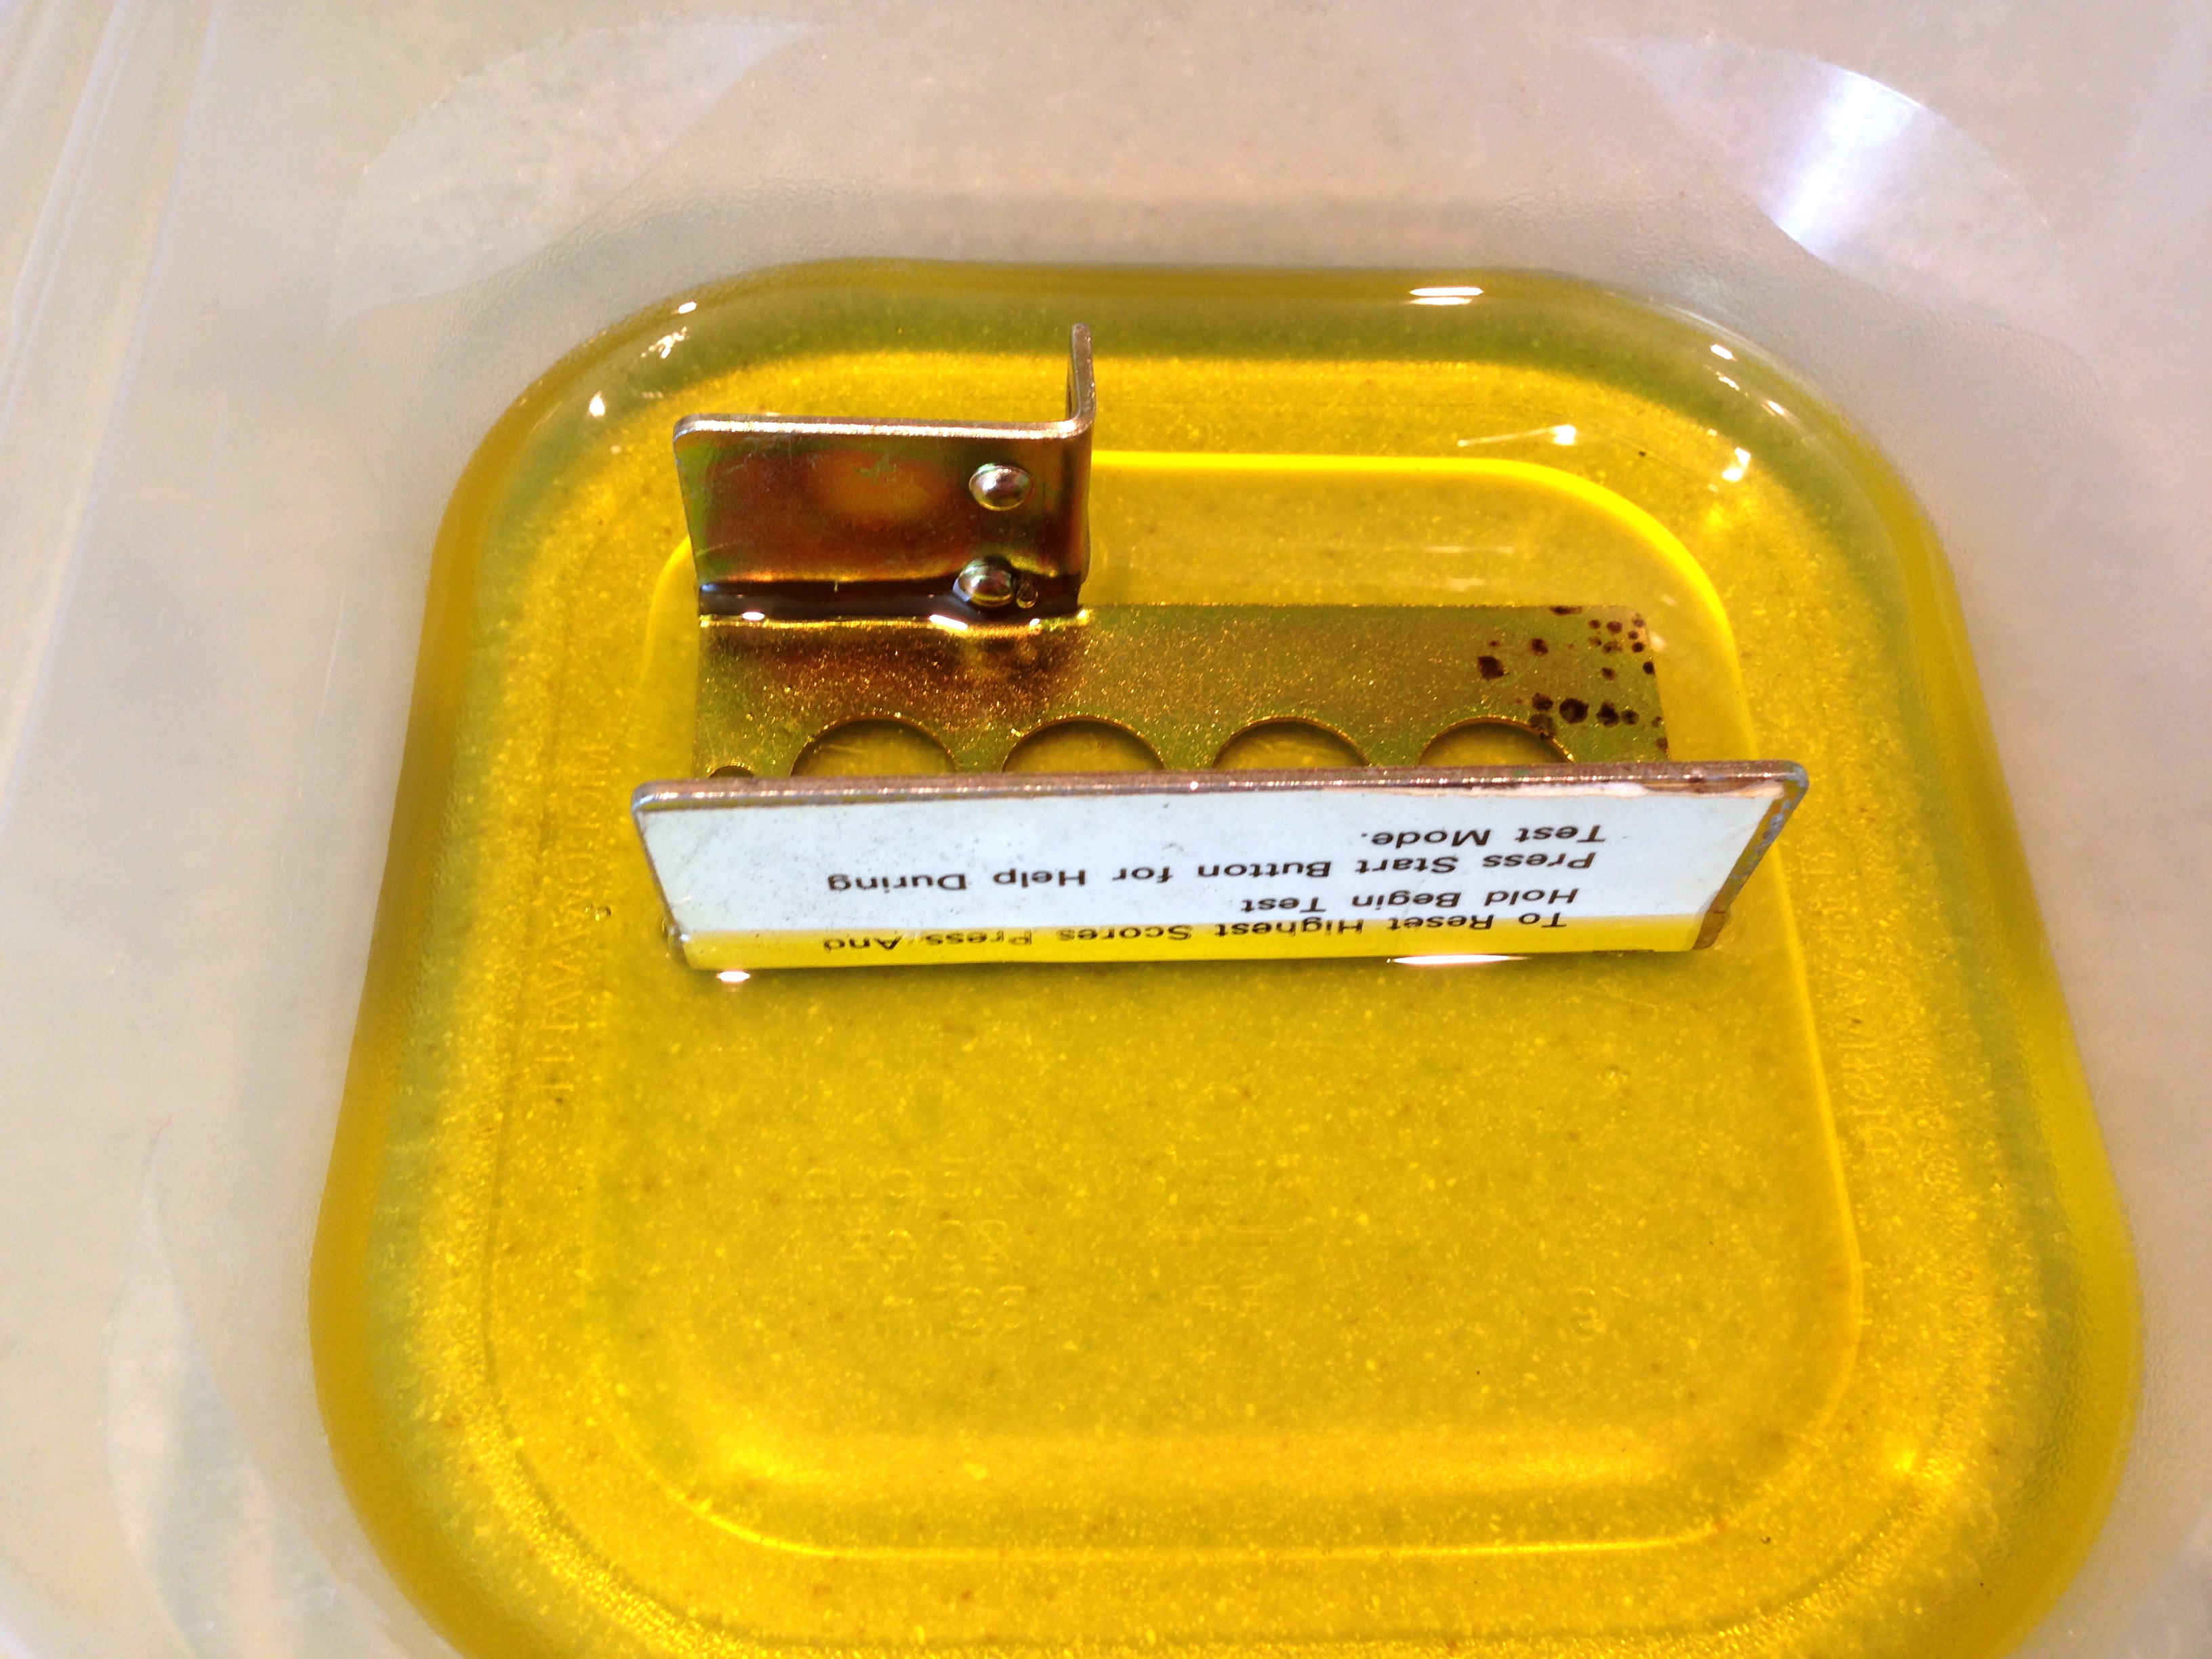
I’ve used this technique before, and always had good luck with it. Unfortunately, it didn’t work quite as well here, because of one detail. This isn’t a typical paper label- it has some kind of laminated plastic coating on top of the paper. This is nice for durability, but it means the olive oil can’t soak through the paper into the glue. It can only get to the glue around the edges, so the process became one of soaking for a while (say, 30 minutes), peeling the now-released edge up a bit to expose more glue, then soaking some more.
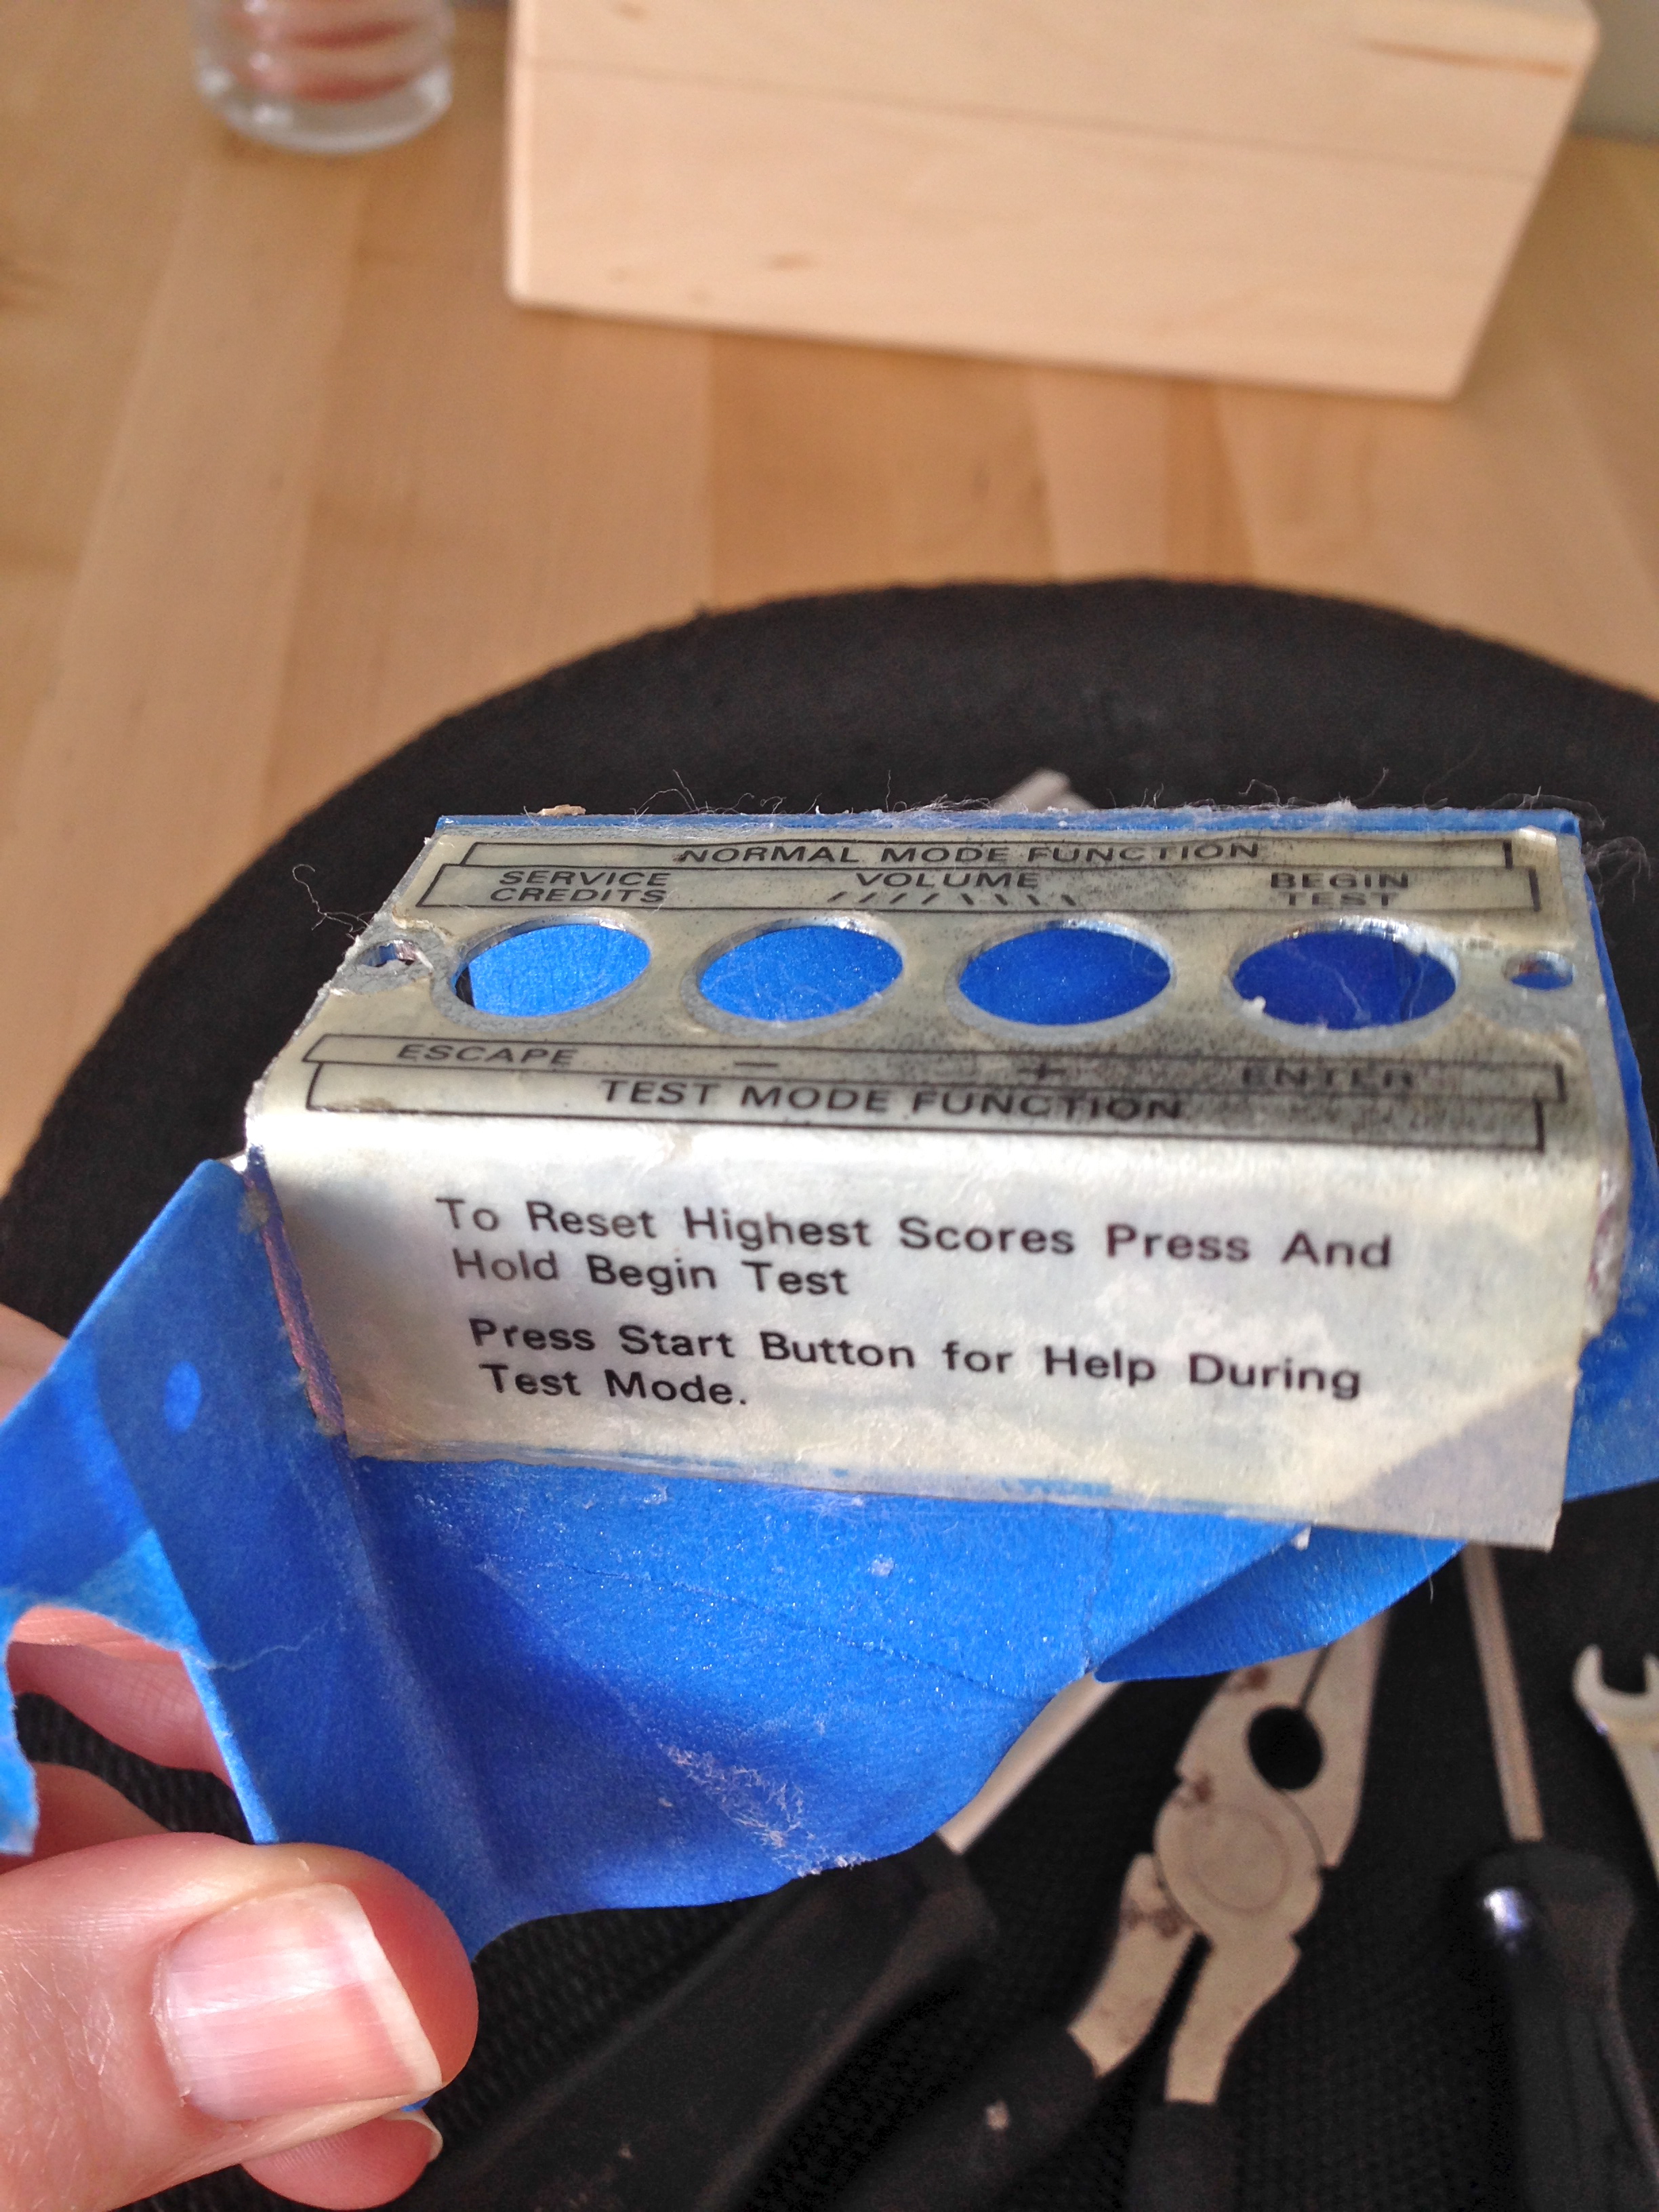
In the end, the process worked, but not as well as it has for me in the past. About half of the paper got left behind, partly because of the laminated surface, and partly because I was too impatient with letting the oil soak in between peelings. The process was taking all day, and I wasn’t trying to do a perfect restoration here. I just wanted a serviceable label on the new bracket. Impatience got the better of me a bit, in hindsight.
I gently cleaned up the label to get the olive oil off, and also the old finger smudges. Unfortunately, the black speckling you see above is overspray from someone’s hamfisted spray-paint touch-up job on the cabinet. There’s nothing that can be done about that, short of reproducing the label from scratch.
Next, I masked off the label’s footprint on the new bracket, and applied some spray adhesive.
Spray adhesive is kinda messy stuff, so the bracket needed some cleanup afterwards. If I were to do this again, I would paint the bracket white under the label. The removal process left some thin spots in the paper, so the opacity of it varies a bit.

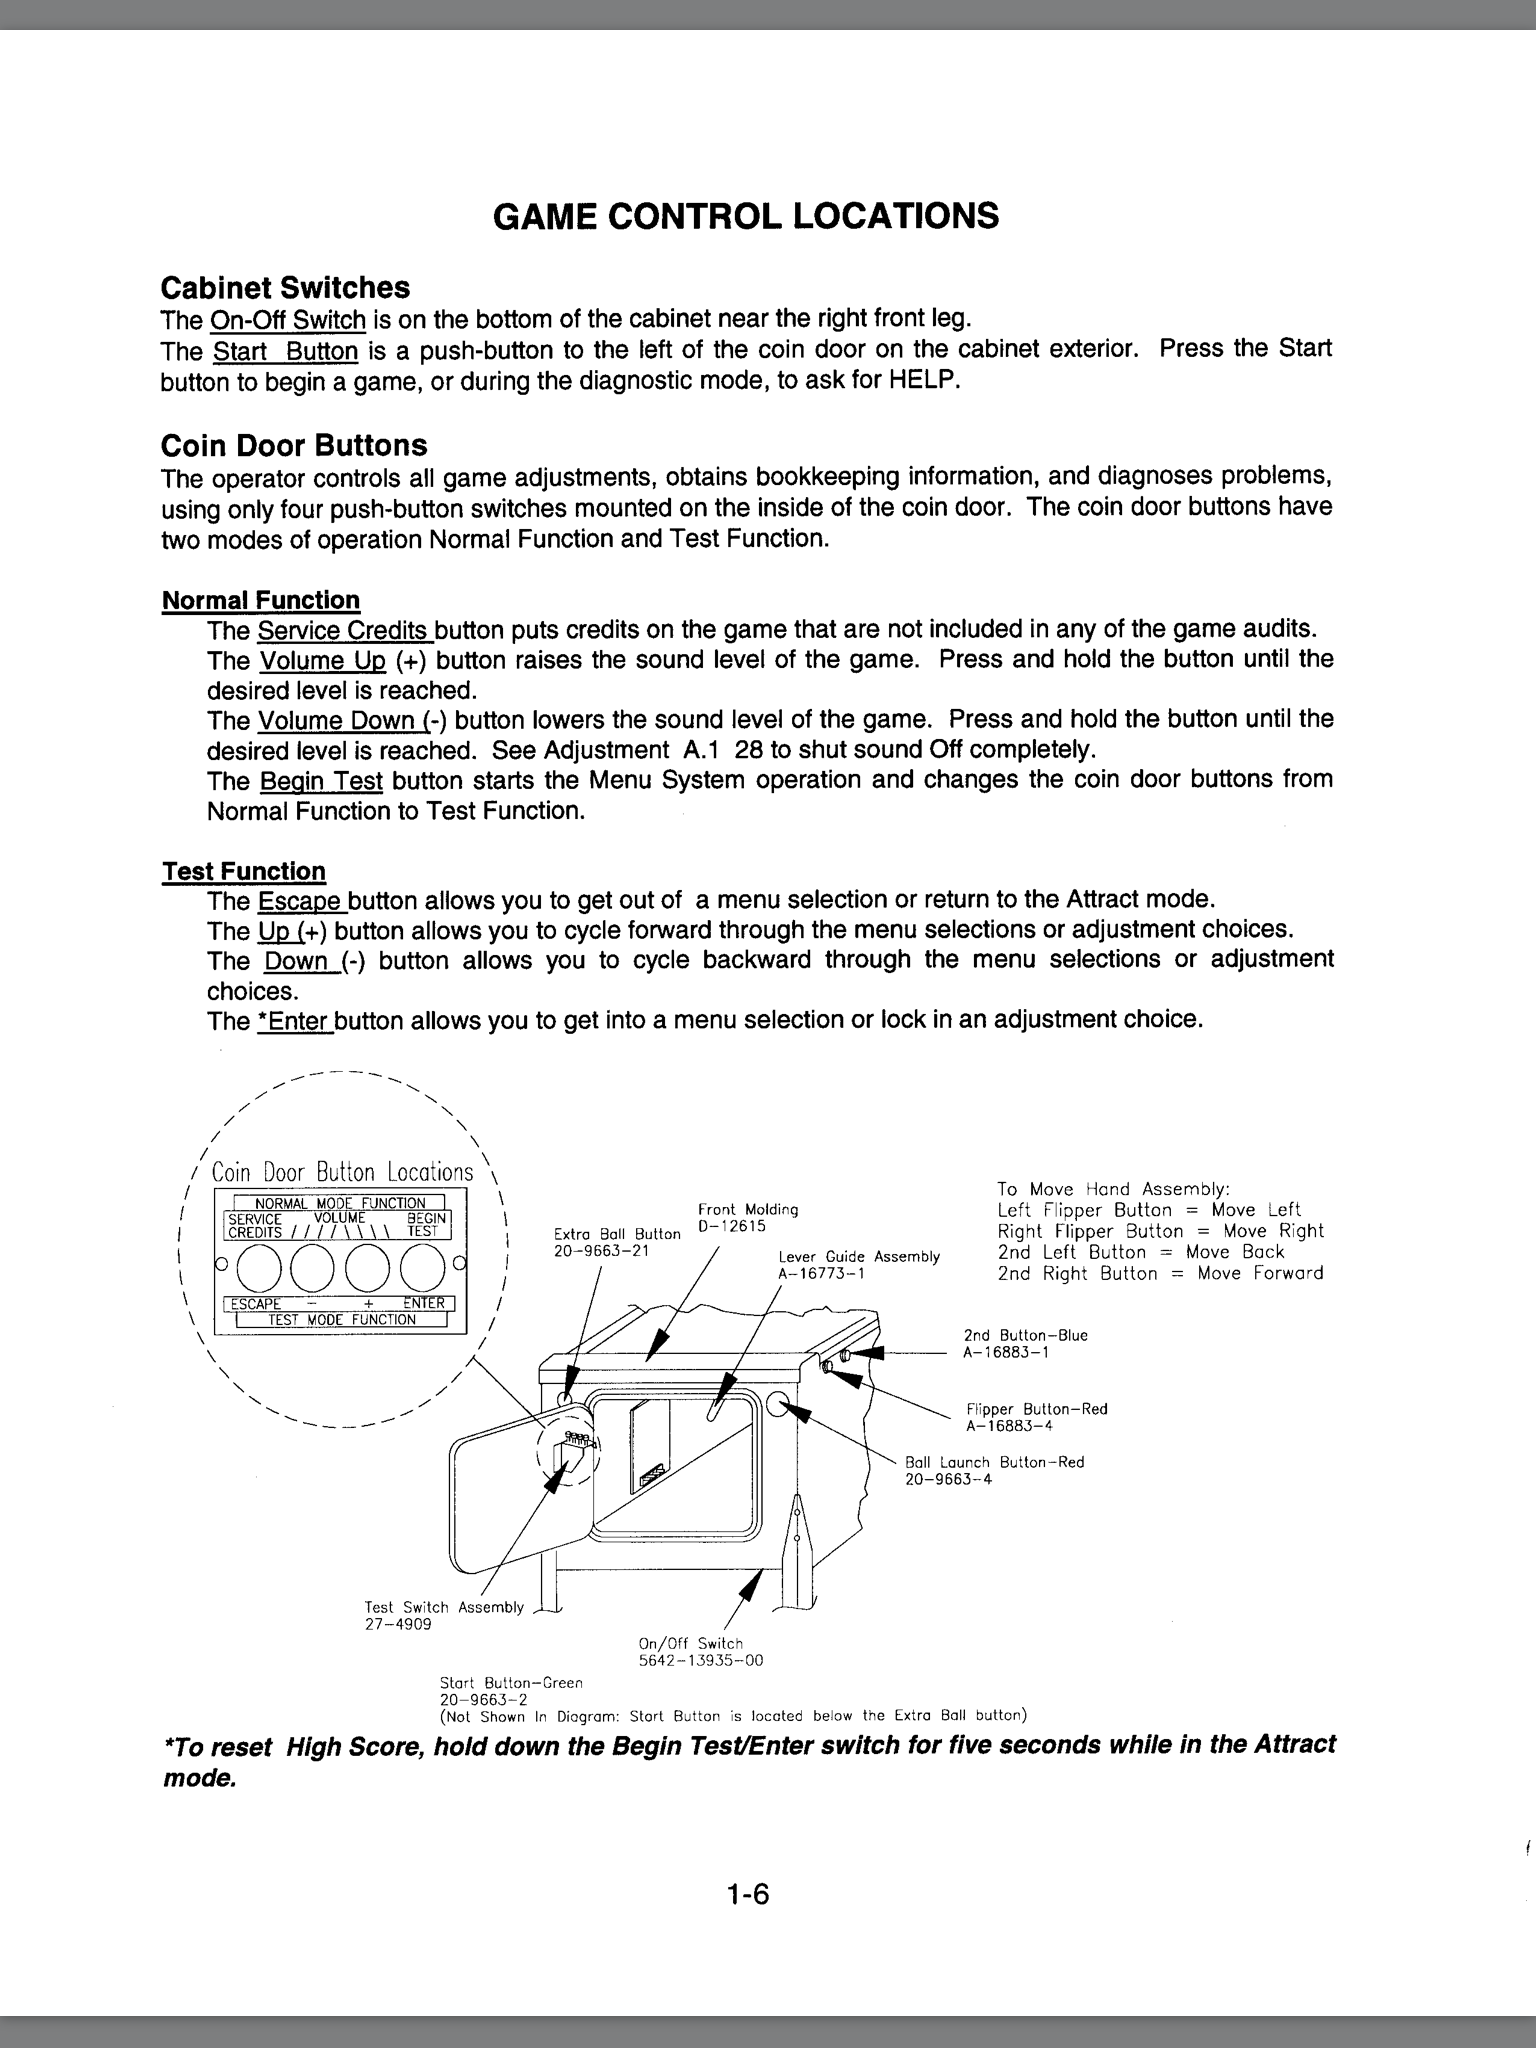
I wanted to make sure I put the panel back in the correct orientation- not just matching the labels, but correct relative to the machine as well. Not having another early 90s Williams pinball machine handy to compare it to, I made an educated guess from a diagram in the manual.
This was a simple afternoon project (not counting all the waiting-for-olive-oil-to-soak time), but it made an appreciable difference in the enjoyment of ownership. Now I can get back to the list of 200 other things that need attention!
How do you avoid ruining skin on your hands when you do a lot of work with solvents? Ethanol is bad enough… isopropanol, or even dimethoxymethane (aka flux off) are drying it much worse. I’ve tried gloves, but then you can’t quite grab the smallest objects, and it feels awkward and inconvenient in general :/
I wear latex gloves for most of my projects. There are a number of different grades and kinds, and it took a lot of experimentation to find ones as liked. For general projects, I’m partial to these:
http://www.amazon.com/Microflex-MF300L-Powder-Diamond-Gloves/dp/B00IB1IKZC/ref=sr_1_1?s=hi&ie=UTF8&qid=1396818590&sr=1-1&keywords=diamond+grip+gloves
They are durable enough for working on machinery, and resist most chemicals.
For lighter tasks needing better feel, tattoo gloves are nice:
http://www.amazon.com/Disposable-Medical-Tattoos-Piercing-Gloves/dp/B00C8FCHNI/ref=sr_1_1?s=hi&ie=UTF8&qid=1396818655&sr=1-1&keywords=Tattoo+gloves
Thank you very much, I’ll get a box!
I’m going to have to remember that Olive Oil trick.
(Popeye would approve).
Have you done any hacks on the firmware yet? Especially the “copyprotection” mechanism seems to be quite interesting: http://www.maddes.net/pinball/wpc_debugging.htm, http://www.pinwiki.com/wiki/index.php?title=Williams_WPC
Indeed, it is interesting. Johnny Mnemonic uses the “WPC-S” (S for Security) board set, from the era when they started to get serious about trying to lock things down. I have a project related to that on the go, which I’ll be writing up as soon as it gets anywhere interesting (if it does 😉 )
You didn’t put a layer of white paper under the label to replace the dissolved white?
No, and in hindsight I should have done something like that (painting that area of the bracket white would have been easy since I masked it off for the glue anyway). It looks okay, but next time I do something like that, this will be a lesson learned.