Wherein we party like it’s 1969.
A very good friend of mine has been having a rough time lately, and a couple of us in her support network decided that maybe a handmade gift would help cheer her up. My partner in this crime had the idea to do a collage photo frame, and we both agreed it should be in a mid-century modern style because that suits the tastes of our mutual friend. As is so often the case in life, the design for this project was inspired by a pillow.

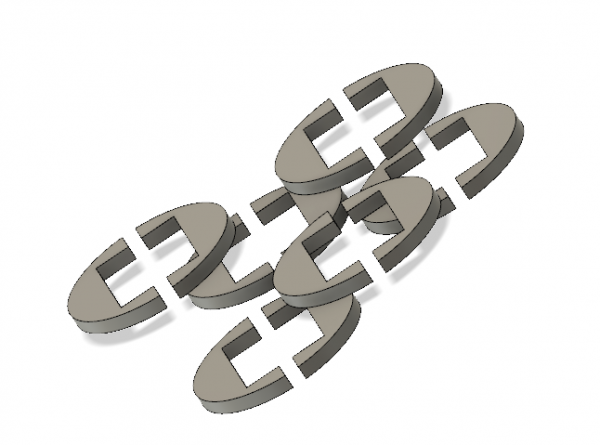
I mocked up our idea in Fusion 360, and came up with the following. Want this model? Patrons get it, so sign up now.

I’m often told that as a woodworker, I’m a hell of a machinist (and as a machinist, I’m a hell of a software engineer). This project would stretch my skills with dead trees in new directions, and I was excited for the challenge. Not really knowing anything about wood, I opted for a high quality birch plywood for the project, since it would be painted anyway. In hindsight, a quality solid softwood may have been a better choice, given the types of operations I needed to do, but the plywood worked okay. I had to be careful to make sure the inevitable chip-out happened in rear-facing areas.
There were many parts of this job for which I really did not have the right tools. However, you go to war with the army you have, not the army you want, and one does what one can. You’ll see a lot of improvising here, with varying degrees of terror involved.
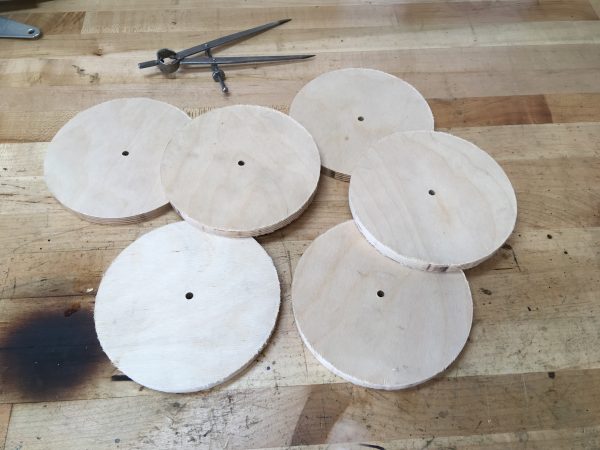
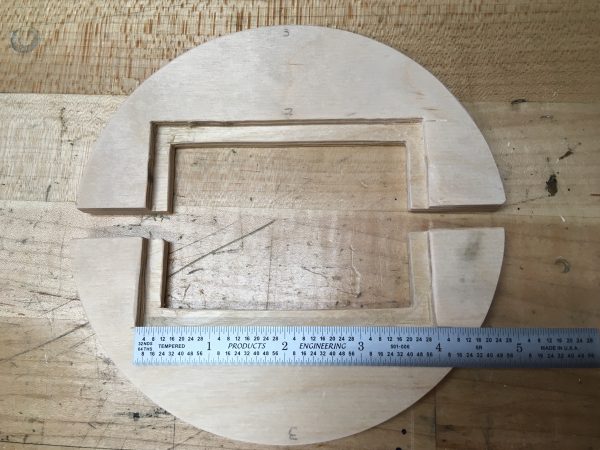
As you saw in the 3D model, each of the six frames is a circle with a square opening, and a ½” strip removed from the center. The circles are 6″ in diameter, and I started by making those. I had a crazy idea for how to do that, and I’m pleased to say it worked rather well.
The only tool I have that could possibly cut a circle in wood is a jigsaw. I have no wood-cutting bandsaw, scroll saw, etc. Jigsaws are unique in that they can do virtually anything, but are actually good at nothing. You can do any job with one, but you generally wish you hadn’t. However, a jigsaw is the army I have, so let’s get creative with our tactics.
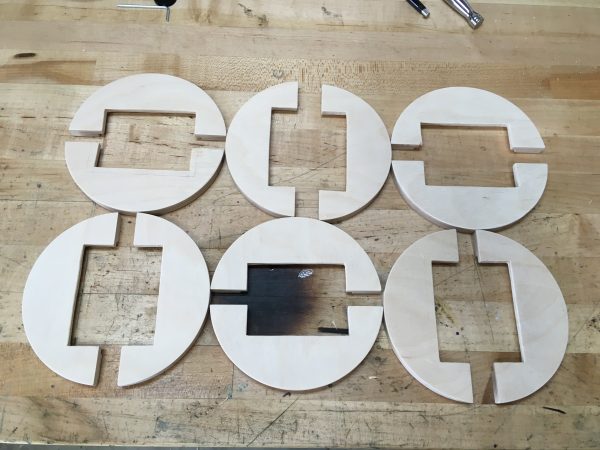
A quick sidebar on process here. Since I have 12 of these half-circle frame parts to make, I needed mass production. To achieve that, I tested each operation you’re about to see on one part, and once convinced it would work, moved on to the next step. Once I had completed a single half-circle and confirmed that the whole process was sound, I ran the other 11 parts through the whole production pipeline. This was very efficient, and also made sure I didn’t paint myself into a corner (or 12 corners) halfway through the job.
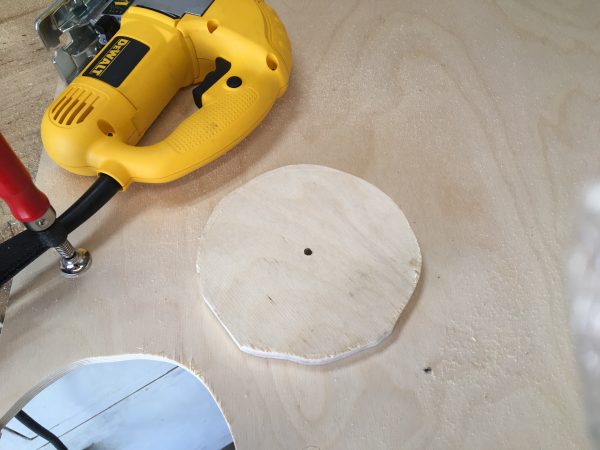
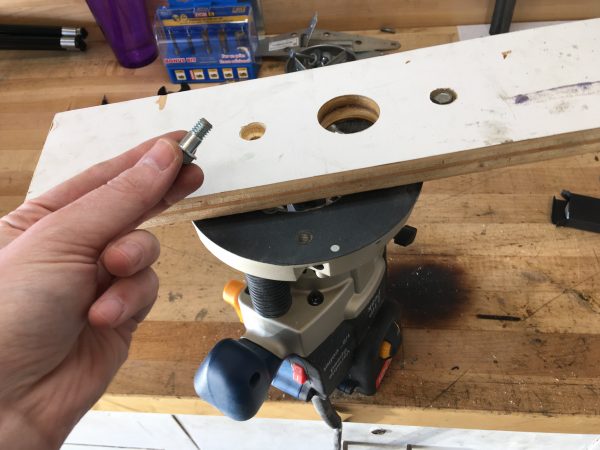
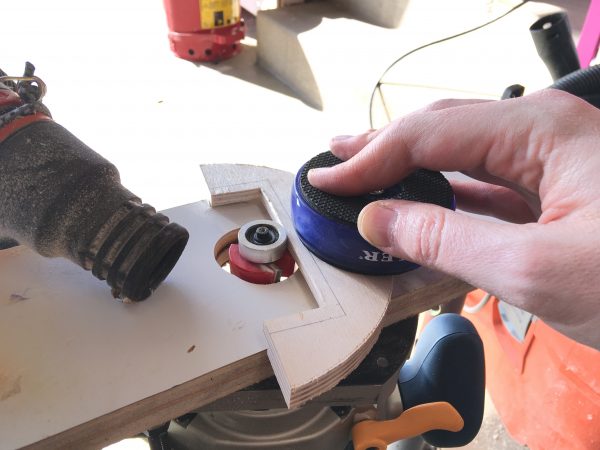
The idea was that, with the circles rough-cut, I would finish them to perfect circles with a router table. The only catch is, I don’t own a router table. I do however, own a router and a junk pile. You see where this is going, and it ain’t for the faint of heart.
I have some lovely scraps of smooth melamine leftover from some kitchen cabinets, and I figured if I could bolt my router to the underside of that, I’d have a pretty slick (literally) temporary router table.
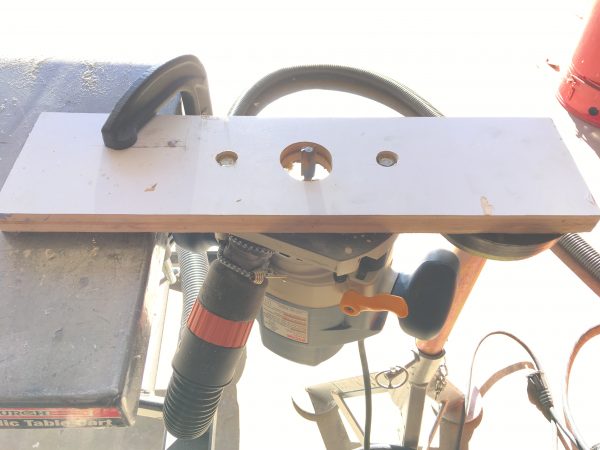
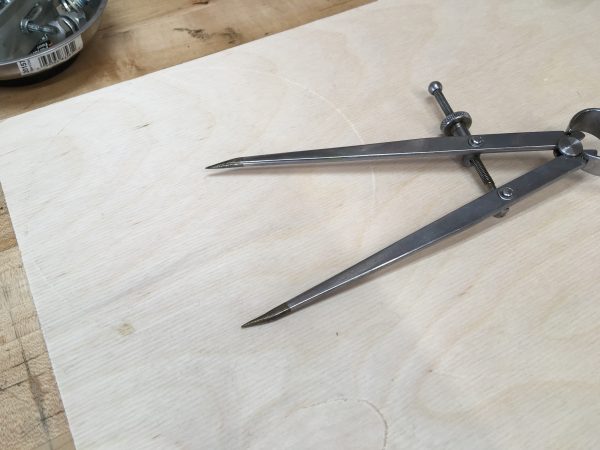
All I needed to do now was get a pivot pin installed the exact right distance from the router bit to make my circles round. That was easier than you might think.
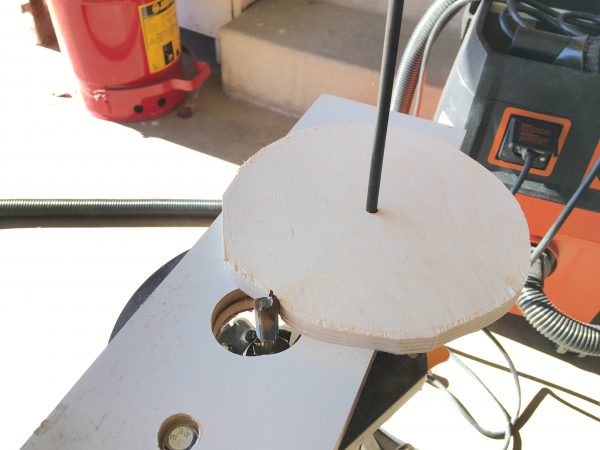
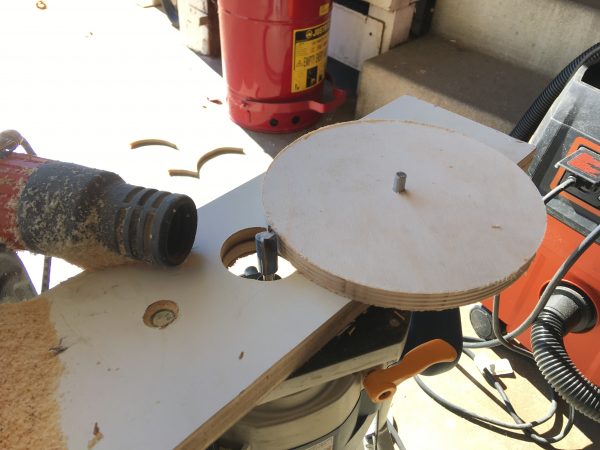
It was then a matter of sliding each circle over the pin, spinning it one rotation against the router bit, and lifting it off again. This was probably the most dangerous power tool fixture I’ve set up to date, but it worked really really well. So well that I kept all the parts for use later. The main trick to using it safely is to turn the circles against the rotation of the router bit. If you go with the bit, it will grab and spin the wood out of your hand in gnarly and dangerous fashion. Keep a firm grip and obviously keep your fingers away from the murdery thing in the middle.
Interesting side note- in machining, we call this “conventional milling” versus “climb milling”. The former is generally preferred, and is what you get when pushing wood “against” the router bit’s rotation, instead of “with” it. In machining, climb milling is used in some cases to get a better finish, but is generally avoided. With a router in wood, climb milling gets you a finish at the doors of a local urgent care facility, and is always avoided.

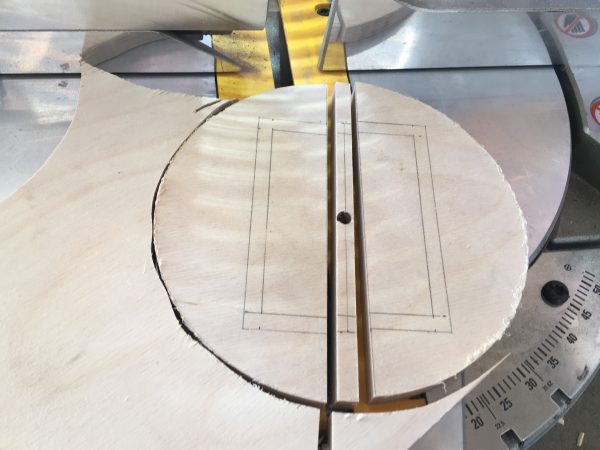
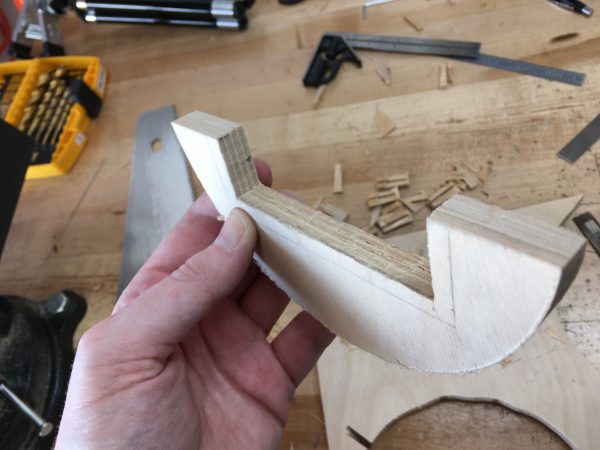
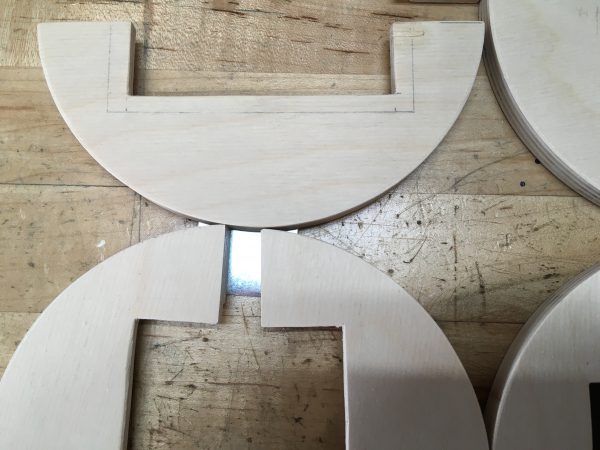
I now had two half circles that formed a circle with a half-inch gap between them. Next up was to cut half the rectangle for the picture opening. A great way to do this would be a dado blade stack on a table saw. Guess what I don’t have? Any of that. Army you have, blah blah.
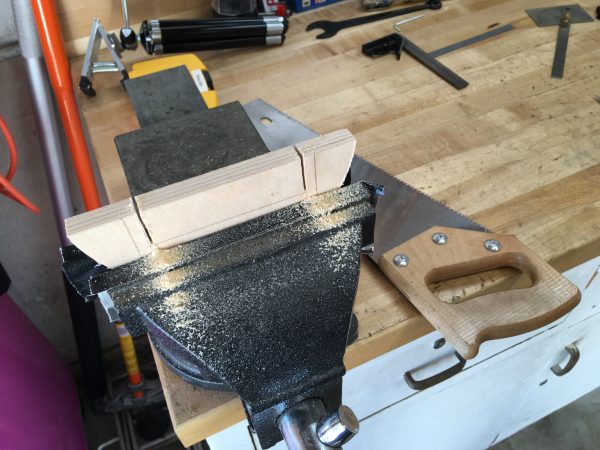
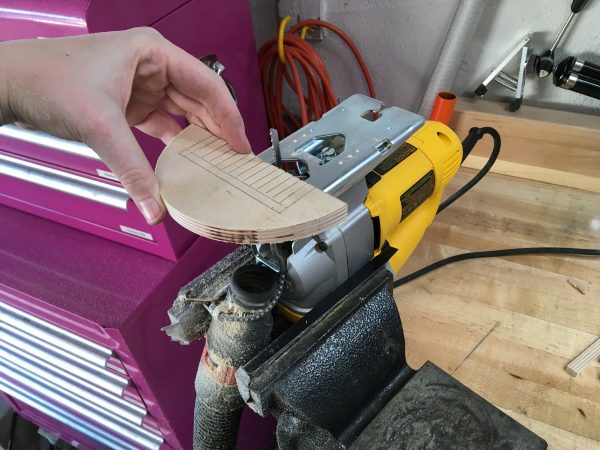
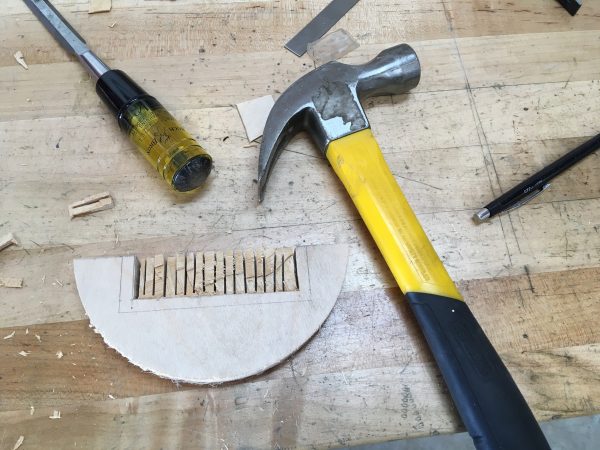
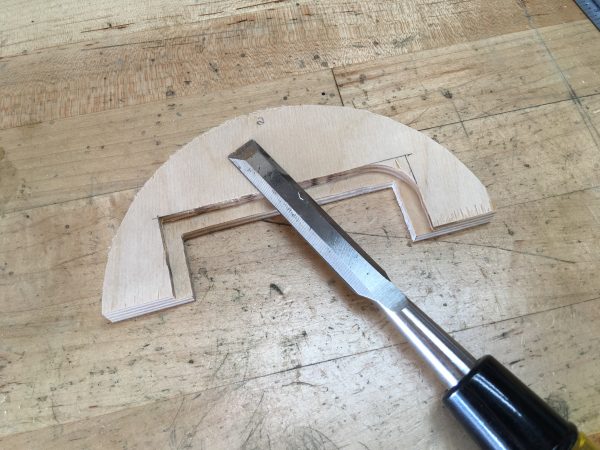
I thought long and hard about good ways to remove all that material with the tools I have, and the only method that I felt was certain to give a good result was old school- a chisel. To ease the chiseling, a common trick is cut a bunch of slits in the area to be removed. Time for another sketchy power tool fixture!
After diamond-honing my favorite chisel, it was time to put on some music and go to work.
The last operation we need is to put the rabbet on the back to hold the glass. The sketchy router table seemed like the way to do this as well, although this would be (amazingly) even more dangerous than before.
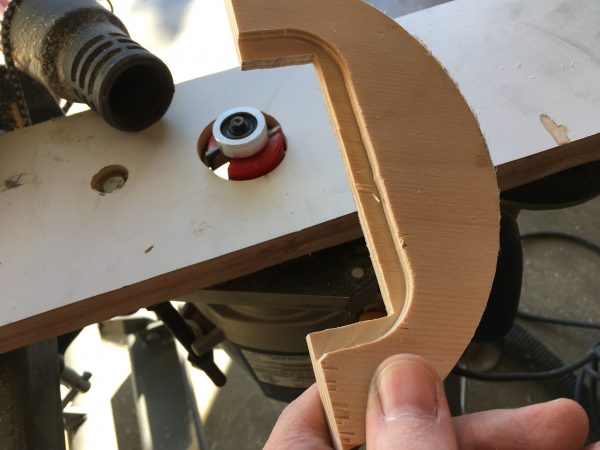
That’s all the steps for a single half-circle. Now I just need to do all that eleven more times.
This was all going fine, except there was one thing I hadn’t considered. How was I going to attach these wooden circles to each other? The original plan of overlapping the pieces made this straightforward, but now I had a new challenge. I tried the obvious approach first, but I couldn’t seem to get the settings right on the welder. Maybe I bought the wrong type of plywood? Talking it over with my design partner in this endeavor, we decided that a connector bracket of some sort should be able to join adjacent circles inconspicuously from the back.
Luckily, we’re more in my wheelhouse now. To the machine shop!
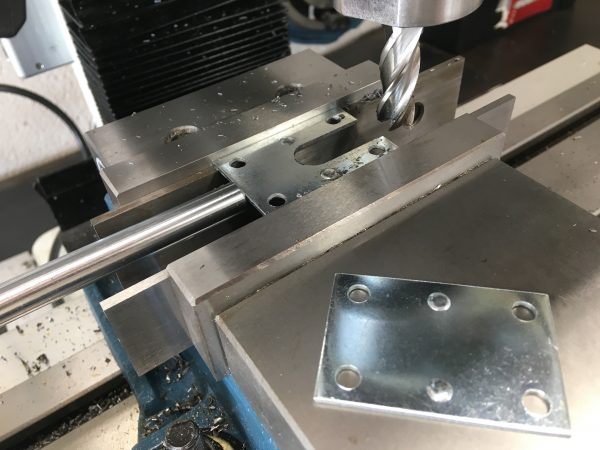
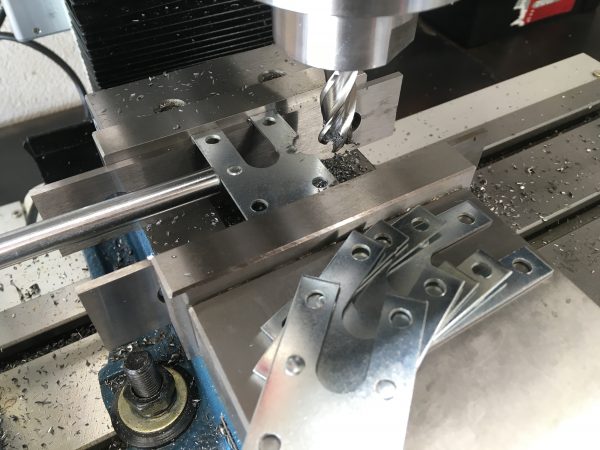
These steps eliminated 90% of the visible bracket. The brackets were then painted black on the front to further obfuscate them.
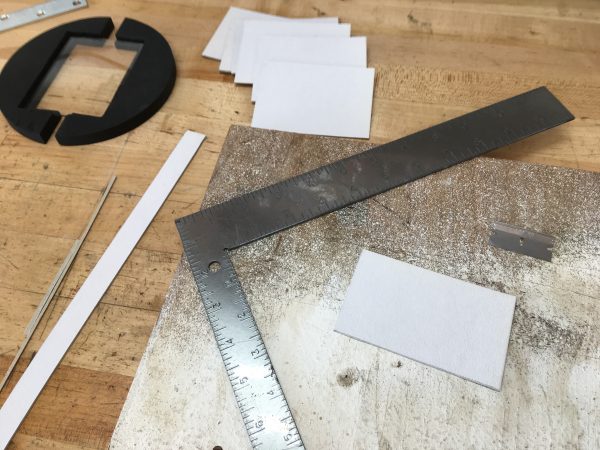
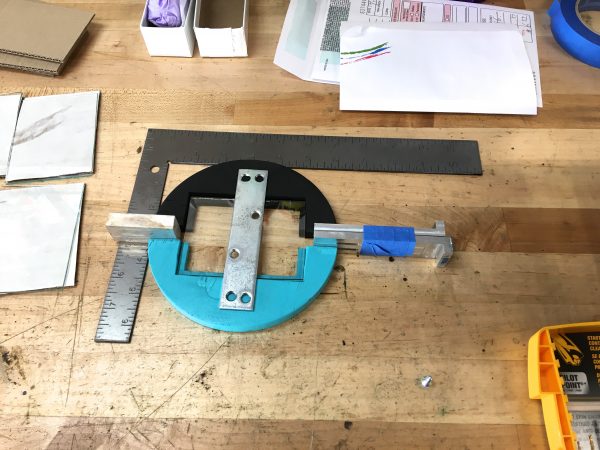
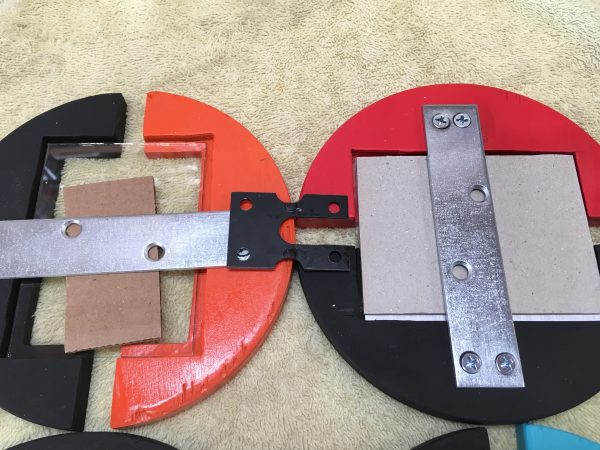
The next question is how to hold the circle halves to each other. They need to remain suspended in space ½” apart. A simple metal plate across the back of each will achieve that, while also serving to retain the glass, photo, and backer board in the opening.
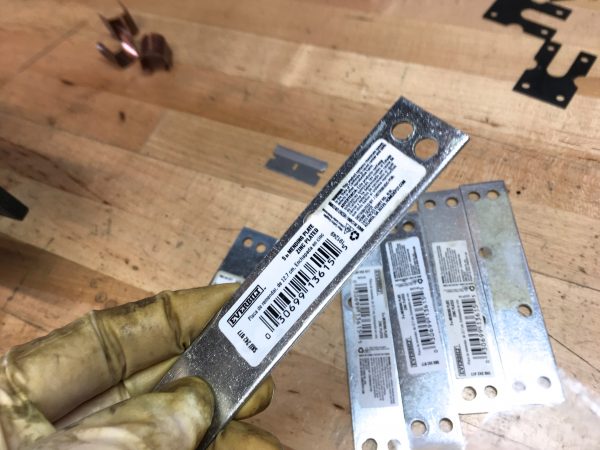
I again started with store-bought mending plates for this. These have one hole at each end, so I needed to add an additional one to prevent racking.
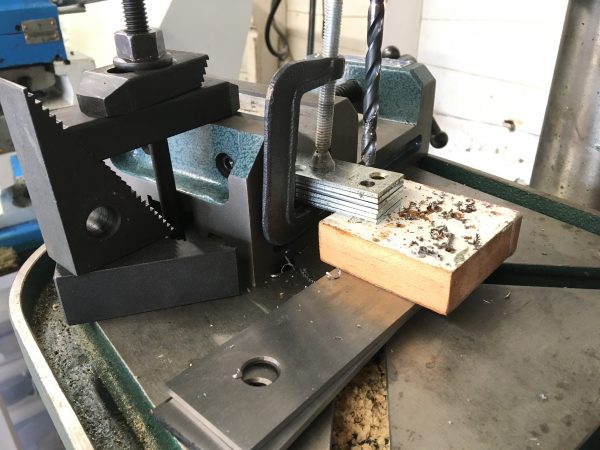
These store-bought plates were quite amazingly poorly made. None of them are quite the same dimensions, few were totally flat, and few of their existing holes are in the same places. That’s what you get for $1.29, I guess. I did my best to average their positions for the group-drilling. Also, note that they are not symmetrical end-to-end, so make sure they’re all facing the same way before drilling. Ask me how I know!
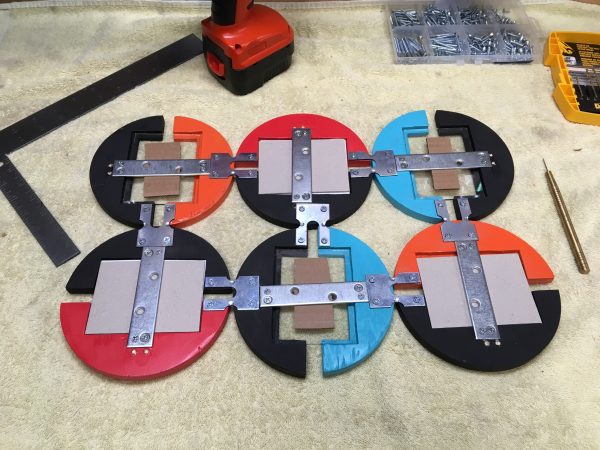
Confident that I had the hardware all sorted out, I sanded and painted the wood parts.
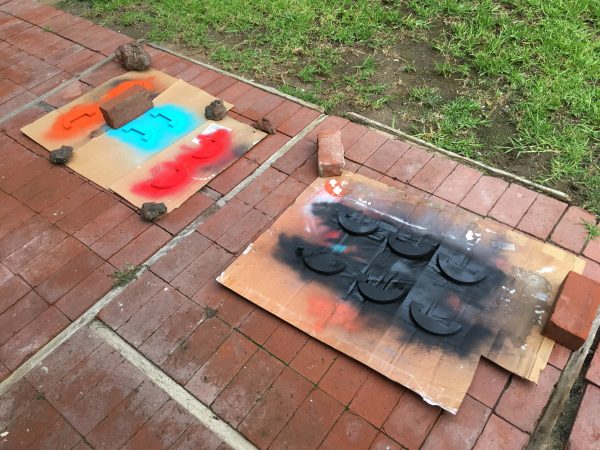
Once the paint was dry, it was time to start assembling hardware!

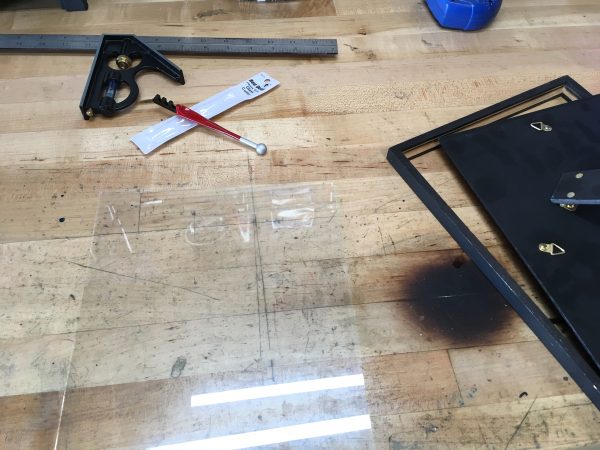
This all seems to be going swimmingly, but there’s one challenge remaining- the glass. My first thought was to get a framing store to cut the pieces for us, since 4×3 isn’t a standard size that I could find for picture glass. You’d think I’d have planned ahead and made the openings 3×5 (which is standard) but here we are.
Custom framing is generally very spendy, so I feared the frame store would want a lot of money to cut custom glass. Undeterred, I decided to cut it myself. I have a couple of old 8×10 picture frames in the closet, so I cannibalized them for their delicious glass and watched some YouTube videos on glass cutting.
Well, let’s just say it’s a lot harder than all those YouTube people make it look. After many many failed attempts and filling my shop with shattered glass, I managed to eke out six pieces that might be usable but were pretty terrible.
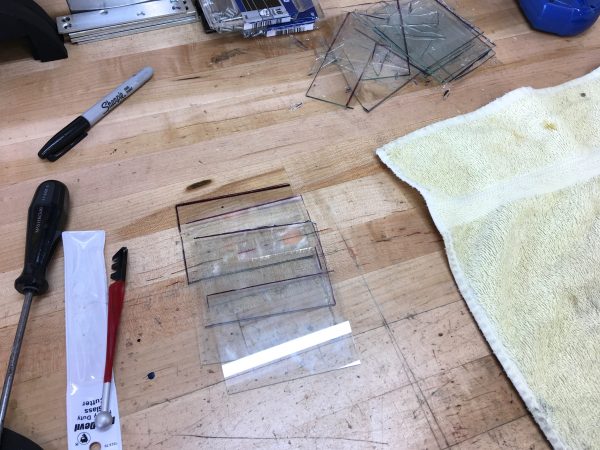
So after spending my morning trying to learn this tricky skill and ending up with nothing much to show for it, what did we do to finish the project? My friend went to the frame store and got a quote to cut the glass. You know how much it costs to get custom glass cut at a framing store to precise dimensions with perfect edges? ONE DOLLAR. Yes, they charged us one goddam green George per piece. I spent my whole morning wading in broken glass for a dollar. I really should have just called them first. I wouldn’t have believed anything cost a dollar any more, never mind a skilled service like this. I do not understand the economics of the framing business, clearly.
Okay, I think it’s time for some actual assembly!
Okay, we have the main brackets installed, so all that’s left is to join our circles with the connection brackets. No problem, right?
After much mulling over, I decided the right thing to do was re-make the main brackets shorter so they clear the connector brackets. This was a bummer and meant a bunch of redone work, but it was the right thing to do.

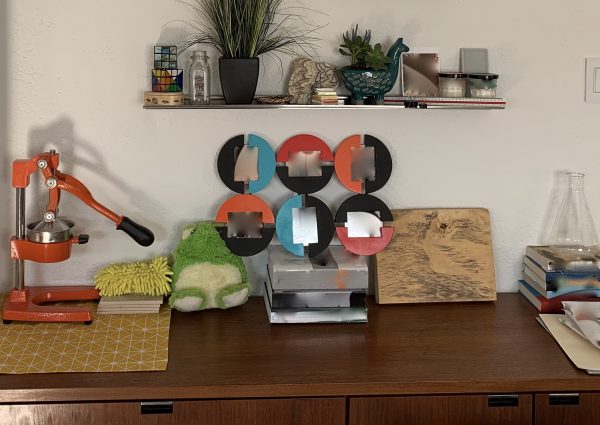
This was a fun project with a lot of interesting challenges, and I’m pleased with the result. It can be hung landscape or portrait, and the photos are easy to change out as desired. The design should fit well with our friend’s mid-century modern decor. I’m not in a huge hurry to get deeper into woodworking, but I sure learned a lot doing this and won’t shy away from more dead trees in the future.
Must feel amazing for your friend to see you go to such great lengths to make a present for them, hope they feel better soon!
Now I can’t wait for the Summer, so I can get back to woodworking, which I have to do outside or in the tiny non-heated workshop. Also, this feels like my experience with glass cutting 😀
Yah, I need someone to show me in person how to cut glass, I guess. YouTube makes it look so easy. 🙂
The particular glass in question may have something to do with it. Obviously tempered glass isn’t going to cut easily, but really thin stuff may be especially hard to work with.
It sometimes helps to put a drop of water on the glass before starting the cut. (Same goes with notching glass tubing before snapping it.)
> I do not understand the economics of the framing business, clearly.
From having a number of things professionally framed, the place where they seem to nail you is the markup for the matte board and frame itself. Also, here in Seattle, we have framing shops all over the frickin’ place. I’m fairly well convinced that all the frame shops are actually mob fronts for laundering money.
Given you have a router I would have done the ‘machining stages’ in a different order:
Knock out the rectangles first, and then rabbet, both with the router, whilst still a large sheet of material.
You can clamp straight things to guide the router.
Then use a couple of the scraps to make a ‘plug’ that fits the rectangles and a radius bar (basically your router table the other way up and mobile).
Use Router to cut out the circles.
Clean up the rectangle corners with a chisel and slice up using the chop saw.
That said cant argue with the results. Nice looking frame.
Yes, of course I know you can guide a router with a straightedge, but the setup to cut six rectangles (that’s 24 edges) perfectly, then squaring up the 24 corners would have taken way longer than a simple chisel.
It’s not really about the speed one way or the other, more that by retaining a large sheet for longer the operations can be done without having to hold smallish pieces by hand near the machines. The jigsaw in a vice is probably safe done with care, but a small slip would ruin your day, and rabbeting holes in a large sheet holding the router is (IMO of course) a safer thing to do.
Just yesterday I was thinking of making a jigsaw table to use as an ersatz table saw. And then you go and clearly it’s not as lethal as I had thought.
Also, “Fusion is so darned fast and convenient that this only took about five minutes”. What mythical beast is this?
Autodesk Fusion 360- it’s CAD/CAM/FEA software that has a free license for hobbyists and startups. It pays to go through some tutorials, but once you do, it’s very fast and easy to use. I’m a big fan, as you can probably tell. 🙂
My wife makes lots of big artwork that needs round plywood backing. I made a replacement shoe for my router that’s a piece of plywood the same thickness as the commercial shoe but about a meter long with a bunch of holes in it. So: I want a one meter circle, go find the radius that matches, put a screw through that hole into the plywood, lift the router (bend the shoe) and turn it on, and oh so gently plunge it in until it’s flush with the plywood, and around I go.
There is a moment just at the end where life can get extremely exciting because suddenly you have a giant wheel with a pivot and a powerful motor trying to spin it, so you want to stop just shy of the full cut and finish with a file.
Your project came out beautifully, and I particularly like the detail of recessing the glass.
Dear aunt Quinn,
use a nail remover for to remove a sticker. I mean a nail polish remover. Old-school ones feat. acetone are the best, modern ones are okey more or less.
Love,
Ziggy
I buy acetone by the gallon because it is useful for many things. For this particular type of sticker, I find WD-40 is a better solvent for the glue they use.
Quinn,
I’m so confused why you didn’t just make this using your milling machine? It seems like the perfect tool to do repeatable stuff like this.
Also, for the brackets, I wonder how rods (in pairs) going from frame to frame would have been for a look, letting you float them away from each other a little more.
And since you have the router table from hell, wouldn’t it have been easy enough to use that as a dado instead of the bastard jig saw jig?
It’s not good to get sawdust on machine tools. It soaks up oil, gets trapped in gibs and generally makes a mess of them. They also don’t spin nearly fast enough for wood. People do it, but it’s not a good idea.
I wanted them touching rather than floating away from each other, but your idea sounds interesting.
I could have used the router for the rectangles, but it would have been slow, I would have had to square up the corners anyway, and I was trying to use that sketchy setup as little as possible. I was not a comfortable rig to use, from a safety standpoint.