Shuffling bits for fun and profit(?)
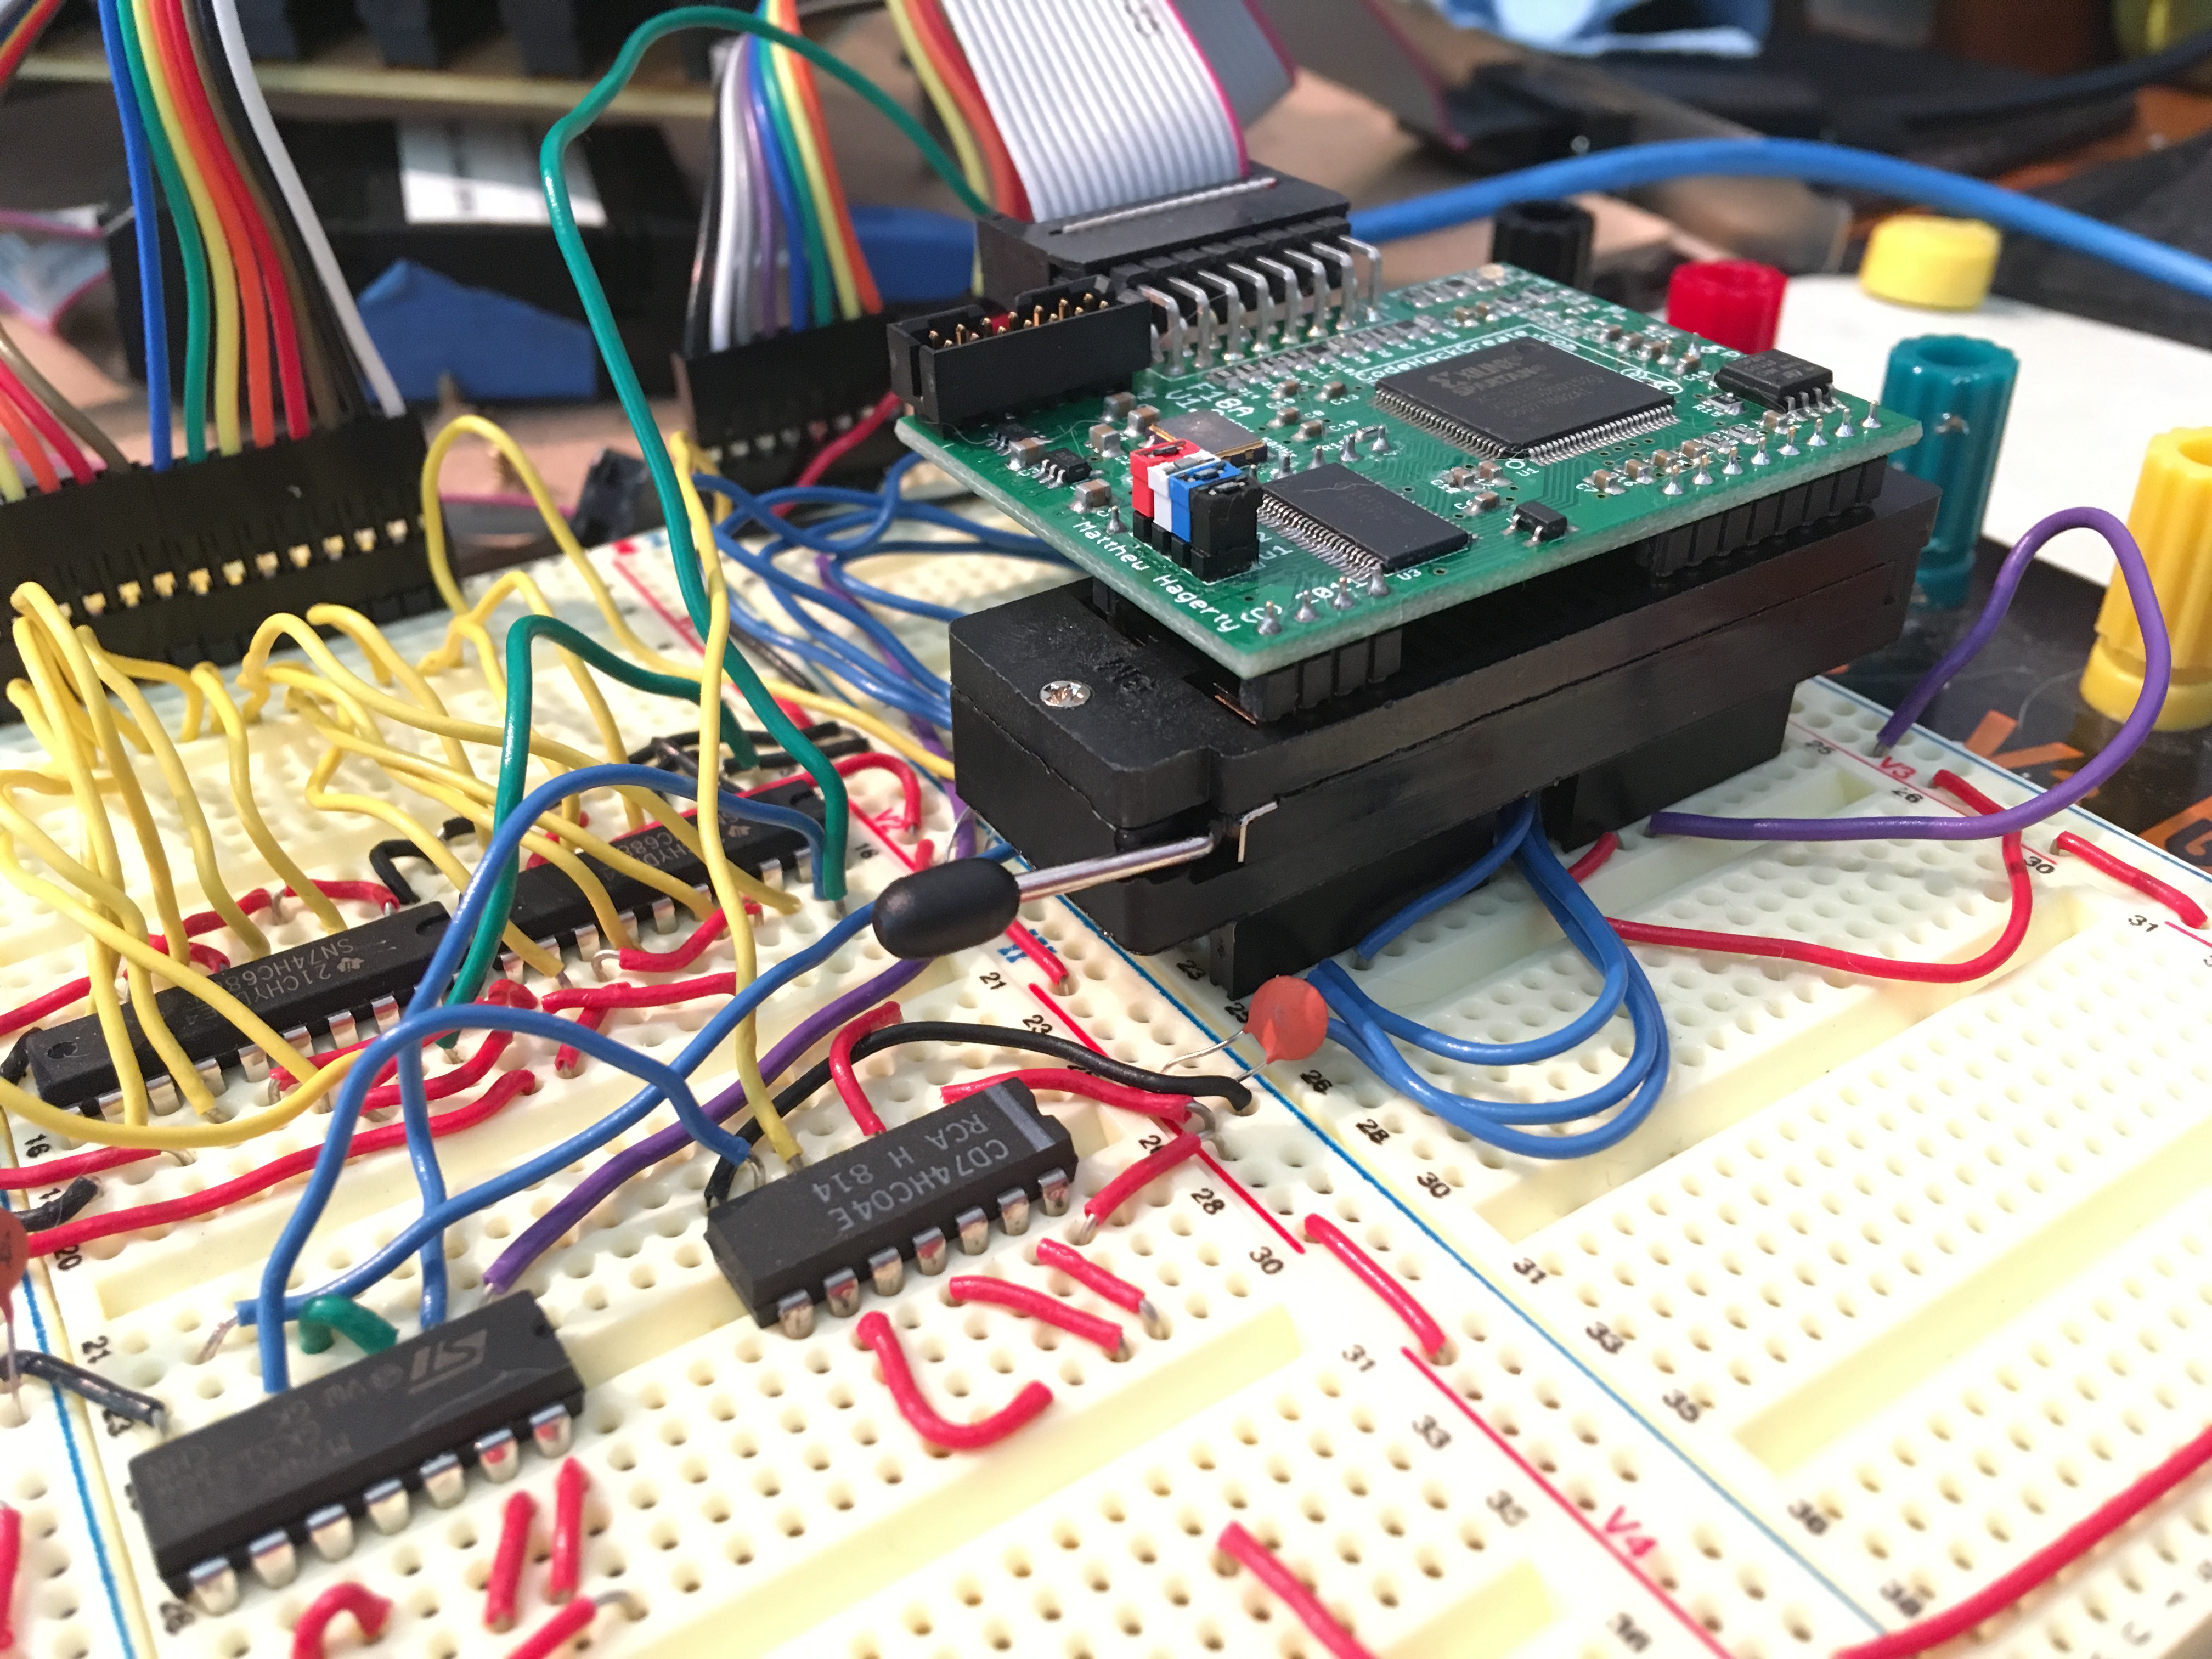
Last time, we got the F18A physically repaired and running off Veronica’s power supply. Things seemed to be working okay, and I could copy bytes into registers, but my VRAM block copier was not yet working. You may also recall that I threatened to buy a ZIF socket for the F18A so that I could easily remove it each time I flash Veronica’s ROM, on the off chance that was contributing to the repeated frying of the F18A’s bus transceiver. I’m happy to say I made good on that threat. If you’re not familiar, a Zero Insertion Force (ZIF) socket is a lever-action device that clamps down on the leads of a chip, and allows you to insert and remove it quickly as much as you want, with no damage to the chip. They are commonly used in (E)PROM burners and such, but are useful in a case like this as well.
I’m pleased to say that since the last post, I’ve flashed Veronica’s ROM hundreds of times, and some combination of better power filtering and removing the F18A during each flash seems to be working. I’ve had no more bus transceiver failures since those first two. Huzzah for persistence! If nothing else, I’m a stubborn old heifer, let it be said.
One of the annoying things about ZIF sockets is that the leads on the underside of them are not standard DIP leads, so they don’t seat properly in breadboards. I did manage to find some machined-pin headers that fit in the ZIF socket and also the breadboard, so that’s why there’s a stack of connectors in the photo above.
With the hardware seemingly well sorted, I could get back to my software. Recall that I felt my VRAM block copier wasn’t working, despite my rigorous on-paper vetting of the code. However, this is one of those situations where it’s hard to say what’s actually broken. There are a lot of moving parts here- my block copier, all the various indirection tables in the F18A, the frame buffer, and so on. Any one of those things being incorrect would cause the whole system to fail. As usual, this debugging task boils down to trying to find a way to isolate pieces of this system to verify independently.
Last time I had established that the F18A starts up with all the lookup tables for sprites, colors, VRAM, etc in pretty predictable default places. Recall, for example, that I was able to modify the built in font by poking at pixels in the $800 area of VRAM (which is where the V9918’s documentation suggests locating the sprite table).
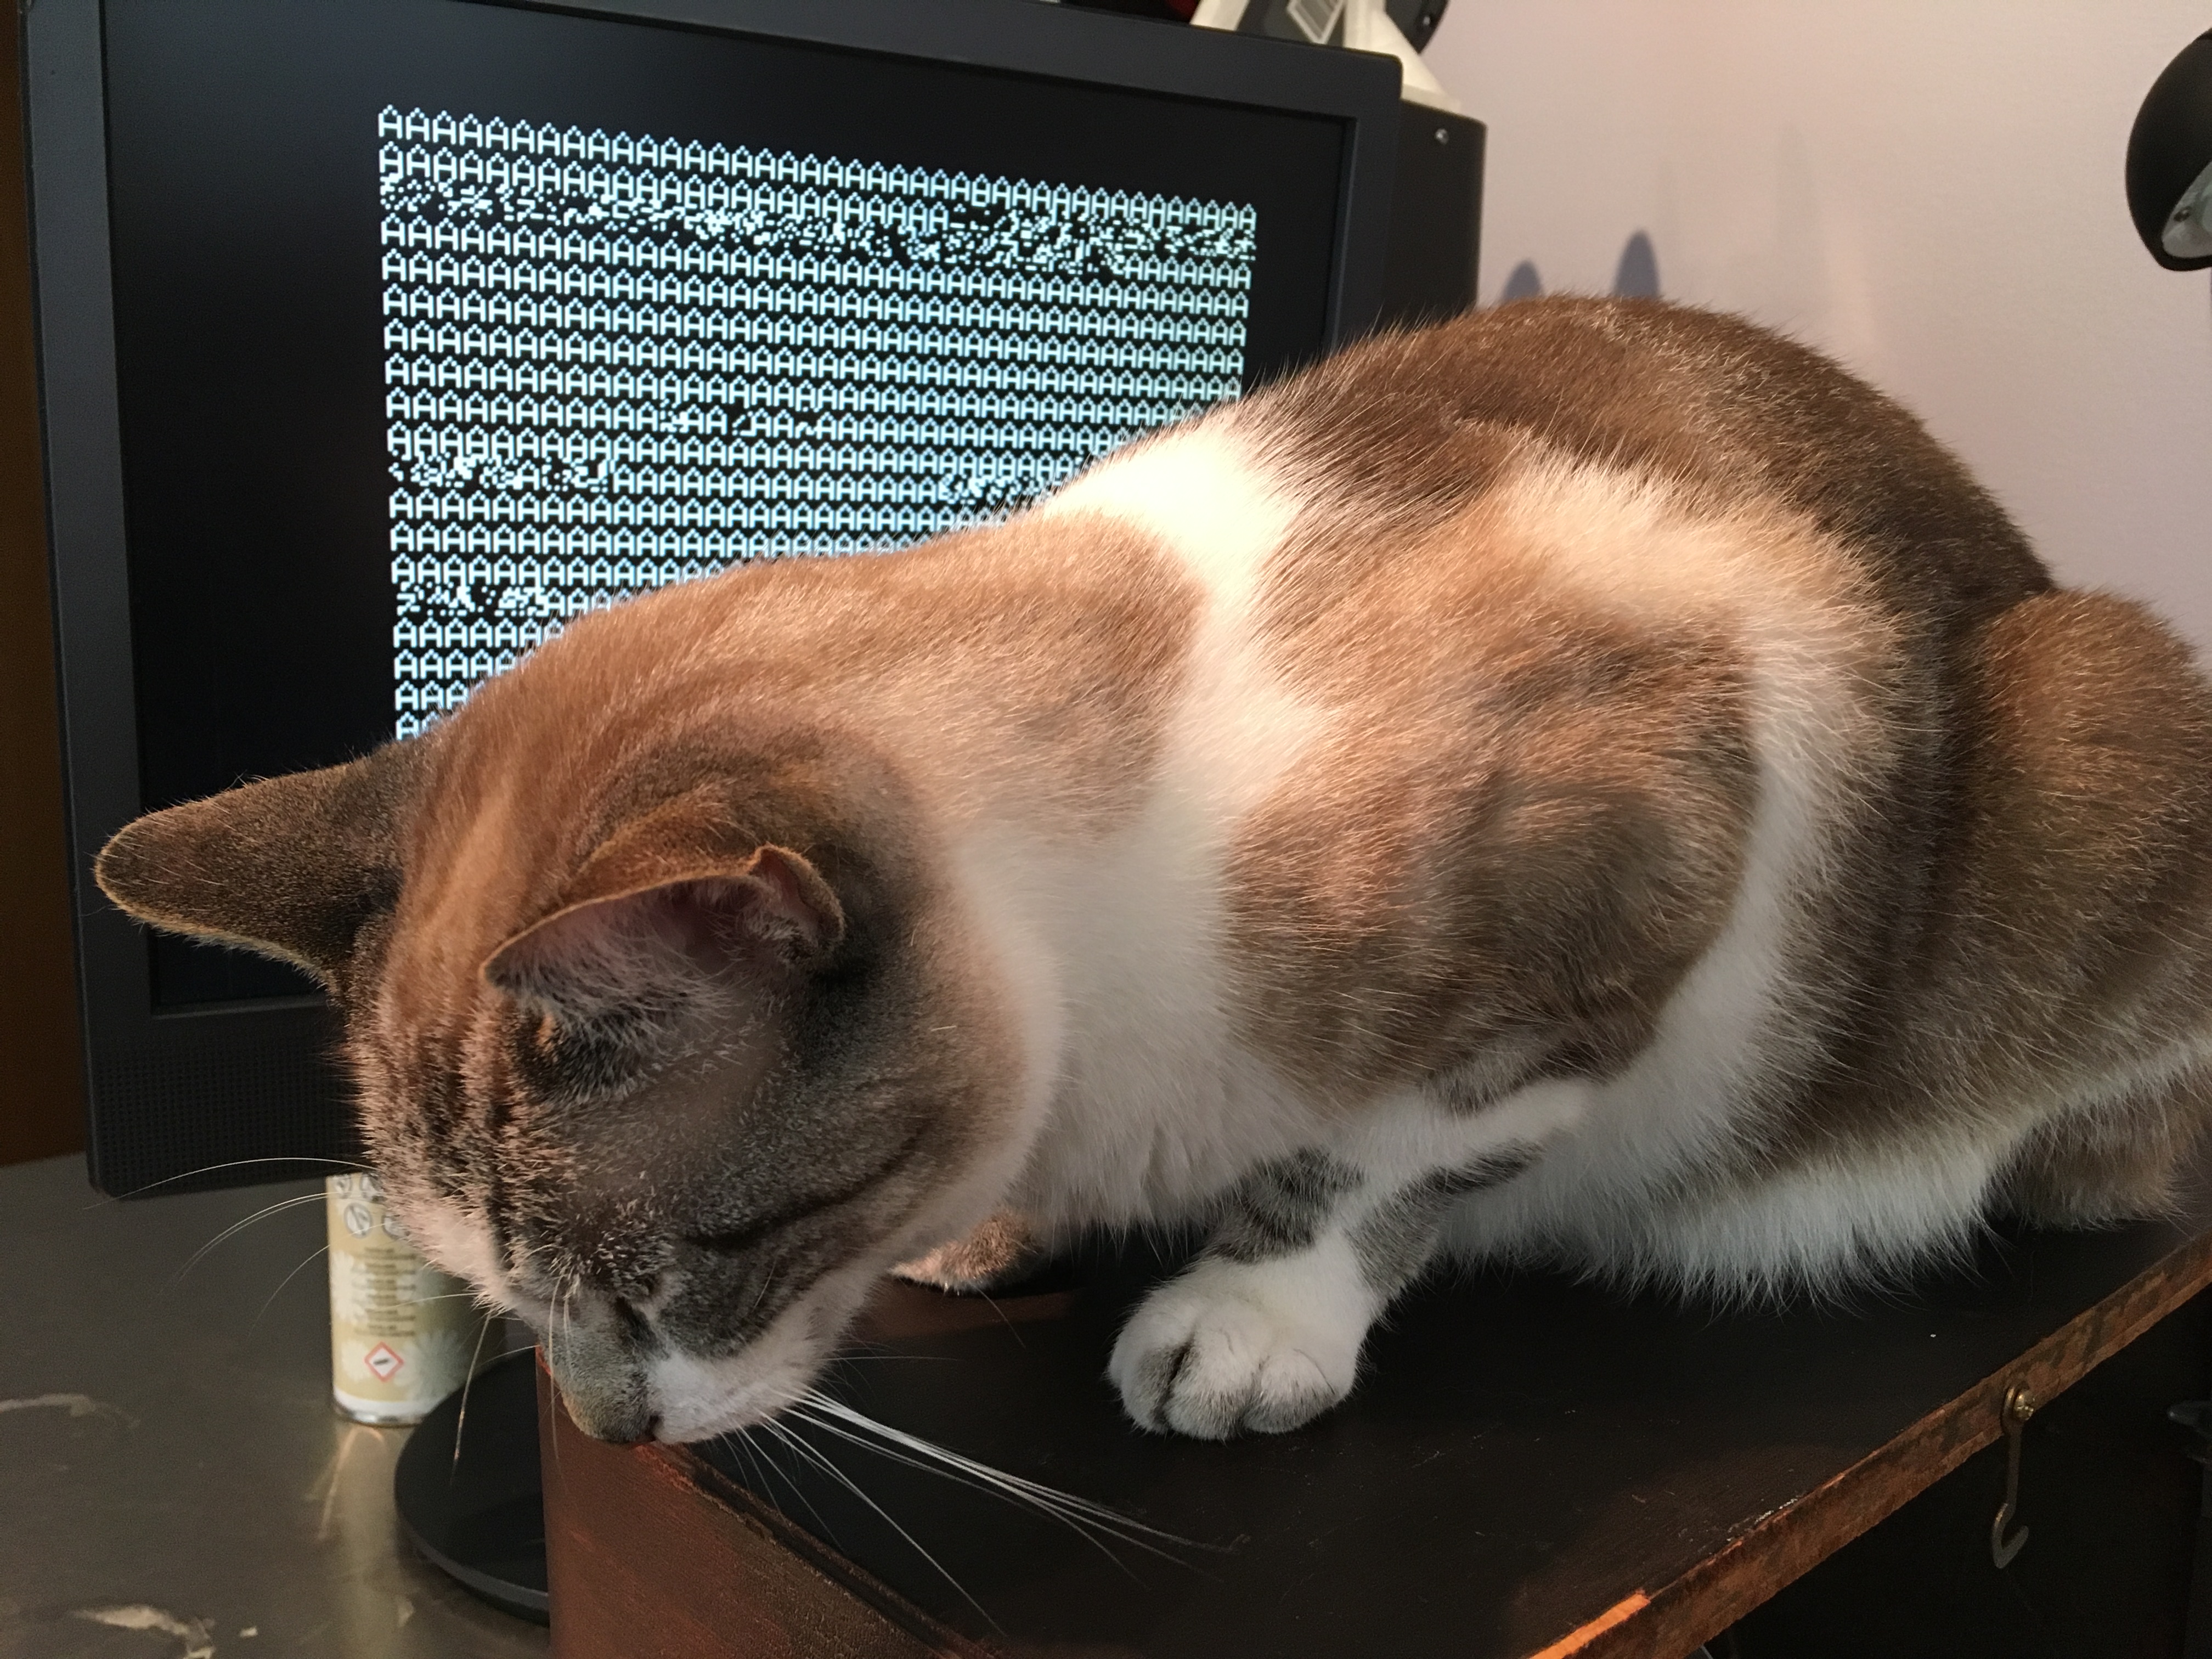
My goal is to use my VRAM block copier to move a font from Veronica’s system RAM into VRAM. This means copying 2048 bytes from RAM (or ROM, really) to $800 in the F18A’s VRAM. A V9918 font is 8 bytes per character (6 bits wide with two unused per byte) and 256 characters for a total of 2k. I created a dummy font with a single hand-drawn ‘A’. I started with an “all up” test- using the block routine to copy that character to every position in the font (aka sprite) buffer in VRAM. If this works, the screen should turn to solid As, because any character value that happens to be in the frame buffer will render as an A.

I found that it didn’t seem to be quite working. Looks like a bunch of garbage got sprayed into other areas of VRAM when I did that. When debugging a memory move operation, it’s generally best to start with first principles. The edge cases are where things generally break, so test copying one byte, then one row of bytes, then two rows, etc. Each of those will exercise a new loop or branch in the block copier and help isolate the problem.
To do that kind of testing, I needed to set up an environment where I could see if it was working. The simplest case is to copy a few bytes from the upper left of my font to the upper left of the F18A font area, so I set up a test whereby I could see if that was working.
I knew from past experience that character 0 was a blank, and that the frame buffer was initialized with that. So modifying character zero in the font should be visible as filling the screen with things. I tried that to copy a letter A pattern from my font to character zero. This would be a much smaller memory move, and thus a much simpler code path in the block copier.

I played around with this for a while, and I suddenly realized what was wrong. I wish I could say it was a careful scientific process of eliminating variables, but sometimes debugging is just a flash of inspiration. I realized that my block copier was relying on the source data being aligned to a 256-byte boundary. This radically simplifies the code, so it’s a nice requirement to impose. My test font was not aligned to anything. In fact I even commented in the block copier that the source must be page-aligned (a “page” in 6502-speak is a 256-byte block) and then promptly forgot about my own constraint. It always pays to RTFM, especially when you wrote TFM.
As I was getting ready to test a more complex code path in my block copier to modify more of that font, it occurred to me that I could test my copier just by placing text on the screen. Why not write a test function that uses the block copier to place characters at the top left?
Since I have the ability to write a single byte to VRAM (we got that code working last time) I used that code to place a row of 10 characters in the upper left, numbered 0-9. Then I can overwrite characters 0-9 in the font with my block copier, and I should see the text change. Let’s start there to validate that this test idea will work.
Since I know I can create success, if it fails with the block copier, I’ll be able to work backwards to find out why. Thus, I set up a test where my block copier would copy a long string to the upper left of the frame buffer.
Here’s the test string copier:
In case it’s helpful, here’s that block copier again (see below). Those PARAM values and such are all just zero page locations. Using the zero page for parameter passing is a common pattern on the 6502, because traditional stack frames are kind of a pain on this chip. The concept of function stack frames came in with compilers, and later chips created dedicated opcodes for managing them. It’s a lot more work to manage local variables and recursion with the 6502 instruction set using a compiler-oriented stack frame pattern. Hence using the zero page and other tricks like self-modifying code, or placing parameter blocks inline in the code. Contrast that with something like the 68000, which has a huge instruction set, and many opcodes dedicated to handling stack frames. It’s such a joy that you can transcribe C into assembly for that chip by hand quite easily. I know this because for an assignment in an assembly class, I wanted to write a wireframe 3D renderer (with viewport clipping and multiple windows because I’m insane). That’s straightforward(ish) in C, but a huge pain in the ass in assembly. So I wrote it in C and “compiled” the code by hand into 68000 assembly. It worked great, and considering the assignment was actually to write a simple 2D blitter, let’s just say I got an A. The time I spent on that caused me to get a B- in calculus, but hey, we all make our choices. Anyways, the 680×0 architecture was the height of CISC thinking in CPUs, and the 6502 was the beginnings of RISC thinking. The latter would turn out to rule the world in the end, so it turns out Chuck Peddle was right all along.
So after all that, it turns out that the VRAM block copier that I wrote on an airplane four months ago actually worked perfectly all along. The only thing wrong was how I was using it!
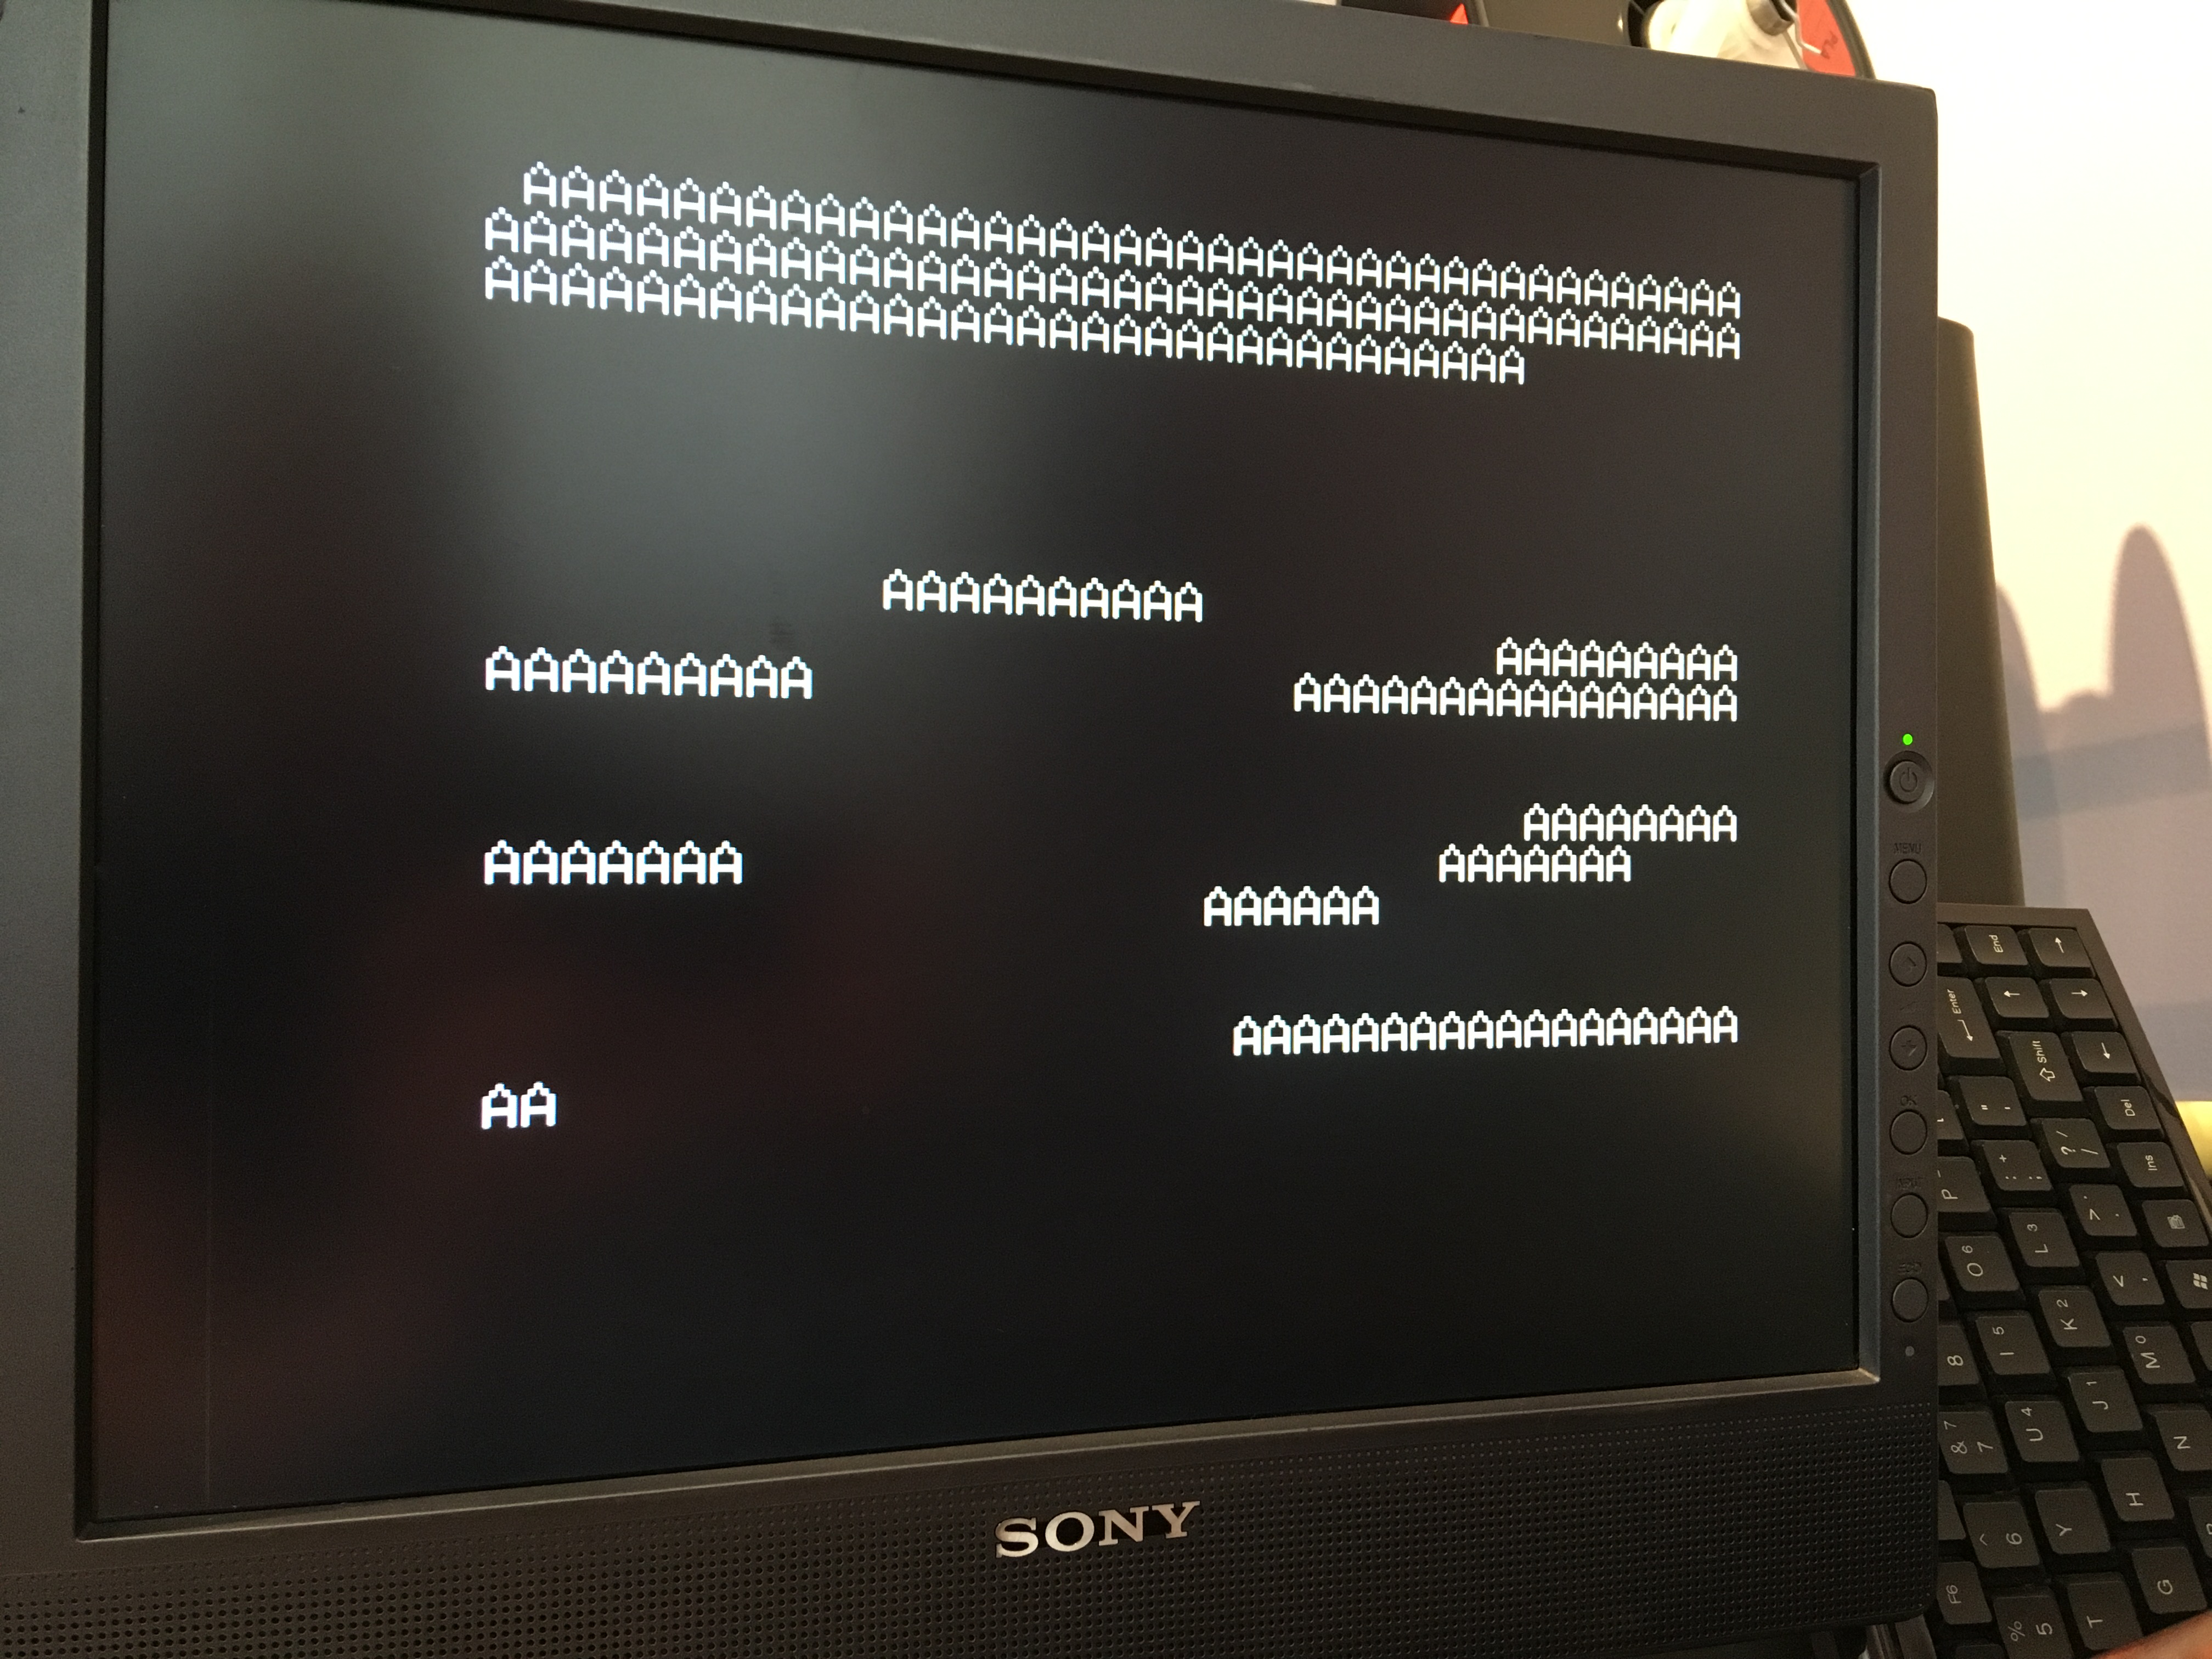
Next I set out to write my font loader routine. I went back to using the block copier to copy the same A into every character position (except 0 this time). This should look like my previous text screens, except everything will be an A.
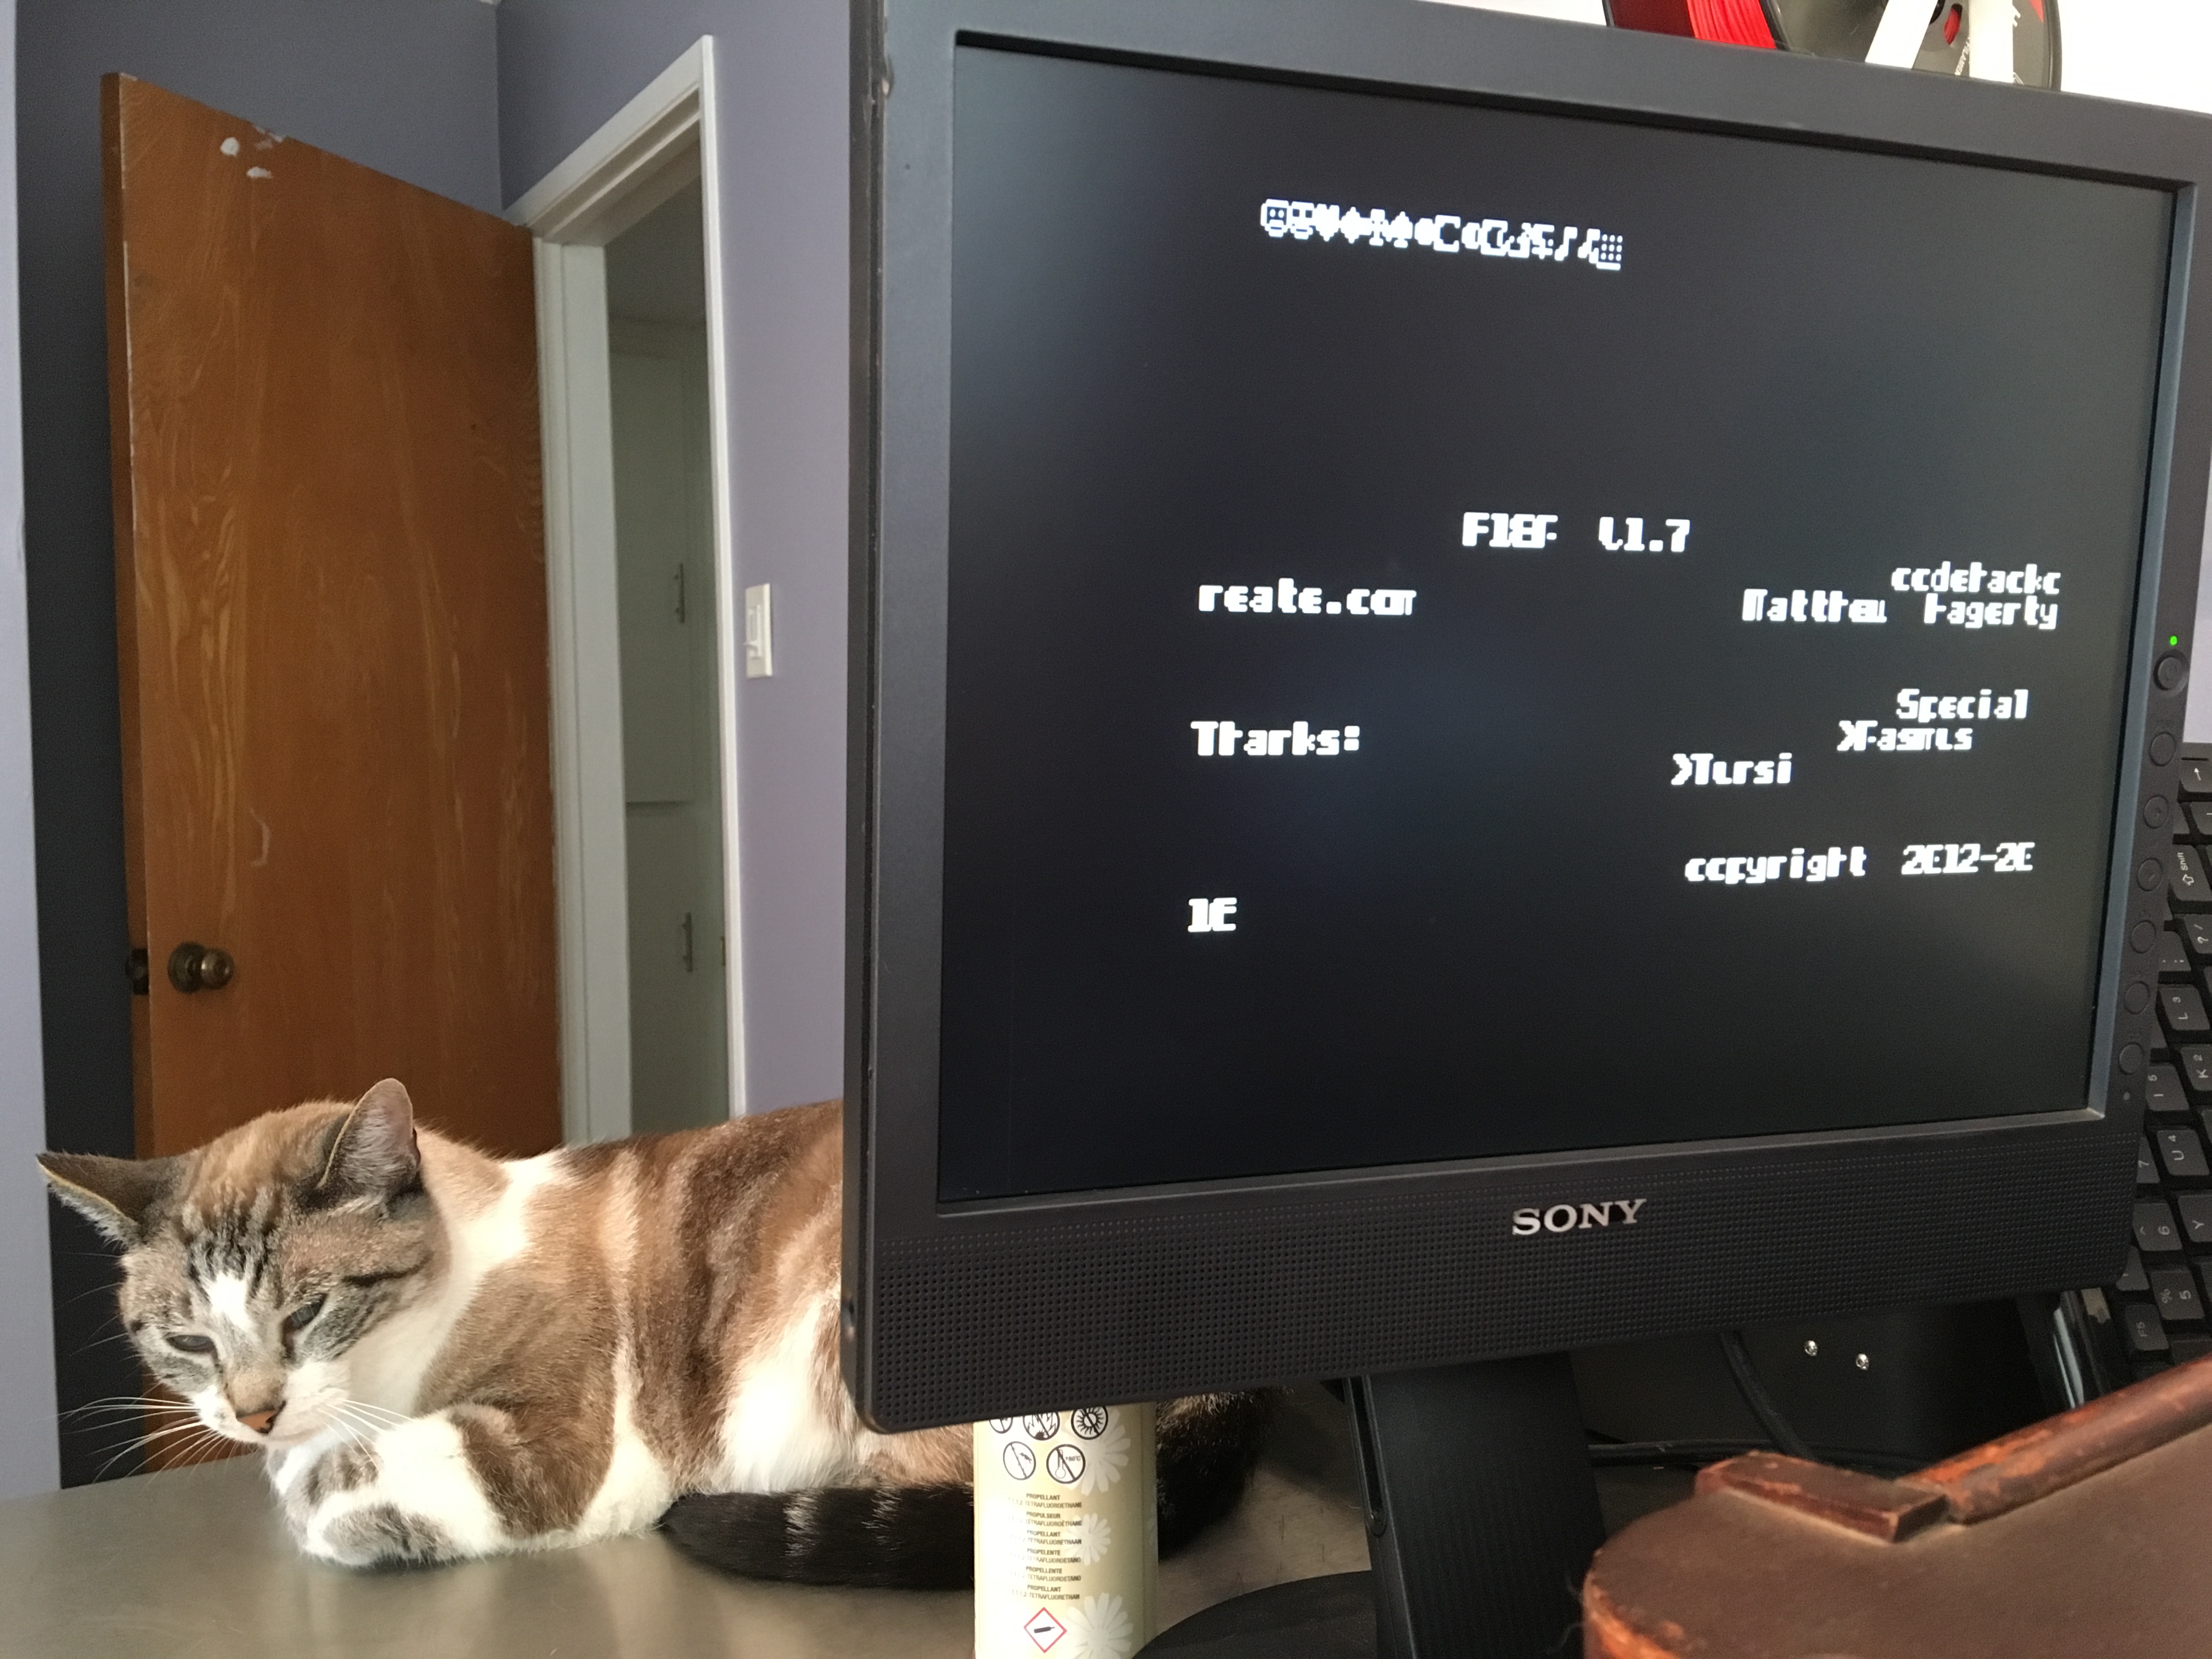
Now, at this point I only had an ‘A’ because I hand-encoded that character in my font data in ROM. I needed a complete font. The F18A does have a built-in font (you saw pieces of it earlier, and it’s used to render the splash screen). However, I want to make my own because I want to learn how to manipulate every aspect of this device for my own purposes. It’s also just a good excuse to make the chip do things.
For giggles, I want a specific font in my F18A- the Apple II font. Everyone who grew up with early home computing probably has a nostalgic fondness for the typeface of the computer of their youth. I have, for example, often seen tributes to the serifed vomit that was the IBM PC text mode font. Some people like typographical abortions, and I don’t judge them for that. My personal jam is the font from the Apple II, which came in 40 column and 80 column flavors.
I considered digging through the various Apple II emulators that I have to find the contents of the character ROM, then massaging that into a useful form. However, it was quicker to ask around amongst the awesome Apple II folks on the KansasFest mailing list. Within an hour, they had provided all sorts of related data in various forms. I grabbed a version of the 40 column font in a format close to what I needed, and got to work.
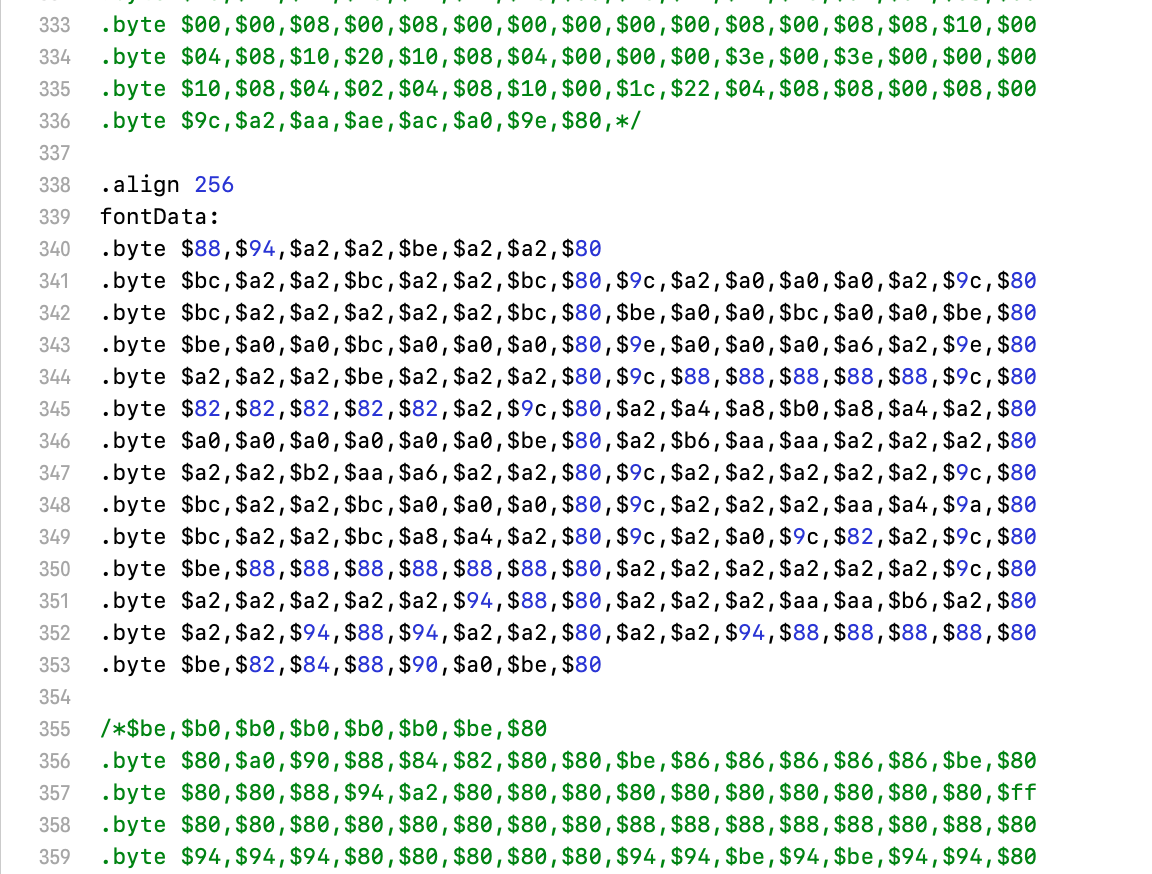
My font needs to live in Veronica’s ROM, so that it can be copied into the F18A at startup. This isn’t particularly efficient, but it’s what we have to work with. To get it in Veronica’s ROM, it needs to live in my ROM source code as a long series of .byte statements. That’s the ca65 assembler syntax for declaring static data in the binary. By amazing stroke of luck, the Apple II font is already a good fit for what the F18A wants- 6 bits wide by 8 lines high, stored as 8 bytes per character. In principle, I should be able to paste-and-go. I started by doing this, and ended up with something along the lines of:
With the entire Apple II font tucked away in my ROM image, I was quite chuffed to give it a try. However, this new ROM image wouldn’t even boot. That seemed odd, but it didn’t take much poking around to figure out why. One of the nice features of ca65 (and probably most assemblers) is the ability to output what’s called a “list” file. This is basically the entire object code of your program, mapped into where it will actually go in memory, interleaved with the source code that generated said object code. If your object code will be going through a dynamic linker or is relocatable code, the addresses may not mean much- they’ll still be correct, but relative to $0000 or other dynamic load location. In my case, there’s no linker here. The origin of the code is set to where the image is stored in ROM (at $F000 in the 6502s memory space) so the List file is a very powerful tool indeed. I can see exactly where every byte of my program is going to end up when it is mapped into ROM. In this case, the bad news is at the end of my List file:

I suppose I should have seen this coming, but this font is 2k in size, and Veronica’s entire ROM is only 4k. With Veronica’s old video system, the font was stored in the program EEPROM space of the AVR microcontroller generating the video, so I didn’t have to use precious system ROM for it. The F18A does have its own resident default font, but I really wanted to get my own loaded in there, for the reasons already discussed. Ultimately, what I need is a form of volatile mass storage from which large data like font files can be loaded. Computers in the 1980s often handled this problem with dedicated character ROMs that could be mapped in when needed, so they didn’t occupy valuable system address space. However you go to war with the army you have, and right now I have a 4k ROM and need to load a font from it.
The first thing I did was get rid of all the cruft that I could. I had, for example, an entire Pong game in ROM, as you may recall. That doesn’t need to be there. A few other blobs of test code and such were expunged. It was still not enough. That’s when I realized that I really don’t need an entire 256 character font in ROM. The goal is to get my ROM monitor up and running on the F18A, and I can make do with a “bootstrap” font of just a few characters to manage that. I stripped the Apple II font down to just the capital alphabet. I’ll add a couple of useful punctuation marks and numbers later as well.
The basic alphabet is 208 bytes, and that we can swing.

I did one other little trick. Instead of loading my 208 byte alphabet at the top of the sprite table (which the V9918 uses for rendering text characters), I loaded it at an offset of 520 bytes from the start of the sprite table. That put my ‘A’ in the same place as it would be if I had loaded an entire font. That saves me having to write any kind of messy character remapping code. The F18A can do lookups on the ASCII values just as it always would, and nobody is the wiser that I only loaded 26 characters.
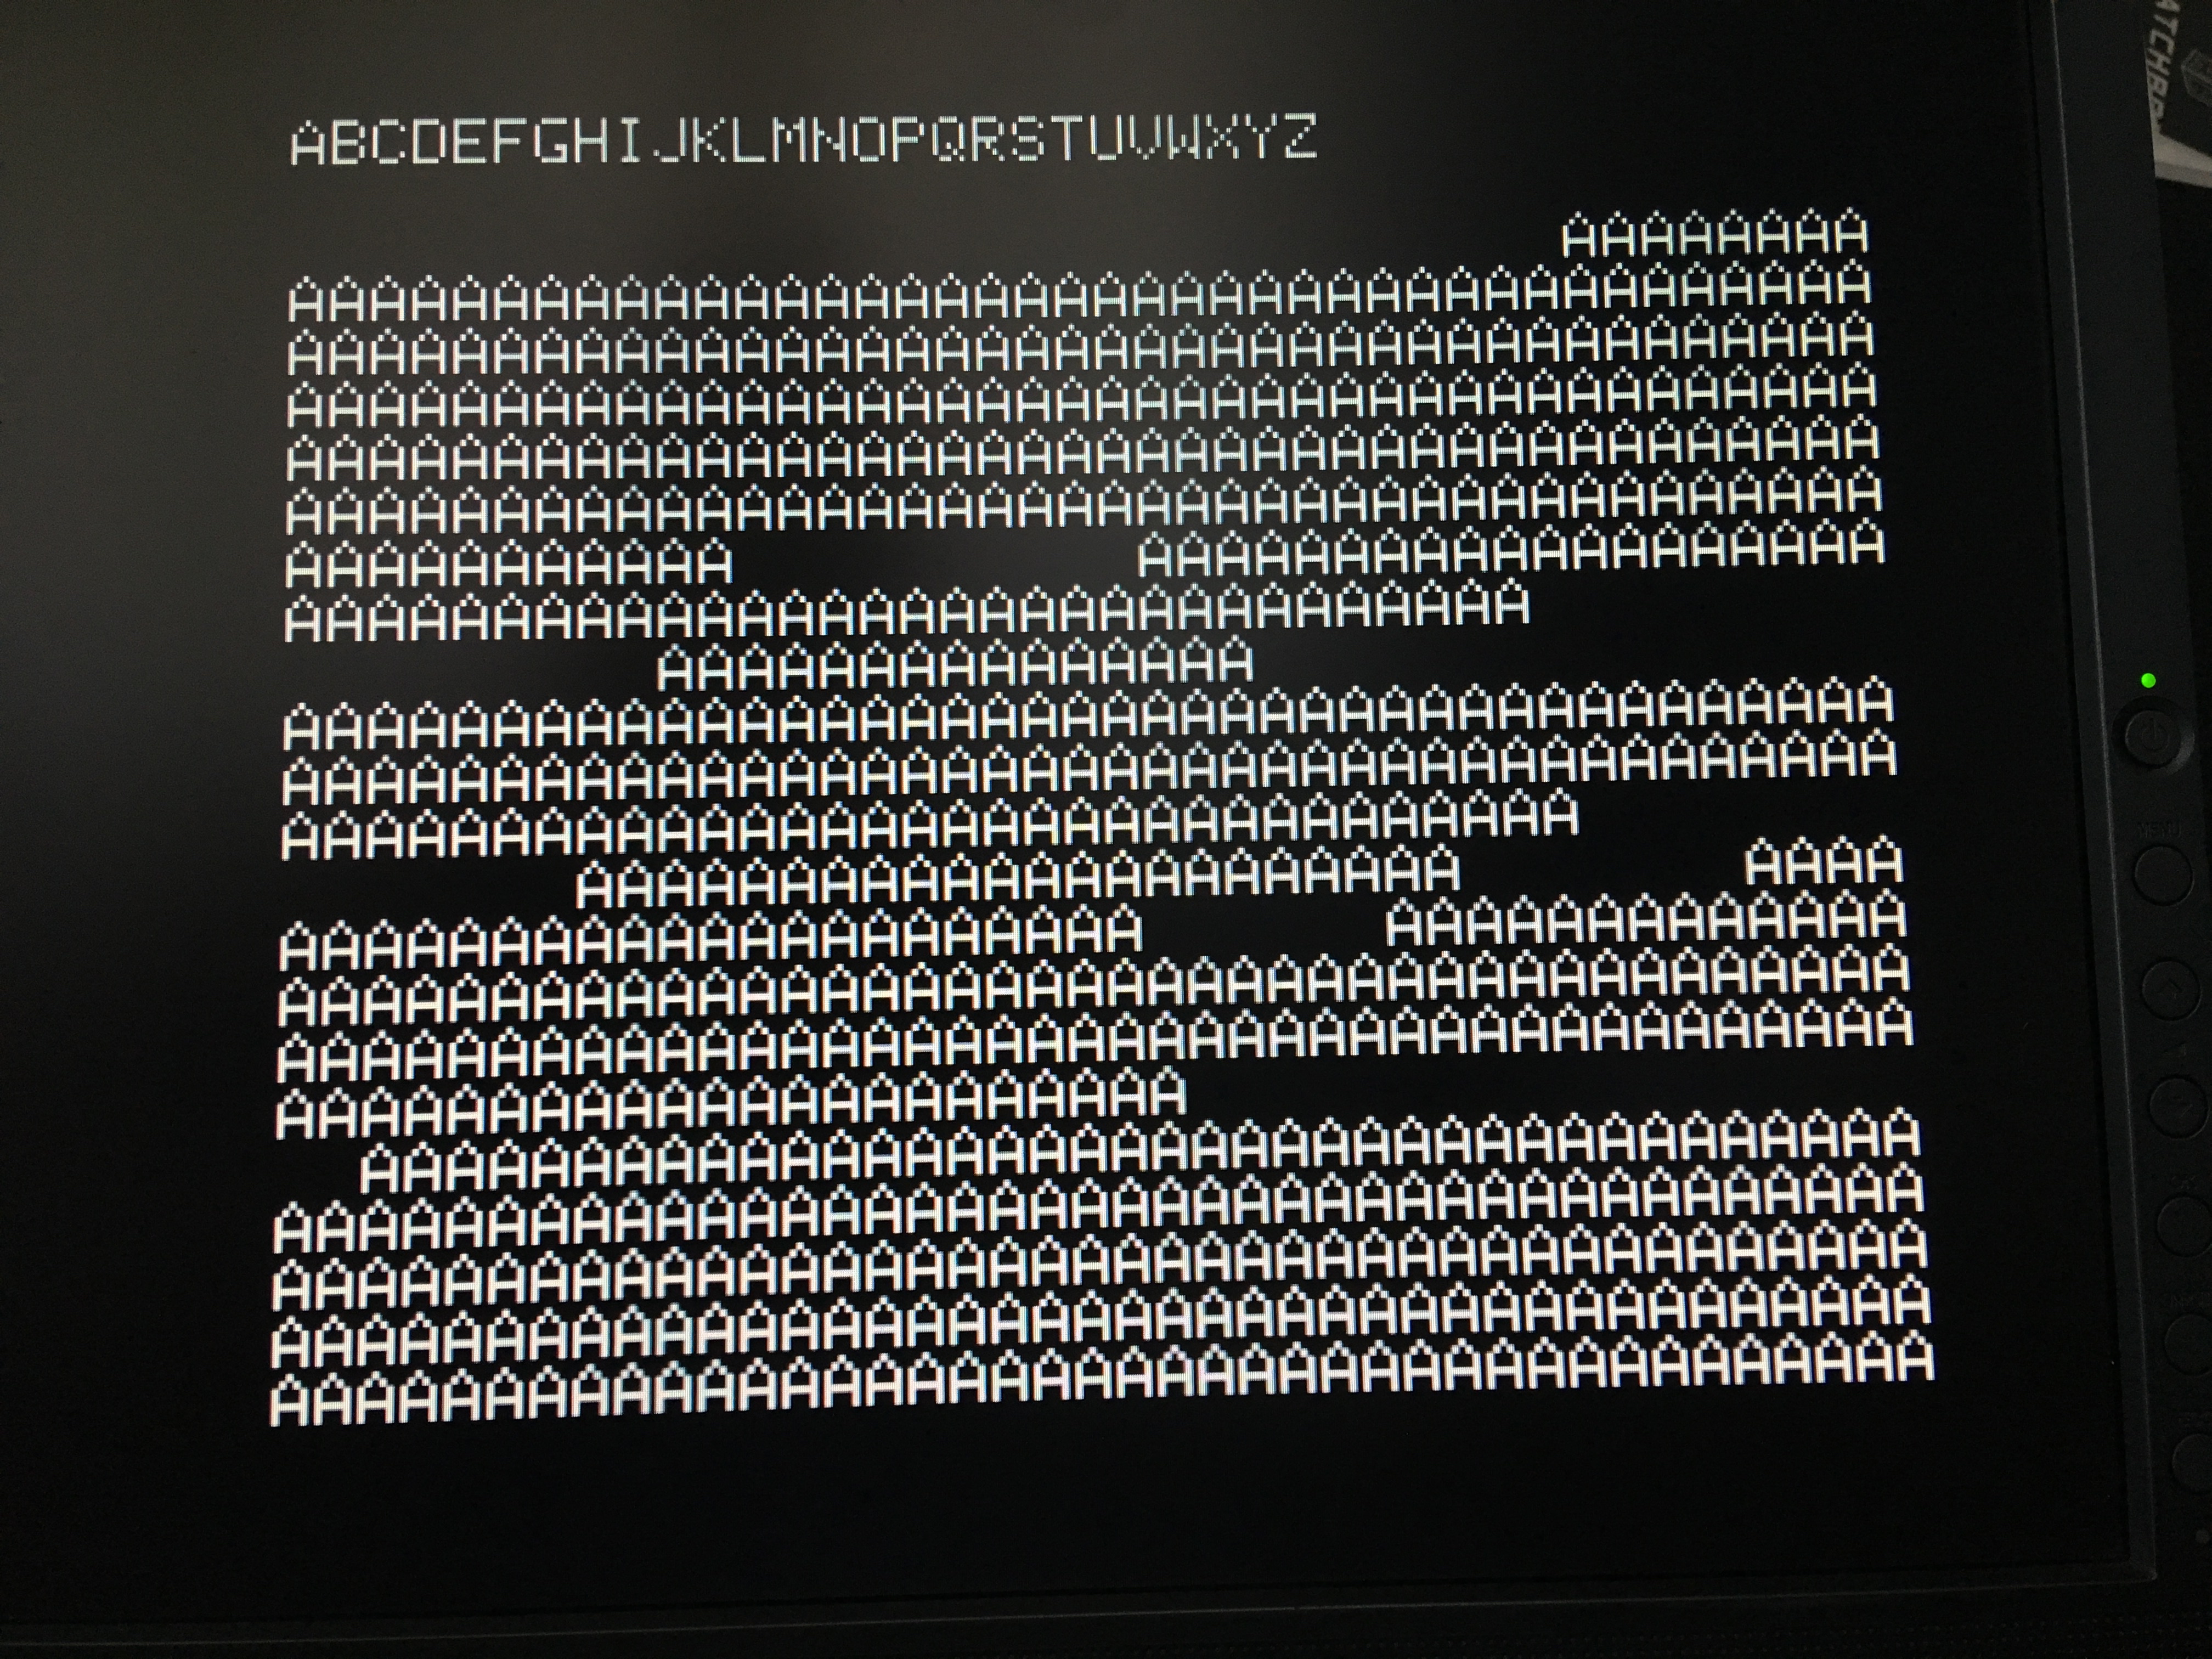
Okay, time for another test run. We still have that code printing the alphabet on the first line at boot, so let’s see how that looks…

There’s a couple of interesting things happening here. First, there’s a vertical bar on the left edge of each character. This is because the Apple II has an annoying habit of setting the high bit on everything text related. Due to an idiosyncrasy of the video rendering hardware, Steve Wozniak was able to save a few gates by having all text characters be high-bit-set. This messes you up when programming assembly on the Apple II as well, because ASCII characters in memory may or may not have the high bit set, depending on where they came from and where they are going. The Woz was all about reducing chip count, and wasn’t too worried about the torturous effects on programmers of the system (see: Apple II Double Hi-Res Graphics, if you think your programming job is hard).
The other artifact we have there is the characters are all chopped off on the right edge. This is because while the Apple II and F18A are both expecting six bit characters in an eight bit byte, the Apple puts the unused bits on the left, while the F18A (from the V9918) expects them to be on the right.
We can solve all these problems by bit-shifting all this font data left twice. I could do that in code when the font is loaded, but it’s silly to do a static transformation on data at runtime. It’s way better to fix the data. I could fix my 208 bytes by hand, however I want to eventually use this entire font, so I should fix all of it. That would be immensely tedious by hand, so I’m going to bang out a little Python script to do it. Tools are power, and in computing, programming languages are your tools. The more of them you know, the more likely it is you will have the right one to apply to a quick and dirty problem like this.
Here’s the python script I came up with. It reads the font from standard input in the ca65 format (with the .byte parts and all that) and outputs a new blob to standard output in the same format, but with all the hex values bit-shifted left twice.
Standard I/O streams in Un*x operating systems are incredibly powerful tools, and it behooves you to use them whenever possible. That saved me writing any sort of file handling code, I didn’t have to parse command line arguments to get filenames, and now this tool can be chained together with other tools. This was the vision of Unix from the very beginning, and it is as powerful today as it was 60 years ago. You may not think of Python as being a good I/O piping language, but it does just fine! The syntax to invoke it is a little esoteric compared to something written in C or a shell scripting language, but it works just fine:
cat Apple2BootFont.txt | ./Apple2FontShift.py
One of the tricks to making this easier is proper use of the shebang at the top of the python program. Any text-based scripting-language program can be executed as if it was a native binary if you put a blob at the top with the magic prefix #! (hence she-bang) which tells the shell executor which program to run the script against. In my example above, it’s specifying Python 3 in the weird place Mac OS insists on installing it. One caveat with shebangs is that they can reduce the cross-platform support of your script, because different OSes put standard tools in different places. Not even different variants of Linux can agree on whether tools like python belong in /usr/bin or /usr/local/bin or /var/bin or whatever. Forget about Mac and Windows, who couldn’t even agree on a file path separator. However there is a POSIX-standard cross-platform(ish) version of the shebang that helps quite a bit:
#!/usr/bin/env python3
This can work quite well, even between Mac and Windows (we do this a lot at my day job). The POSIX standard doesn’t actually specify where env is supposed to be, but most Un*x variants seem to agree on /usr/bin and foreign OS shells seem to have agreed to see that format of shebang and interpret it as “go find where I put a tool called python3 by whatever means I normally use for that”. It mostly works sometimes.
I didn’t do that in my Python script because, well, I’m lazy and I copy-pasted that script framework from another one on my machine. And so the bad habits become immortal. History may judge me, but my script worked, goddamit.
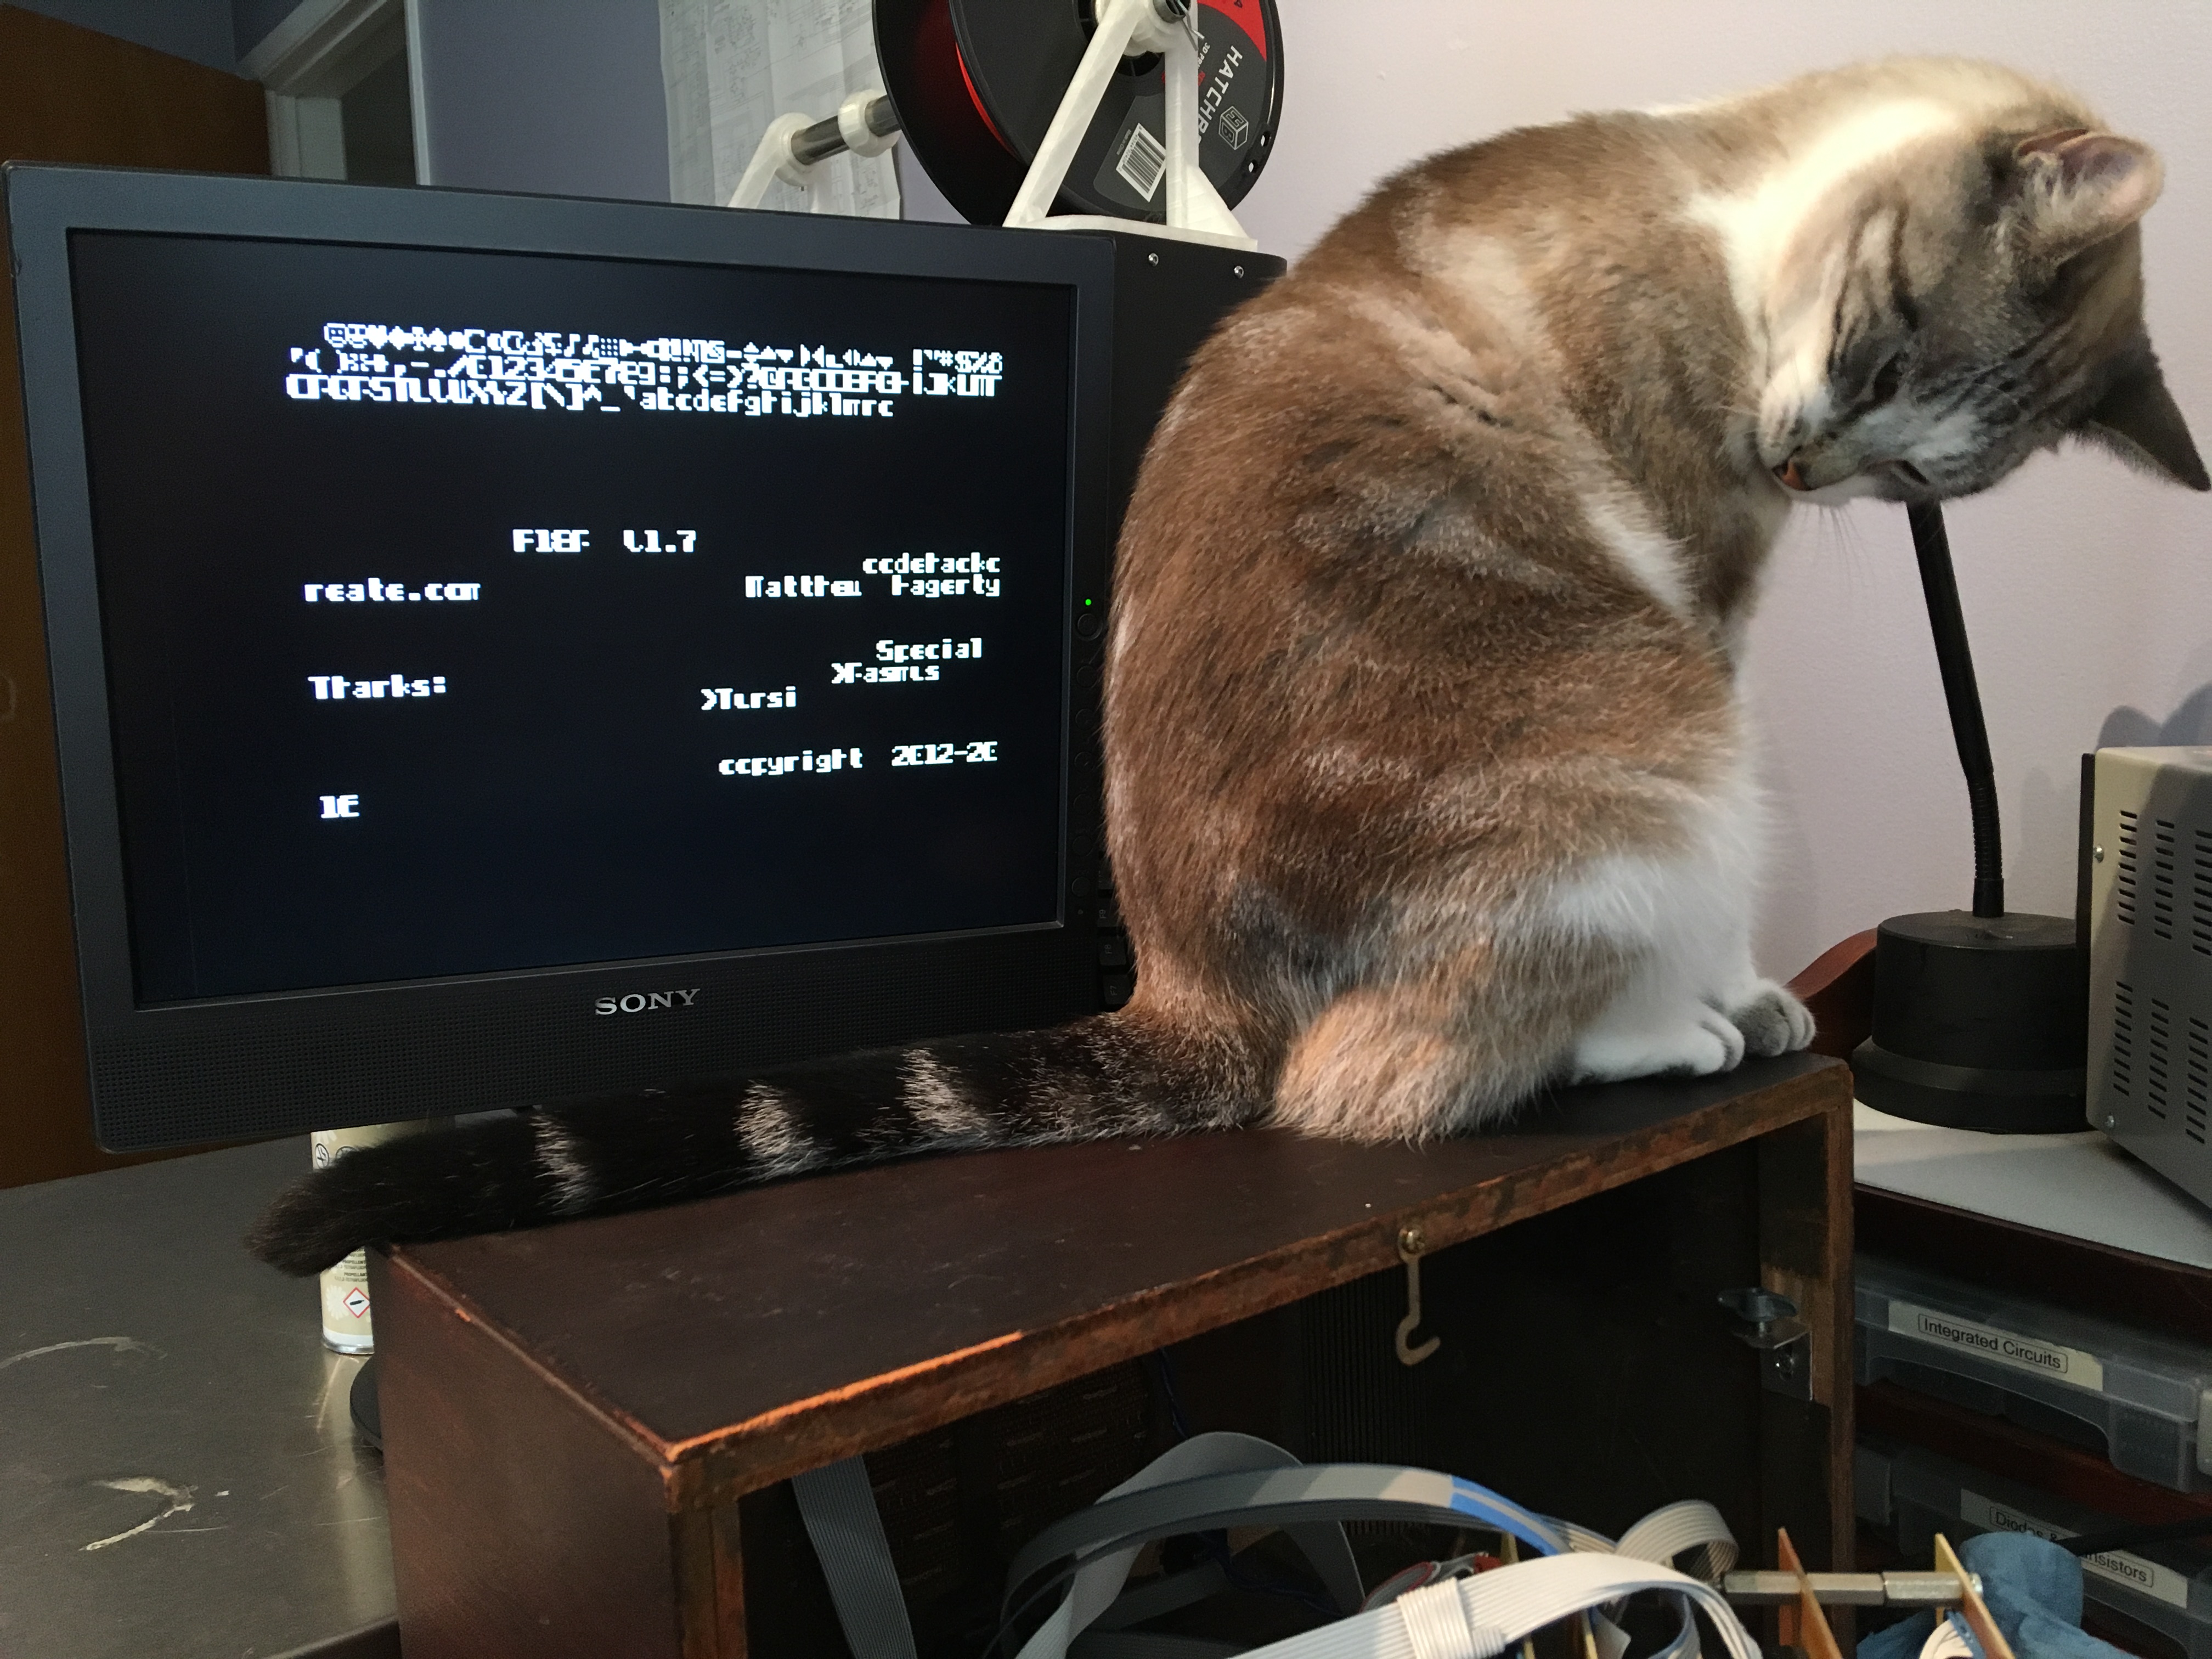
Okay, so after all that, how’d we do?
Huzzah! This is a great result. We now have the ability to load a font into the F18A, my VRAM block copier is known to be working, and we’ve got all the indirection tables for sprites, frame buffers, color tables, etc, sorted out. I think this is a great place to stop for now, but I think next up is to start connecting the plumbing between the F18A’s rendering and Veronica’s API for the ROM monitor. Stay tuned for all the hot 6502 on FPGA action.
Cat for scale.
Haha, precisely. 😀
LZW or even RLE would work wonders on the font’s size in ROM.
Yah, great idea! I may do that.
Interesting – my personal nostalgia fonts are BBC Micro Mode 7 and the PC DOS font (or as I think of it, the ZZT font), but having never owned an Apple II the one you’re using is instantly recognisable to me as the character LCD font. I guess the world’s LCD makers have decided it’s the platonic ideal of a 6×8 pixel representation of the latin alphabet (at least if you don’t care about minimum 2 pixel horizontal runs for legibility on fuzzy CRT hardware)
Yah, I’m sure it’s very similar. When you get down to 6×8 or 5×8, there are only so many ways to represent the letters. Especially things like E, N, W, and M. It’s amazing how a different pixel here or there can lend personality to a font, though. The Apple II font as a whole is recognizable, even if many individual characters are the same as other 5×8 or 6×8 typefaces
Is it a sign of aging that my nostalgia font is that of the VT52?
I never knew that you could pipe files into python like that. I’ve always hardcoded the filename and opened it in Python and then looped through it. I’m going to bookmark your code and try to remember to use that style in the future.
Not a commonly used pattern in Python, to be sure, but I’m very fond of it. Saves so much effort.
Note to self: Add “was cat sleeping at time of error?” to troubleshooting path diagram.