To make progress, sometimes you have to make tools.
My scores haven’t been great on Johnny lately. An outside observer might suggest that perhaps I suck at pinball. I, on the other hand, take the much more rational position that something must be wrong with the machine.
Once in a blue moon, that actually turns out to be true. Johnny has a particularly lucrative shot called the Throwing Spikes. There was a lot of Japanese gangster stuff in the movie, okay? Anyways, when the ball runs down the left inlane on to the left flipper, it lights the Throwing Spikes shot. You then have a couple of seconds to fire the ball up the right ramp or around the right loop. If done quickly, you get a Throwing Spike. For each Throwing Spike you collect, you gain progressively more interesting rewards. There’s a multiball mode, there’s an extra ball, there’s extra points, all sorts of stuff. Probably the best reason to collect Throwing Spikes is because when you have three of them, it lights the Spinner Millions. With this lit, you get a million points every time the spinner goes around once (until the end of this ball). This combos very strongly with some other things, such as Hold Bonus and Bonus Multiplier, leading to really big points if you play your cards right.
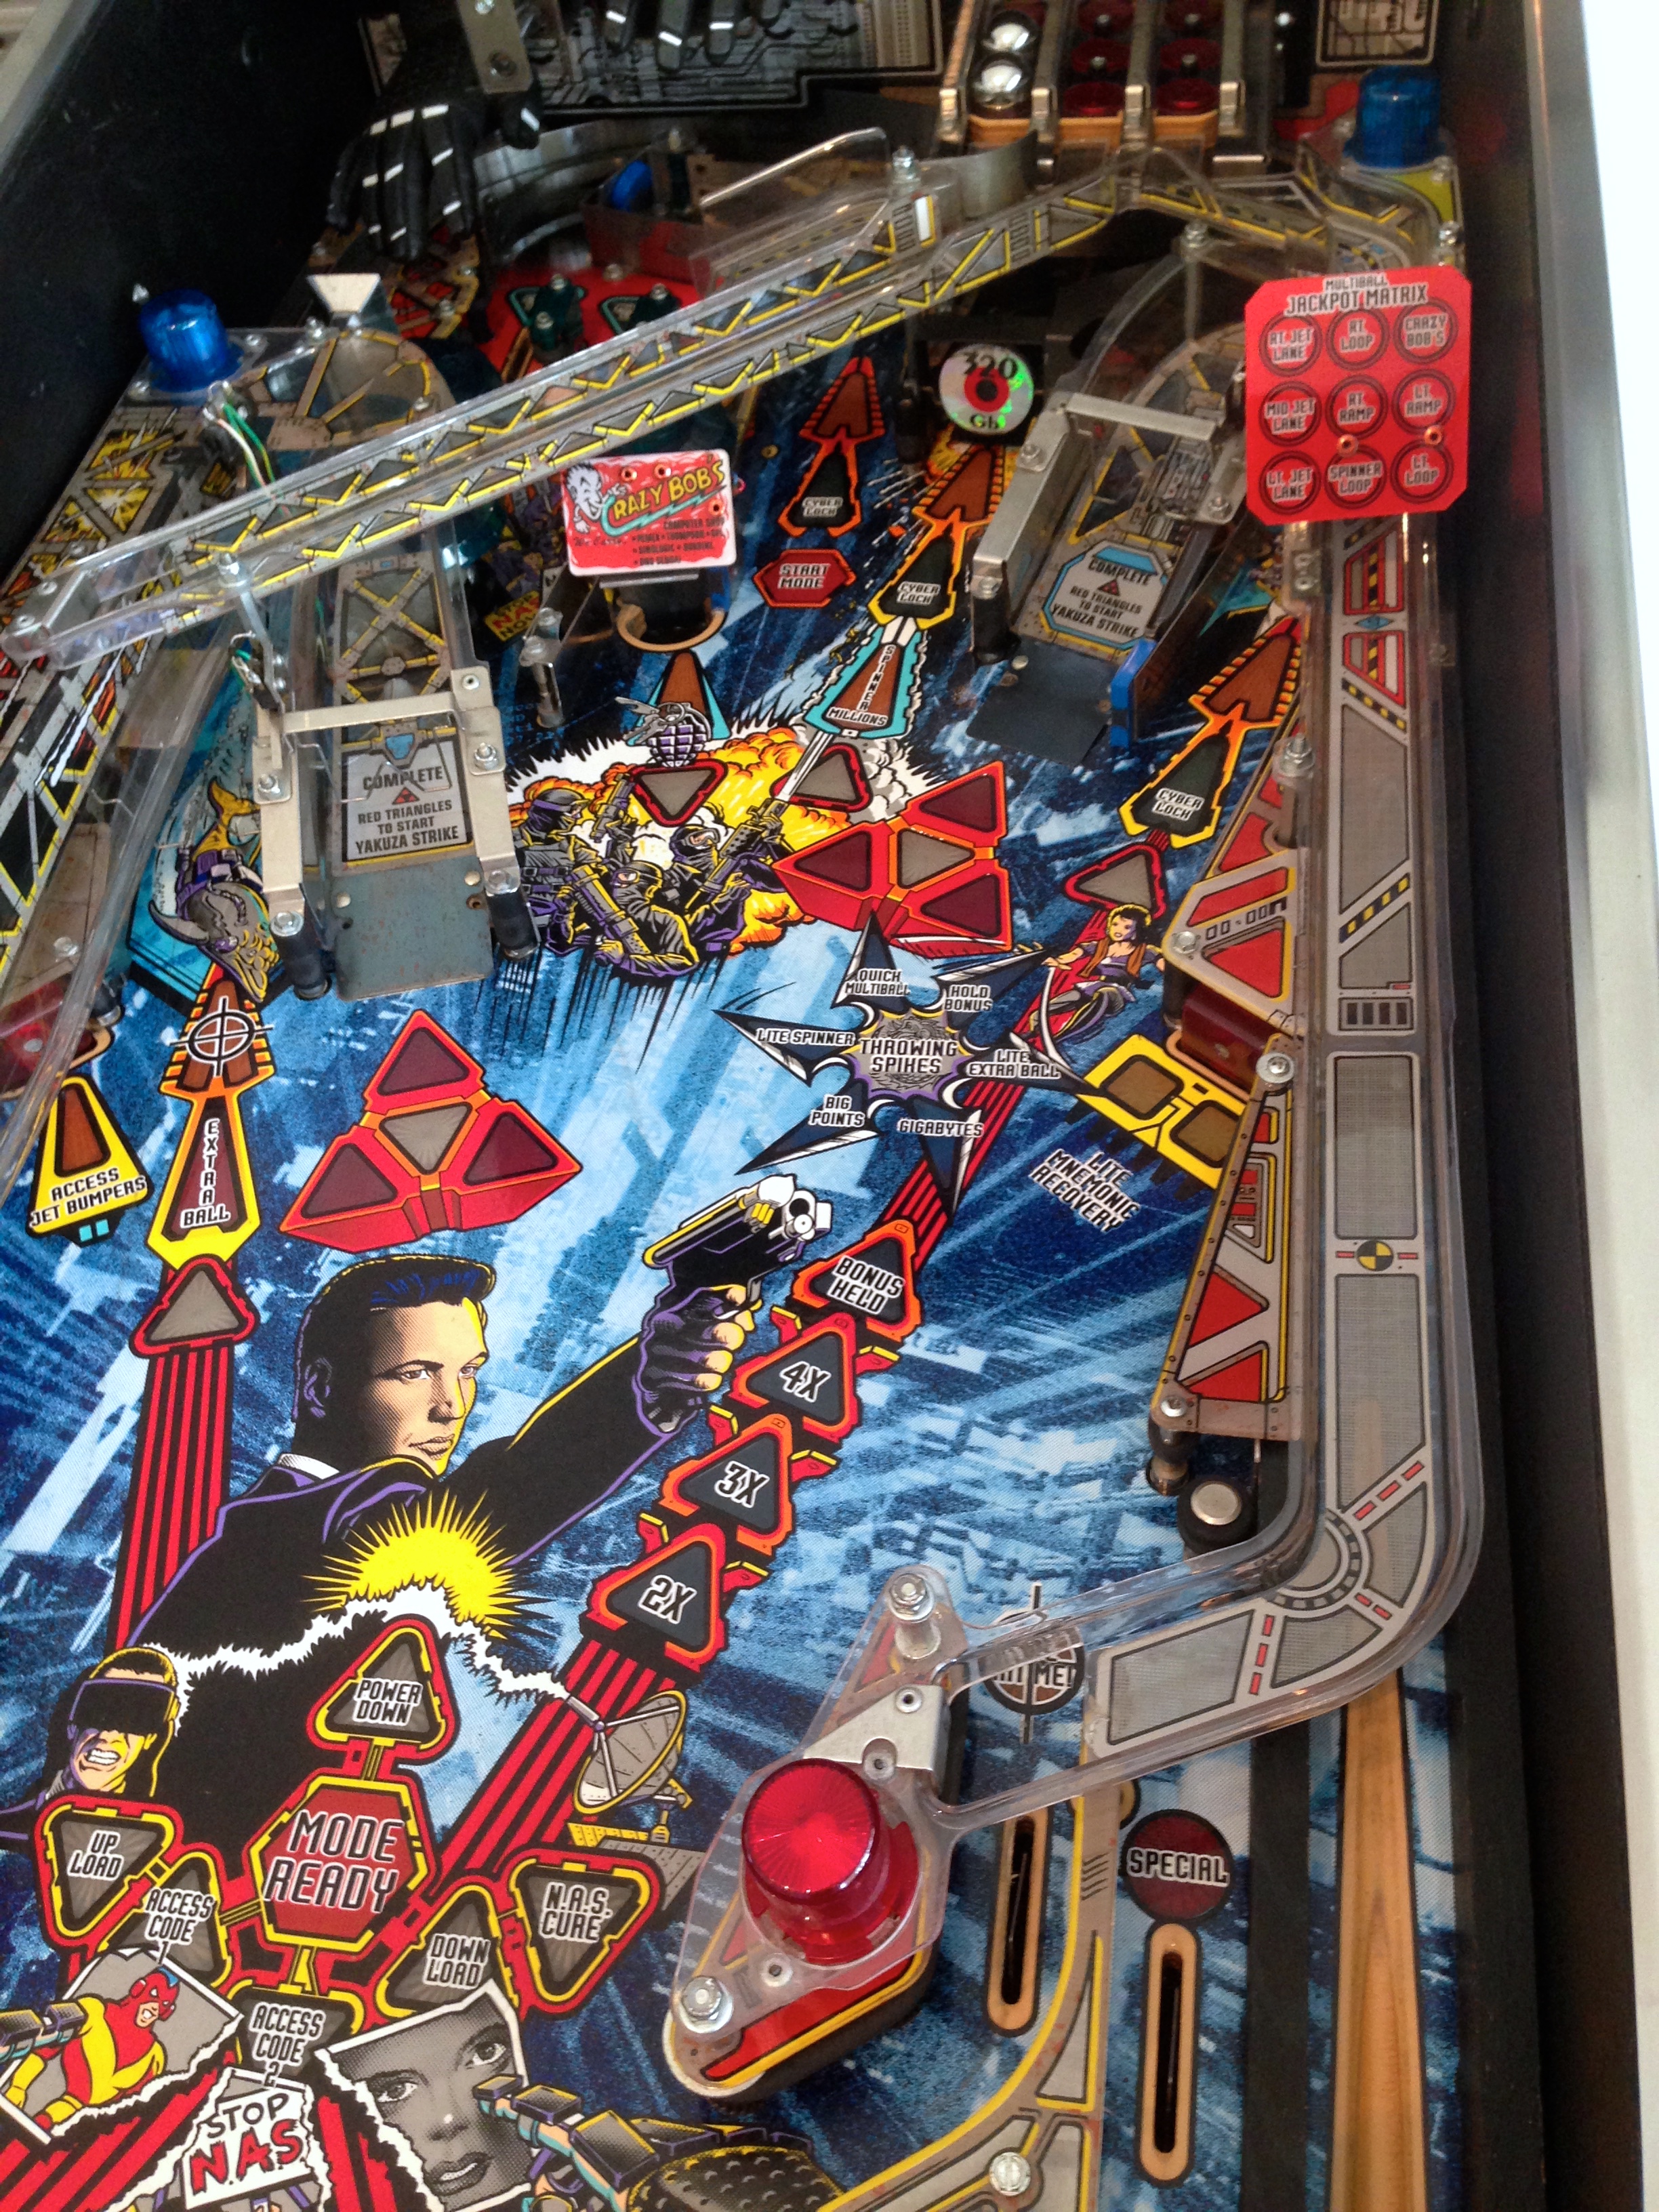
Why am I explaining all this? Well, I’d been noticing lately that I’ve been getting robbed (robbed, I tell you!) of Throwing Spikes. The ball will come down the left inlane, start the timer to collect a spike, and if all goes well, I sweep that ball straight up the right ramp with authority. There’s a very satisfying sound effect and animation when a spike is collected, and I was getting… nothing. For a long time, I figured I must be misunderstanding something. There are certain game modes where you can’t collect some items, so maybe I was just using the spikes incorrectly. It could also be that my shot wasn’t being detected because the ramp switch wasn’t firing. However, when a switch stops working, normally the computer detects this and lets you know (as I’ve explained previously). There was no such error reported, so I had been assuming the switch was okay. Well, today I’d had enough. I knew I was hitting that shot correctly, and I knew it wasn’t being recorded.
I popped off the glass, fired up switch-test mode, and sure enough, the switch that detects the ball rolling down the right ramp was only firing about 40% of the time. That’s why the confusion- it’s frequent enough that the computer wouldn’t detect a malfunction (ie. not totally dead), but infrequent enough to harsh my buzz in gameplay. Clearly this (and only this) is the reason my scores are low.
The way the computer detects dead switches is simple- each ball that is played increments a counter for every switch. When a switch is hit, the counter is reset to zero. If a counter reaches a certain number (calibrated for each switch, but usually in the 30-70 range), the machine decides the switch must be bad, and throws an error code. Yes, that means it’s possible to simply play really badly and legitimately never hit particular switches. That’s pretty uncommon though. This case that I have is the worst of both worlds- the switch works often enough to reset the error counter, but fails often enough to really mess up your game.
With the glass off and a few minutes to kill, I thought to myself, “Self, I’m-a-gonna replace that switch real quick”. If that’s what had happened, there wouldn’t be a Blondihacks post about it, so this is where things get interesting.
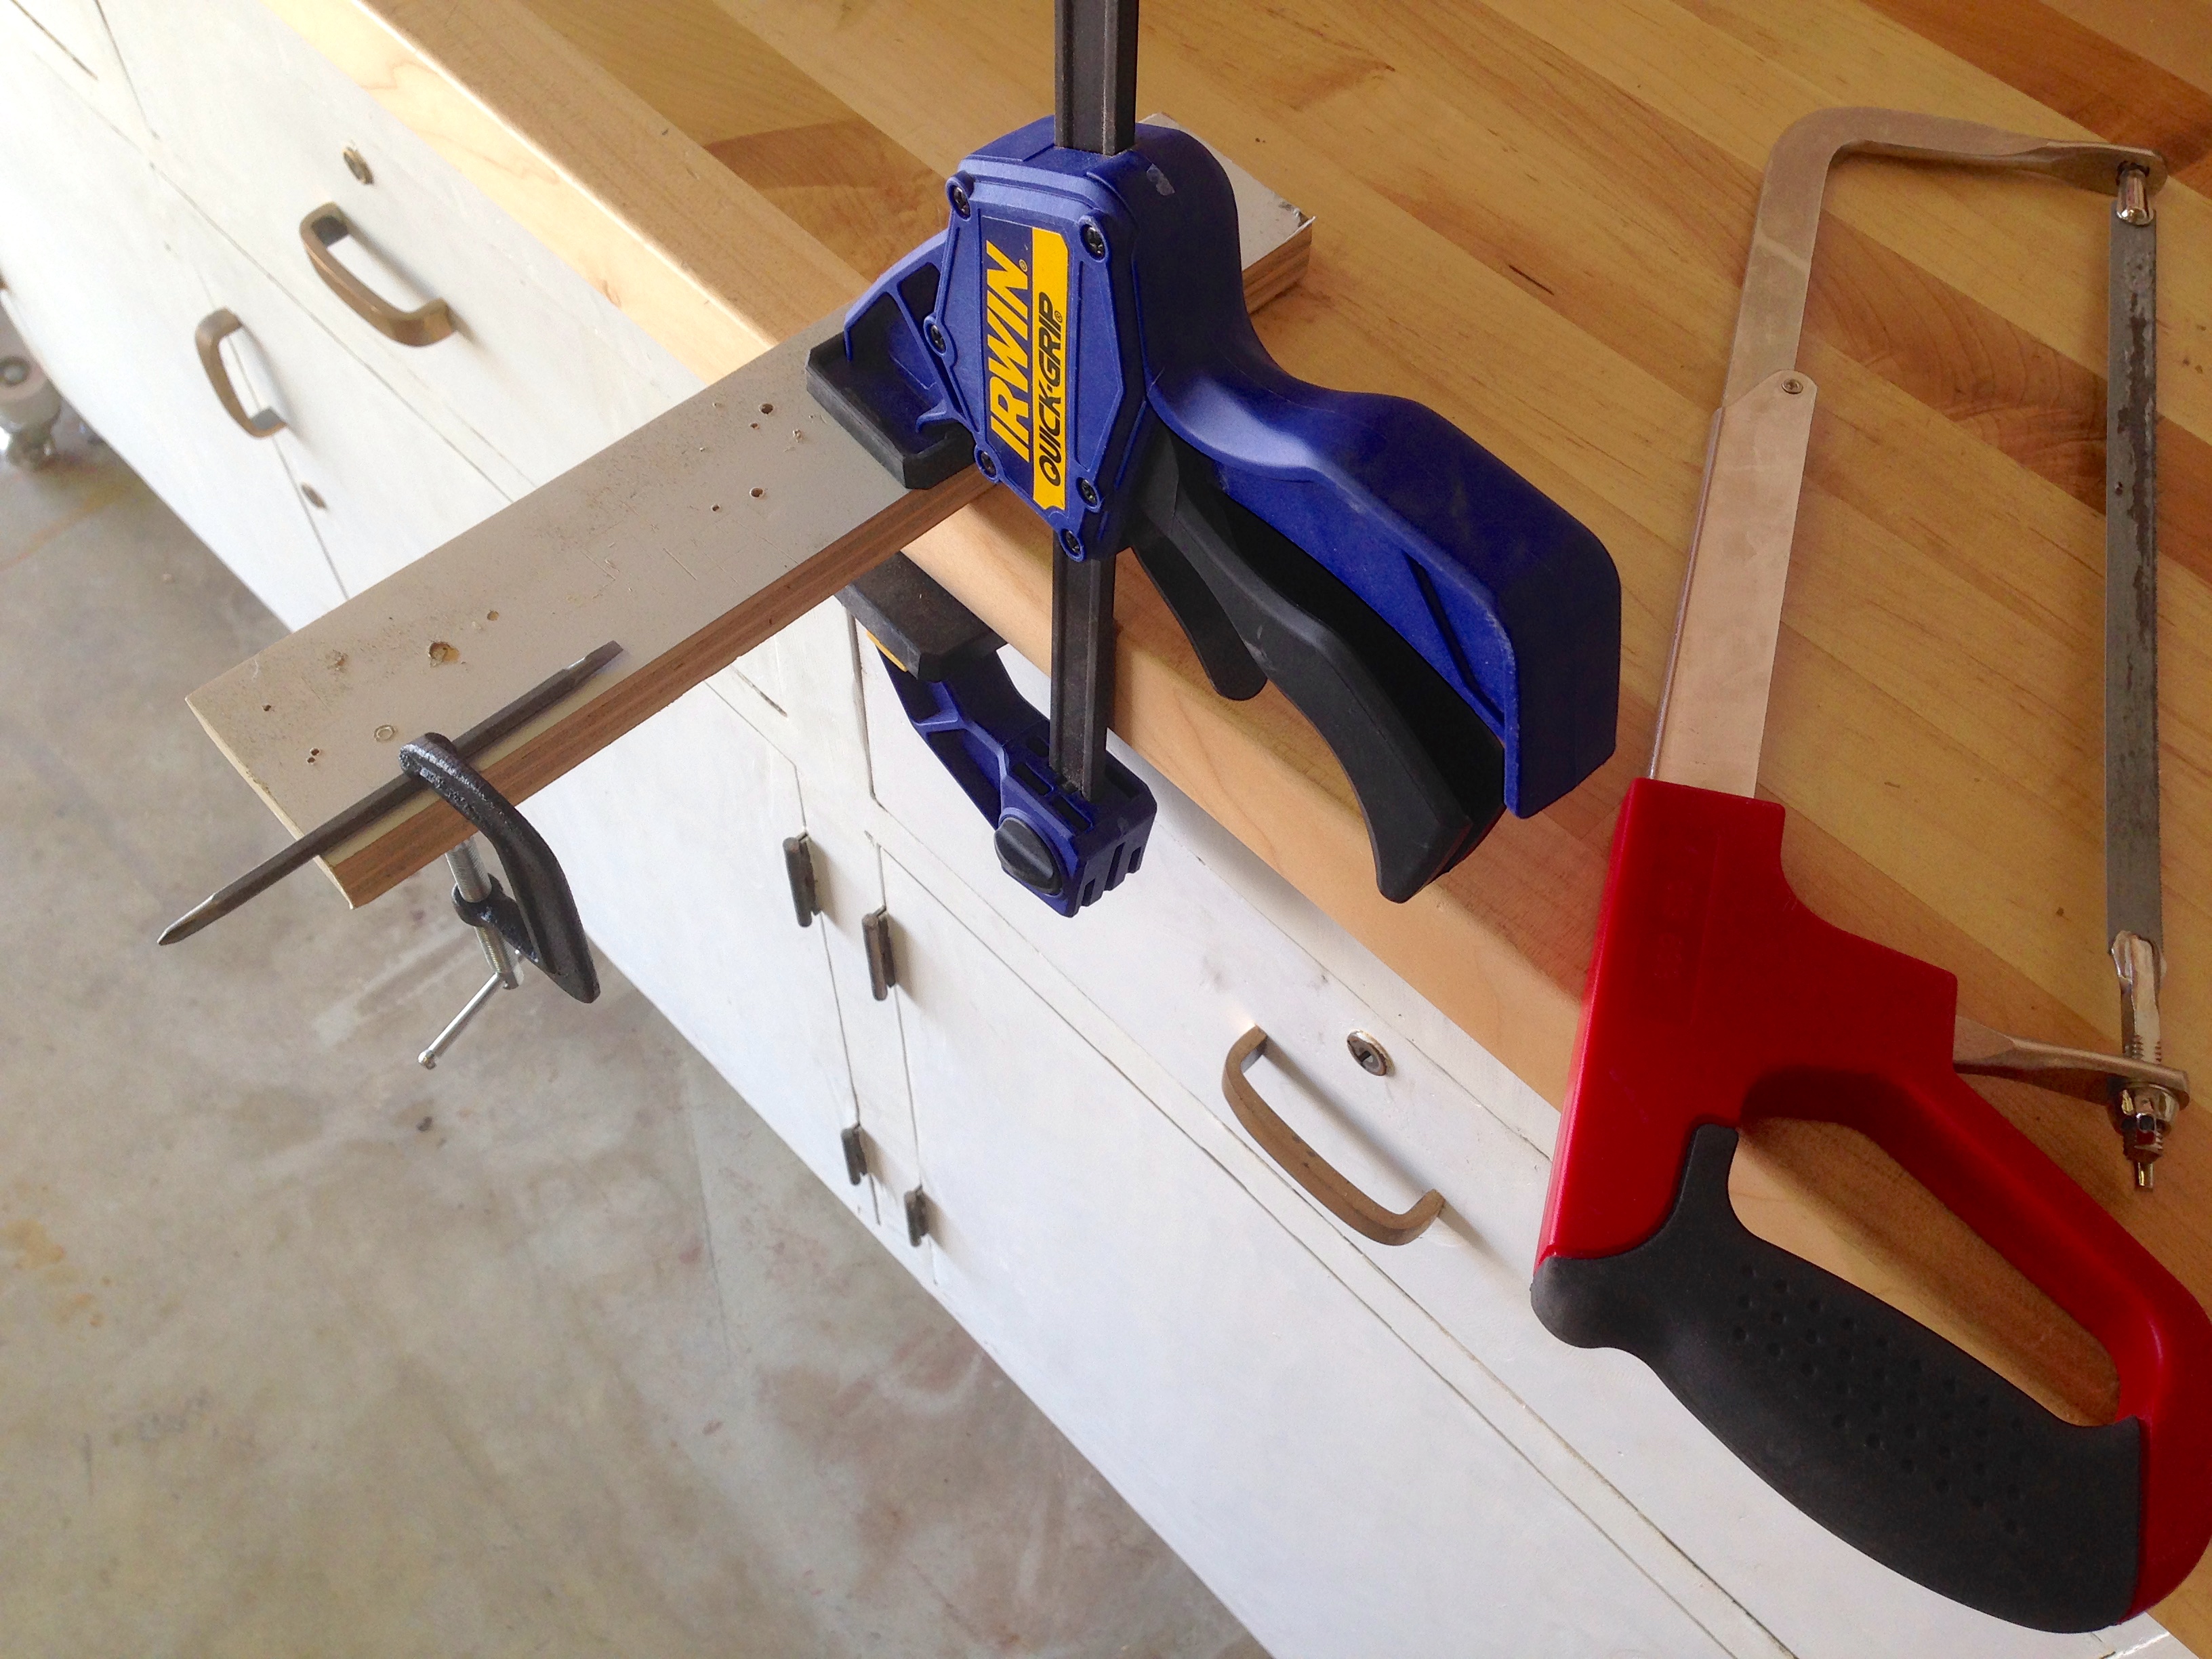
I knew the party had started when I looked at how that switch is mounted.
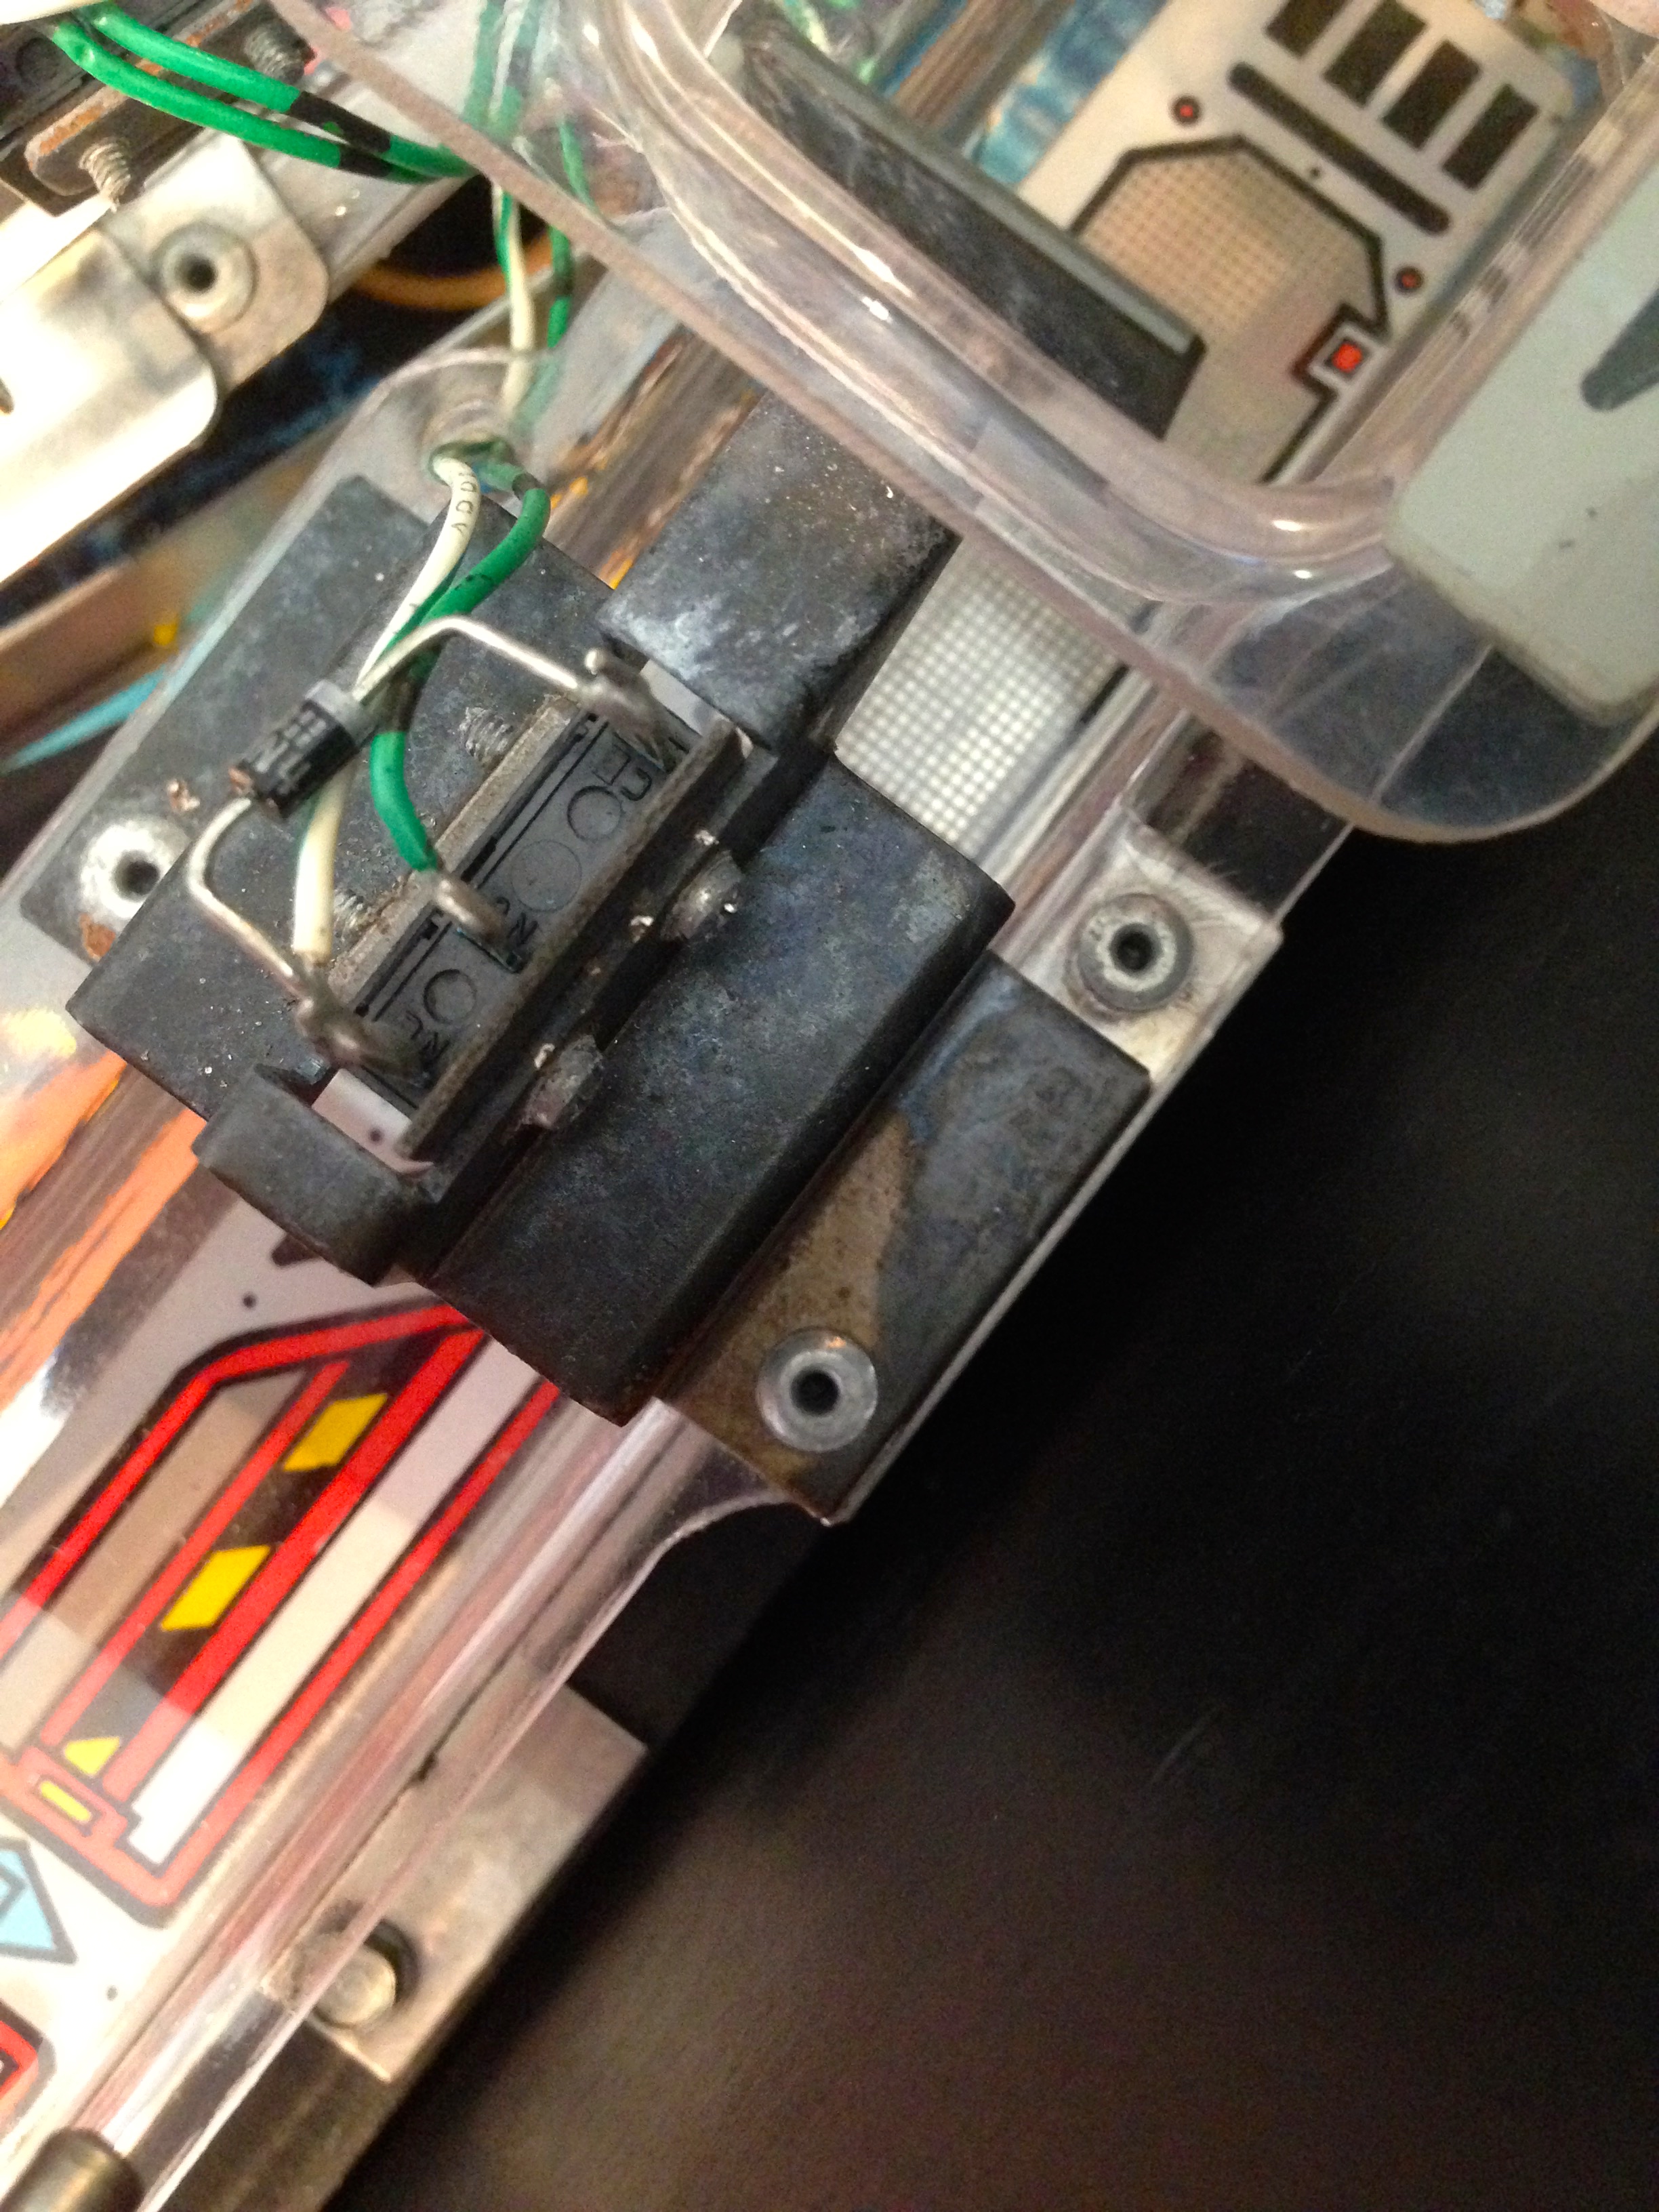
If you can’t tell from the photo, the switch is about one inch away from the side of the machine, and the mounting screws are facing inwards. That means, to have room to remove them, the entire right ramp has to be removed from the machine. The right ramp is under the center ramp, which means that has to be removed as well. There are various other things that have to be removed first to allow the center ramp to be removed. All of that amounts to disassembling about half the playfield to get to those two little screws. In addition to the work involved, any time you touch a plastic ramp or anything near a plastic ramp, there’s a fair chance of damaging them. They are nearly irreplaceable on this machine, so I’d really like to avoid removing them if it can be helped.
What I need is a tiny right-angle screwdriver of some sort to get in there. A small Phillips-head bit (used in electric screwdrivers, nut drivers and the like) would work, but I don’t have any in the right size (of course). What’s a hacker to do? Go buy one? Nay, I say. To the junk pile!
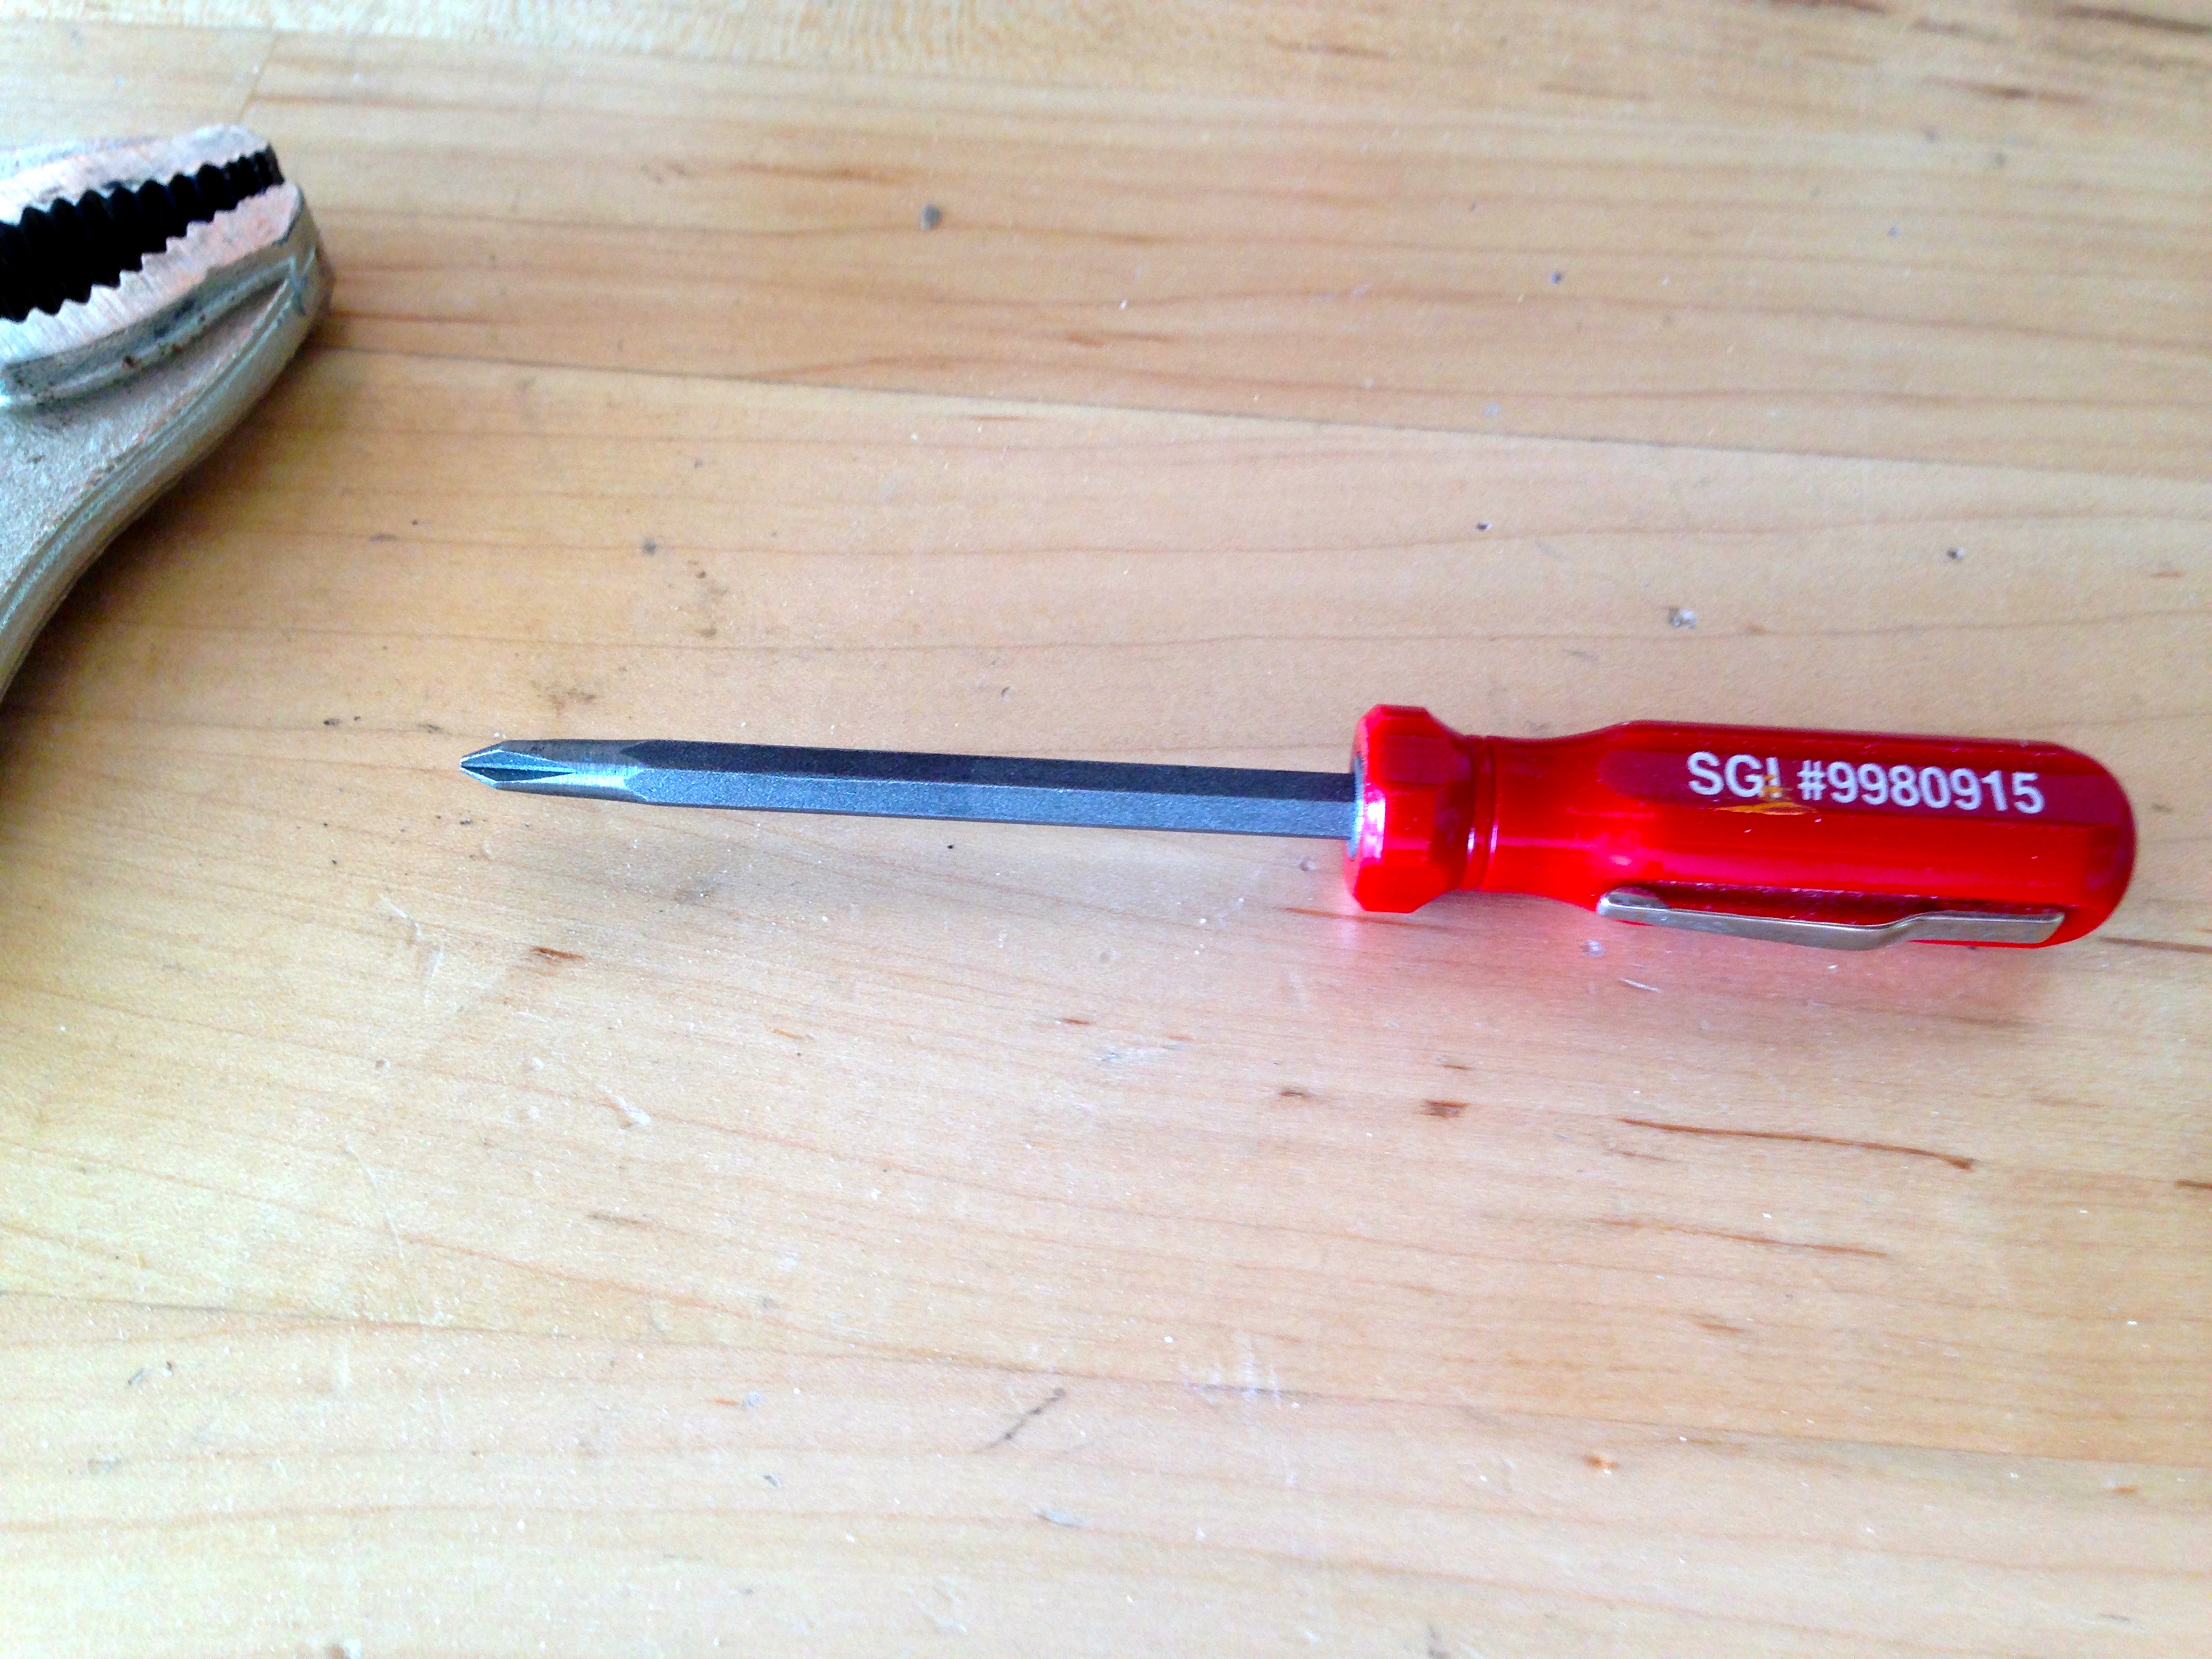
I found a pile of these little pen-sized screwdrivers that were issued to Silicon Graphics field support personnel. I worked there a very long time ago, and somehow accumulated a bunch of them. Because I have so many, I don’t feel bad about destroying one. It’s perfect because it has a removable shaft that is hex-shaped. I can cut the end off and be left with a Phillips head on a shaft I can turn. All I need to do is make one simple cut.
Hooray power tools!
“Hooray hacksaw” doesn’t have the same ring to it, but it’ll get the job done. It’s pretty small though- how will I hold it while cutting?
Note to self – buy a freaking bench vice, already.
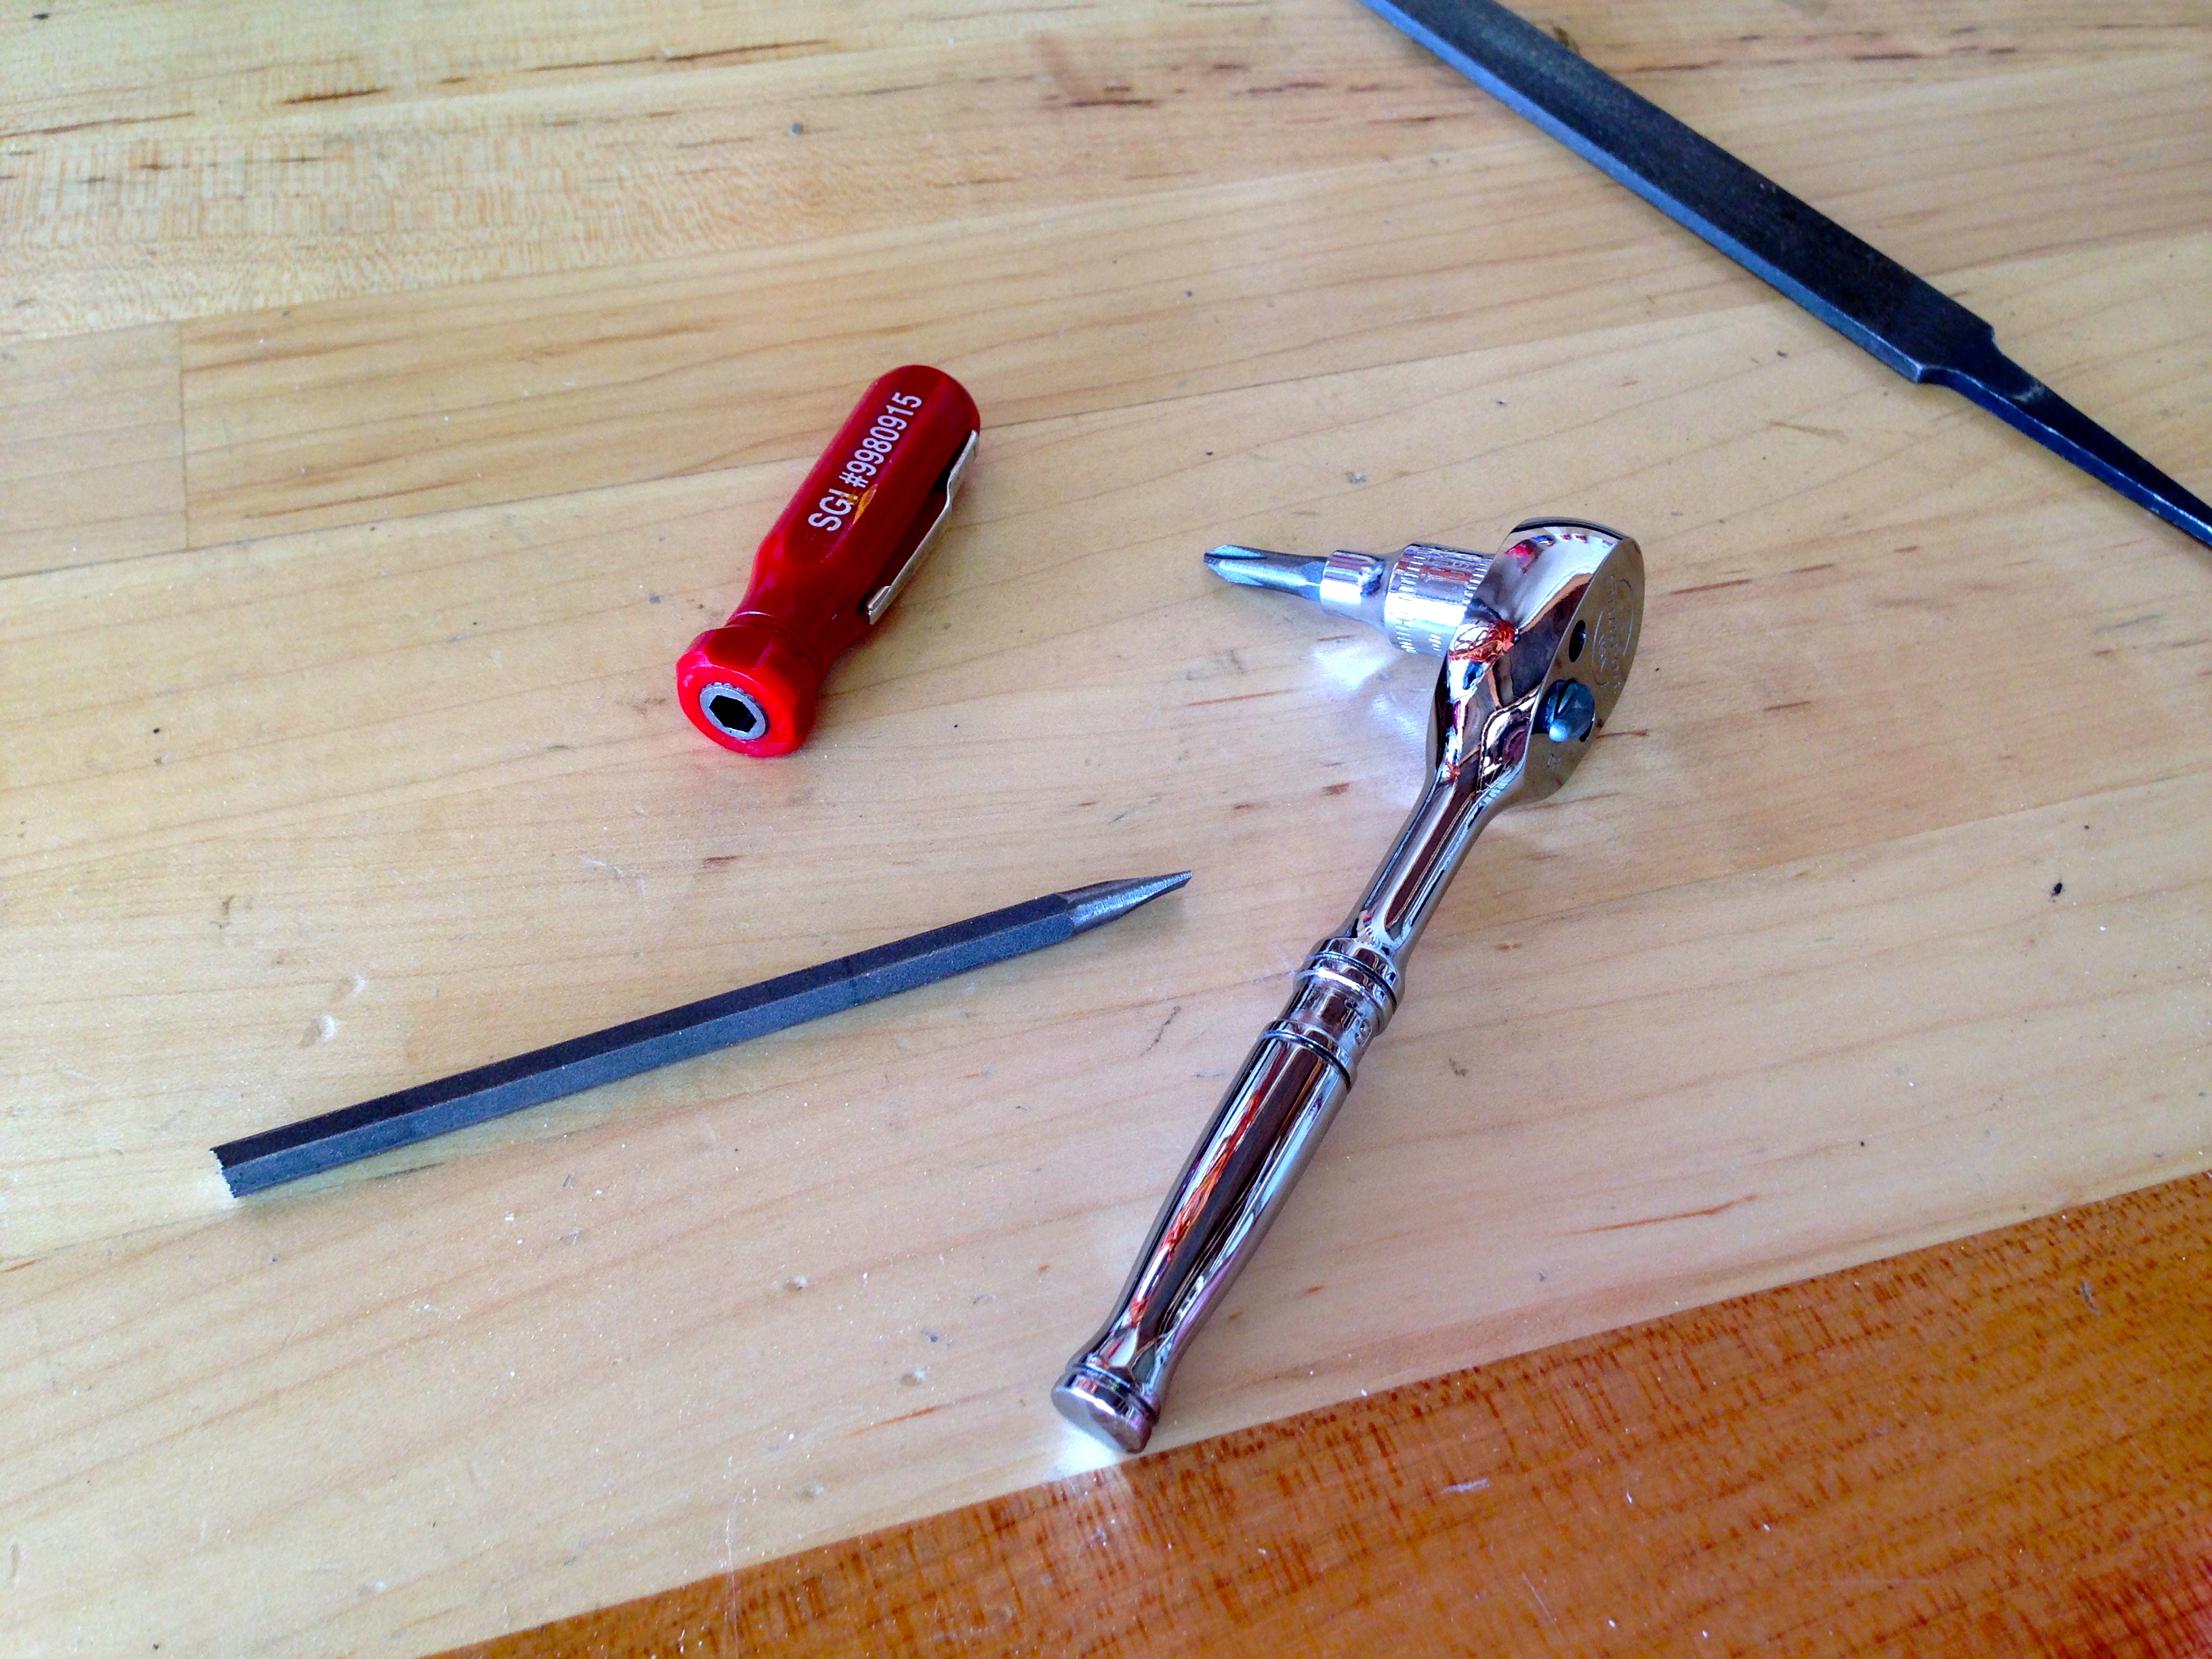
The brave SGI screwdriver has given its life in the name of science, so with the application of a 5mm socket and a 1/4″ ratchet, we have our solution to removing that switch without touching the ramps. Let’s go!
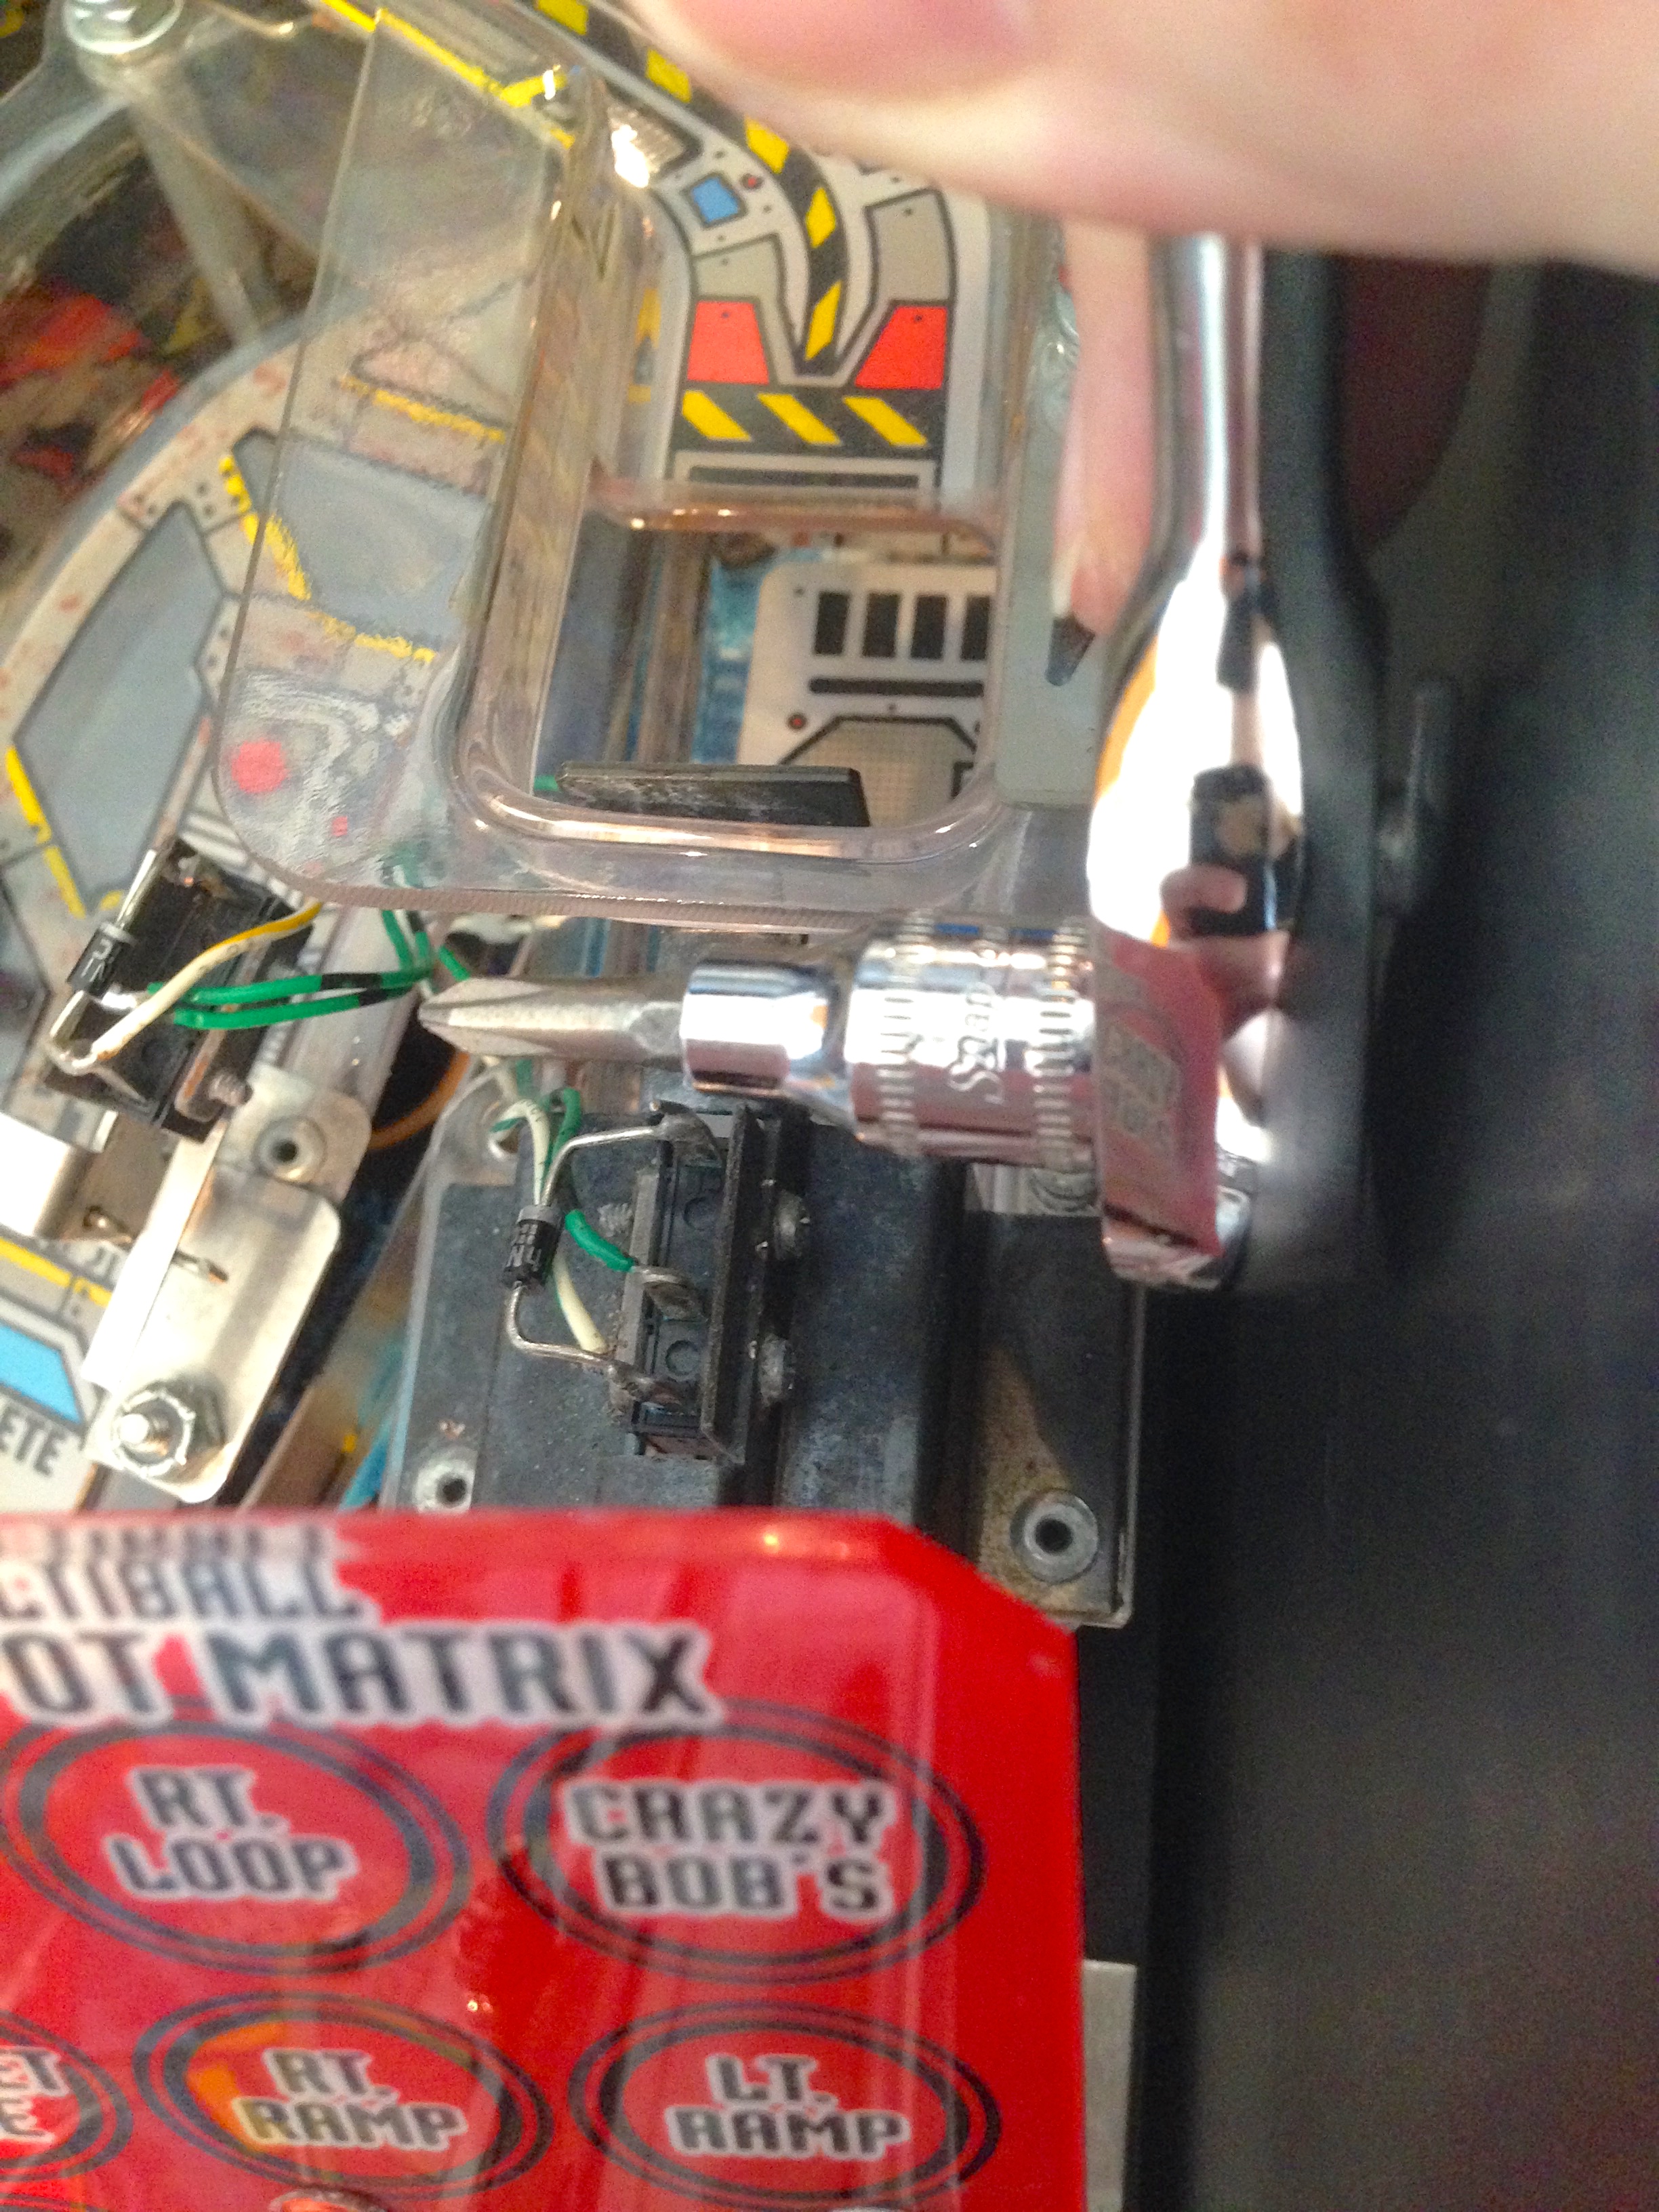
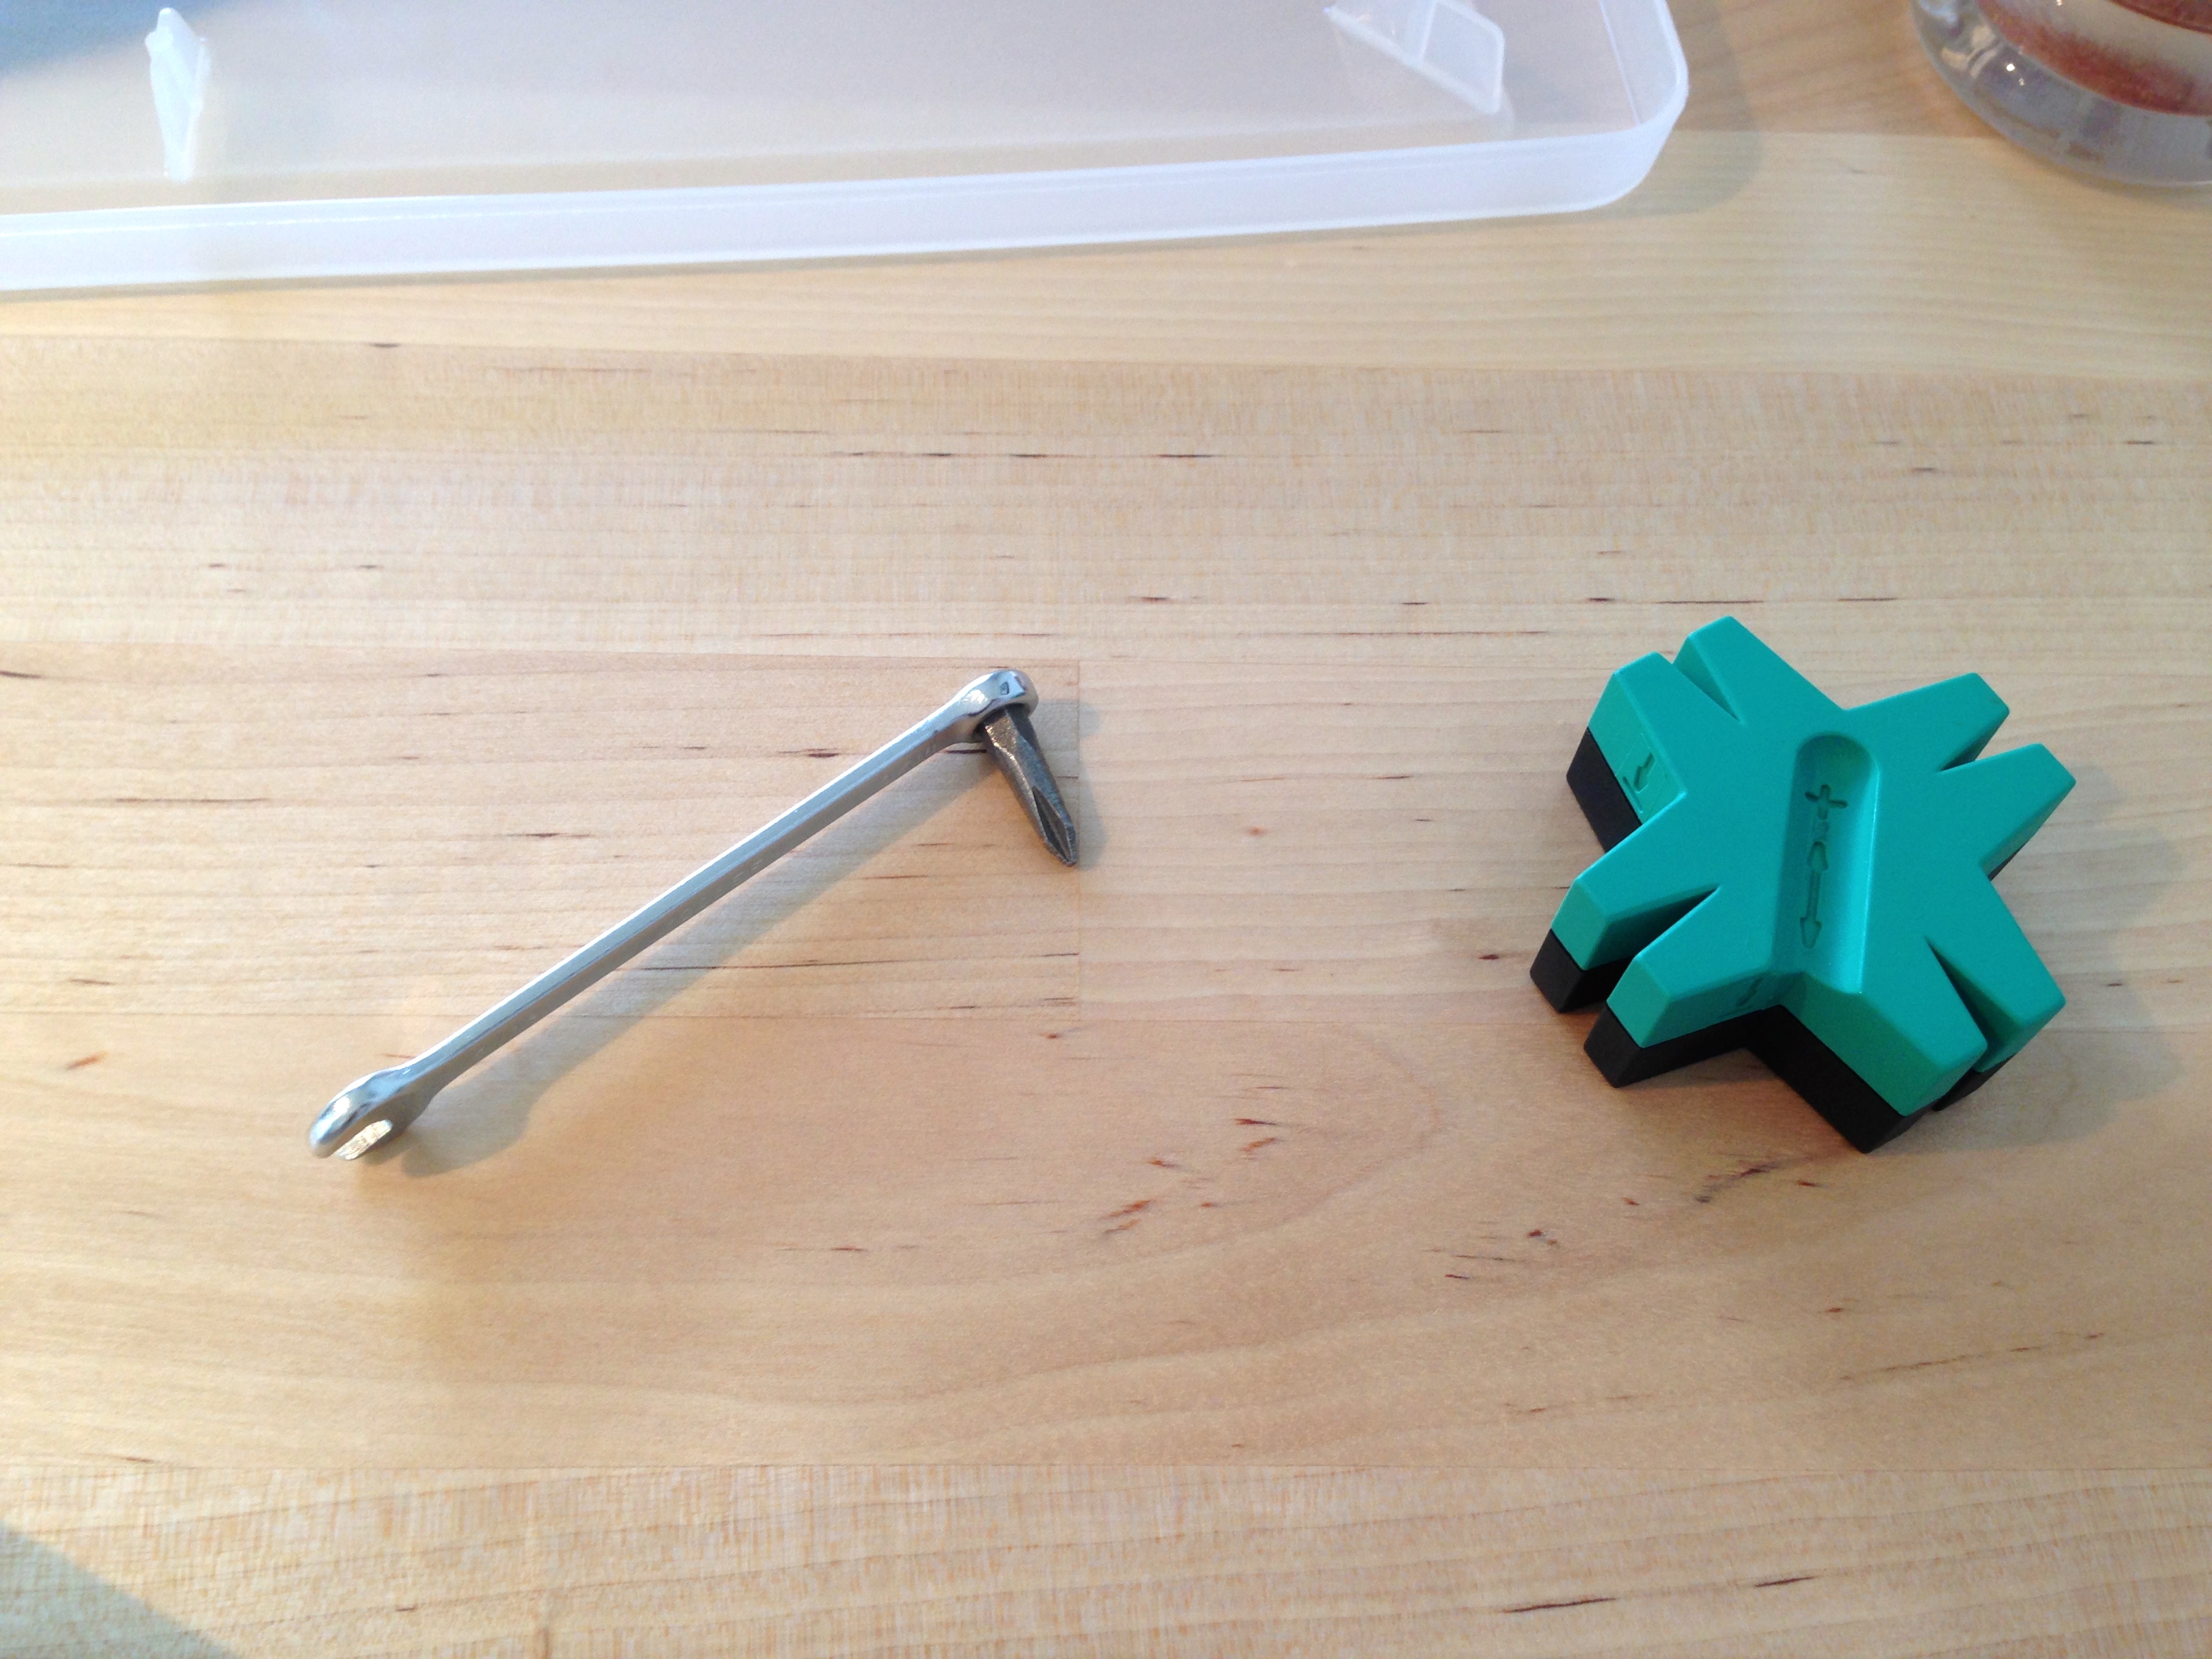
Um… yeah…. I really should have measured things before trying this. Okay, Plan B.
The quick and dirty tool worked like a champ, and I got the screws out. Now I just needed to disconnect the switch. The switch is soldered to the wiring, but in most cases, there’s a simple harness you can disconnect, which allows you to bring the whole assembly to the bench for easy servicing. In rare cases, the wiring runs through some orifice in the playfield that makes this impossible. Guess which case this switch is. Sigh.
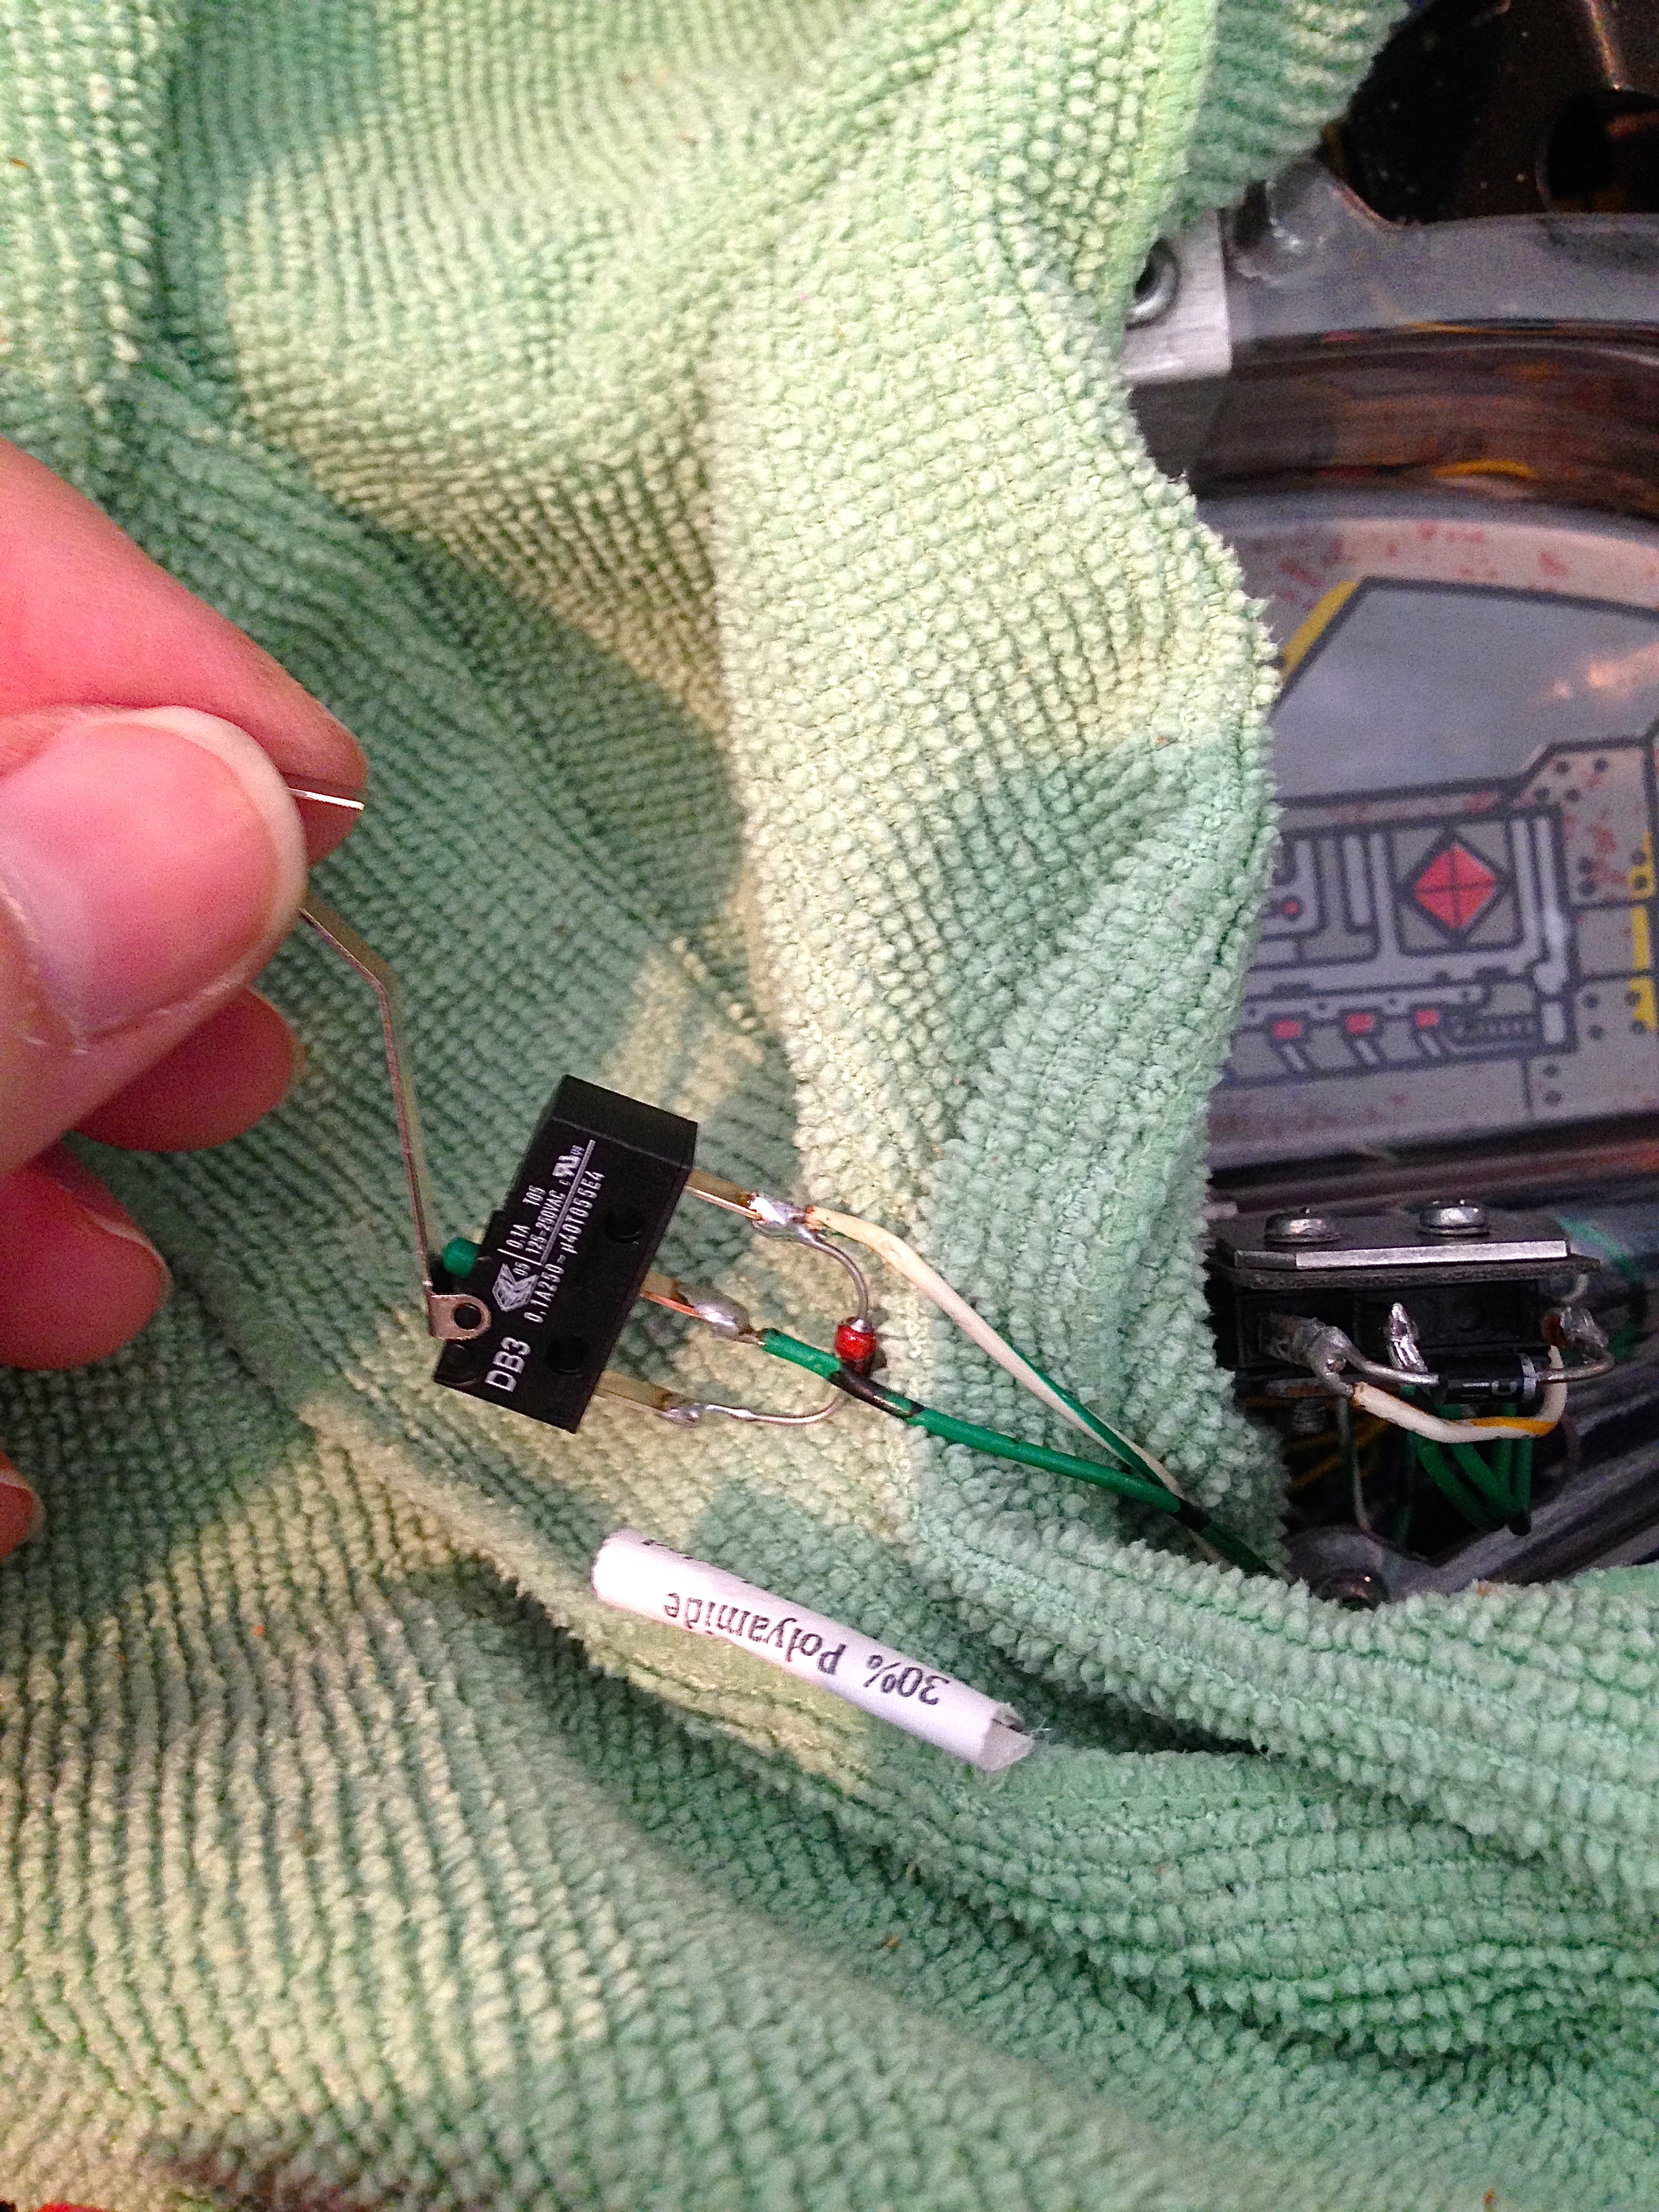
This meant I needed to desolder and resolder the switch in-situ on the ramp. This is never fun, because you really don’t want to splash solder on anything, and there’s pretty much nothing on a pinball playfield that will survive accidental contact with a soldering iron. Steady hands, friends- this is delicate surgery, indeed.

Times like this, the Hakko 808 vacuum desoldering gun really pays for itself. I’m able to get in, desolder, and get out with very little fuss, and minimal heat applied near all the utterly irreplaceable plastic parts.
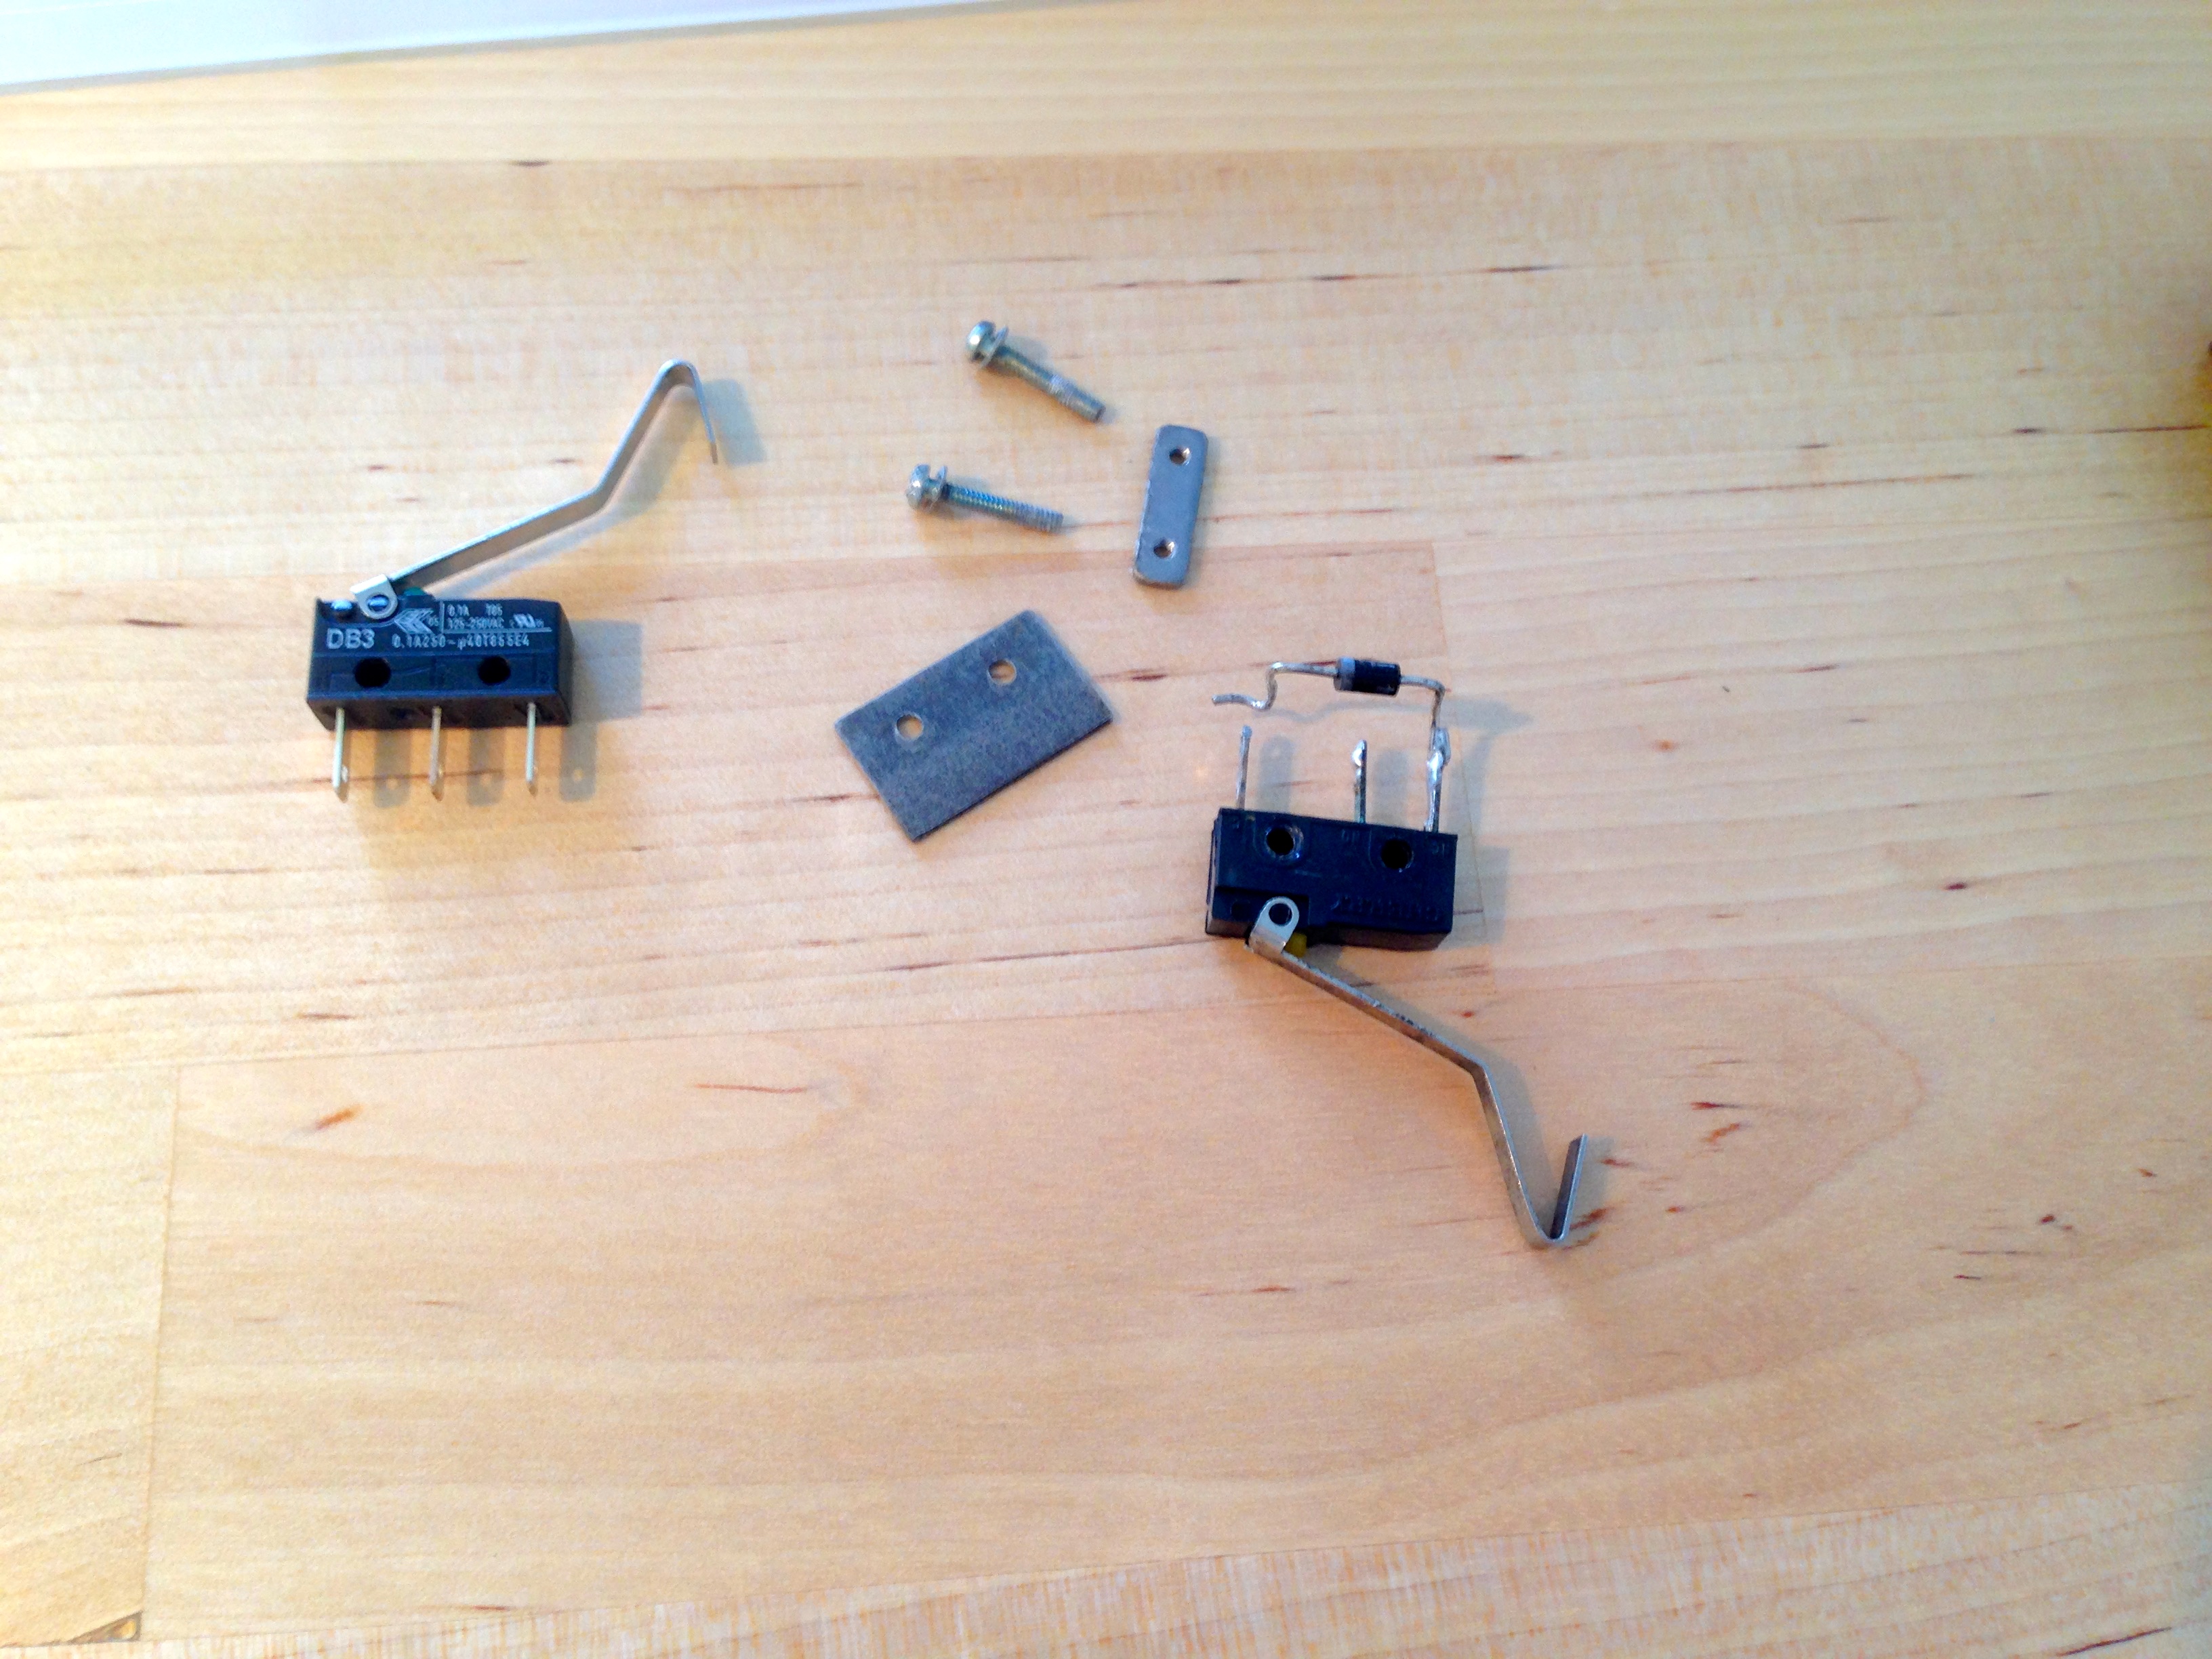
I opted to replace the diode as well, while I’m here. It tested fine, but why not, since we have it all apart anyway. Those diodes fail on occasion, and when they do, it really wreaks havoc on the switch matrix. Diode problems can be really difficult to diagnose, so a preventative replacement is a no-brainer here.
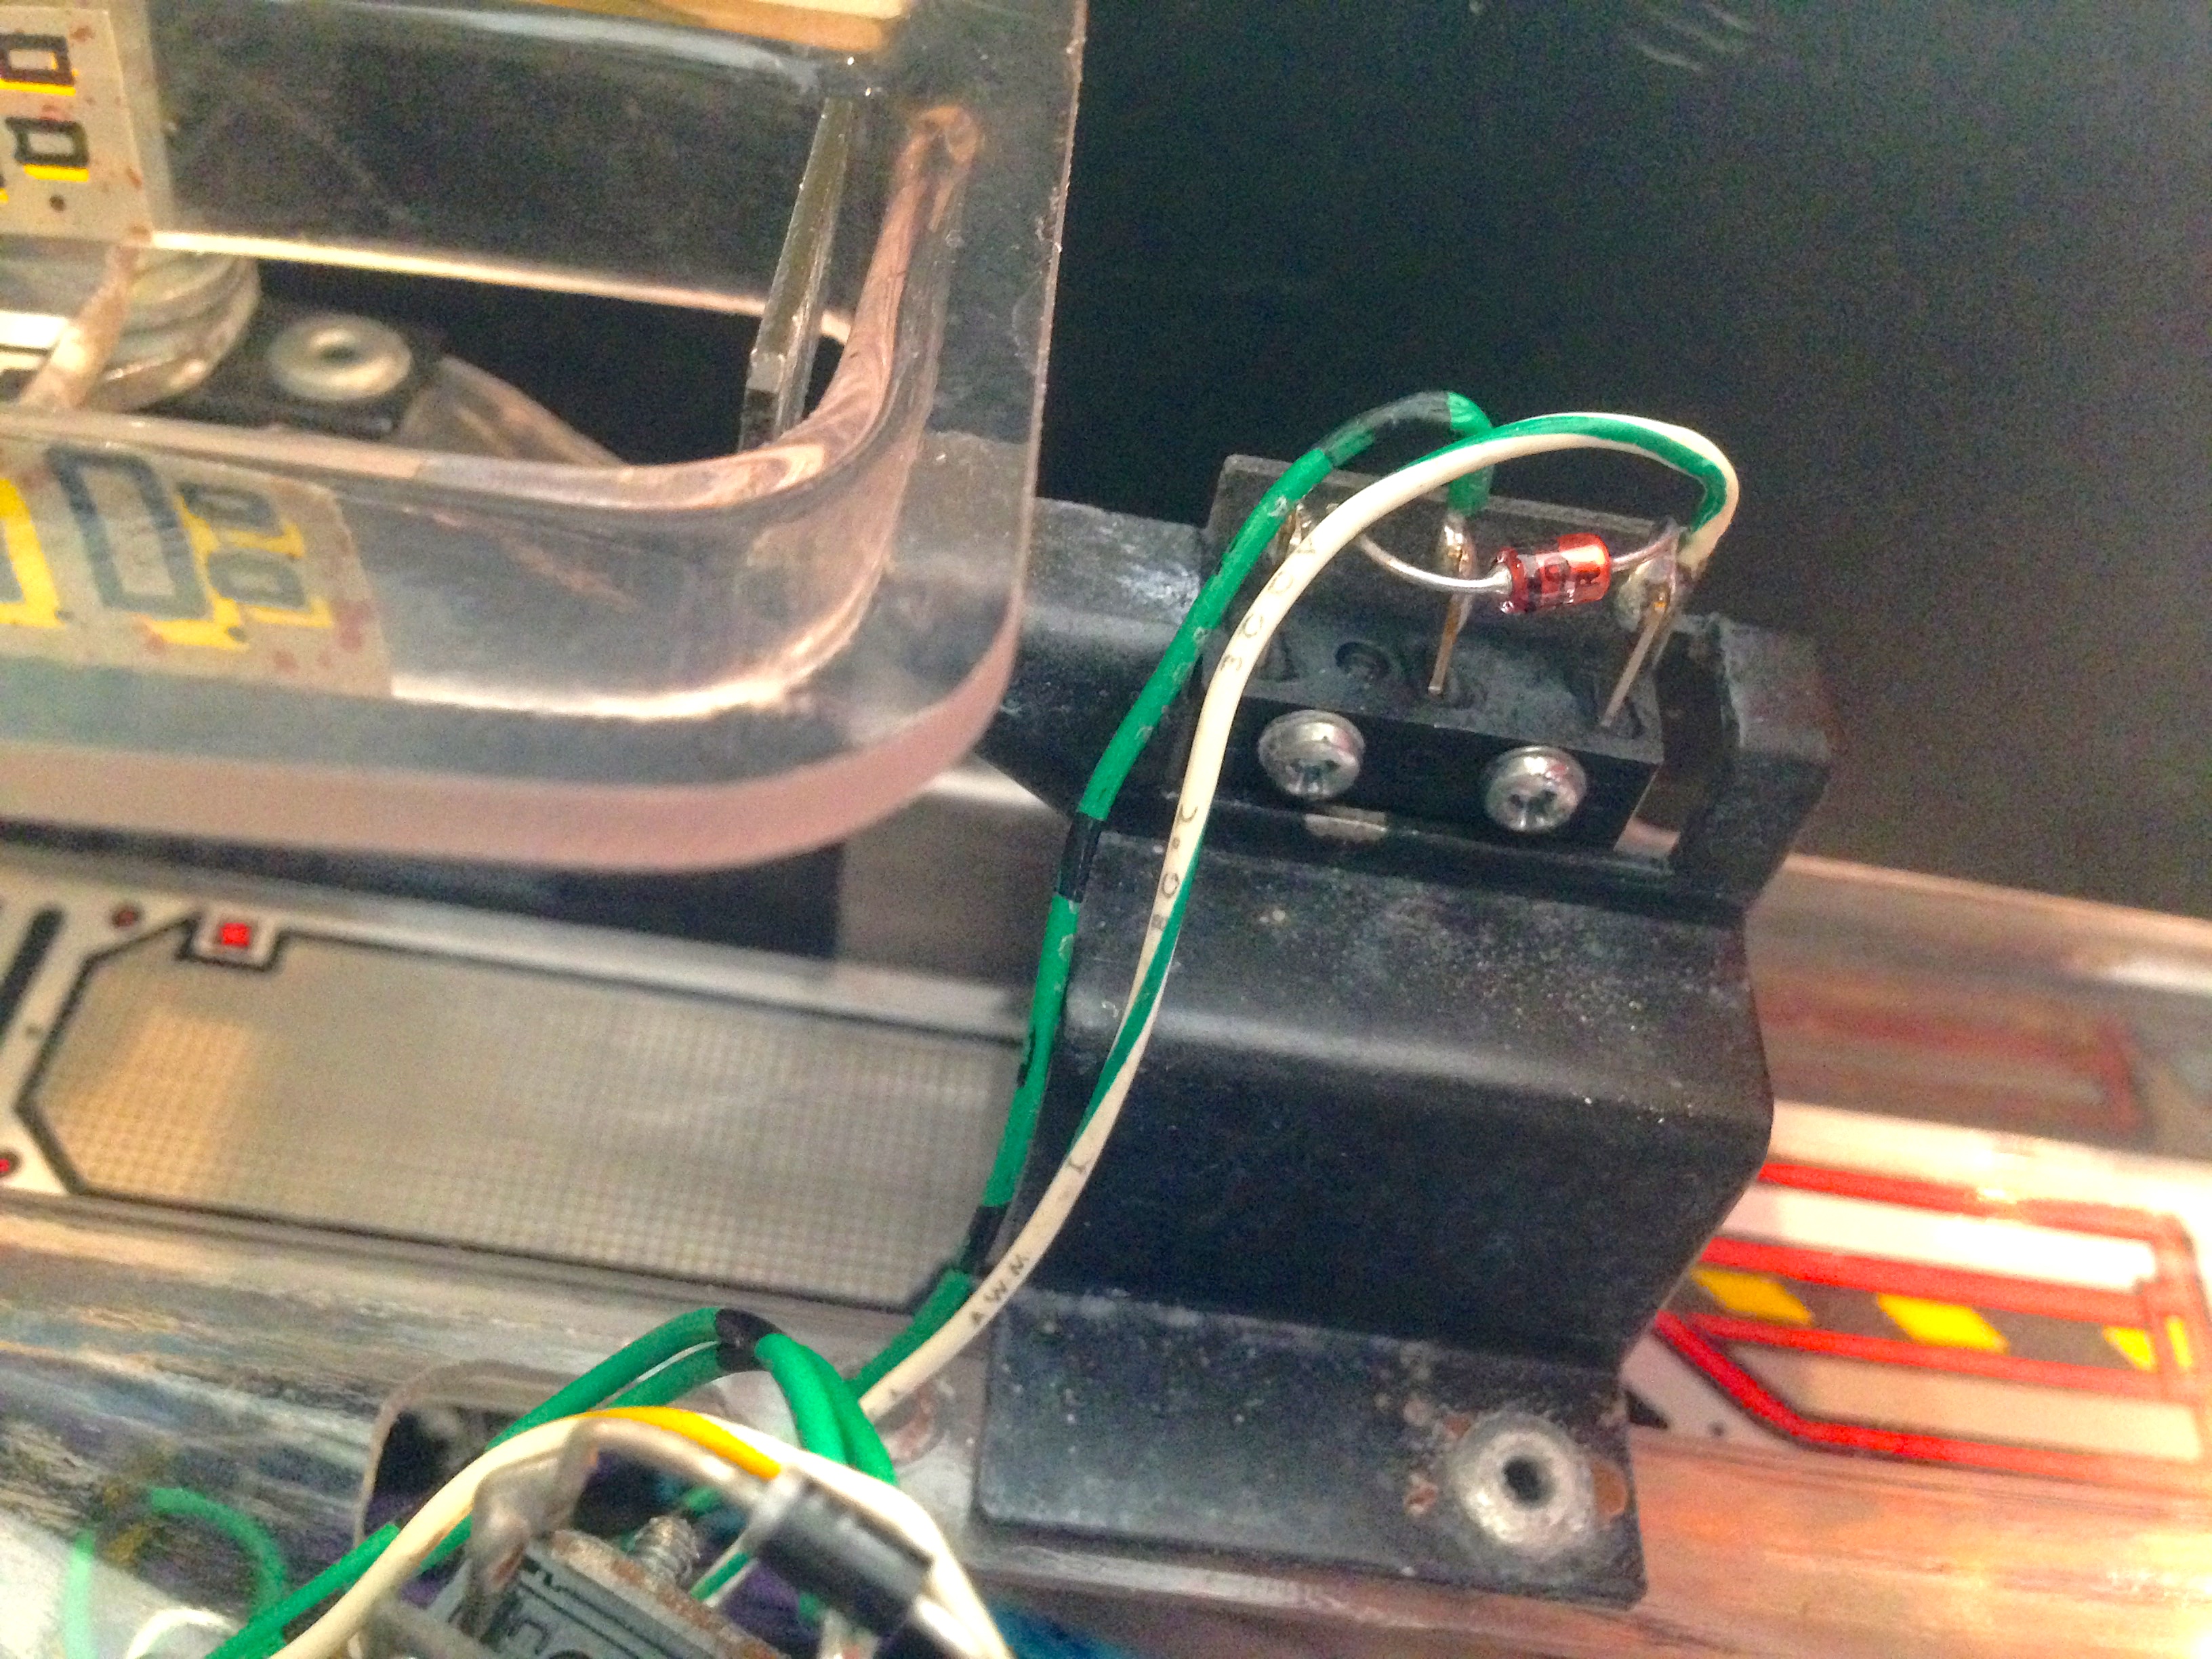
To reinstall, I really wanted to arrange it so the screw heads were facing the other way. Unfortunately, this is quite in opposition to the design of the bracket holding the switch. It is clearly intended to be mounted the way it was, and only that way. The screws are threaded into a backing plate opposite the bracket, and the mounting bracket is one-sided. To get around this, I flipped the screws around, and put the backing plate on the same side as the mounting bracket. It means that the screws are applying less even pressure on the switch, so I tightened them very gently. It seems like it should hold up fine, but time will tell.
Naturally, I now needed to play a thousand games or so to make sure it works. I’m happy to say it does, and I’ve been racking up Throwing Spikes like they’re going out of style. It turns out that I still suck at pinball, but at least I can’t blame the Throwing Spikes anymore. There must be something else broken. I said there must be something else broken.
“I said there must be something else broken.”
Sounds like what you’ve got there is a good old PEBCAK problem. 🙂 I’m sure it’s nothing you can’t fix with a few more repairs, each followed by the mandatory thousand games to make sure the repairs are solid. 😉
PEBCAP, in this case. 🙂
Hahaha, nice. 😀
I bought a screwdriver bit set years ago that has a ratcheting driver that the bits fit into – it’s great for this kind of thing. Something like http://www.amazon.com/Pittsburgh-Ratchet-Screwdriver-Ratchets-Phillips/dp/B005N7TVZK – they come in handy not only for the tight quarters situation, but also for removing tough screws, as you can get more leverage on the ratches than a driver.
That would indeed be the perfect tool for a job like this. Thanks for the link!
The first thing that came to my mind when seeing this problem was to drill the rivets and flip the mounting assembly. the second was to custom manufacture a better bracket with a plasma cuter and sheet metal press or 3D print a piece to brace up the existing bracket.
Anyway your solution was simpler. Nicely done as always.
sig: 404ERR
long time reader first time poster.
That’s not a bad idea, actually- that didn’t occur to me. I think I’d be scared to try that for fear of cracking or otherwise damaging the ramp. Food for thought, though. Thanks for posting!
Hmm, on further inspection it looks like that wouldn’t have been an option after all. The bracket that holds the switch also has a plate sticking up off the back of it that serves as a backstop for the ball to hit when coming down off the upper ramp (so it doesn’t impact the acrylic). That means the bracket isn’t reversible, unfortunately. Interesting idea nonetheless- there’s as many fixes for pinball problems as there are technicians. That’s part of what makes them so fascinating to work on.
Maybe I missed something. Seems like a lot of trouble to go to when you can raise up the playfield and unscrew the switch when its clear of the cabinet?
http://beancounters.blogs.com/.a/6a00d83451d8a369e20120a5eff72f970c-800wi
In fact it’s me who missed something. I honestly did not think of that until reading your comment right now. Wow, do I feel silly. Oh well, I had fun doing it anyway. 😀