So you wanna buy a drill press…
If you’re at all interested in machine tools, a drill press is a really great place to start. It’s an easy introduction to many of the principles and procedures of machine tools, it’s inexpensive, and it’s incredibly useful for other things if you decide metalworking is not for you. If you’re on the fence about buying one, I thought I’d put together a little guide on my recent experience with acquiring and setting up a Grizzly G7944.
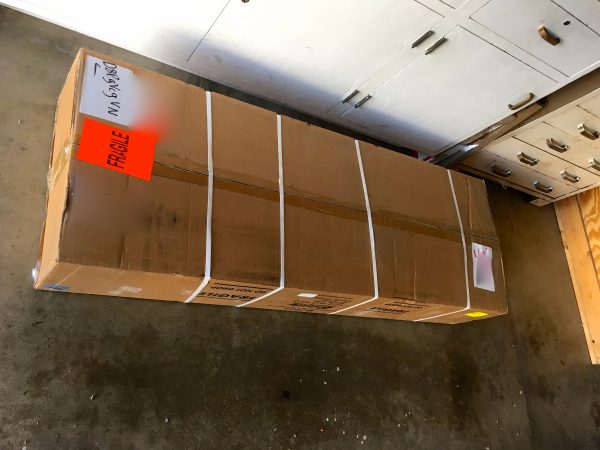
This adventure started for me because Amazon has been offering Prime shipping on certain items that ship by freight. Things like this are too big and heavy for UPS or FedEx, so a big truck shows up at your door with the item. This is normally kind of a hassle because you have to make arrangements with the trucking company, and usually you get a four to six hour window in the middle of the day. Furthermore, there are freight charges, and extra charges for lift-gate service. The latter is necessary if you don’t happen to have a forklift or a tractor-trailer loading dock in your home. You basically pay extra for them to use the little hydraulic platform on the truck to lower it to the ground. Officially, that’s all they do. It’s sitting in the street, and it’s your problem now. In my experience, truck drivers are very cool people, and they will throw it on a dolly and wheel it into your garage, or other ground-level area for you. They aren’t obligated to do that though, so be nice to your local truck drivers.
Anyways, Amazon’s Prime freight service (also called Scheduled Delivery) is fantastic. You use the site to choose a two-hour delivery window, and you can choose a time of day or evening that works for you. The whole experience was great. If Amazon sells the heavy thing you want, I recommend buying it there. You can also buy direct from Grizzly or other industrial suppliers, but the experience will be more like what I described above with large time windows and general inconvenience.
As of this writing, I no longer see the larger Grizzly drill presses listed on Amazon. Perhaps Grizzly decided it wasn’t working out for them, or there’s some snafu with the stock. Who knows.
This is a good point to stop and explain how these low-end machine tools work. Basically, there are one or two factories in Asia that produce a particular price-conscious version of each machine. These are then bought and rebranded by various American and Asian companies. Sometimes they just repaint them, and sometimes they fix them up a bit first. You’ll see them branded as Jet, Harbor Freight, Sieg, Central, Fox, and others. Make no mistake- these are all the same machine made by the same anonymous factory somewhere in Asia. In the case of Grizzly, they repaint them, and write a good English instruction manual. I’m not aware of any improvements they make, but they do have a reputation for standing behind the products, which counts for a lot. These machines are a great value, but they are built to a price point, and quality control definitely varies. Plan to spend some time fixing various little problems with them. Worst case, it’s nice to know Grizzly will replace or repair it if needed. Buying a budget-priced machine tool is more like buying a mostly-finished project. It may need some (or a lot) of work before it’s really great, and it’s a roll of the dice for how good your particular one is.
Alrighty then- let’s get into this thing, shall we?
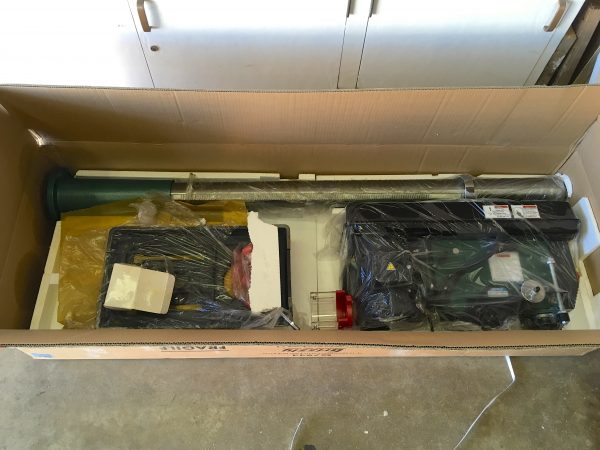
Before getting too far into assembly, it’s a good idea to clean the packing grease off of everything. You’ll notice that machine tools have a certain “look” to them- painted bumpy surfaces surrounding shiny silver ones. That’s because all these pieces are made the same way. Iron is cast into the rough shape of the object, and then any surfaces that need to be precise are machined. So, the top of the table is shiny and perfectly flat, because it has been machined precisely. The sides and bottom don’t matter, so they are bumpy cast iron that has been painted.
The precision surfaces are unpainted, so left to their own devices, nature would do what nature does and they would rust. That’s obviously a problem, since they might sit in a warehouse for years, and they are shipped by sea, surrounded in salt air for weeks on end. To prevent rust, they are covered with a sticky yellow substance sometimes called ‘cosmoline’. Cosmoline is a specific brand of product, but people use that word to refer to any sort of protective temporary coating on unpainted surfaces. This stuff needs to be removed for the tool to operate smoothly. The easiest way I’ve found to do that is brake cleaner. Brake cleaner is the sovereign transcendent godmother of all solvents. Racers buy it by the crate-load, and it’s incredibly useful around the shop. Try not to breathe it in- it’s pretty nasty stuff. However, it gets rid of cosmoline like a Great Dane left alone near the Thanksgiving turkey; one swipe and it’s gone.
Ironically, after cleaning all the unpainted surfaces, we need to cover them again. They will rust, after all! The cosmoline needs to be replaced with something that won’t interfere with operation of the machine. If you’re old-school, a thin film of used motor oil (or similar) can be wiped all over these areas. Done frequently, this prevents rust while not compromising the precision of the surface. If you’re newer school, try something like Boeshield. It leaves a very thin waxy film on the surface that protects it and lasts for a long time. Boeshield is expensive, but a little goes a long way. It’s good stuff!
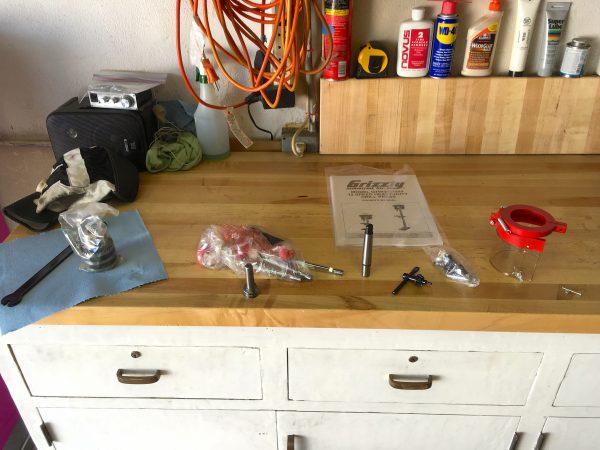
Once everything is cleaned up, we can get to assembly. I found the Grizzly assembly instructions to be very good. First step is easy- bolt the big post to the base.
There are a couple of common themes with these cheap tools. One such theme is that the moving parts may need a little love.

These things are mostly very easy to take apart, so I find it’s worth the effort to disassemble the moving parts, clean whatever crappy mystery grease is in the area, and relubricate them. Things always run much smoother after that.
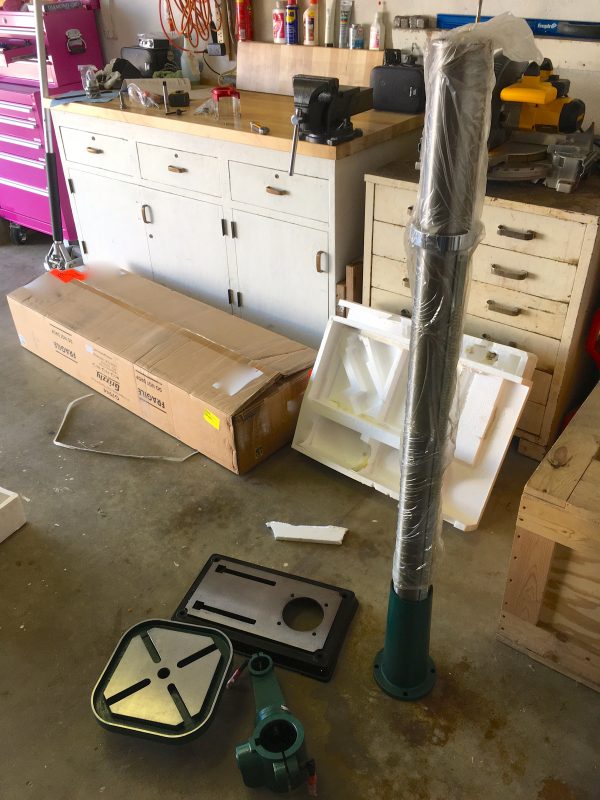
The next step is the hardest- lifting the head on to the pole. The head is where 80% of the weight is, so you will need a second person or some mechanical assistance to hoist it up there safely.
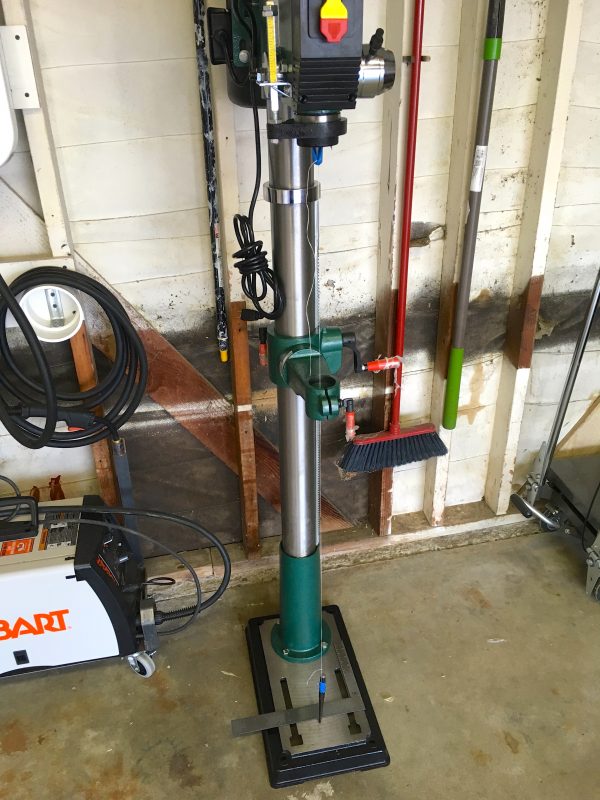
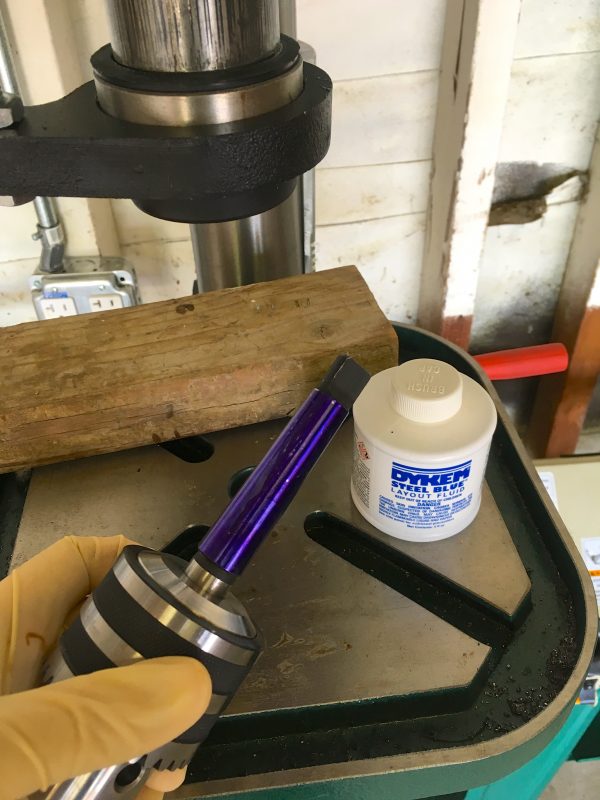
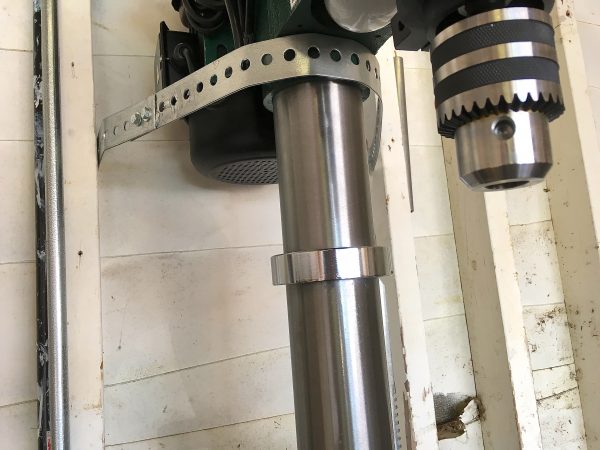
The next step is to install the chuck. This is another good introductory lesson to machine tools, as the chuck is held into the machine using a Morse taper (sometimes called a Machine Taper). The chuck has a spindle on top of it that has a precisely machined cone shape to it. The drive train is connected to the “quill” up inside the head. The quill has a precisely machined inverse cone that receives the tapered spindle on the chuck. Well-machined surfaces will actually stick together of their own accord by static friction. The Morse Taper is simply whacked into place with a rubber mallet, and it will stick. This is a surprisingly strong joint that can transfer a lot of torque, and is still easy to remove. Because these are cones, the harder you press, the tighter the joint becomes. Morse tapers are used to hold spinning things together in a lot of situations on machine tools. This is a great example of how they work.
Another nice aspect of having a chuck mounted with a taper is that there are other things you can mount in the press that also use a taper. For example, you can buy drill and reamer sets that mount with a taper instead of being screwed into a typical chuck. Lots of low-end drill presses have the chuck permanently attached to the quill, so this taper mount is an example of the surprising value some of these budget machine tools offer.
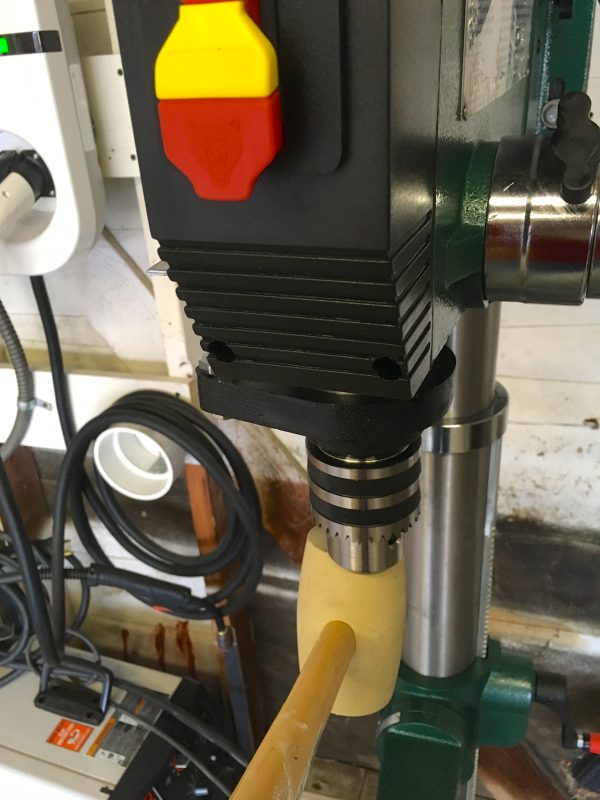
Here’s where things can get a little interesting, and where the budget aspect of these tools can start to show. For a Morse taper to work well, the two pieces have to be machined really precisely. If there are imperfections, the static friction weakens and the chuck can fall out. I was doing a job with this press that was particularly stressful laterally, and the chuck kept taking periodic vacations in the southwardly direction. I decided to take a look and see if it could be improved.
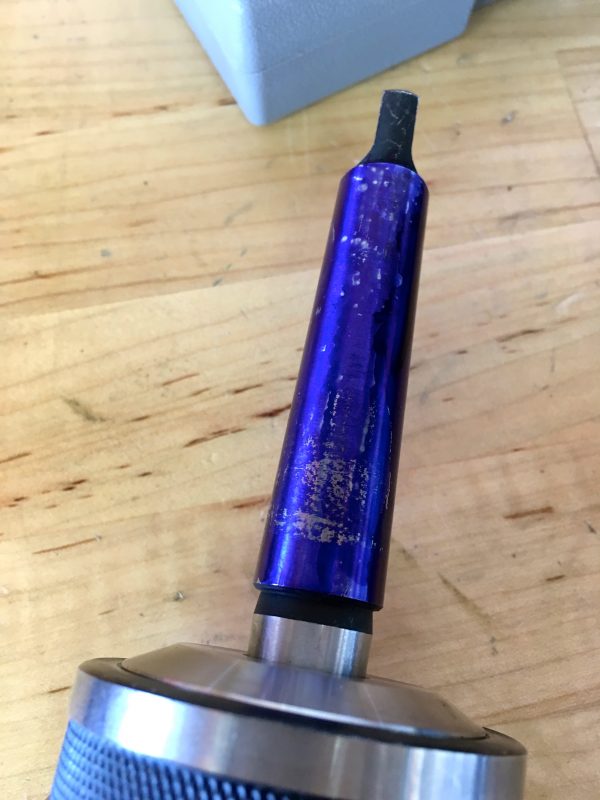
I re-cleaned everything thoroughly to make sure there was no dust or oil on anything, polished it up with some Scotch Brite, then pounded it back in place. I’ve had no trouble with it in normal use- only when doing that thing that I should not have been doing with a drill press (more on that project later). Lateral forces are never going to be great for a drill press, and even less so for an inexpensive one.
Okay, back to assembly.
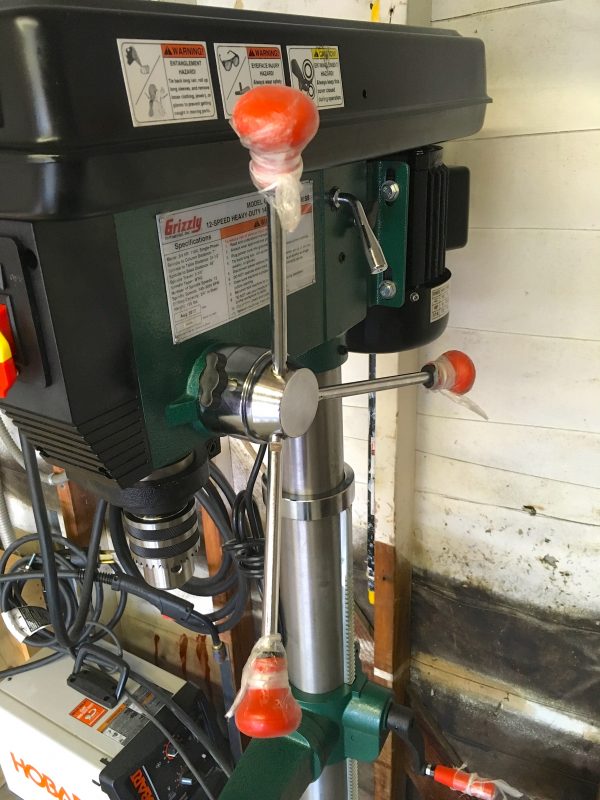
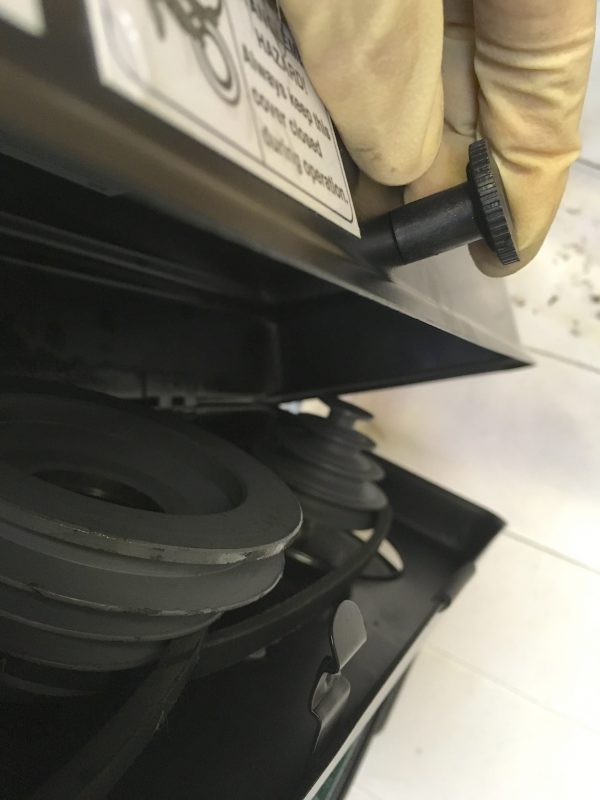
You can see this model has two belts and four pulleys in each stack, which gives us 12 speeds. That’s pretty nice! The belts are relatively easy to move, but I tend to leave it on a moderately low speed. I may move it to the slowest speed for a really big hole. For smaller holes you can run it faster, but I’m not usually in that much of a hurry. If you’re drilling dead trees, you may want to run it faster, but I don’t know why anyone would bother with that stuff called “wood”. My understanding is that it catches fire when exposed to flames! The horror.
The real test of a drill press is how slow it will go. This one bottoms out at 140rpm, which is quite good for the price. That should allow some very large bits indeed. I anticipate doing many ill-advised (but fun) things with this machine.
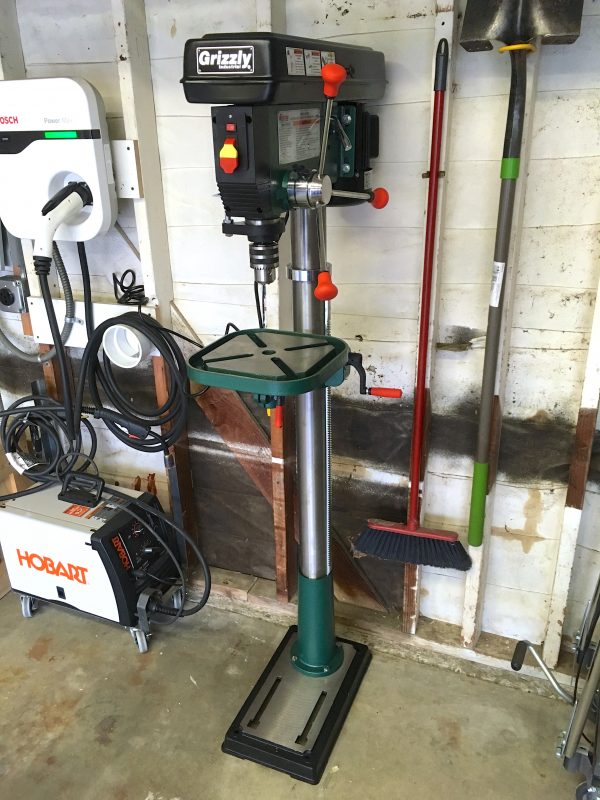
You might be wondering about securing the base. If you have a bench-top press, this means bolting it to the bench. For a floor-standing press like this, it means putting concrete anchors in the floor and bolting the base to them. I haven’t done that yet, because I haven’t decided exactly where I want to put it yet. Frankly, it’s also quite useful to be able to muscle the machine around a bit for working with big pieces and odd jigs. If you ask around, it seems that pretty much nobody bothers to bolt down a drill press, unless it’s in a professional shop, where I believe OSHA requires it. That said, drill presses are rather top-heavy, so it’s probably a good idea.
While I didn’t want to bolt it down yet, I do also live in earthquake country. Around here, you always gotta ask yourself- what will happen if the very earth itself decides to jump three feet to the left because haha pathetic humans? I opted to throw a safety strap around it just in case. It has a section that is removable so I can still move the machine when I need to, but when stored or used in the normal position, it has no chance of crushing small children. More importantly, it has no chance of being found embedded in the hood of my car the morning after an earthquake.
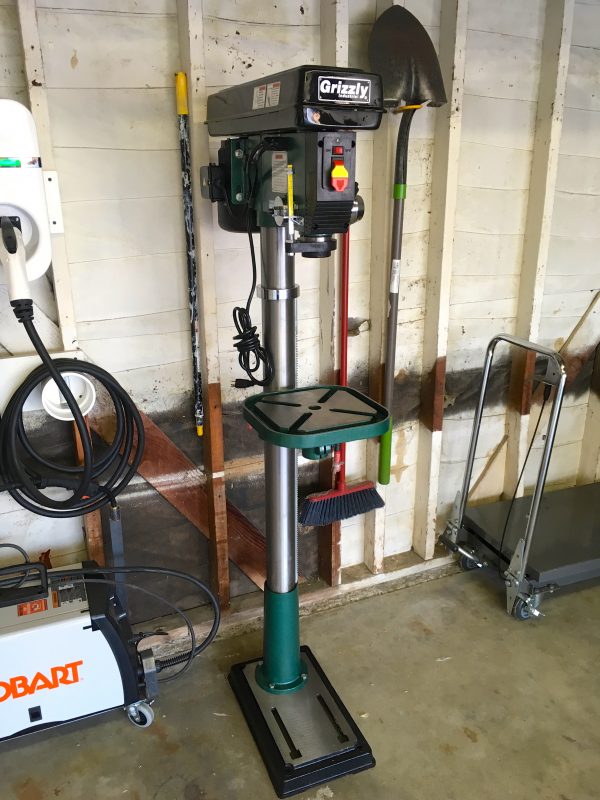
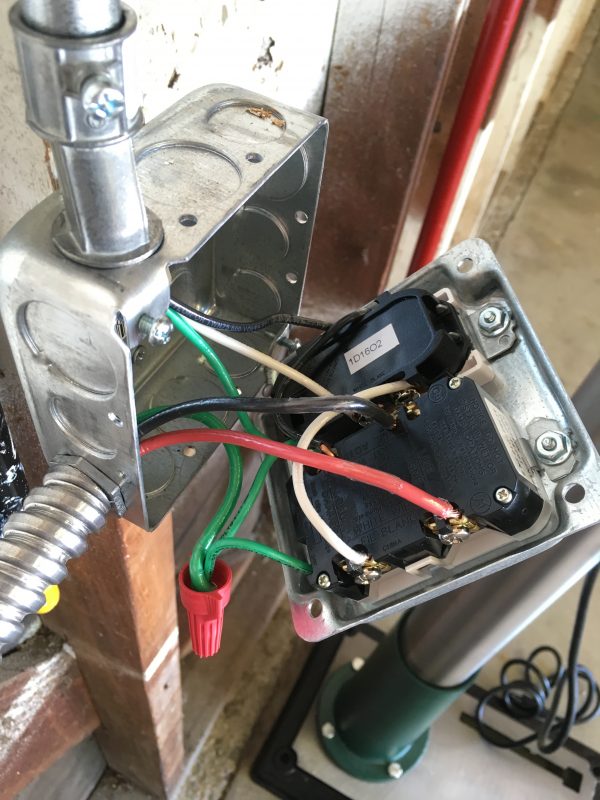
If you’re particularly observant, you may have noticed something in those pictures- there’s no power outlet near by. This occurred to me also, and rather than using an extension cord, I decided I was overdue for better power in the shop. While most machine tools can be purchased in convenient 110V versions for home use, many draw more current than typical home circuits. Especially in older structures. At least a 20A circuit is a good idea for 110V tools like this.
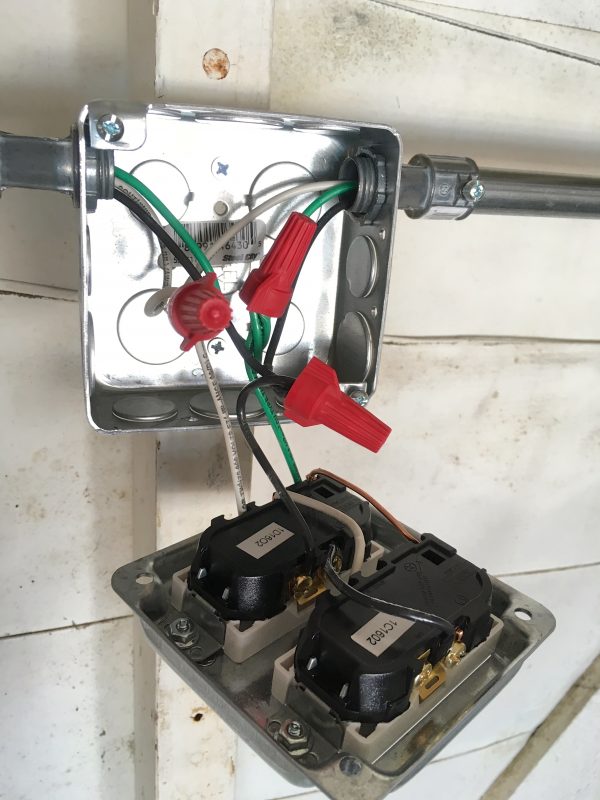
I’m no electrician, but some googling will reveal The Right Way™ to do this (for certain values of Right). Note that this also varies considerably by country as well. In addition to running a new 20A circuit from the garage sub panel, I also put everything downstream of a Ground Fault Circuit Interrupter (GFCI) outlet. I was only recently introduced to this idea, but it’s a good one. Like most people, I had only seen GFCIs in bathrooms, and figured they had something to do with safety around water. Indirectly, that’s true. Electricity and water certainly don’t mix, as my Brazilian friend is fond of pointing out. Apparently electrically-heated shower heads are pretty common there, and hilarity ensues.
A regular circuit breaker is designed to prevent the building from burning down if there’s a short or other overload. It responds to heat build up, and breaks the circuit if the load exceeds the wiring’s capacity (assuming the wiring is properly matched to the circuit). A circuit breaker is great, but doesn’t do anything to protect the humans (other than from being burned to death in a house fire, I suppose).
A GFCI, on the other hand, is designed to protect humans directly. It detects differences in current between the energized conductor and the return conductor. If there’s an imbalance, it means current is leaking out of the system through some other path. For example, that current might be leaking directly to ground through a human that just ran a power saw through an extension cord. If your meat sack suddenly becomes a current sink, a GFCI might save your life. The other cool thing about them is that they protect all other outlets downstream of them. So it’s easy to protect your whole shop with a couple of them- one on each circuit.
Okay, with the electrical sorted out, we need to calibrate the drill press. It’s a relatively precision tool, and for best results, it needs to be set up properly. I say “relatively”, because this is no milling machine or lathe. However, a little setup goes a long way to being able to trust it to drill accurately.
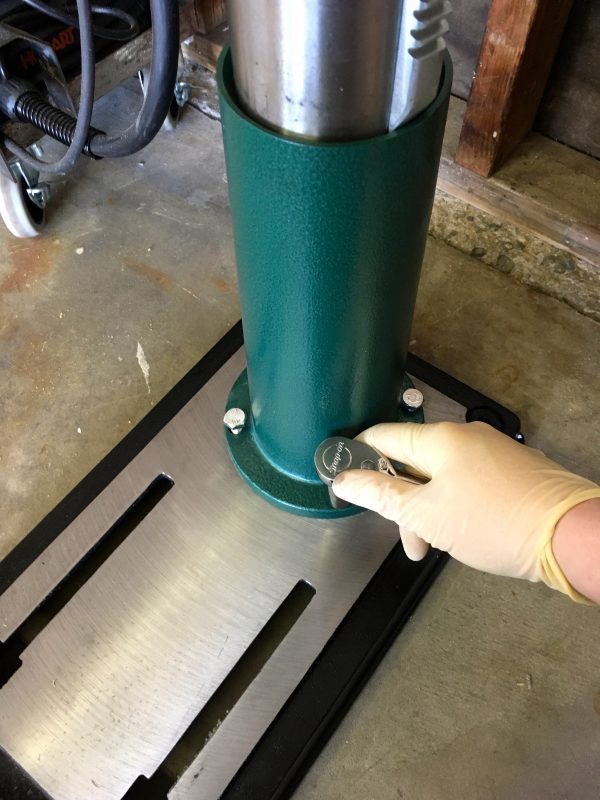
The first and most important thing to do is tramming. This is a fancy word for making the table square to the chuck. There are very fancy tools for tramming a table, but for a drill press, a simple machinists’ square is sufficient. A drill press is imprecise in enough other ways that getting the table trammed to within half a lamb’s breath is not necessary (or probably even possible).
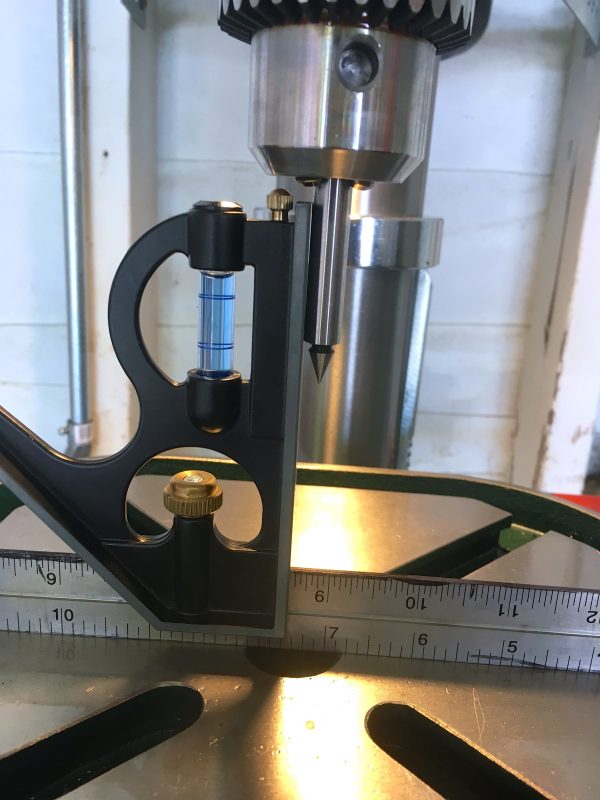
If you look between the square and the edge finder in that photo, you can see a sliver of daylight between them towards the top. We’re close, but not quite square. To square it up, we need to tilt the table.
Looking underneath, you’ll see the tilt adjustment. This is a combination of a retainer pin, and a bolt the size of a cat’s head. You remove the pin by tightening the nut on it. This draws the pin out to the point where you can grab it and pull. Then you need to loosen that beastly 24mm bolt.
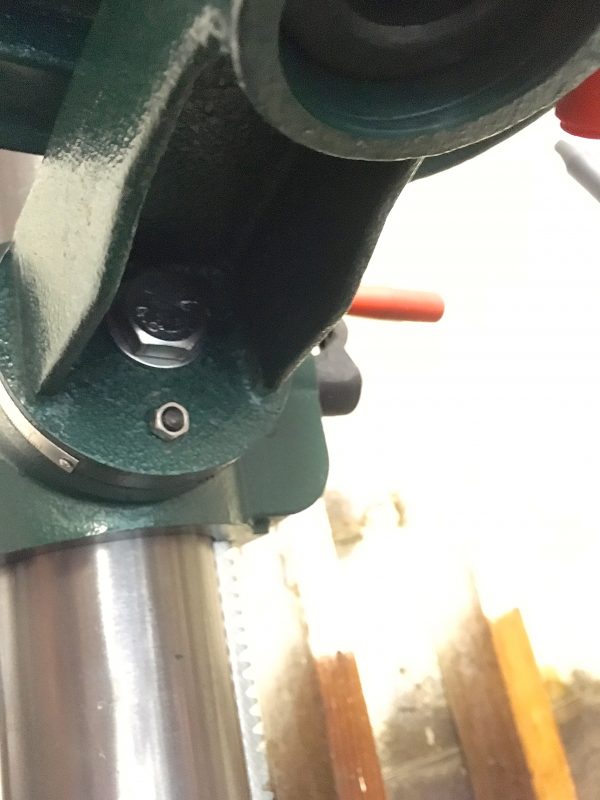
Expect that large bolt to be tight. Really tight. The torque specification on it is, by my calculations, Goddam Shit-Ton foot-pounds. For metric folks, that’s Holy Mother Of Donkeys Newton Meters. I used a 24″ breaker bar with a cheater pipe on it to back it off.
All you need to do is relax the bolt a touch, then tap the table with a rubber mallet to get it to move a tiny amount at a time. You don’t want to “loosen” the bolt per se- just take of the pressure off it, if that makes sense.

When you’re done, tighten the bolt pretty much as tight as humanly possible, then tap the retaining pin back in place.
Once you have the table trammed, it’s a good chance to check the accuracy of the built in scale. I don’t usually expect much from a strip of sheet metal riveted on hastily by hand on a grim factory line somewhere, but this one is actually not bad.

The last thing we can check is the run-out. This is a measure of how much the spindle wobbles as it spins. No spinning mechanism is 100% perfect, but a quality machine tool will have very very little runout. We would expect the runout on a budget drill press to be fairly high, and frankly there’s not a lot we can do about it without dismantling and remachining the quill and drive mechanism. However, it’s nice to know what it is, so we can plan for the imprecision when making things. For a drill press, it tells you how out-of-round your holes are going to be. It’s also nice to know what 400 bucks buys you. Run-out is a good indicator of overall quality of a machine.
Run-out is measured by placing a dial indicator against the chuck, and turning it by hand. The maximum amount of needle deflection over a full revolution gives you the run-out.
On the chuck body, we’re showing 4.5 mils of run-out. I gave the chuck another pound with the rubber mallet and got it down to 3 mils. Three to five thousandths is about what we can expect for a machine line this, and is not too bad for the price. A milling machine it is not, but it’ll drill holes just fine.
We can also run this test on a round bar in the chuck, to get a sense of what additional run-out might be introduced by the chuck jaws.
Here I get 6 mils off the dial, but my setup is not as good that time, so there’s probably a bit of cosine error in there. It’s likely about five mils after correcting for the indicator arm angle.
That wraps up the assembly and setup of our new toy. Time to go make some holes in stuff!
Nice write up as usual Quinn!
I have a bench top harbor freight special, good to have a guide for dialing it in.
One thing I’ve heard is that these budget presses ship with below budget chucks, but it seems like the one you’ve got isn’t neatly as bad as mine. I never measured the runout but it was unusable for it’s intended purpose of drilling PCBs.
That sounds like a much smaller machine than this? This one is definitely too big for drilling PCBs. It wouldn’t hold bits anywhere close to that small. I can definitely believe the smaller HB machines get crappier fast as the price point drops.
I have one of those little Dremel drill press stands, and it works great for PCBs. I recommend it! The little Jacob chuck attachment for the Dremel holds bits so small that I can’t hardly touch them.
You can chuck up a pin vice or get a smaller chuck for your drill press to hold smaller bits. I have drilled hundreds of #60 gas jets in a mill equipped with a r8 collet. You want to minimize runout, but I found the largest source of runout was the pin vice.
+1 for nice writeup.
I, too, have a Horror Freight benchtop model. Christmas present one somewhat-recent year. Haven’t opened the box yet and it’s already probably past whatever coupla-weeks warranty they give it… mostly because I have a room to reorganize in some big ways before I can get it going.
That said, I’ve bookmarked this post, so it’ll be around (I hope) when I get around to setting up the press 😉
Thanks again, Quinn — the only reason I haven’t joined your Patreon is I’m poor as an empty plant pot. I hope you’ll accept my humble apologies instead…
Hm. There maybe something wrong with the formatting in this post – on safari on my iPhone, most of the text is over the photos making it unreadable, and the photos are smeared over the background. Sometimes it reverts to text and photo in a handy box, but most of the content is illegible, unfortunately.
On further examination, it seems one drill photo has accidentally become the background for the whole post.
Hit refresh, perhaps. It sounds like your browser didn’t load all the CSS propely. Works fine on my iPhone with Safari.
Perfect, thank you.
I was disappointed to see you hook your drill press to a GFIC. GFICs are of value but they are not suitable for every load, specifically they do not work well with large inductive loads like freezers, air compressors and drill presses. They are also completely unnecessary on properly grounded metal body equipment like drill presses. If you are fighting an inspector, since you ran a circuit, if you run a 220 line and convert your drill press to 220 the inspector will not ask for a GFIC. most drill presses will easily work on 220 by rewiring the motor by following the directions under the motor cover. 220 light bulbs however are a bit hard to find.
Interesting- thanks for that perspective. It’s easy enough to remove if it starts causing problems, but so far it seems fine.
>>220 light bulbs however are a bit hard to find.
They’re plentiful on the other side of the Atlantic, as well as on the other side of the Pacific: sites like DealExtreme carry bulbs in whatever size, wattage and shape you can imagine, and both Edison and bayonet. Nearly all of them are rated 80-250VAC.
(it was easiest to purchase a couple of B22 socketed bulbs for a Teasmade from there, instead of getting someone in the UK to find the right ones, buy them and send them over. Wattage was a bit of a gamble, but 3W LED turned out fine)
30mA fault current GFCI’s are mandatory in houses built in the last 30 years (or so) in The Netherlands. Freezers, stick welding transformers, 2000w vacuum cleaners, a washing machine and my drill press have not once made it trip.
What *does* make it trip? A leaking lamp in the back yard, an oven with a worn down cable that touched the metal case, a piece of metal in the central heating boiler that deformed because of a partially clogged burner. All of those are things that can cause danger when something else (the ground connection) is also faulty.
Resettable circuit breakers do tend to break circuit with some heavy inductive loads. The stick welder tends to trip it with its inrush current. However, that can be solved by using a slower tripping one (currently i have B16 breakers, C16 is also allowed. Slower ones only for special purpose circuits)
“If you are fighting an inspector…” IMO the inspector does not need to know about your power tools or the new wiring in your shop. If you’re new to home wiring first spend some time learning about it, invest in a few good tools, then do a thorough and careful job and it will be fine.
Nice write up, thanks for this Quinn!
This, except for a few minor details, one bigger detail and the length of the pole, is exactly my Güde drill press, and I think I’ve also seen it branded Einhell and CMI (house brand of the OBI chain of hardware stores). So now Europeans know that they can get their greasy paws on one of these.
The one big difference is a keyless chuck, which robs you of the possibility of embedding the key in the far wall of the workshop.
Congrats!
http://hackaday.com/2016/09/01/likely-everything-you-need-to-know-before-adopting-a-drill-press/
Thanks! Me and HaD go way back. Nice folks over there.