Let there be light!
An increasingly popular modification to pinball machines is to convert the lighting system to LEDs. These machines typically have 100+ incandescent bulbs in them. In addition to burning out frequently, they consume quite a bit of power. Perhaps most concerning of all for a pinball machine, they make a lot of heat. It may not seem like a tiny 6.3VAC bulb could make much heat, but over long periods of time, they do cumulative damage. The bulbs are typically installed under something plastic, such as a toy on the play field, or so-called “inserts”. The latter are shaped plastic pieces pressed into precisely cut holes in the playfield. They indicate states and modes in the game, and give information to the player. Each one has a bulb underneath it. The top surface of these inserts needs to be perfectly flush, to prevent altering the course of the ball as it rolls over them. Over many years, the heat from the ball can cause the plastic insert to droop in the middle. It can also affect the glue holding them in place, which can cause the insert to shift proud of the surface by a small amount.
These are difficult problems to fix, so it’s much better to prevent them all by upgrading the lighting system to a much more efficient alternative- LEDs. In addition to using less power, they also make close to zero heat, and last much much longer than incandescent bulbs. Perhaps best of all, they look amazing. They make a clean, vivid, modern light that is much brighter. Particularly for a game with a modern high-tech theme like Johnny Mnemonic, the look can’t be beat (in my humble opinion).
Let’s take a look at what we’re starting with. Shown below is the original incandescent setup, in various common lighting conditions.
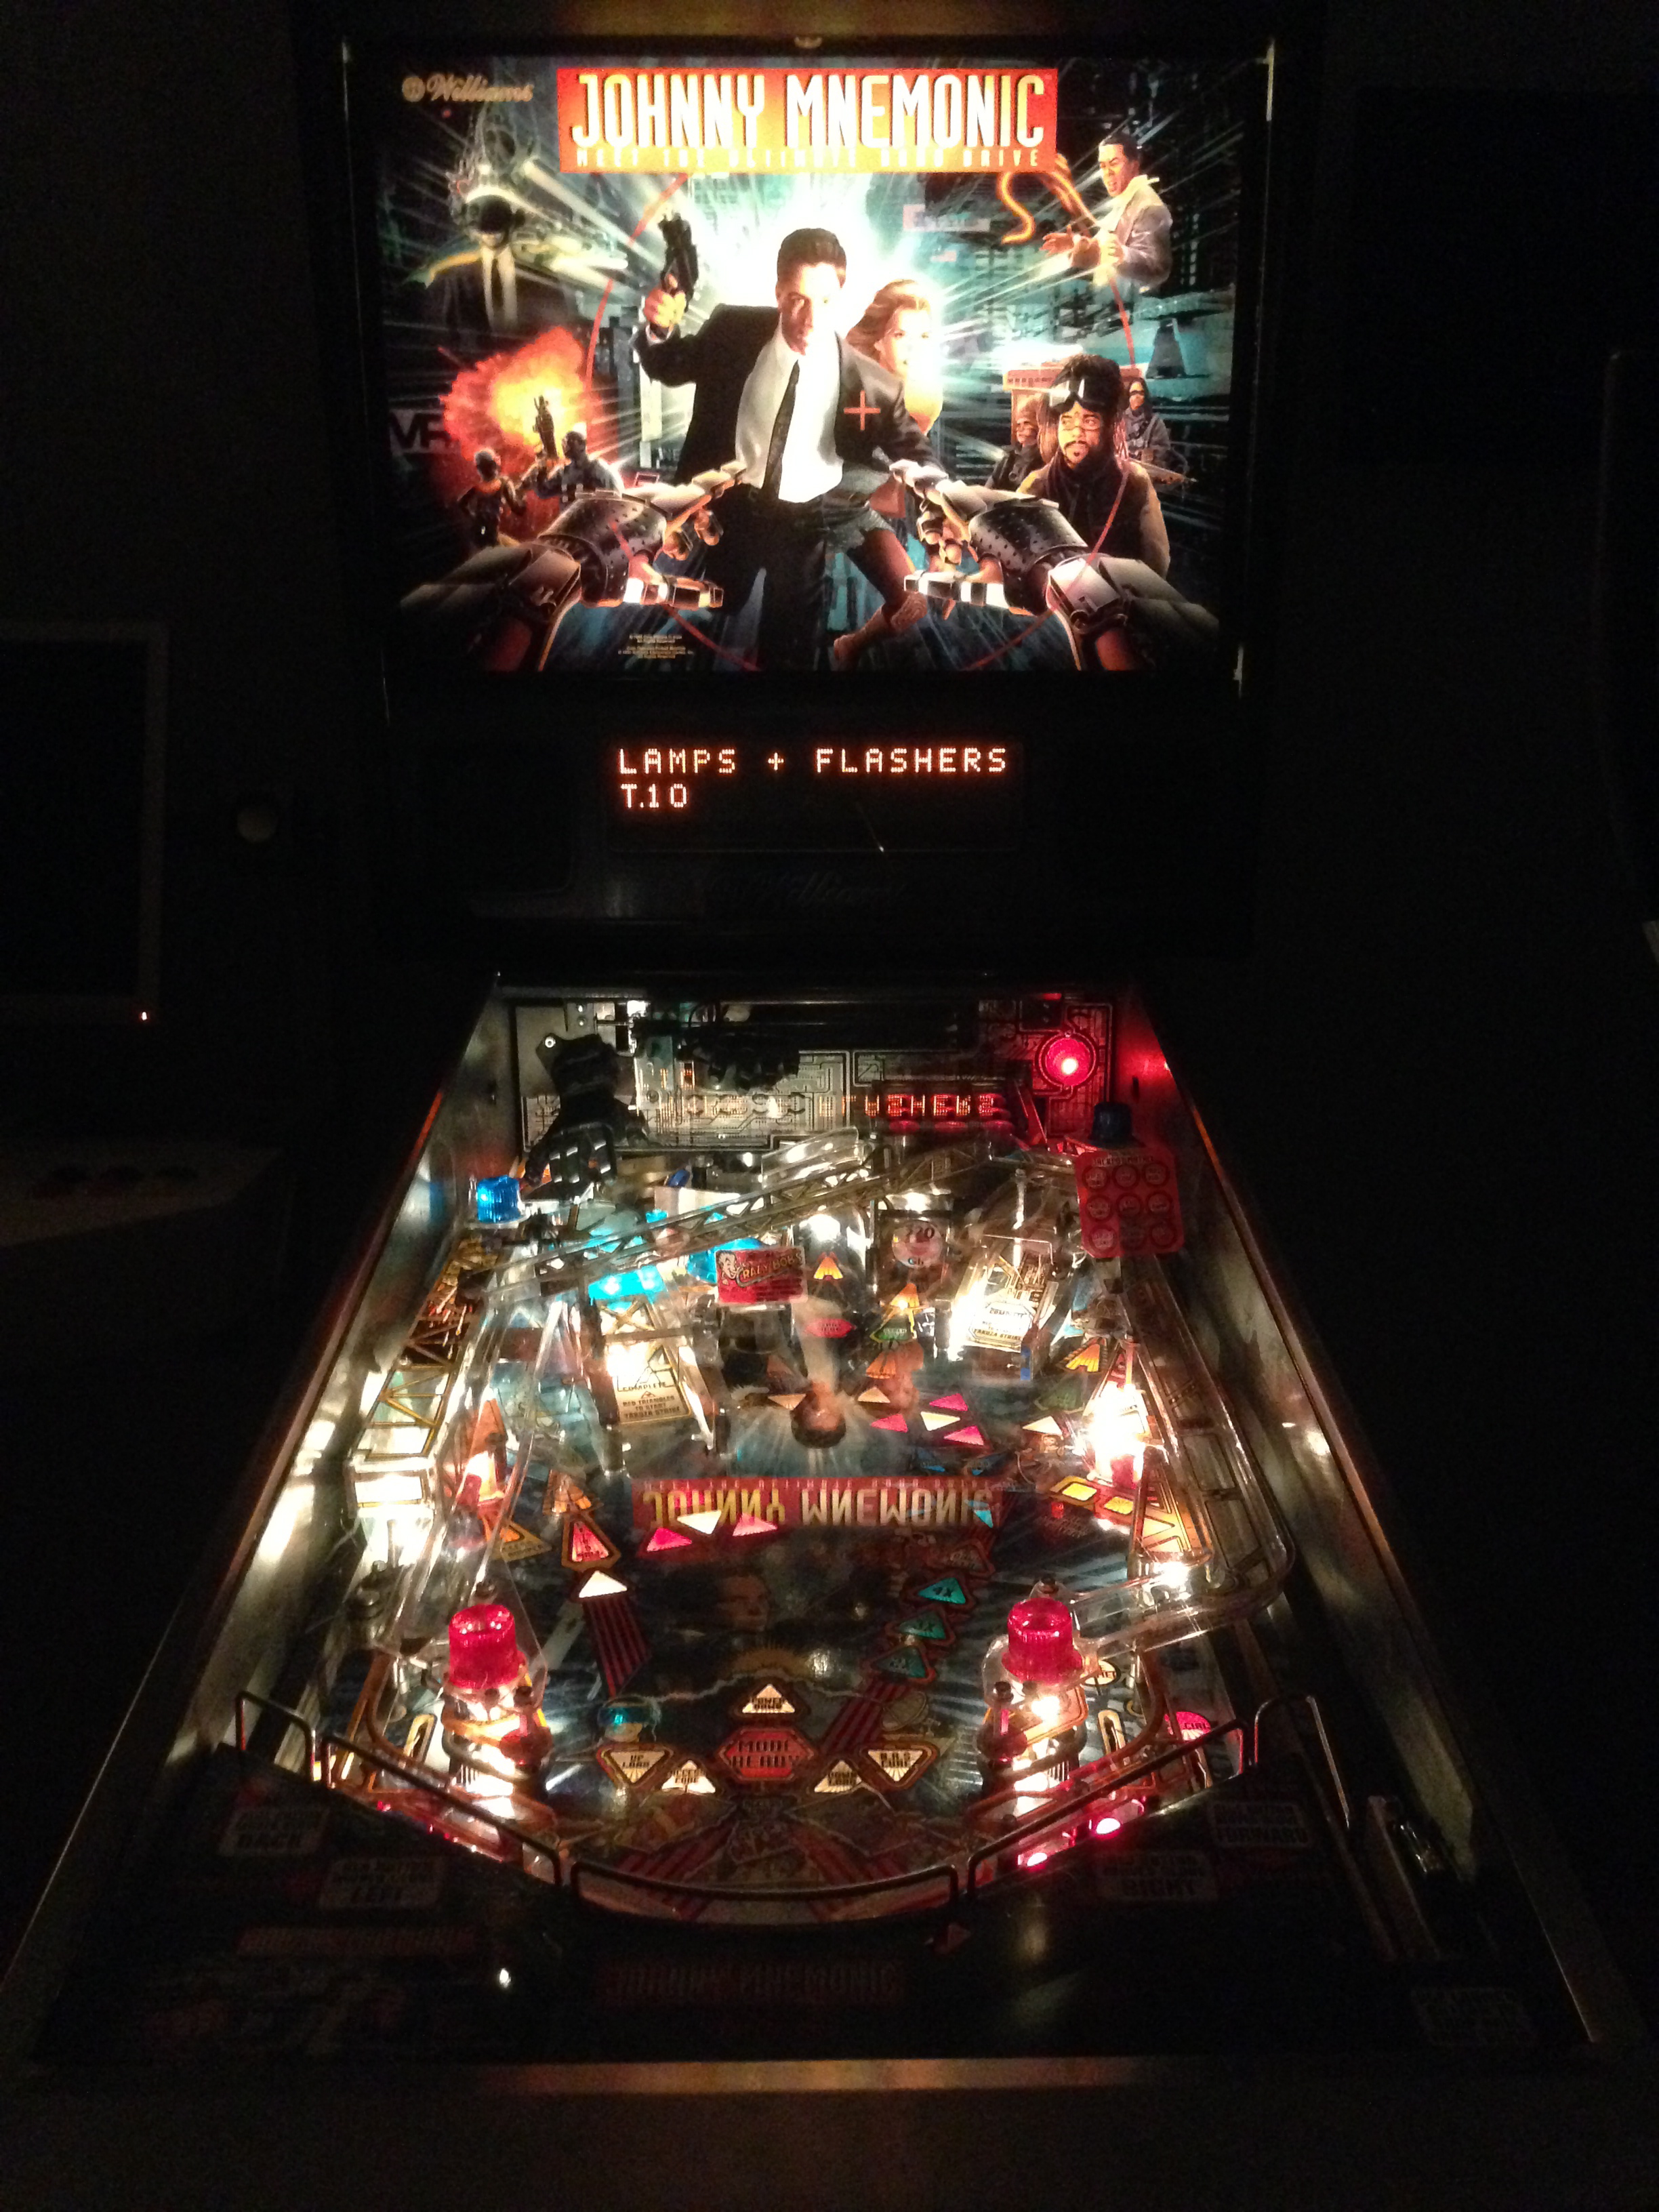
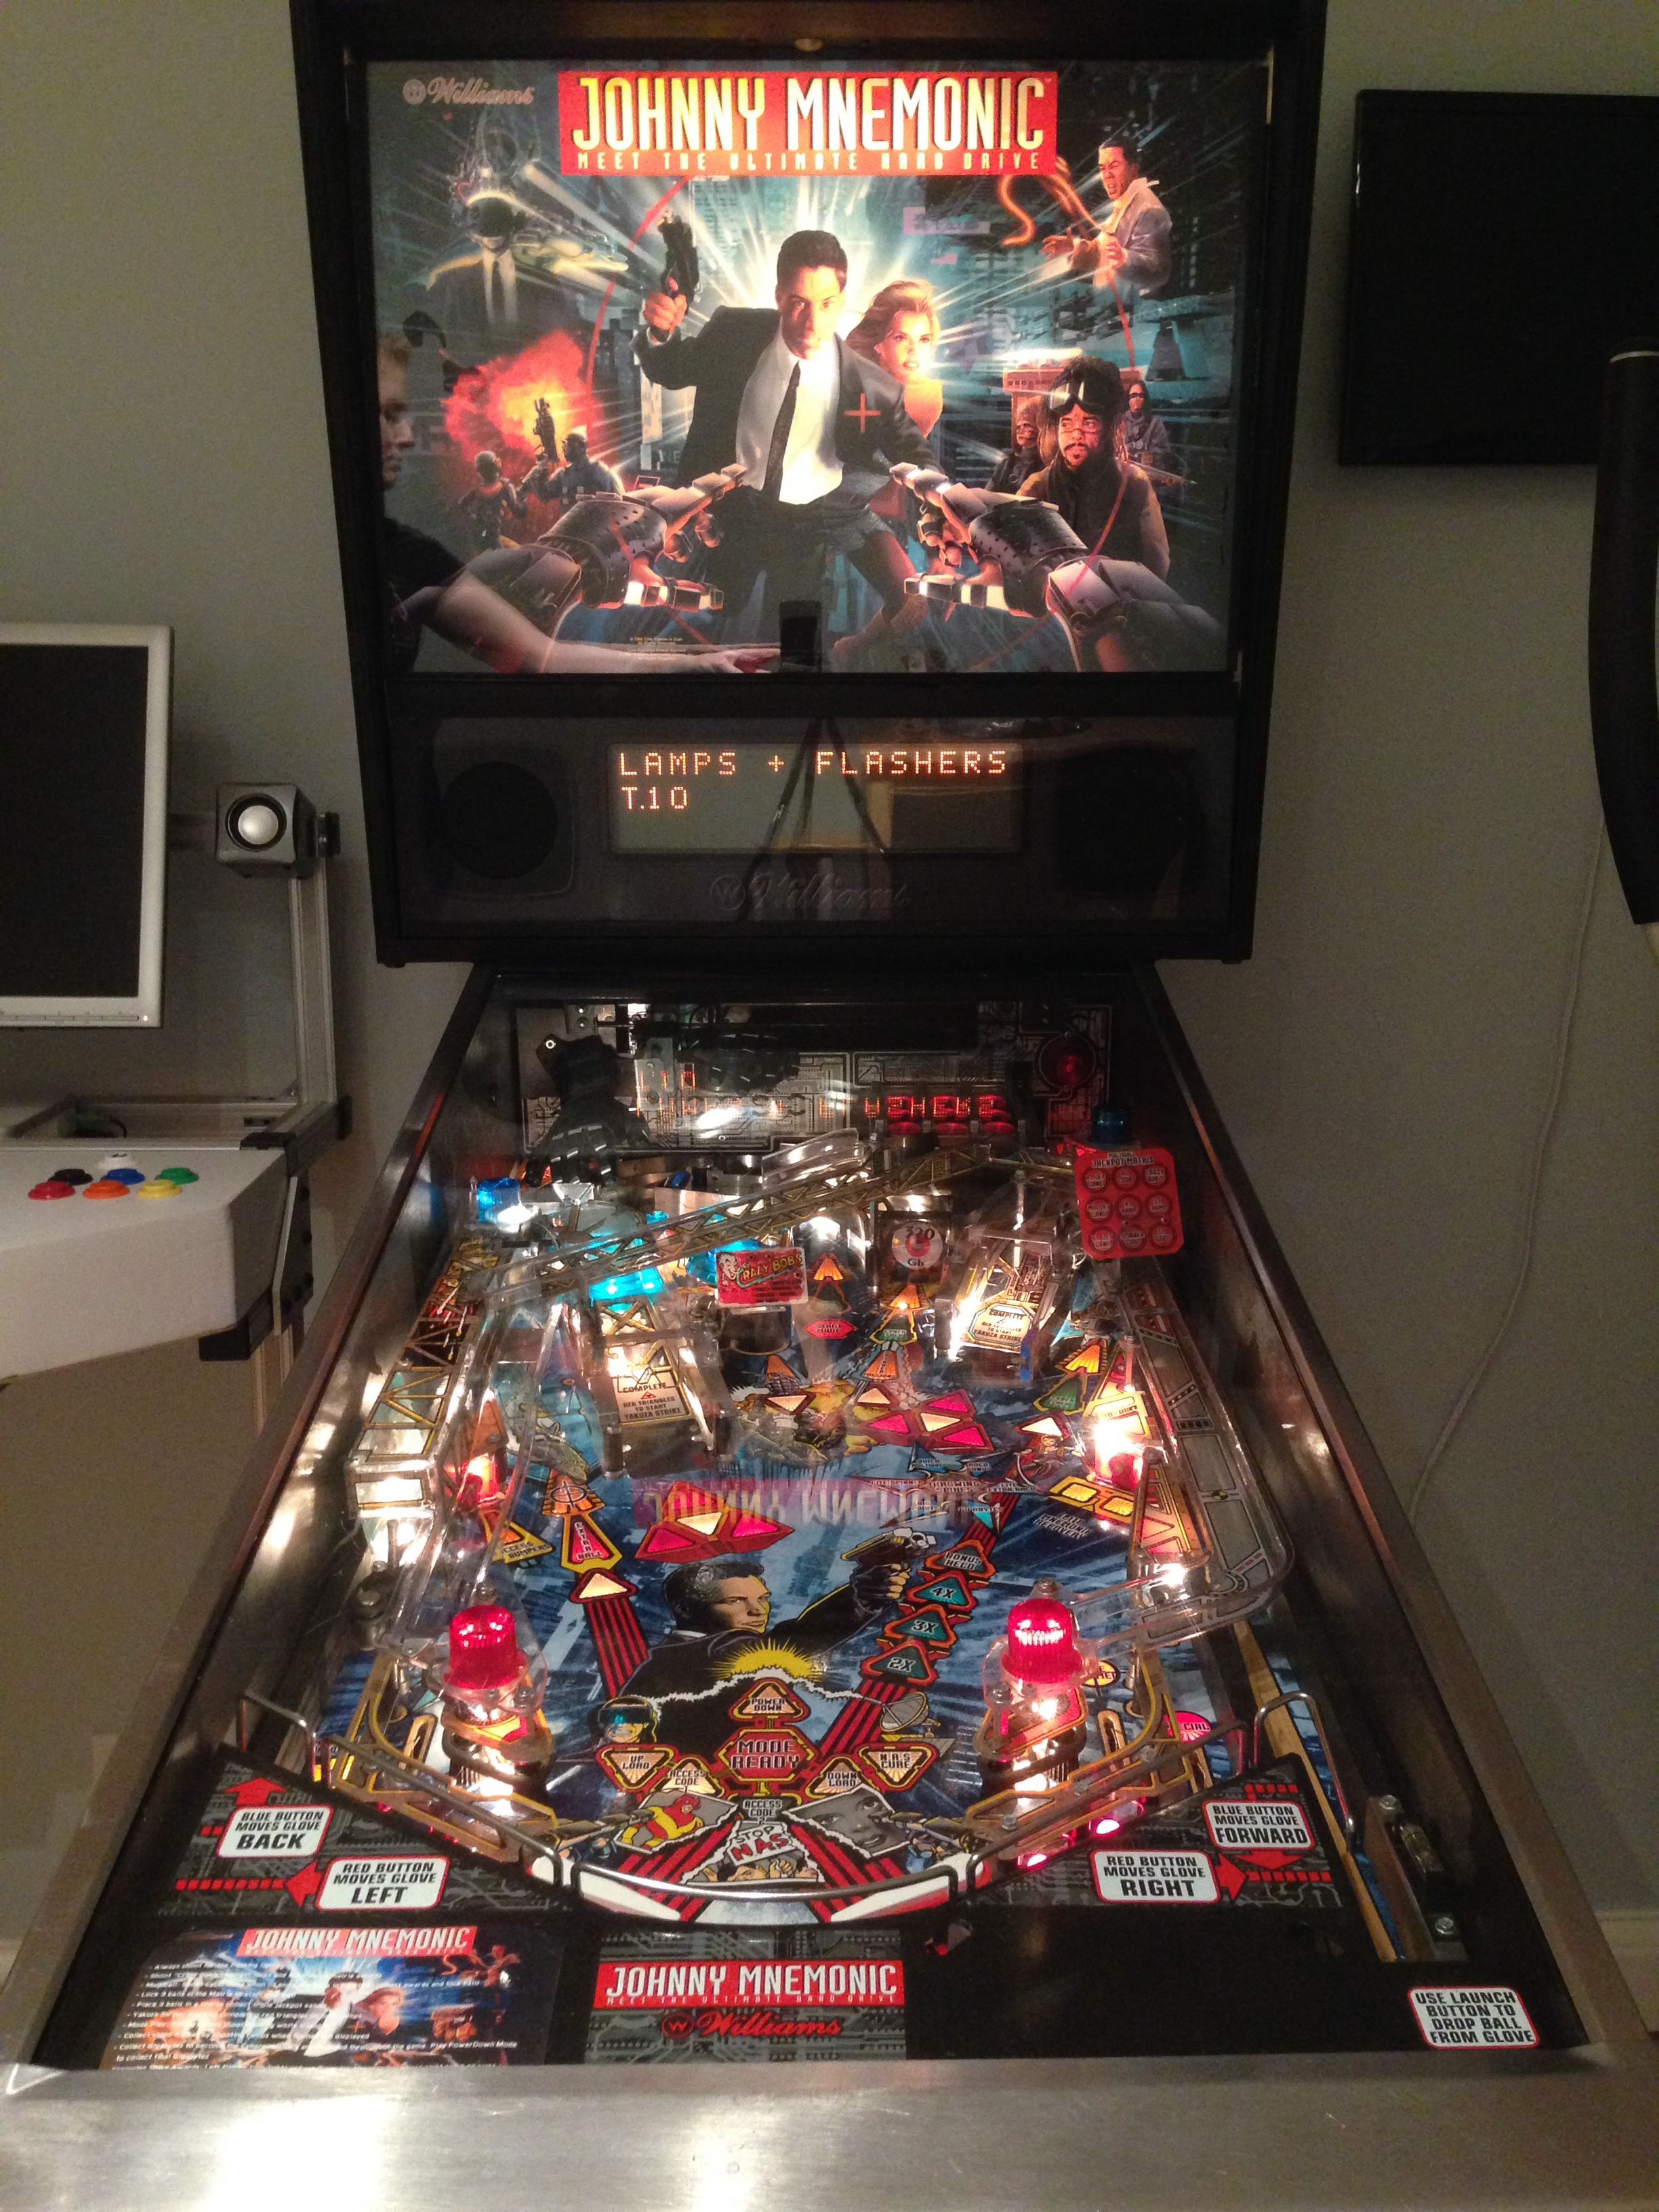
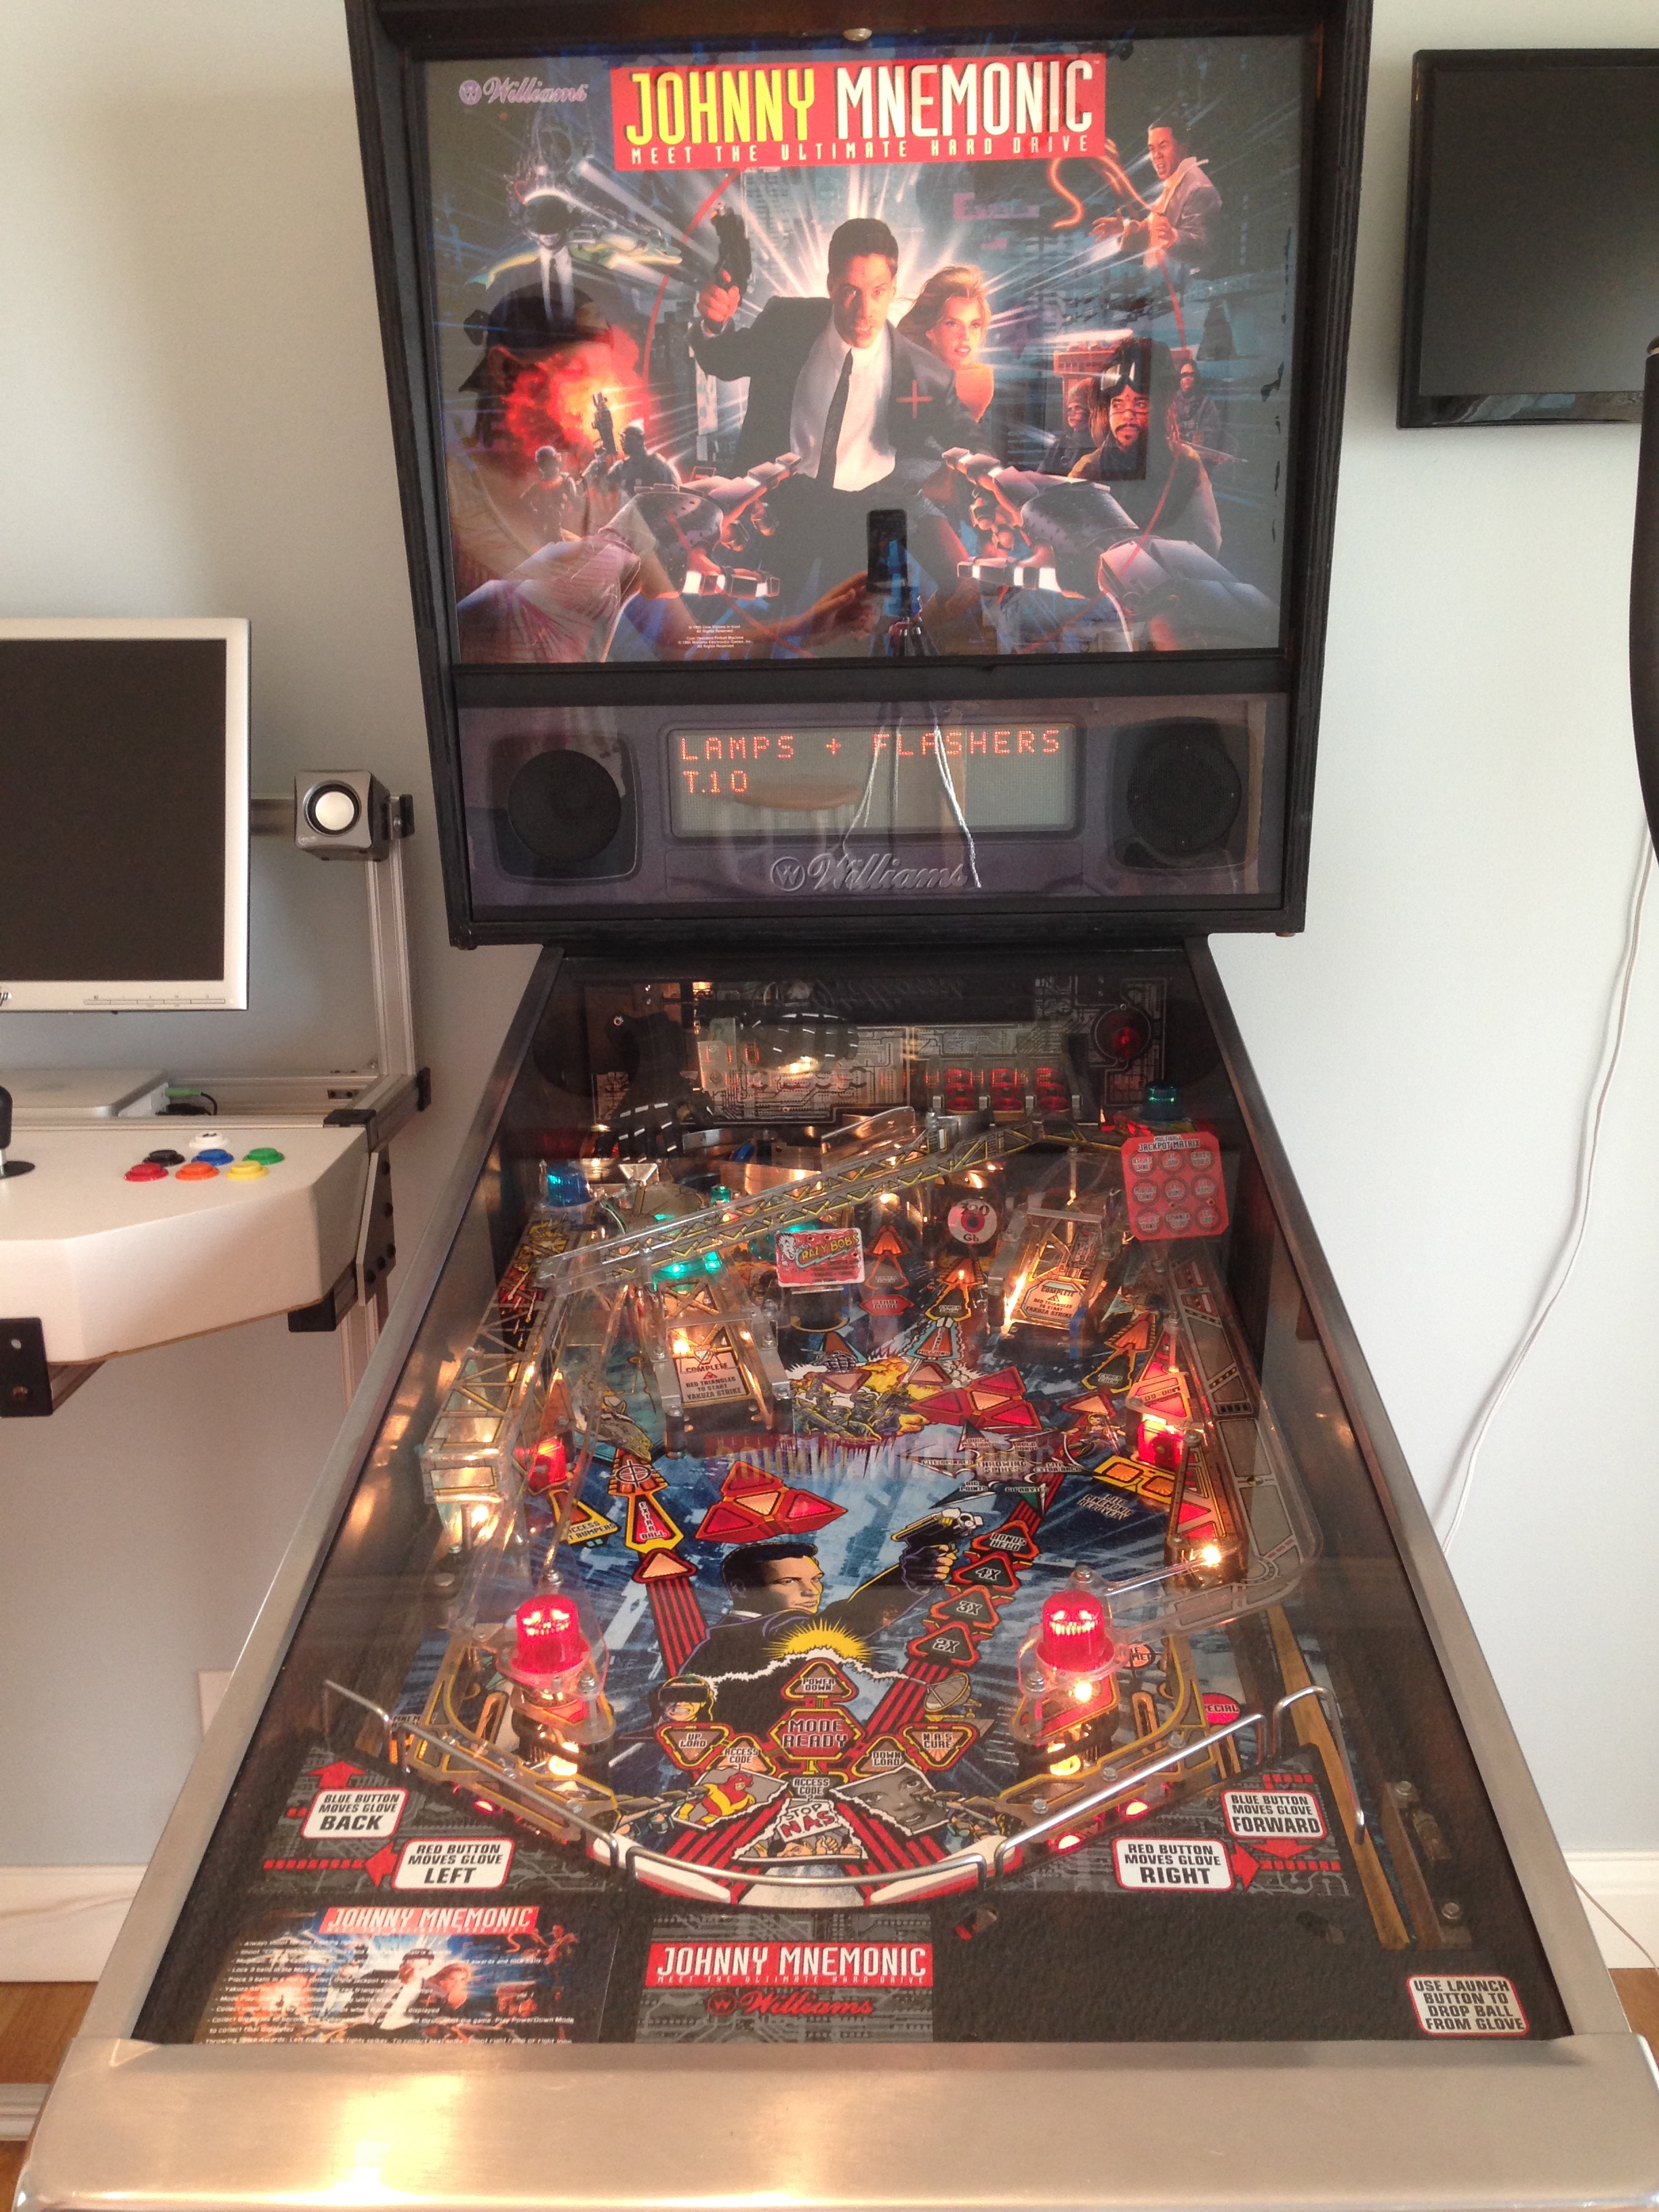
Impressive lighting for the day, but we can do so much better in the 21st century. Let’s get our hands dirty.
The first challenge is choosing and acquiring the bulbs. There are a lot of pinball LED makers around these days, and their product selections can be completely bewildering. It’s difficult to know where to start, particularly when it’s not even clear what type and count of bulbs you need. Furthermore, the LED bulbs come in many variations, colors, and flavors (take my word for it- do not eat LEDs).
It helps to know something about the problem we’re trying to solve. LEDs are not a drop-in replacement for incandescents. The main lighting circuits are low voltage AC (6.3VAC), and the flasher lamps are high voltage DC (20VDC). Neither of those are convenient for driving an LED. Furthermore, the games are developed around the lighting characteristics and performance of incandescent light. That means they use various dimming and pulsing effects that rely on the light decay characteristics of incandescent filaments. Any LED solution needs to mimic or accommodate all these properties. The voltage concerns are pretty solvable, but a couple of issues do arise:
- Ghosting. This is an effect where the game thinks the bulb is off, but it still shows a faint light. This is because some games extinguish a bulb by dropping the AC voltage to a very low level, but not quite off. An LED is much more efficient, so this small amount of juice is still enough to give off some light. Luckily, there are now modern bulb designs developed specifically for pinball machines that address this issue.
- Flickering / Dimming effects. This is a much thornier problem. Some modern games dim the entire play field, or sections of it, to create various effects. For example, when starting a Video Mode (which is a small video game played on the dot matrix display), the whole play field is dimmed to prevent visual distraction. Ramping an AC voltage down to lower the light level works fine for an incandescent, but LEDs don’t like it at all. The “proper” way to dim an LED is to run it on DC, and use high-frequency pulse width modulation to simulate dimming by lowering the duty cycle. As of this writing, I’m only aware of one way to do this in an older pinball machine- with an add-on PCB called GI OCD, made by this clever fellow. His board sits between the lamp controller in the pinball machine, and the lamp circuits. It interprets the AC voltage level, and converts it to rectified pulse-width-modulated DC that is fed to the LEDs. It’s very clever, but sadly also difficult to get. He has a long waiting list for the boards, which I am on. I’ll do a writeup on the installation of that board when I receive it. In the meantime, there is a workaround. Buried deep in the settings menus, there is an option to disable dimming effects:

Option A.1 25. Who knows why they put it in there 20 years ago, but lucky for us they did!! With Dimming effects disabled, the flickering goes away. The loss of the dimming effects really isn’t very noticeable, honestly. I haven’t missed them at all. In fact, I wasn’t honestly aware such effects were taking place until I put in the LEDs.
- Strobing. Strobing effects can occur because LEDs transition between zero brightness and full brightness much faster than incandescents. This can be noticeable with AC voltage lighting circuits, or on flasher lamps which are rapidly pulsed to create a strobe-light effect (not to be confused with the Strobing artifact on the LEDs). These strobing effects are noticeable to some people, but not others. It’s most noticeable on the flasher lamps, which are particularly bright, and intentionally pulsed rapidly in the software (hence the name flasher lamps). They are used sparingly in most games, and only for special events in gameplay. As such, strobing is generally not a problem worth worrying about for most people. Some folks are sensitive to it in the same way that some people are sensitive to old-fashioned fluorescent lights in offices. If so, that same clever fellow has a nice solution for this, although again there is a waiting list for it. If, like most people, you only notice it on the flashers, and it bothers you, you can simply stick with incandescents. Unlike the general illumination, the high power flasher lamps are plenty bright in original incandescent form.

The next thing to know is, what kinds of bulbs do these machines use? It boils down to a couple standard types. And I do mean “standard”. Most of these are automotive bulbs you can find in any auto parts store (which is a handy tip if you’re not planning to go LED- but then why are you reading this?).
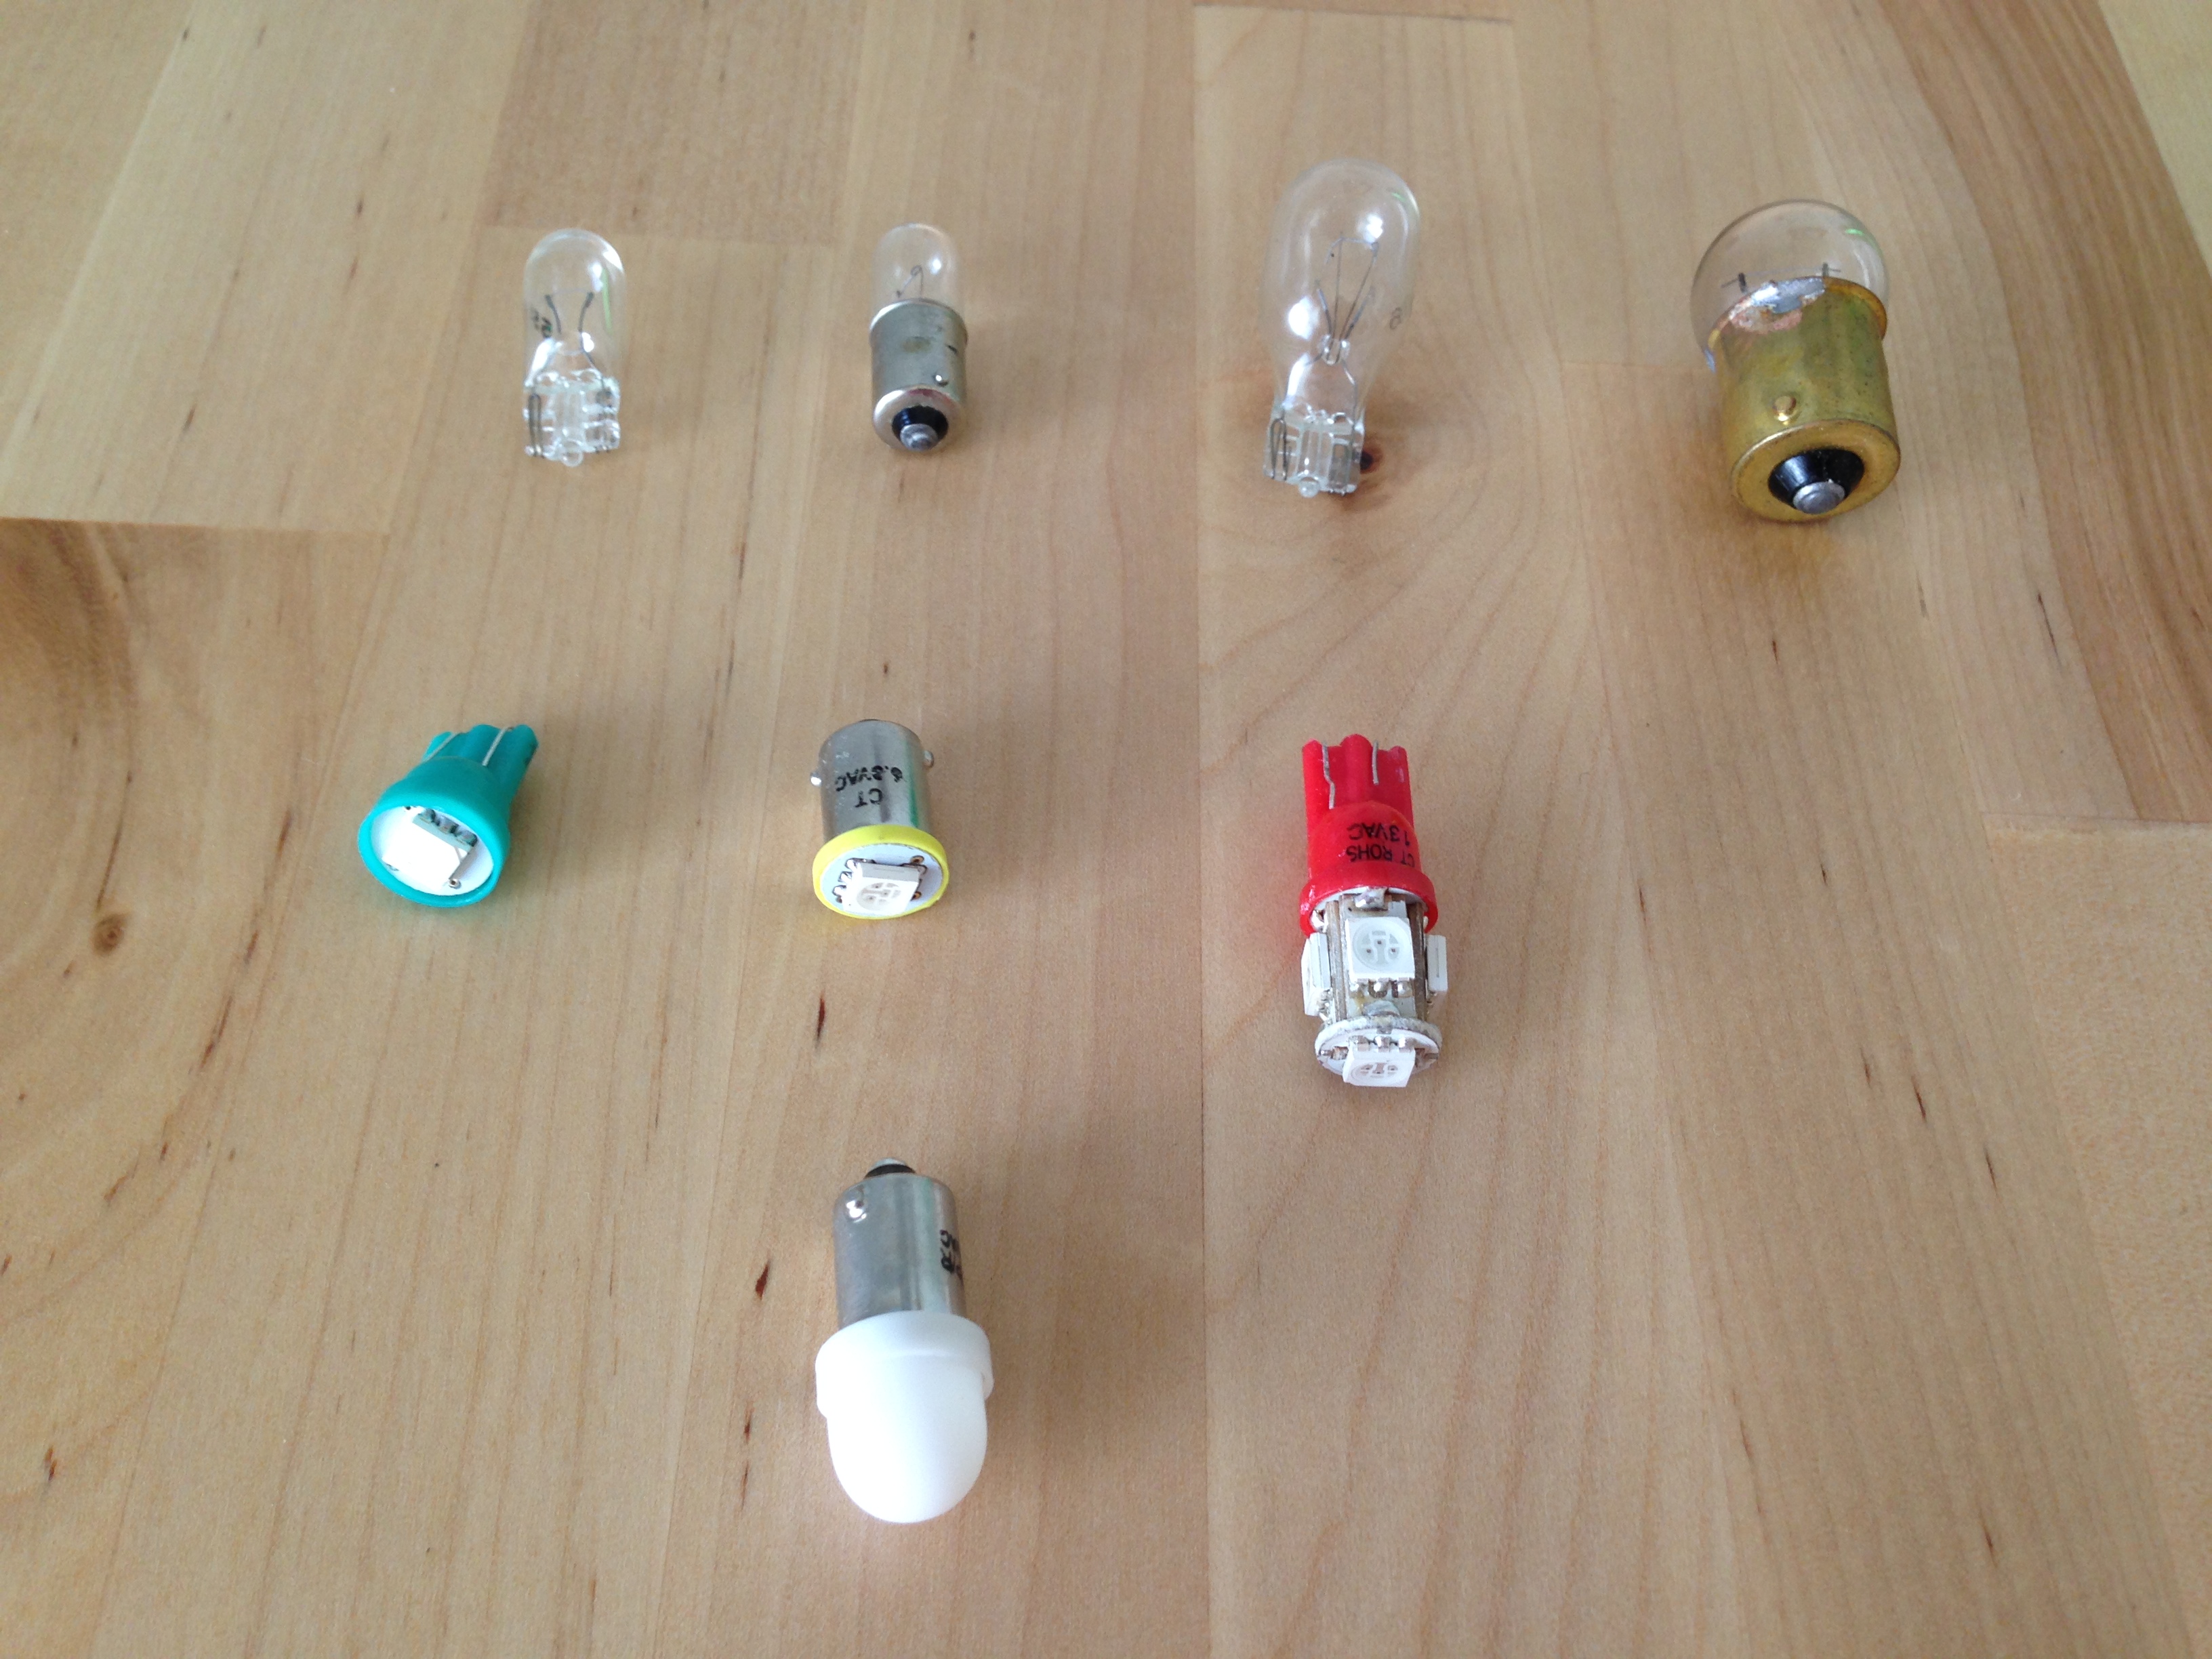
In the above photo, left to right, we have:
- A 555 bulb, used in most insert lights, the back box, and a few miscellaneous places (like Start buttons, some pop-bumpers, etc). These simply press in and pull out. You have to be careful of the thin wires that wrap around the base. They can break off in a socket, causing a short, or misalign with the contacts, preventing the bulb from working.
- A 44 bulb. This is the same as a 555, except with a twist-in base. I’m showing two common kinds of LED replacements- one has a semi-transparent dome over it that disperses and mutes the light a bit. These can be used in places where the LED is aimed at the player’s eyes. LEDs are intense, and can be distracting if aimed right at you. These are not commonly needed, in my opinion.
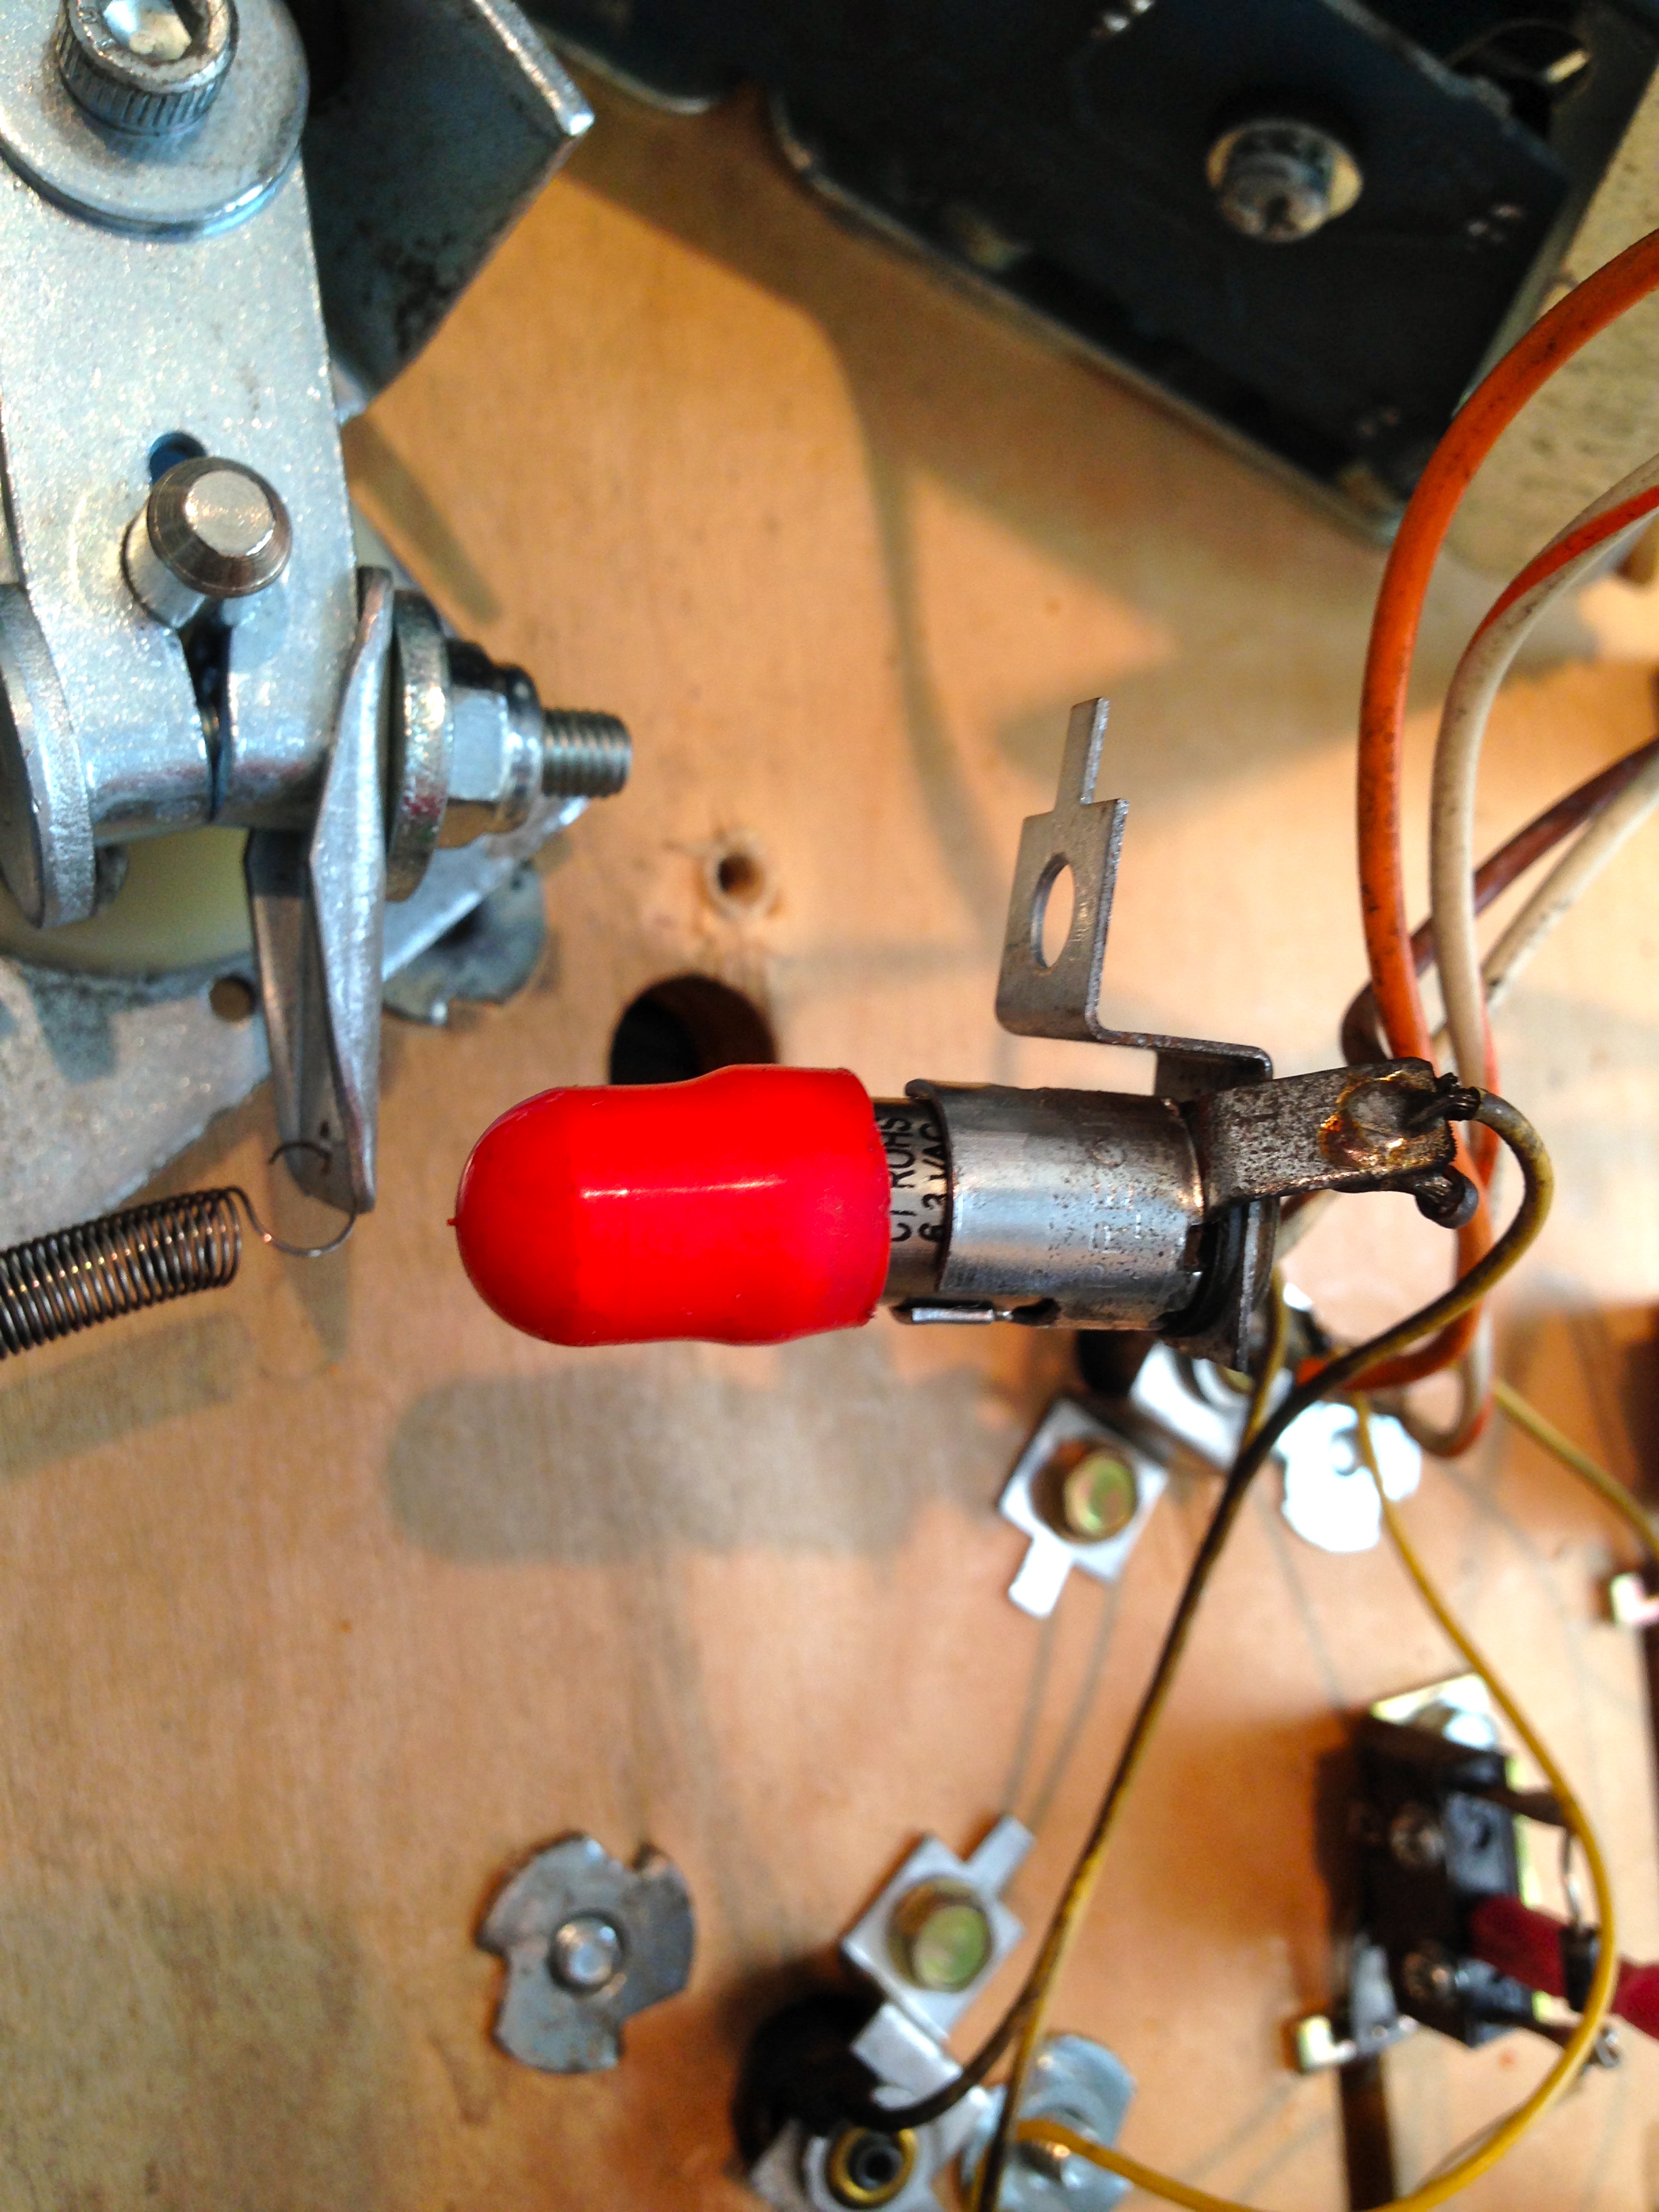
- A 906 flasher. These are big and bright, but with a similar base to the little 555. These are used in most flasher lamps
- An 89 flasher. This is another type of big flasher, typically used in under-playfield situations. Johnny has one that lights up the cyberglove from below when the ball is shot into it, for example. I don’t show an LED equivalent in this photo because I didn’t have any spares. They look much like the 906 LED flashers.
You’ll note that all those LEDs are funky colors. This is where LEDs really shine, if you’ll pardon the pun. Namely, you can match the color of the light source to the element being lit up. If you have a red plastic dome over a red LED flasher lamp, the two work together to create a wonderfully intense color that you can’t get any other way. You can also create new colors by mismatching the LED to the plastic color. Interesting combinations are possible, but personally I’m a huge fan of matching the plastic color everywhere, and using white for general illumination.
So personally, I decided to go all-in and LED the entire machine. I opted for products from a company called Cointaker (caution- loud auto-play video at that link), who’s bulbs have a very good reputation. Even knowing everything I mentioned above, it’s daunting trying to know what bulbs to order. I opted to start with a Cointaker kit. These kits exist for a lot of machines, and come complete with location guides for every bulb. Very helpful! It’s unclear exactly what is included in a lot of these kits, but they are generally a good starting point. I found I needed to order a couple more bulbs here and there as I figured out what I would like, or wanted to experiment a bit. The standard Cointaker kit is great, though, as is their customer service. They are quick to respond with any concerns, questions, missing parts, etc. My apologies if this sounds like a sales pitch, but my experience with them has been excellent.
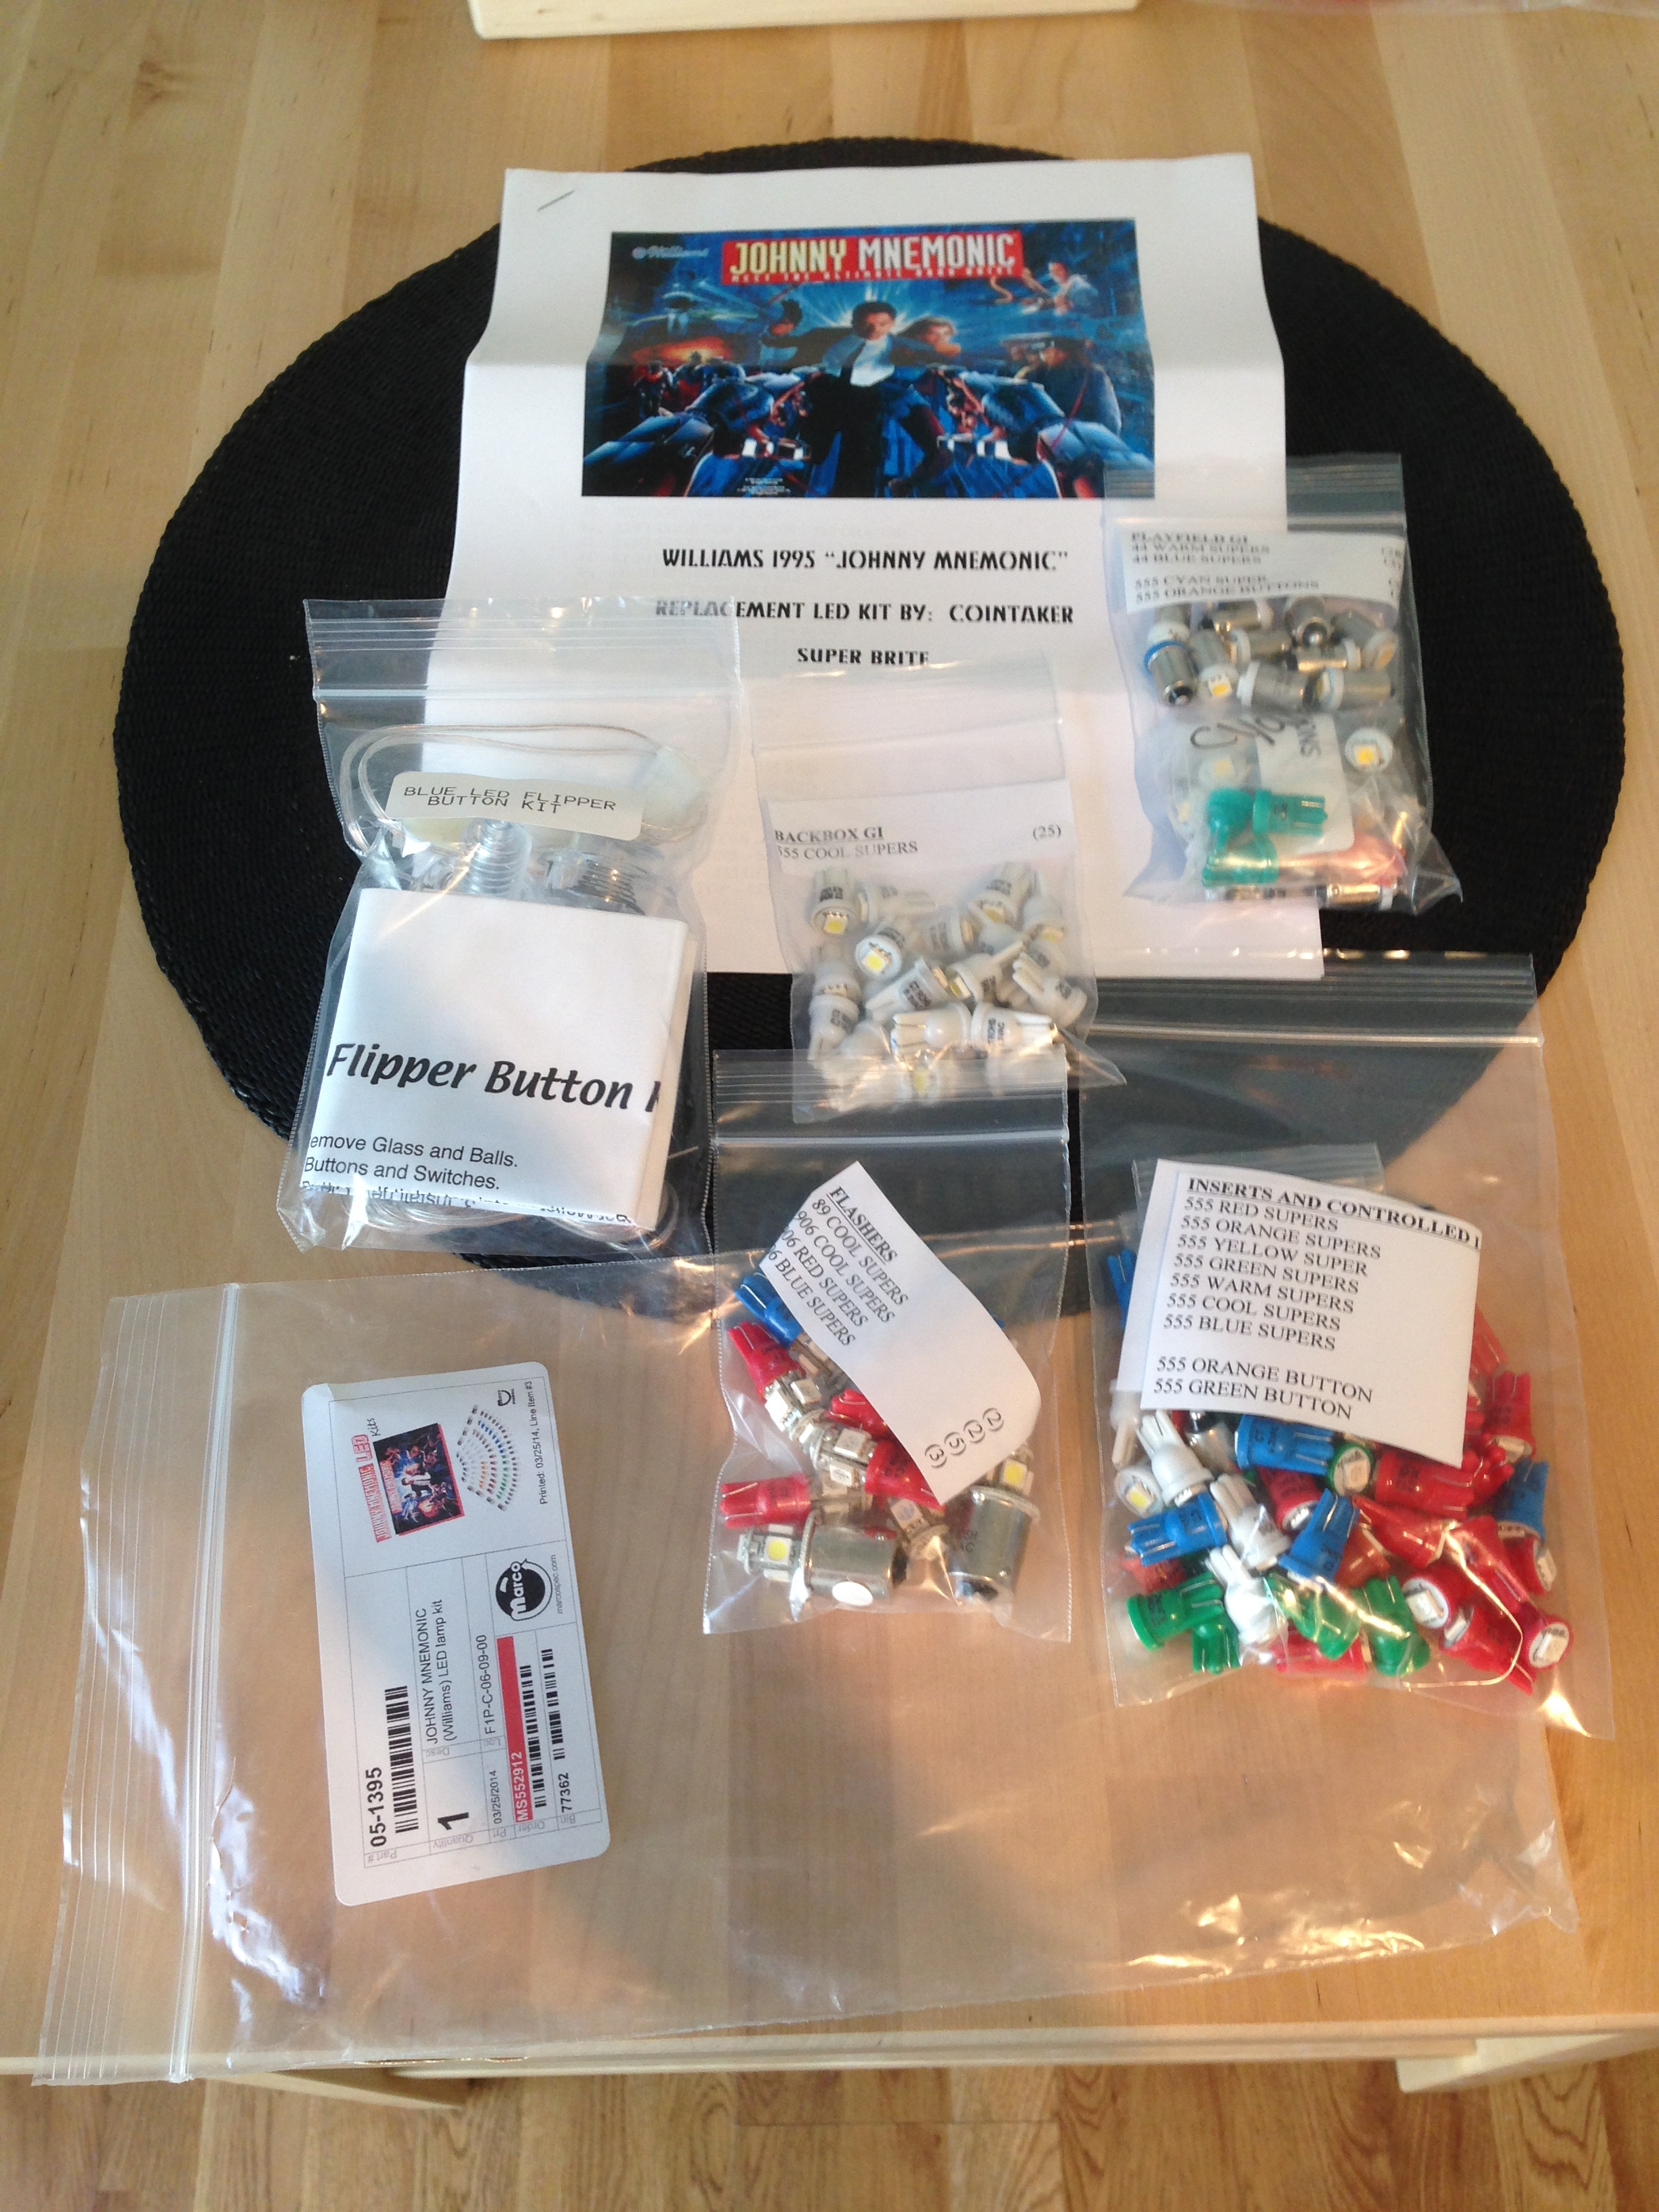
In this kit, a bulb is included for every play field insert, all flashers, all general illumination, the back box, and (quite unexpectedly) illuminated flipper buttons. A nice touch is that it even includes bulbs for the Launch Ball, Start, Extra Ball, and coin return buttons on the front of the machine.
I started with the play field insert lighting, because this is the easiest. The kit comes with a checklist of each bulb, the color, and its location. They do this by listing the bulbs in the same order they are listed in the game diagnostic menu. This means you simply run the bulb test mode, and go through each bulb one-by-one, replacing them as specified in the list. It made what could have been a very daunting process of figuring out where all these dozens of colors belong into a very easy task.
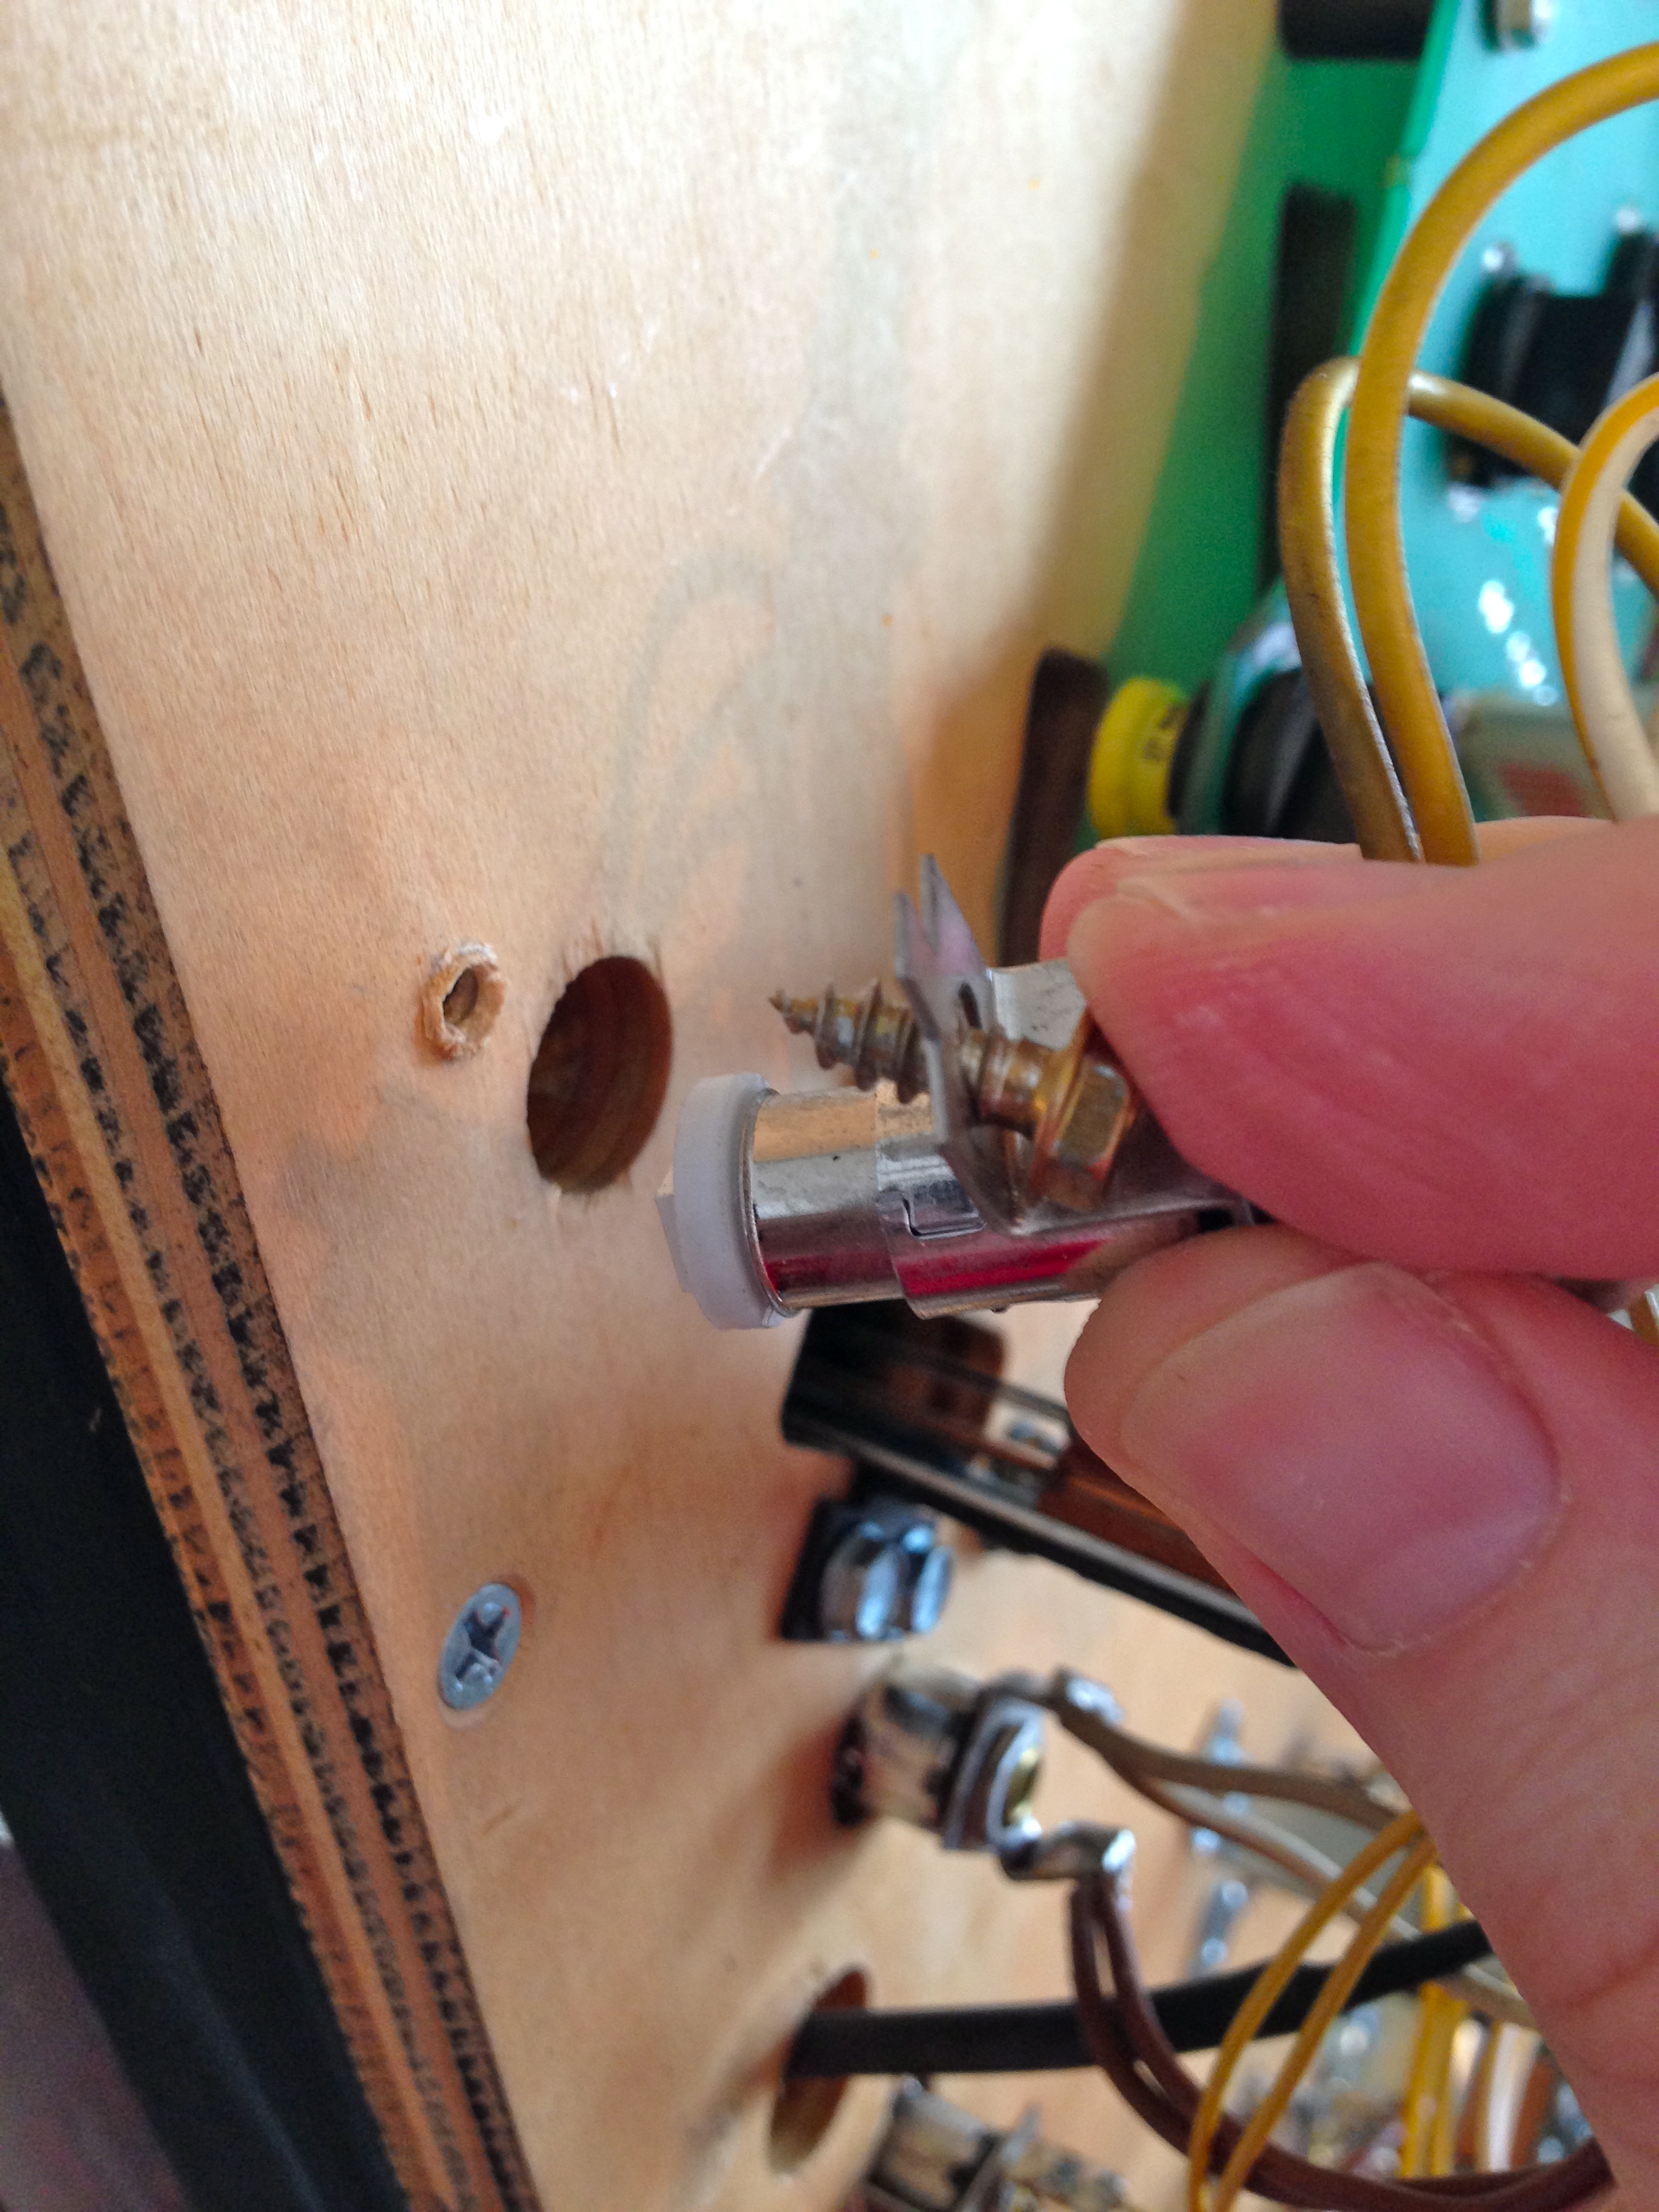
General illumination bulbs are a little more trouble. They were intended to be replaced from the top of the playfield. However, they are usually under plastics, and barely stick up enough to be grabbed with your fingers to twist them out. Removing plastics is a hassle (and you risk breaking them). Furthermore, the LEDs are shorter than the glass bulbs, so you can’t get purchase to install them from above through the thick wood of the play field.
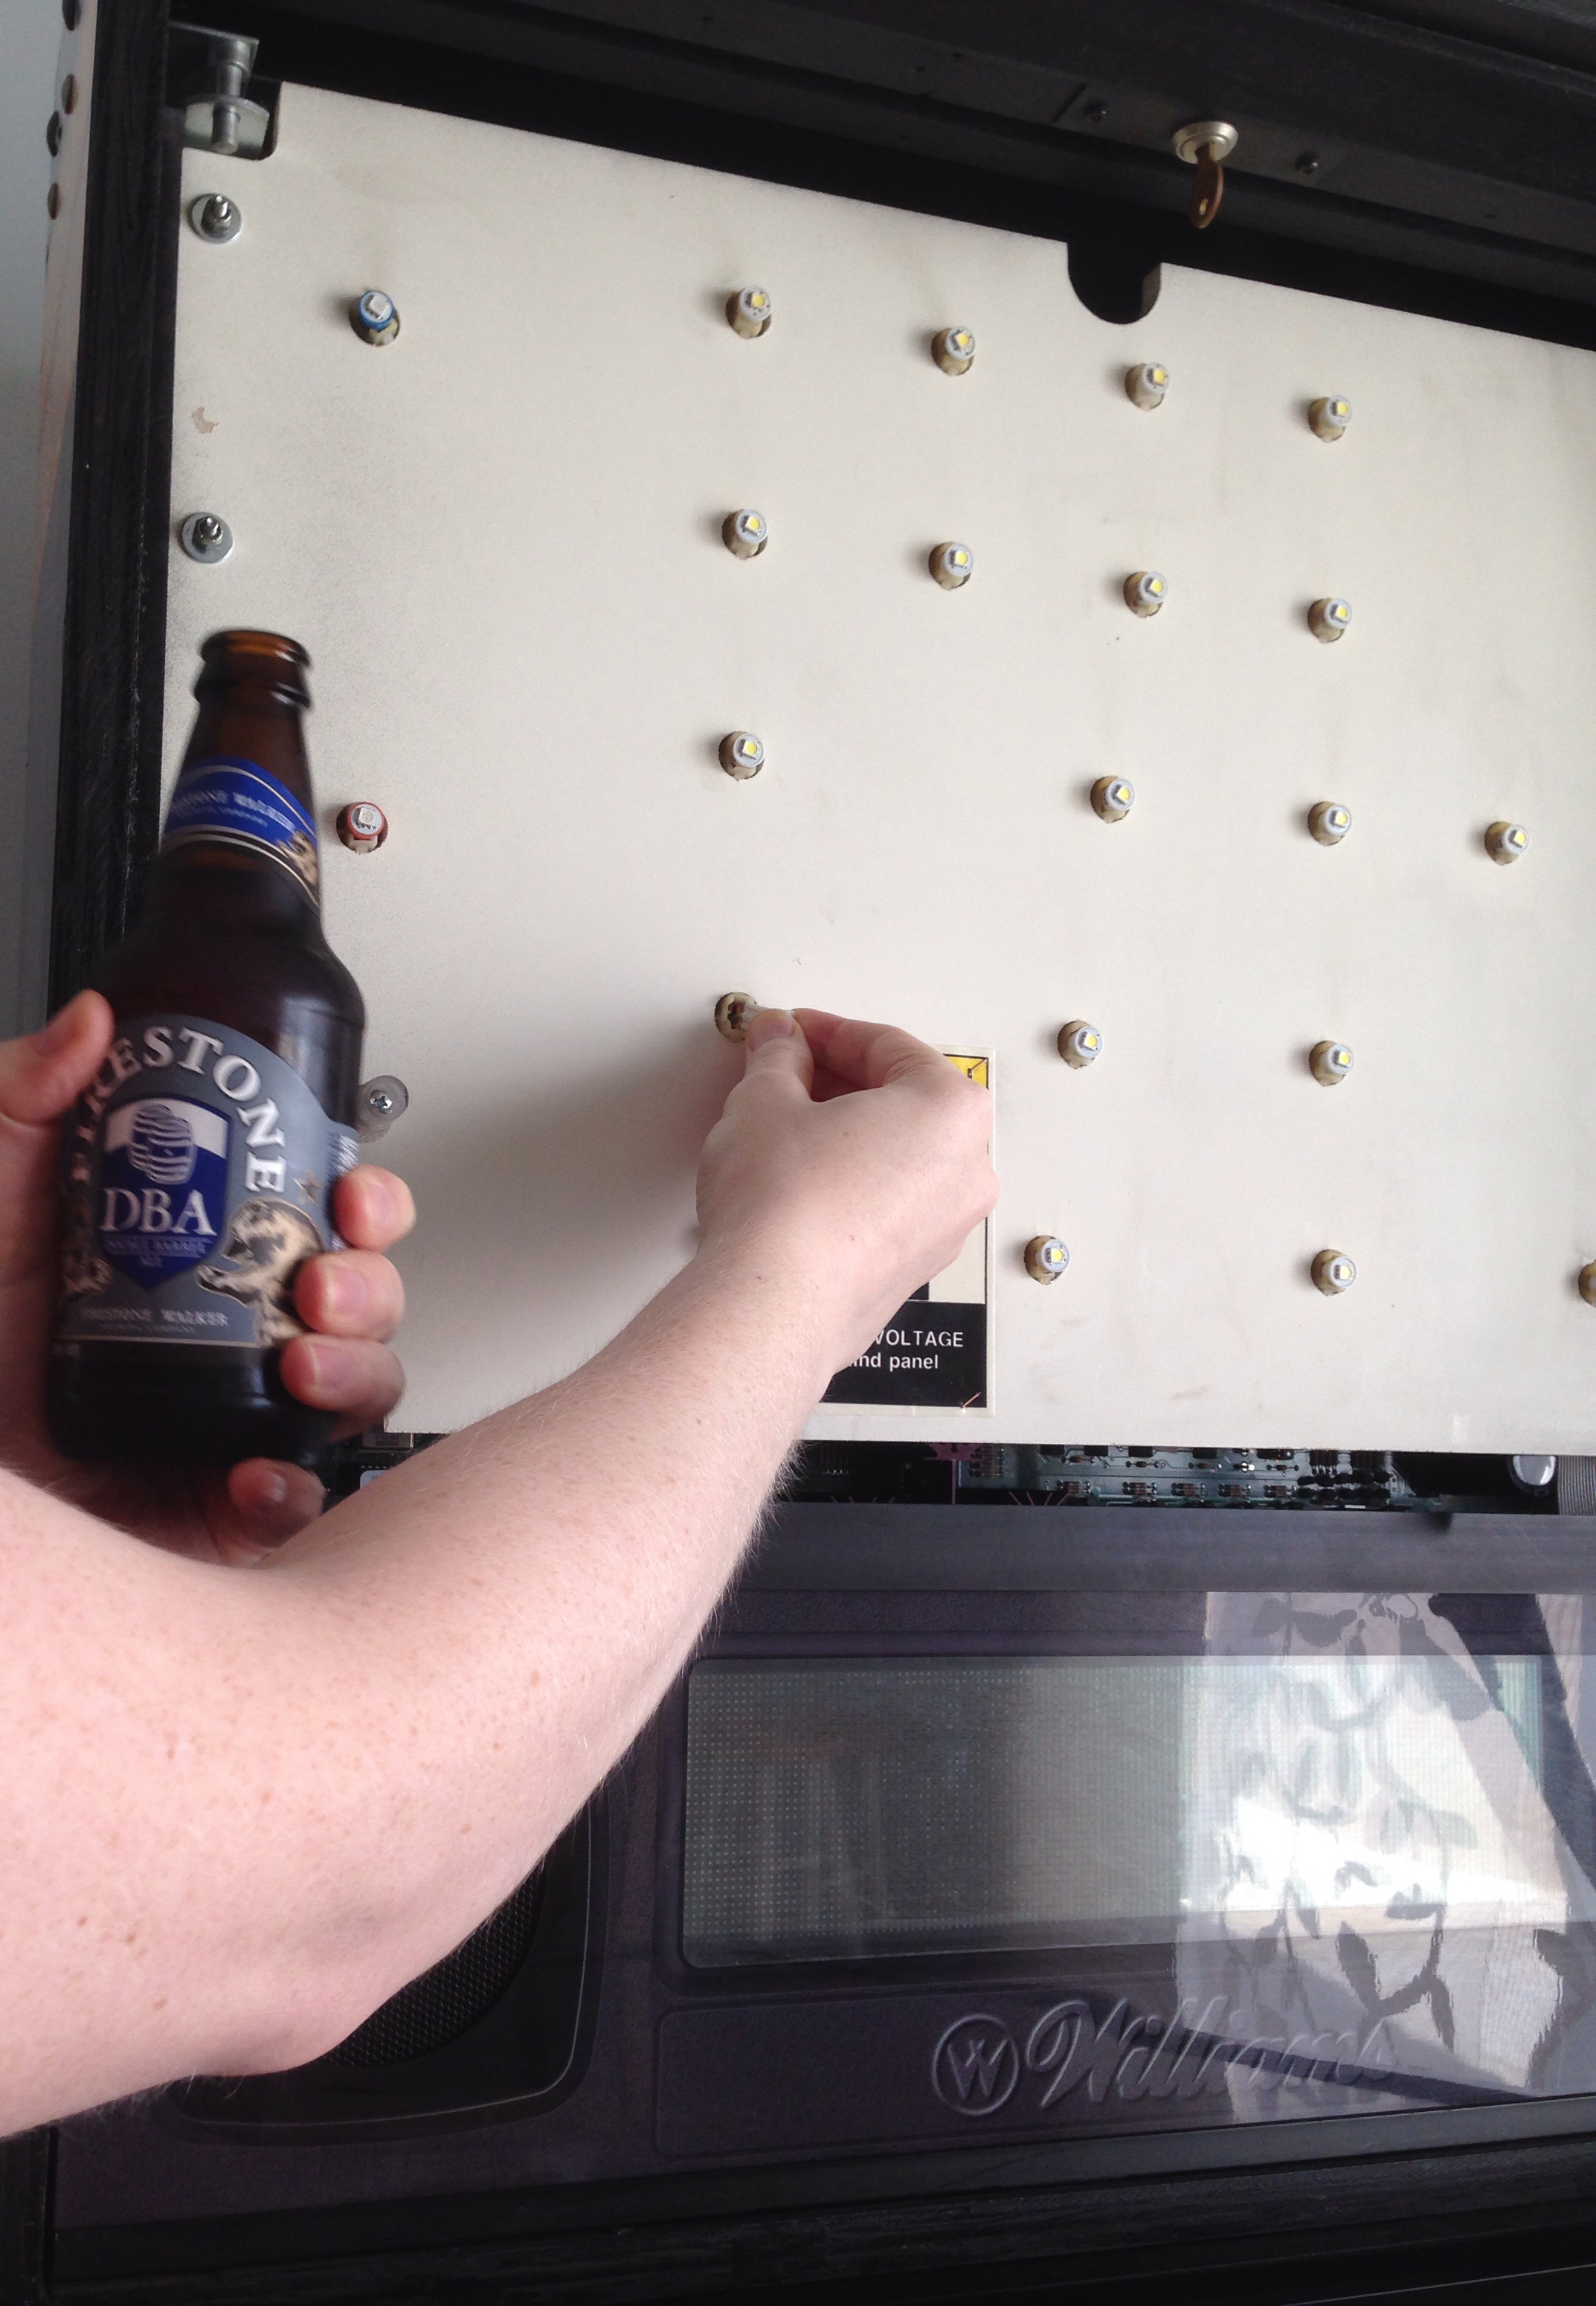
Again, the Cointaker instructions to the rescue. They recommend removing GI lighting from below, using a nut driver. This is definitely good advice. Each socket is bolted to the wood with a single 1/4″ self-tapping screw, and it’s a simple matter to remove them, swap the bulb, and reinstall the socket. You do need to be careful not to strip out the wood when you do this, since wood isn’t a great medium for removing and reinstalling threaded fasteners. Be gentle, and don’t over-tighten them. Allow the screw to pull itself in and out. Don’t apply pressure downward.
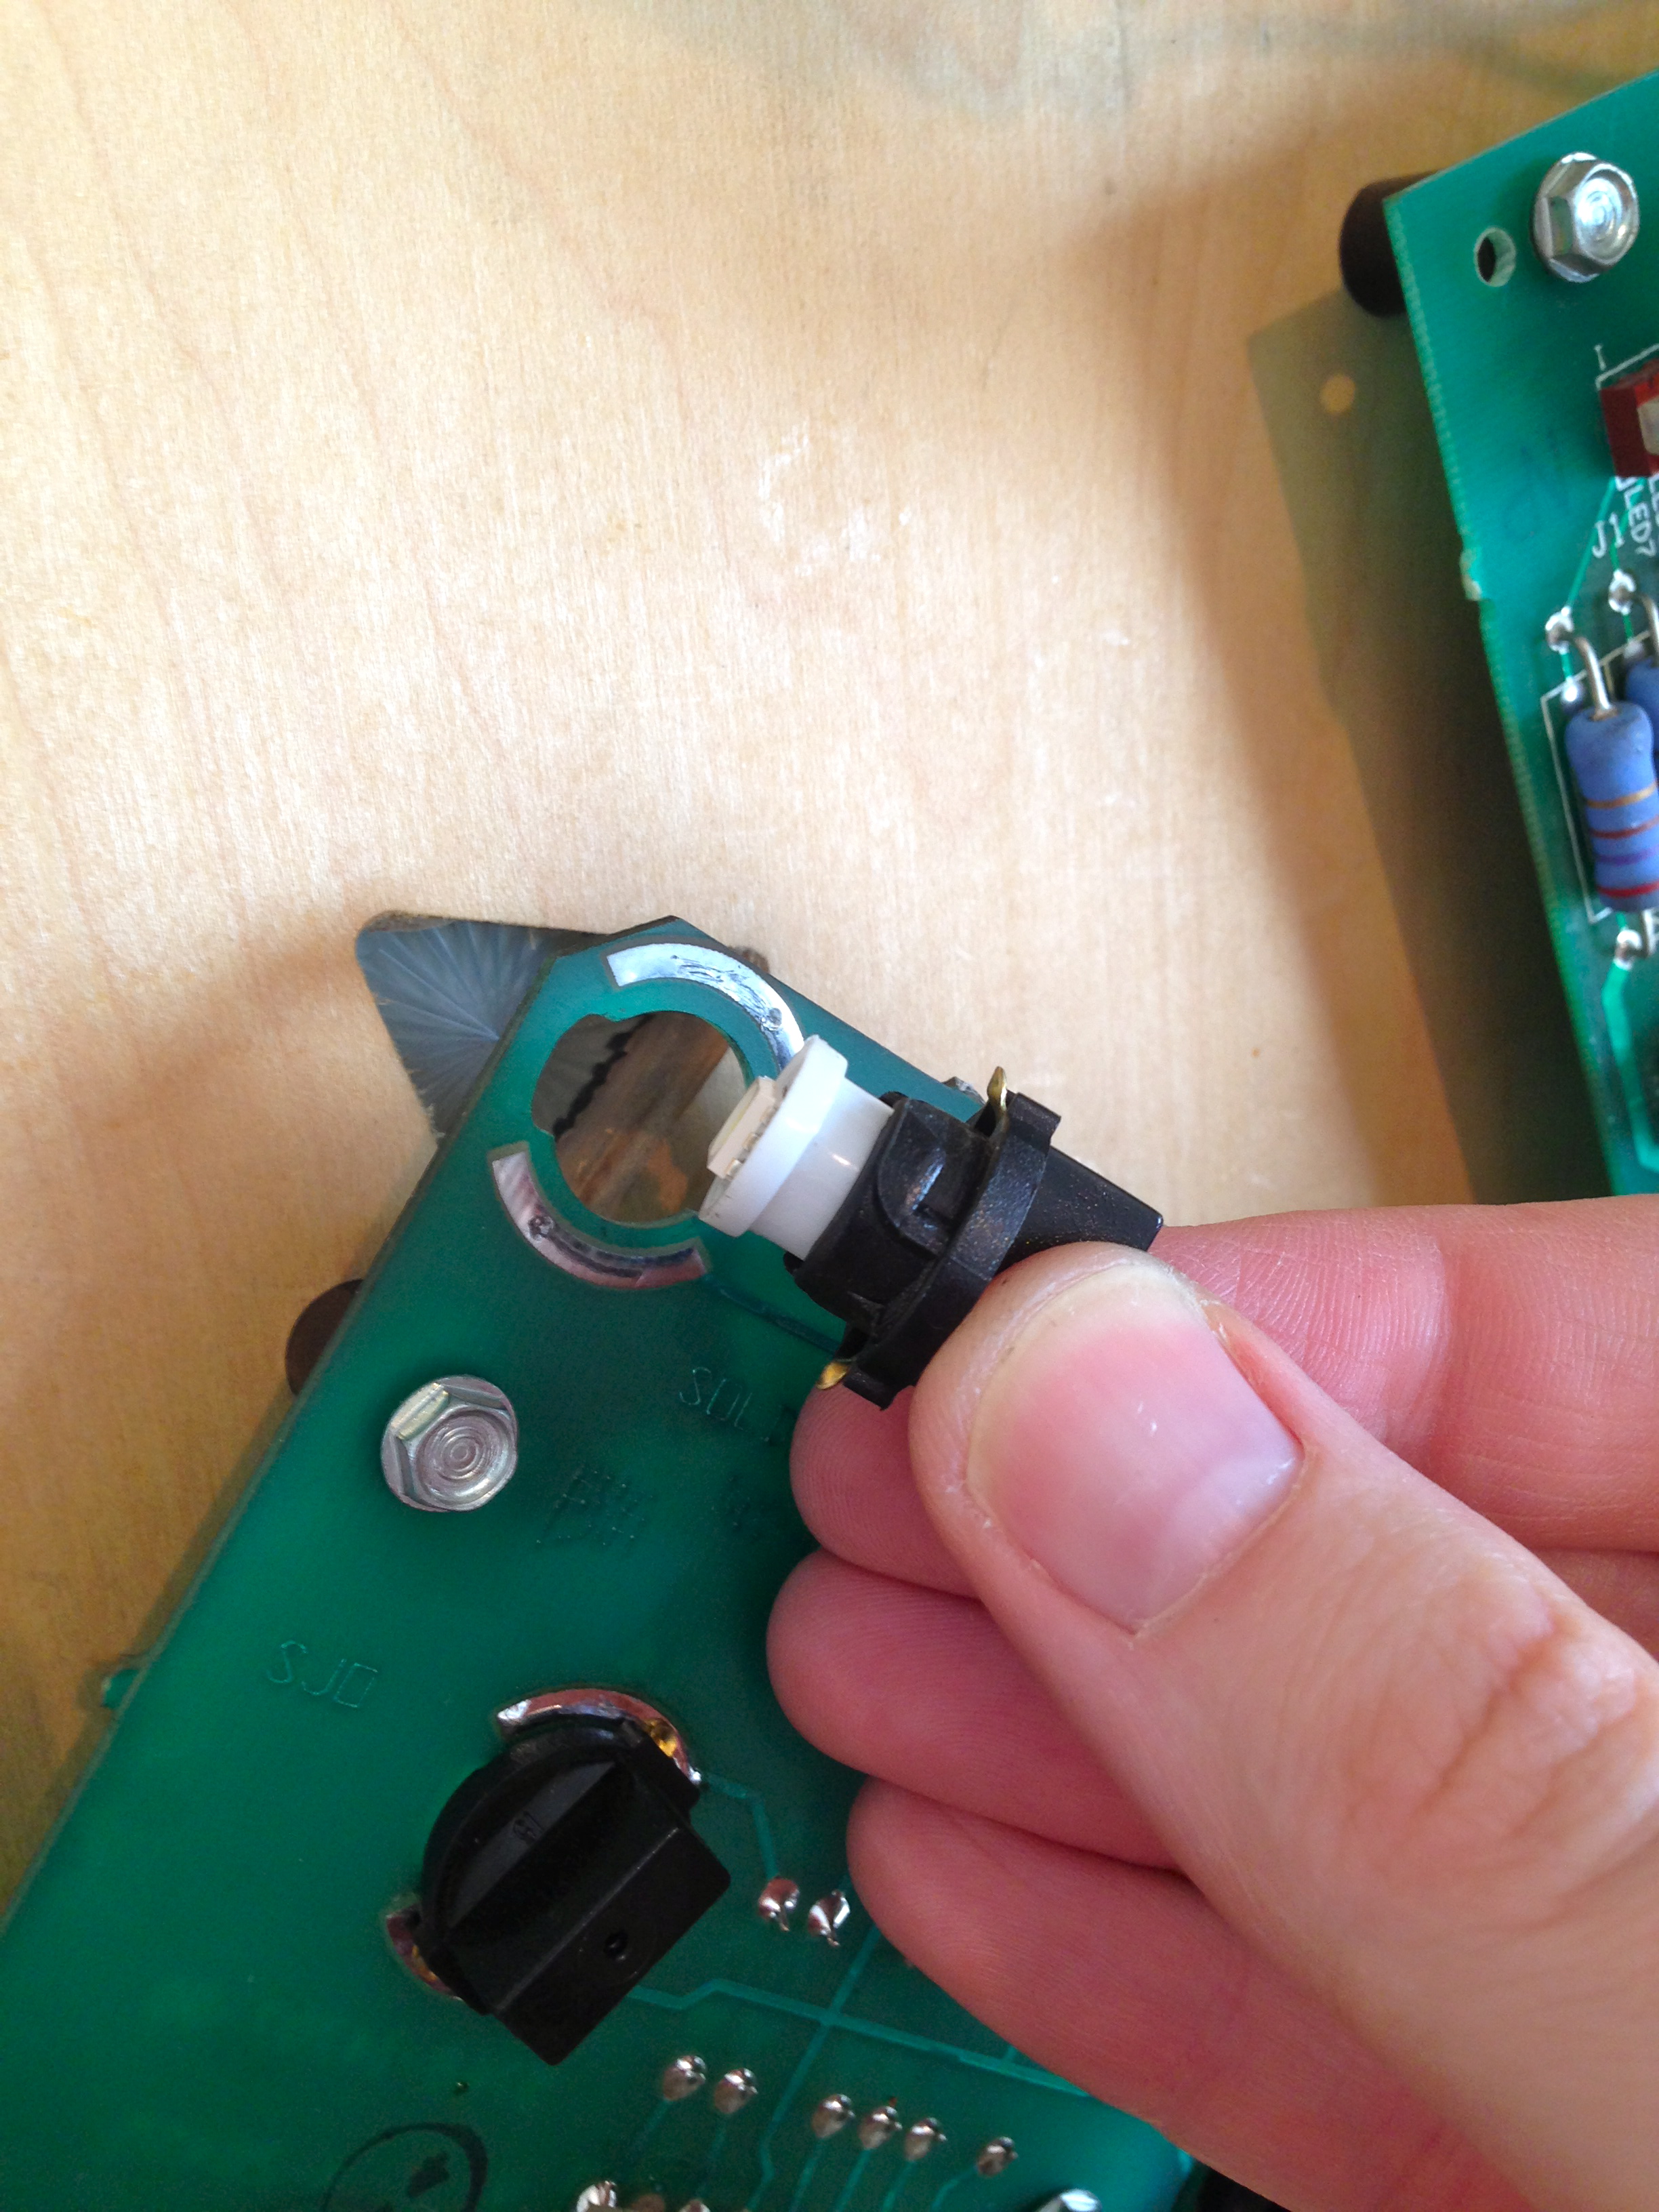
The back box is entirely trivial- each bulb pops right out, and the new one pops right in. You don’t even have to put down your beer for this part.
Each game will have a few unique lighting peculiarities to deal with. Johnny has two that are noteworthy. First is the cybermatrix. This is a 9-position mechanical ball lock. Each of the positions is a button that the ball falls onto (when dropped from the glove). Each button is lit from below to indicate various game states. These bulbs are buried inside the assembly, requiring the removal of the whole thing. This is another great reason to do an LED conversion- some bulbs in these games are very difficult to reach, and LEDs mean probably never having to go through this again.
Removing the cybermatrix should be a simple matter of two nuts on the backboard, but that would be too easy for Blondihacks, right?
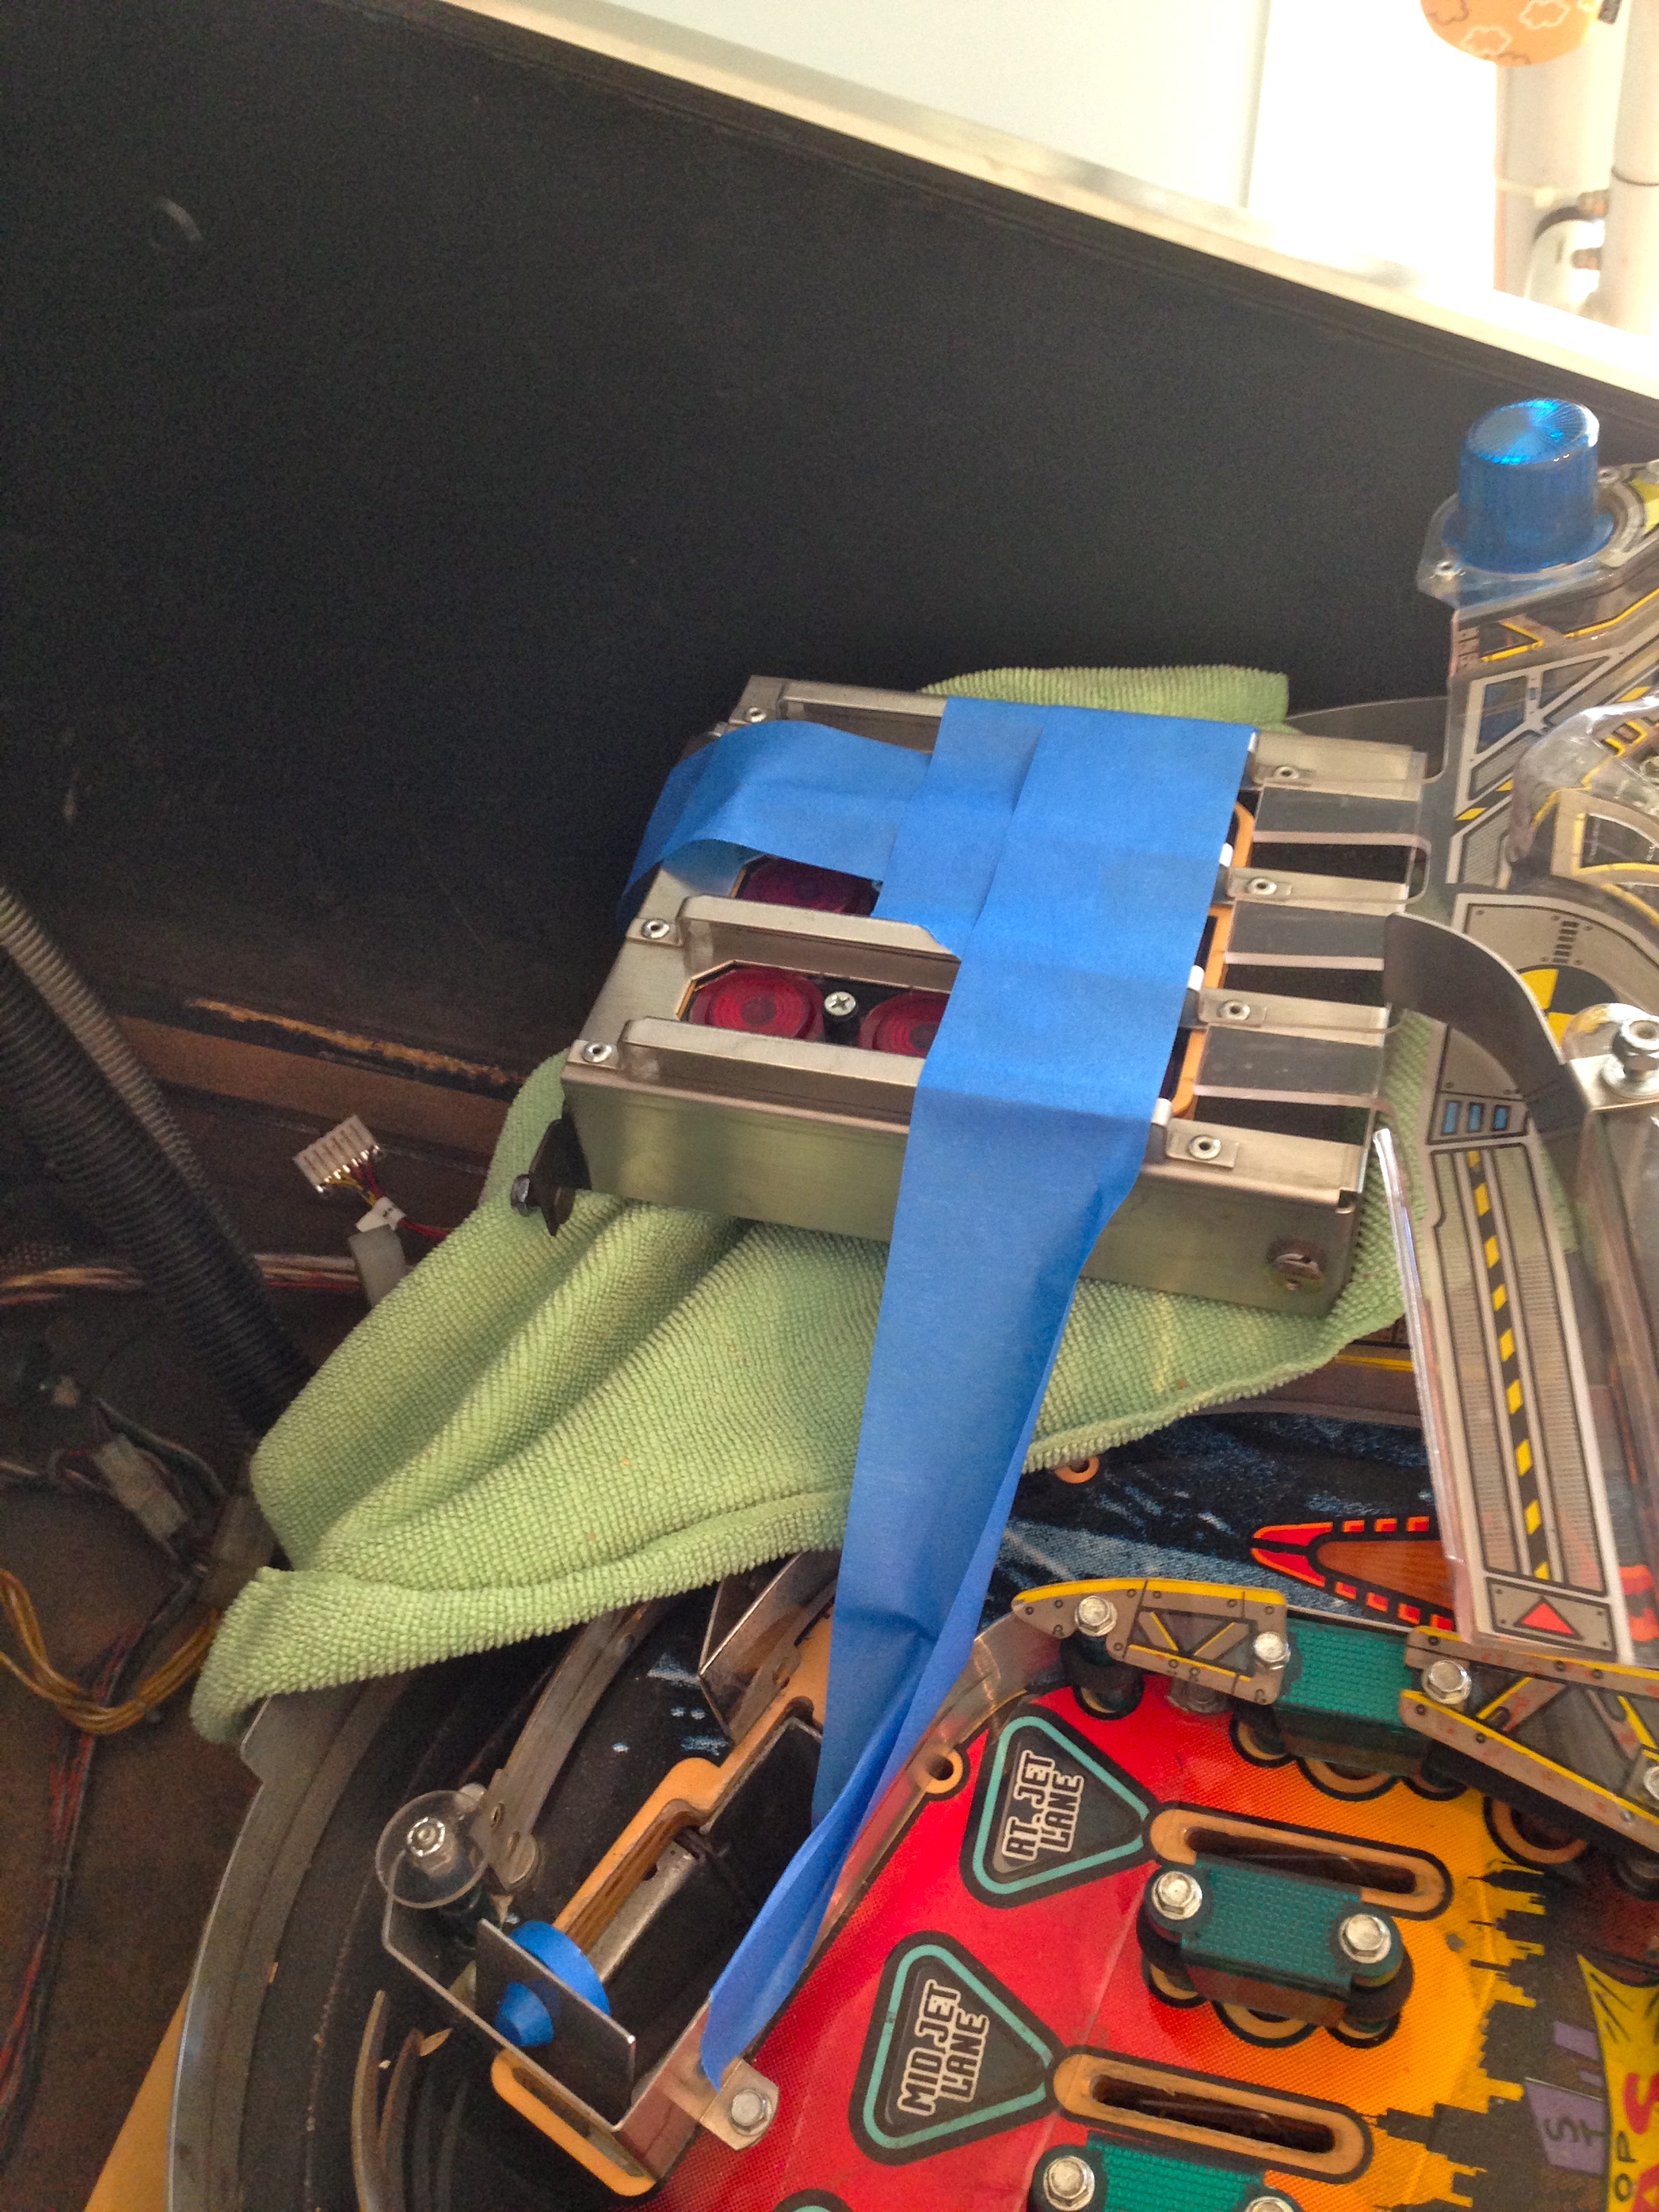

I ended up having to loosen the backboard, loosen all the plastic ramps, loosen some plastics, and generally do a lot of reverse Tetris-ing to get that cybermatrix off the play field. I wanted to make sure whomever comes after me didn’t have to go through that, so I set about fixing the issue.
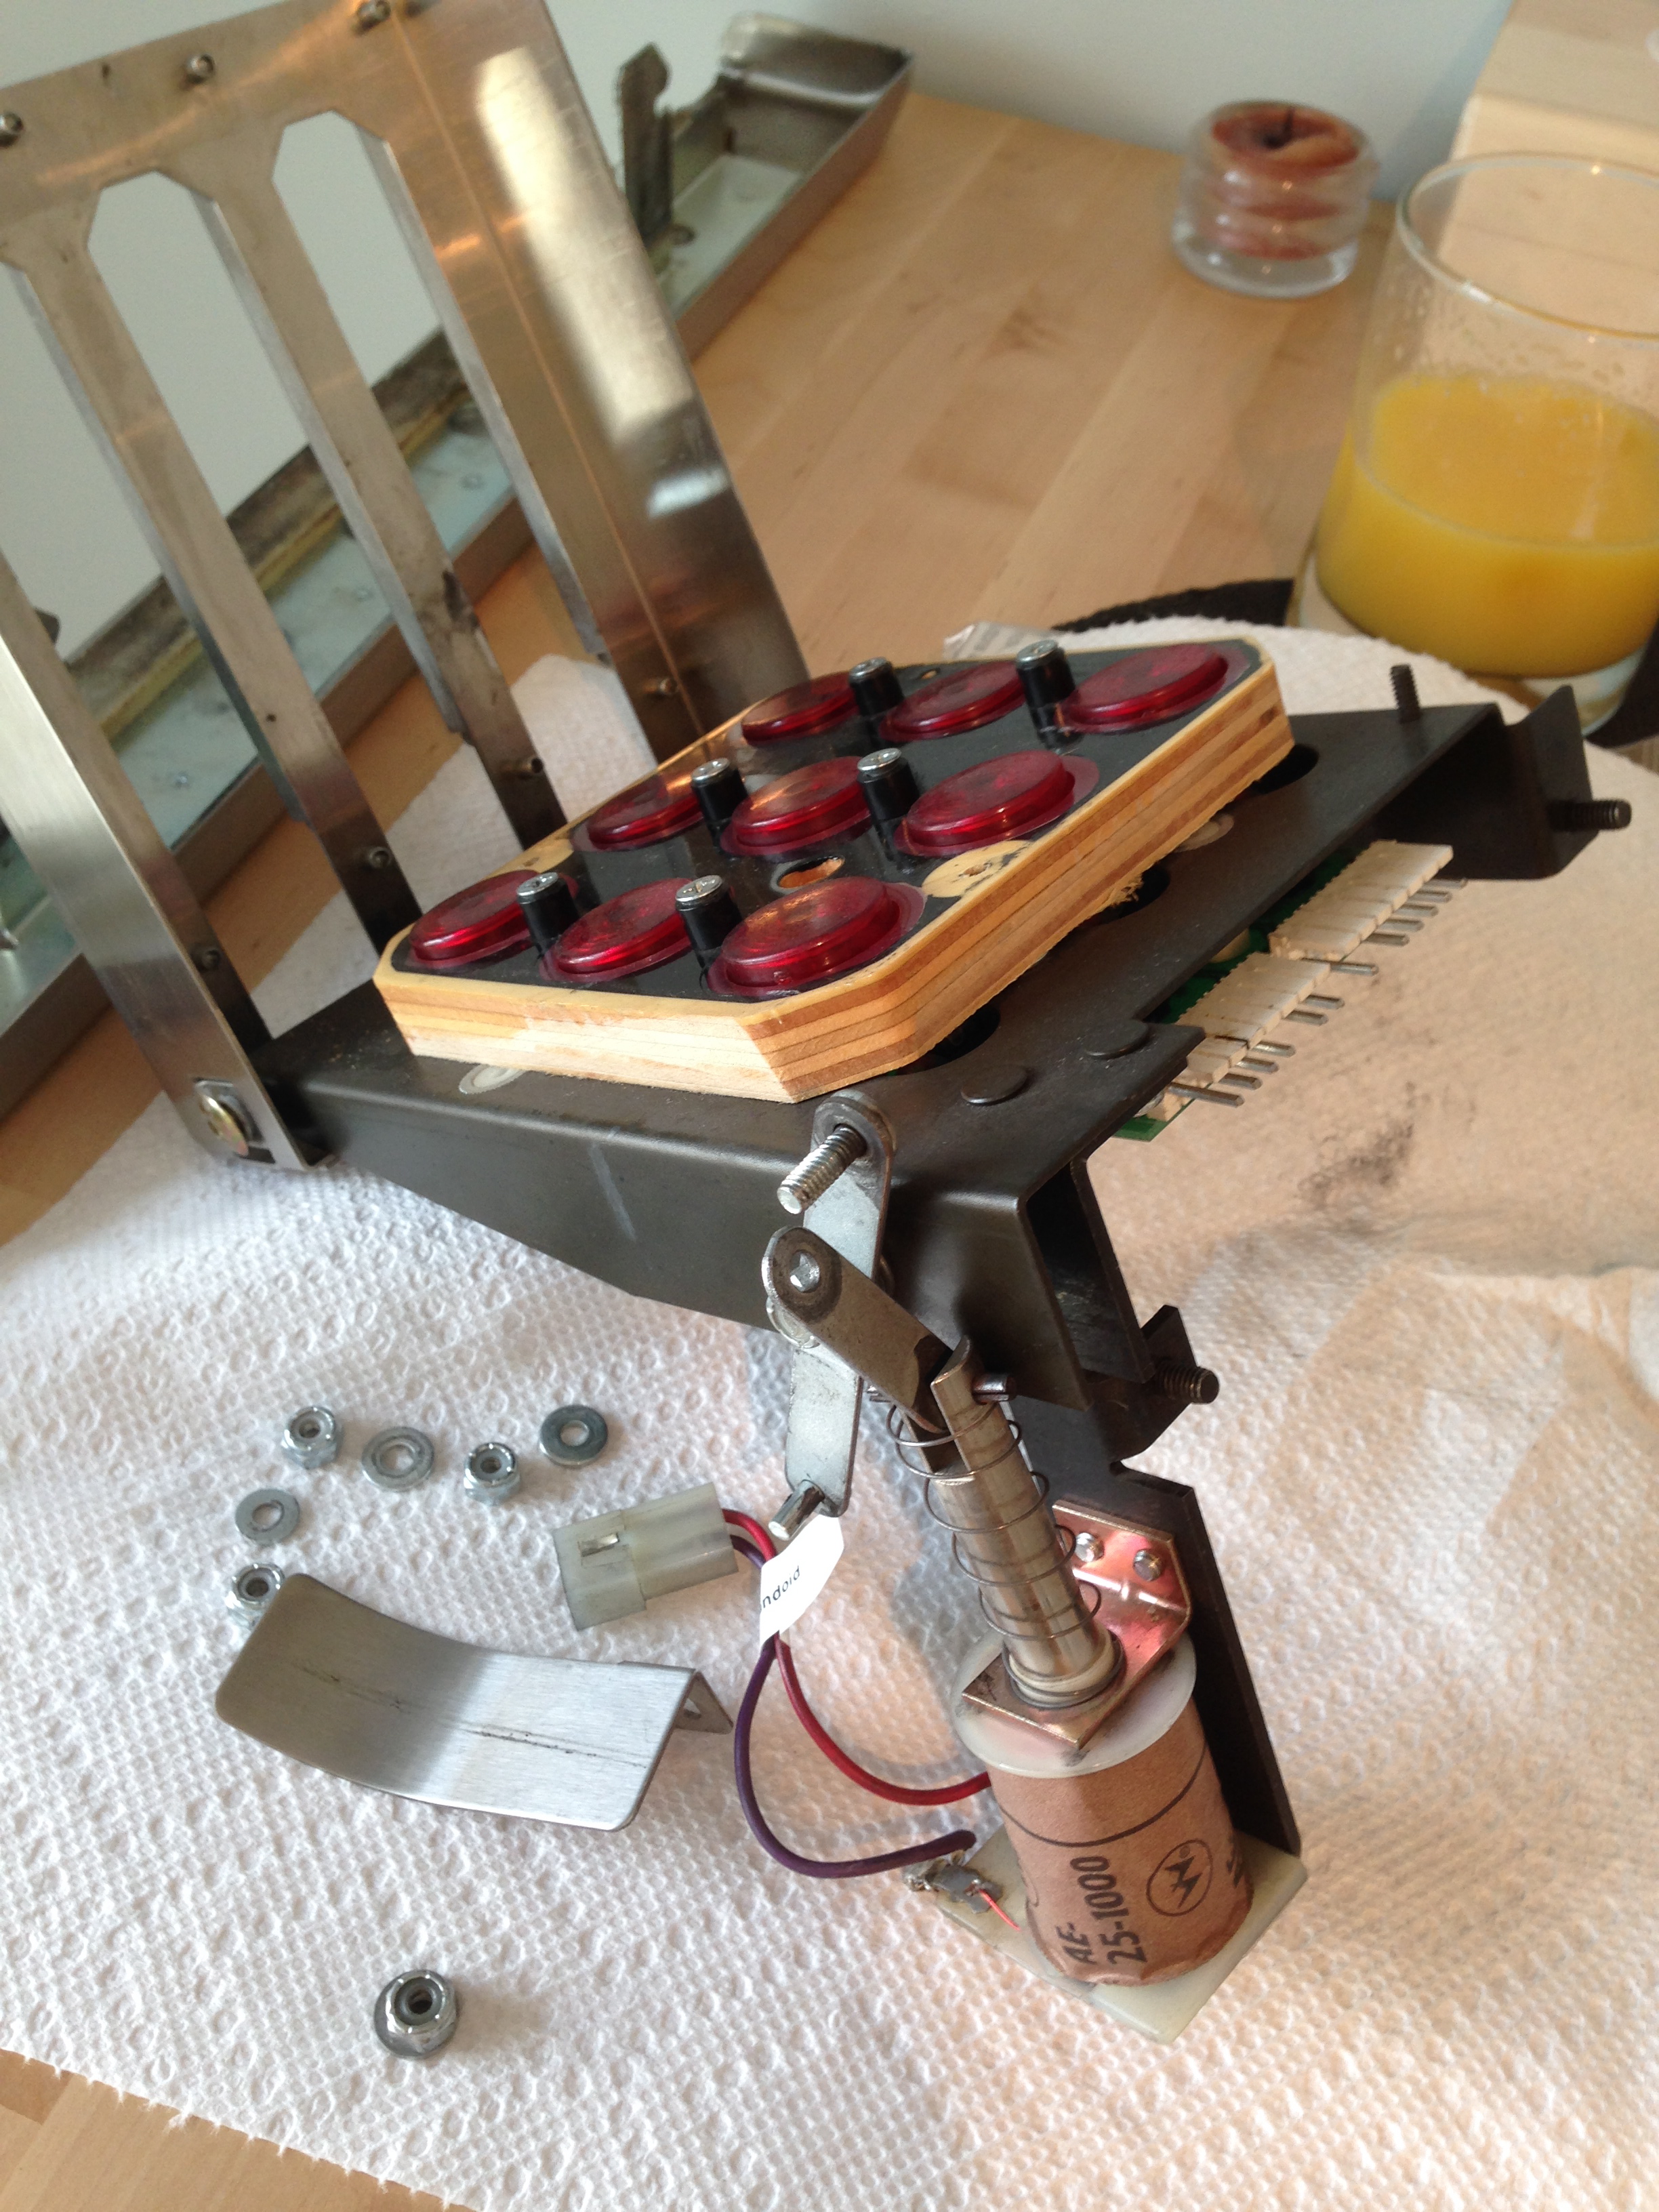
With that resolved, it was a simple matter to swap the cybermatrix bulbs from underneath this assembly. Note that sometimes it takes multiple insertions to get a 555 LED bulb to work correctly. This is because of those delicate wire contacts I mentioned earlier. Also, some of them are polarized, and need to be tested, then flipped if they don’t work. Because of this, I connected the electrical on this matrix and ran the lighting tests before reinstalling the whole assembly on the play field. Once installed, these bulbs are completely inaccessible for any adjustments.
The moral is, always test each bulb with the machine on before reinstalling anything that makes the bulbs hard to get to. This is generally only an issue for the press-fit 555 bases. The other style (the base 44, twist-in kind) don’t have these concerns.
The second unique issue with Johnny is the bulb inside the lower jet bumper. It has to be removed from above, by removing the plastic cap on top of the bumper. However, to access the screws holding the cap, you have to remove two of the enormous plastic ramps that are in the way. These ramps are fragile and very difficult to replace, so I’ve opted to leave that bulb as an incandescent for now. I made a note to replace it the next time I have those ramps off for some other reason. It’s not worth risking damage to them for a bulb that you can’t really see anyway.
So, was it all worth it? Let’s check out the sparkle in Johnny’s eyes now.

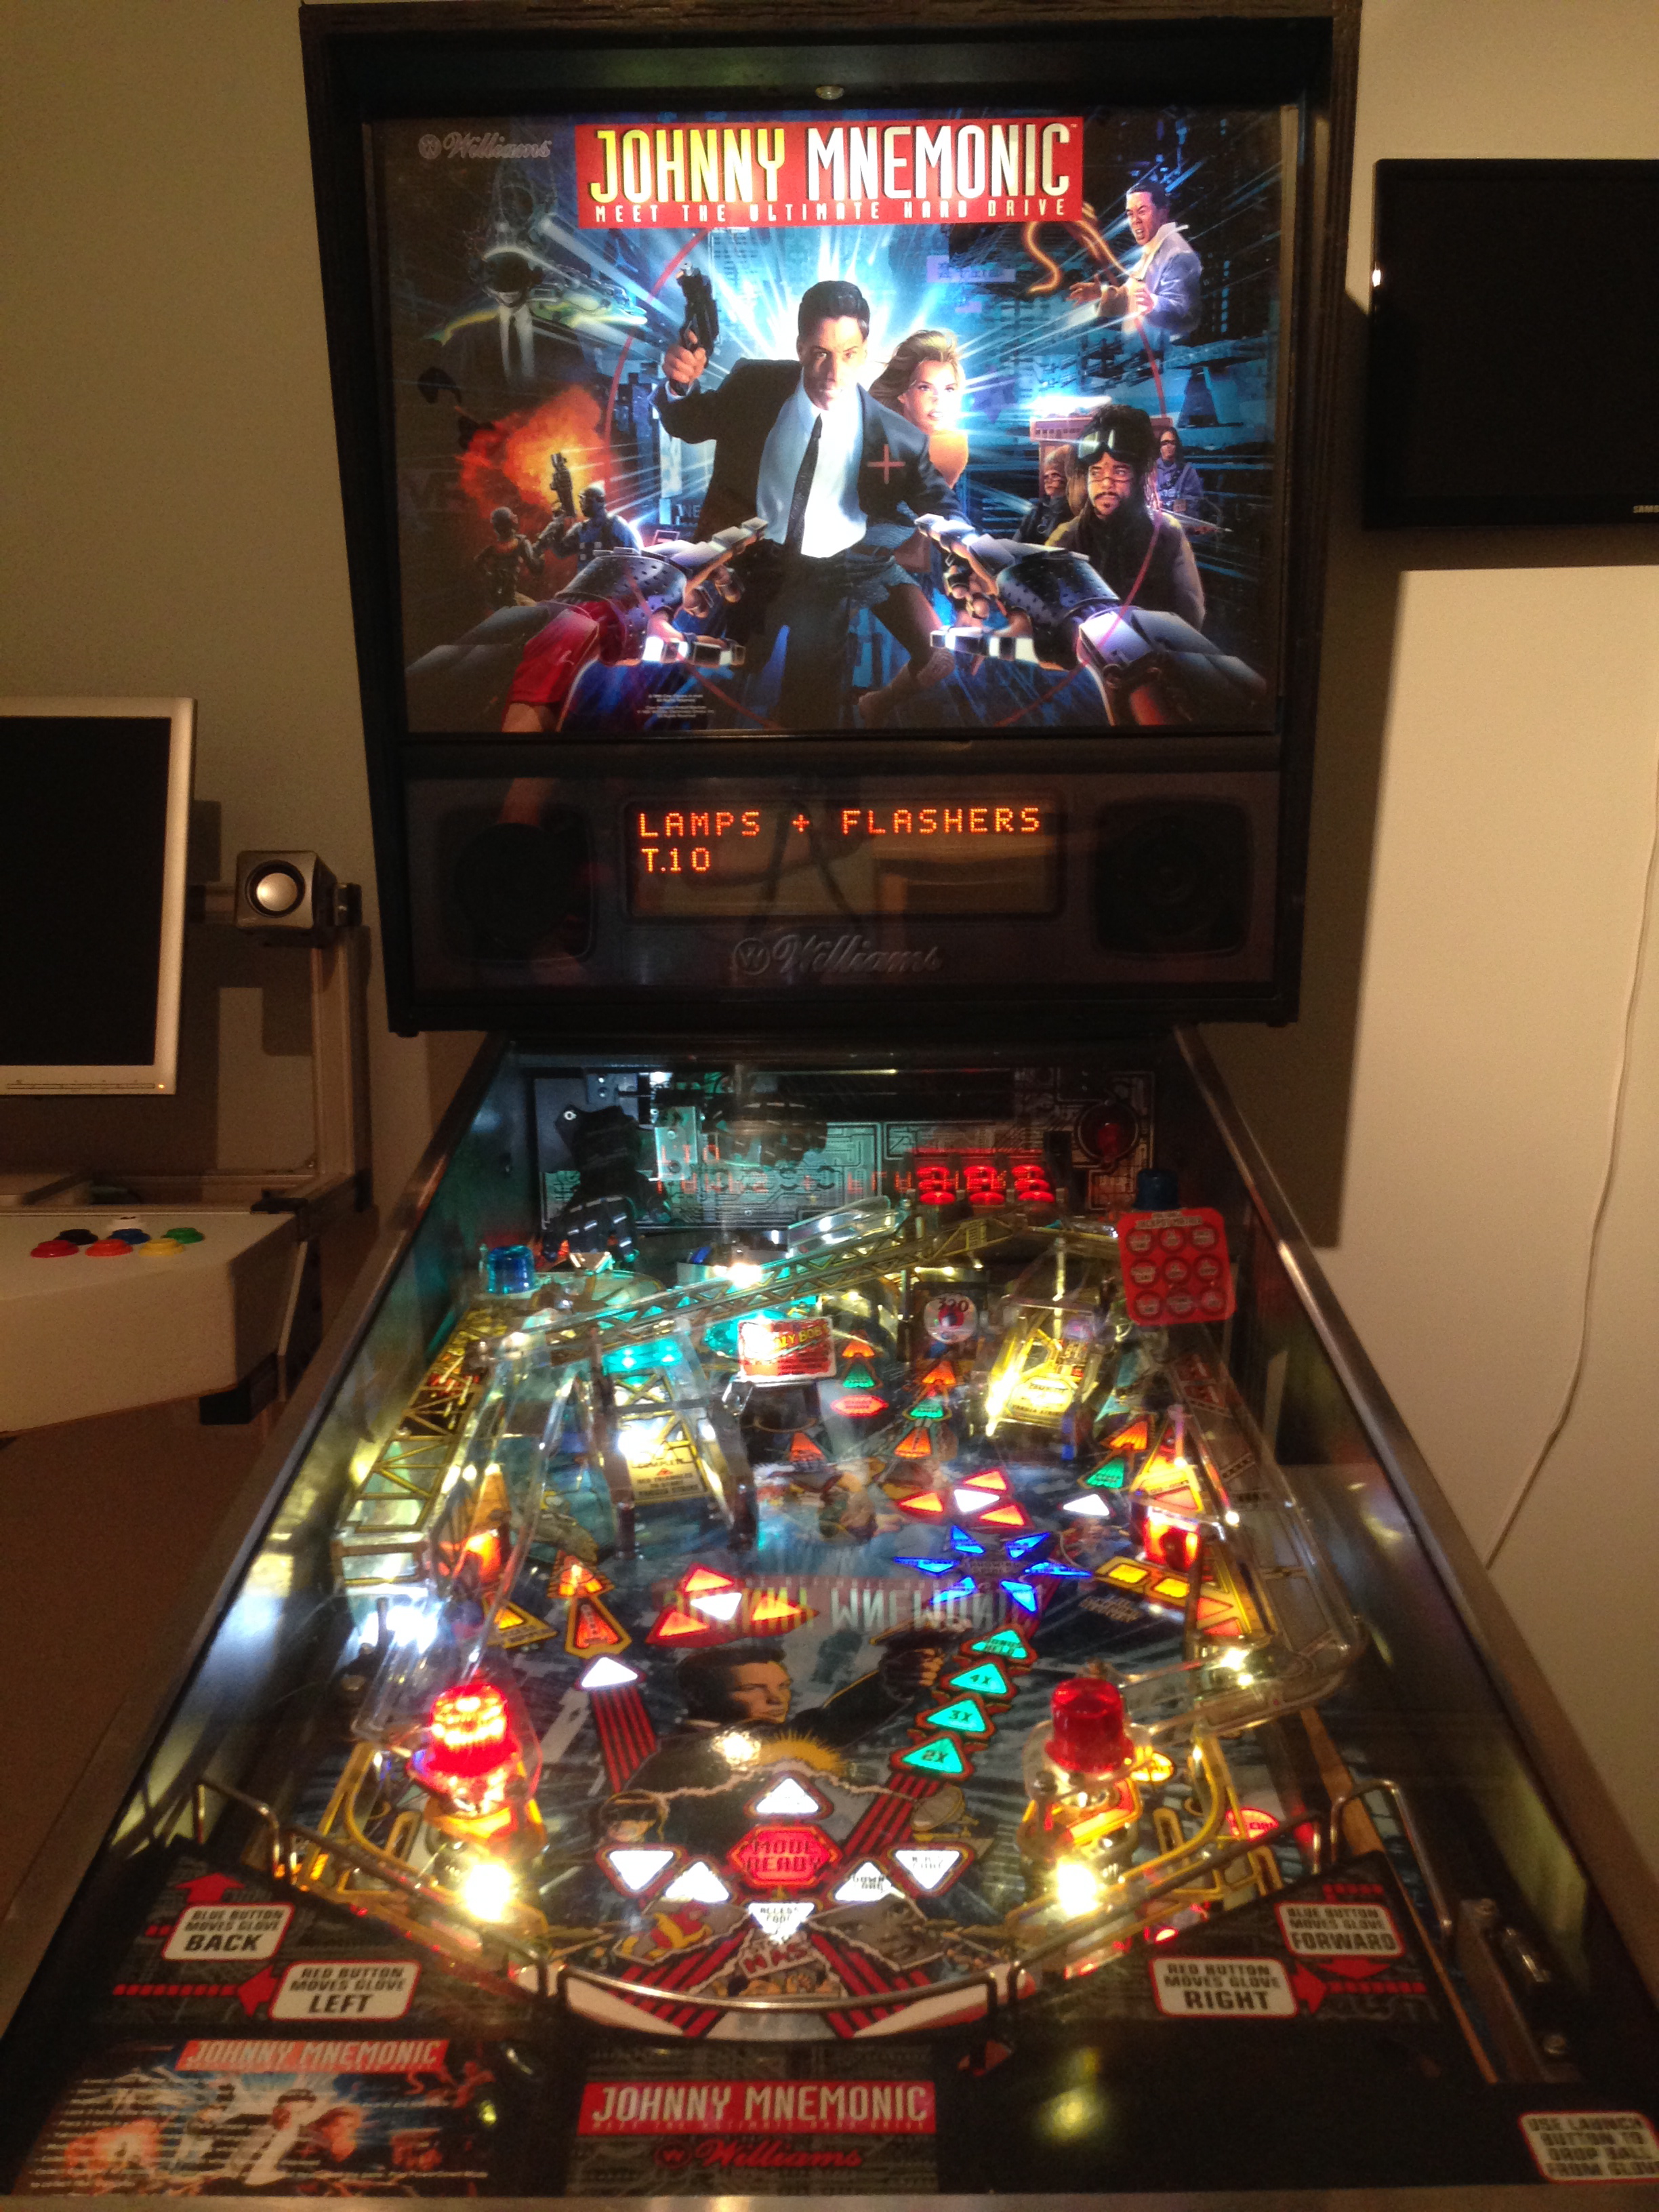

I know there are lots of folks who prefer the original look of incandescents. For me though, there’s simply no contest. Even with the minor quirks of LEDs, they are such a huge improvement in the way the game looks and feels. Plus they’ll preserve the life of the plastics, some of which are nigh-on irreplaceable.
One last look, in case there’s any doubt. here’s a split view taken with about the same ambient lighting. LEDs on the right, old-fashioned glass toaster Edison things on the left.
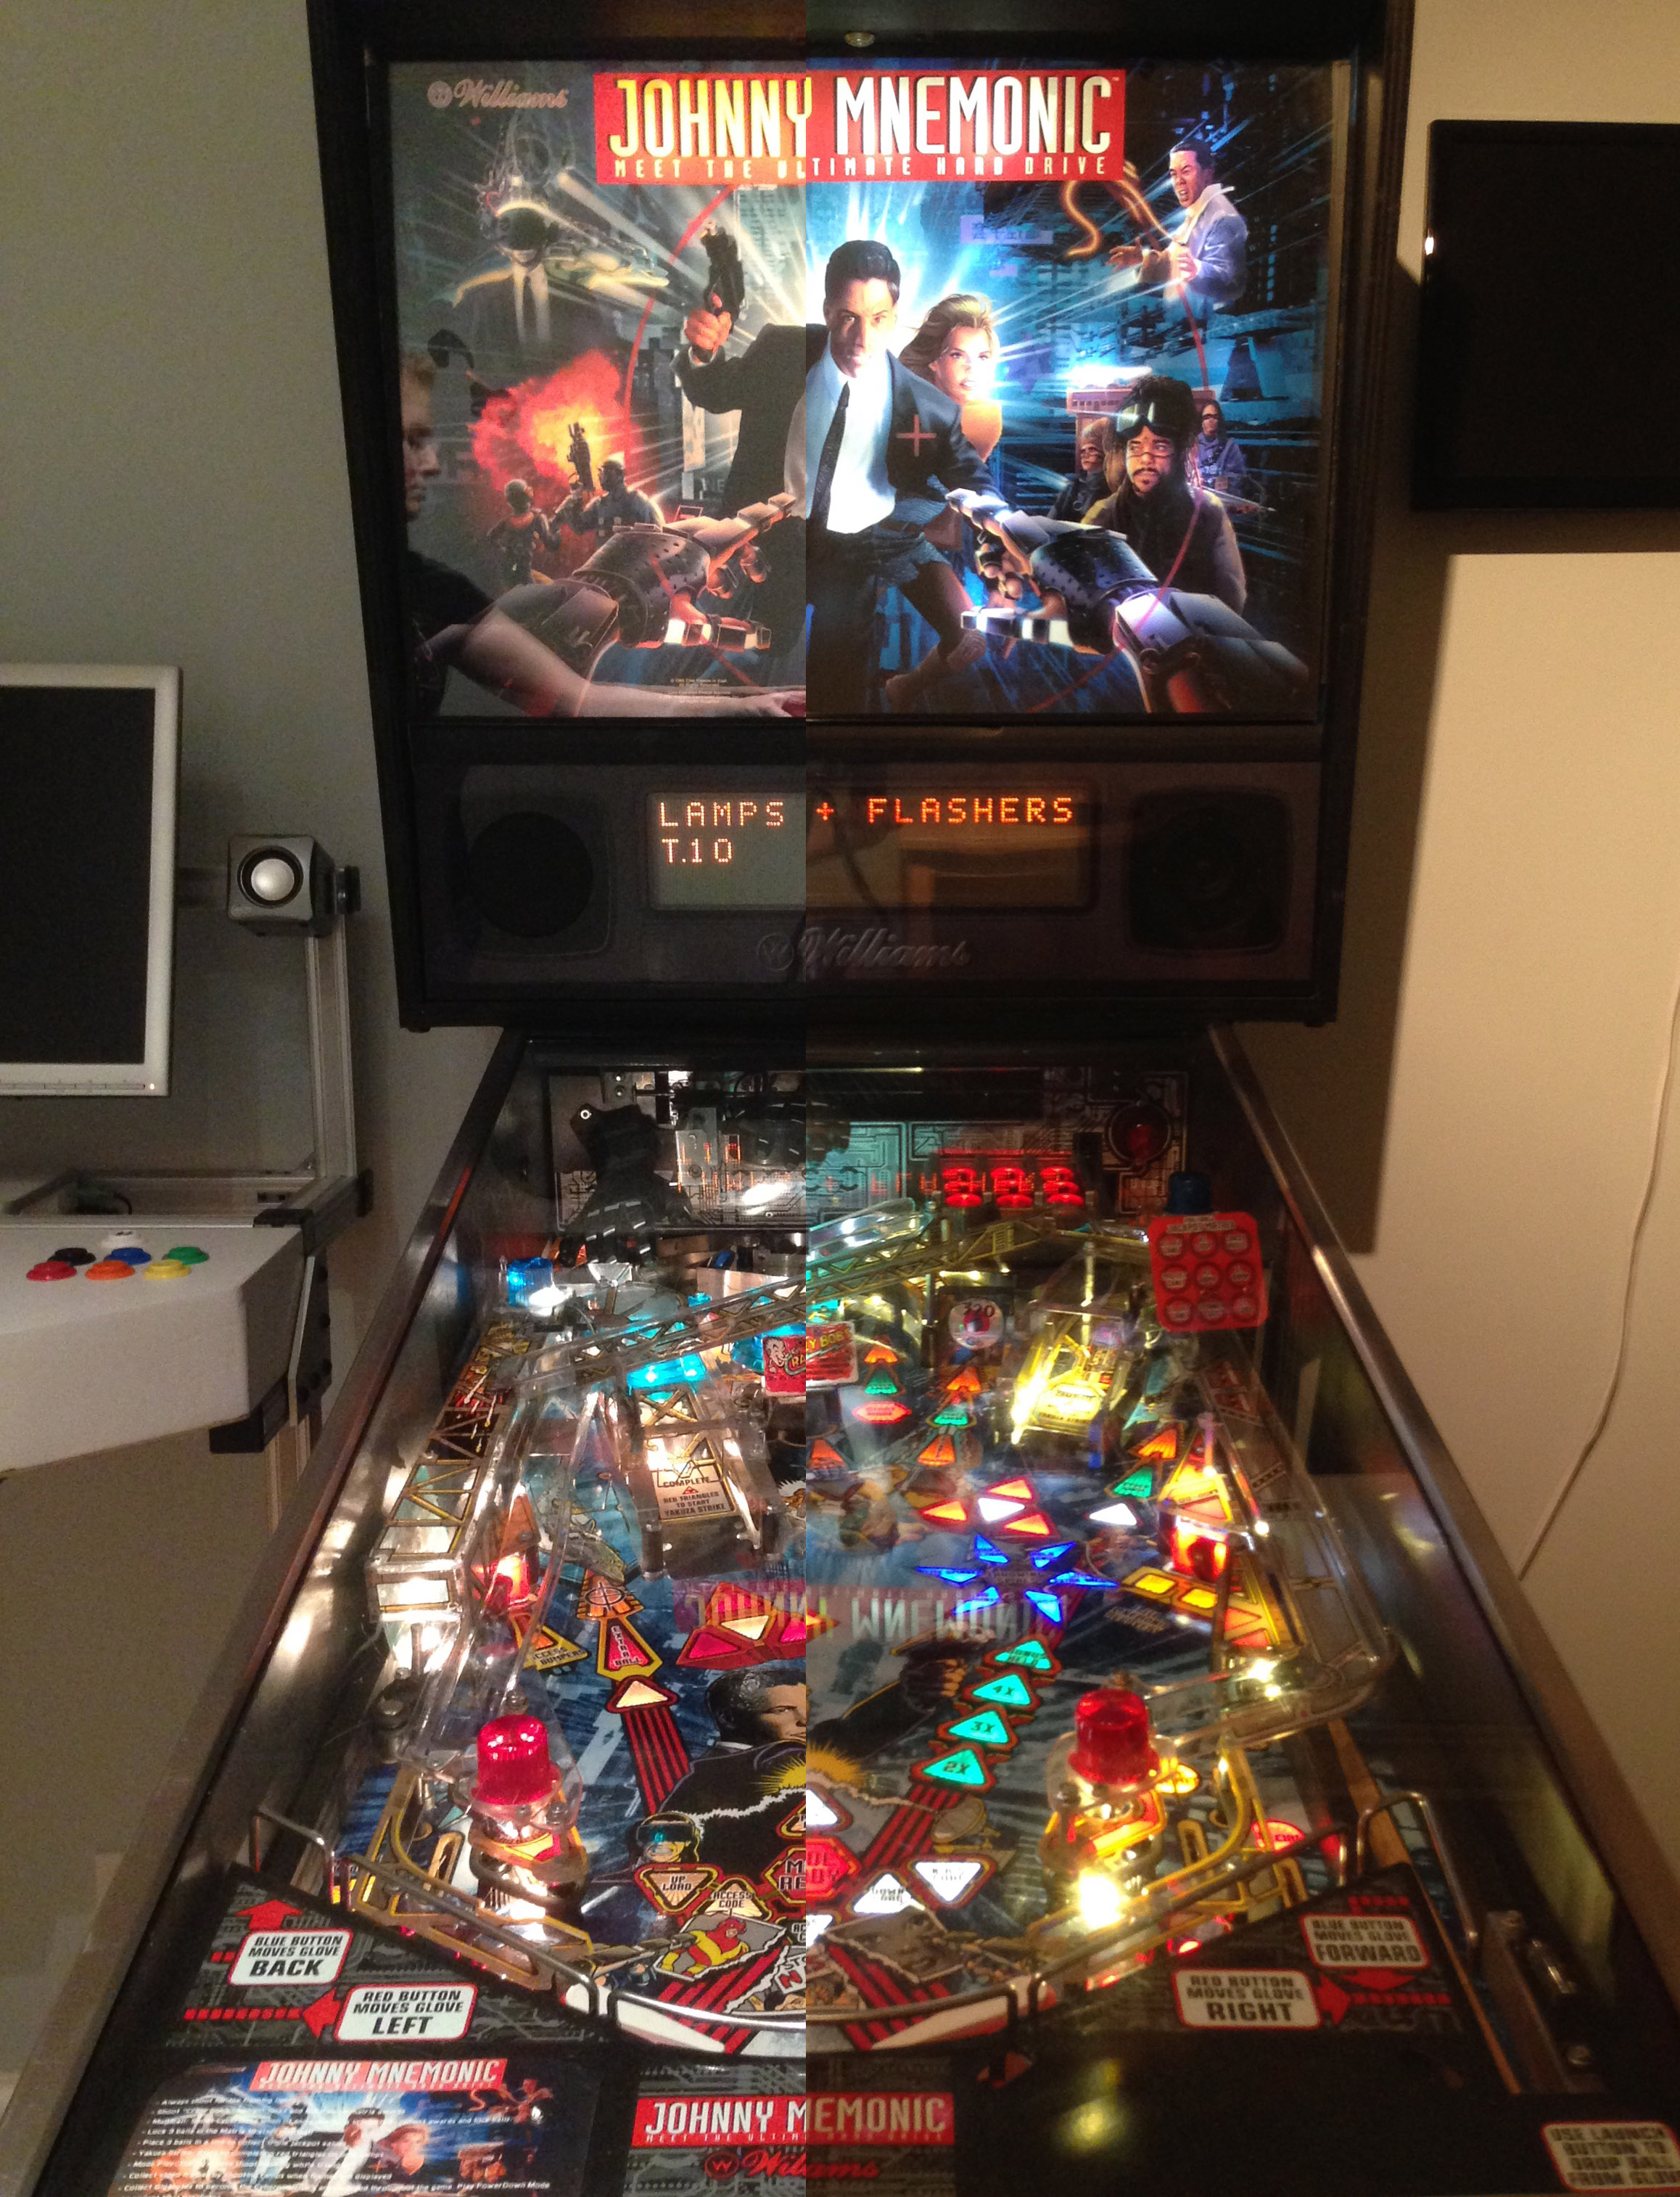
Huzzah for science!
“Voltage concerns solvable”—I wasn’t aware I couldn’t simply replace my incandescents with LEDs. How on earth am I supposed to address voltage concerns? I wouldn’t have the faintest idea where to start.
Sorry, I should have explained that better. These bulbs have integrated current limiting resistors so that they can run on whatever voltage level they are intended for. Some of the larger ones, such as the flashers, have multiple light-emitting junctions on them, so I wouldn’t be surprised if they are wired in series to drop voltage and limit current that way. Although, I hope that isn’t the case, since wiring LEDs in series is a big no-no for the longevity of them. At the price point these are targeting though, it wouldn’t shock me (pardon the pun). Maybe I’ll tear one apart and get the scoop.
What’s the problem with wiring LEDs in series?
My understanding was that series is OK, as long as you still have the appropriate current limiting (a resistor, or some fancy constant current supply). It’s wiring them in parallel, sharing a single resistor, that’s the big no-no.
The problem with wiring them in parallel is that the LEDs will never be quite identical, and one will take a slightly higher share of the current. That will make it a little bit warmer. And that reduces its forward voltage, causing it to take an even larger share of the current.
The only risk I can think of from wiring them in series is that if one fails short (possible, but not common), the overall voltage drop will decrease and the current through the rest of them goes up. But if one fails, you’d want to replace the whole lamp anyway.
Yup, you’ve got it. Series is sort of okay if you have a constant current driver. Parallel with one resistor is a big no-no. Parallel with one resistor per LED is the best way.
Series wiring is sort of okay as long as all the LEDs are really really identical. In practice they rarely are. There’s frequently one bad one in the bunch with an MTBF that’s a third of all the others.
Love seeing this machine come back together. I just did the exact same conversion with a newer Tron machine using the same LEDs. It’s such a difference, when I see the same machine with incandescents at the local arcade I think there’s something wrong with it.
Unfortunately on my machine it had a lot of flicker and dimmer problems because of the way it used the incandescents. The board from LEDOCD worked perfectly and was a simple install. But yeah, super long wait.
Agreed! A machine with incandescents, no matter how new, just seems to look old and tired to me now. The one exception I’d say is an EM machine. I think those may look better with incandescents, just because the soul of those machines is in the older technologies. They’re sort of the vacuum tube amplifiers of pinball machines, and converting one of those to transistors just seems wrong somehow.
It’s a shame the GI/LED OCD guy won’t/can’t sell kits (I asked). There would be no wait to get one, and I’d rather enjoy building one. Oh well- nothing to do but wait.
Something looks off on that comparison split pic…look at the DMD. The left side is less saturated and dimmer. Doesn’t look like a fair pic, although I know LEDs make a world of difference.
It’s hard to get a perfect one-to-one photo with a cell phone camera, because the aperture adjusts automatically. To be an exact side by side comparison, you’d need to set a manual fixed aperture and maintain it for both before and after. That’s made more difficult because the photos are several days apart, and while I tried to control the ambient lighting conditions, they were a little different as well. Still, the comparison is pretty close to what you see in real life. It’s tricky to capture in a photo the impact that LEDs have.