All your base are belong to us.
Every aspect of a pinball machine is a compromise between durability, cost of manufacture, serviceability, and the limits of technology. The seemingly benign topic of this post is a canonical example of that- battery boxes.
These games have a lot of settings they need to maintain. Elaborate cost structures, important bookkeeping data for operators, gameplay modifications, regional language information, etc. When these games were made, persistent flash memory was not an option. While it existed, it was far, far too expensive for mass-produced commercial equipment. Instead, the state of these machines was maintained with a simple set of AA batteries tied to a static RAM. Much like computers of the period, other options were sometimes used (such as those awful soldered-in NiCd batteries). The pinball companies learned pretty quickly that operators wanted something simple that could be replaced. AAs soon took over as the standard, but there were many growing pains here as well. Originally, the battery box was mounted directly to the CPU board (or other main board), because this is cheap to manufacture. The battery box can go through the wave soldering machine with everything else, no muss, no fuss. However, this turns out to be a very very bad idea if the operators don’t change the batteries regularly. They often didn’t, either due to time constraints, or the machines being in storage. The batteries work just fine for the better part of decade, but the seals in them don’t. It only takes a couple of years for batteries to start leaking. They don’t leak acid, as is commonly said, but rather alkaline (hence the name alkaline batteries). As you may recall from middle school chemistry, bases are just as destructive as acids. It doesn’t matter which direction you go on the pH scale- it only matters how far.
You see where this is going. The batteries get old, they leak, the base gets on the PCBs, and the damage commences. This damage is insidious, difficult to see, and can create maddening problems that are difficult to debug. Not to pick on pinball makers- this was a common problem in arcade games as well. The classic example is the Sega System 16 platform, used in great games like Shinobi, Altered Beast, and Golden Axe. This platform had what’s known as a Suicide Battery. The battery is mounted at one end of the motherboard, and when mounted vertically in the machine, that becomes the top. When the battery leaks, the alkaline runs down the entire length of the board, eating components, traces, vias, and anything else it touches. This often bricks the game permanently. In summary, at some random point around the 8-10 year mark, the game randomly commits suicide (hence the name).
Pinball makers did catch on to this, and made some efforts to address the problem (without adding too much labor cost during manufacturing, of course). Eventually, Williams settled on putting the battery box up on standoffs, at the bottom of the main board. That minimizes the chance of corrosion affecting any PCBs, while still making manufacturing fairly easy.
Sometimes, that just wasn’t enough.
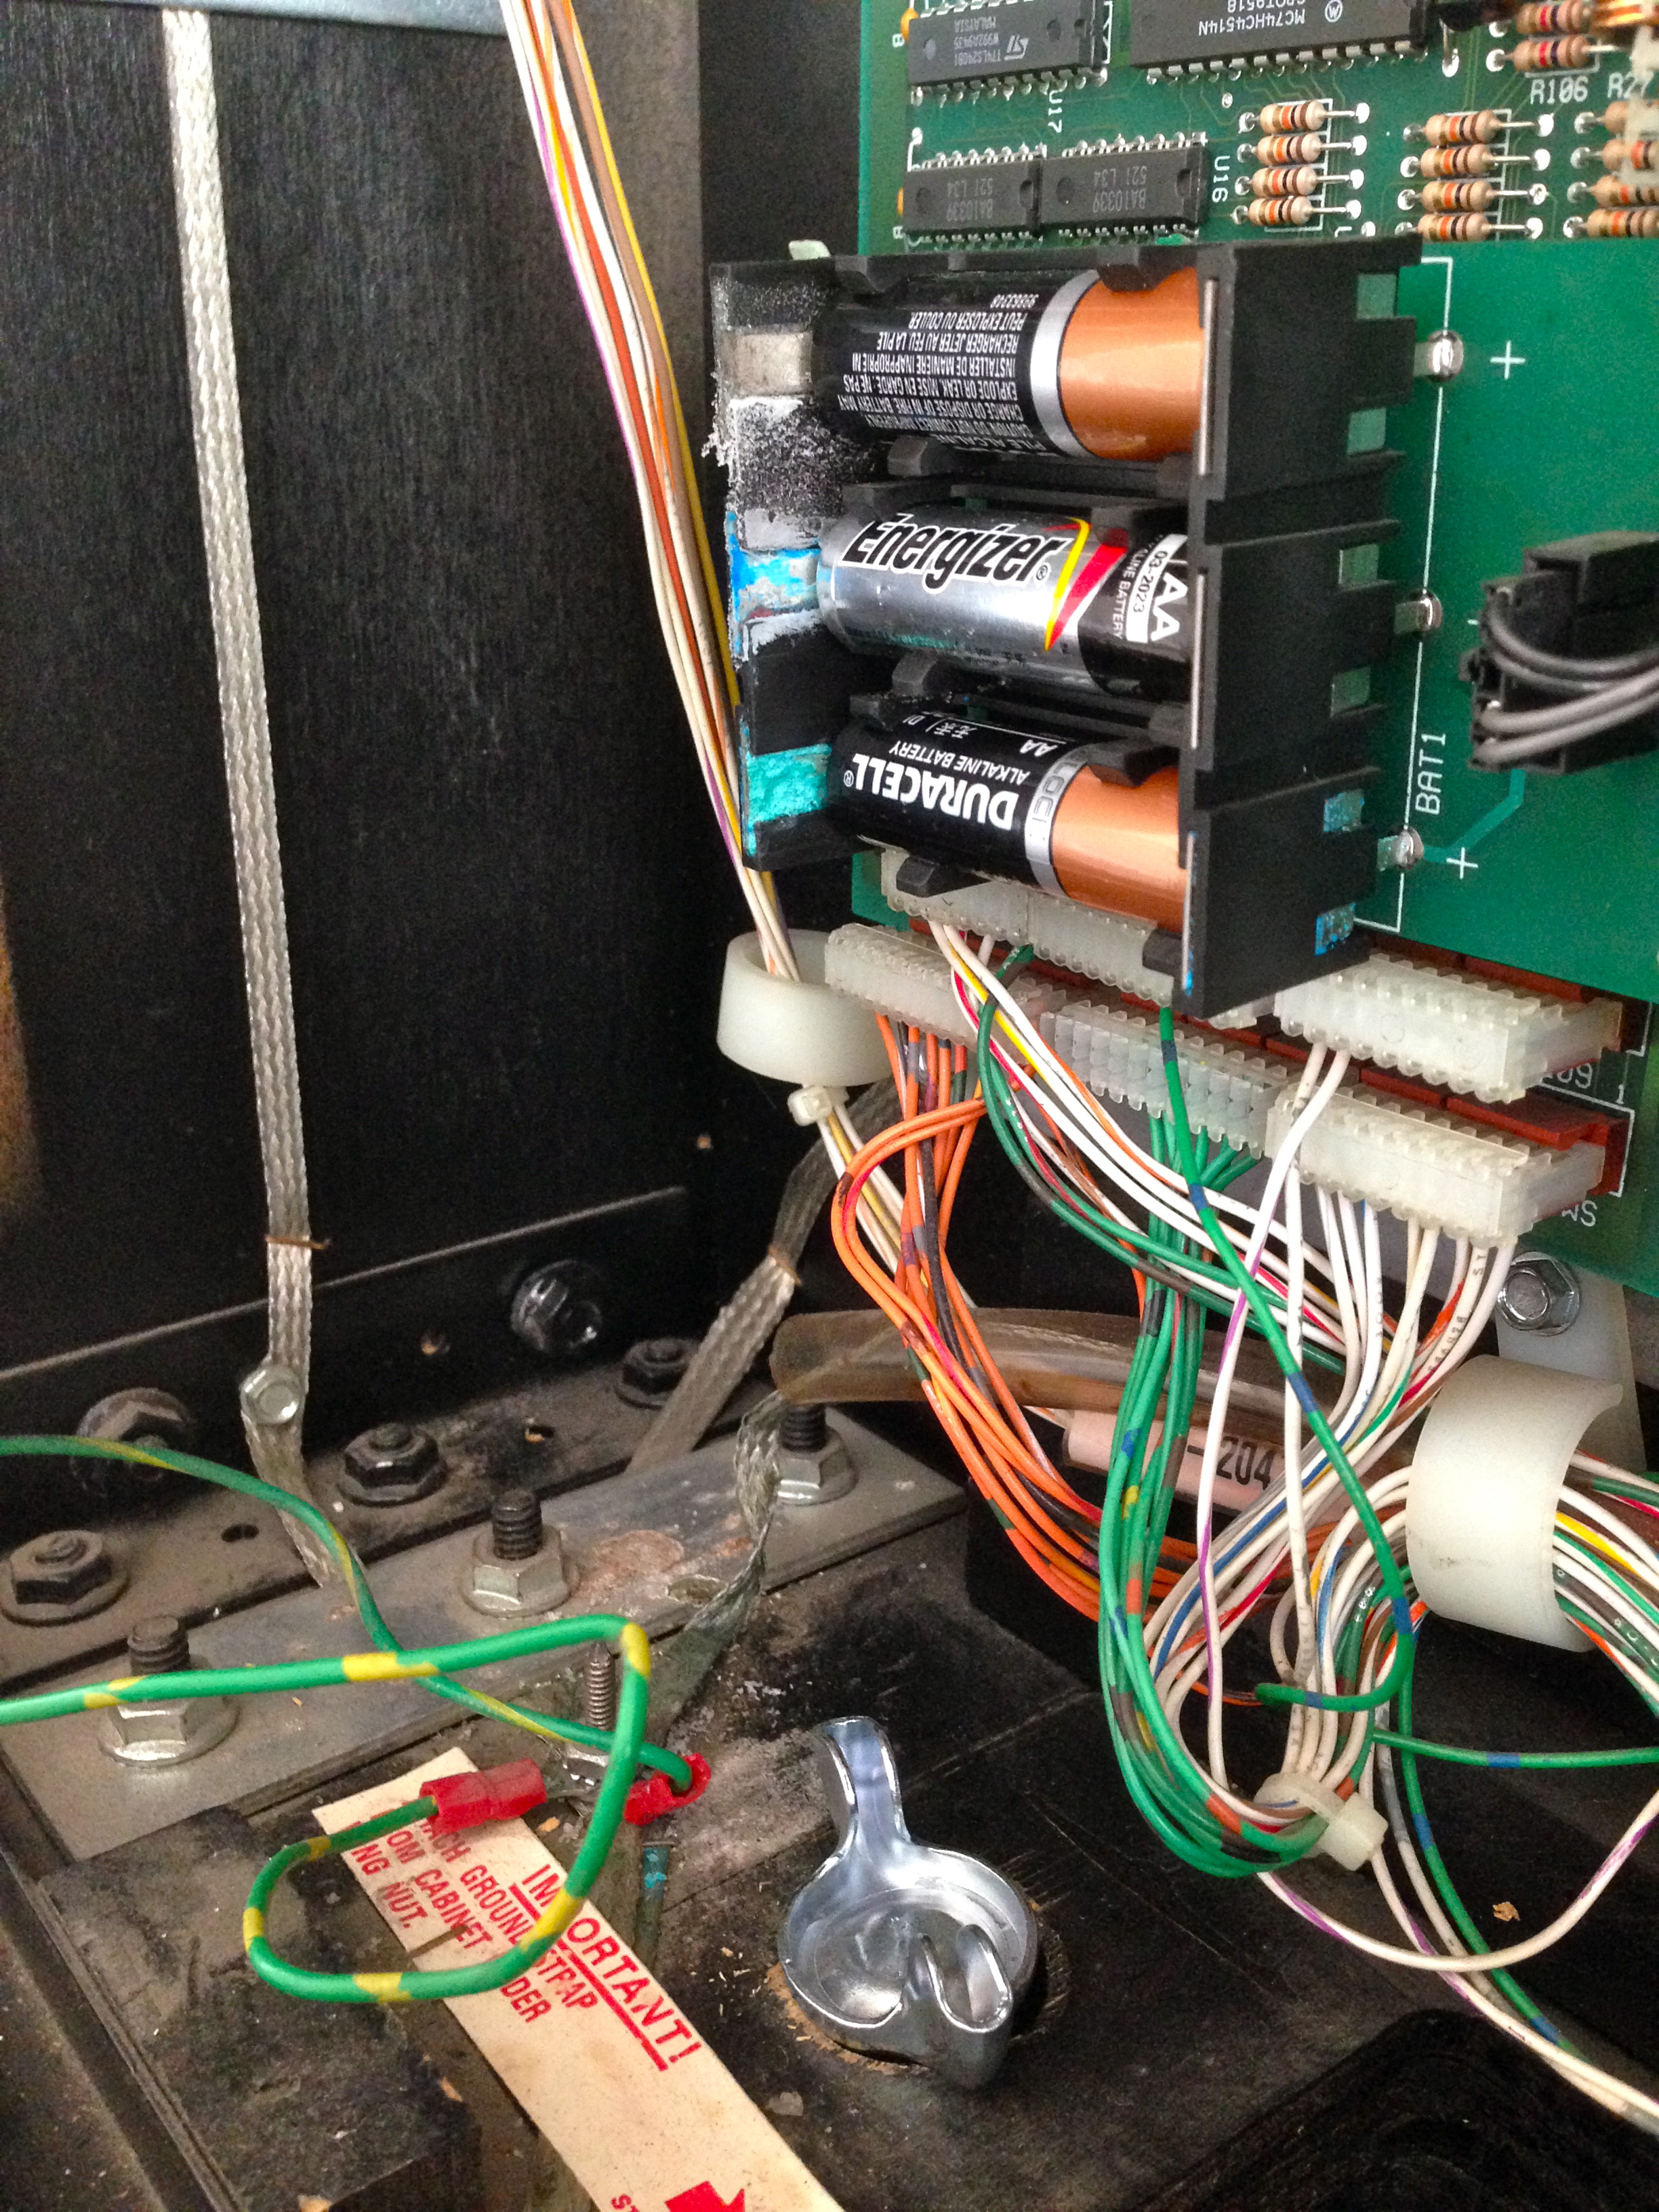
Even with this “remote” location, there’s potential for trouble.
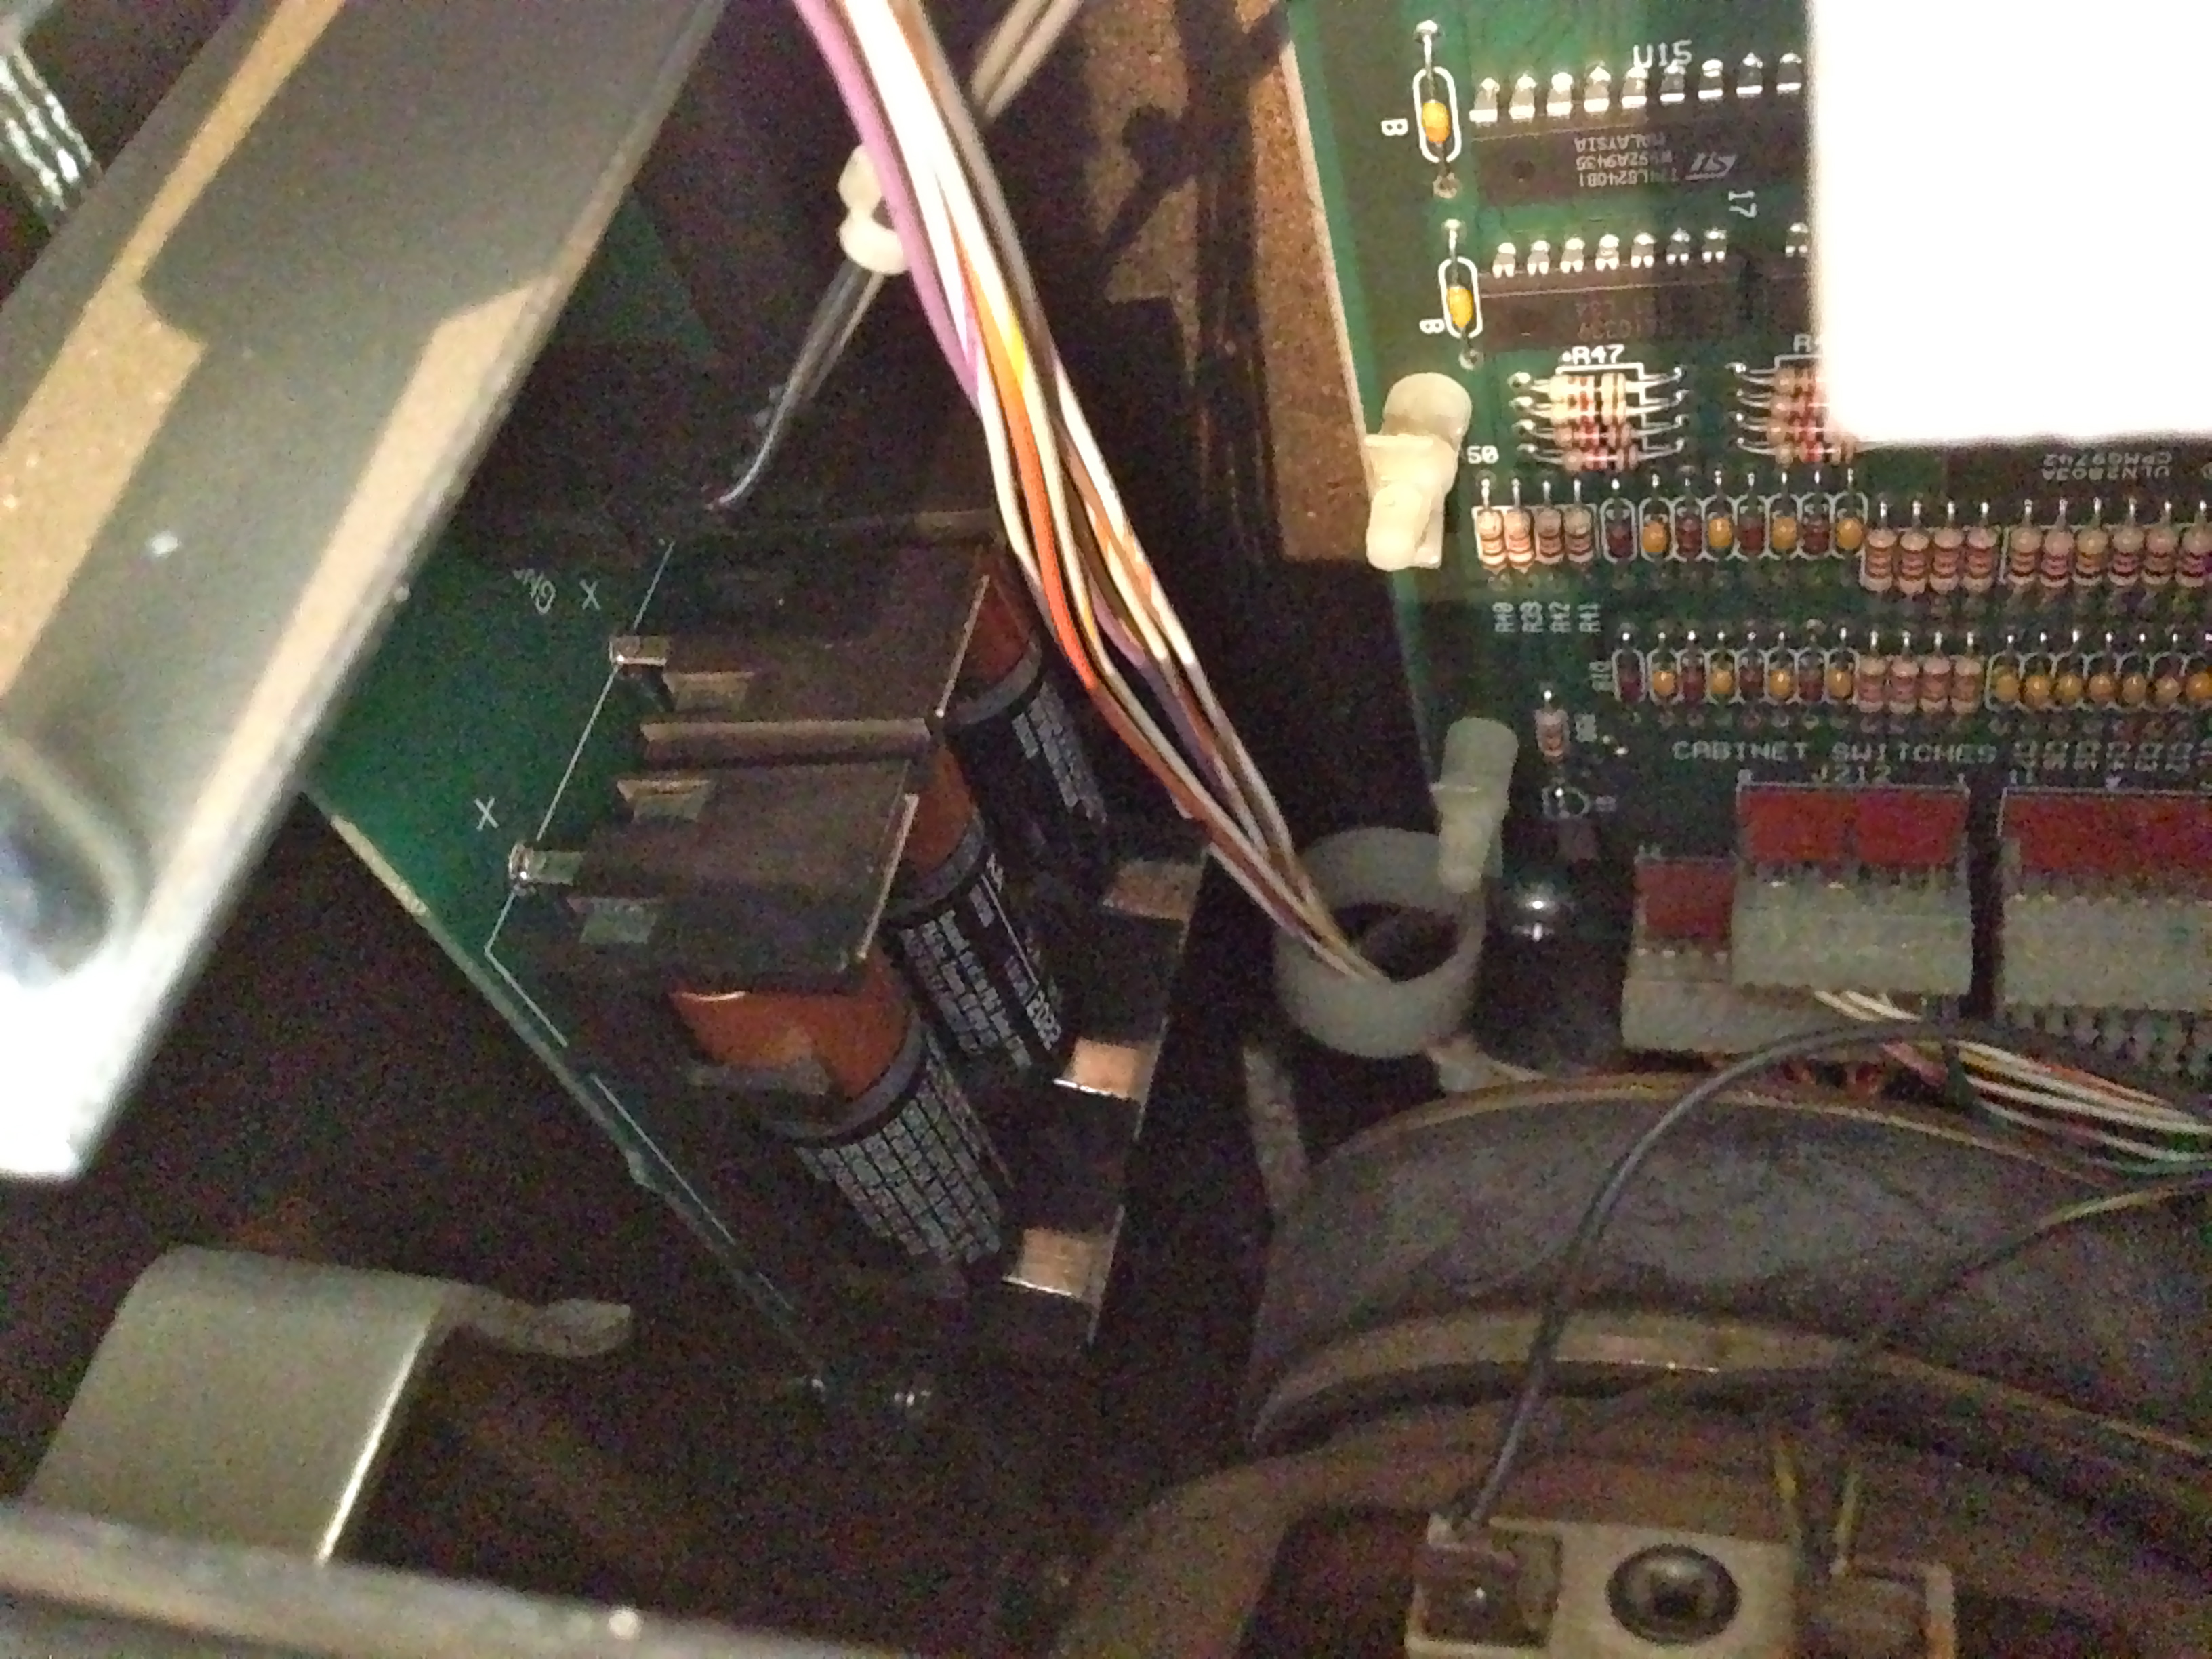
My Johnny wasn’t showing any immediate signs of problems caused by battery damage that I could see, but it’s clear that he had dodged a bullet. There’s a ton of corrosion all over the place, and it’s sheer luck that nothing worse has happened. I’m going to fix this before his luck runs out.
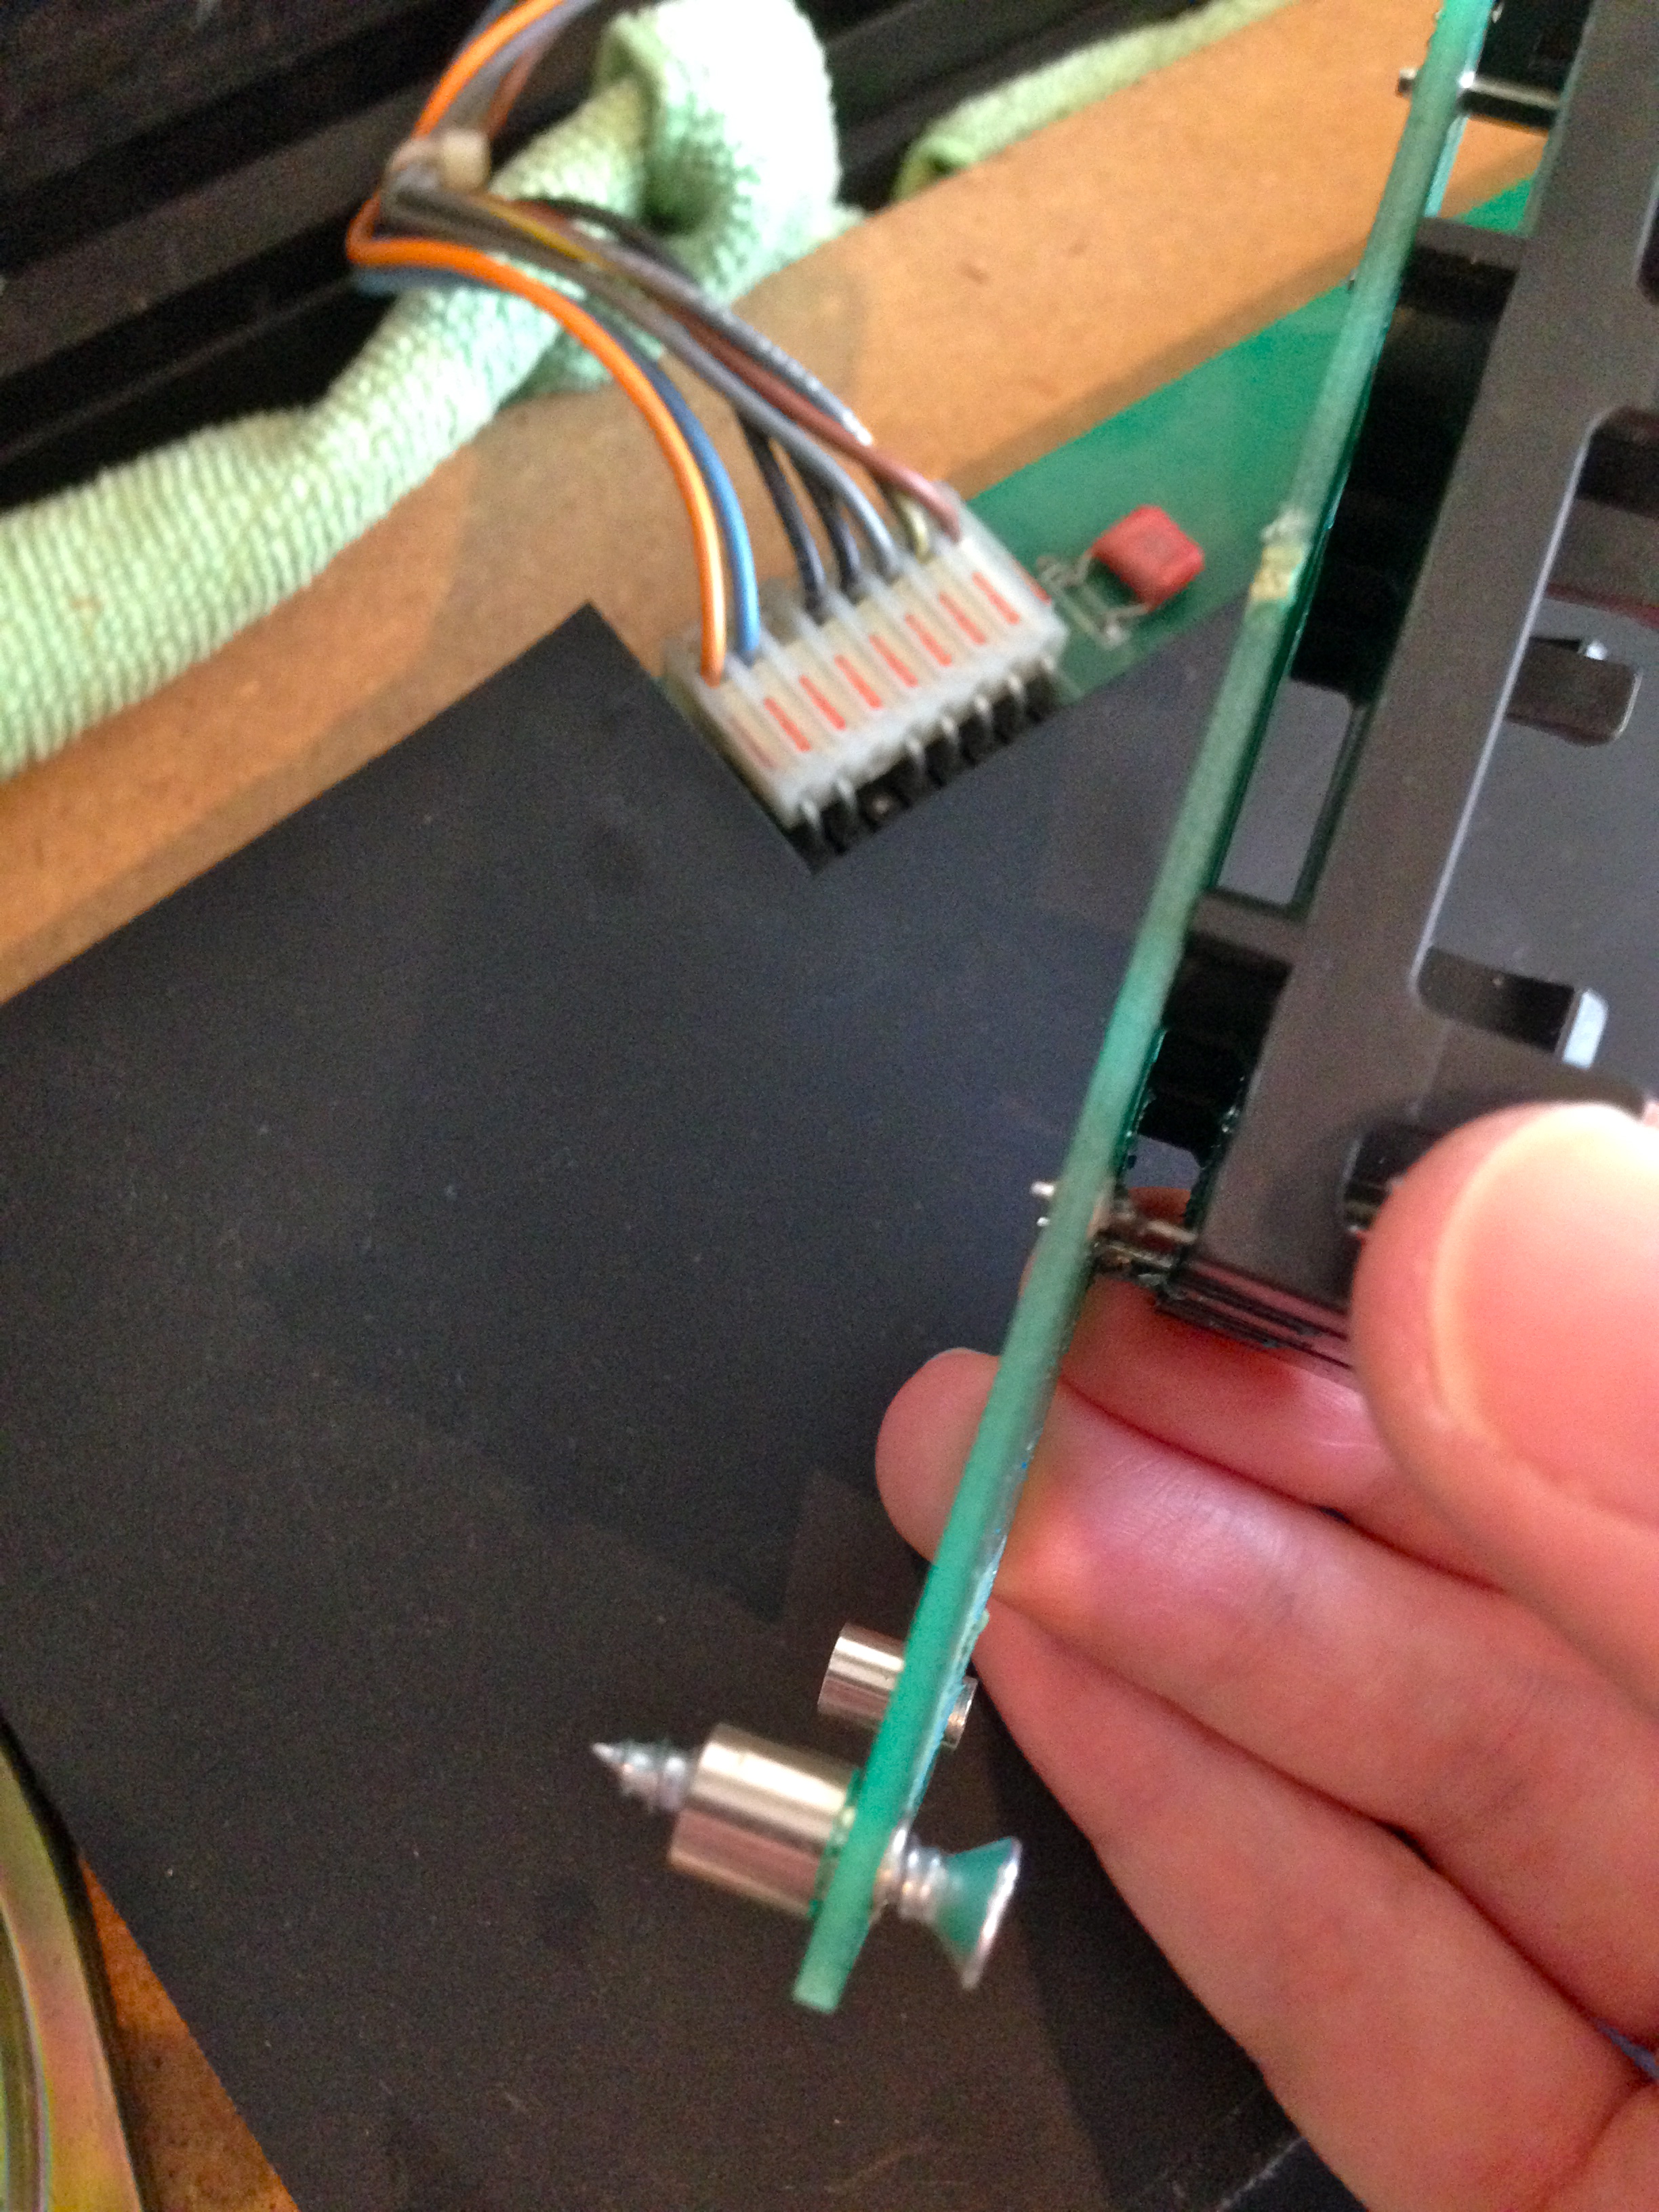
The first step is to get that battery box off of there and assess the damage. It may need to be replaced, or it may be salvagable.
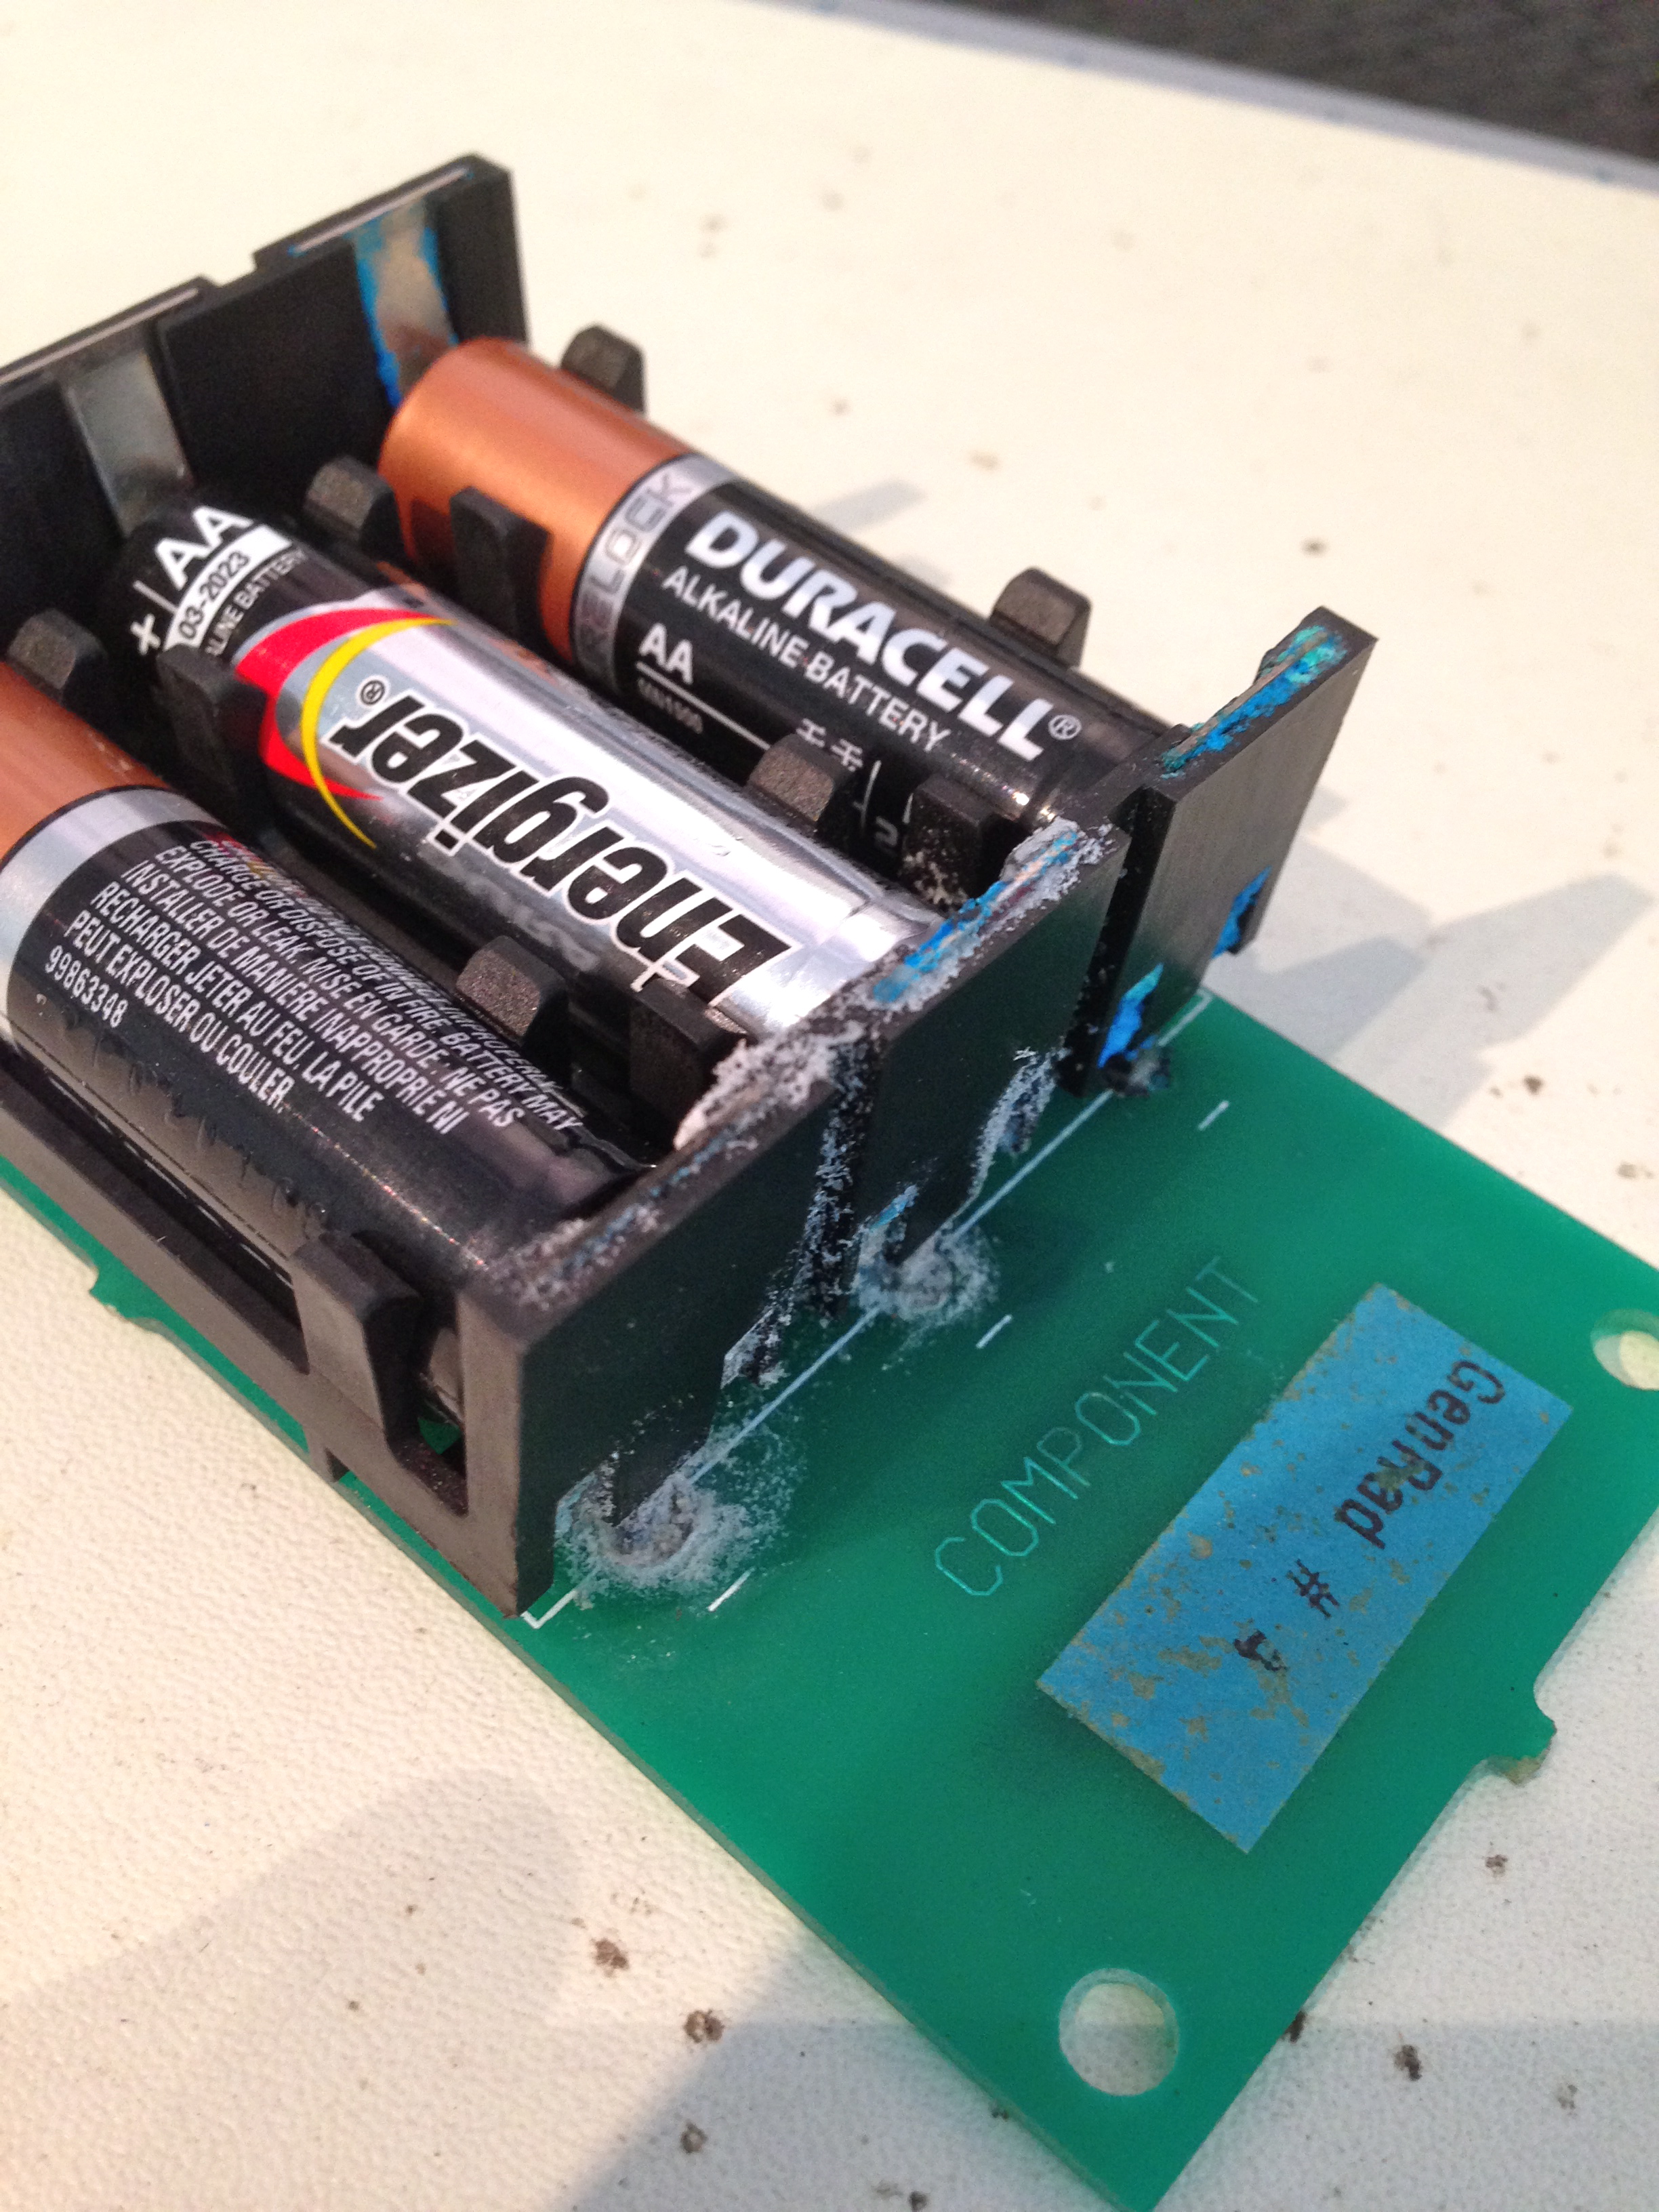
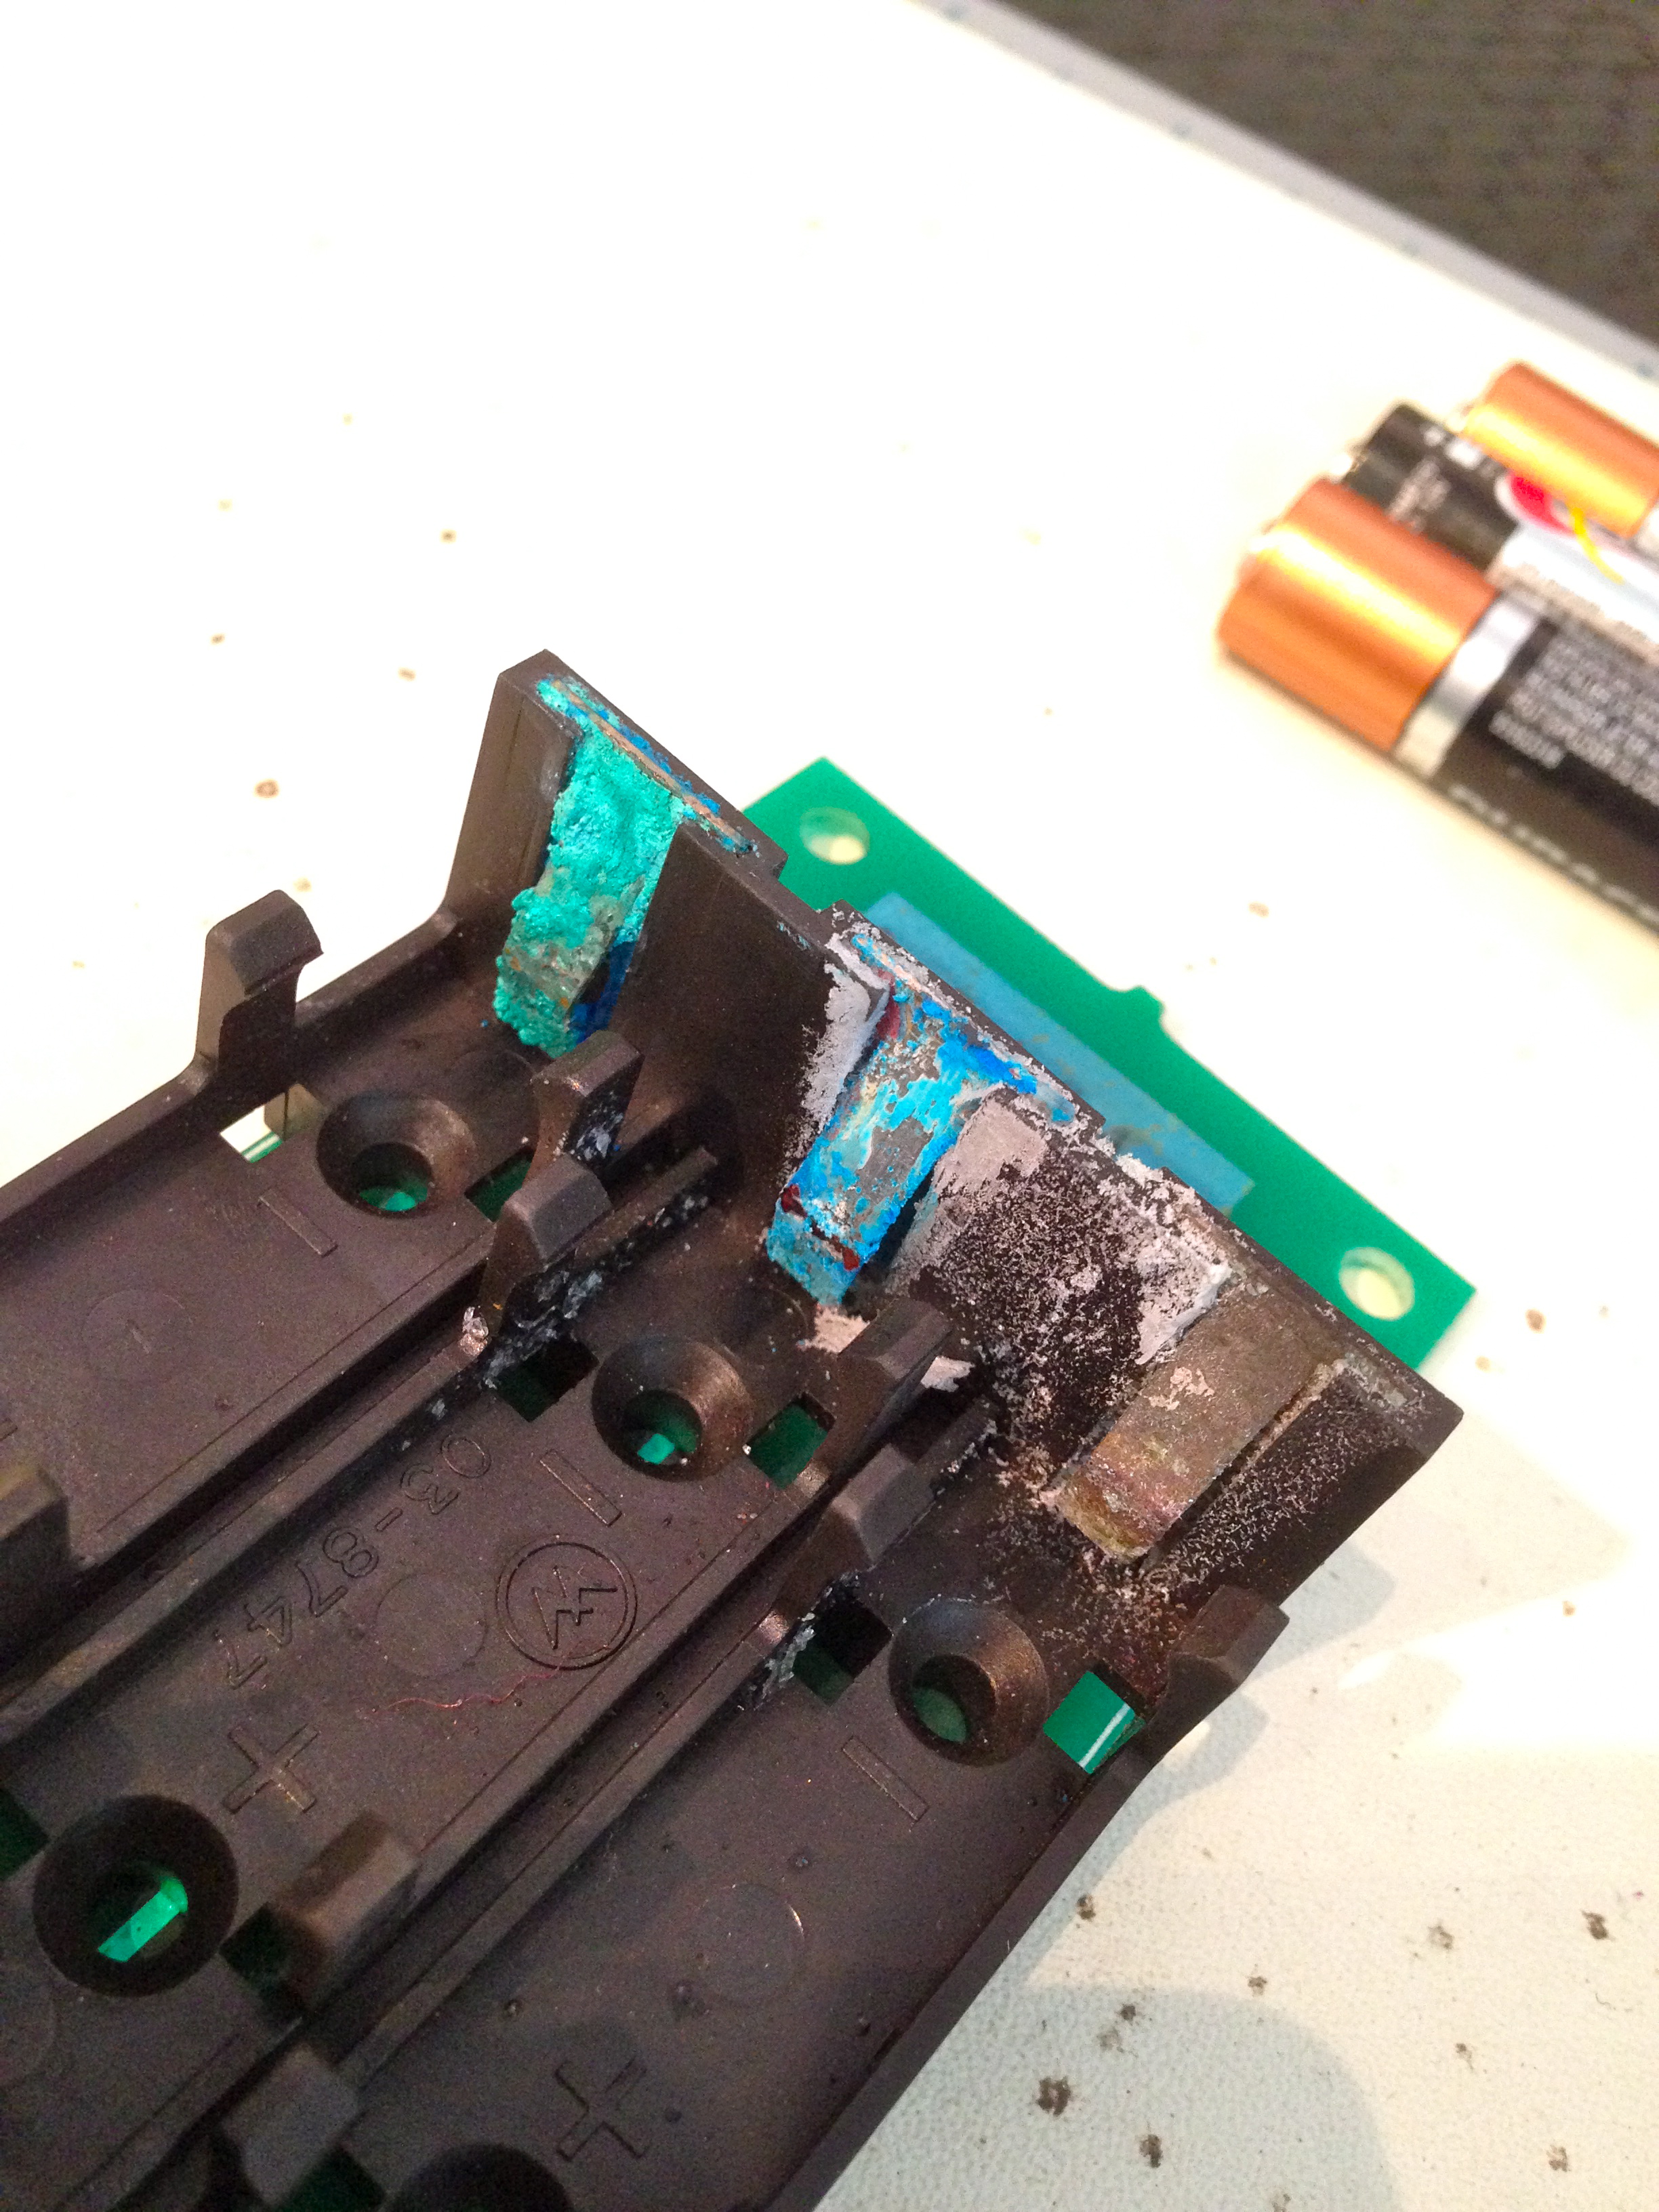
This looks really bad, but battery corrosion often cleans up just fine. If it hasn’t sat there too long, you can neutralize it and the metal underneath may be fine. It’s a simple matter of applying a good soaking of vinegar to all affected areas. The crusty corrosion will soften up and melt away. You can see it bubbling as the reaction takes place. Sometimes you can simply soak the part in vinegar. In this case, I opted not to, since I didn’t want to trap vinegar in any of the nooks and crannies, where it might cause problems later. Instead, I went in surgically, by soaking cotton swabs with vinegar and wiping off the corrosion. A dental pick is helpful to get in the cracks and such.

So, decision time. Do I toss this and replace it, or use it as is? For the time being, I decided to continue using it (after verifying that it still worked). The main reason is that I’m going to make sure future leaks can’t cause problems, and I like that this is an original Williams part (the (W) logo is even stamped on it). Among other things, it’s specially designed to hold the batteries firmly when the back box is folded down. I’ll hang on to it for now. The corrosive base is all neutralized, so it shouldn’t cause any further problem. I did of course replace the batteries. The old ones had been soaking in that corrosion, so their seals are likely close to being shot, even though they were new(ish) batteries.
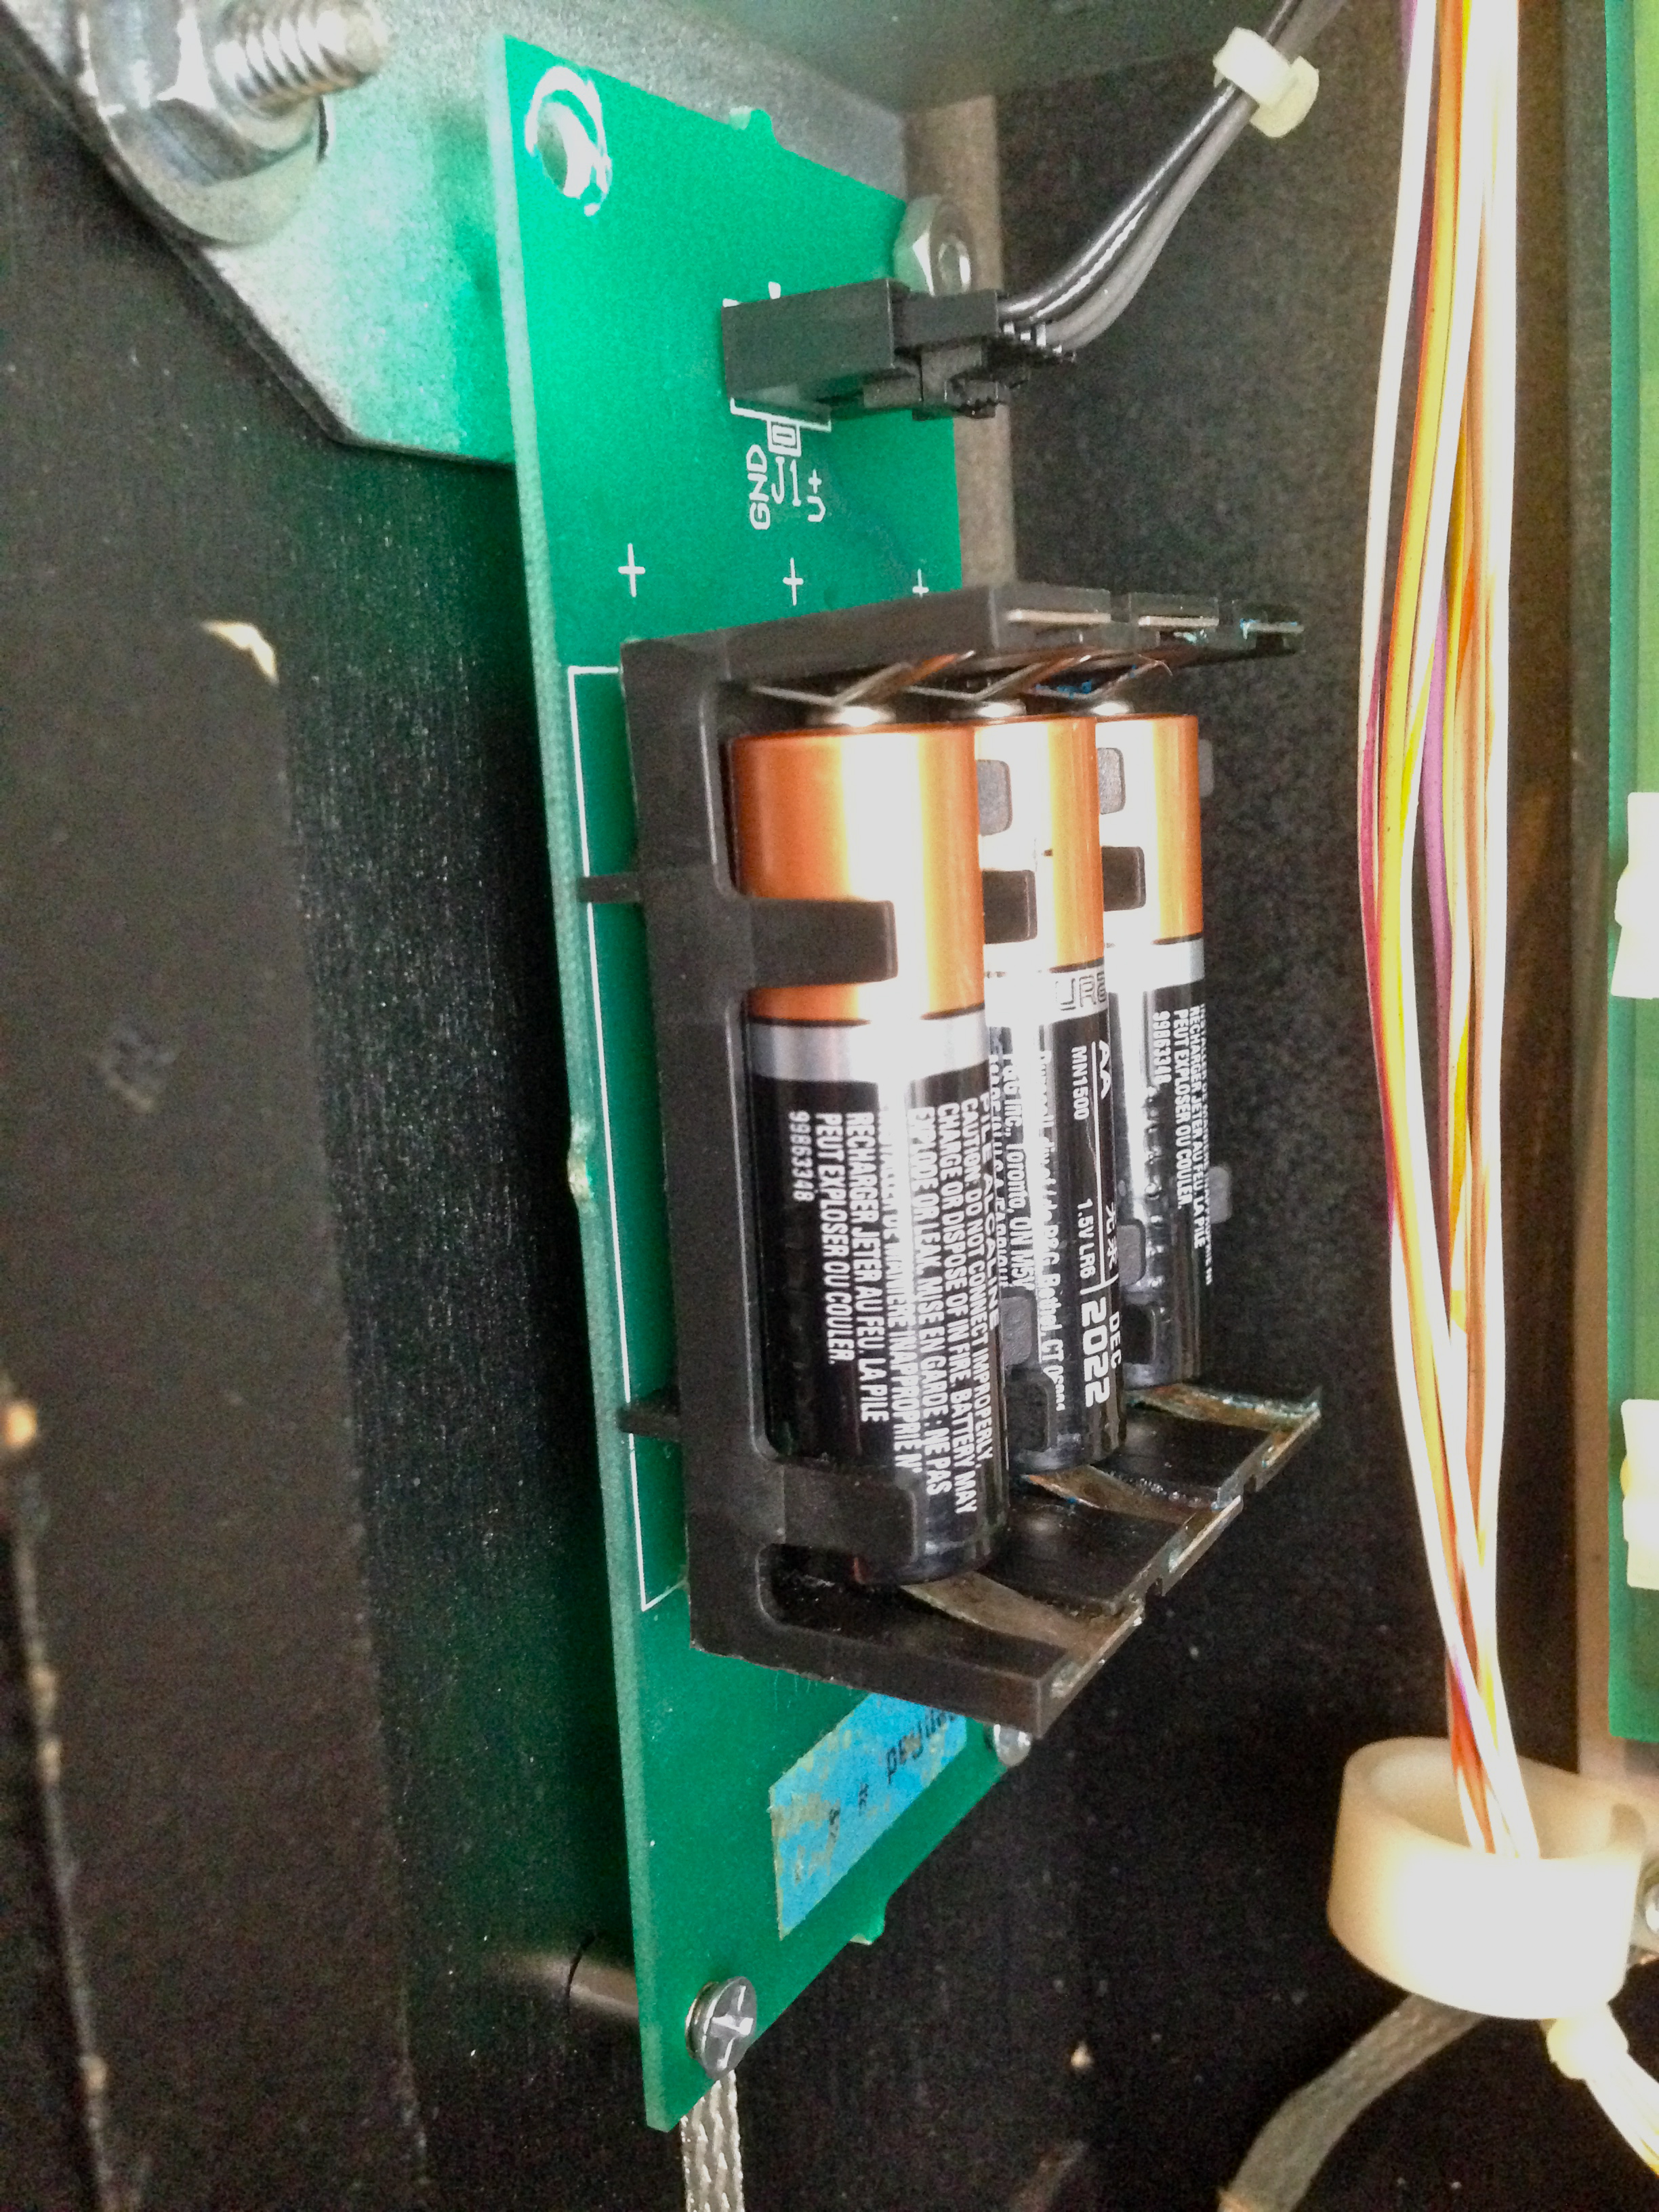
The great thing about Williams WPC-S and WPC-95 games is that the battery box is connected to the CPU with quite a long cable. In fact, this cable gives us enough slack to mount the battery box somewhere further out of the way.

Mounting the board in this new location was super easy. The hinge mounting bolts for the light board are conveniently the perfect size for one of the standoff holes in the battery box PCB. They have extra thread on them, so one 1/4″-20 nut, and the top was mounted.
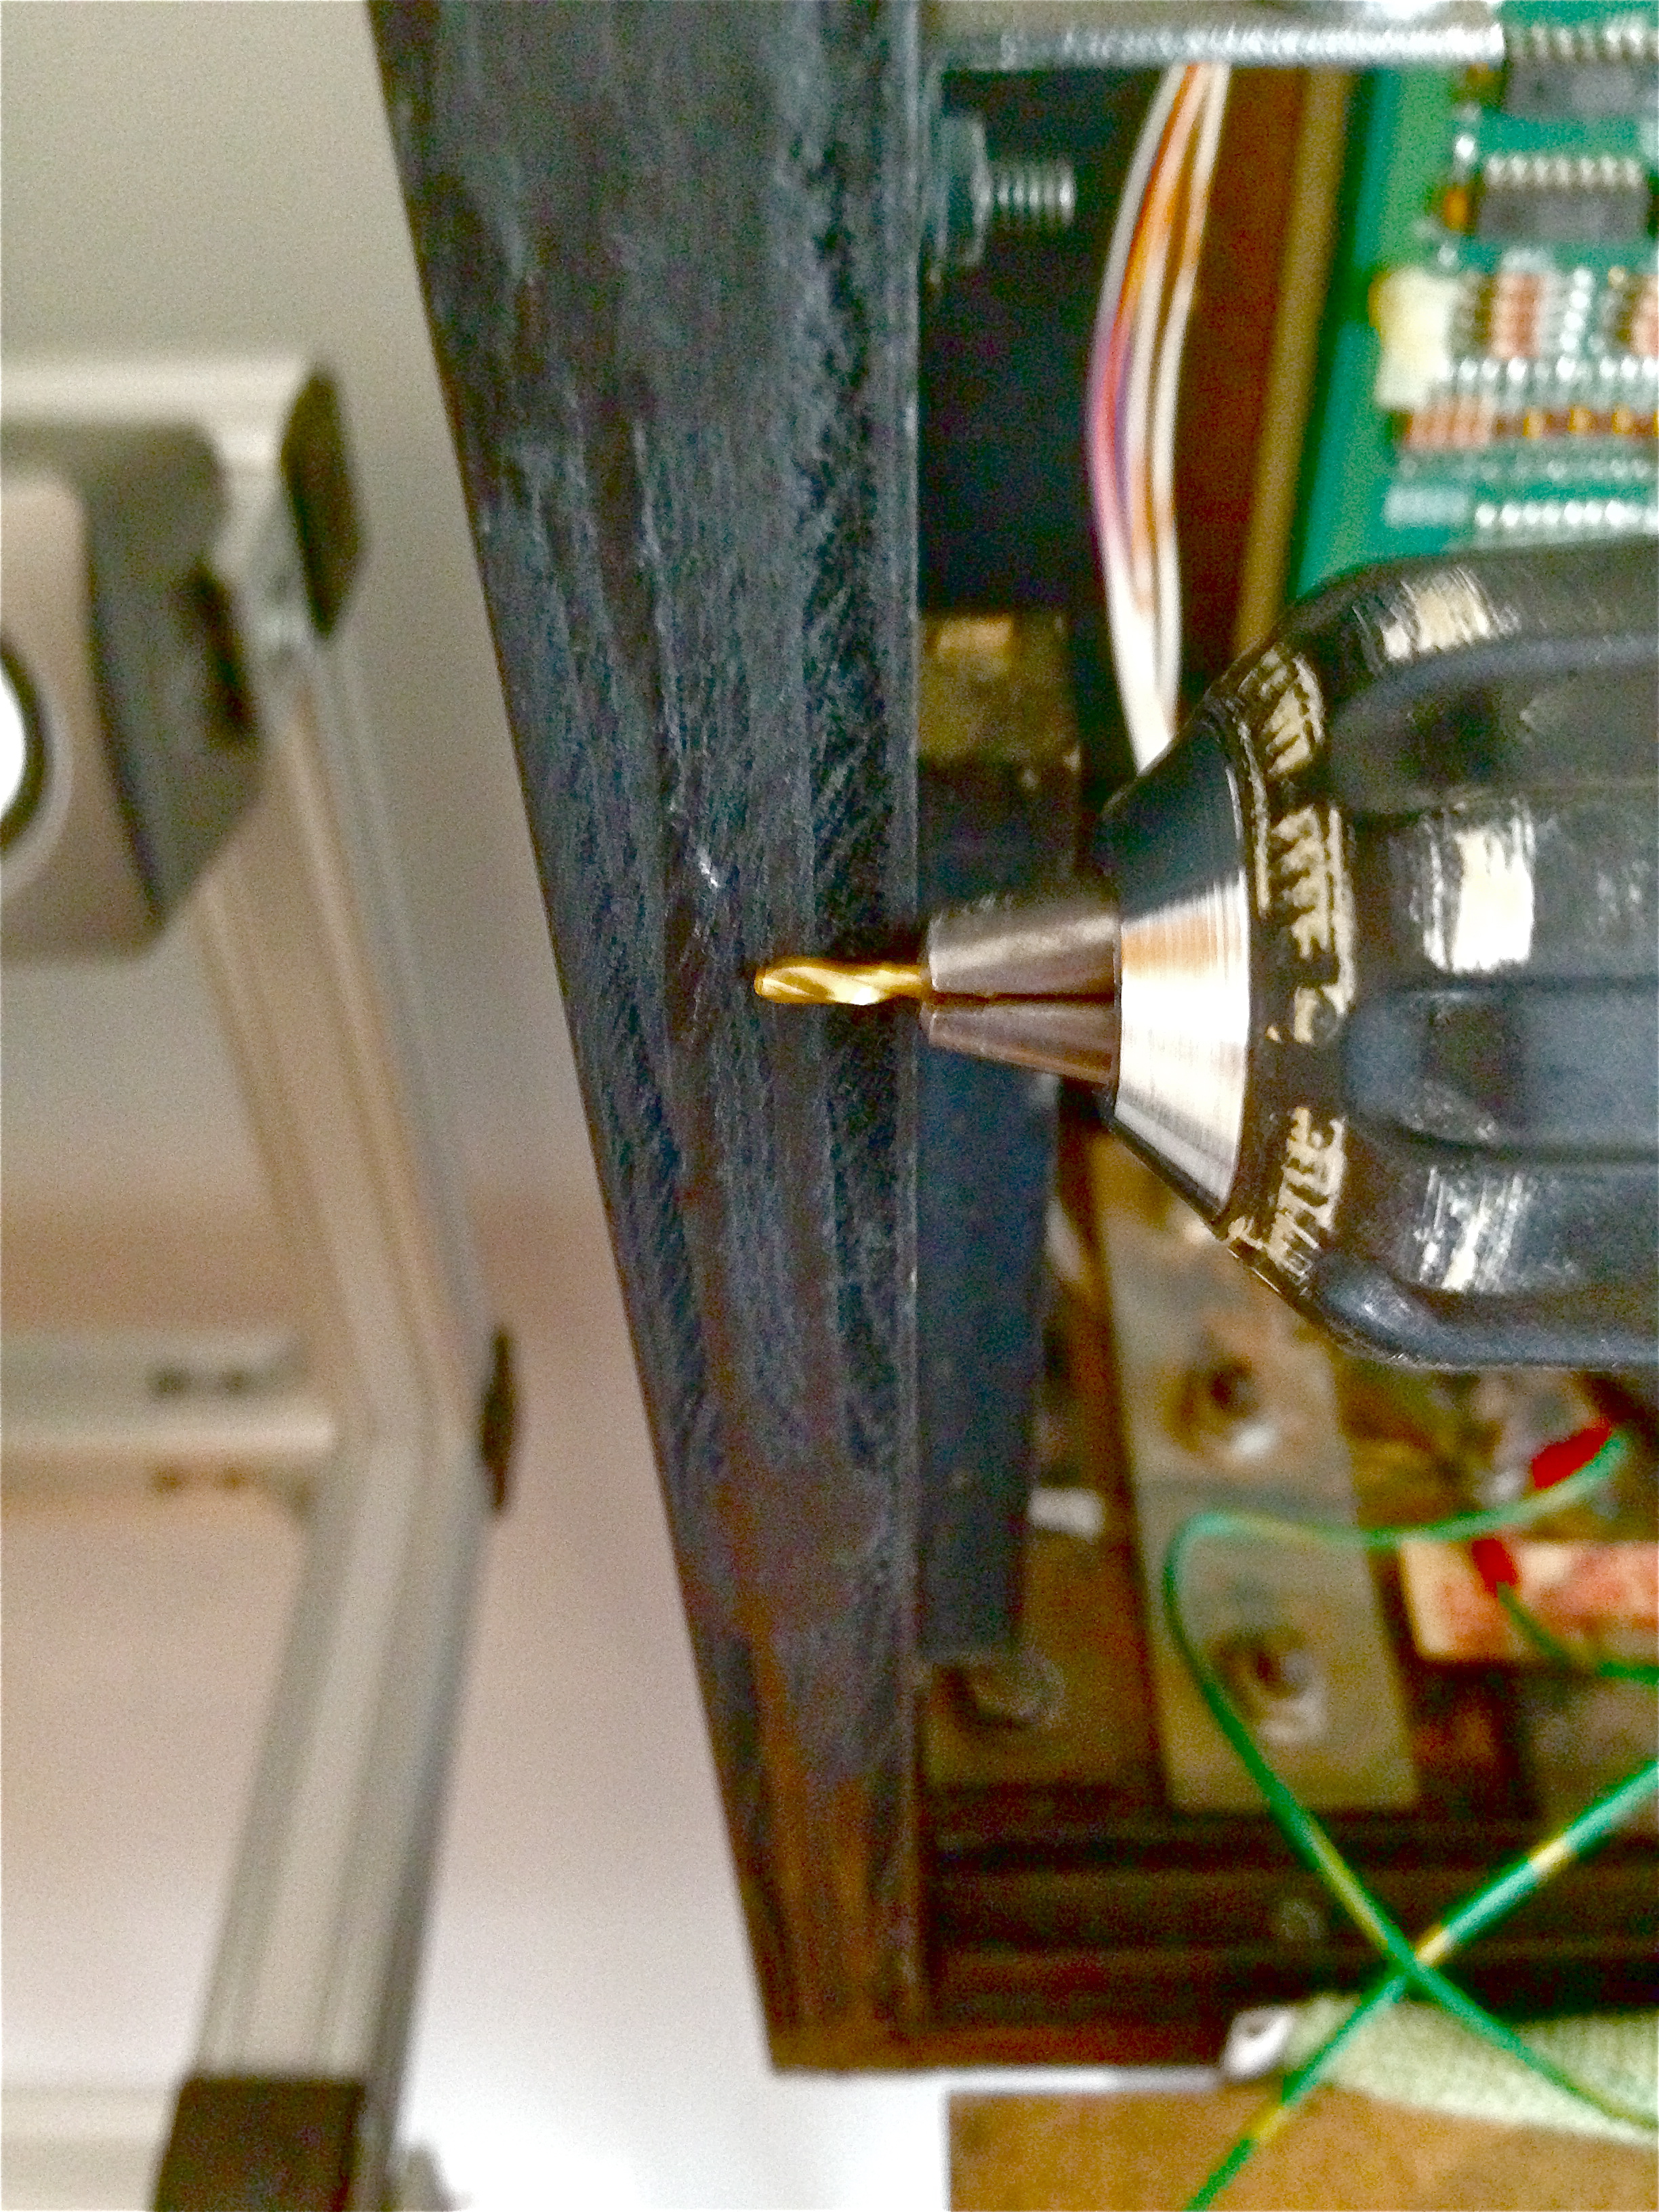
For the bottom, I used some wood screws to attach it to the side of the head. These needed pilot holes. This needs to be done with care, because it would be very sad to punch a hole through the artwork on the outside of the head.
The top left corner of the board is unattached, since there wasn’t an easy way to fasten it there. However, three corners is plenty for that little PCB. It’s definitely not going anywhere.
This location is perfect for the battery box, because it’s remote, the original CPU cable reaches it, and it’s not in the way of the light board, or the speaker panel.
A good rule of thumb is to change the batteries in your pinball machines when you do your smoke detectors. Back home, the local fire department used to run Public Service Announcements on New Year’s Day to get people to do it. I guess that stuck with me, because to this day, I change all my smoke detector (and now pinball machine) batteries every New Year’s Day. It’s a nice little chore you can do while hung over. Just don’t set them off by accident, because that does not mix with a hangover.
That’s all there is to this one! I’m going to change Johnny’s batteries regularly, but someday someone else might forget. If so, I’ve just done them a huge favor. Whoever you are, future Johnny Caretaker, buy me a whiskey (neat) and we’ll call it even.
I have an old computer[1] from which I removed its leaking battery. I also removed the crystals – fortunately there wasn’t much, and nothing appeared to be stuck to the surface. Lucky me!
But I’ve read some alarmist tales that seem to claim that the corrosion somehow would keep going on inside the pcb traces or something like that (it wasn’t too clear what they actually meant, really). Does that sound likely?
[1] an Amiga 4000 actually
Indeed, this happens on pinball machines quite a bit. It starts my delaminating the solder mask. This shows up as a bubbling of the green layer. Then it can get into the traces and break them. It can also thin them, increasing their resistance and causing all manner of odd problems. Broken or damaged traces can usually be replaced with jumpers to keep a board going a little longer.
One of the worst issues is that vias can get separated from inner layers of the PCB (in the case of a four-layer board). This is virtually impossible to fix.
Fascinating–so factory-produced solder mask also delaminates at contact with bases. I thought only the solder mask I used in my homebrew PCBs (Dynamask 4000, for reference) had this unfortunate property.
How do you set off a pinball machine by accident?
I see what you did there. 🙂
I’m really loving these Johnny articles, I’ve always wanted a pinball machine but sadly, I can’t justify the cost at this time in my life.
I feel like I’ve been doing the restoration along with you, I love this sort of thing, and I’ve never been one to not try a hack for fear of maintaining stock.
One question though, I’d always thought the “suicide battery” got it’s name due to the fact that if you remove it (before the charge runs out), a game would lose it’s decryption keys for the anti-piracy hardware.
Glad to hear it! It’s fun to write about this stuff, so it’s nice to know people are reading it.
As for the suicide battery, we’re both right. 🙂 The term is also used for some arcade games that, as you say, stored their private security key in a battery-backed up RAM. If that battery went dead, the ROM wasn’t decryptable, and the game was bricked. Capcom was probably the worst offender with this- their CPS-1 and CPS-2 platforms underpin a lot of arcade games, and they all have this issue. Back in the day, Capcom ran a service where you could send the game in (at great cost) and they would unbrick it if this happens. Like all DRM, this system only served to punish the law-abiding people, and did nothing to deter piracy. Luckily, said “piracy” is now the only reason those games are playable. You can replace the encrypted ROMs with unencrypted ones burned from MAME, and the games will work again. It’s a good thing DRM is always defeatable with minimal effort, because otherwise history would be losing a whole lot of media culture like this.
Whats even better? NVRAM and _NO_ batteries at all. On my SEGA’s it was socketed, so a $25 NVRAM dip adapter. Since Williams WPC-S didnt socket the 6264, but if your ok with desoldering the chip and putting a socket… beats any kind of batteries imo.
http://www.pinitech.com/products/6264_adapter.php
Yah, good call. You’re totally right about that. I may still do that upgrade at some point. For now, the batteries are out of harm’s way, but I like the NVRAM idea a lot. Thanks for the link!