Making something that sucks.
After my poor result from attempting to 3D print the rather large Teddy Top prototype, I thought I’d give vacuum forming a go. This is a very popular technique with prop makers, cosplayers, and model airplane folks. It looks like fun, and since the thing I’m trying to make is a hollow plastic shell with no overhangs, it seems like a great technique for my project.
I did some research on the subject, and there are as many designs for homemade vacuum formers as there are hackers on this blue marble. I settled on a simple design that you’ll see many variations of- a single-hole platen with aluminum clamping frame, running off a household vacuum. Many people say you need a box with a lot of little holes in it, and as many other people say you don’t. I’m unclear on what the virtues of the two designs are, but I do know the single hole design is a lot easier to make, so here we are.
The basic principle of vacuum forming is that you make a positive master of the thing you want, then get the plastic all soft and melty, then use vacuum to suck the plastic down against the master as it cools.
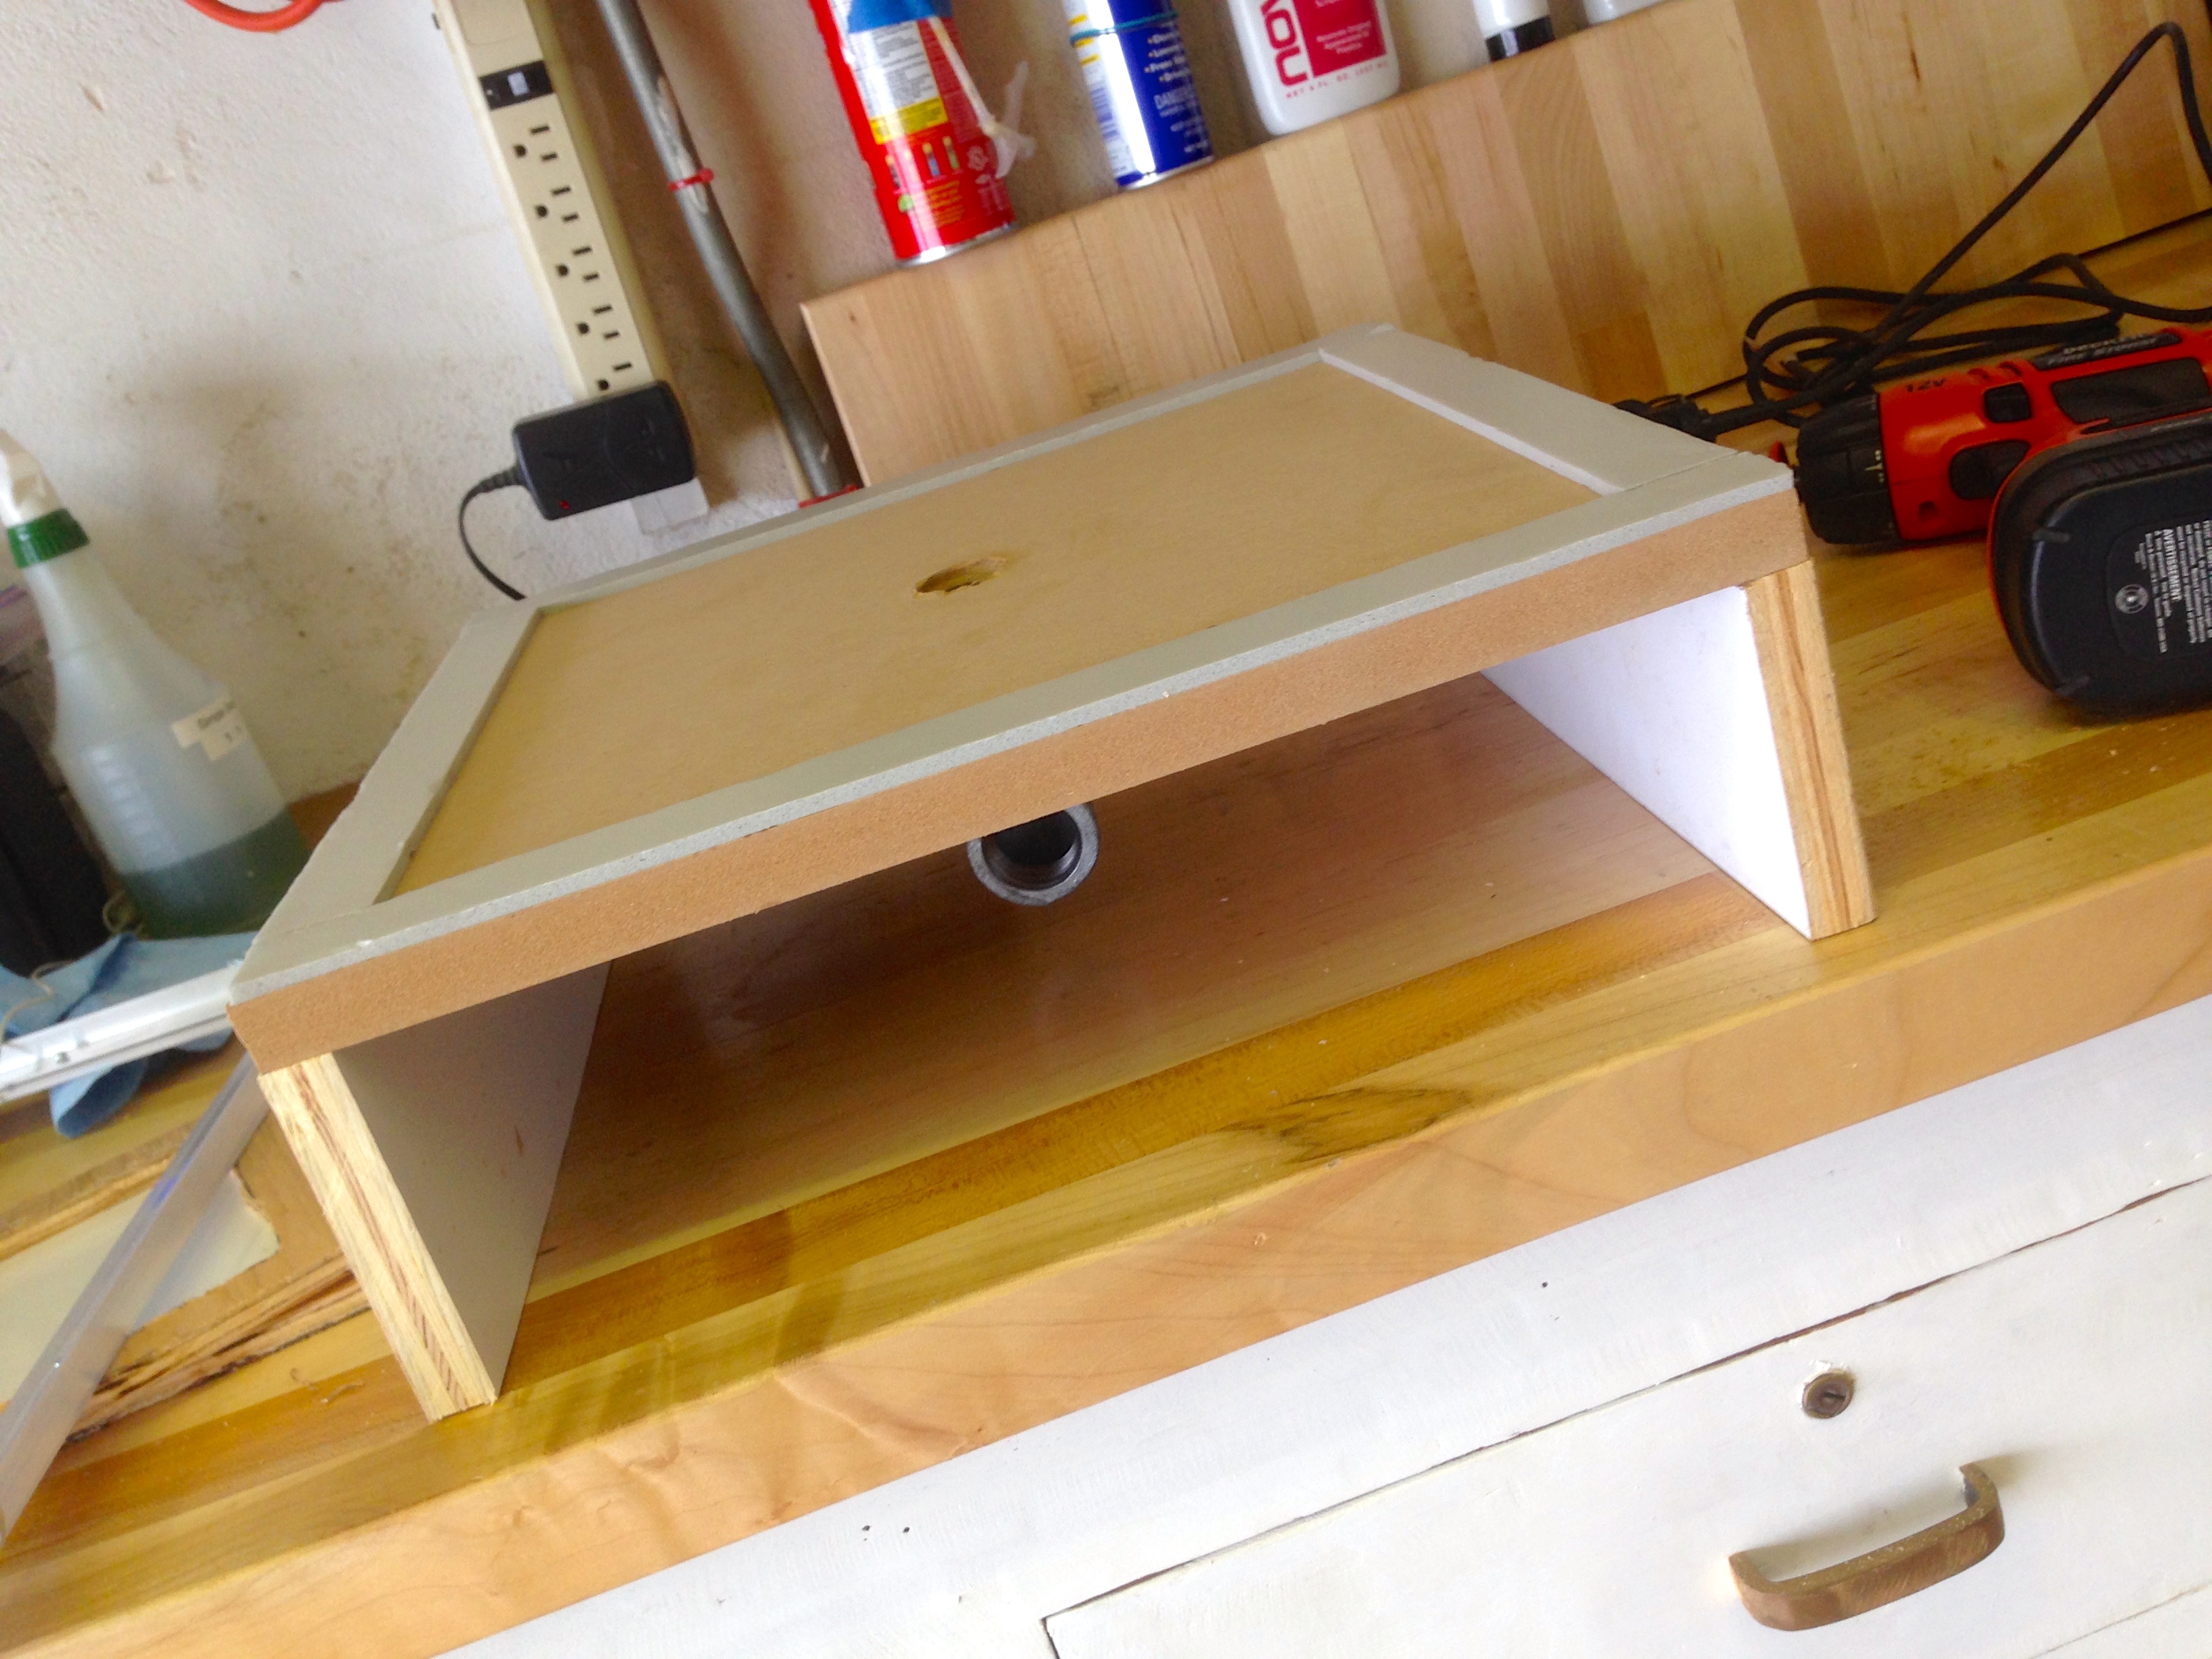
First, we need to make the platen. That’s a fancy word for “board with a hole in it”. It needs to be smooth and sturdy, so MDF is a good choice. Next, we need a source of vacuum. A lot of people use a shop vac for this, but there’s nothing especially magical about shop vacs. Any household vacuum of sufficient power will work. For the kinds of plastics we’re talking about, something in the range of 1000 watts is what’s required. This rules out most handheld units, but most full-size household vacuum cleaners will get the job done. In North America, vacuum cleaners are generally rated in motor amperage, so we’re looking for something in the 9-12 amp range.
Next, we need a way to mate the vacuum to the platen. There are two easy ways to do this:
- Sacrifice an attachment by cutting it flat and screwing it to the platen. This gives a guaranteed fit, if you can spare the attachment.
- Take the pipe from your vacuum to the plumbing aisle at Home Depot, and find a fitting that mates to it.
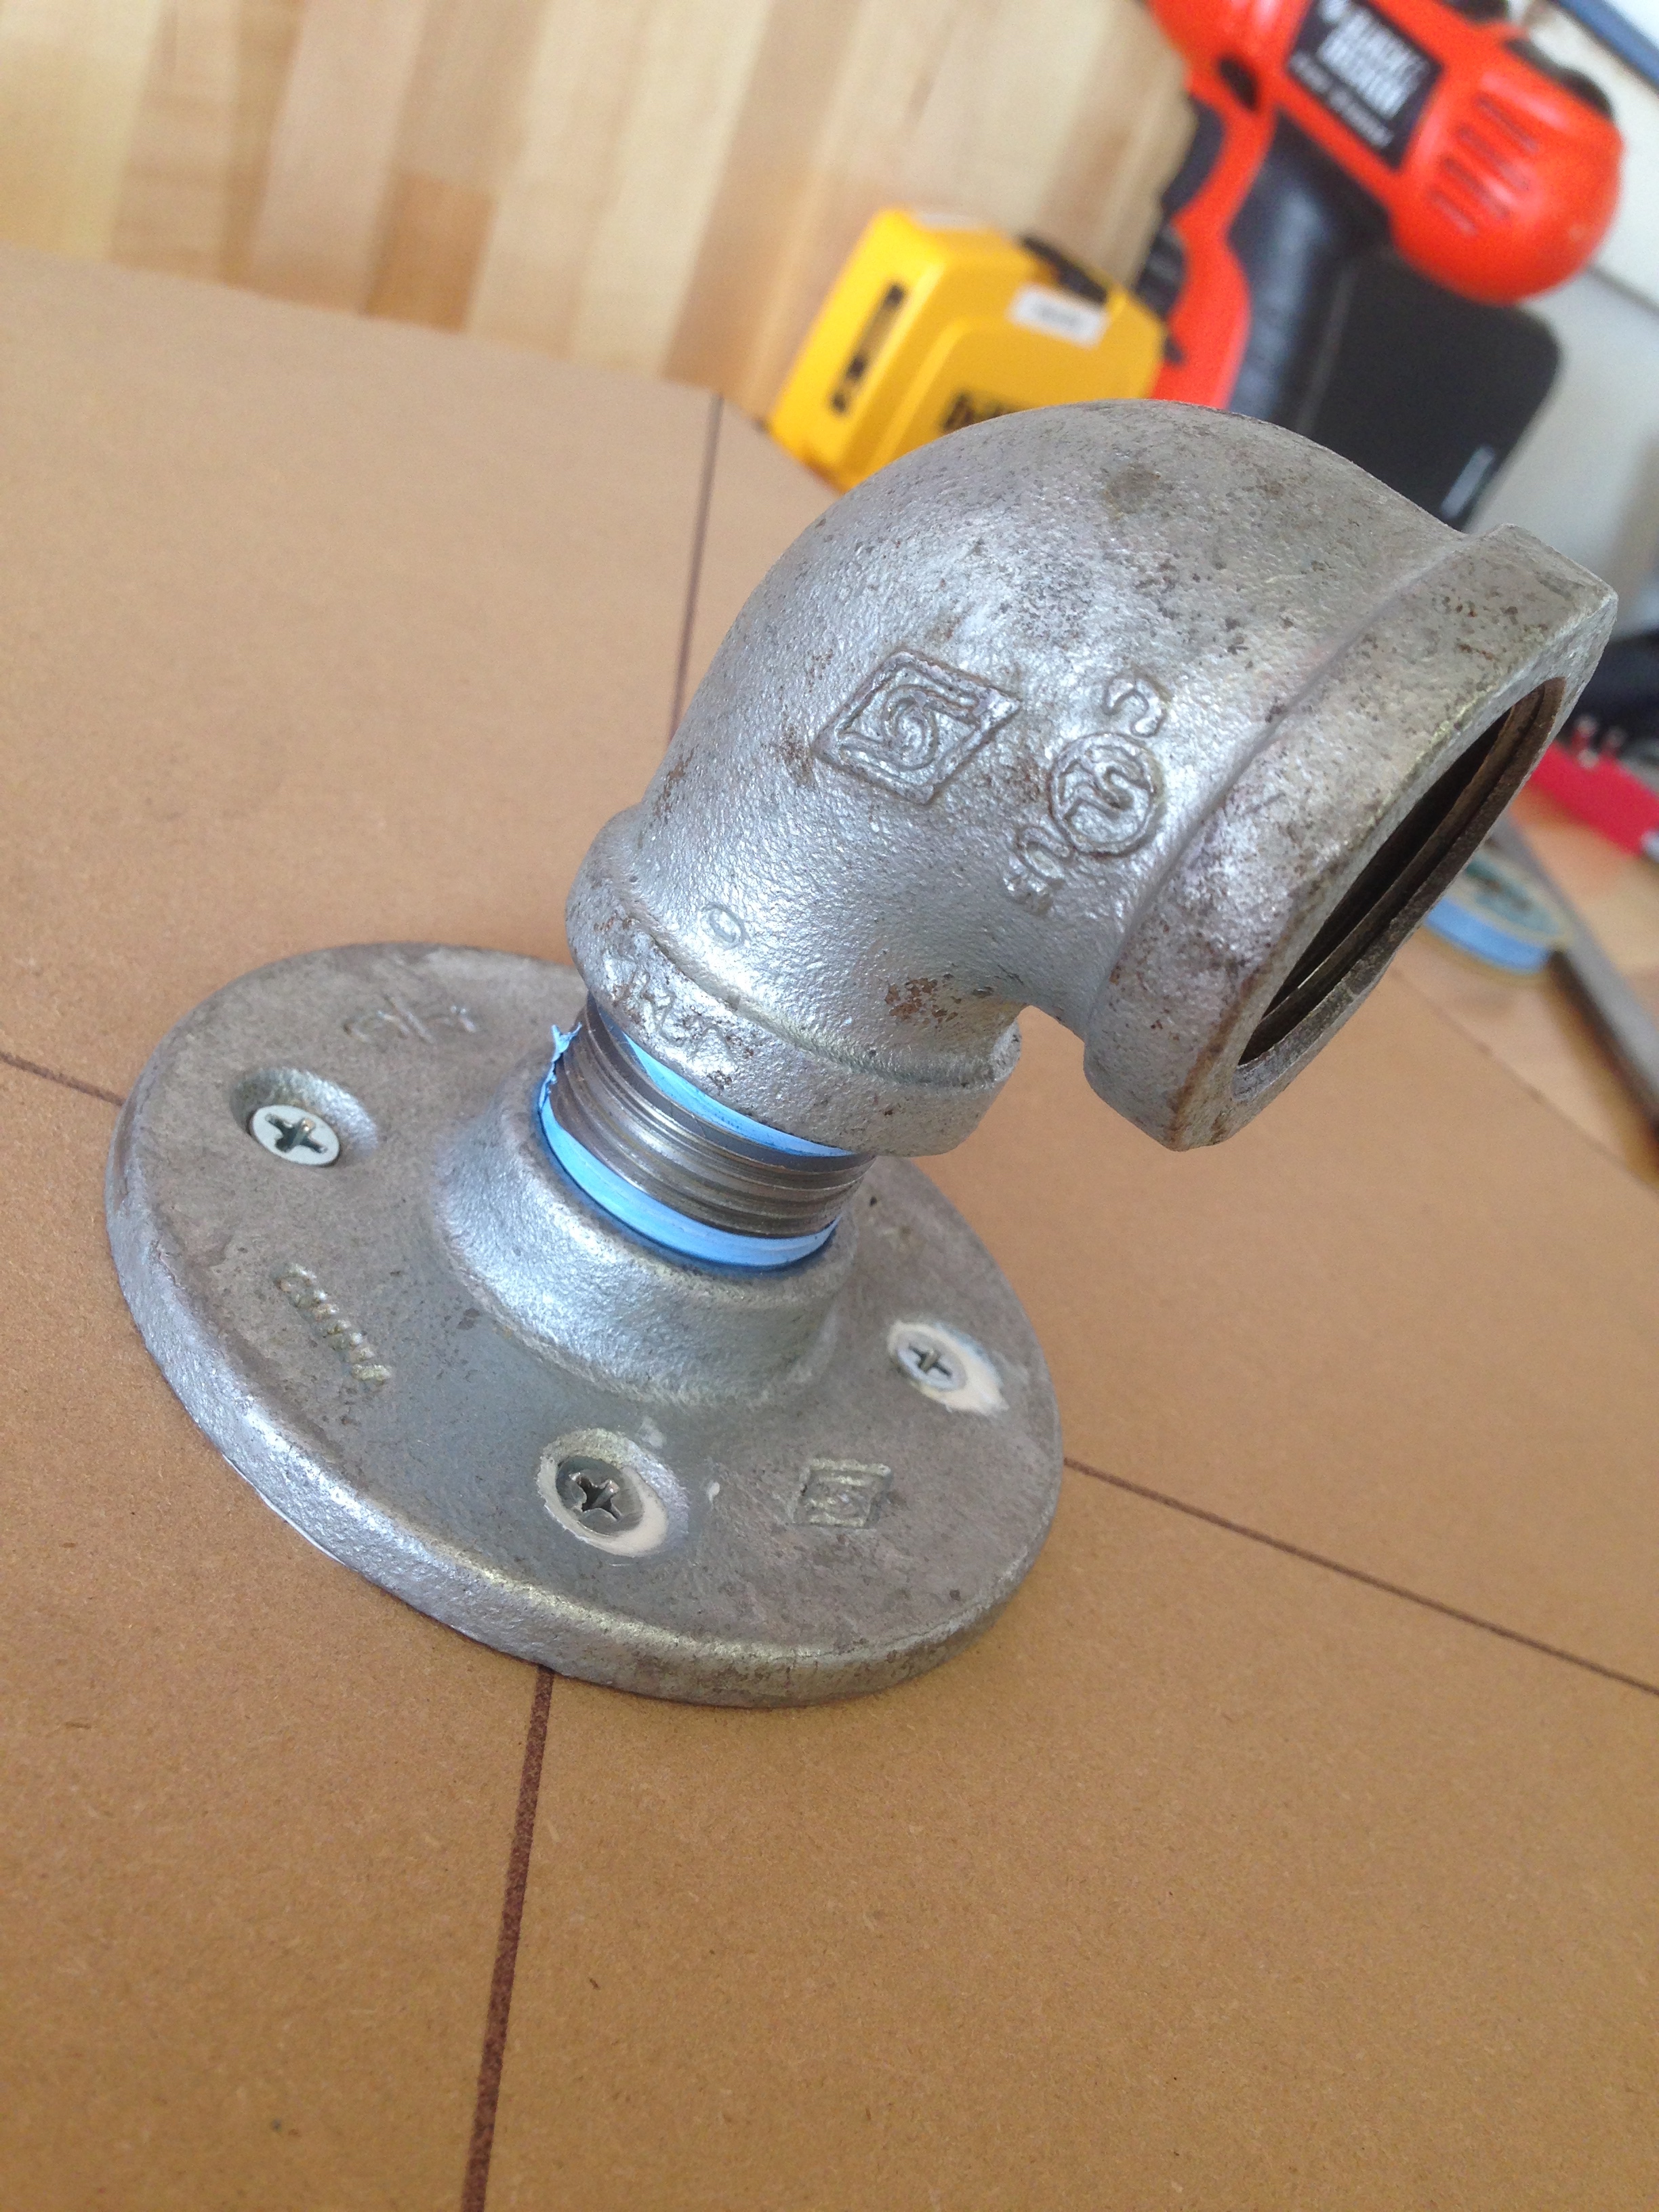
In my case, I chose option 2, and I found that the pipe would “screw” into a 1″ galvanized pipe fitting quite well. You may have better luck in the PVC section, but this worked for me. The connection needs to be as airtight as you can get it.

A floor flange makes an easy way to mate the plumbing to the platen board with a hole in it.
The plastic to be formed is clamped into a frame. This whole frame gets heated up then pressed against the platen. That means you need a way to seal the clamping frame to the top surface of the platen. For this, I went to my old friend camper tape. Weather stripping of any variety would work fine as well.
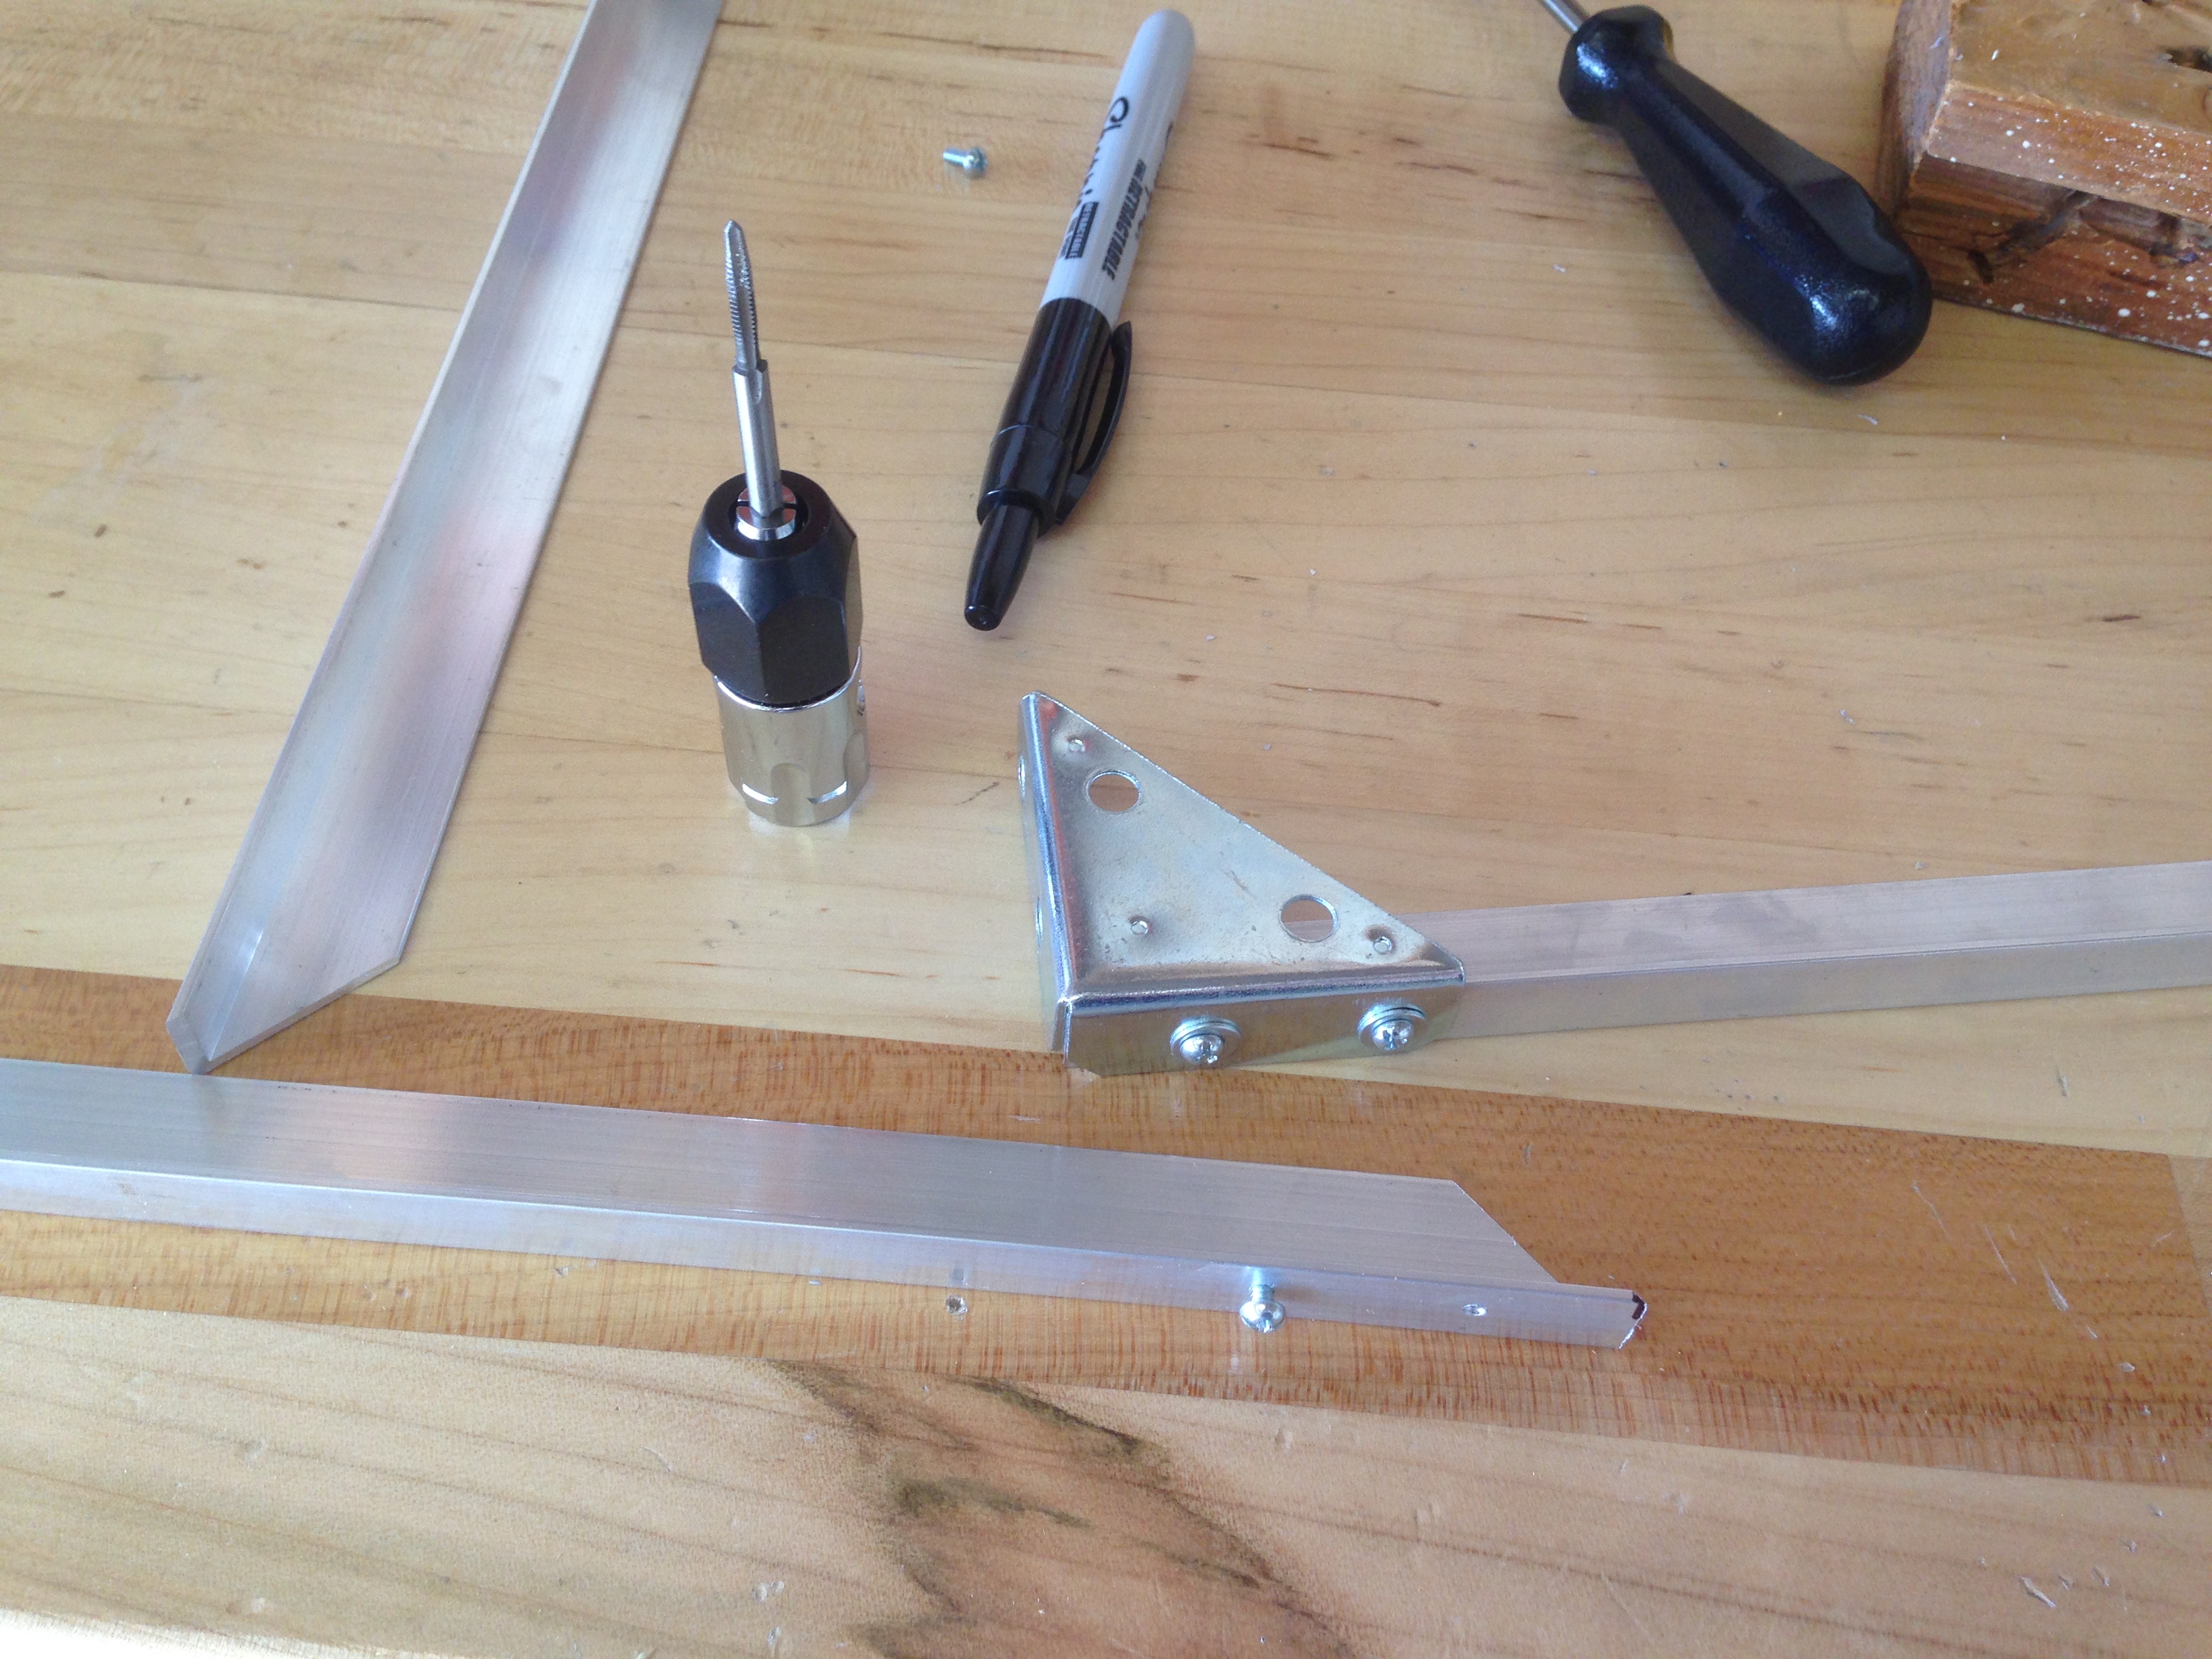
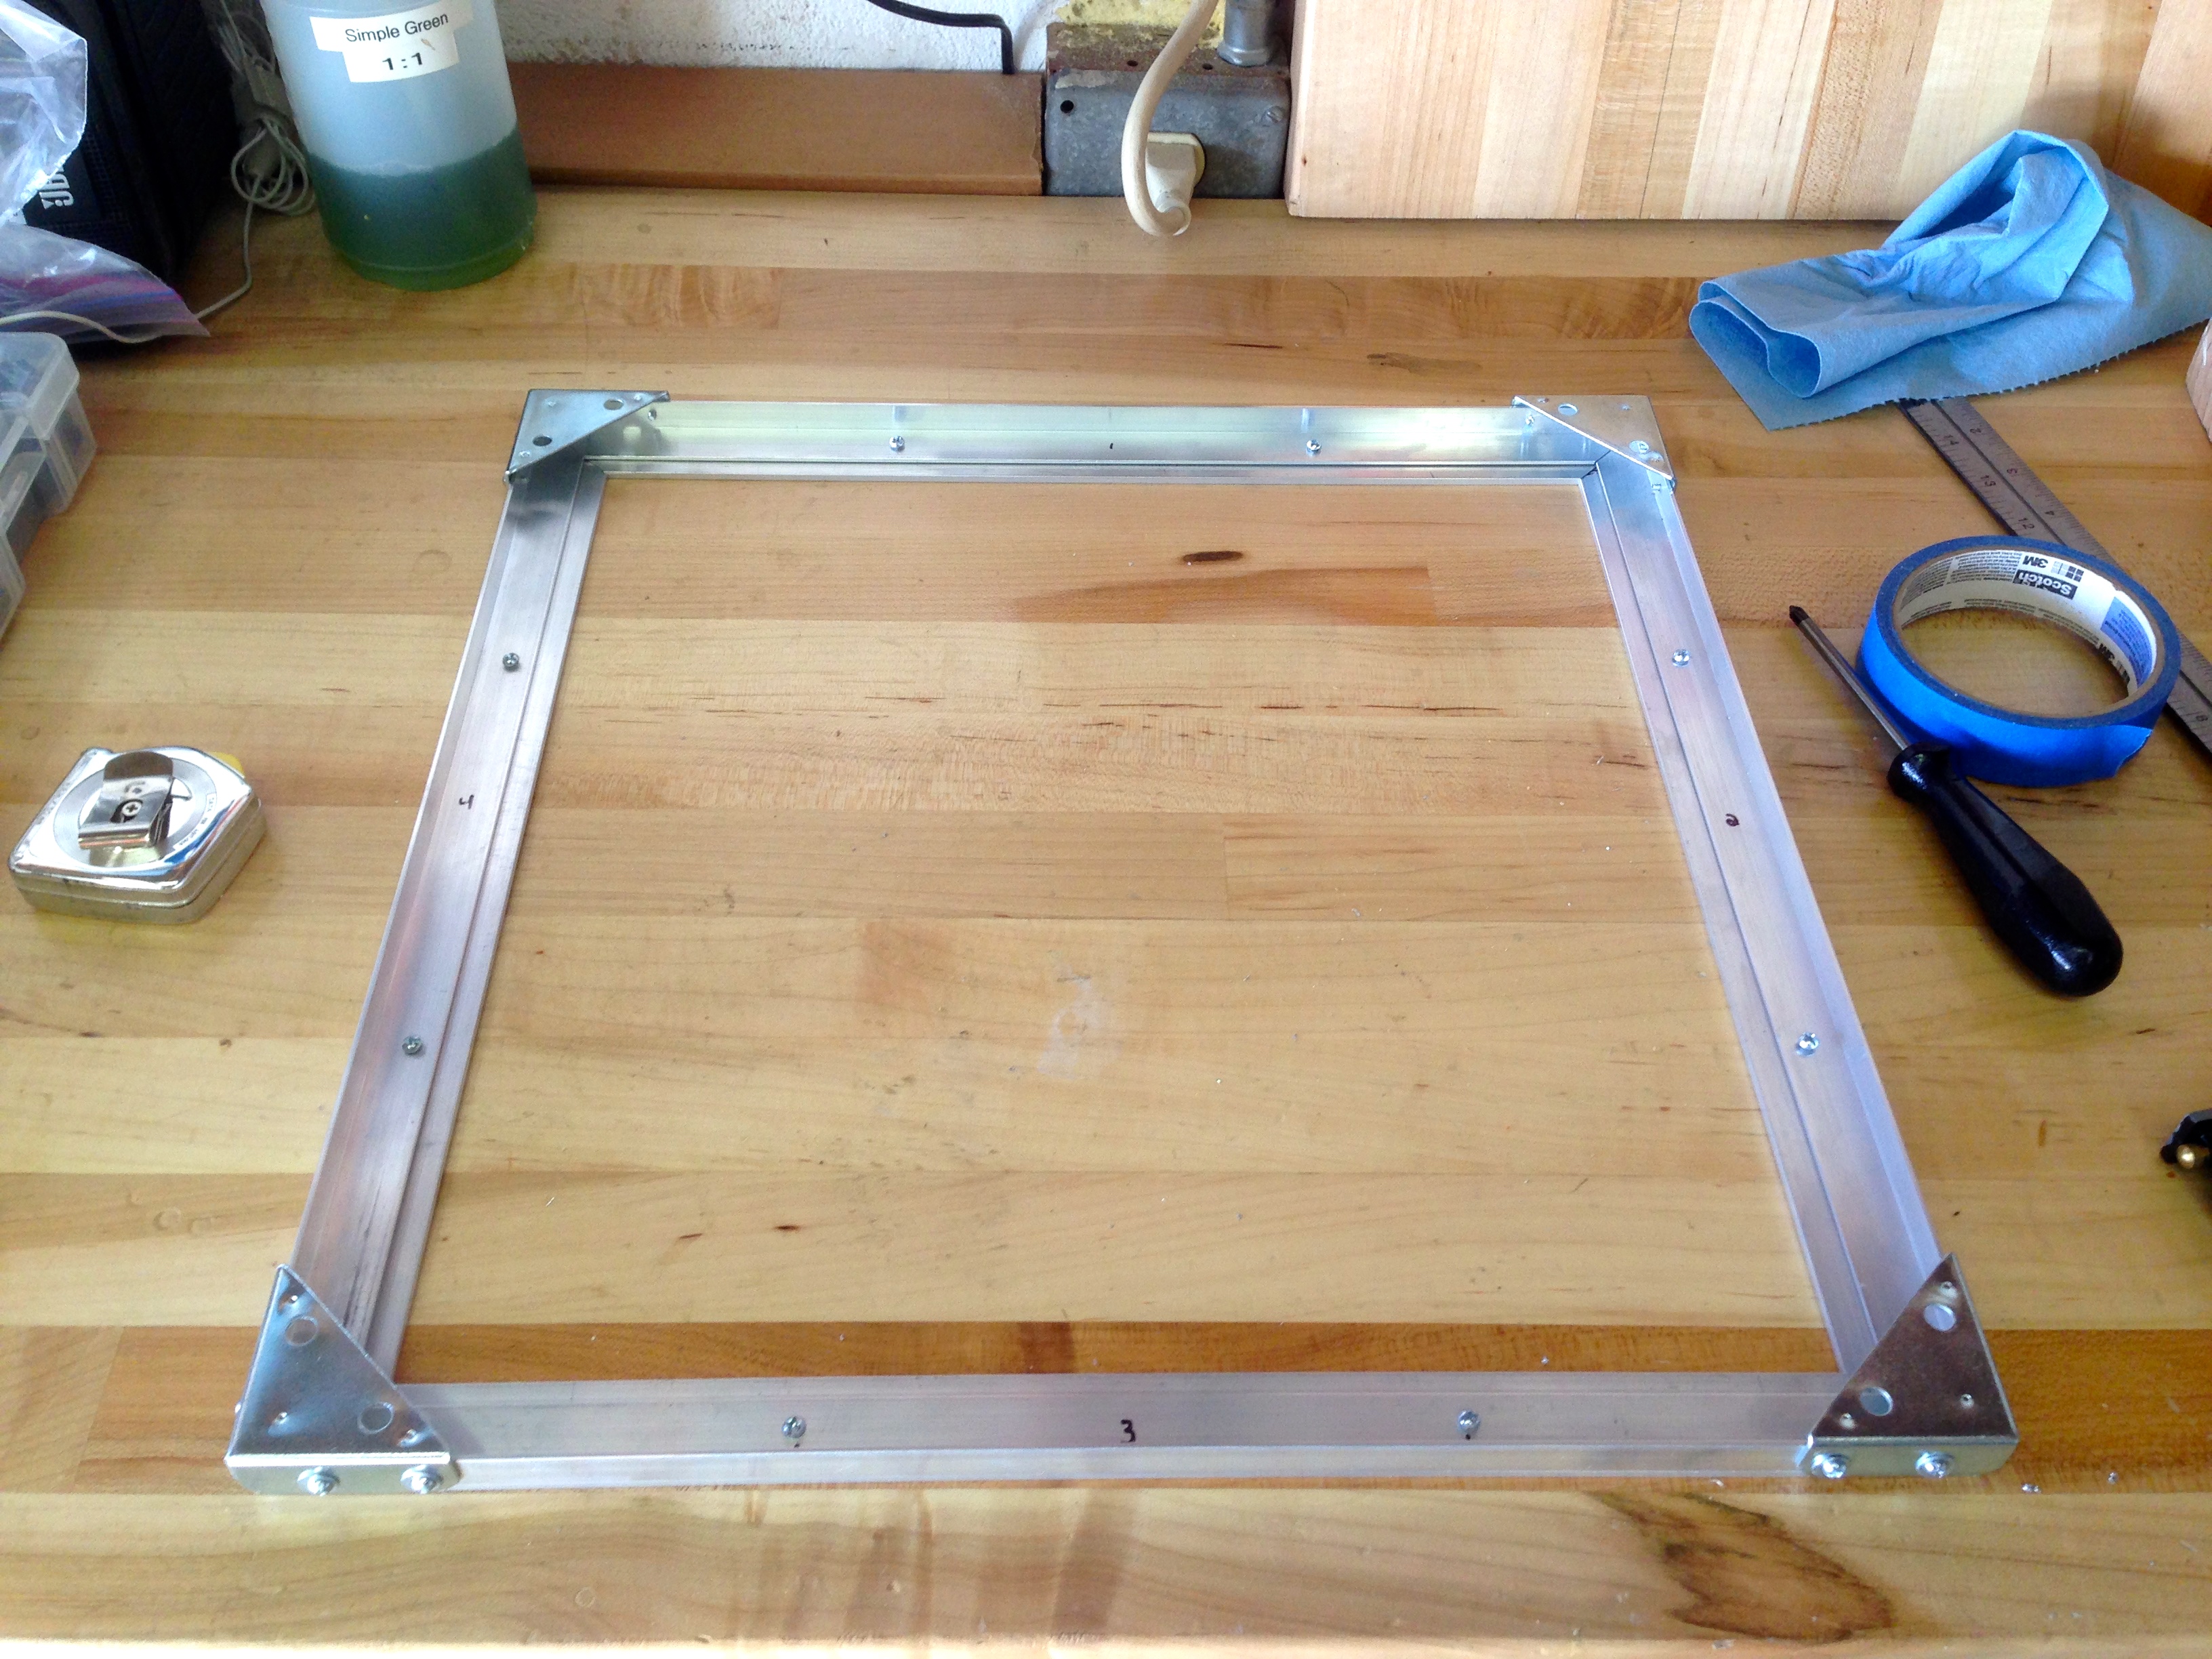
Speaking of the clamping frame, we need one of those too. A lot of people suggest using aluminum window frames for this, which strikes me as an excellent idea. The catch is that you have to find frames with aluminum corners, not plastic ones. Most nowadays are plastic. In fact, my local Home Depot didn’t seem to have any of the above. So, in Blondihacks fashion, I decided to make my own aluminum clamping frame. In fact, I decided to ridiculously overkill it. Really, it was just an excuse to bust out my tap-and-die set and mount up El Diablo in the chop saw.

Now that I’ve completely ridiculously overbuilt that, it’s time to figure out a master. This turns out to be the trickiest part of the process. You need something for your master that is easy to work with, and will stand up to having melted plastic sucked down on it. If you plan to make a lot of copies of something, then wood is a good option. Model makers like balsa wood, because it’s easier to work with for carving the master compared to something like pine. Another popular option is to use a high-density foam board of some sort. I opted to try the latter.
I found these slabs of pink stuff at Home Depot. They come in 24″ square chunks, and they’re intended for craft projects. The sign said it was for making bulletin boards and such. It looked pretty easy to work with, in any case. I need something that I can easily carve my Teddy Top shape out of, and this seems like it might fit the bill.

I wanted to be sure of my process before spending a lot of time making the final product, so I cut some little test pieces of this stuff to see how it works.
For my plastic, I opted for a sheet of 1/16″ ABS plastic. It’s easy to get, and relatively inexpensive. It should be very strong, as well. Rather than waste a lot of large pieces of the forming plastic on my tests, I whipped up a (very) rough test frame out of 1/4″ plywood and binder clips. No points for looks, but it’ll get the job done.
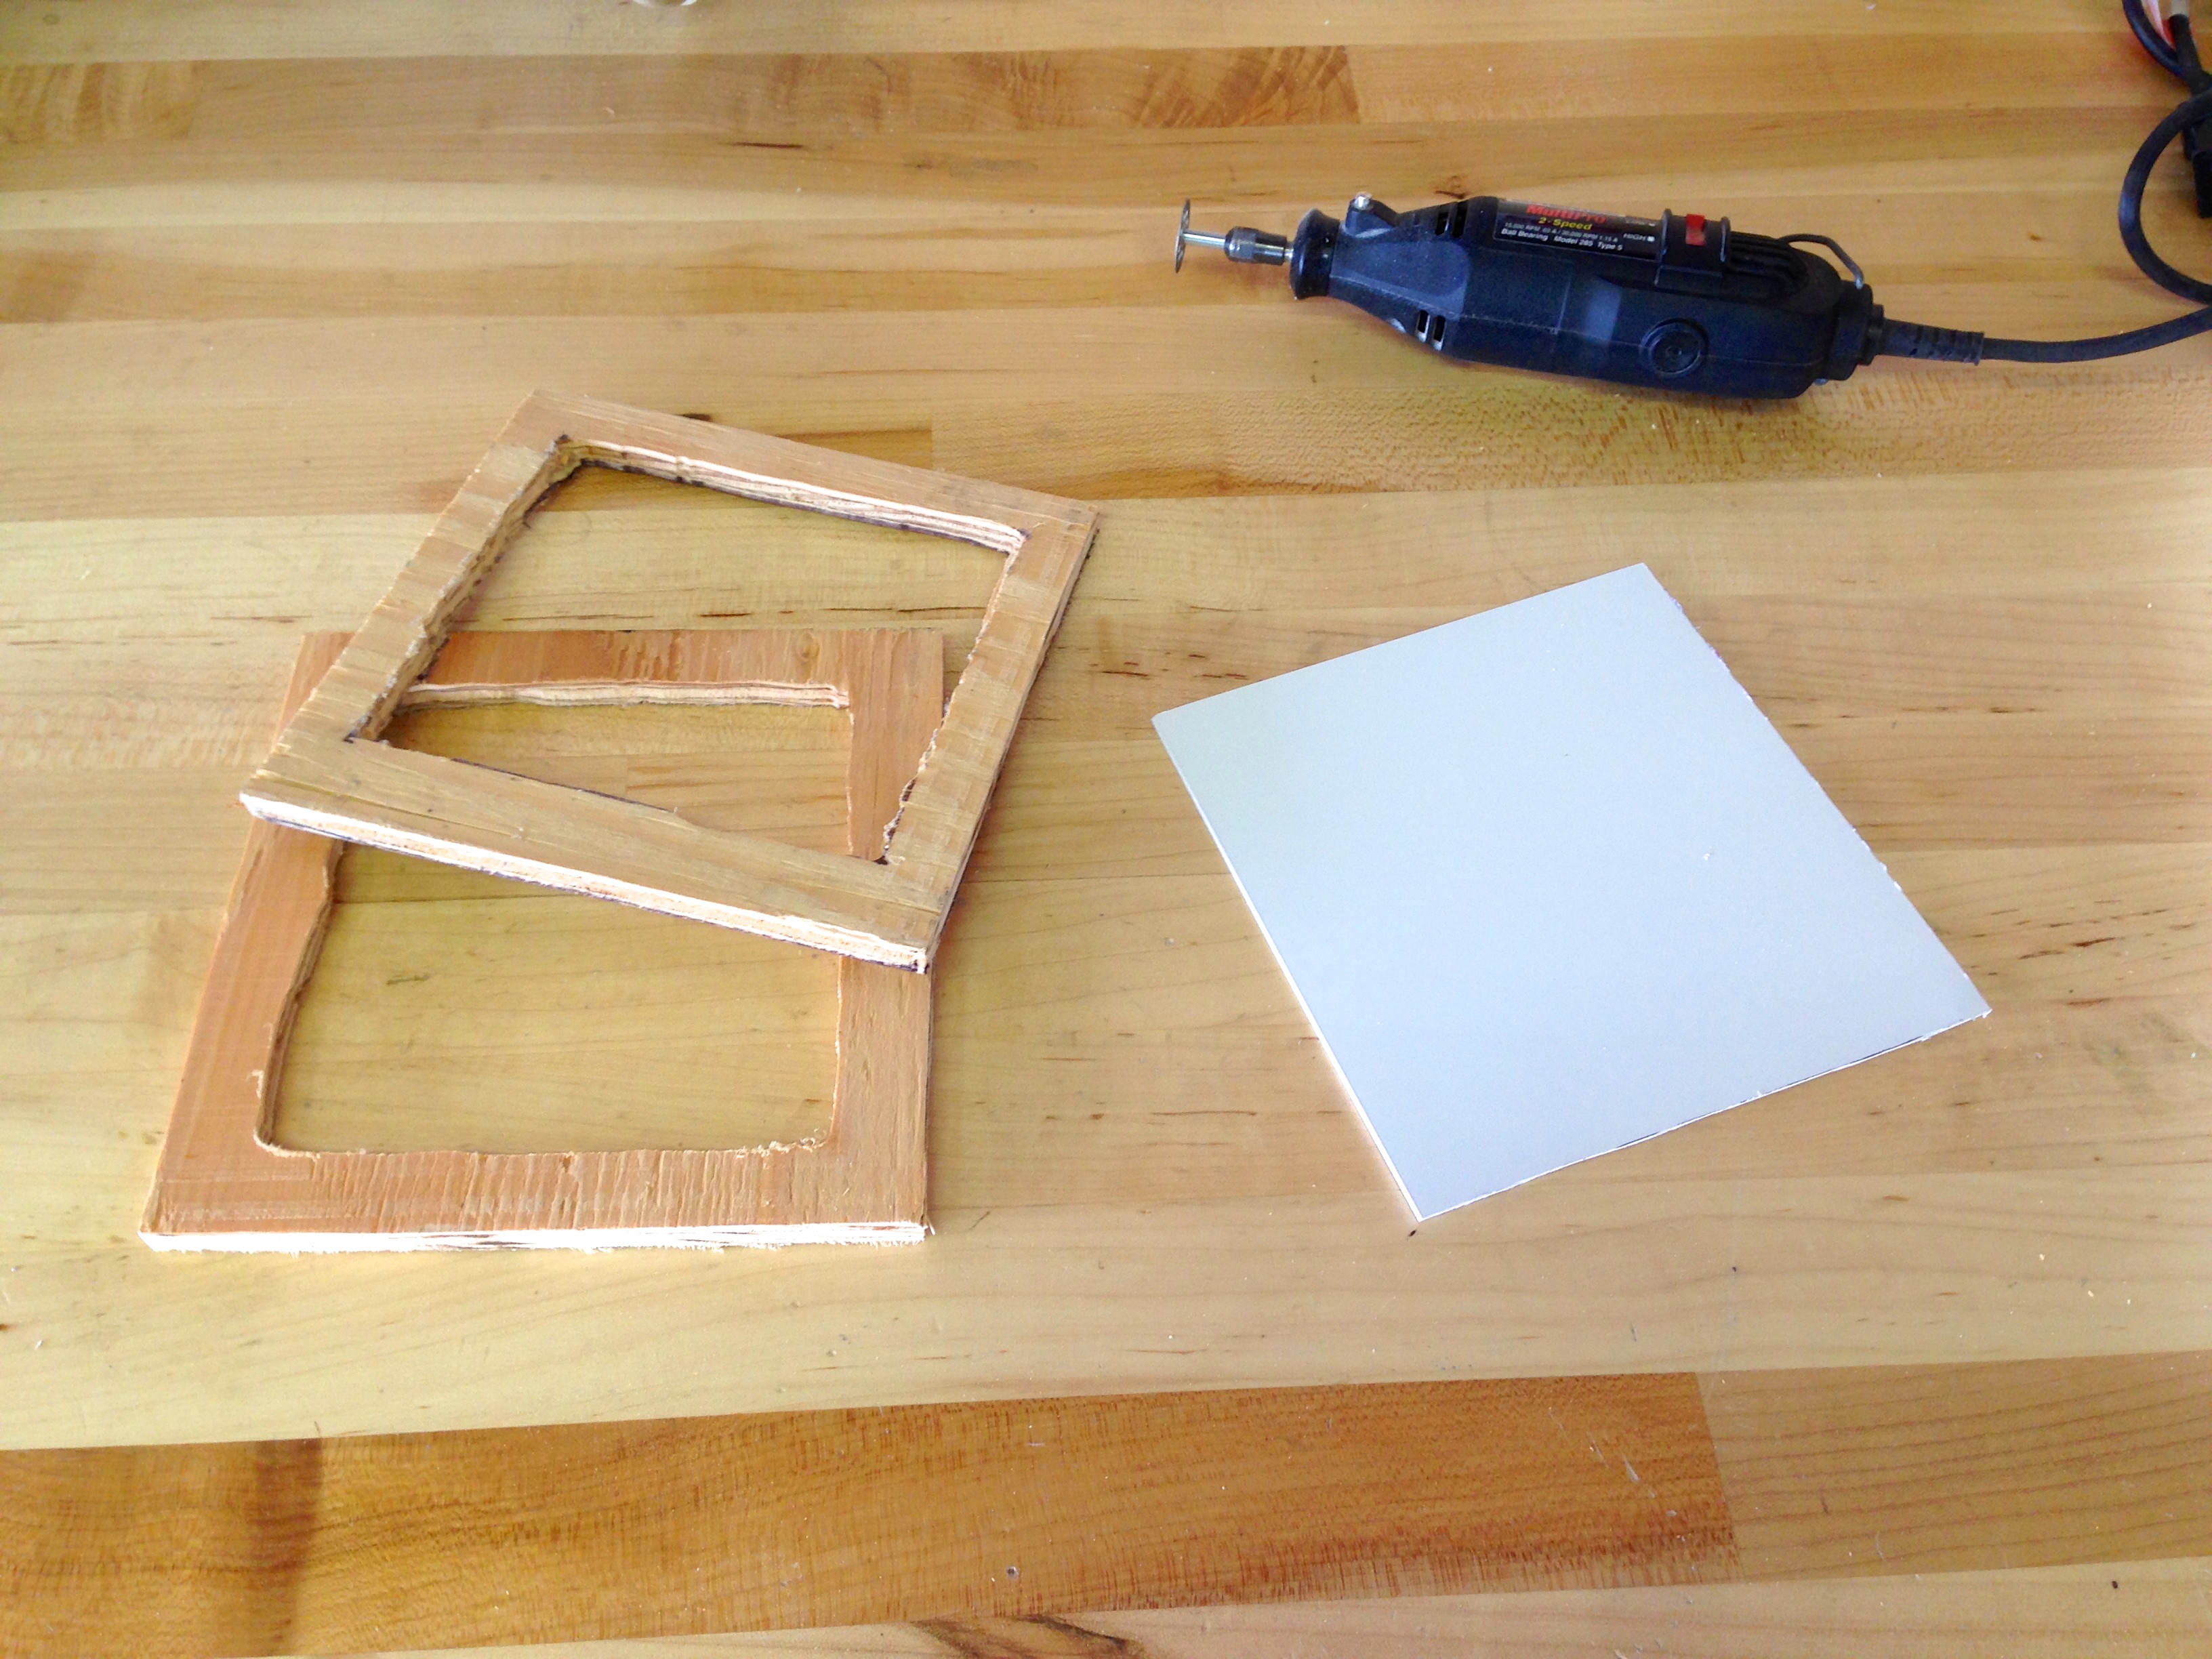
For cutting the plastic, I found the diamond blade on the Dremel worked well. That’s my go-to cutting instrument. When in doubt, diamond Dremel it out!
To seal this smaller frame against the platen, I made a back-to-back square of camper tape. It can’t be stuck to the frame, because it would melt in the oven, but it can’t be stuck to the platen, because it would block vacuum on the larger frame.
I heated the oven to 350ºF, placed the clamped plastic in on top of some water glasses, and waited for it to melt. You’re supposed to apply it to the form when it’s soft enough that it droops below the frame about half the height of your master. For me, that took about 5 minutes.
I made a little T-shape out of the foam to practice on.
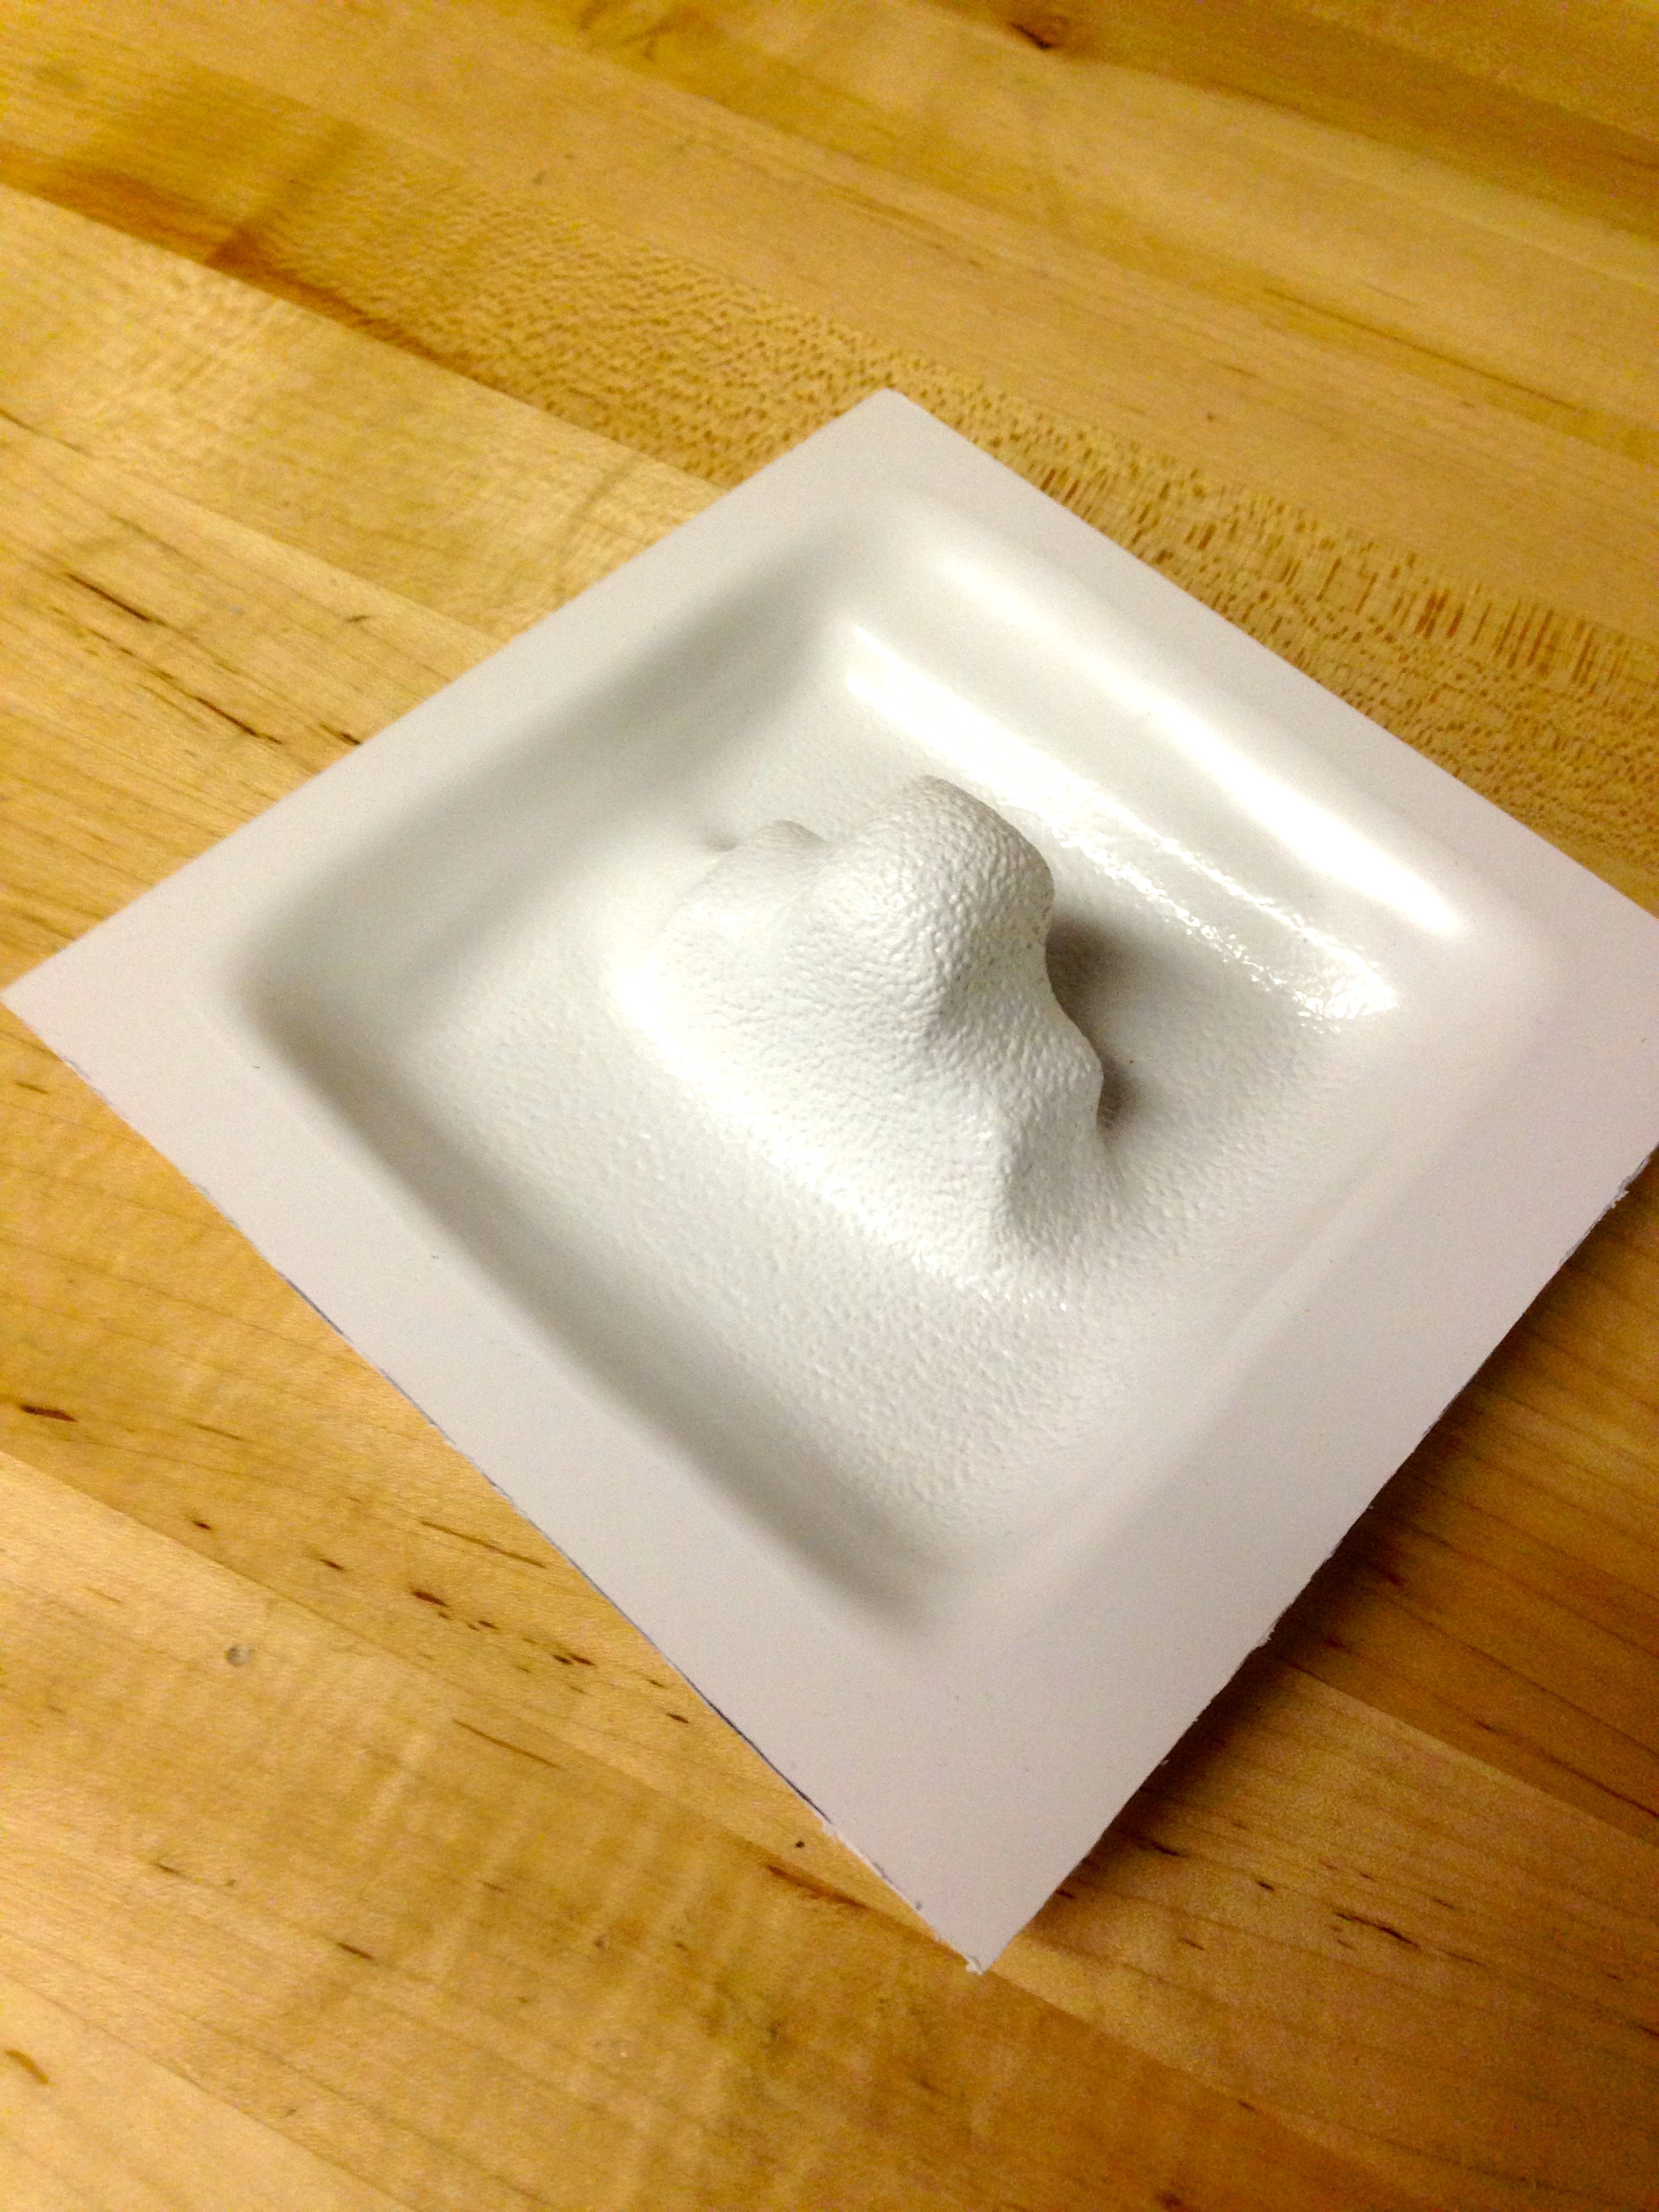
First lesson learned- the pink foam doesn’t stand up to the heat of the plastic. It melted into a rounded blob while the plastic cooled. The ABS is also acquiring an orange-peel surface when heated. I’m not really sure what causes that, and I couldn’t find any information about it.

A little more research indicates that you need to protect the foam from the heat. Methods for doing this include applying plaster, concrete, or clay to the outer surface. Another option caught my eye- bondo. I’m a big fan of bondo in general. It patches, it seals, it sands, it’s easy to work with- generally good shit. The only downside is that it smells utterly awful while curing. Not something you want in the house, for sure. Also, make sure to wear a respirator while working with it (especially when sanding). No, not the N95 paper dust masks you get in the checkout aisle at Home Depot. A proper P100 valved respirator. It costs a lot less than new lungs.
So, I slathered some bondo on another test block, and fired up the rig again. I didn’t bother sanding the bondo smooth, because it would give me a sense of how much detail I can get out of the former. This second one worked much better- the bondo did its job of protecting the foam from heat, and the forming went off without a hitch. The result is pretty neat, but I wouldn’t say it’s awesome.
I attempted to catch video of the process, but unfortunately my hand kinda blocks the money shot. In any case, you get a rough idea of how it works. My oven is just out of frame to the right.
Volume warning- the vacuum is pretty loud.
I decided to step back at this point and take stock. There are a number of concerns here:
- The orange-peeling that the plastic acquires when heated. I can’t find any explanation for this, or mention of it online. It’s not a show-stopper, but kind of annoying.
- The limited detail level. Further research suggests that I’m using too heavy a plastic for 1000W of vacuum, and apparently ABS is not a good choice for beginners, as it is more difficult to vacuum form.
- There’s some people that say doing this in your kitchen oven is a Bad Idea™. Apparently chemicals are released from the plastic during heating that you don’t want around food. However, those people are a small minority, so it’s unclear if this is concern-trolling, or if this is a legitimate concern. I struggle to believe it would be a problem for one or two pieces, but I certainly wouldn’t set up a production line in my kitchen with this stuff.
I think the bottom line is that I didn’t do quite enough research before embarking on this. I chose the wrong type and thickness of plastic, I underestimated the difficulty in making a master, and I failed to consider the possible implications of nasty chemicals in my oven. I’m going to evaluate my options again and think about how to proceed on Teddy Top.
In any case, I don’t consider this a failure. I had fun building this thing, I learned a lot, and I spent time with my tools, which is always valuable. The more you build things, the better you get at it. Any time spent in the shop is time well-spent, in my book.
I do think that going to vacuum forming will help you get what you’re after for this. That said I have no idea how hard it’s going to be to get the result you’re after. You might want to see if you can find a T and a valve you can use to reduce the strength of the vacuum by letting air in, but I don’t know how controllable that will be either. I’d suspect the orange peel texture is going to be related to too much vacuum too fast. My guess is that you’re getting small channels of air once it touches the master in small points that are making the creases which might go away if you reduce the rate of vacuum.
I don’t know if it’s actually viable but you might try using a heat gun to do the heating and avoid some of those problems.
Regarding the orange peel style surface finish issue: I’ve not done any vacuum forming myself but from what I’ve seen people usually turn on the vacuum after the soft plastic is in place on the master. I have no idea if this is your issue but trying it might help.
The orange peel actually happens in the oven while the plastic is heating up. Maybe it means I’m heating it too quickly? Or too slowly? Or not long enough? It happens about two minutes before the plastic starts drooping.
I think the orange-peel could be due to moisture absorbed by the plastic. Plastic for 3D-printers is shipped in airtight bags along with desiccant.
Could you try a different, thinner plastic such as styrene which supposedly is less prone to moisture and then use fibreglass & resin on the inside to stiffen it up?
On Orange peel texture – While working with enameling (colored glass on metal) several years ago, I learned that when remelting a piece while adding more colors, the Orange peel texture appeared just before melting, probably caused by non-uniform temperature or composition causing small areas to melt before their surroundings, and surface tension altering its shape. Since you don’t want melting, try lowering the oven temperature a little.
Fun article.
That’s great insight- sounds very much like what’s happenning here. Lower temperature and slower warming, perhaps. I could put the plastic in before the oven is preheated, and let it warm up as slowly as possible as the oven warms.
Once you enter the realm of vacuum forming, I think the experience level required skyrockets.
It is the right tool for the job, but I think you would be best served finding someone to show you the ropes first.
I have read many online tutorials, blogs, and forums related to this subject and ended up with no holy grail of undisputed wisdom.
3D printing is at a fever pitch is the lack of requirement for a master. No master, all of the sudden anyone can create something for free with no artistic ability required. Well limited artistic ability anyways.
Instead of using the oven to heat the plastic, how about a hot air gun? I found one at Harbor Freight for less than $20 that delivers air at > 1000F. http://www.harborfreight.com/1500-watt-dual-temperature-heat-gun-572-1112-96289.html
All the sources I read said not to use a hot air gun (which I have one of). Apparently it’s impossible to get even heating that way, unless the piece is very small.
Also, here’s a reference book you should look at.
http://gingerybookstore.com/VacuumForming.html