How far we’ve come from where we were.
It’s an auspicious occasion here at Blondihacks. You see, my Philips Sonicare Elite toothbrush died. Why is that an occasion of note? Well, the same failure of this same toothbrush roughly four years ago is the event that started Blondihacks. The toothbrush was roughly four years old at the time, and it died because the internal NiCd battery would no longer accept a charge. NiCd batteries do that. They kinda suck. That failure caused something to break inside me as well. A $140 device lasting four years, then failing due to a $2 part was simply unacceptable. The prominent label of “no user serviceable parts inside” would never again deter me from getting my money’s worth out of a product. Luckily, that first repair went really well, and I was inspired to keep doing it (and keep blogging about it). Had the toothbrush melted down in my hand that day, perhaps there would be no Blondihacks, no Veronica, and of course no Dish-O-Tron 6000 Extreme. What fun would that be?
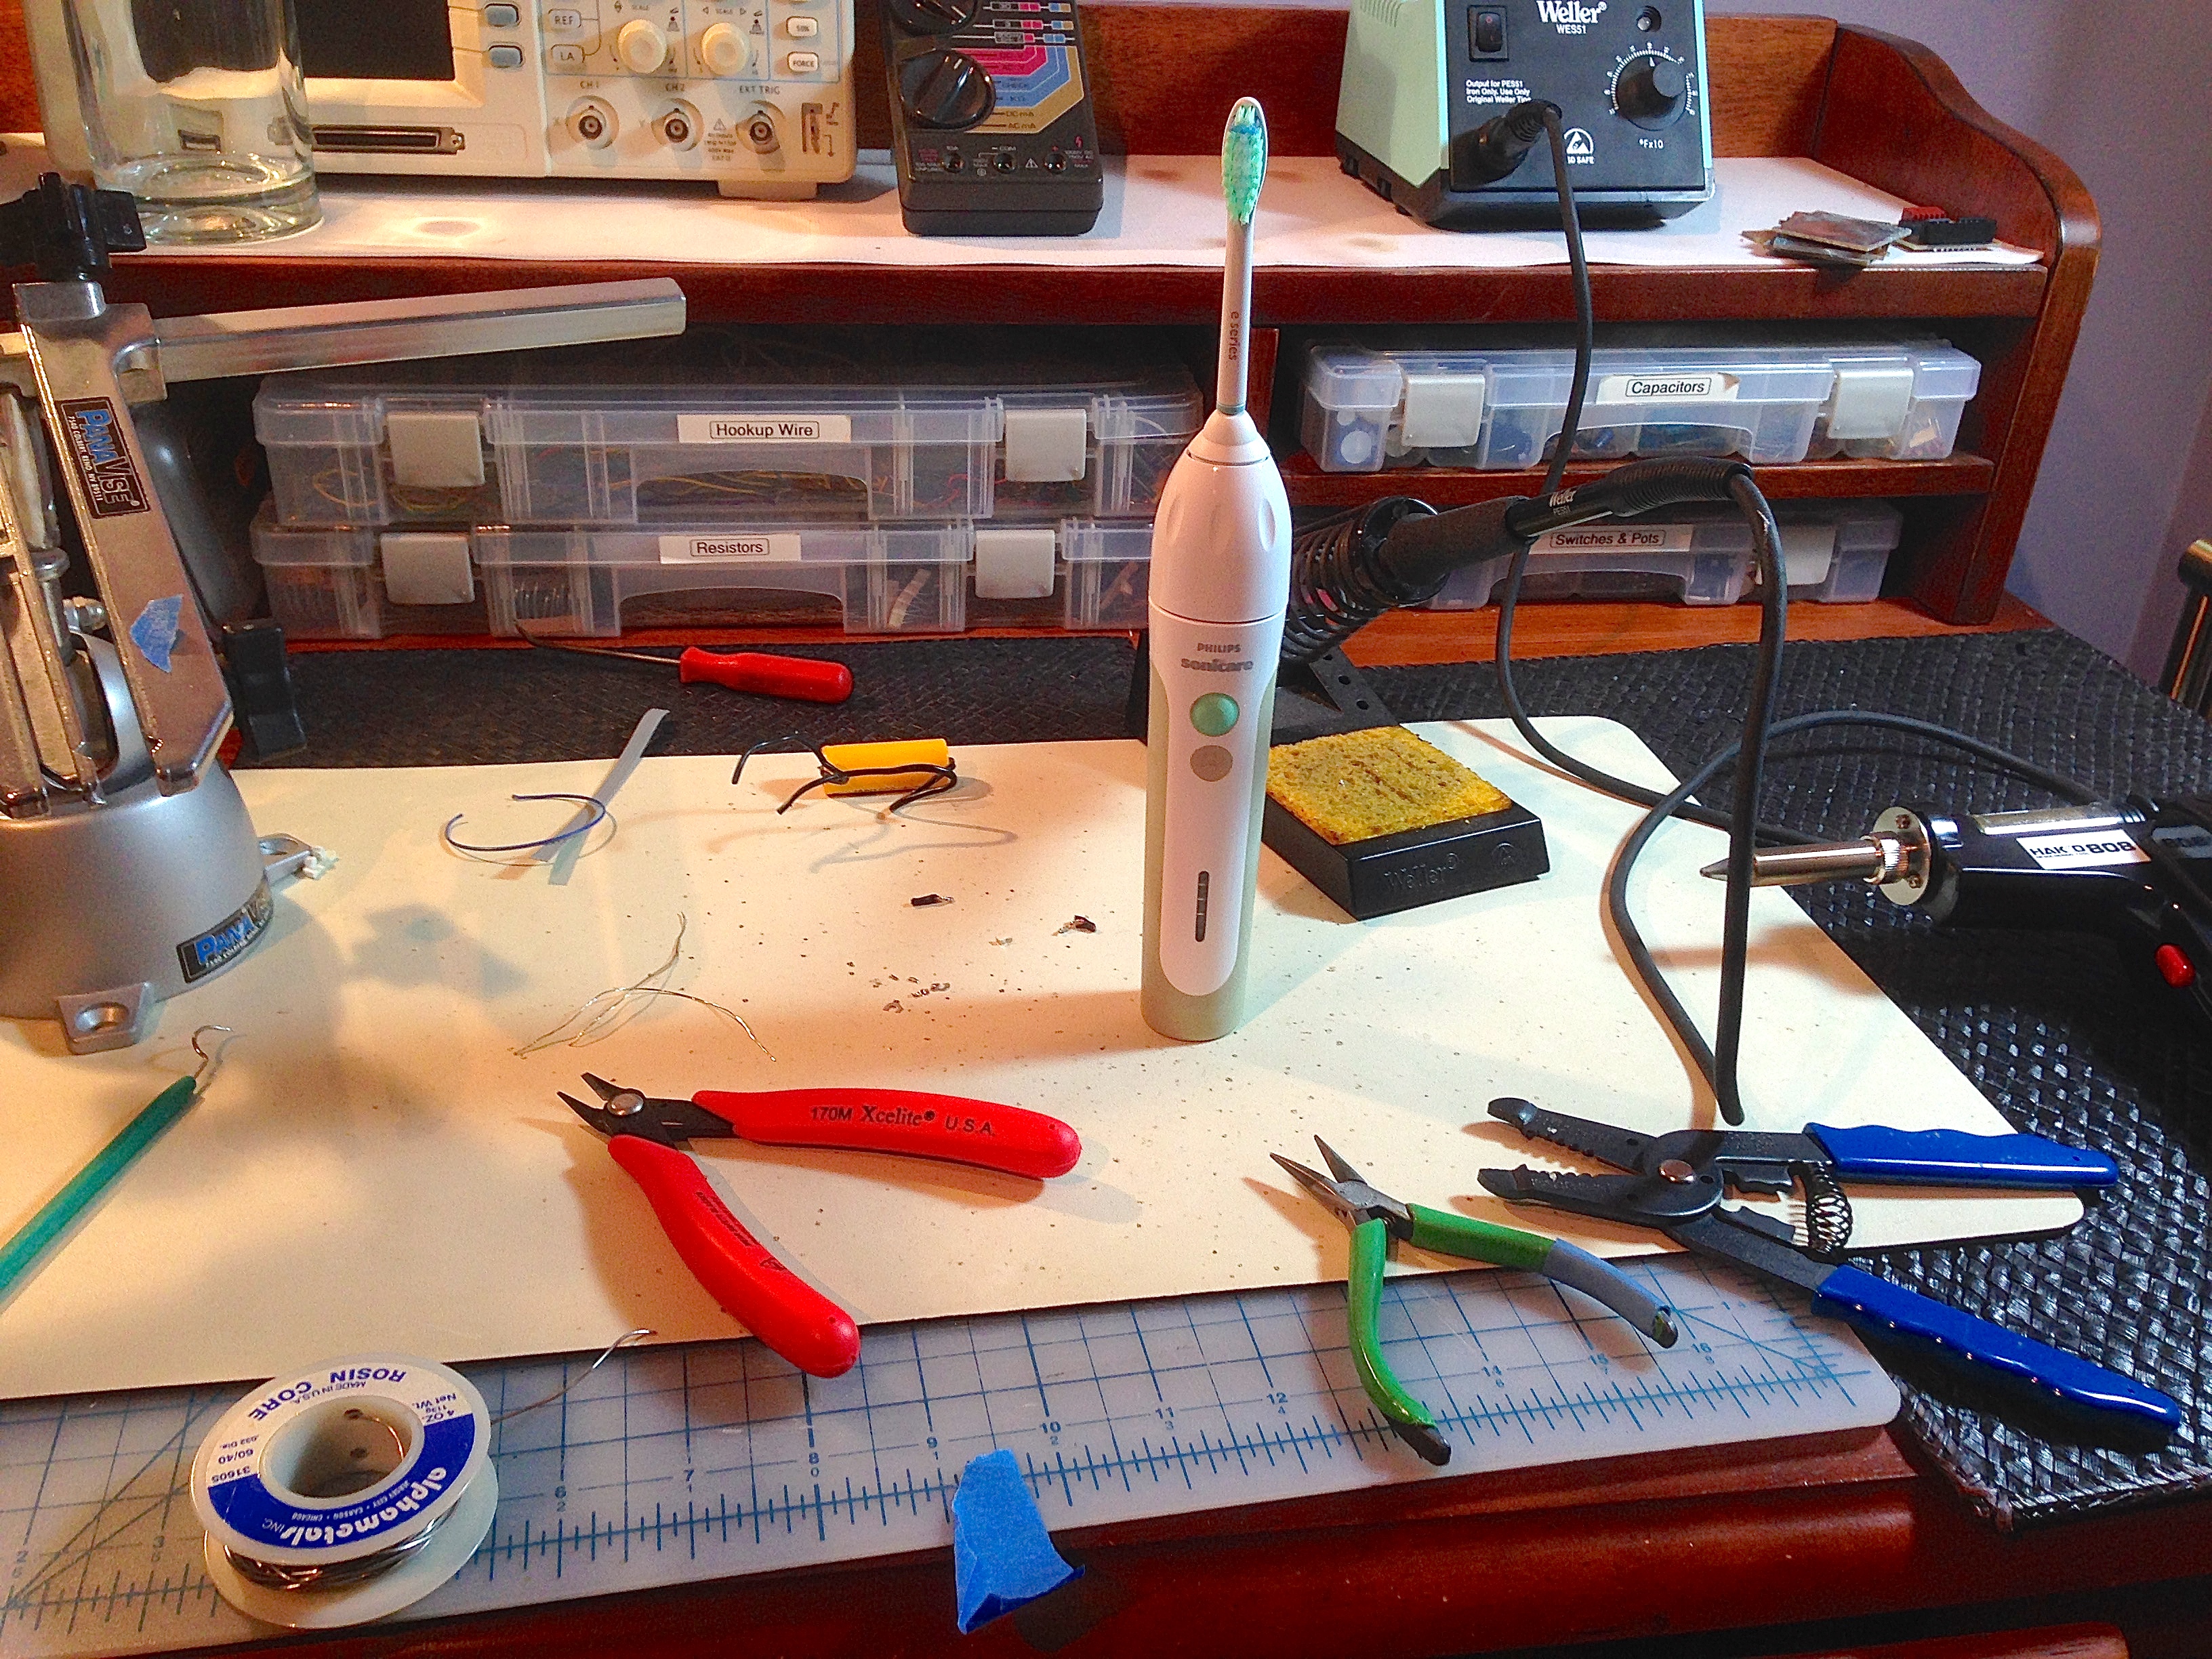
Here we are four years later, and it’s time to replace the battery in the toothbrush again. I’ve learned a few things since last time, and picked up a few new tools as well. This time around, for instance, I’ve learned you can buy batteries with tabs spot-welded on. No need to foolishly attempt to solder wires directly to a battery with a high-wattage iron. I also have a proper desoldering gun, so no more splattering solder everywhere as I yank things apart while holding the iron to the joints. It’s a brave new hacking world.
Once again, there was no way I was letting an expensive device go in the trash because of a single weak point. This thing is basically just a water-tight tube with a voice-coil in it, after all. There’s no reason it shouldn’t last virtually forever. I aim to ensure it does.
I had to remind myself how to take this thing apart. Luckily, I wrote it down on the internet the first time. I jest, but that’s a genuine reason why I keep blogging this stuff. It’s an engineer’s notebook of sorts. I can’t tell you how many times I’ve referred back to my own posts to remember how something works! This toothbrush looks as though there is no way to take it apart. No visible fasteners, and hardly so much as a case seam to work with. However, as I always say, anything that was assembled can be disassembled. The trick here is:
- Remove the little rubber trapezoidal “foot rest” on the back.
- Under that is a plastic trapezoid. Pop that off with a metal pick.
- Unscrew the toothbrush head, then pop the mounting ring off of it.
- Screw the “naked” mounting ring back on to the base.
- Over-tighten the ring slightly while pulling on it. This breaks the seal between the inner and outer layers of the case.
- The guts of the brush will pull straight out (do not twist!).
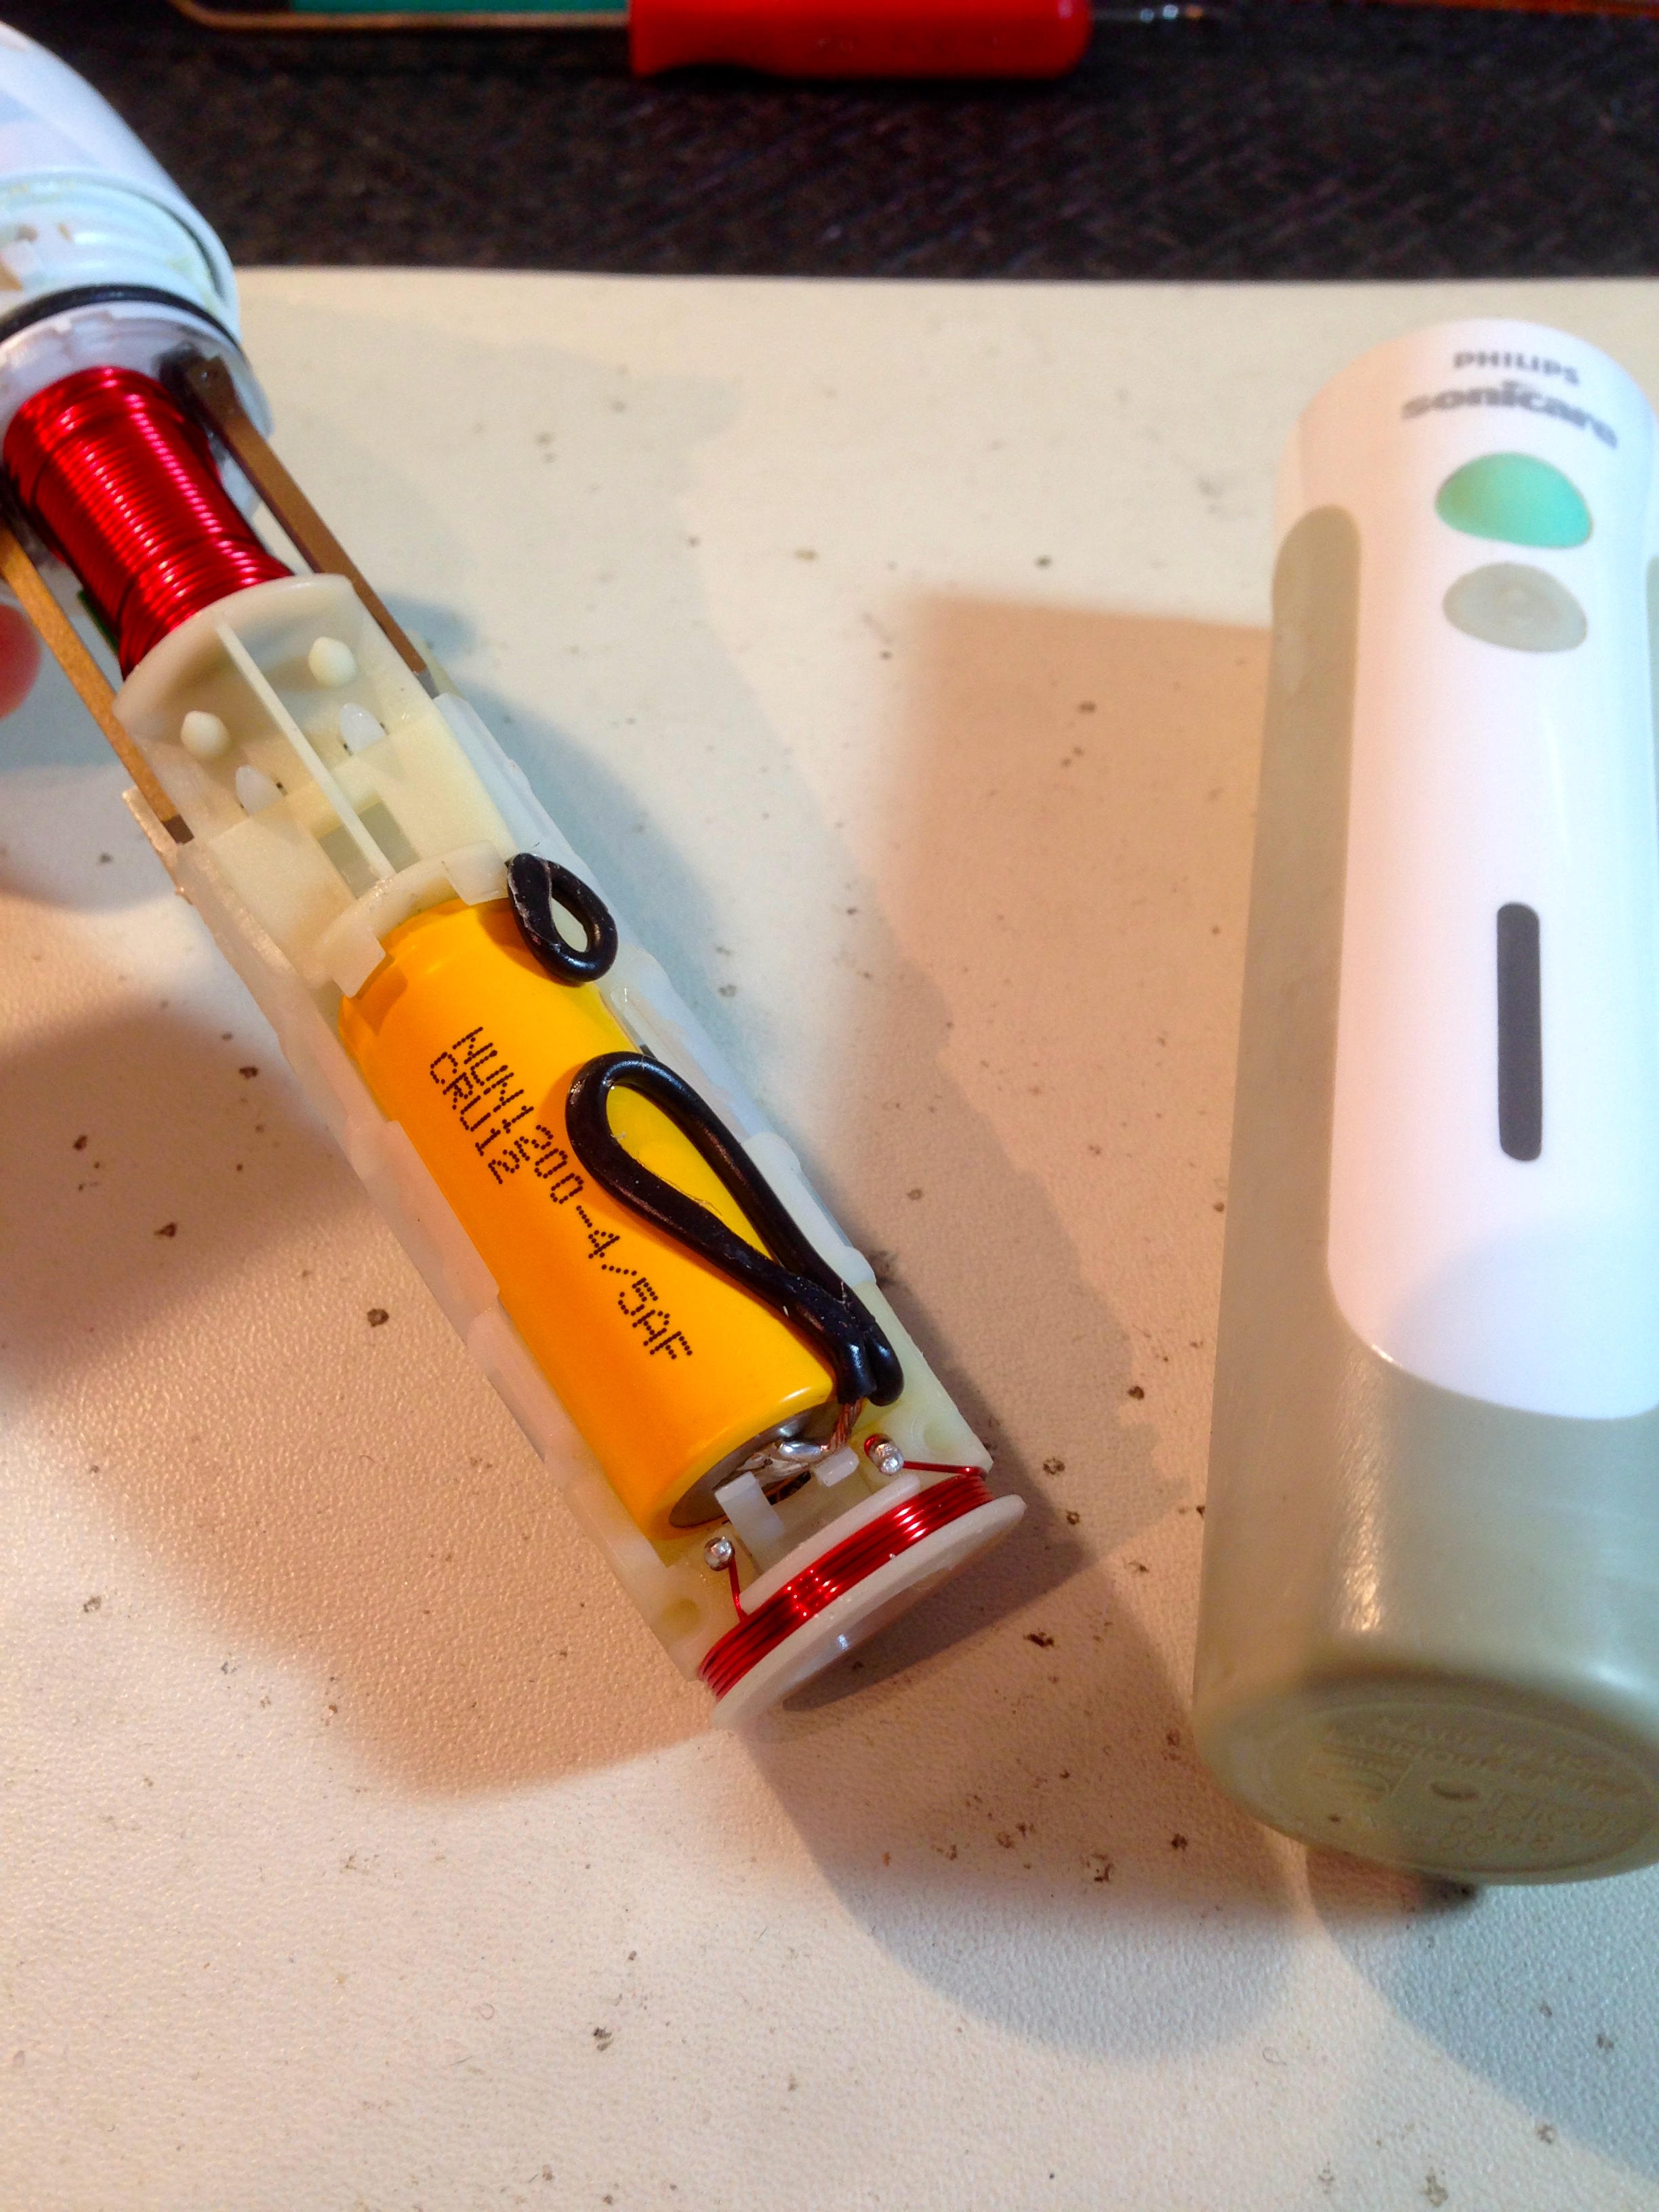
As you can see, last time I bought a normal 4/5AF NiCd cell, and soldered wires to it. I then ran these wires around the back and soldered them to the PCB where the old battery’s tabs inserted. This time, I think I can do a little better.
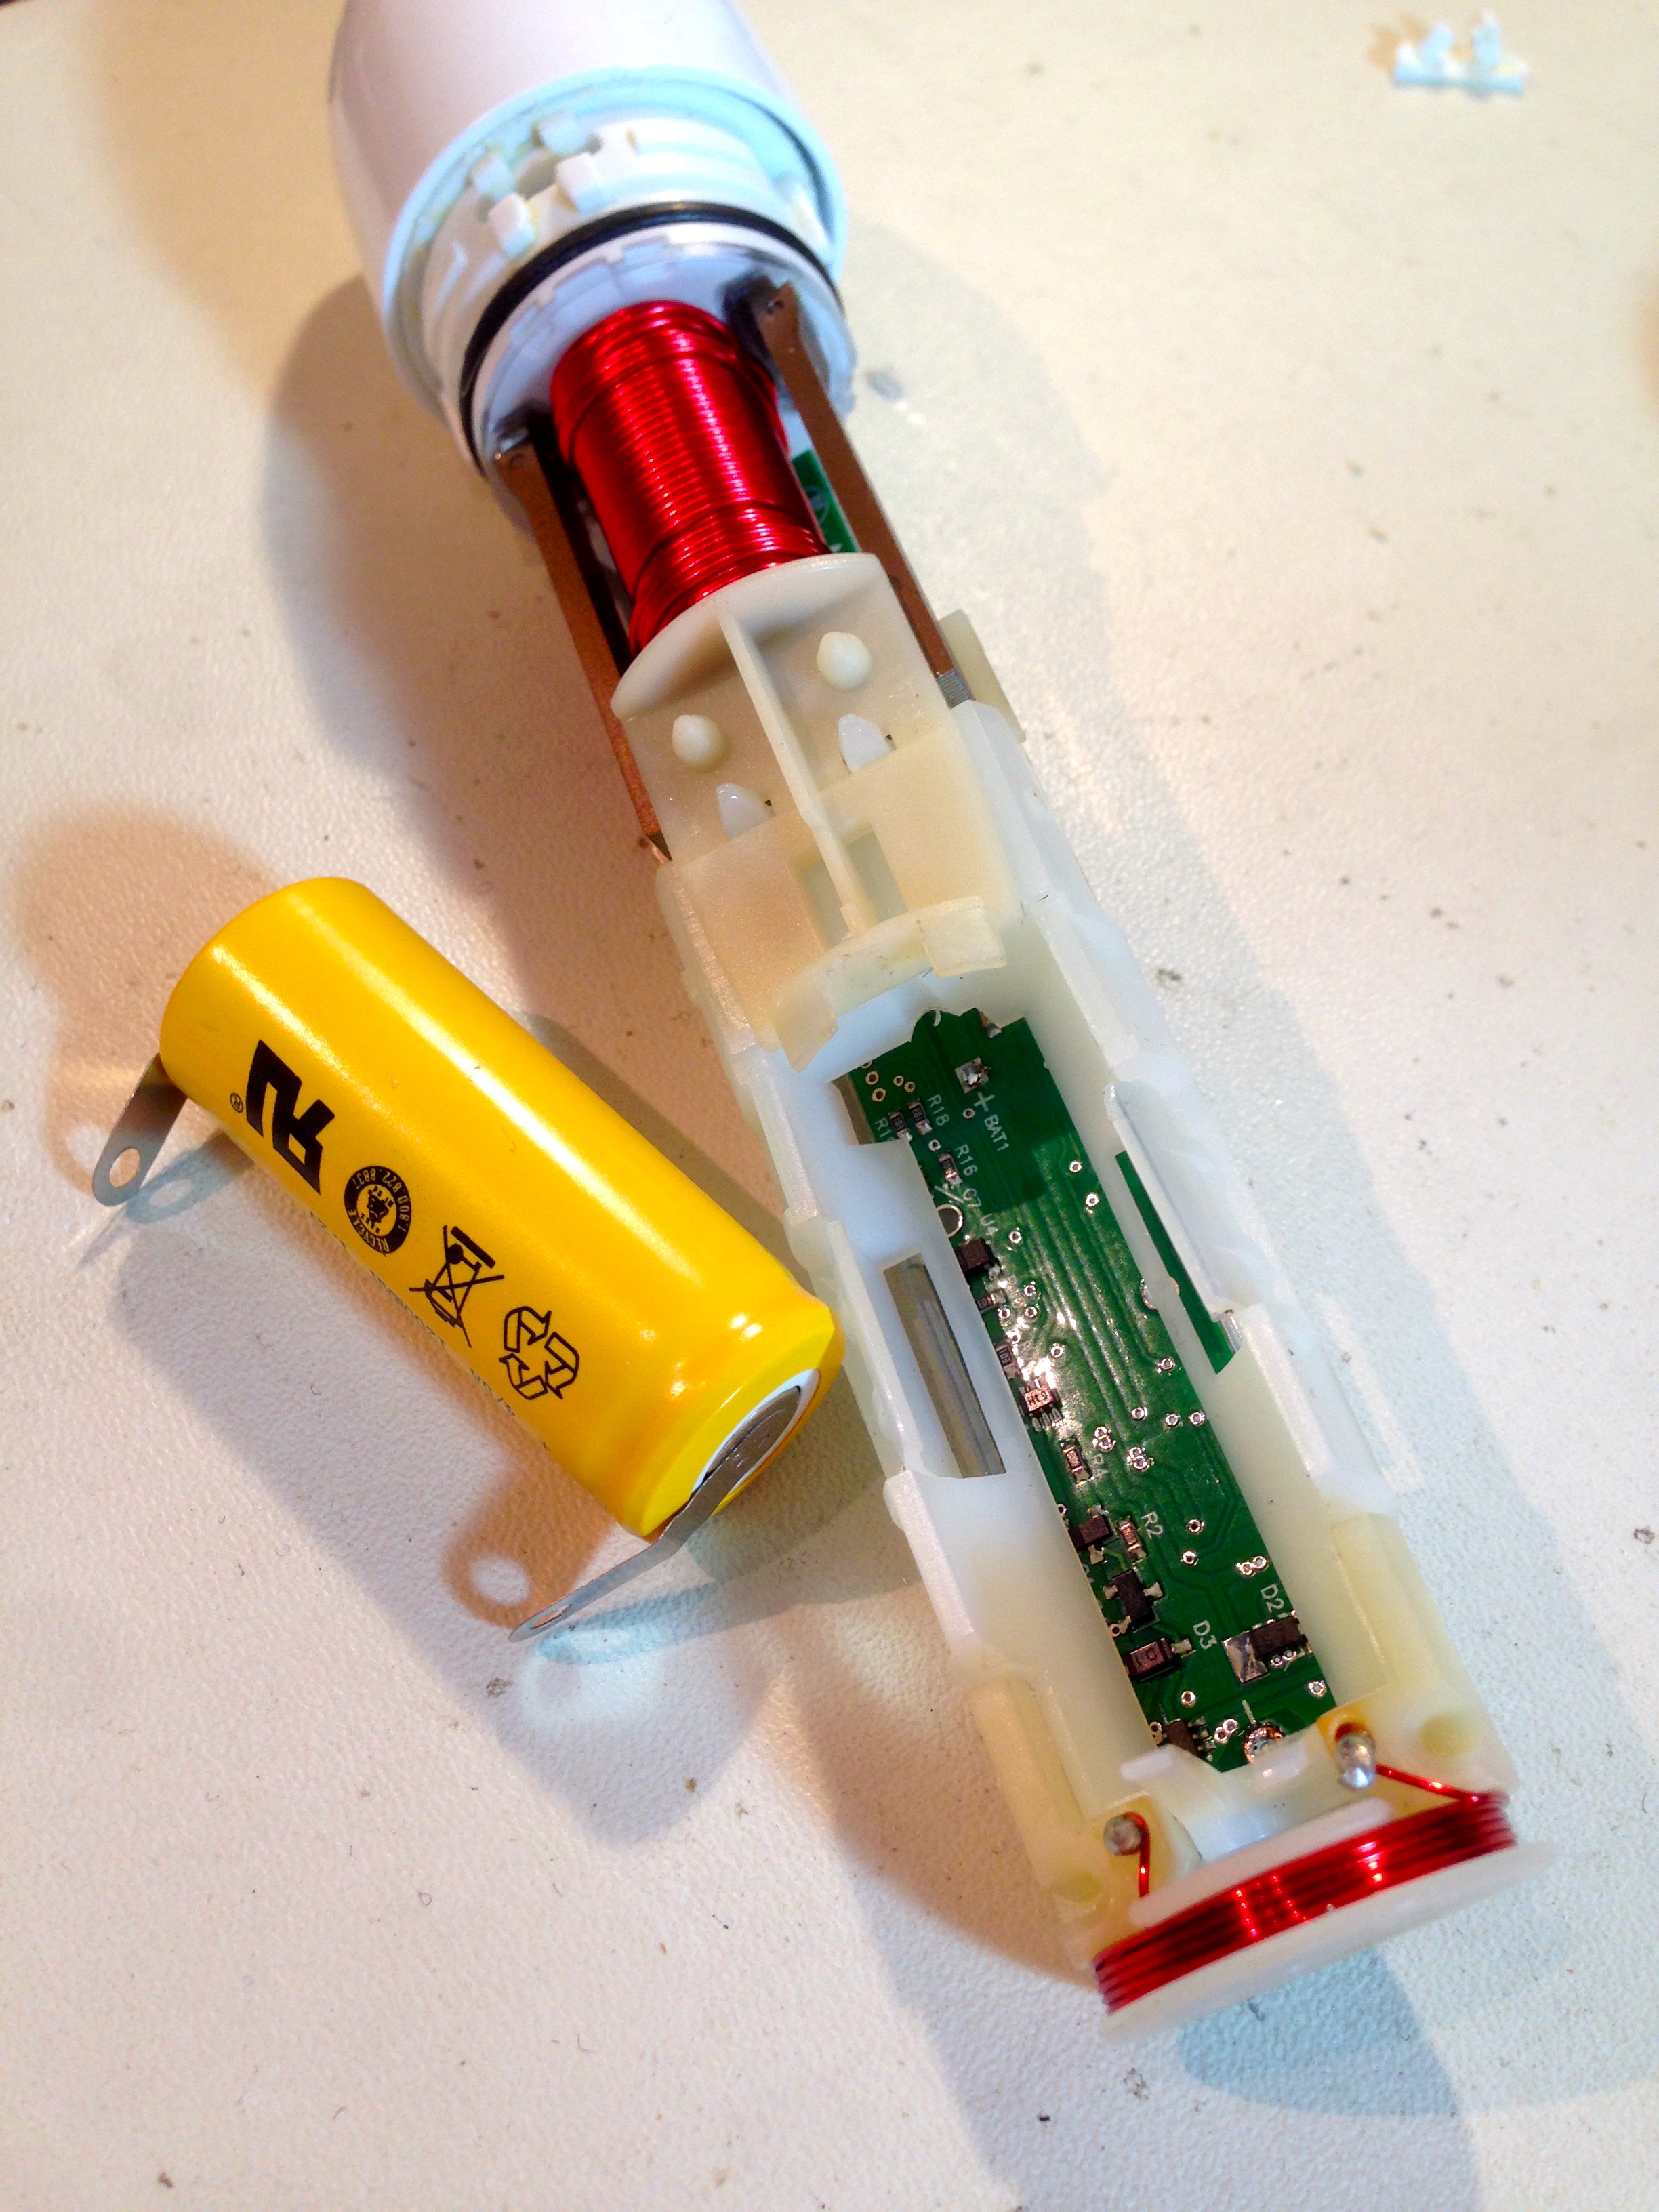
Naturally, I was pretty chuffed with myself for ordering a 4/5AF NiCd cell with spot-welded tabs this time. That chuff didn’t last long, however, as I soon realized these tabs were entirely too big for the itty bitty PCB holes they needed to mount into. Turns out there are different kinds of spot-welded battery tabs. No matter how much you learn, there’s still things you don’t know. Luckily, I’m making a note of this here on the internet so I can refer back in four years’ time. Third time will be the charm for a flawless repair, perhaps?
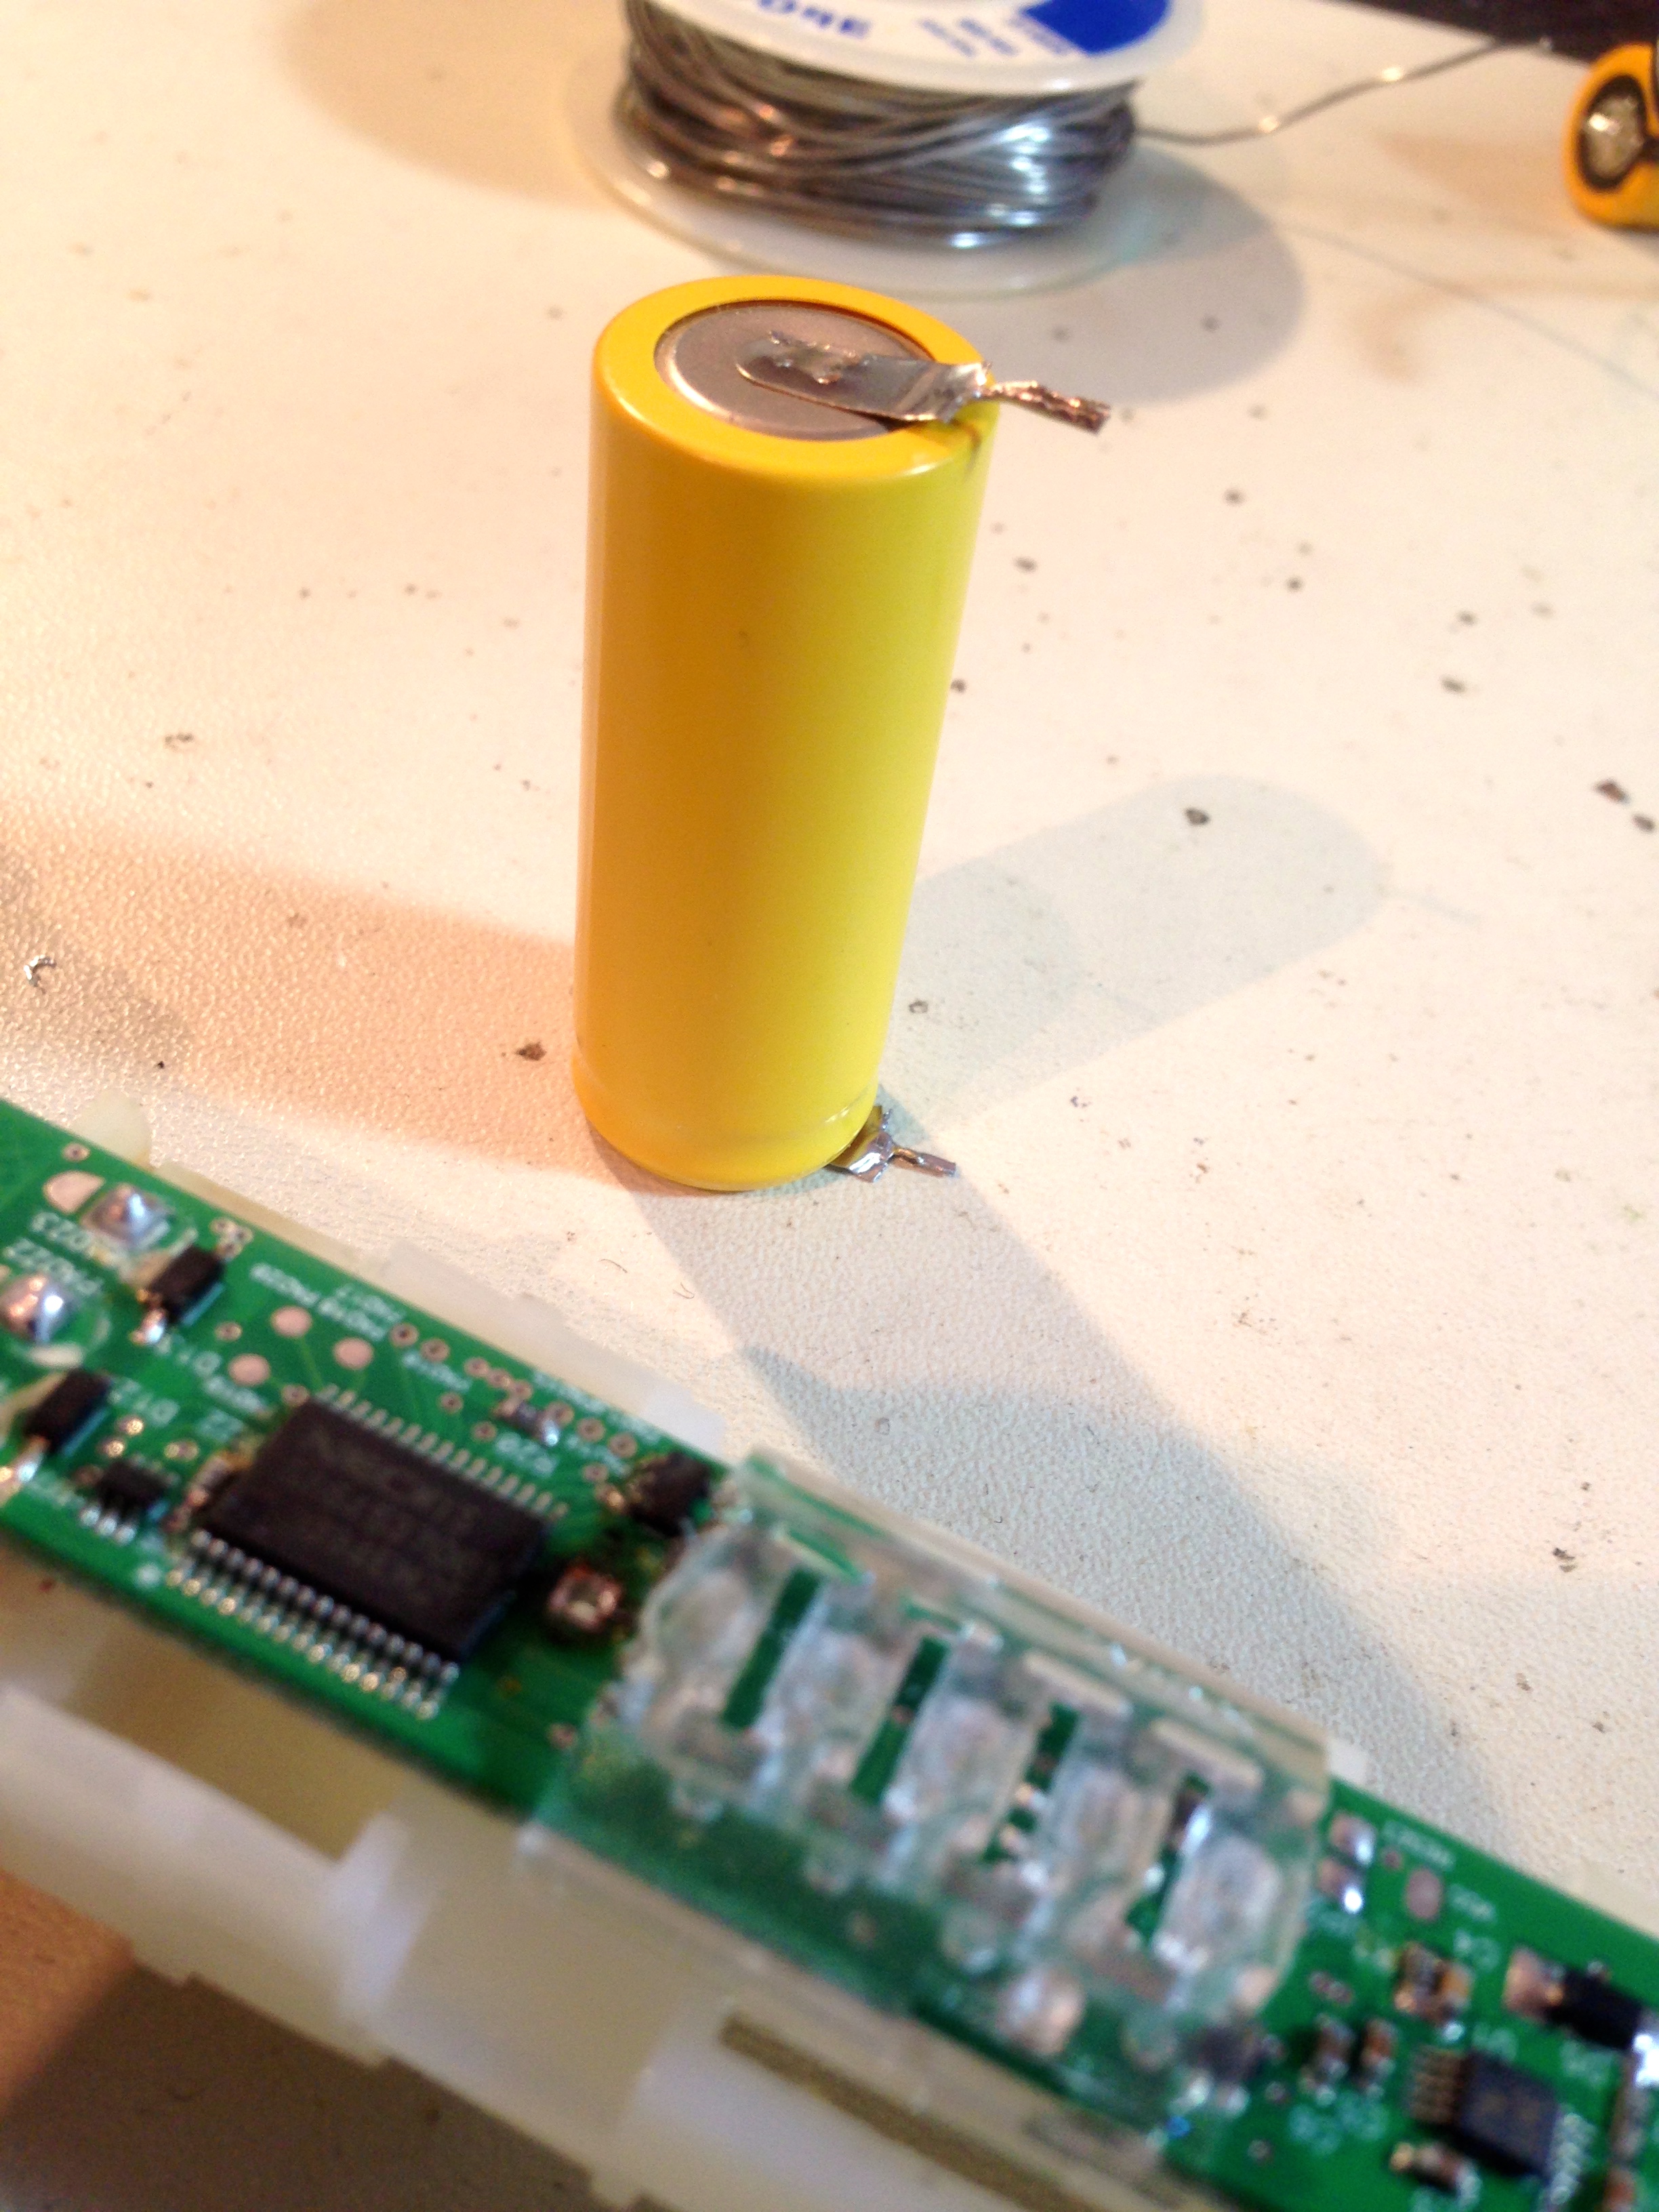
Okay, this has officially turned in a hack again, so here go. First thing to do is massage these tabs so they’ll fit my requirements. I cut each tab into a T shape, leaving a skinny bit sticking down in the middle. I then crushed this skinny tab lengthwise to form it into a kind of “fat wire”.
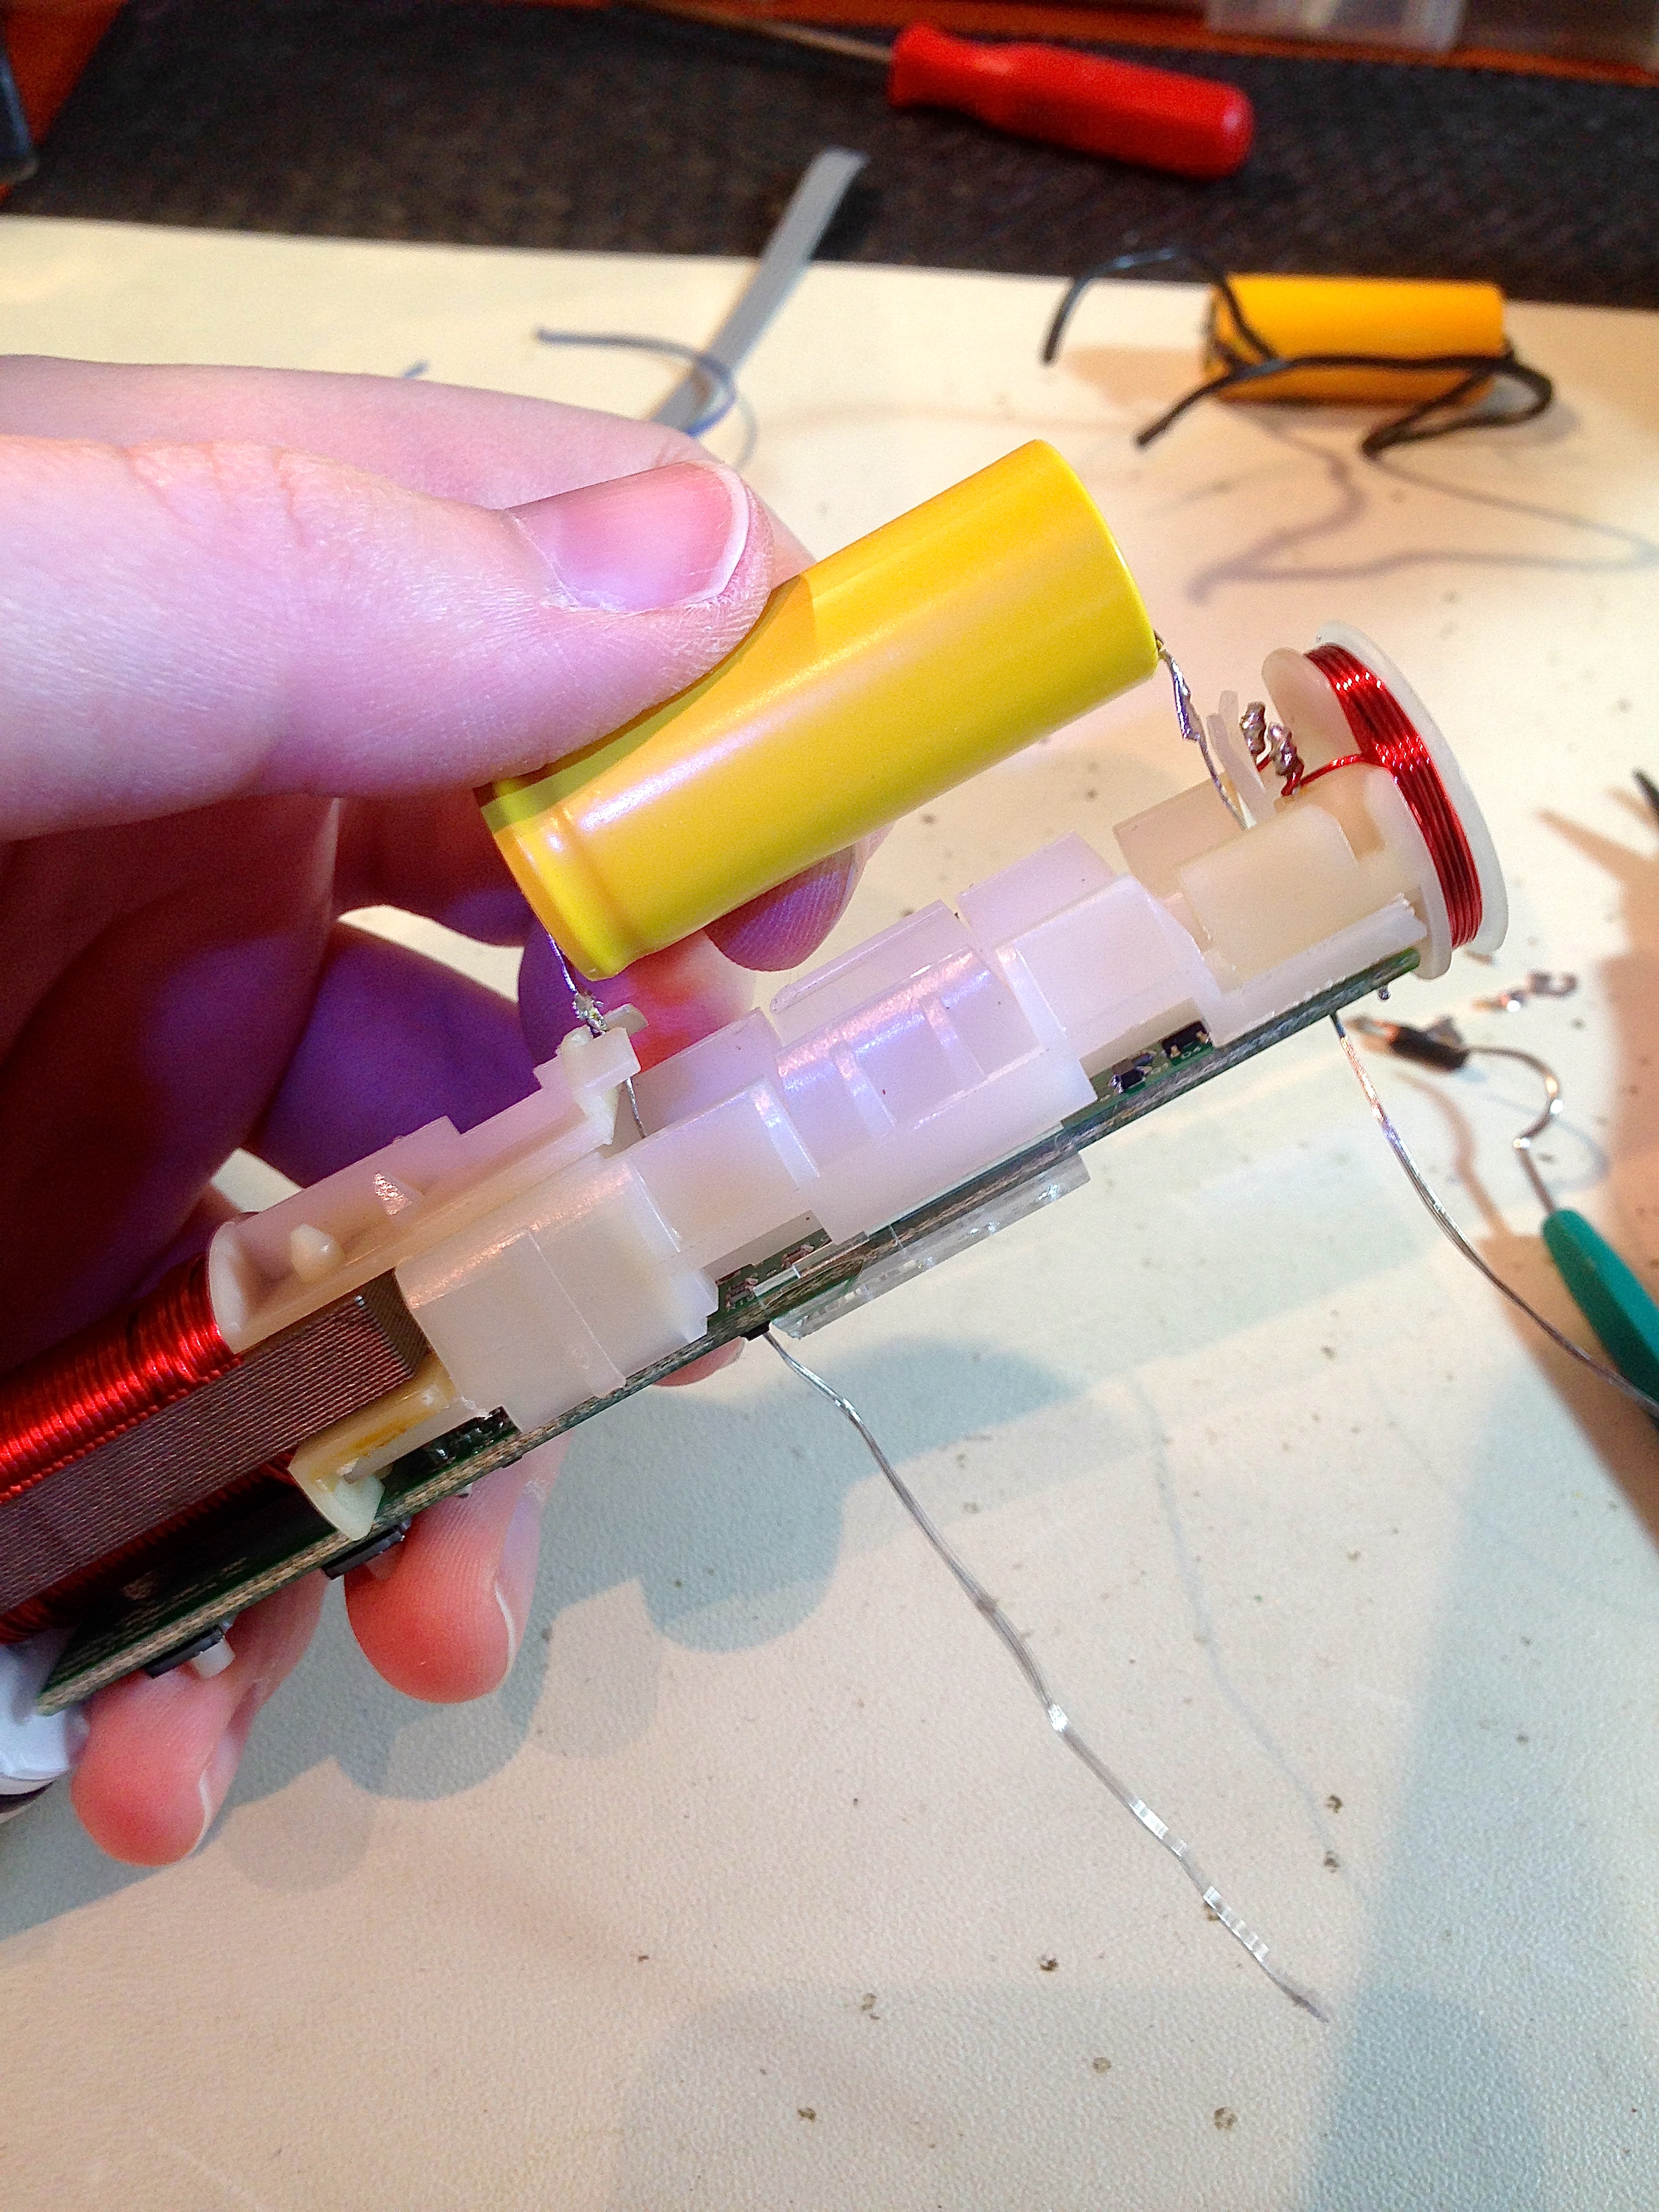
We’re not out of the woods yet, however. The battery has a plastic bracket that holds it in place at the top and tightly along the sides. This is likely an anti-vibration measure. The catch (nyuk nyuk) is that this bracket prevents us from inserting the battery straight down into the PCB. This makes it very difficult to get the tabs into the holes.
To overcome this, I had an idea that was both very clever and very stupid. Thinking like a seamstress, I figured I needed some guide wires to draw the tabs into the holes, regardless of the angle of insertion of the battery. Since the tabs are metal (honest), the easiest way to do this was solder some wires on there to fish through the holes. Great idea, right? Well, almost. You see, I neglected to consider that this battery is not dead, and this toothbrush has no genuine off switch. I’m soldering a live battery into a live circuit. Live. The potential here is for my guide wires to short on something (or each other) and cause all manner of grief. This would be a minor concern, except that the wire I had handy wouldn’t fit through the PCB holes intact. Rather than finding some smaller wire, I gleefully stripped the insulation off so it would fit.
Luckily, the universe let me off with a warning this time. At one point during my tab-fishing, something did short, and the whole assembly suddenly got very warm. I happened to be touching the parts that shorted, so I was notified promptly of the error, and was able to correct the situation with extreme haste. In the end, my fishing technique did actually work, and I got things settled into place.
Reassembly is the reverse of disassembly, as we say. I soldered in my tabs, cut off the fish wires, and we were in business.
Thus wraps up our first Toothbrushversary here at Blondihacks. Maybe I’ll see you all again in four years, when this needs doing again. I hope you’ll keep reading, and I’ll keep pretending I know what I’m doing. I shall conclude this post with the same sentiment that started this entire blog:
No user-serviceable parts, my ass. Come on, Philips- what else you got. I can do this all goddam day.
Thanks for all the Bliondihacks!
“PHILIPS” only has one ‘L’, by the way…
===Jac
The name was changed to protect the guilty…
Hah! Thanks- I never actually noticed that before. I updated the text.
So, I have an even more harrowing story of forgetting that bare wires are good conductors.
It’s not a proud moment, in fact it’s downright scary, now that I think about it.
You see, we had a couple of old Federal Pacific breaker panels in our house. (Look them up, there’s nothing good to be said about them, at least of their residential and light commercial products)
Having learned that they’re a firehazard, I set about replacing them. I fancy myself an amateur electrician, and I think that one of these days, I may even go and get a licence.(I do know that they are not eternal licences, but must be reupped regularly)
I have replaced several panels already, and felt that this one would be no different.
For whatever reason, at the moment of my error, I had not pulled the meter that fed this particular panel. Now, to be fair, I actually have quite a bit of experience working on live panels and circuits. You just don’t touch anything that is “live”, never touch anything grounded and any wire, period, and ensure you have good shoes,and are not standing on a conductive surface.
I was pulling the old romex out fo the box, when I had the final, nearly fatal, lapse in judgement. Now if my readers are not familiar with Romex(tm) cable; it is a pair of (sometimes 3) insulated solid conductors and a solid bare ground conductor all inside a common sheath.
I should also clarify for the dear reader that the average breaker panel has a pair of live, mostly uninsulated, bus bars that run the length of the panels (see here for an example: http://www.swimming-pool-information.com/images/pentair-easy-touch-pool-spa-controls.jpg)
Well, as I’m pulling a wad of romex through a knockout, I fail to ensure that the conductors are held clear of these live busbars, and a 12awg groundwire shorts between the busbar and the well grounded case.
So, amidst ashower of sparks caused by the copper weldingitself to the busbar and case, and a loud angry buzz as unknown hundreds of amps (thousands would have vaporized the wire) I do the only sensible thing; I yank harder. Panic and adrenalyn can do weird things to one’s mental facultys.
Fortunately it was not welded on too solidly as I was able to pull the cable free and clear the short before any damage was done. Damage in the panel doesn’t count as it was being shitcanned. I think I also left the melted end of that ground wire in the panel, as it was melted off at just the right length anyways.
I think it took me an hour to come down from that adrenalin rush.
Yikes! I’ve never had anything that harrowing. I installed a 40amp circuit in my house’s panel for my electric car charger, and that was sobering enough. Knowing that those two big bolts at the top were live even with the main breaker off gives one much pause. 200 amps, a few inches from where you’re fiddling. It’s like working with a loaded gun pointed at you.
Makes you respect electricians a bit more, doesn’t it 🙂
Yes, “even more” is the right term. I already respected them lots, but now even more. 😀
The closest I’ve come to anything like that was dropping a socket wrench across the terminals of a car battery as I was trying to remove one of the battery clamps. That made pretty sparks and left a nice melted gouge out of the side of the wrench. I’ve treated car batteries with a lot more respect since then.
Coming from an automotive and racing background, I’ve had my fair share of run-ins with car batteries as well. Their ability to deliver current is astonishing- head and shoulders above any other chemistry. You can weld quite well with a set of booster cables and a welding rod on a car battery. Protip if you’re headed off the grid- throw some welding rods in the trunk. Might get you out of a bind. 🙂
Also respect the ignition system. When all that current capacity is converted to voltage, the result is impressive. A hot coil will dump 40 kilovolts through you without bothering to ask permission. Usually won’t kill you, because the current is low, but it’s a memorable experience.
Reminds me of a temp job I had at a factory where they made construction elevators. Most of the time I did the menial jobs like drilling holes in the boxes and getting my skin irritated for a week because of the glass fiber but sometimes I was allowed to actually wire them up too. And to test them, we had a special cable with, on one end, a three-phase 220V/380V plug, and on the other end a couple of plugs that would plug into the contact strips on the DIN rails. Obviously the idea was that if you would connect the DIN rails first, and then plug in the three-phase plug, it would be safe to test if the relays were wired up correctly. One time however, I plugged them in in the wrong order and welded three of the four DIN plugs together before it tripped the circuit breaker. My boss was forgiving but his boss was not happy; we had to get new plugs and apparently they were very expensive. Oh well…
===Jac
Once you have electrocuted yourself, it does rather stick in your mind…
Here are some of my memories – http://stardot.org.uk/forums/viewtopic.php?f=16&t=9195&hilit=+240v#p105336
Haha, yikes! Closest I’ve come to something like that was while replacing a light switch in my house. There was a gang of four switches, and I thought I had identified the breaker by testing the first couple in the box. In a moment of stupidity, it didn’t occur to me that all four switches in the box might not be on the same breaker. I was bending a wire to make room, and my knuckle brushed the adjacent switch, and suddenly I had strong tingle crawling all the way up my arm. I was wearing latex gloves, which probably helped a bit. It was a nice little warning shot across my bow. Now I just kill the MCB when doing anything electrical anywhere in the house. Not worth messing around!
Your Veronica will be more attractive.
Well done!
I’m pondering a very similar replacement in an assuredly much cheaper Oral-B brush. BUT! What I want to do is replace a NiCad with a NiMH battery. Is that kosher…?
You can always try. But NiMH have much tighter tolerances than NiCd.(Translation: harder to charge “right”)
Well, hm. I’m pretty sure it’s an inductive charging system — the base has a little can/peg that fits into the bottom of the toothbrush. I’ve opened the toothbrush itself before, and there’s a coil of unbelievably fine wire in that area.
I’d be quite surprised to find a regulated supply in the base, given how cheap the whole thing looks — but the way it’s put together I’d have to open it with an X-Acto to find out 😉 I really don’t see Mom being very understanding of that…
Replacing NiCd with NiMH kinda works, but I wouldn’t recommend it. The proper charging circuit for each chemistry is technically different, so the NiMH might wear out quickly, or not charge fully.
The Sonicare is inductive charging as well, although that’s the power delivery method, which is separate from the charge regulation. The latter is a tiny chip that probably costs 0.1 cents in bulk, so I would not be at all shocked to find one in your brush.
As for not wanting to cut it apart, if the brush is dead anyway, you have nothing to lose. If it’s glued, heat will release the adhesive. Usually plastic stuff is assembled with clips or catches of some sort, because that’s inexpensive on the assembly line. About the only time actual cutting is required is if things are sonic-welded. Even then, as I say, you have nothing to lose.
The toothbrush works for now — I just don’t want to muck it up permanently when it dies 😉 which will be a lot sooner with NiCad — because of that memory effect mess and all.
It’s glued together.
Huh — for some reason I always thought that NiCad and NiMH charging circuits were essentially identical. At least, that’s what chargers that charge both make me think! (Maybe they have some weird way of detecting the chemistry? Dunno.)
I guess I’ll leave it for now…
I’m not an expert in this area, but my guess is that a NiMH charger is fine for NiCd, but not necessarily vice-versa. Those “universal” chargers are probably just NiMH chargers. I researched this a bit when I did this the first time, because NiMH batteries are easier to source. I found enough resources saying you shouldn’t do it to convince me to replace it with the same kind just to be sure. Four years out of a NiCd is frankly not bad at all, so I didn’t hesitate to use one again.
The difference between charging a Ni-Cad and a Ni-Mh is how a fast “intelligent” charger determines that the cell or battery is charged. These chargers carefully monitor the voltage across the battery, and the voltage and the shape of the “waveform” (the voltage is not steady, it varies over time as the battery charges) is different for the two types.
If the charger is a “dumb” trickle charger, then there is no difference – the same cheap resistor circuit is used for both. With this circuit, there is no charge cut-off. Once the battery is charged, the circuit continues to supply current to the battery. As the battery cannot recharge anymore, a second chemical reaction takes place in each cell, which results in the excess energy being given off as heat. As long as the current is within the limits defined by the manufacturer, this causes no harm. The battery can be left on charge for long periods, but the battery takes a very long time to recharge. The third way is a variation of the trickle charge. The charging current is higher and we are now relying on the user to switch off the charing current after 12 to 14 hours (typical). The battery can handle being “overcharged” for a while, but will be damaged if left on charge. This is why the instructions say to stop charging. Some charging circuits also include a sensor to detect when the battery is getting hot. The control circuit normally switches off or to a low current trickle mode.
Great info, Mark- thanks! My understanding of battery chargers is pretty limited, so I appreciate this.
I just went back and read about the Dish-O-Tron 6000 Extreme, which was from before I started following your (awesome) blog. Now I’m curious though, is it still in operation? How did it age after 3 1/2 years?
It was in daily operation up until I moved house about two years ago. My current dishwasher is a drawer-style, not a flip-down door style, so one of the fundamental operating principles of the Dish-O-Tron is no longer valid. It still works great though! It’s one my favorite builds, but nobody “gets it”, I don’t think, based on how little traffic it generated.
My current dishwasher has its own dirty/clean notifier which actually works pretty well, so I don’t need it in any case. It’s ready to be pressed back into service if I get a new dishwasher, though!
I really enjoyed the writeups about it. I had a good laugh at the graffiti cheat-sheet that you left glued to the inside of the screen cover. 😀 Brings back memories. I still have my Vx and accessories tucked away in a closet.