Getting Crazy Bob open for business once again.
I recently diagnosed and repaired a flasher lamp on Johnny Mnemonic. It was a simple fix, but illustrates the basic process of diagnosing high power components in a pinball machine, so I thought it was worth writing up.
Sometimes it can be challenging with a new game to even know when there’s a problem. I had been playing Johnny for quite a while now, and hadn’t noticed anything wrong with Crazy Bob. Crazy Bob’s is a ball trap in the center of the play field. He represents the local scrap dealer in the Gibson universe, and you visit his shop for various gameplay purposes. One of the key reasons is, when he’s having a sale, you can go in there and buy special equipment. This equipment can be used to gain big advantage on the final mission (or “mode” in pinball jargon).
During gameplay, Crazy Bob indicates he’s having a sale by lighting his sign. The game has ways the player can make this happen, and it refers to it as “lighting Crazy Bob’s”. Voice overs also remind you occasionally by saying “Crazy Bob’s is lit” if you haven’t been there when you should. It’s a bit confusing, because there’s also an inset light in the playfield in front of Bob’s that lights up for different reasons (Crazy Bob also gives you clues on where things are in the Matrix, and sends you on the missions).
Then one day, I was poking around on the play field doing something unrelated, and I noticed a great big flash lamp hiding behind the sign above Crazy Bob’s shop! All of a sudden, all these oblique references and gameplay mechanics made sense. I wasn’t using Crazy Bob’s properly, because his sign wasn’t lighting up! I didn’t even know it was supposed to until I saw that, and it explained a lot about the rules I had read and call-outs I was hearing.
Naturally, the first thing I did was replace the bulb. Still nothing. I swapped the bulb with a known working one in another flash lamp, and determined that the bulb was indeed bad, but the good bulb still didn’t work in Bob’s sign. Something deeper was afoot.
The debugging lesson here is, “don’t get too caught up in your presumptions”. You may recall back when I first got the game that the seller had told me there were bad high-power circuits on the Power Driver Board. “Aha!”, I thought. Finally I found one of those bad circuits. Flash lamps are high-power elements driven from the Power Driver Board, so I guessed this was the problem.
The Power Driver Board is a massive beast with a lot going on, so the first stop is the schematics. As Crazy Bob guides you through the Matrix, so do the schematics guide us through the dense jungle of the Power Driver Board. That was the most tortured simile I have ever written. New personal record!

This diagram tells us three critical things- the voltage that the lamps run on, and which two connectors on the Power Driver Board run it.
So the next obvious step was to check for voltage on those connectors. I put the game in flasher test mode, and selected Crazy Bob’s flasher. This causes the game to flash it about twice per second.
Then I can open up the back box, and probe the connectors. This type of test needs to be done with some care. There are high voltage components in all areas of these machines. Some of them, such as the pop bumpers and flippers, run on 50VDC. This can absolutely kill you. So, treat things with respect when the machine is powered up. A good tip is to work with one hand in your pocket. That way, if you do touch a probe to the wrong thing, or bridge something with a screwdriver, the current can’t go through your heart. You’ll still have a bad day, but you’ll live to post about it on snarky blogs.
So, with the public service announcement out of the way, let’s check the Crazy Bob’s circuit. The schematic tells us it’s driven from 20VDC between pin 6 on connector J107, and pin 2 on connector J126. Pin and junction numbers are all silkscreened on to the board, which is handy. These open-back connectors can be probed without removing anything, which is also nice.
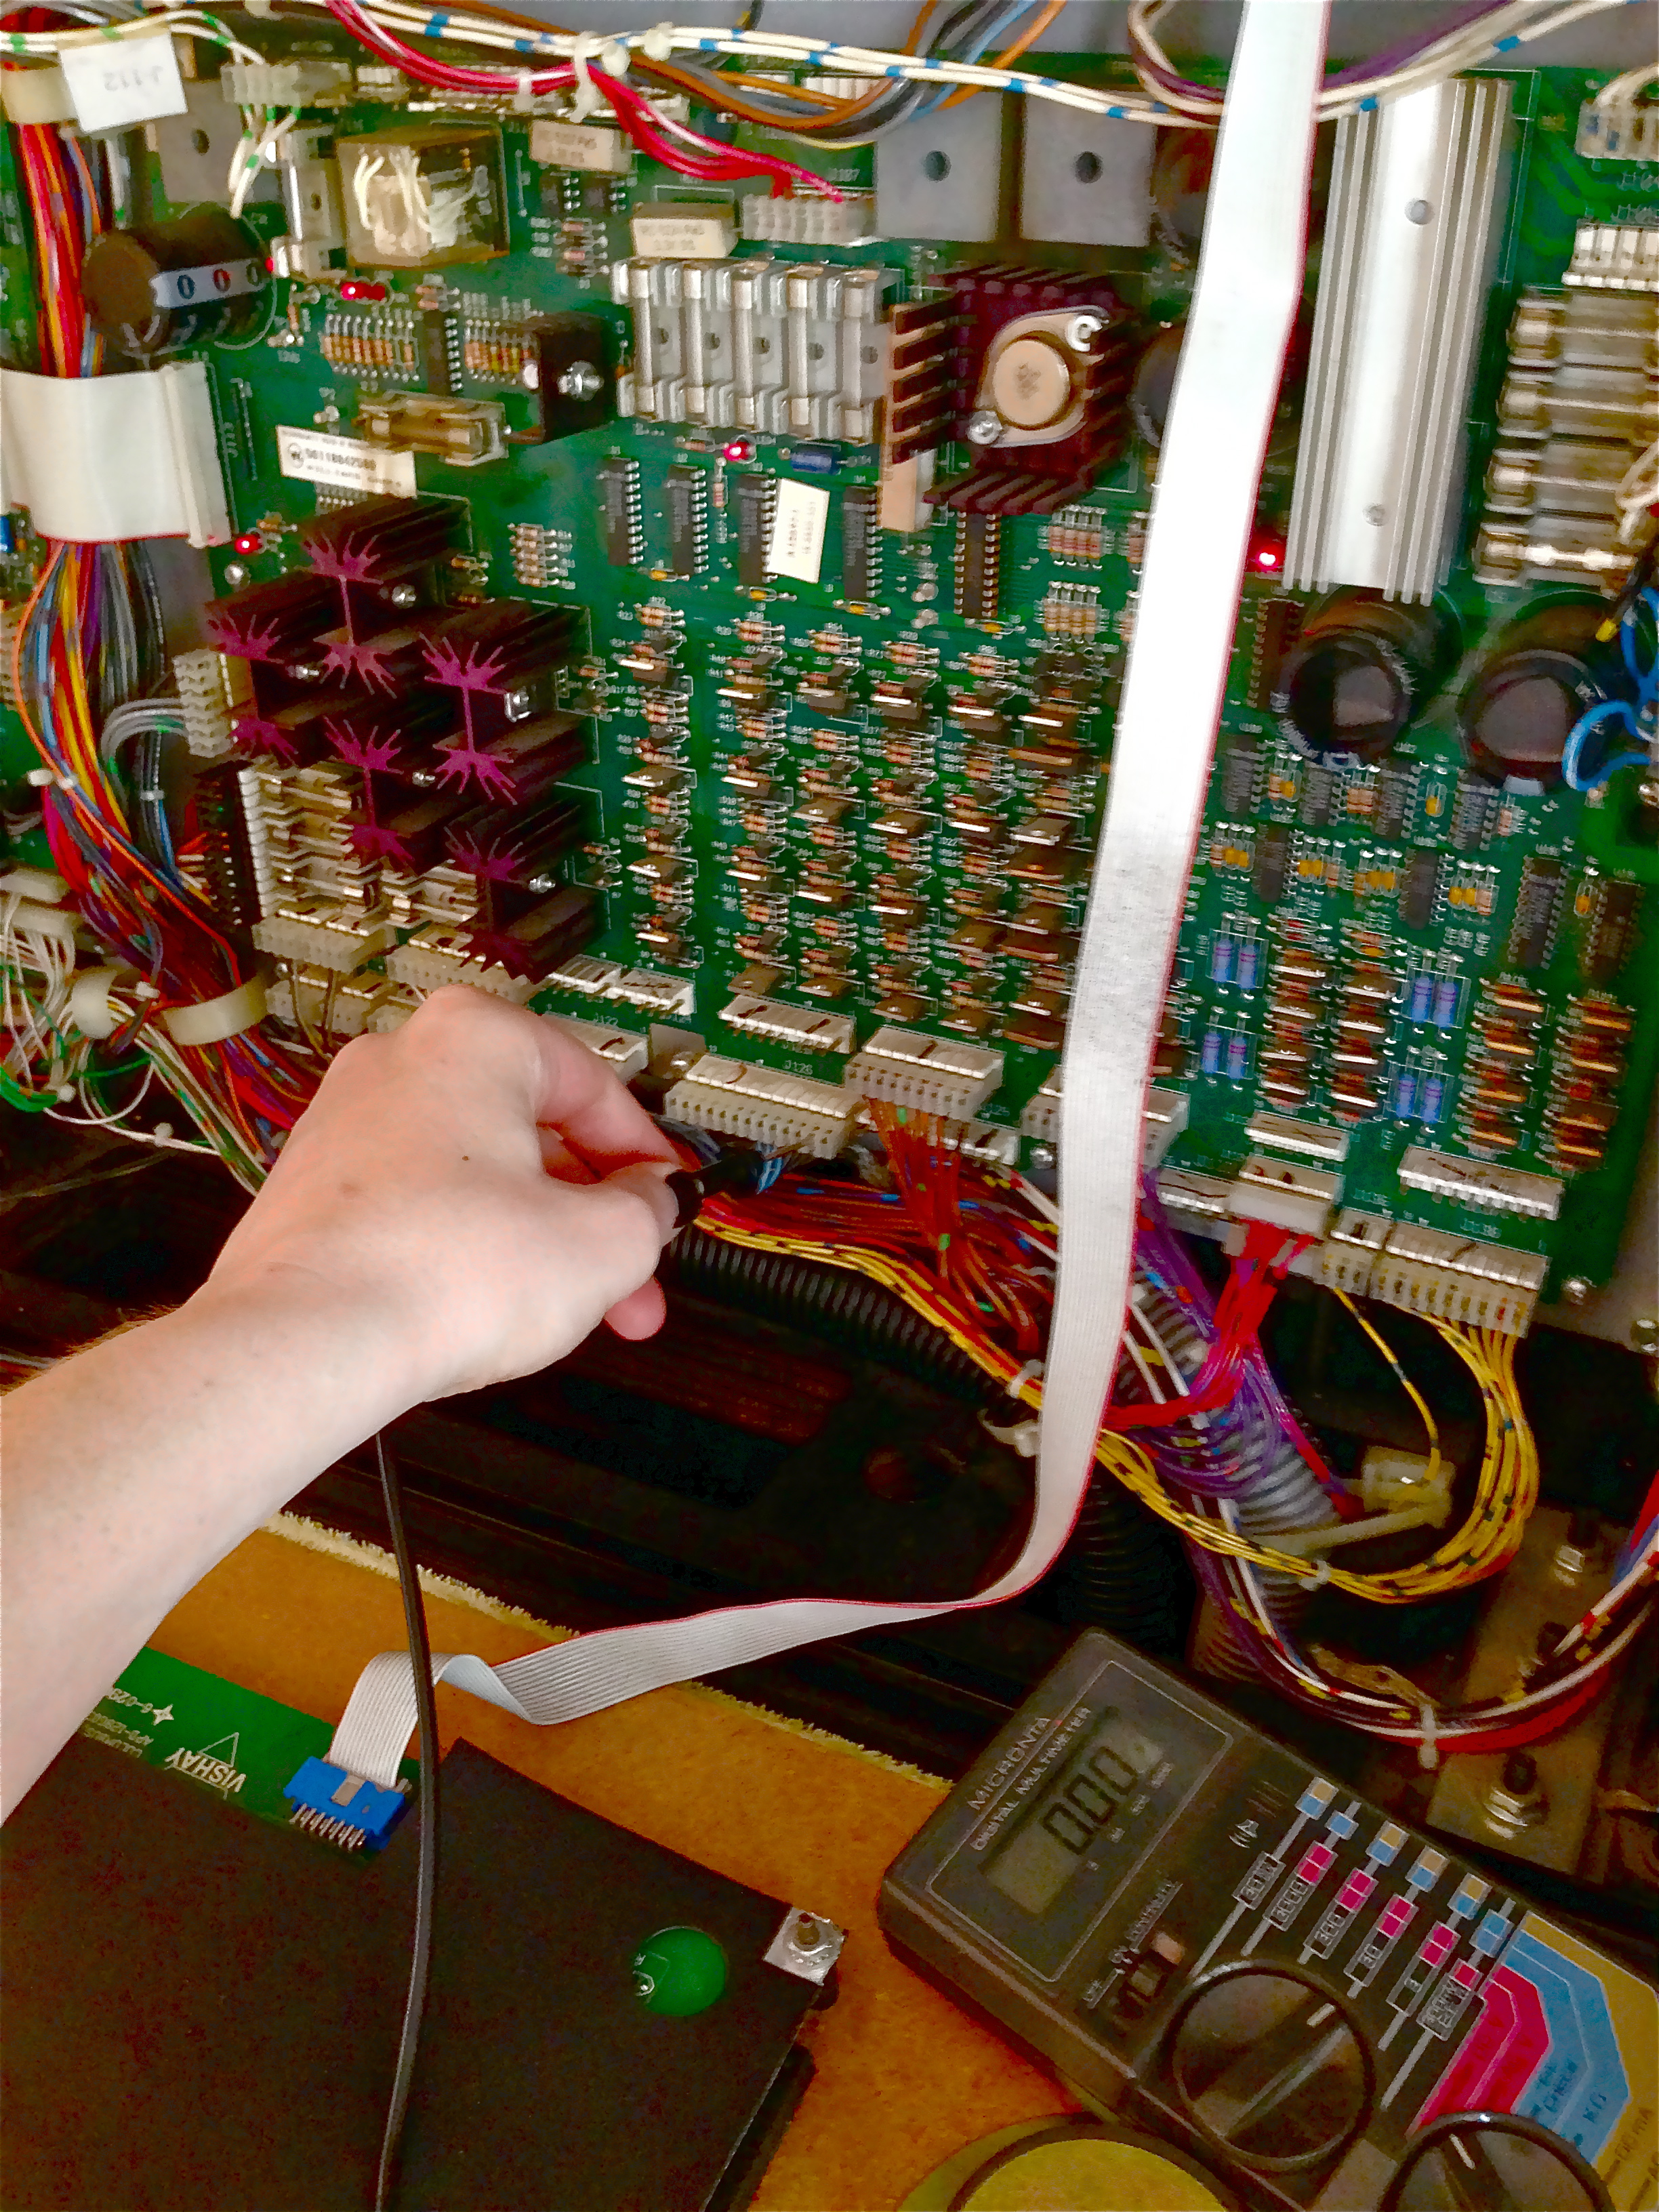
The test mode on the game is pulsing the circuit, so the meter won’t show a steady 20VDC. However, depending on the refresh rate of your meter, you’ll see varying levels in the 5-20VDC range if the circuit is working, or constant zero if it isn’t. My circuit was working perfectly!
So, there you go. My pre-supposition that the Power Driver Board was a problem waiting to happen led me on a wild goose chase. I should have stopped to consider what the most likely failure point is, after the bulb (which I had checked). Which part of the system is weak, and subject to abuse? The socket, of course. Time to look at that.
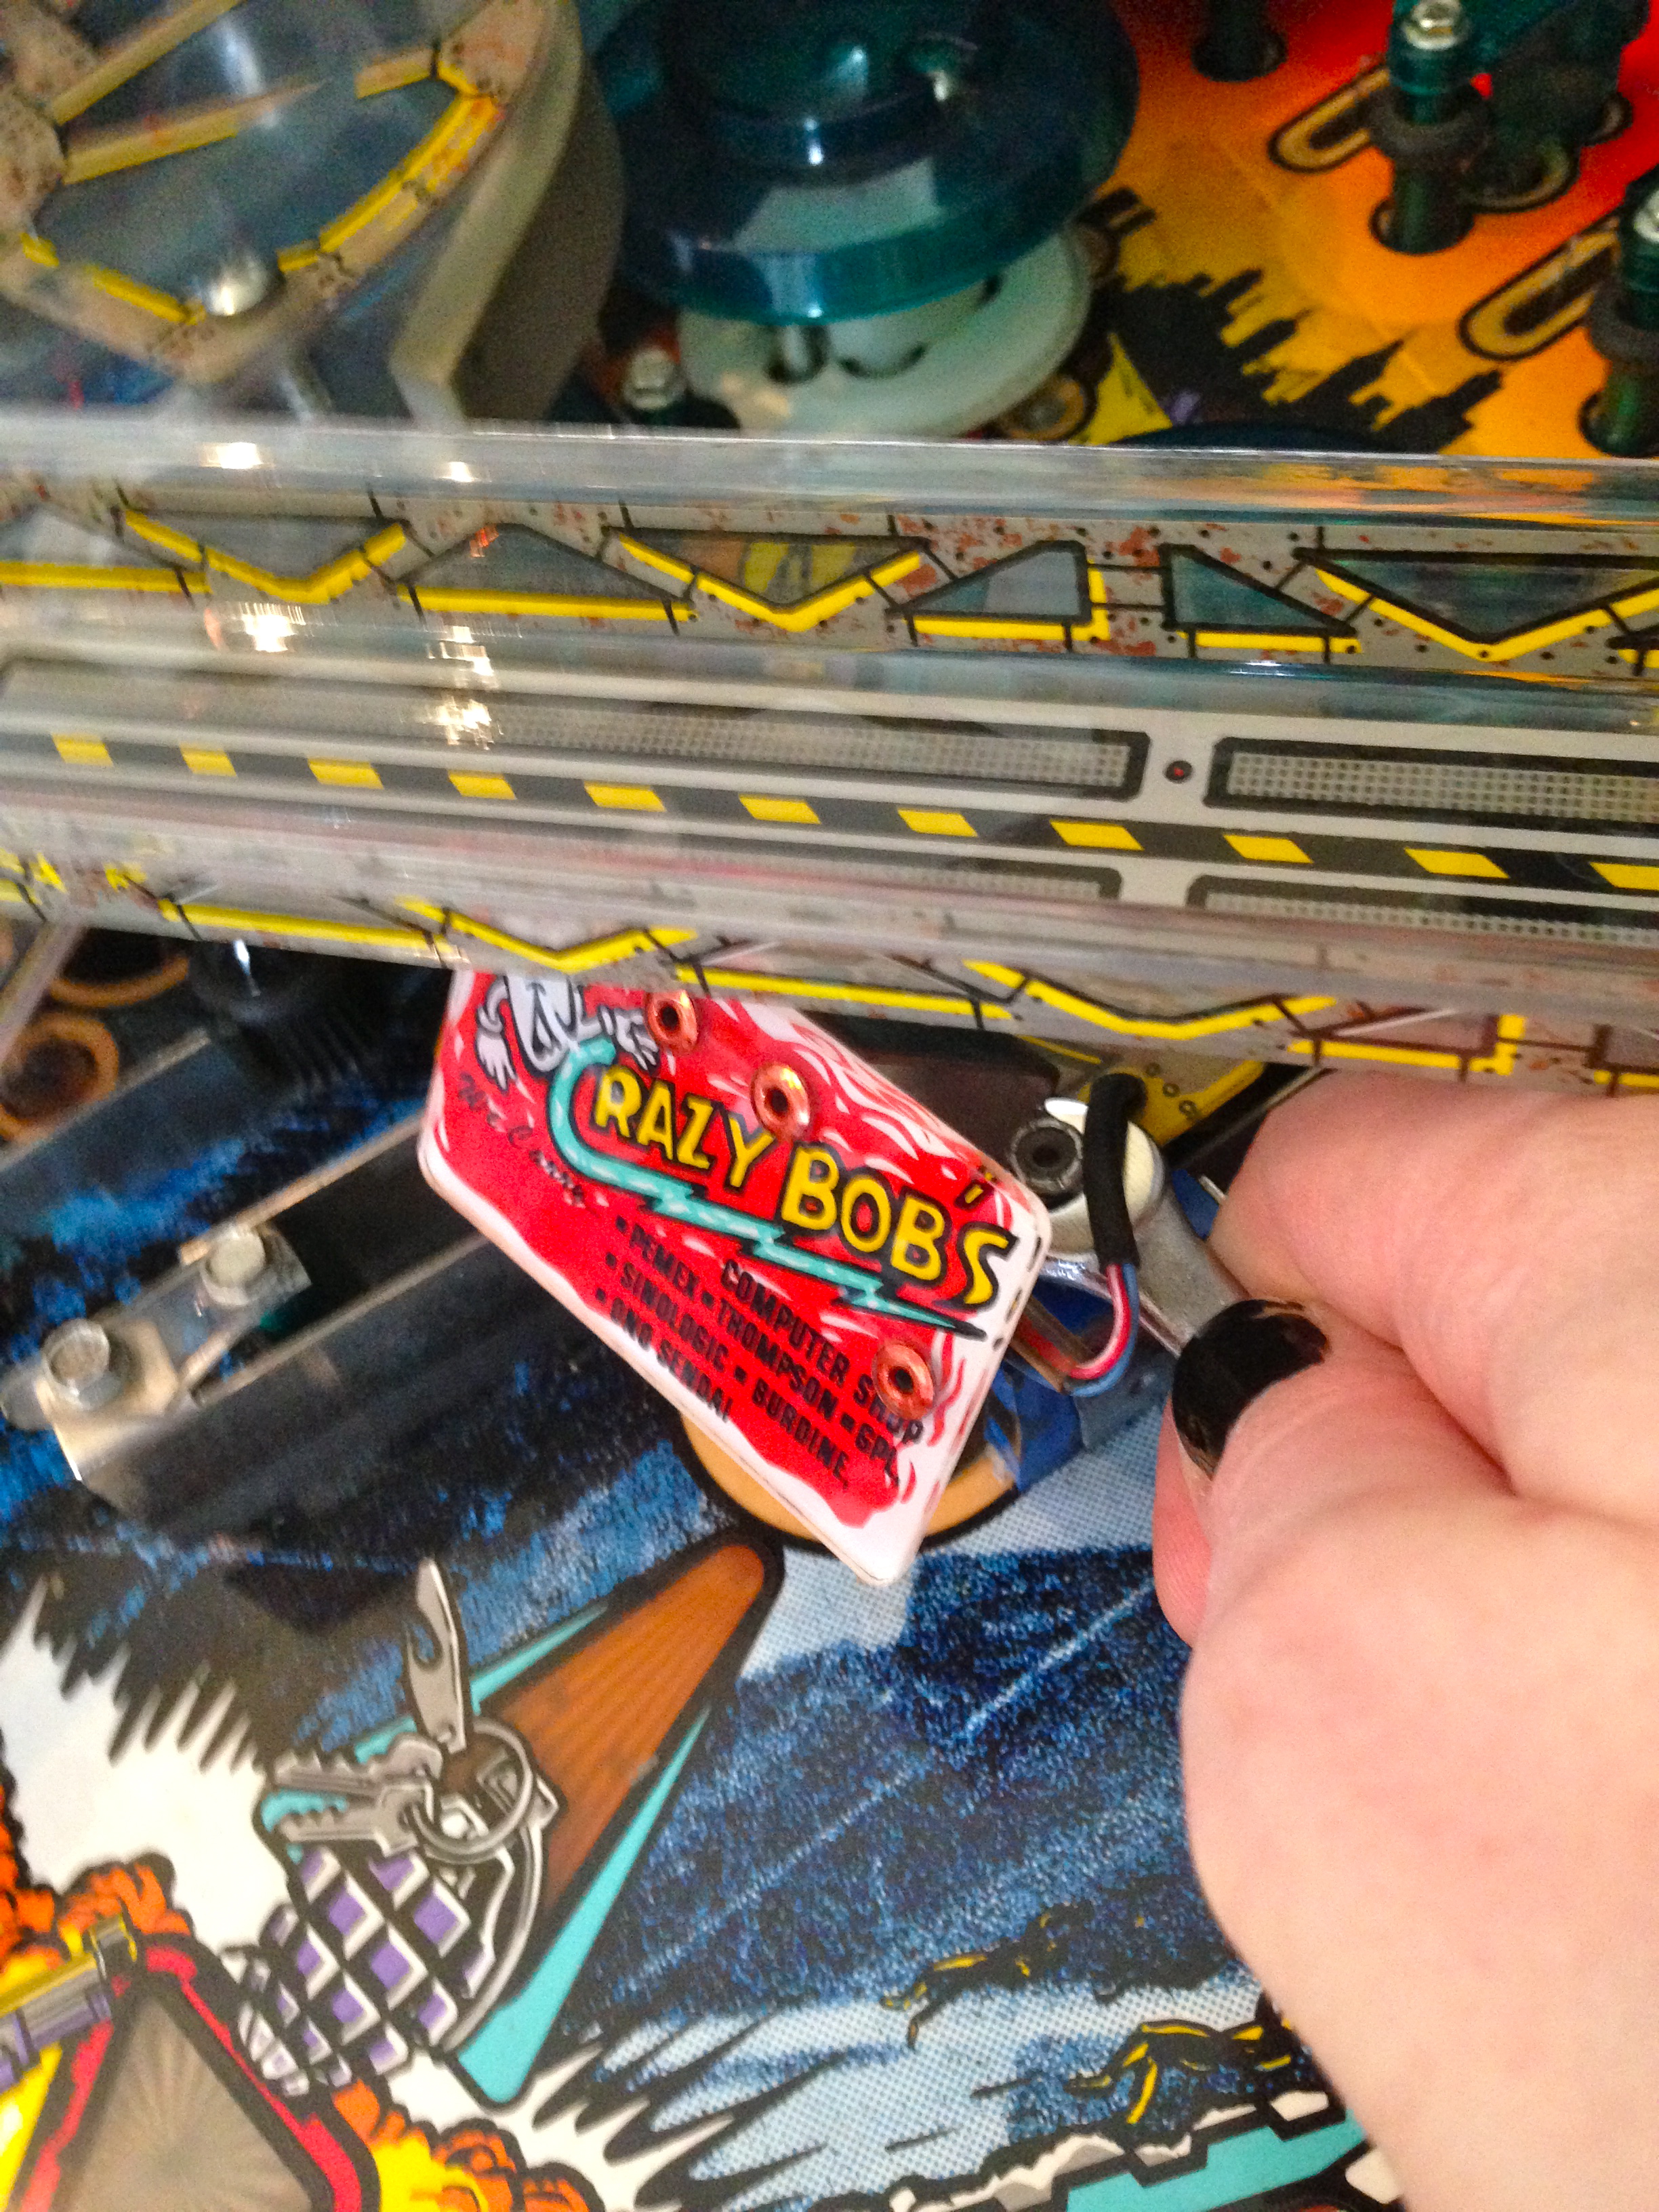
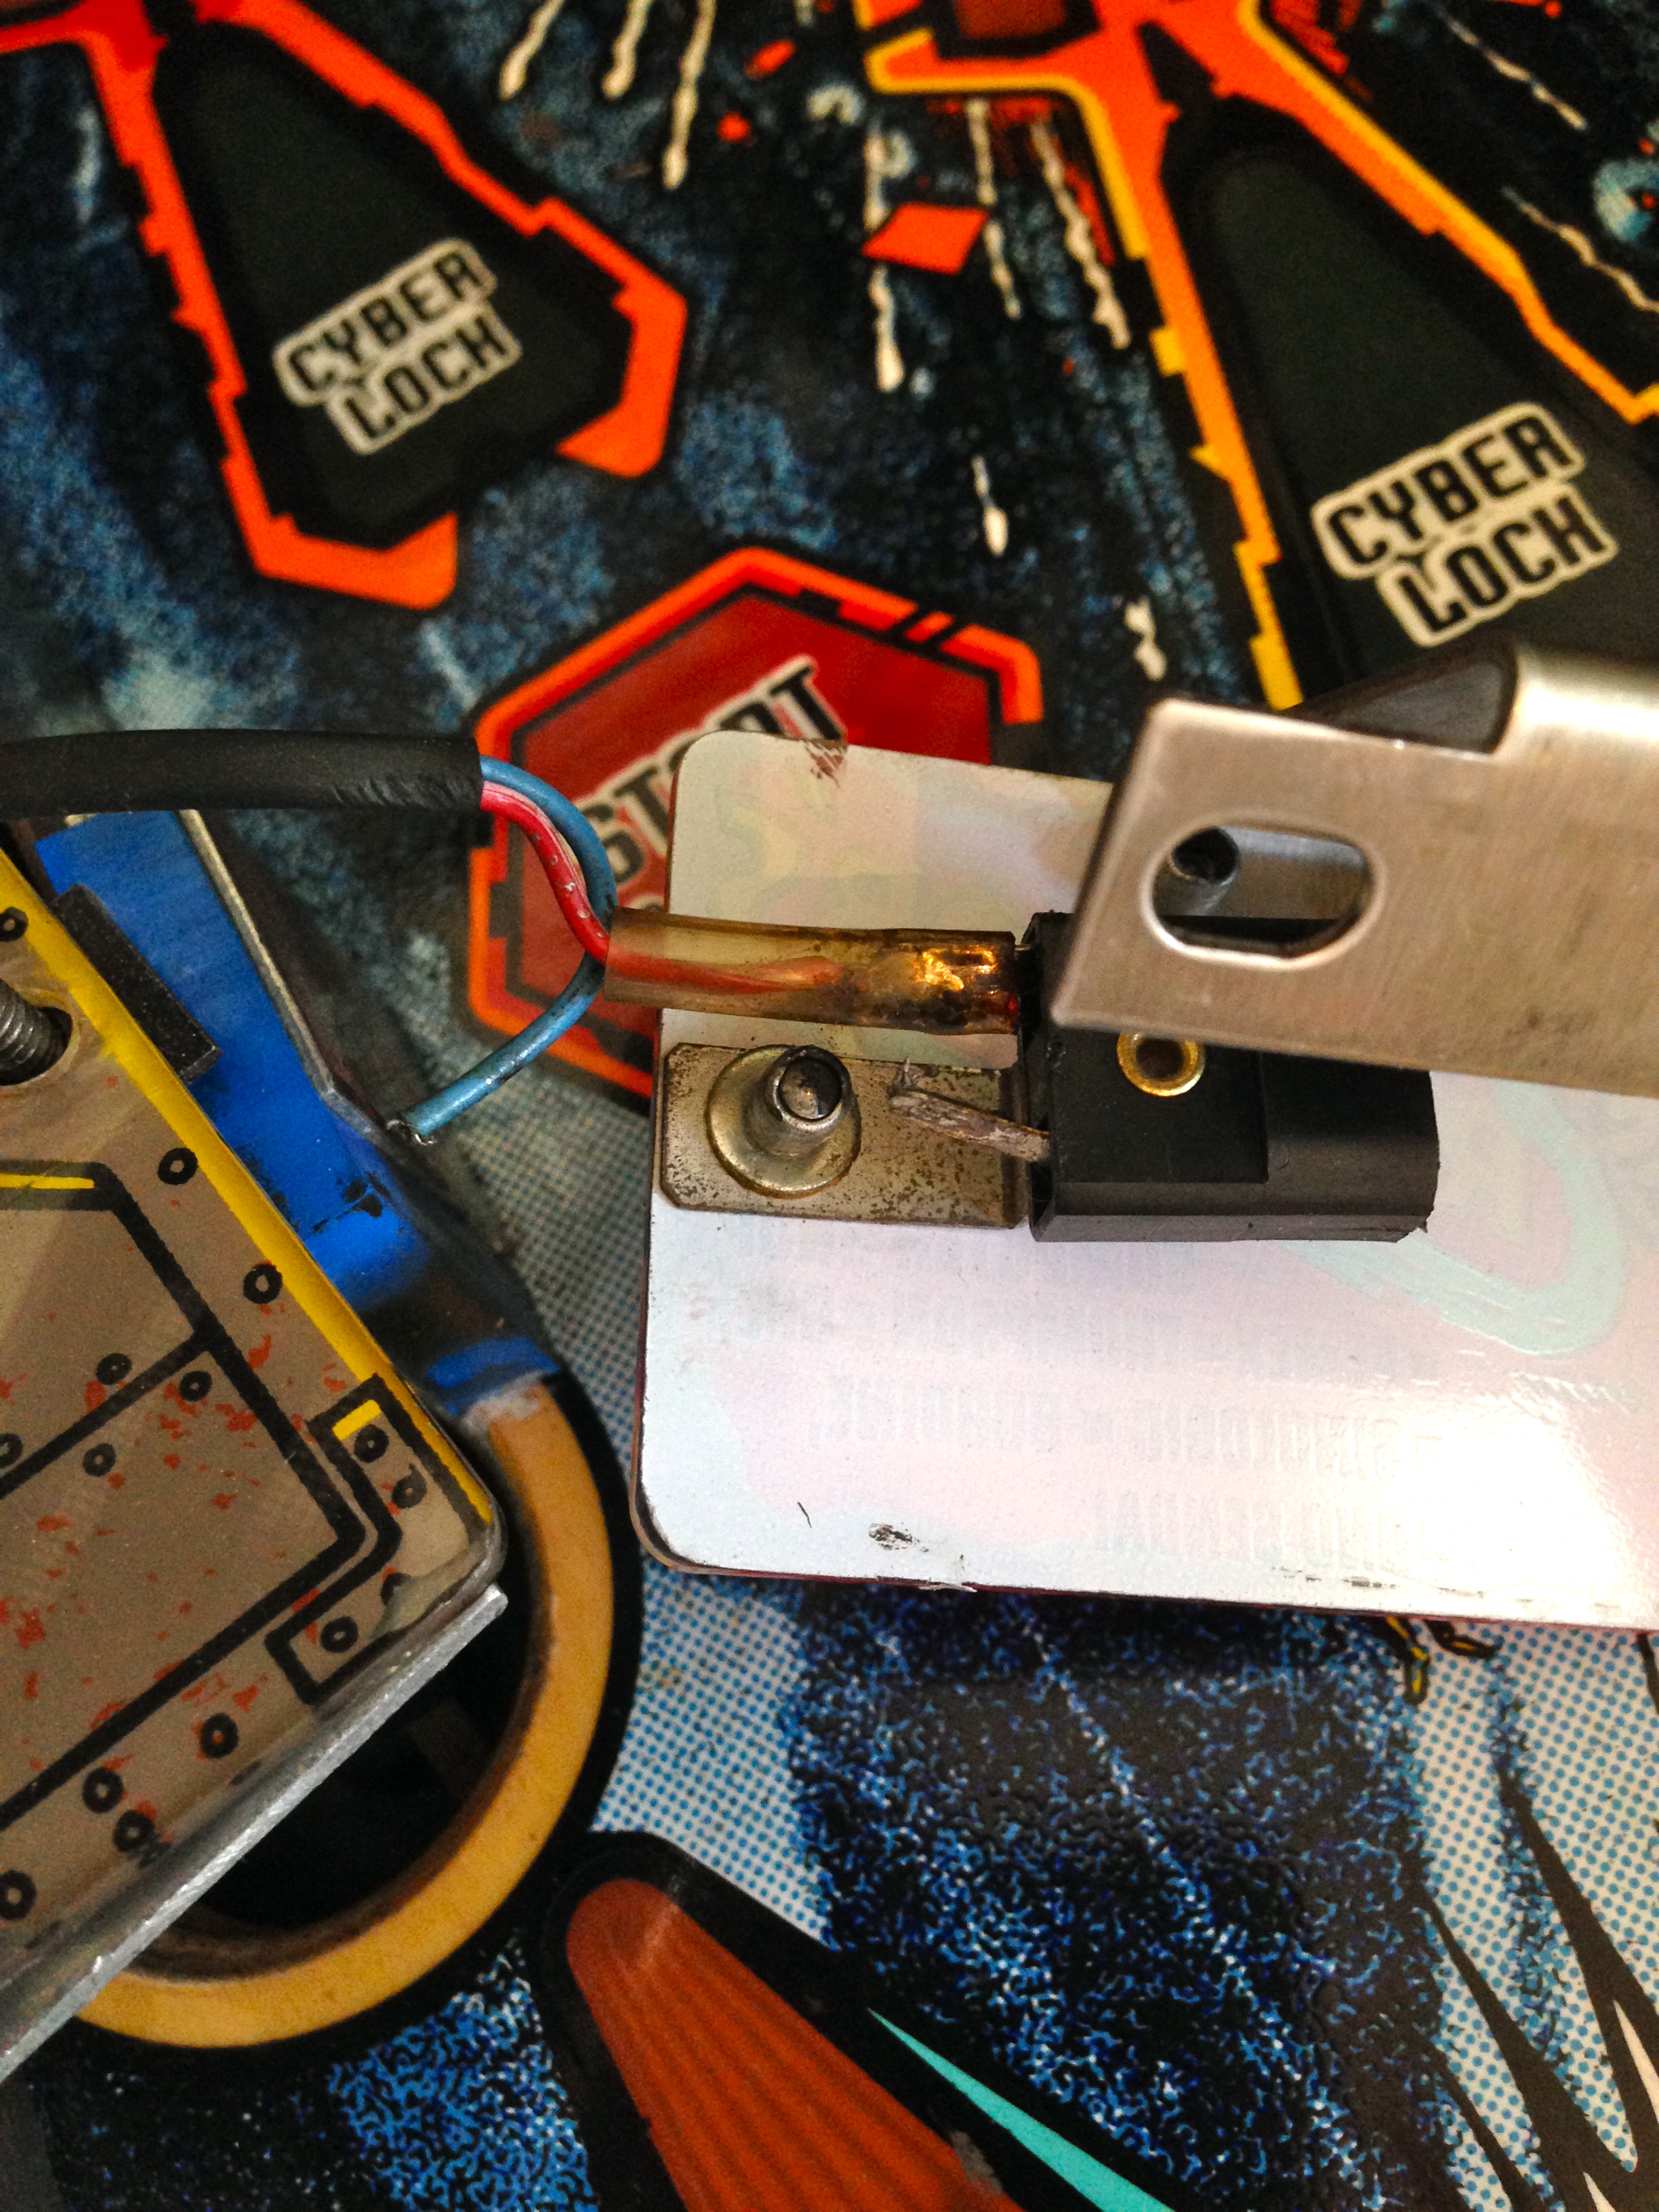
The socket is mounted to the sign, and the whole sign assembly gets shaken around quite a bit from having a 27mm steel ball hammered at it hundreds of times a day. Sooner or later, these connections will fail. Time to power down the game, and warm up the Wellie!
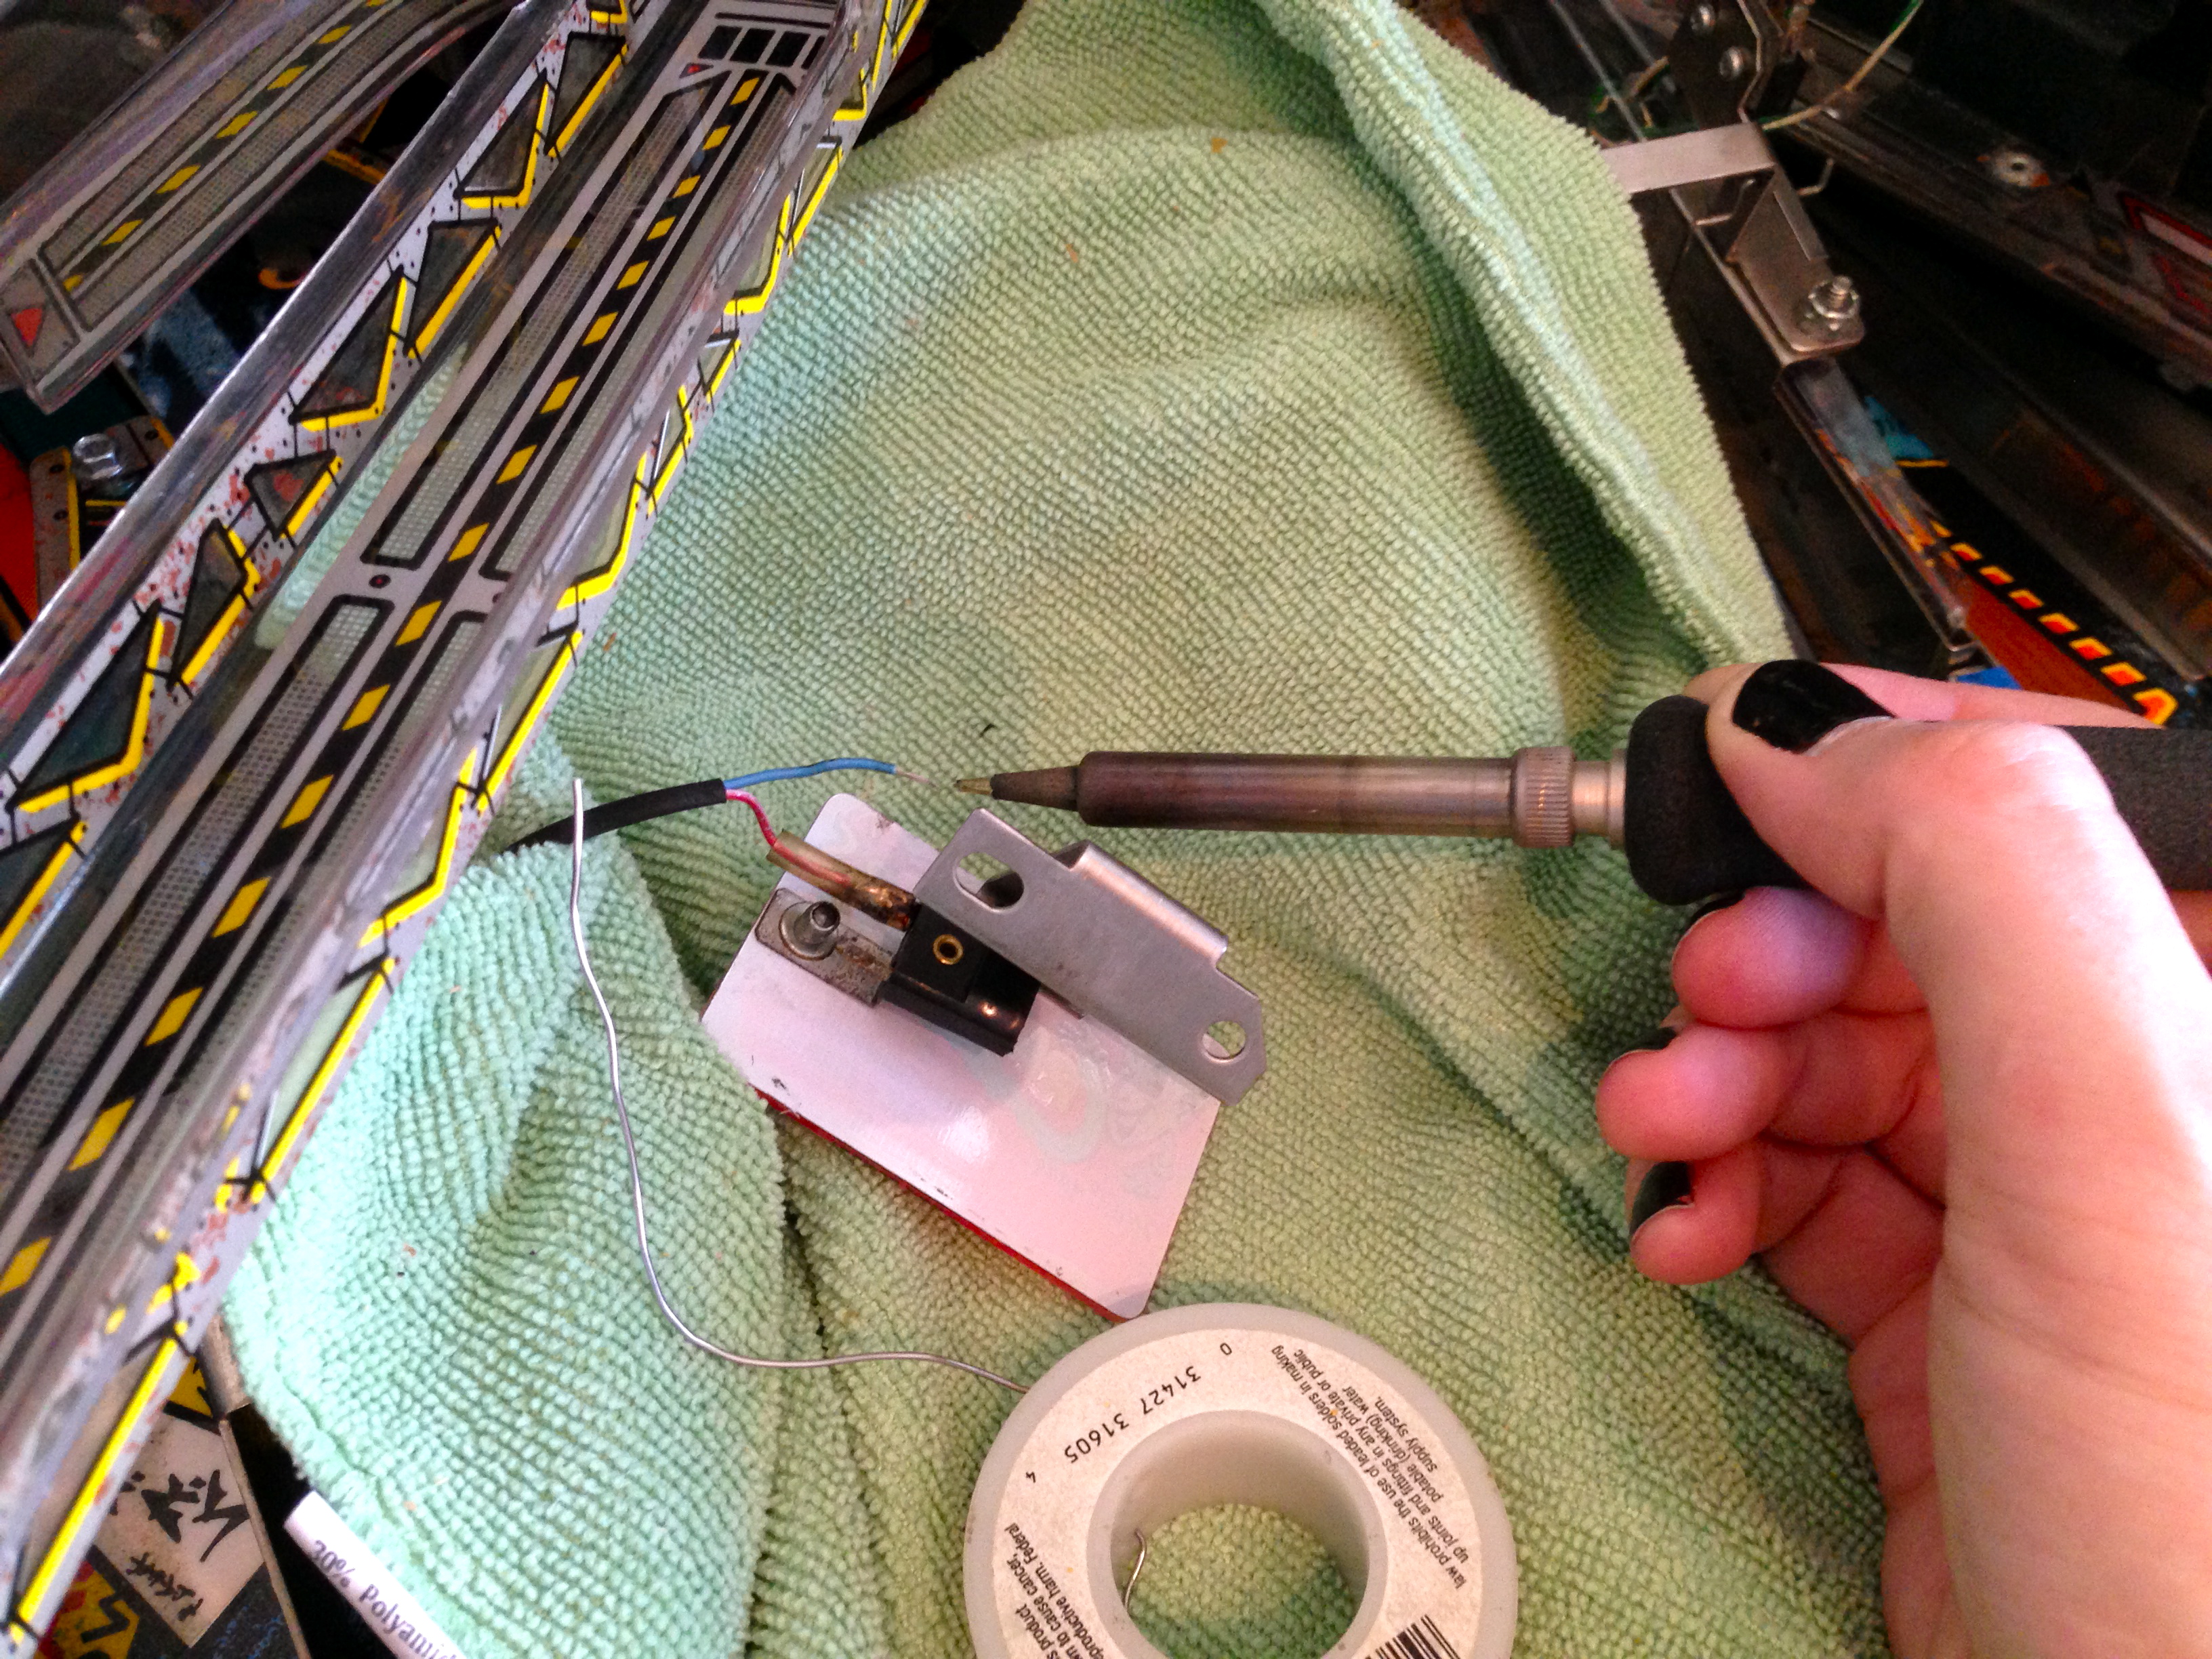
A quick test with a bulb that we know to be good…

Just like that, Crazy Bob’s is open for business once again. I have to say, the strategy of how and when to use his store makes a lot more sense now. This was a very easy fix, once I knew there was actually something wrong, and once I got over my biases about what to look at first! Of course, part of me is still waiting for the other shoe to drop on that Power Driver Board. There may always be that little voice in my head saying, “something on it is broken, you just haven’t seen it yet!”.
Until then, I shall continue to silence that voice with bourbon, and play more pinball. Hack on!
Quinn,
Good tip about the one hand rule for electrical safety. My high school electronics teacher was a vet with radar experience. His rule was no jewelry especially rings. His description about shorting across even low voltage and making a ring white hot left a lasting impression on me. *shudder*
And single malt, please, they go better with Girl Scout cookies!
?;-)