For the first time ever, our girl didn’t show up for work.
Veronica has been making the rounds of makerspaces, conferences, etc lately. She has been through more airports than I ever would have imagined, and has been X-rayed by the TSA more times than anything I own. Despite this, she has never failed to fire up and show off her tricks. Until now.
For a second time, I was invited to give a lecture to a class at Stanford, and Veronica was the guest of honor. I dutifully hooked her up, gave my spiel, then fired her up for the demo. The class was greeted with this:

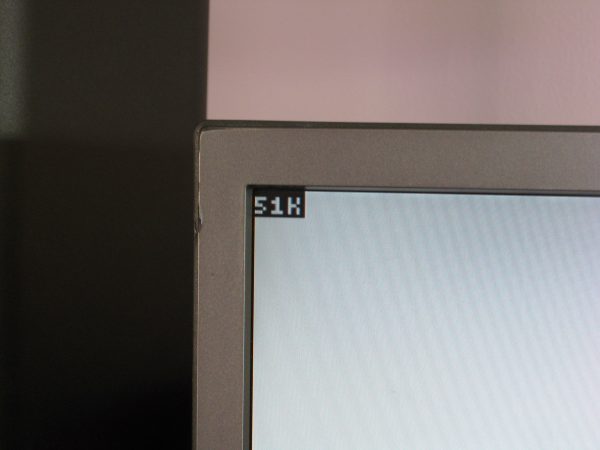
Why Quinn, you’re saying, whatever do you mean? Everything appears to be working just fine. Not quite. You see, this splash screen is supposed to be followed by a RAM check, whereby the machine iterates through all the memory and counts it off onscreen. It then drops you into a ROM Monitor prompt. However, the machine was stuck on this splash screen.
You may recall from long ago that Veronica’s VGA video and sprite system is bit-banged from an AVR microcontroller that lives on the so-called “GPU board”. This board is effectively a separate computer sharing the same bus as the main CPU, and being given commands via a dual-port FIFO SRAM. An interesting side effect of this pretty terrible design is that it’s possible for the graphics to boot without the machine itself. In fact, I often take advantage of this to show the splash screen for an extended period by halting the CPU immediately at boot using the front panel switches.
I jiggled wires and rebooted a zillion times, but it was no good. Veronica was not going to boot properly. I danced a little jig to entertain the class instead (not true), and slunk home with my tail between my legs to try and fix Veronica (mostly true).
I had no idea was what wrong, because the machine had never failed to fire up before. I had no accumulated wisdom for this type of failure, so I was starting from scratch.
Car people have a saying that every engine wants to run. All it needs is air, spark, fuel, and timing. If any one of those is missing, the engine won’t run. If they’re all there, it will run. It may not run well, but it will run. That’s a handy mnemonic, because it gives you a blueprint for getting any engine to run without knowing anything about what is wrong. By individually solving for the presence of those four things, you can get the engine to a useful tunable state, no matter how dead it was when you started.
A computer is not so different. It wants to boot. It just needs power, clock, bus, and code. If we’re starting from dead as we are here, then it’s time to go back to first principles and work our way up.
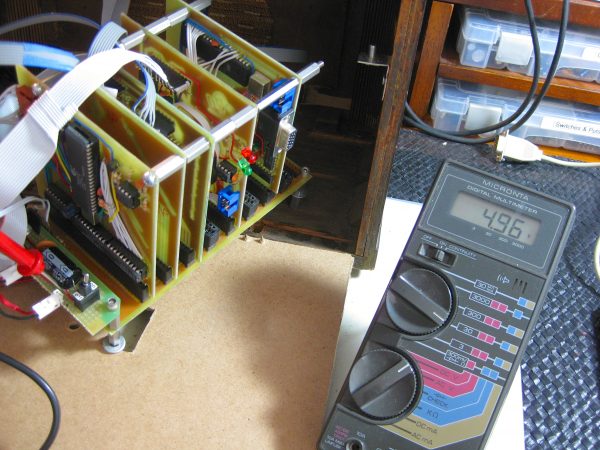
A quick check verifies we have 5 volts at the power supply. So far so good. Not to leave any stone unturned, I also checked for 5V right on the 6502. Power could be getting lost somewhere along the way. We have power at the chip too, which means the CPU is mostly likely trying to wake up.
If there’s power, there needs to be a clock. Without that, the CPU won’t start to try running code after finishing its reset. As you may recall, the very first thing a 6502 does at power-up is try to pull a 16-bit pointer from $FFFC in memory, then jump to that place in memory and start executing. However, it needs a clock to do any of that. To the logic probe!
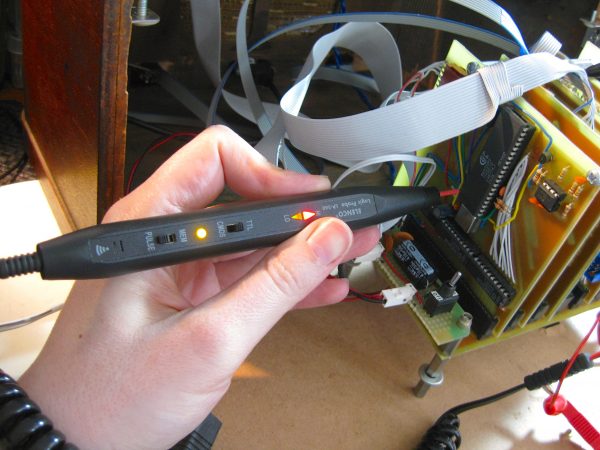
You can’t tell the exact frequency of the clock from the probe, but you can get a rough idea from the pitch of the sound, and you can develop a feel for various frequencies up to about 20MHz. I could tell this was in the ballpark, and in any case the 6502 will run just fine on anything in the range of a few kHz to about 2MHz. We’re definitely in that wheelhouse. I’ve run out of tired metaphors for numerical approximation, so I hopefully I won’t need any more in this article.
Also worth noting, the 6502 has a clock output as well. This is intended to drive the bus, RAM, etc. It’s also a handy way to check if the CPU is alive. Clock going in means it’s trying to wake up. Clock coming out again means it actually is awake. We have both.
There is power and there is clock. If the machine still isn’t booting, then we know code is not executing. That could be because the ROM is invalid, or because the ROM can’t be reached for some reason. We know at this point that the CPU is trying to boot, but can’t. Time to go deeper.
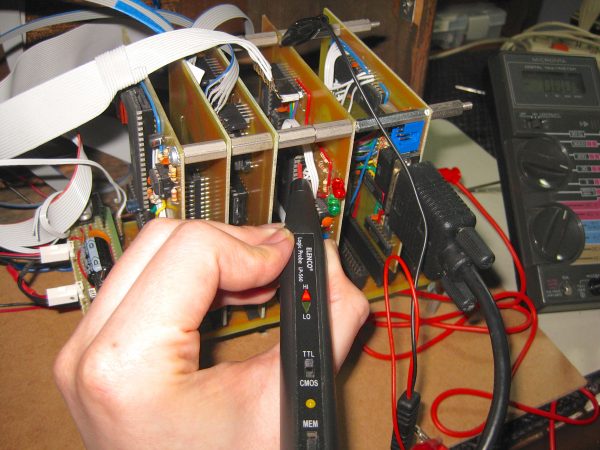
I started to probe the address lines of the RAM. This would give me a sense of whether the CPU was trying to access it. One of the reasons Veronica does a RAM check at startup is because that causes the address lines to be accessed in an ordinal fashion. That’s very handy for debugging all manner of bus and memory related issues. Having the machine exercise itself in an orderly fashion at startup gives you patterns to look for. It’s not really so much about testing the RAM itself. Modern SRAM chips pretty much don’t fail, and the visual effect of scanning through the RAM at boot is as much about nostalgic fun as anything.
The systemic diagnostic utility of this process really shines here, though. During this boot sequence, if we probe the address lines of RAM (or the address bus) in descending order, the tone of the logic probe will increase. This is because the address lines are being counted up in binary, in order. If you remember your grade school math, you know that during binary counting, the lower-order bits change at a higher frequency than the higher-order ones. This makes the tone higher on the logic probe. Again, it’s a crude measure, but if the probe sings higher and higher notes as we go down the address pins, it’s a safe bet our CPU is running through the RAM check sequence.
I did not find this musical pattern on my address lines, which means something more fundamental is wrong. We need to back up a bit.
If you’re really paying attention, you probably already spotted the weakness in this test. The RAM check itself is in ROM, so if the ROM is incorrect or inaccessible, we can’t get to the code that would iterate over the address lines and help us prove code is running correctly.
All is not lost, however. We can still glean useful information from this probing. For example, if the bus is really borked, then some address lines might be floating or stuck at a particular value. If the CPU is genuinely trying to access ROM and boot, as we believe it is, we should see some activity on these lines that modulates in a reasonable way, with nothing floating or stuck. Floating signals will sound like silence or a soft warbling noise on the probe. Always a sign of something deeply amiss. Similarly, address and data lines in a computer never stay at one value for any length of time. A constant 1 or 0 on any line would indicate a problem for sure.
In fact, this test was inconclusive- sometimes it sounded like normal bus activity, and sometimes there seemed to be floating or stuck lines. Then things got really weird.
While I was probing around, the CPU suddenly seemed to wake up and run a random portion of its RAM check. It died before finishing, and the screen was not in the correct state, but it did run some code for a moment! This behavior was very erratic and very difficult to reproduce.
On a lark, I tried reflashing the EEPROM, in case the airport x-ray munged something. No change.
The evidence was mounting that the problem was the bus. It seemed that the CPU was only intermittently able to access the ROM, and when it did, the data was often incorrect. This suggests something is making a lot of noise on the bus.
Given that the machine has been sitting untouched in my living room, and was in a known working state before getting on the plane, it seemed likely that the problem was physical, not electronic. What kind of physical ailment could cause a noisy bus? A loose or misaligned backplane connection is certainly the most obvious. However, one of the first things I did was clean and reseat all the cards, just to eliminate dust and vibration as culprits.
I was somewhat stumped at this point, and so I started poking around at various connectors, and checking signals at random with the probe. Sometimes, when you get stuck, it’s because you need more data about the problem. You don’t always know where that new data will come from, so random exploratory observation can bear fruit. Often from a most unexpected source, as in this case.
While probing around like a baked monkey, the machine suddenly started working perfectly! Then I bumped the graphics card by accident, and it died again. I wiggled the graphics card, and it rebooted. I held the graphics card to one side, and the machine worked. Then I let go, and it died. The problem was clearly the graphics card not sitting well in its slot. It might be oxidation on the card edge, a rogue tortoise-shell cat hair, or the slot connectors getting tired, but it was clear the connection between the graphics card and the bus was not awesome. A poor connection means resistance and noise, and that plays havoc with digital busses. The graphics card is especially prone to this, because it’s the highest-speed portion of the system. It runs at 20MHz- about the lowest you can get away with and still jam out a decent number of VGA pixels. 20MHz is high enough that the mean old physics underlying digital electronics starts to rear its ugly head. Things like impedance matching and parasitic capacitance start to matter. It ain’t TTL Lego any more. When the high speed portions of the machine aren’t happy, they make sure the rest of the machine isn’t happy either. High speed misery loves low speed company, and the graphics card will happily flood the bus with noise if you let it.
With the problem identified, I cleaned up the graphics card connector as best I could, reseated it, and secured it firmly in the backplane with the mounting hardware. All seems well again, and Veronica now stays running while being jostled. It seems a little gremlin got in there somewhere, but I managed to send it packing with a little perseverance. Computers are sensitive beasts- homemade ones in particular. The slightest bit of dust or corrosion in the wrong place may be all it takes to bring it all down.
I celebrated my success with a rousing game of Veronica Pong.
Hurrah! She Lives – and how dare you (potentially) blame it on an errant torty hair.
Blame the cat hair. I have a beautiful torty cat too, and her hair ends up in my computer all the time!
Nice troubleshootin’ tex!
How do you like that Elenco LP-560? Would you recommend it for simple 1 MHz diagnostics?
Definitely! It’s a great little probe. I use it more than my fancy 16-channel logic analyzer, honestly. For most digital logic problems at 1980s speeds, it’s all you need.
(Adding to my Amazon shopping cart…)
You need an affiliate code 🙂
You can slip me three quarters of a cent at KFest, and we’ll call it even.
Blaming the cat is one of my favorites. With six, no specific critter is at fault, and all get forgiven.
In my years of hardware related work, connectors cause 4 out of 5 problems. I always use the screw down connectors. (Or at least used to.)
What an awesome article, thanks for writing up the full process and your thoughts in a step by step fashion.
I’ve always known that random observation and testing can lead to useful results, and you excellently articulate the reasons for doing it along with leading by methodical tests.
Listening to the electronic sounds a computer makes is such a long forgotten skill. Even without a probe, when my first 8086 booted, I knew all the really subtle noises it made, chattering hard drive, fan, CRT monitor gun, even how the pitch of the electronic whine changed when the different subcomponents and cards initialized.
Nice troubleshooting!
One of my favourite tools in my workshop is Caig Deoxit. Stuff works wonders and helps prevent any of the sort of oxidation that may have happened.
Sadly, it will not dissolve cat hairs.
I’m happy to say that due to my reading your posts whenever they appear (and the back log) I can finally understand most things! I am learningding!
I can completely relate to this… I have a collection of vintage stuff (from DEC to Amiga)… One of my Amiga 2000’s was acting up, continually restarting. I spent days going through that board with at a scope and then a logic analyzer.. The problem was *clearly* something between the keyboard and the reset circuit… until I brushed against the accelerator board and everything resolved itself. 🙂
Argh!!!