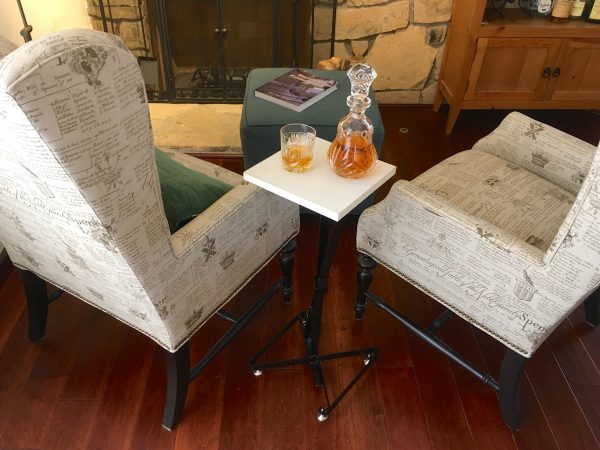
Sometimes, you just need a place to set down your adult beverage.
My recent metalworking posts have gone over well, so I thought I’d fire another one in the direction of you, gentle reader, and see if it sticks. This time around, I wanted a small table to sit between a couple of wingback chairs. This section of Dunki Freehold is the designated Whiskey Nook, as is standard in any civilized freehold. Whiskey Nooks are crucial for contemplating the geopolitical implications of Sartre, ensnaring escaped koalas, and generally getting blasted in comfort. Tragically, my Nook was missing a place to set down my glass in between deep ruminations upon the implications of quantum mechanics for the future of our legal system. We can correct that oversight with a small end table. This is a great entry level project which introduces a couple of very useful techniques, and there’s nothing much you can do wrong.
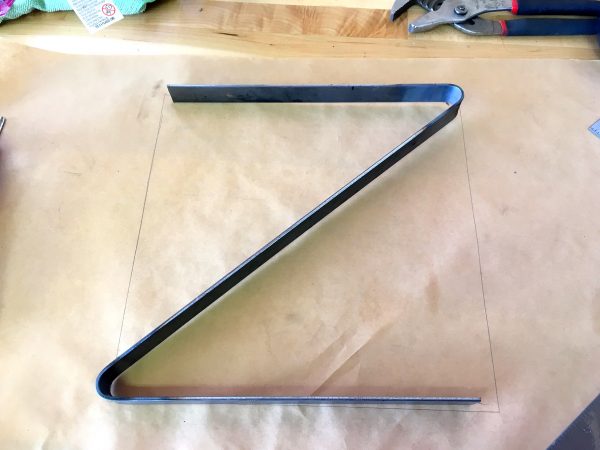
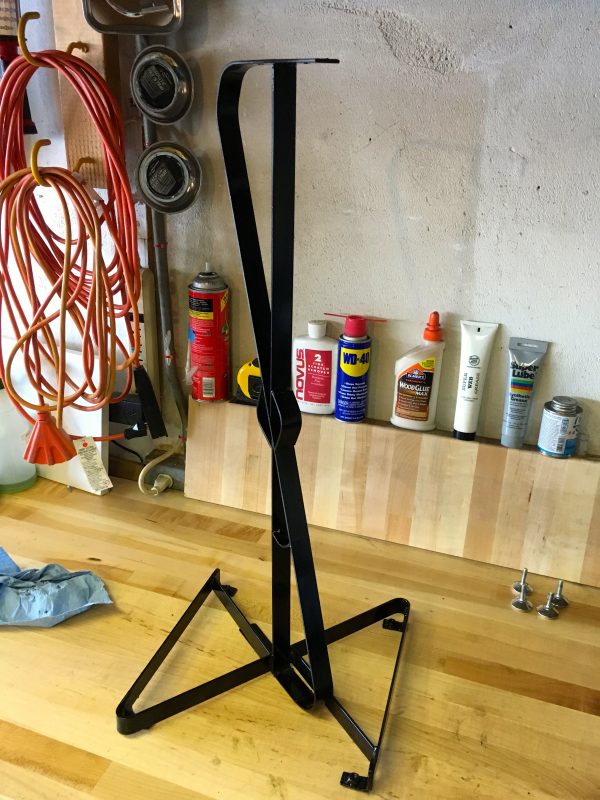
The junk pile coughed up some four foot lengths of ¼” x ¾” mild steel, so I decided to see if I could do something with them. I wanted a design that was lightweight in appearance, perhaps with some graceful curves. I also wanted something that could be slid in close to the chair and overhang the armrest. After the third or fourth beverage, the ruminations tend to be less about string theory, and more about coping with the weight of one’s own arm. These are the struggles of deep thinking and heavy drinking. The last design goal I had was for something asymmetrical with the feeling of a cantilever. I’m partial to things that look at a glance like they should be unstable, because they showcase the beauty of physics, and the power of engineering.
I decided the core of the stand would be an S-shaped piece of steel, so I needed to make some large-radius bends in the material. Doing this really cleanly and consistently is probably best done with a roller-bender. They exist for various kinds and shapes of stock. However, there’s another way that is arguably more fun because it involves fire.
A little backstory is helpful before we light the torch. Steel is amazing stuff with amazing properties. One of those is its ductility. This is more or less a function of the carbon content of the steel. Higher carbon content steels are stronger, but less ductile. Basic mild steel like you get from the local Jawa is fairly low-carbon, and thus quite bendable. For many things, you can simply clamp one end of the steel and bend it cold. This is often fine, but it does cause “work hardening”. The steel will be a bit more brittle when you’re done. If you try to bend too tight of a radius while cold, the steel will crack. A niftier way is to bend the steel while it is heated to the “critical temperature”. This is the point at which chemical changes start to take place. The critical temperature varies by the exact kind of metal, but for typical mild steel it is about 1400°F (760°C). The way the steel is cooled after this heating can also alter the properties of it. Mixing different methods of heating and cooling, you can get tempering, annealing, stress-relieving, normalizing, hardening, case-hardening, surface-hardening, and more. Suffice it to say that heat treatment of metals is a complex topic beyond the scope of this article.
All we need to know here is that heating it to the critical temperature makes it easier to bend, and prevents work-hardening. It is worth noting that this heating operation does take some of the temper out of the steel, but for most household projects, that doesn’t matter. If you’re doing this with spring steel, tool steel, or other high-carbon materials where strength really matters, you need to retemper it after bending. Again, that’s all outside the scope of this post. We just wanna make stuff not straight because pretty.
We start by setting up a bending jig. Using a jig will give much nicer results than trying to do this freehand. Even with a jig, as we’ll see, you need to pay attention to get a nice bend. In my case, a big piece of scrap pipe in the vise is all we need. For tighter radii, it’s helpful to have two posts close together- this is often done by welding the jig pieces to a metal work surface. That’s overkill here, however.
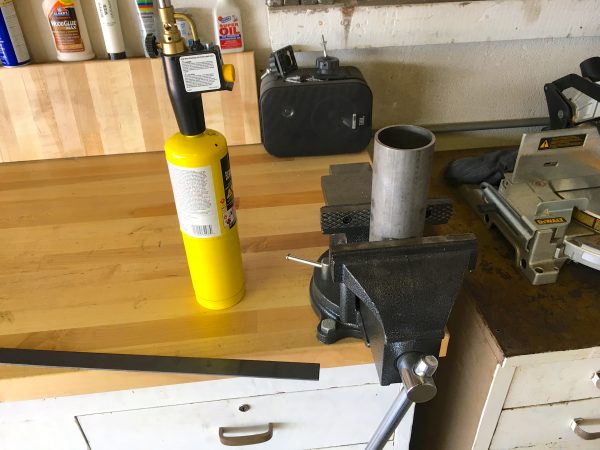
Now the fun part- the heating. I’m using a MAPP gas torch here, which you can buy in any hardware store. MAPP gas is technically methylacetylene-propadiene propane, and it’s basically a safer version of acetylene. It burns very hot, which is what we need. In fact, MAPP gas burns at 5300°F (2925°C), which is pretty darn swell.
Simply hold the torch under the spot on the steel that you want to bend, and start heating. The goal is to get an even cherry-red color in the area being bent.
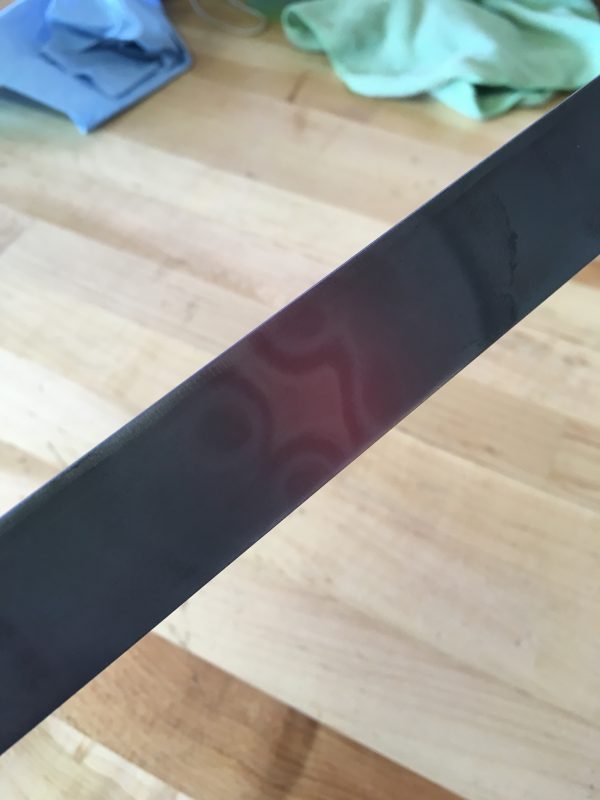
An interesting thing about metals is that you can pretty accurately measure their temperature by their color. A good machinist’s textbook (such as this one) will have a section on heat treatment of metals, which includes a color chart. You can also find them online.
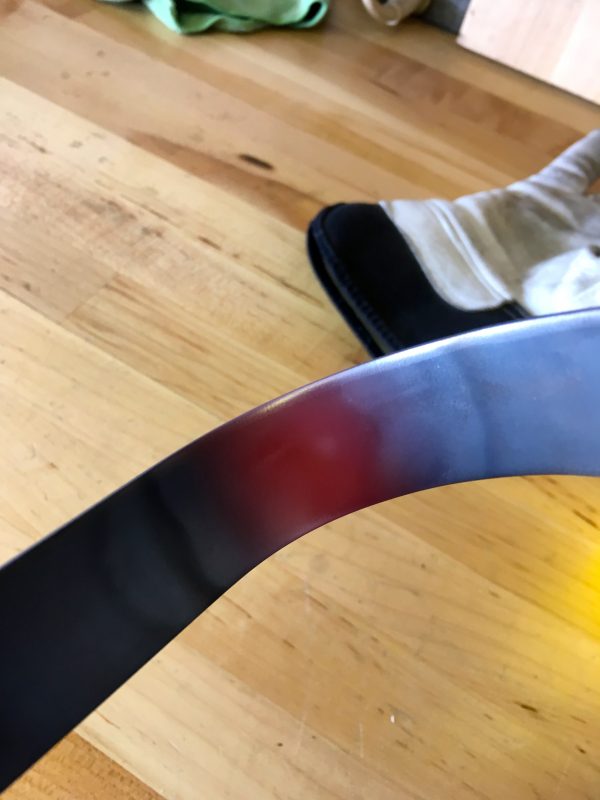
When you hit that cherry red color, quickly put the torch down and pull the steel against your jig, wrapping it around the big pipe. Bend smoothly and quickly. The metal is soft like clay at this moment, so it doesn’t take a lot of strength. The cherry red will not last long at all, however, because the piece you’re bending and the jig are both very efficient heat sinks. You’ll get a few seconds at most to make your bend. Don’t get greedy, because once the metal drops below cherry red, you’re now cold-working it, and your bend will be messy and uneven (and the steel may even crack). In this case, my large-radius bends were done in a couple of passes. When the metal cooled off too much, I would heat it back up again before continuing until I had the bends I wanted.
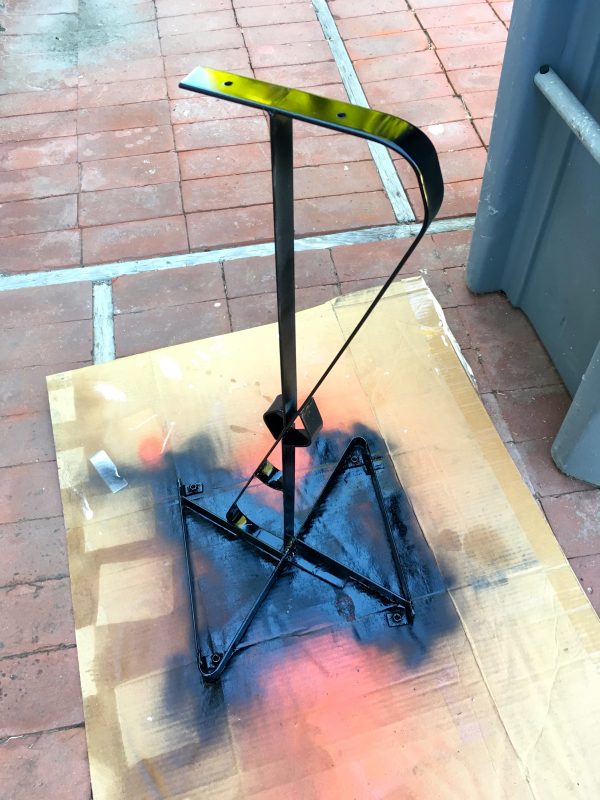
You’ll see later that one of the two large bends in my S-shaped stand is kind of boxy. This is because I tried to bend too much in one go. Rather than throw the piece away, I opted to put the less attractive bend at the top, where it isn’t really visible (under the table top).
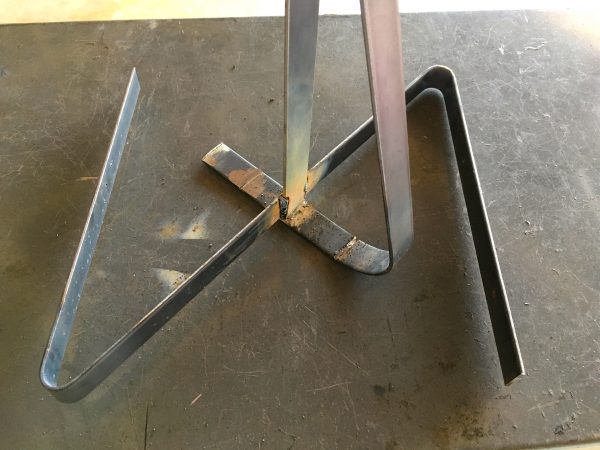
With my basic S-shape done, it was time to start stabilizing things. I didn’t really have a grand plan here- I simply kept adding pieces until I was satisfied. A project like this is nice that way- you can make it up as you go along.
There’s an old fabricator’s saying that “Everything is a spring”. You’ll learn this very quickly when making furniture, and when working with steel in particular. The bar stock seems impossibly strong on the shelf, but when you start making shapes out of it and putting weight on it, you realize you have made a giant Slinky. This is where we take off our artist beret and put on our engineering beanie. To stabilize things and take the springiness out, we need to triangulate.
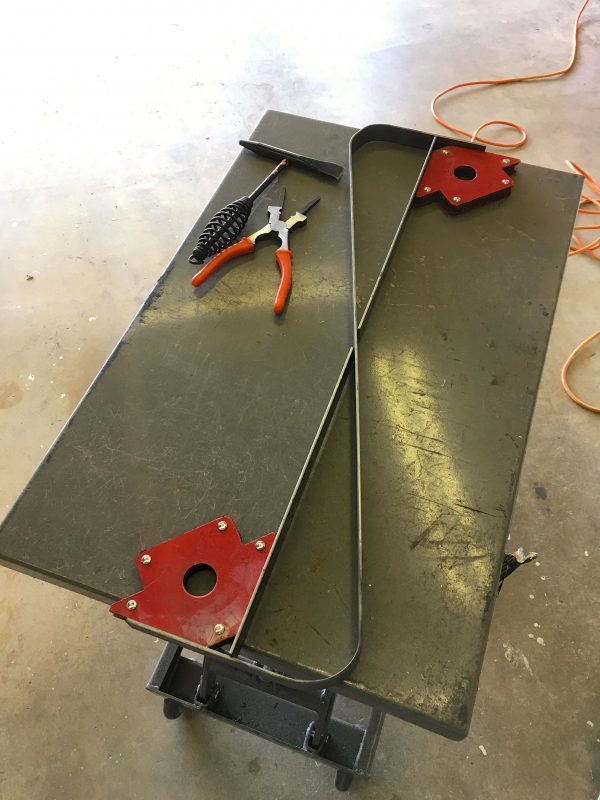
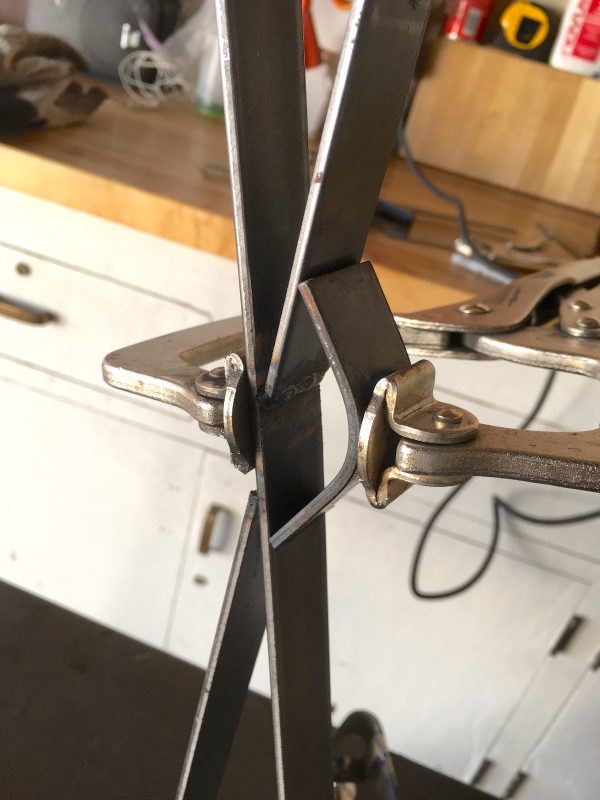
There’s a limit to how stiff something made with parallel flat bar is ever going to be. If you want it 100% rigid, you need to start adding pieces in orthogonal planes. However, a few decorative additions got me something strong enough for my needs without getting too “heavy” looking.
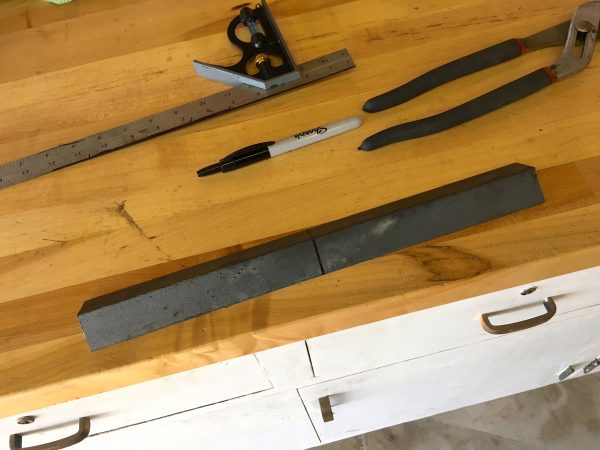
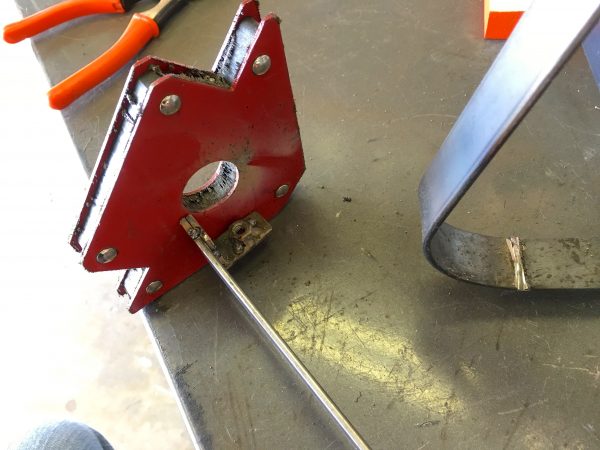
Next I needed a base. The junk pile coughed up a piece of angle iron that seemed like the perfect length to cut two stringers out of.
My thought was to weld little plates under the angle iron to hold feet. This was a bad idea for many reasons. First, the angle iron is not at all in keeping with the style of graceful curves on the piece. Second, feet on furniture need to be even, flat, and level. This is nearly impossible when trying to weld a small square of material at 45° into the inside surface of some angle-iron. Nevertheless, I gave it a shot, because I’ve never let bad ideas keep me from doing stupid things.
I’ll spare you the pictures of the end result, but suffice it to say, when I was done with this, I had two ugly angle-iron stringers with four feet that were all at different height and angles. It was a hot mess. Literally, because the welds were still cooling. Incidentally, keep your metalworking gloves on while doing a project like this. It’s easy to forget which welds are fresh, and if you grab one with your bare hand, well… you won’t forget twice. Ask me how I know!
There’s something called the Sunk Cost Fallacy, which you might be familiar with. This is the human cognitive tendency to continue down the wrong road long past when you should, because you have so much invested in it. The notion that you need to preserve that investment leads you to believe that the wrong decision has more merit than it does. If you ignore time and money spent, you can see that the better decision is still to throw away that work and try again. It was time to throw away this first attempt at a base.
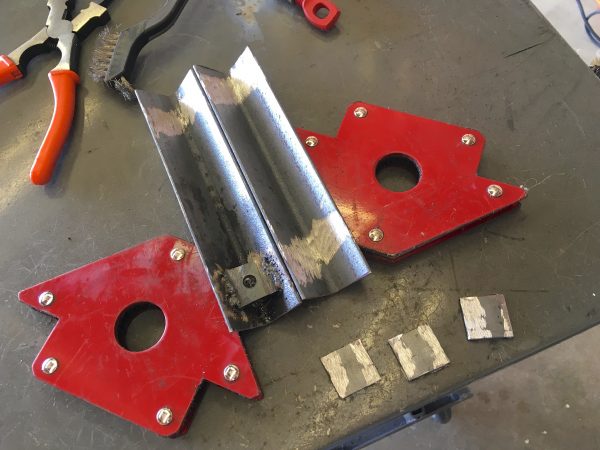
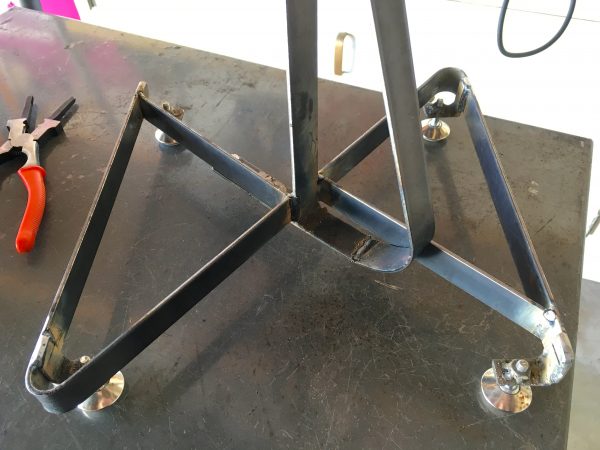
Attempt two was to take the same S-curve idea from the upright, and apply it to the base. An S-curve would provide four mounting points in the corners, and the end result could be quite attractive.
For sharp radius bends like this, it’s helpful to know a bit more about steel. Steel has a “grain”, which is an alignment of the impurities and other particles in the material. This grain is created by the mill rollers when they roll it out to dimension. If you are bending across the grain (that is, your bend line is 90° to the grain direction), the steel is tougher to bend, but is less prone to cracking. For bar stock, you usually can’t control this, because you have to bend it across the length of the bar, which may or may not align with the grain. If you’re bending large plate or sheet metal, and can choose the orientation, you may opt to bend along the grain to make it easier, or across the grain if you need a tighter radius. You can actually see this effect of the grain in bends like those above. The surface on the outside of the bend will start to show what looks like little splinters that are flaking off. This is the grain of the steel failing, and is a sign you’re pushing your luck on the radius.
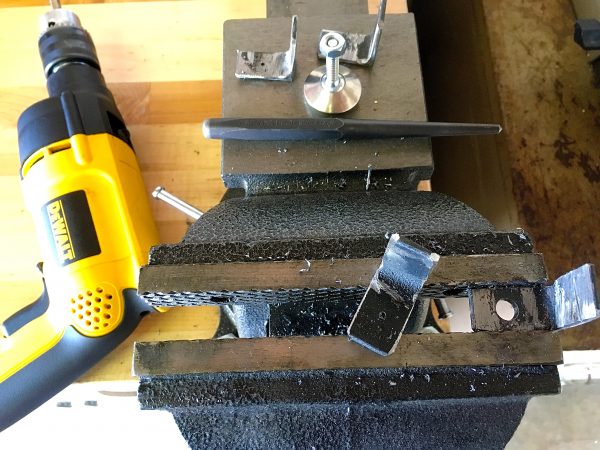
This is a good place to pause and talk about drilling steel. If you don’t do it right, it can be miserable. Done properly, it’s quite satisfying and doesn’t take long. The first step is getting the right twist drills. Machinists get angry when you call them “drill bits”, but I mix both terms here, because this is a lay-person blog written by the layest of people. Anyways, you pretty much can’t spend too much on drill bits. You absolutely get what you pay for. At a minimum, for mild steel, buy cobalt bits from DeWalt, Milwaukee, or better. If you’re going to be doing this a lot, consider going to a proper machinist’s drill set, like Norseman or Chicago Latrobe. Don’t forget that drills can be sharpened quite easily if they are high quality. Many people buy the cheapest junk Home Depot sells and then replace them when they get dull. That’s another way to go, but I find it less enjoyable.
Next, always drill a pilot hole. The point at the center of a twist drill doesn’t cut. The cutting edges meet there, and that tip isn’t capable of removing material. The pilot hole gives that point a void to ride in so the cutting edges can do their jobs.
Next, use lubrication. Any kind of oil is better than nothing, but you can use proper cutting fluid if you want to be fancy. I use 3-in-1 oil or old motor oil, and in a pinch WD-40 works too. The machinists in the audience all just died a little inside when I invoked the W word. Nevertheless, it does work. The point of cutting fluid is primarily cooling. Metal sliding against metal gets hot in a hurry, and it’s critical that the drill bit does not overheat. If it does, the temper will be knocked out of the steel of the drill bit (just like in our bending operations on the table stand), the cutting edges will dull instantly, and the bit will likely be ruined.
The last and possibly most important thing is what machinists call “speed and feed”. In the case of drilling a simple hole, this means having the right speed on your electric drill, and applying the right amount of pressure. The speed is lower than you think, and the pressure is more than you think. This is why drill presses are a thing. In addition to keeping things square, a drill press is designed to run very slowly, and allows you to apply a lot of pressure. The cutting edges need to bite into the material, and they need pressure and time to do that. If you’re using a hand drill, get a corded one with a nice variable-speed trigger, and practice running it almost as slow as it will go. Be careful about overheating the drill motor if you’re doing this for a long time with a hand-drill. The fan inside the motor needs speed to move air, so it will tend to overheat a bit. A quality drill motor will pay for itself here. Like most tools, it’s hard to spend too much on a power drill.
You’ll know you have the speed and pressure right when you have chips and/or spirals coming out of the hole- not powdery dust. The latter means the drill is grinding, not cutting, and that’s bad news. The drill is dull, you’re running too fast, or you’re not applying enough pressure.
Okay, with that little speechification out of the way, let’s get back to our table.
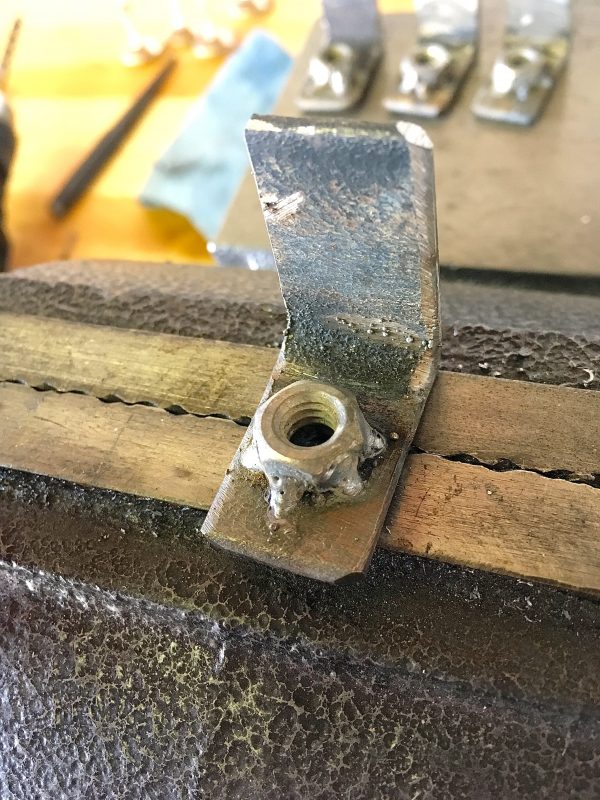
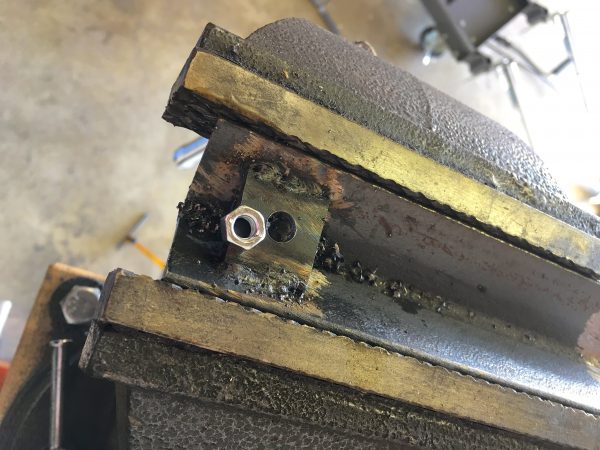
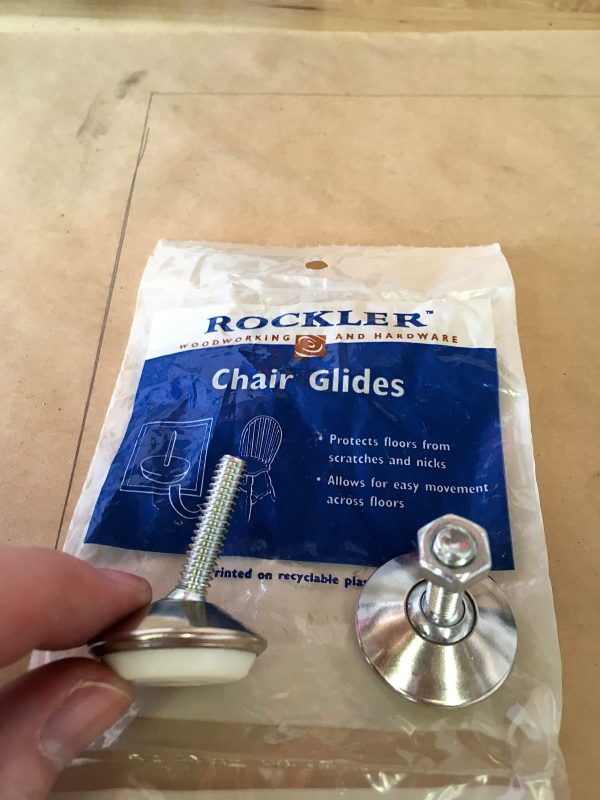
A quick word on feet. All furniture needs leveling feet. The furniture itself is probably not completely square and level, and the floor it will be sitting on definitely isn’t. There is nothing more annoying than wobbly or un-level furniture. It is maddening.
Note that I didn’t bother protecting the nuts from welding spatter or paint. I used to worry about that, but I now find it’s actually easier to simply run a tap through them when done to clean out the threads.
This design has a simple flat bar on top with a couple of screw holes. This allows me to experiment with the material for the top. For now, I’m opting for a scrap of melamine I found on the junk pile. Later on I may try something with natural wood for a more classy look. I’m not a huge fan of working with wood, though. It’s really difficult to weld, and I can’t seem to get the hang of it. I guess I don’t have the technique down yet, but I’ll keep practicing.
That’s it for this project. Well, not quite. We need to test it out. It’s five o’clock somewhere, right?
Yep, always 5 o’clock somewhere, and if there is nothing else on the agenda, go for it.
“I’m not a huge fan of working with wood, though. It’s really difficult to weld”. Hilarious. Your posts are always very interesting and I love your writing style. Thanks.
Great post. I’m loving the variety you’ve been posting lately. “It’s really difficult to weld” cracked me up too. 🙂
Hey Quinn, from the land of the Koala…
If your looking for a 5 o’clock tipple, one I greatly enjoy is Dubliner.. It is very hard to get here in Australia ( Tasmania ) but well worth hunting down, great as a sipper by it’s self or on top of icecream… Love it..
Also enjoy reading your posts.. 😉
Hey thanks! Always interested in recommendations of a… spiritual nature. 😉
I think with wood, you have to use something like epoxy… ‘galoo’ is what I think they call it. It’s an adhesive bonding agent. Supposedly it works quite well as long as the pieces are in compression or very mild shear. Apparently in tension or high shear you need to supplement them with mechanical fasteners. But weirdly, a friction bind is all you need for a fastener, something like a one-ended rivet, sorta, called a… ‘nale’, unless the pieces are under very high tension. So, if there’s a lot of tension, screw it.
Sounds exhausting. All that for something that is just going to catch fire someday anyway.
Off topic from this post, but I wanted to say super duper thanks for your work on the VGA generator. I got the stupid idea to try to build a 6502 machine a while ago and your R&D is a huge help. I got an atmega164p spitting out a VGA signal today running your assembly code. Feels pretty good.
That’s great news! Glad I could help. I know that feeling well.