For when “incredibly strong” just isn’t good enough.
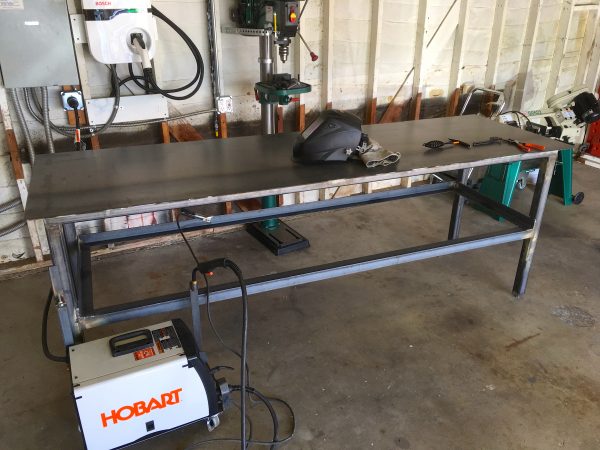
A while back, we did a fun little welding project here on on the blog that I have since been referring to as Furiosa’s Birdhouse. I’m in need of more work surface at Blondihacks World Headquarters, so I decided it would be fun to make a steel workbench. A really, ridiculously, obscenely heavy workbench. Like I always say, if there’s time to build something, there’s time to comically, pointlessly overbuild it. Well, it’s not entirely pointless, as we’ll see much later on.
When planning a project in steel, it’s a good idea to use an online steel weight calculator. If you’re used to working with wood, you may be very surprised how heavy steel actually is. Particularly in significant thicknesses, as I’m using here. Building something like this is a great exercise in learning how to handle heavy things in the shop, because it gets heavier and heavier as you go along. As we’ll see, it starts out being manipulatable by one person, but by the time I’m done, we’re well past that. Enough jibber jabber. Let’s get started!
People are always telling me how great Sketchup is, so I took this opportunity to try modelling the corner of the shop where the bench needs to fit, and also the bench itself. This was an interesting exercise, and I do actually like Sketchup quite a bit, but the truth is I could have planned this on a napkin in about 1/10th of the time. Oh well, here we are.
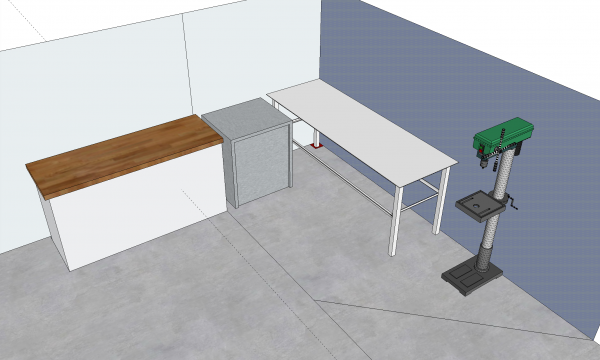
Underneath the top, you can see the details. The basic structure of the workbench is a box section frame, with legs under the corners. The legs are braced with angle-iron stringers that will be used to support a plywood storage shelf.

I opted for 3/16″ (4.75mm) stock for this project. If you’re experienced working with steel, you may be mildly alarmed at this point. Yes that’s beefy, but I told you in the opening paragraph what we’re getting into here. If you’re new to steel, that means the tubing is 3/16″ wall-thickness, and the plate is 3/16″ thick. The nice thing about this is that all the joints will be between pieces of the same thickness, which makes welding much easier. All of this also means the resulting workbench will survive a nuclear apocalypse. I consider that a feature, not a bug.
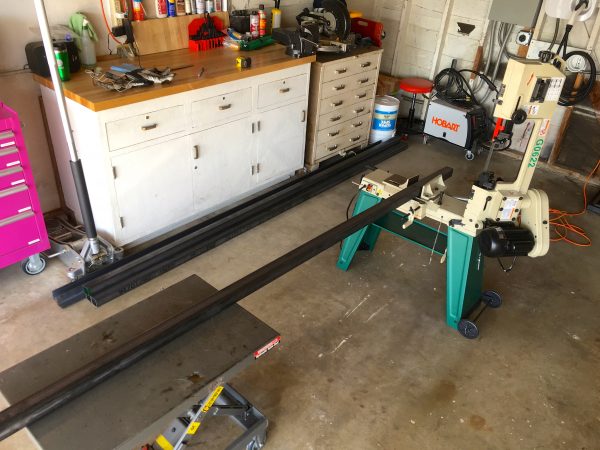
Okay, we need materials! For a project of this size, we’re beyond the realm of the offcuts bin at the local metal supplier or recycler. We’re into the territory of calling them up and placing a real order that arrives on a big truck. When you place an order of this size, my supplier provides free local delivery, and a certain amount of free cutting. That’s especially nice, because steel stock generally comes from the mill in 20′ lengths, which won’t even fit in my humble shop with the door closed.
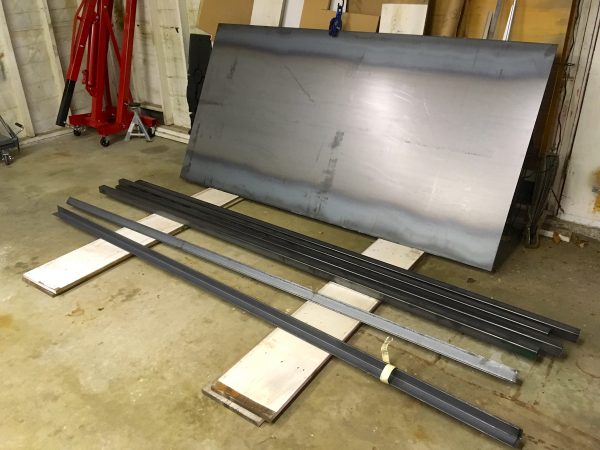
Here we get our first lesson in working with heavy things. The 10′ lengths of stock can be manipulated comfortably by one person, though you need to be careful. Lift with your legs and watch what you’re doing. As for the steel plate, well, forget it. For that we need a hoist or crane of some sort. Two strong people can shuffle it around (barely), but it’s a lot to ask, and not very safe to move by hand.
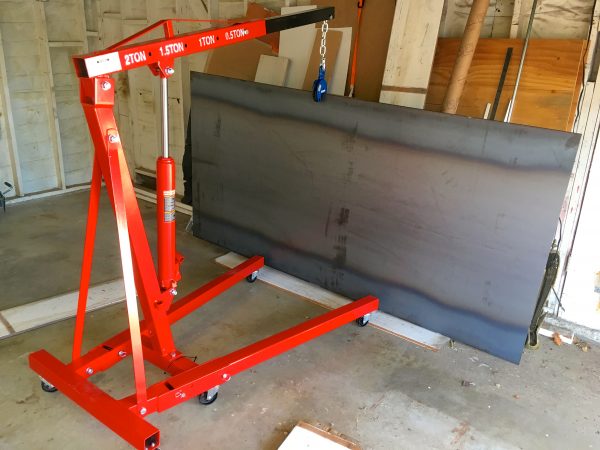
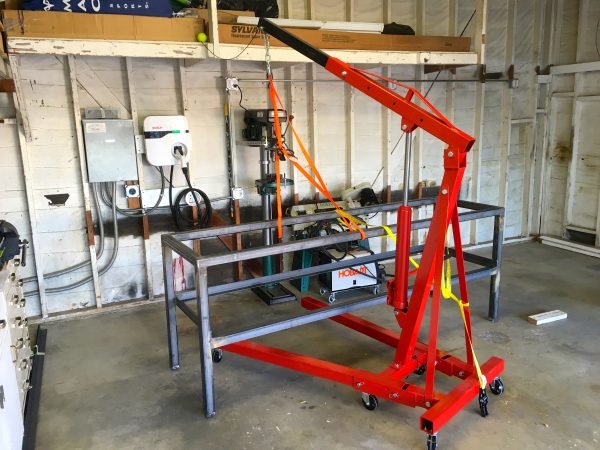
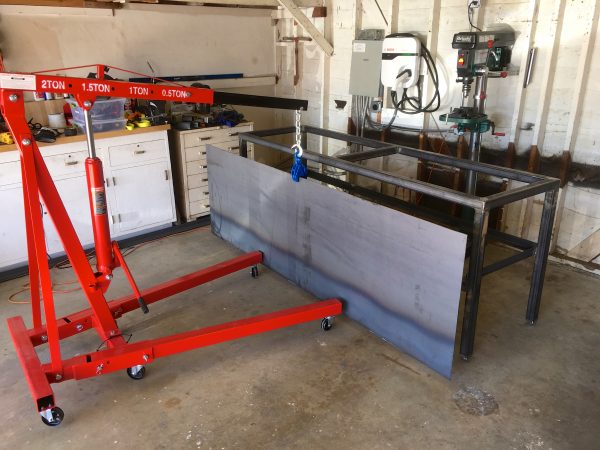
A great tool for this is a hydraulic shop crane (also called an engine picker or engine hoist). These are not very expensive, and allow one person to throw a couple of tons around pretty comfortably.
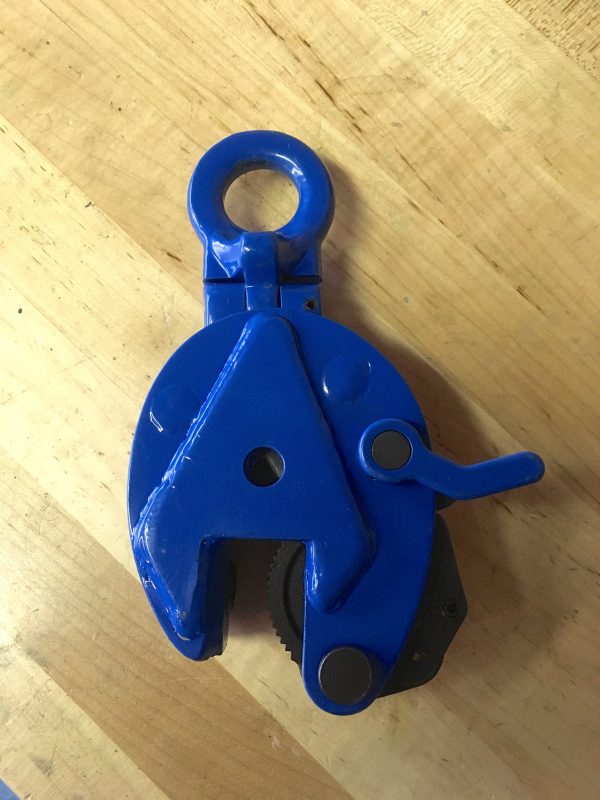
For lifting steel plate, there are a couple of methods that work well. You can throw straps or chains around the whole piece. You can also weld a hook or other lifting point right on to the plate. You can always grind it off later without hurting the stock. A final method is to use a plate dog. A plate dog is a cam-locking device that digs into the steel with little teeth made of tool steel. The design is such that the weight of the material causes the dog to grip tighter.
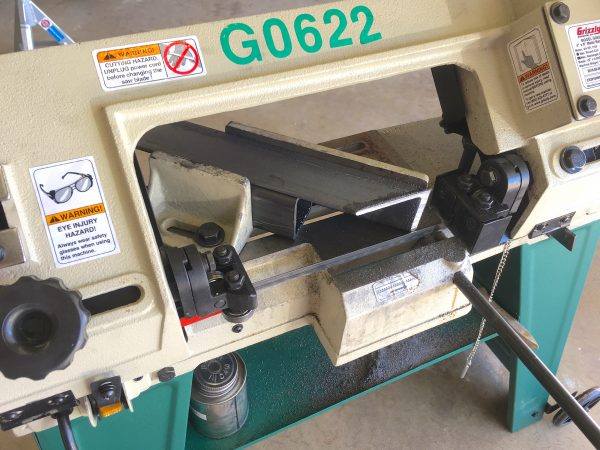
With materials in hand, and the means to move them, we can get started cutting stock according to our 3D model. The horizontal bandsaw is a real wonder here. I can’t imagine doing this with lesser tools.
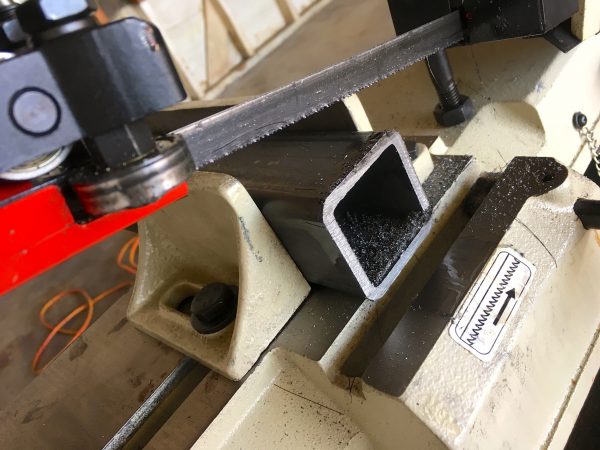
If you recall from before, the main structure of the bench is a box section under the top. I wanted to build this by mitering the pieces together at the corners, because this is cleaner and means there won’t be any open ends of square tube exposed. These would collect debris and moisture over time. Mitering heavy steel tubing can be difficult, but the horizontal bandsaw does a very nice job.
This might seem overly fussy, but it makes a difference. Precise joints like this are vastly easier to weld. That means the welds will be cleaner and stronger. Near-perfect miters also make it easier to square up the final structure.
Speaking of squaring things up, it’s important for this box section to be square and flat. It is the infrastructure for the legs and the top, so the quality of the bench lives or dies in this moment. Getting it square is easy enough- you lay out the pieces and tweak things until the opposite diagonal measurements are the same. Getting it flat was a bit trickier, because this theoretically requires a known-flat surface big enough for the job upon which to lay out the pieces. The whole point here is that I need a large workbench, so I don’t have a current one big enough to reference a flat surface on. You don’t want to weld the corners up one at a time, because that’s a guaranteed recipe for accumulated error. You’ll end up with a wobbly bow tie cross section. You want to lay it out perfectly, then tack all the pieces, then double-check, then start welding things up.
I ended up using the concrete floor of my shop for this layout. Despite appearances, concrete floors are never completely flat. There will be high spots and low spots. With some trial and error, however, I managed to find a way to lay the pieces on my floor such that there were no high spots under the steel. There may be better ways to do this, but this worked for me.
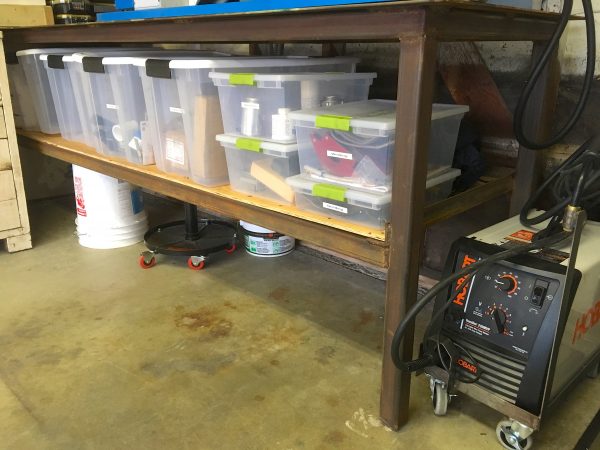
A quick note on welders. Material this heavy is definitely at the upper limit of a 110V welder. I have a Hobart 210MVP wire-feed MIG, which has the terrific feature of running on both 110V and 220V. For this material, I was on nearly the highest setting in 220V mode, so it’s safe to say you would not have a good day trying to weld this stuff on 110V. If there are any real weldors in my readership, feel free to comment if this is feasible. Personally, I need fancy tools to compensate for incompetence.
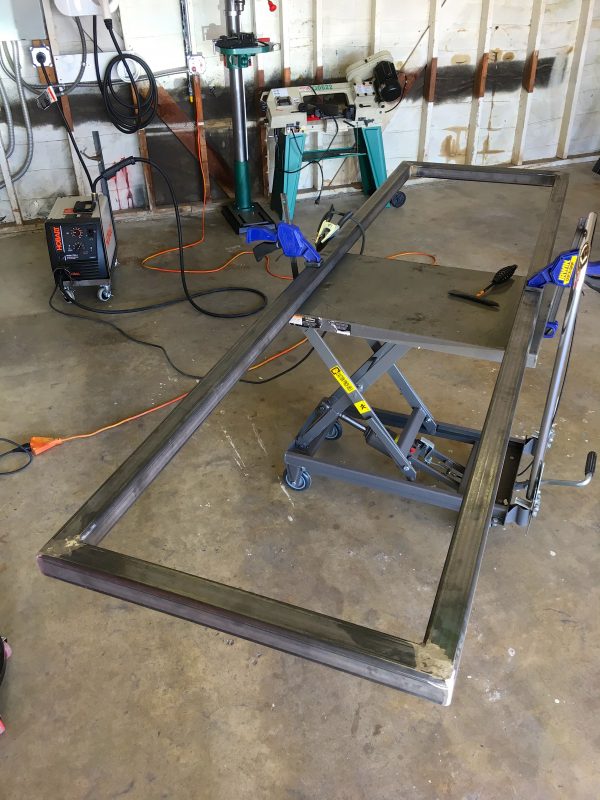
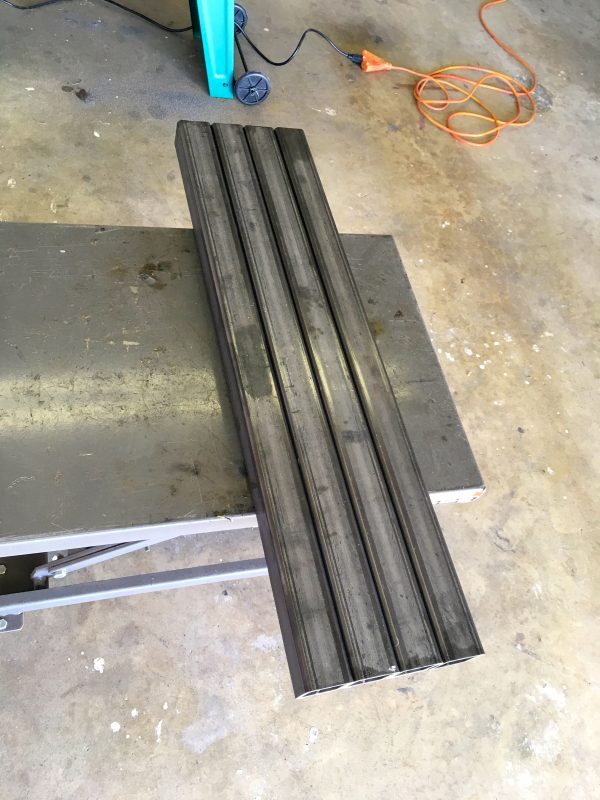
You’ll note that, at this point, I’m making use of the hydraulic cart to manipulate the work. With these four pieces of 3/16″-wall 2″ square tubing welded together, the weight is now just past the limit where it can be safely manipulated by one person.
We’re ready for some gams!
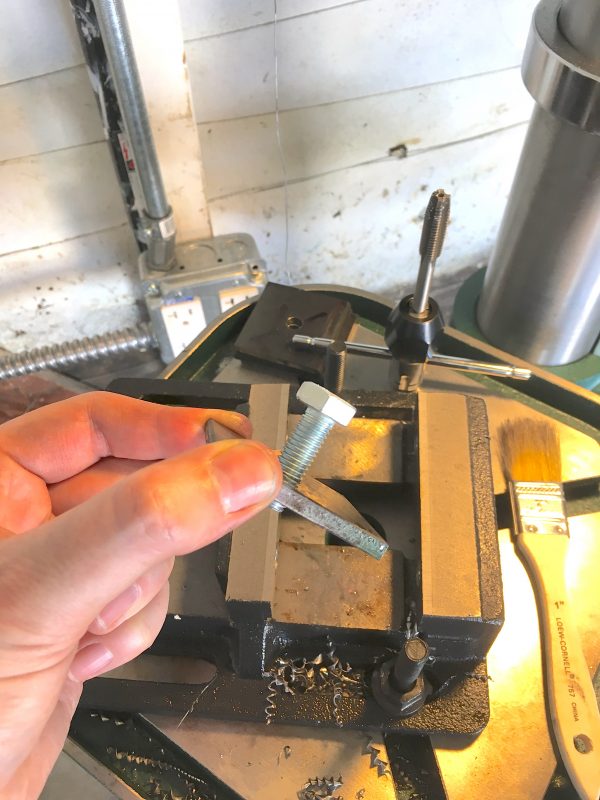
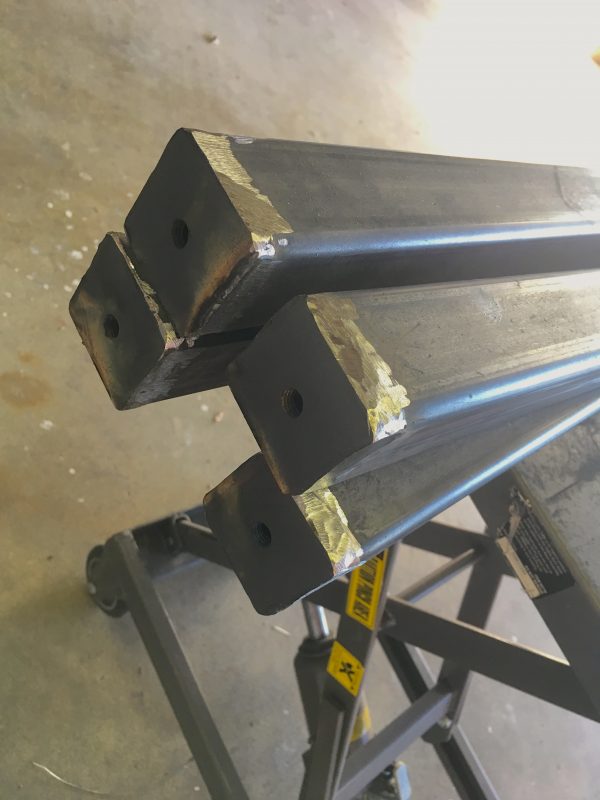
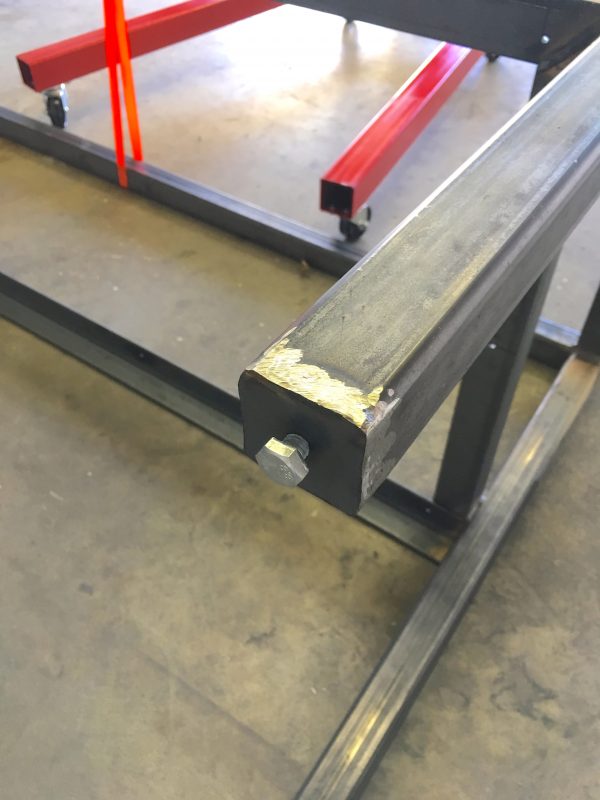
A workbench needs to be as level as you can possibly get it, so adjustable feet are a must here. For a really precision leveling, it’s nice for the feet to be points. I opted to go low-tech for this and use Grade 8 17mm bolts for this. For this to work, I’ll need to cap off the tubing at the bottom of the legs.
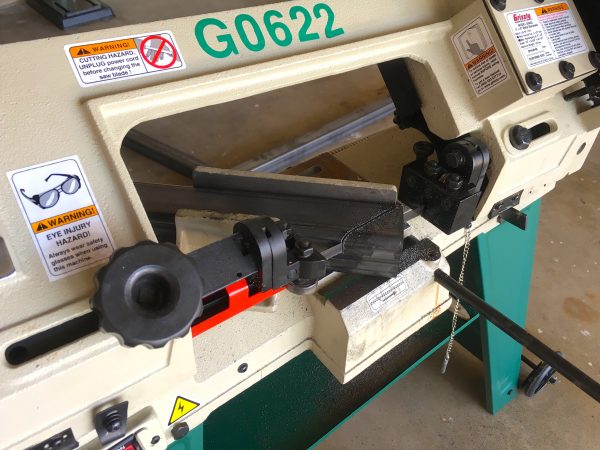
To cut the plates out, I decided to try a lesser-known feature of the standard low-budget 4×6 horizontal bandsaw. It can be locked in the vertical position and be used as a “normal” bandsaw. I will say that this worked… okay. I wouldn’t rush to do it again, but in a pinch, it was helpful.
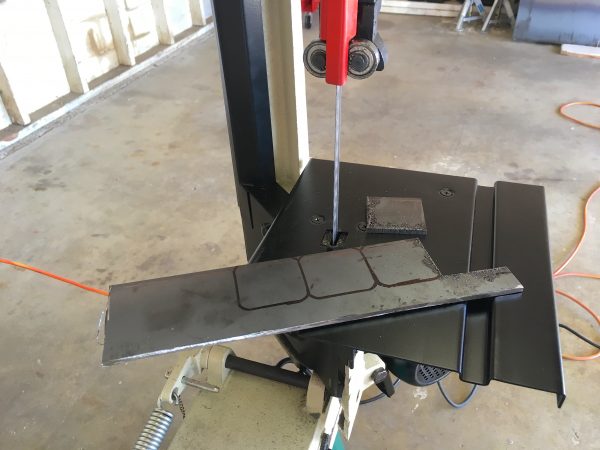
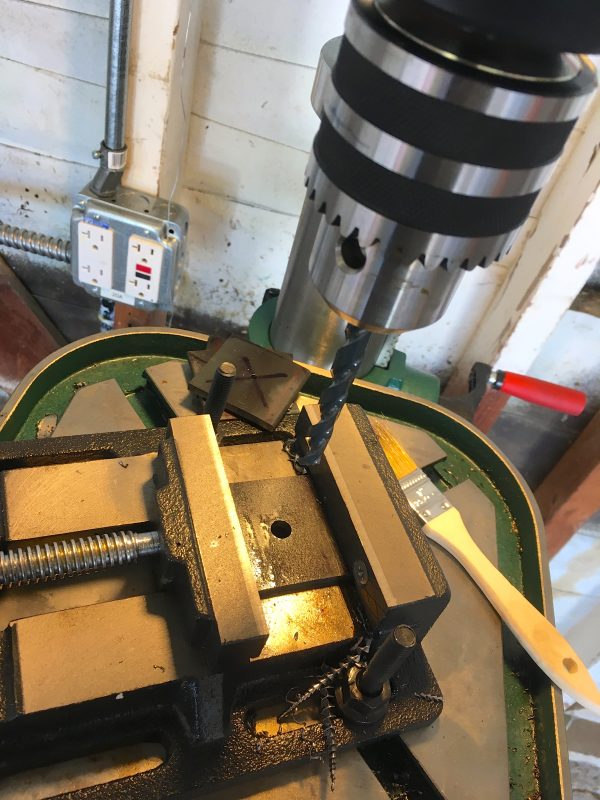
With the leg caps cut out, I just needed to drill and tap holes for my “bolt feet”.
Then it was simply a matter of welding these feet on to the bottom of the legs. I chose a bolt length that was generous, so that the length of the legs didn’t have to be precisely the same all around. This would be difficult to achieve. A nice long bolt for the foot will absorb a lot of variation in leg length and floor surface. Also, with each foot being effectively a point, it’s easy to get a nice level on any surface without the need for pivoting feet.
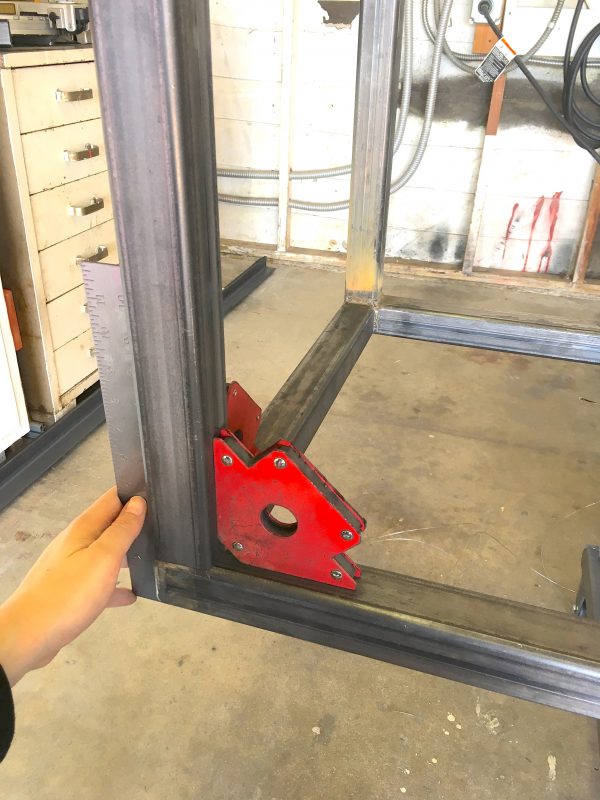
It’s now time to attach the legs to the top frame. This is a big moment, and worth getting right. The tops of the legs may not be perfectly square, and the welded miter joints that the legs are being attached to are certainly not perfectly flat. I took my time here with magnets, squares, and clamps, getting each leg as perfect as humanly possible before tacking into place. In a couple of cases, the tack welds pulled the leg out of square (welding tends to do that), so I had to break the tacks and try again. Sometimes a tack on the opposite side would pull it straight again. Sometimes that would backfire, and I’d have to break both tacks and start over. Patience, padawan.
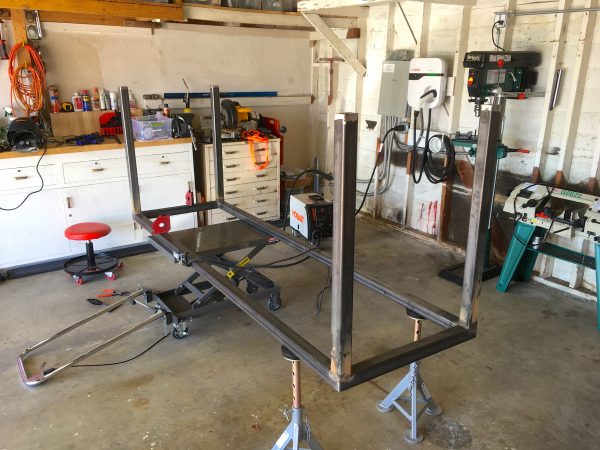
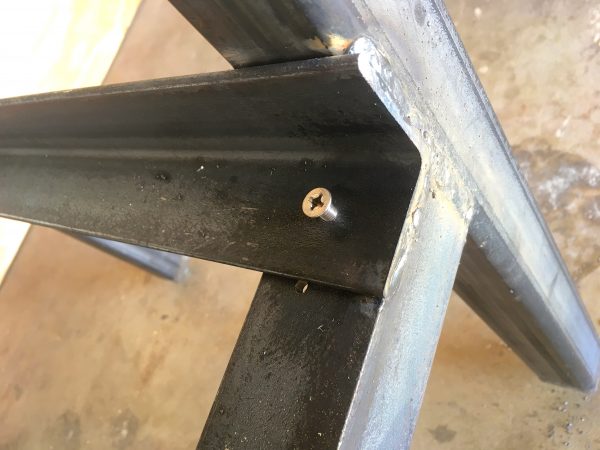
Next up, we need stringers for the legs. These are for stiffening, and will also hold a storage shelf. I made these out of 3/16″ 2″ angle iron. That’s ridiculous overkill, but it’s matchy-matchy with the other materials used, and looks the part. If I ever need to store my lead ingot and sandbag collection, this shelf will do nicely.
I opted to miter the corners here again, to give the shelf a flat surface to sit on. Mitering angle iron is a bit tricky, because angle iron is supposed to be laid peak-up in the bandsaw, like a little mountain. This is the most stable way to clamp it in the vise. In this position, you can’t cut a 45° miter.
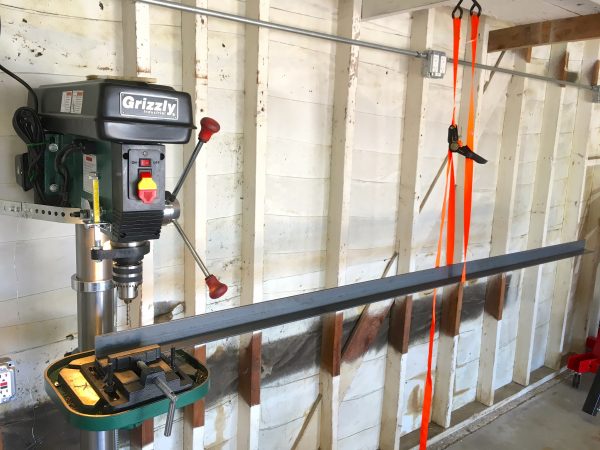
Before attaching the stringers to the bench, I opted to drill some holes for the shelf mounting. It’s easier now, since I can use the drill press. I needed about 16 holes total, which I had no desire to do with a hand drill.

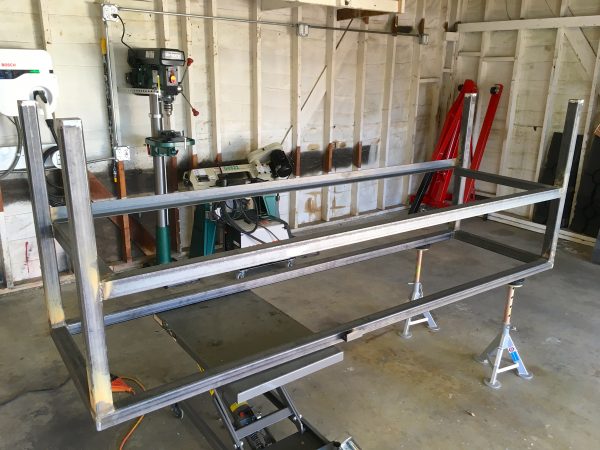
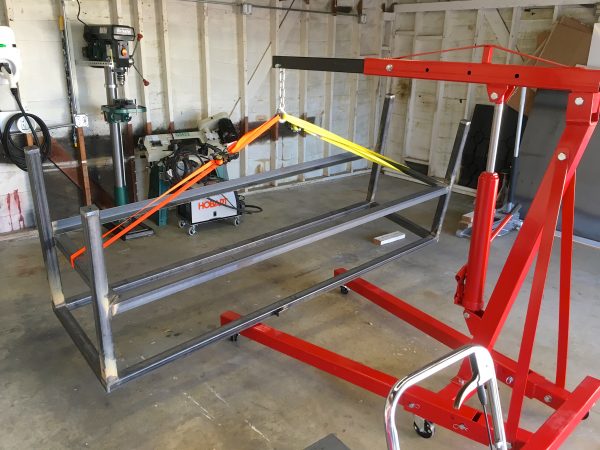
Now things get interesting. We need to attach the top, and to do that, we need to turn it over. We’re now somewhere north of 300lbs, so this gets tricky to do safely with one person.
I used the shop crane and some creative rigging with straps to set it on the floor, then roll it over one side at a time. Think about each move here, and consider the over-balance point. That’s where things get exciting in any lifting operation. Make sure you have guide straps you can use to control every motion of the object. If anything unexpected happens, you did it wrong (and you may now have one less foot).
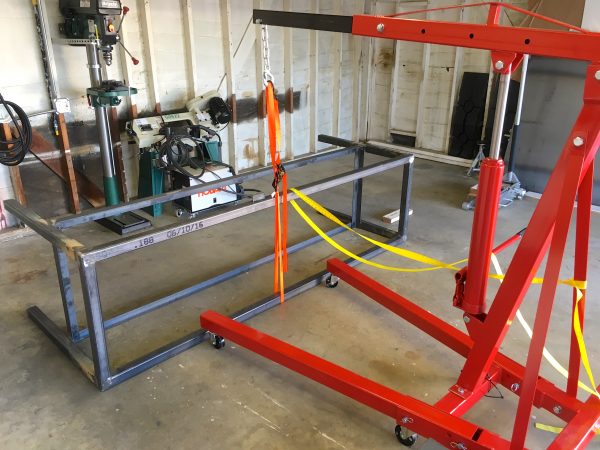
When manipulating heavy loads with hydraulics, consider that the lifting cylinder is only as secure as the rubber seals inside. Then consider how much you paid for the lifting device. Are you prepared to risk your fingers for a 10 cent O-ring supplied by the lowest bidder? Me neither. For the love of cats, please keep your meat from being between the load and any part of the floor.
When planning a project like this, it’s a really good idea to consider what form your materials come in. If you arrange your design to fit well with how stock is provided, you can save a lot of cuts and make the project much simpler. It’s also nice to have as many factory edges in your project as possible, which you can get by minimizing cuts and relying on standard material sizes.
I did none of that.
I planned the table surface to be 30″ deep, because in my experience that’s a nice depth for a workbench, and it also matches my other work surfaces. I opted to make the top 90″ long, because that was the space I had between the wall and the drill press. The position of the drill press was not particularly critical, I just happened to like where it was. If I had thought about this more intelligently, I would have realized that steel plate comes in 48″ x 96″ sheets. If I nudge the drill press over, and I made the top 6″ longer, I could save a cut! I realized this after I had the steel in hand, but if I had realized it before purchase, the supplier would have made the (now) single cut in this sheet for me. They would have done it with a huge shear, leaving a nice straight edge. This would have been great, because making a 96″-long cut in 3/16″ steel plate is project all on its own. A project that I must now undertake because I am dumb.
A plasma cutter would be a great tool for this, but I don’t have one (yet?). Another good option is a steel-cutting saw blade on a circular saw. However, you need a special saw for this- your standard circular saw intended for wood won’t work. The reason is that the motor needs to be shielded from the metal particles. The air vents on your wood saw means it may not survive the process. There are special circular saws with sealed motors for this purpose.
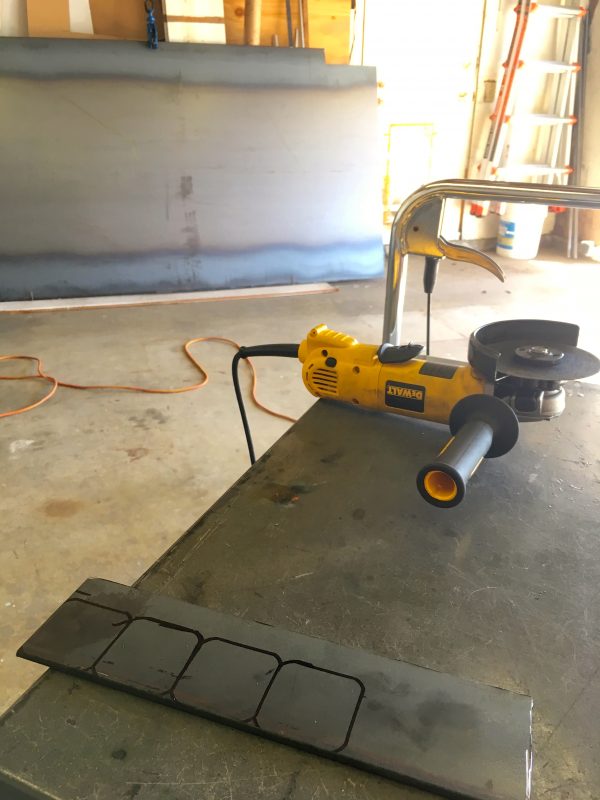
That leaves us with the humble angle grinder. A cut-off disc on a grinder will get the job done, but I wanted a nice edge. It occurred to me that a shoe could be made for the grinder that made it behave like a circular saw. I googled a bit to sanity-check this idea, and learned that Harbor Freight actually sells just such a device! It clamps to the arbor of the grinder, and gives you a flat base along which you can run a straight edge. Great idea?
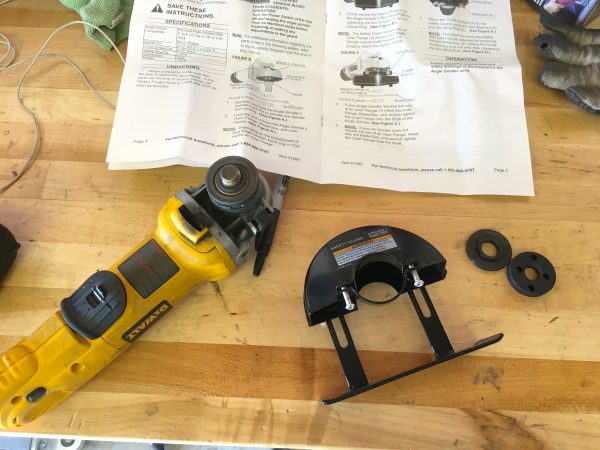
After futzing around with that shoe thing for a while, I decided to cut my losses (nyuk nyuk) and use the grinder naked with a consumable straight edge. I won’t be perfect, but I can make it pretty good this way. The not-perfect edge can go at the back, so the front edge of the bench will still be perfect.
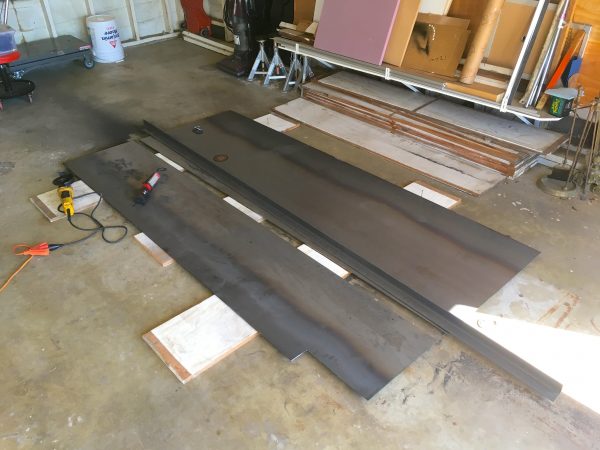
That picture above makes this process look straightforward, but it was no picnic. I wore out five cutting discs, and made one holy hell of a mess. It took a couple of hours to make this one cut, and my hands were trembling the rest of the day. Cutting steel this heavy with stone tools is a lot of work, even when those tools are spinning at 11,000 RPM. Also, my entire neighborhood was covered in black dust by the time I was done. The FAA filed a complaint because planes were encountering black clouds, and now I have to go to court. I think some people died. It’s a whole big thing. Anyway, I got the job done, but next time I would probably just buy a plasma cutter.
Okay, the top is cut, now how do we get it up in the air four feet and set it on the frame? This top weighs 150 lbs, and it’s very awkward, but two sturdy humans could manage it. I am only one sturdy human, though, so it was back to the crane.
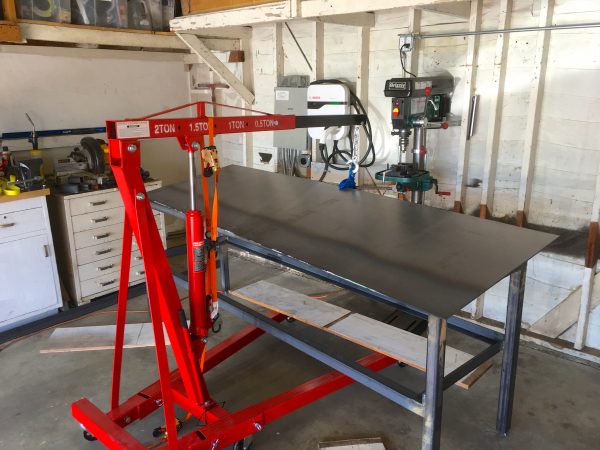
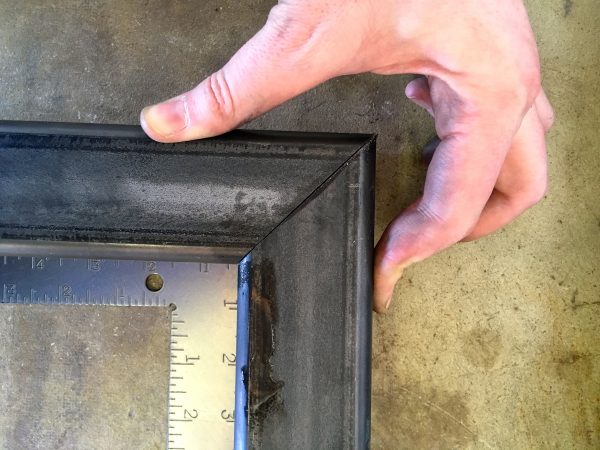
I spent a good long while getting the top lined up just right, with an even 2″ overhang all the way around. I only get one shot at this, so gotta make it right! Finally it was time to weld the top in place. The top is not fully seam-welded all the way around. This would almost certainly warp the plate, which is the opposite of what you want in a work surface. The plate is very flat from the factory, and I aim to keep it that way.
Welding is largely an exercise in heat management. The same heat that fuses steel also warps it. It’s a cruel irony that you basically can’t weld steel without warping it. The only question is how much it warps, and where. If you’re careful, you can either account for the warping in your construction, or you can limit the warping to imperceptible amounts. In this case, a short welds spaced out around the major supports is more than enough strength. I also alternated welding in different areas, to let things cool down in between.

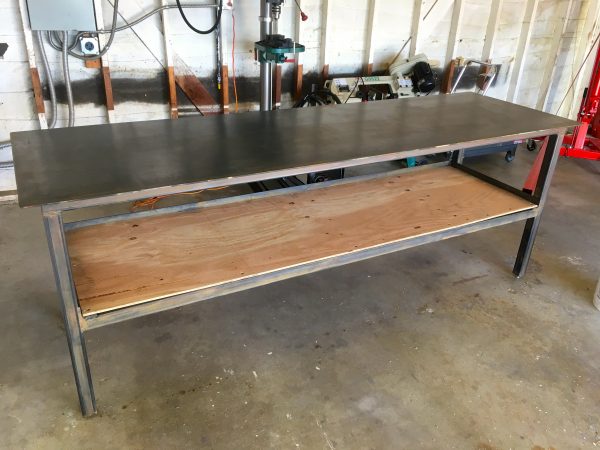
For a storage shelf, I opted to put a piece of plywood down there. Even I have my limits for how much steel I am willing to use in one project.
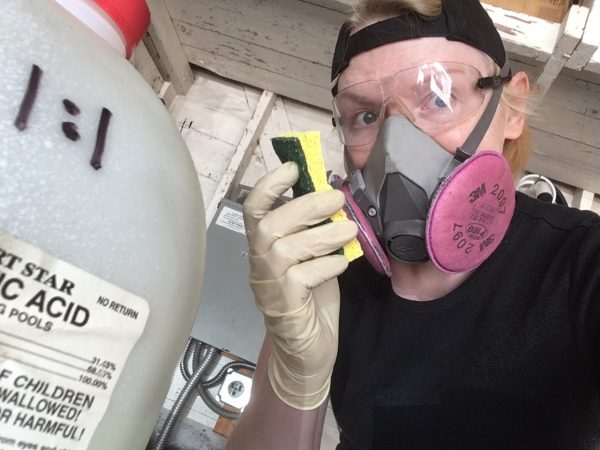
Before fitting the shelf, I needed a finish for the bench. The JAX steel blackener that I tried recently was such a hit that I wanted to do this whole bench with it. It’s a mix of cold-rolled and hot-rolled steel, and the JAX really only works with cold-rolled. Hot-rolled steel has a thick scale on it that needs to be ground off first. I opted to just roll with it, and whatever finish I get is what I get. I used the same process as the Whiskey Bar, but on a much larger scale.
The JAX worked great on the top, giving me a nice old-machinery look. On the frame, I was less successful. The stringers are hot-rolled, so they just flash-rusted. The legs should have worked, but honestly I think I got impatient with the surface preparation. I ended up with a brown tone instead of black. In any case, I ended up with a nice mix of patinas, and the work surface is especially nice.
If, when I die, my family cremates me and puts my ashes in a Sterilite bin, I’d be okay with that. As long as it has a label-maker label on it. “Quinn,” I imagine it would say. Make sure to label both ends and the top of my bin, so that you can tell I am in there regardless of the orientation of the bin on the shelf. Being organized is all about attention to detail, you see.
I opened this article with a promise that I would explain why I wanted a workbench this heavy. I said you’d find out later, but at no point did I claim that would be within this post. I’m a jerk like that.
Now then- WITNESS ME!
Awesome job Quinn! Makes my wooden workbench look puny. Quick question – It looks like it might be easy to catch your hand or arm on a corner of the top – Did you round off the corners and edges?
Great question! Yep, every corner and edge was filed and sanded round and smooth. It feels nice all around and there are no sharp areas.
But what will you do when you realize you want a bench you can actually hammer on?
If you’re alluding to the fact that steel benches are sometimes giant bells that clang like crazy when struck, this one does not suffer from that. Possibly because of the wooden shelf with heavy plastic bins full of stuff acting as a damper. Another trick with steel benches is to glue MDF to the underside to damp sound. I also have a large wooden bench, where most of my hammering takes place.
That’s pretty amazing. My guess for the ‘what the hell is Quinn up to’ pool is that you needed a crazy heavy and stable work surface because you’re going to be making holograms next.
Was the reason it took you 10x the amount of time to model the workshop and bench in SketchUp due to the fact that you comically, pointlessly overbuilt the drill press? Seriously though, learning new CAD tools takes time, especially 3D CAD.
Lastly, isn’t the bench going to get in the way of access to your EV charger?
Haha, actually the drill press is a model I imported from the public library that you can access inside the app. Someone else did a very nice job on it! It’s even green!
Oh, and regarding Sketchup generally- I think it’s a great tool for modeling rooms and spaces. 123D Design may still be my go-to for modeling objects, but laying out physical space in Sketchup is great. I think it was overkill as a tool for this task. This bench is a very simple design that frankly you could plan in your head. However if I was laying out an entire shop, for example, Sketchup would be invaluable as a way to predict interferences and plan clearances. It would also be great for experimenting with different scenarios.
Regarding the EV charger, that’s very astute. In preparation for installation, I had to move a bunch of stuff. For example, there were some electrical outlets in the way (including my brand new ones that I just spent a day installing, grr). The EV charger was moved up and I no longer use the built-in dock for holding the plug. Turns out the dock is just screwed on to the front, so I removed it and mounted it to the wall in a better location, and the charger sits way up high, out of the the way.
I may still have to move the welder plug. It’s right at bench level which is fine for now, but is likely to become a problem in the future. I really wanted a backsplash on this bench, but the 240V outlet (which is a massive PITA to relocate because of how it was installed) was a showstopper on that.
Christ on a unicycle! That bench is fatter and heavier than any at the CNC workshop I work at! Do they not sell 1/8″ section steel in the US?
Are you planning on hacking a full sized male elephant at some point on that leviathan of a table? 😀
Really well made though and good on you for not ending up with a hernia!
We have a saying back in my homeland- 1/8″ steel is for quitters. Okay maybe I just made that up. I wanted to try working with the heavy stuff and it was a lot of fun. Plus, if the big earthquake ever comes, this will hold my house up. Or at least serve as a sturdy core for the pile of rubble that used to be my house.
Sounds like what you are describing is a Morrison shelter- a WWII air raid shelter that’s basically a strong table with wire mesh sides. If your house is about to get bombed (or earthquaked, or tornado’d) you get under the table and it will protect you from falling debris.
https://en.wikipedia.org/wiki/Air-raid_shelter#Morrison_shelter
So… you welded all of this gassless?
I ask because I don’t see an Argon tank anywhere near the welder and some of the shots show the massive amount of over-splatter from the welds.
It’s all flux core mig wire, yes. If by “massive over-splatter” you mean the brown dust around the welds, that wipes off. It’s a residue of the flux wire. The welds themselves are tidy and mostly splatter free (though I’m certainly not the greatest weldor by any stretch).
I could give many compliments but the one that sums it up best is “I am jealous”.
What a beastly workbench. To top it all off you have converted wasted space into productive space.
I also must comment that your garage appears ridiculously over organized, does it stay that way?! I am not sure what I would do if mine didn’t require a full day cleaning at least 2 times a year.
Thanks!
It does stay organized. I would actually like it to be a more organized in some areas. The secret to being organized is two parts:
1) Have a complete system for where everything goes that is natural so you can remember it.
2) Stick to that system
That last part is the one most people forget. I clean up after every single work session and put everything back. I also “clean while I cook” to borrow an expression. Periodically make a sweep and put away stuff you’re probably done with. That prevents things from just piling up without bounds, and reduces the cleanup job at the end.
I am calmer and more efficient in a clean space, and it increases my enjoyment on a project. It took me a lot of years to figure that out, but keeping the shop clean makes me a happier person.