Data on the go to go with my screen on the go.
With the basic Teddy Top now up and running with a nice working LCD, it was time for some storage. Floppy disks are swell for the nostalgia (and cool drive noises), but you just can’t beat modern flash memory storage. A 2GB SD Card costs a couple of bucks, and can store every piece of Apple II software ever made in the entire 16 year lifetime of the model line. Hard to beat that, cool drive noises or not.
Conveniently for me, the Apple II community is filled with very clever people from all around the world. There is a terrific range of solid state storage options. All of these devices work roughly the same way, with differing levels of compatibility with DOS 3.3 and ProDOS (the two major OSes used by 8-bit Apple II machines). You create disk image files using an emulator, or by downloading them from the internet. You copy these images to a flash memory card, and the device “presents” these images to the Apple II as though they were floppy disks inside disk drives attached to the machine. The Apple II has no idea that it isn’t talking to a floppy disk drive. Some devices also support virtual “hard drives”, in the form of a 32MB ProDOS partition. A 32MB hard drive on an Apple II would have been incredibly deluxe at the time, but with the power of Moore’s Law, we can all pretend to be big shots today.
The major players are:
- The CFFA 3000 – Arguably the grandaddy of the space. Works with USB thumb drives or compact flash cards, and has tons of configuration options. Basically every feature you could want. However, it requires an expansion slot, which the IIc doesn’t have. The IIc does have an internal expansion bus, and it may be possible to surgically implant a CFFA in there, but that’s a project for another time.
- The SD FloppyII – A relatively new entry from Bulgaria, this device is very nicely made and it’s getting rave reviews. The only downside I see to this device is that it emulates a Disk II only- not a SmartPort device. That means you can’t emulate 32MB hard drive partitions under ProDOS.
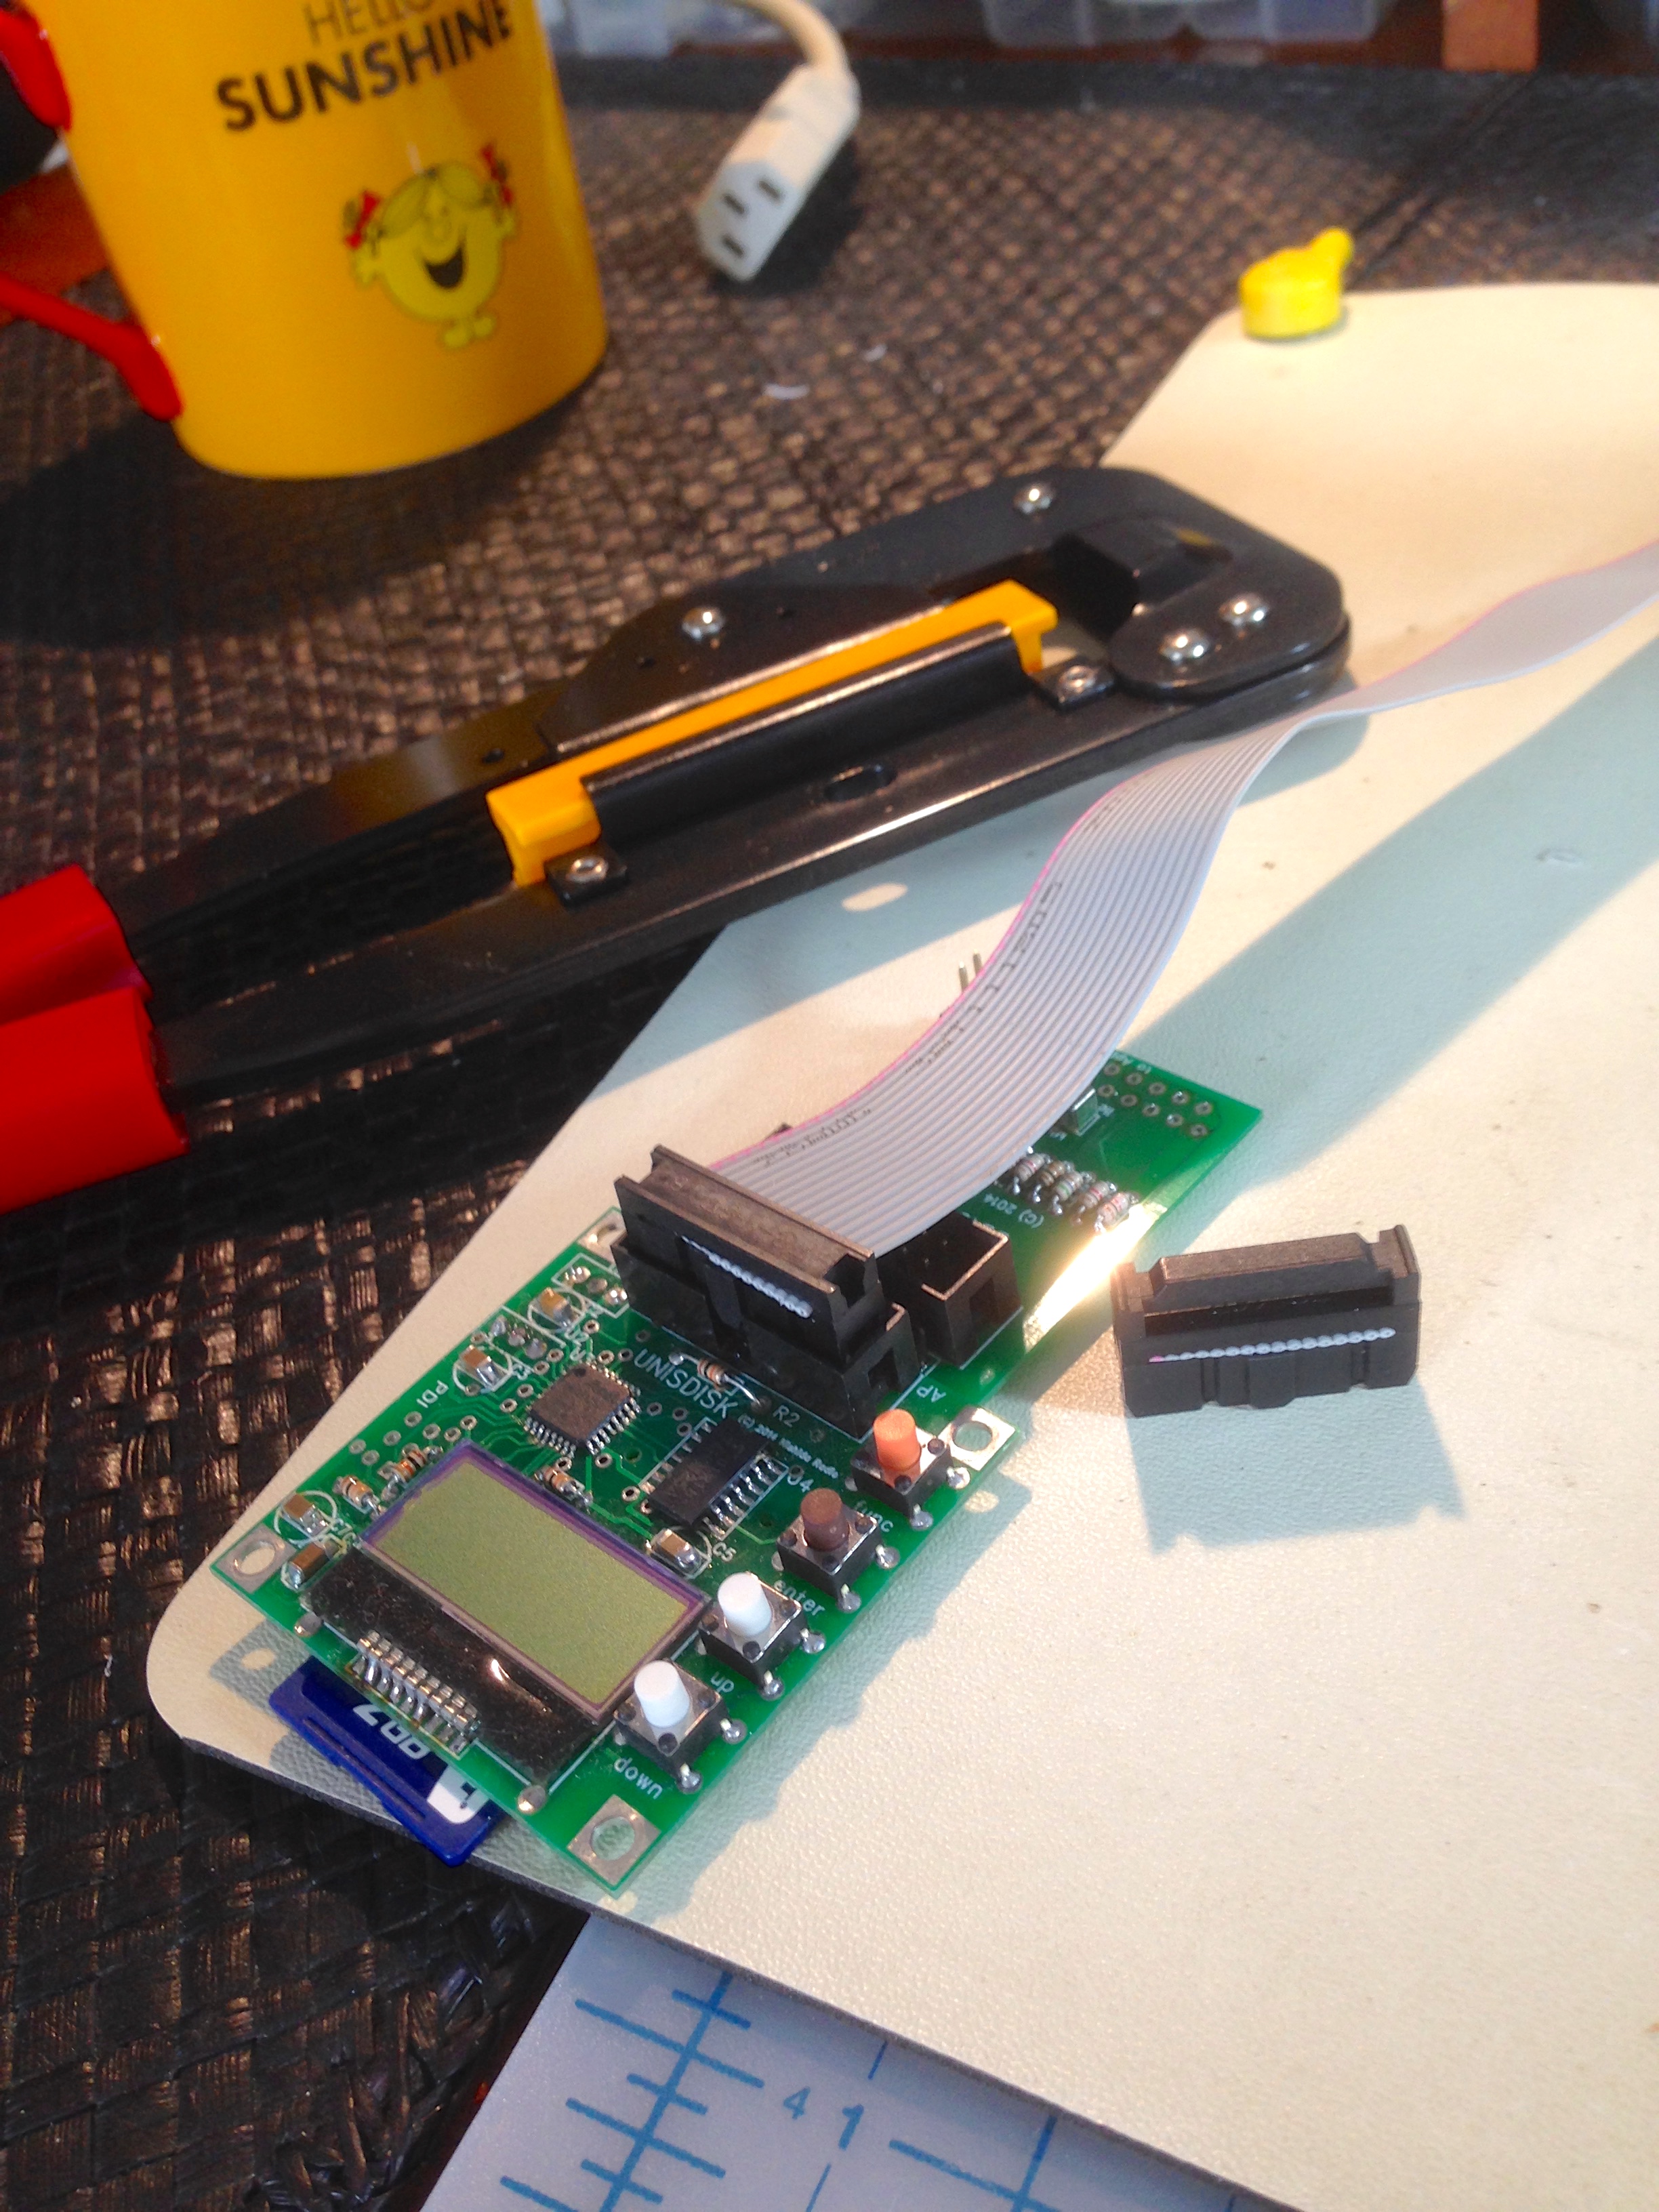
- The UNISDISK – One of the original devices in this space. This is from the magical wizard known as Nishida Radio in Japan. I call him that because he builds devices for Apple II computers that nobody else does, and that fill needs everyone has. He has incredible stuff on his site. The UNISDISK emulates both a Disk II and a SmartPort device, so you can use all types of DOS 3.3 and ProDOS volumes. It also has a nice display for showing which disk image you’re selecting.
Sidebar: There are other devices out there as well, but they have varying levels of availability and renown. I’m choosing to focus on the ones most people are using.
Each has pros and cons, and they all fill a niche. The CFFA is the “power user” choice, but requires an expansion slot, and availability is limited. It’s also the most expensive option. The SD Floppy II is inexpensive, extremely compact, physically attractive, and readily available. It does not require an expansion slot, but only supports DOS 3.3. The UNISDISK supports DOS 3.3 and ProDOS, and works externally or internally in your Apple II. It also emulates SmartPort- the only device to do so, as far as I know. That makes it a particularly good fit for the Apple IIc and IIc Plus machines. Normally, Nishida Radio is very responsive with orders for his wondrous peripherals, but as of this writing he is on hiatus for health reasons. We wish him all the best.
Luckily, I managed to get a UNISDISK prior to his hiatus, because I think it’s the right choice for Teddy Top. It was a tough call between the UNISDISK and the SDFloppyII, but I decided I wanted the SmartPort support. I’m a big fan of ProDOS in general, so I wanted the option to use 32MB partitions.
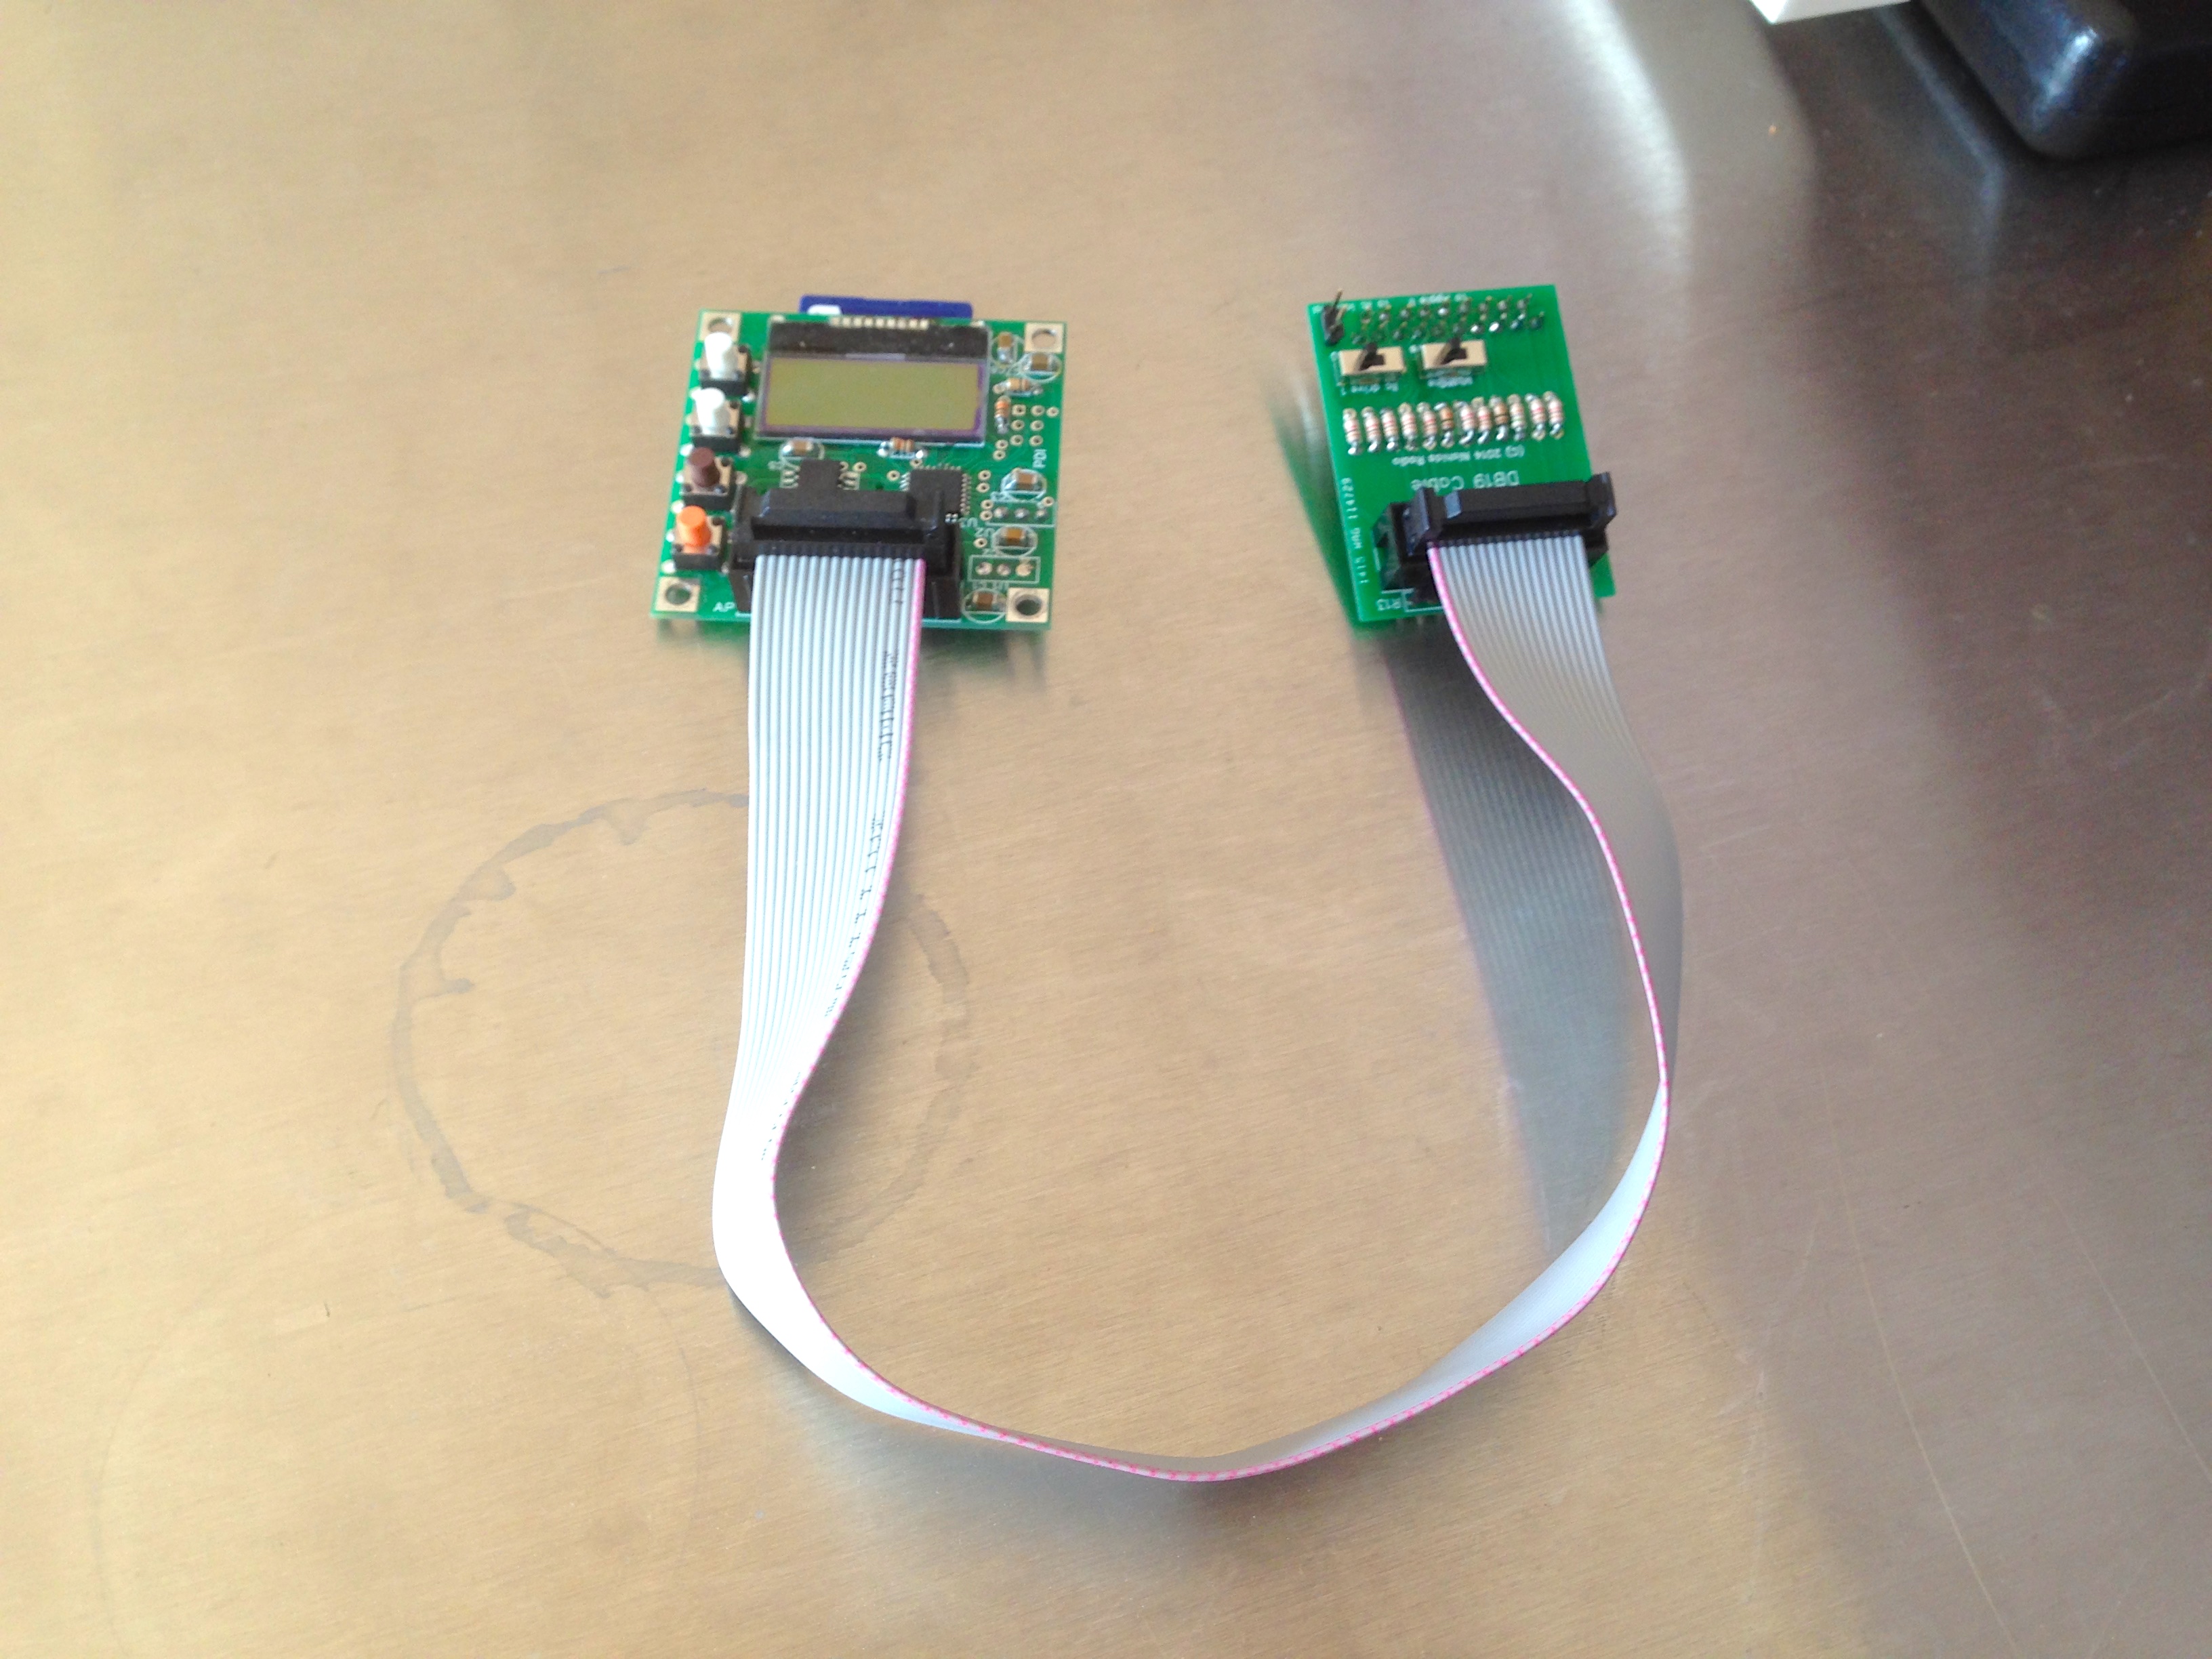
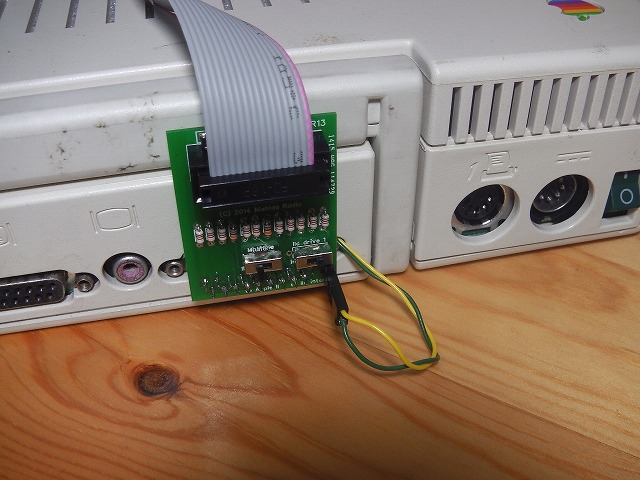
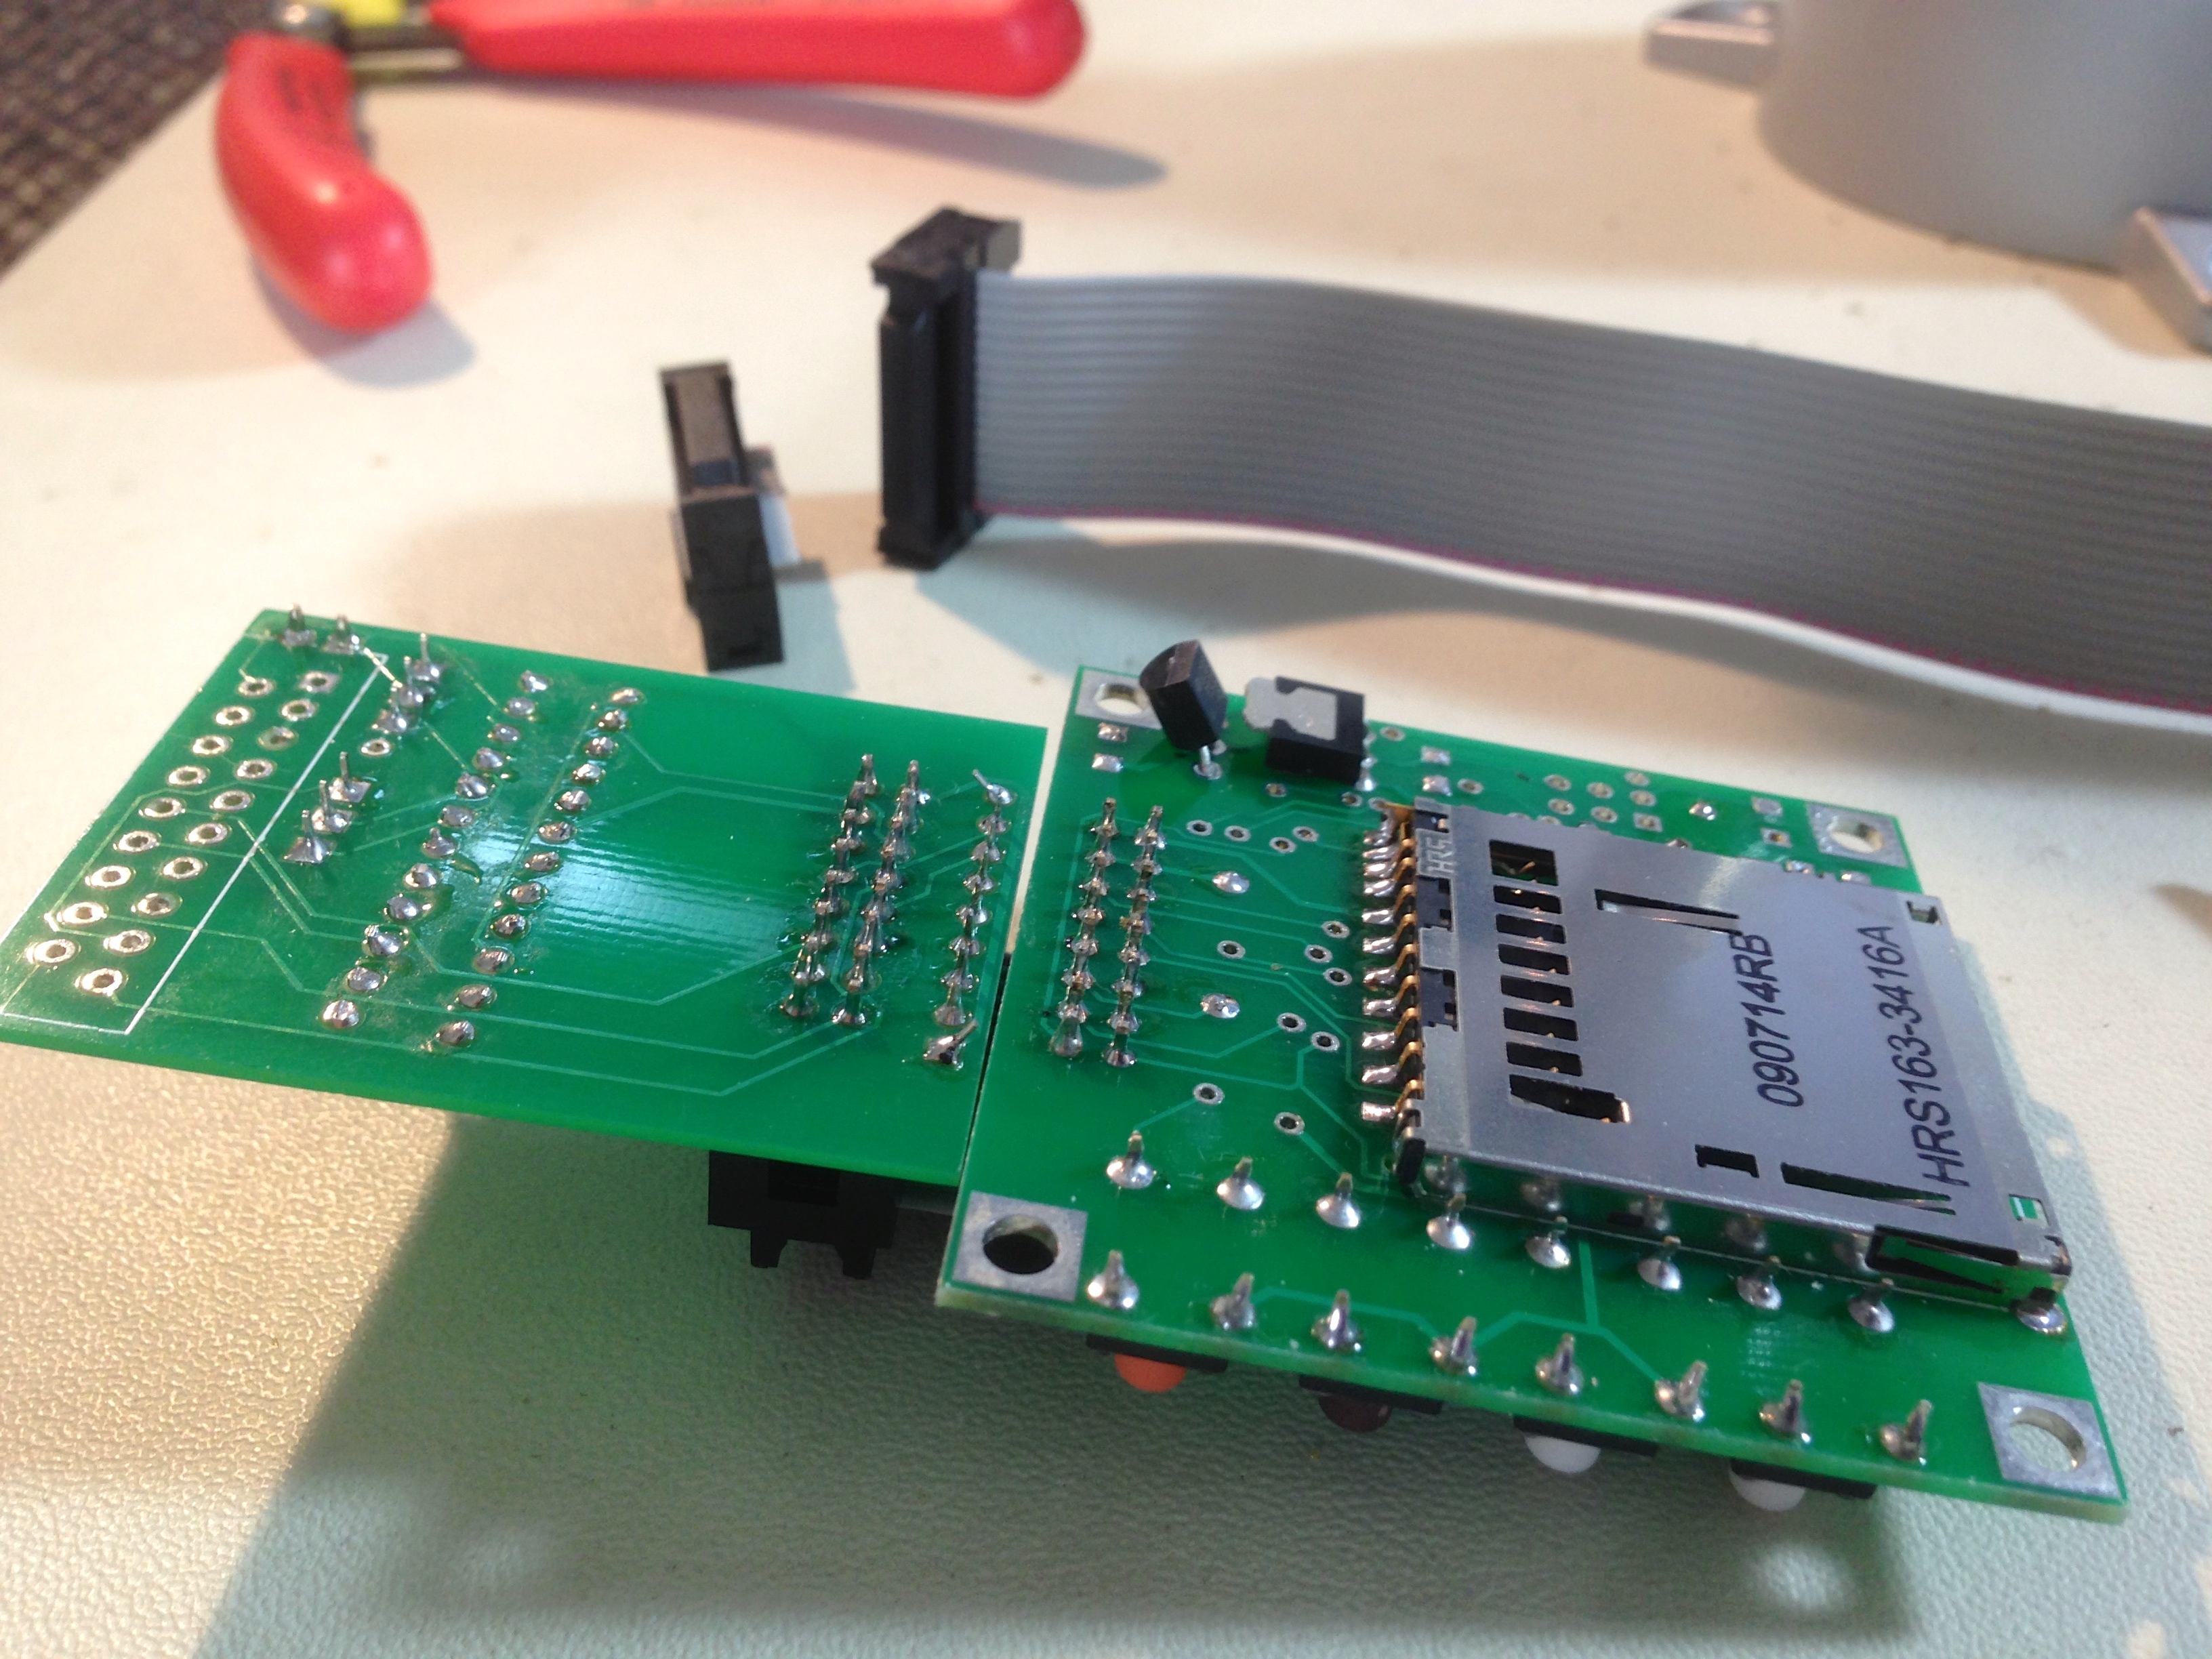
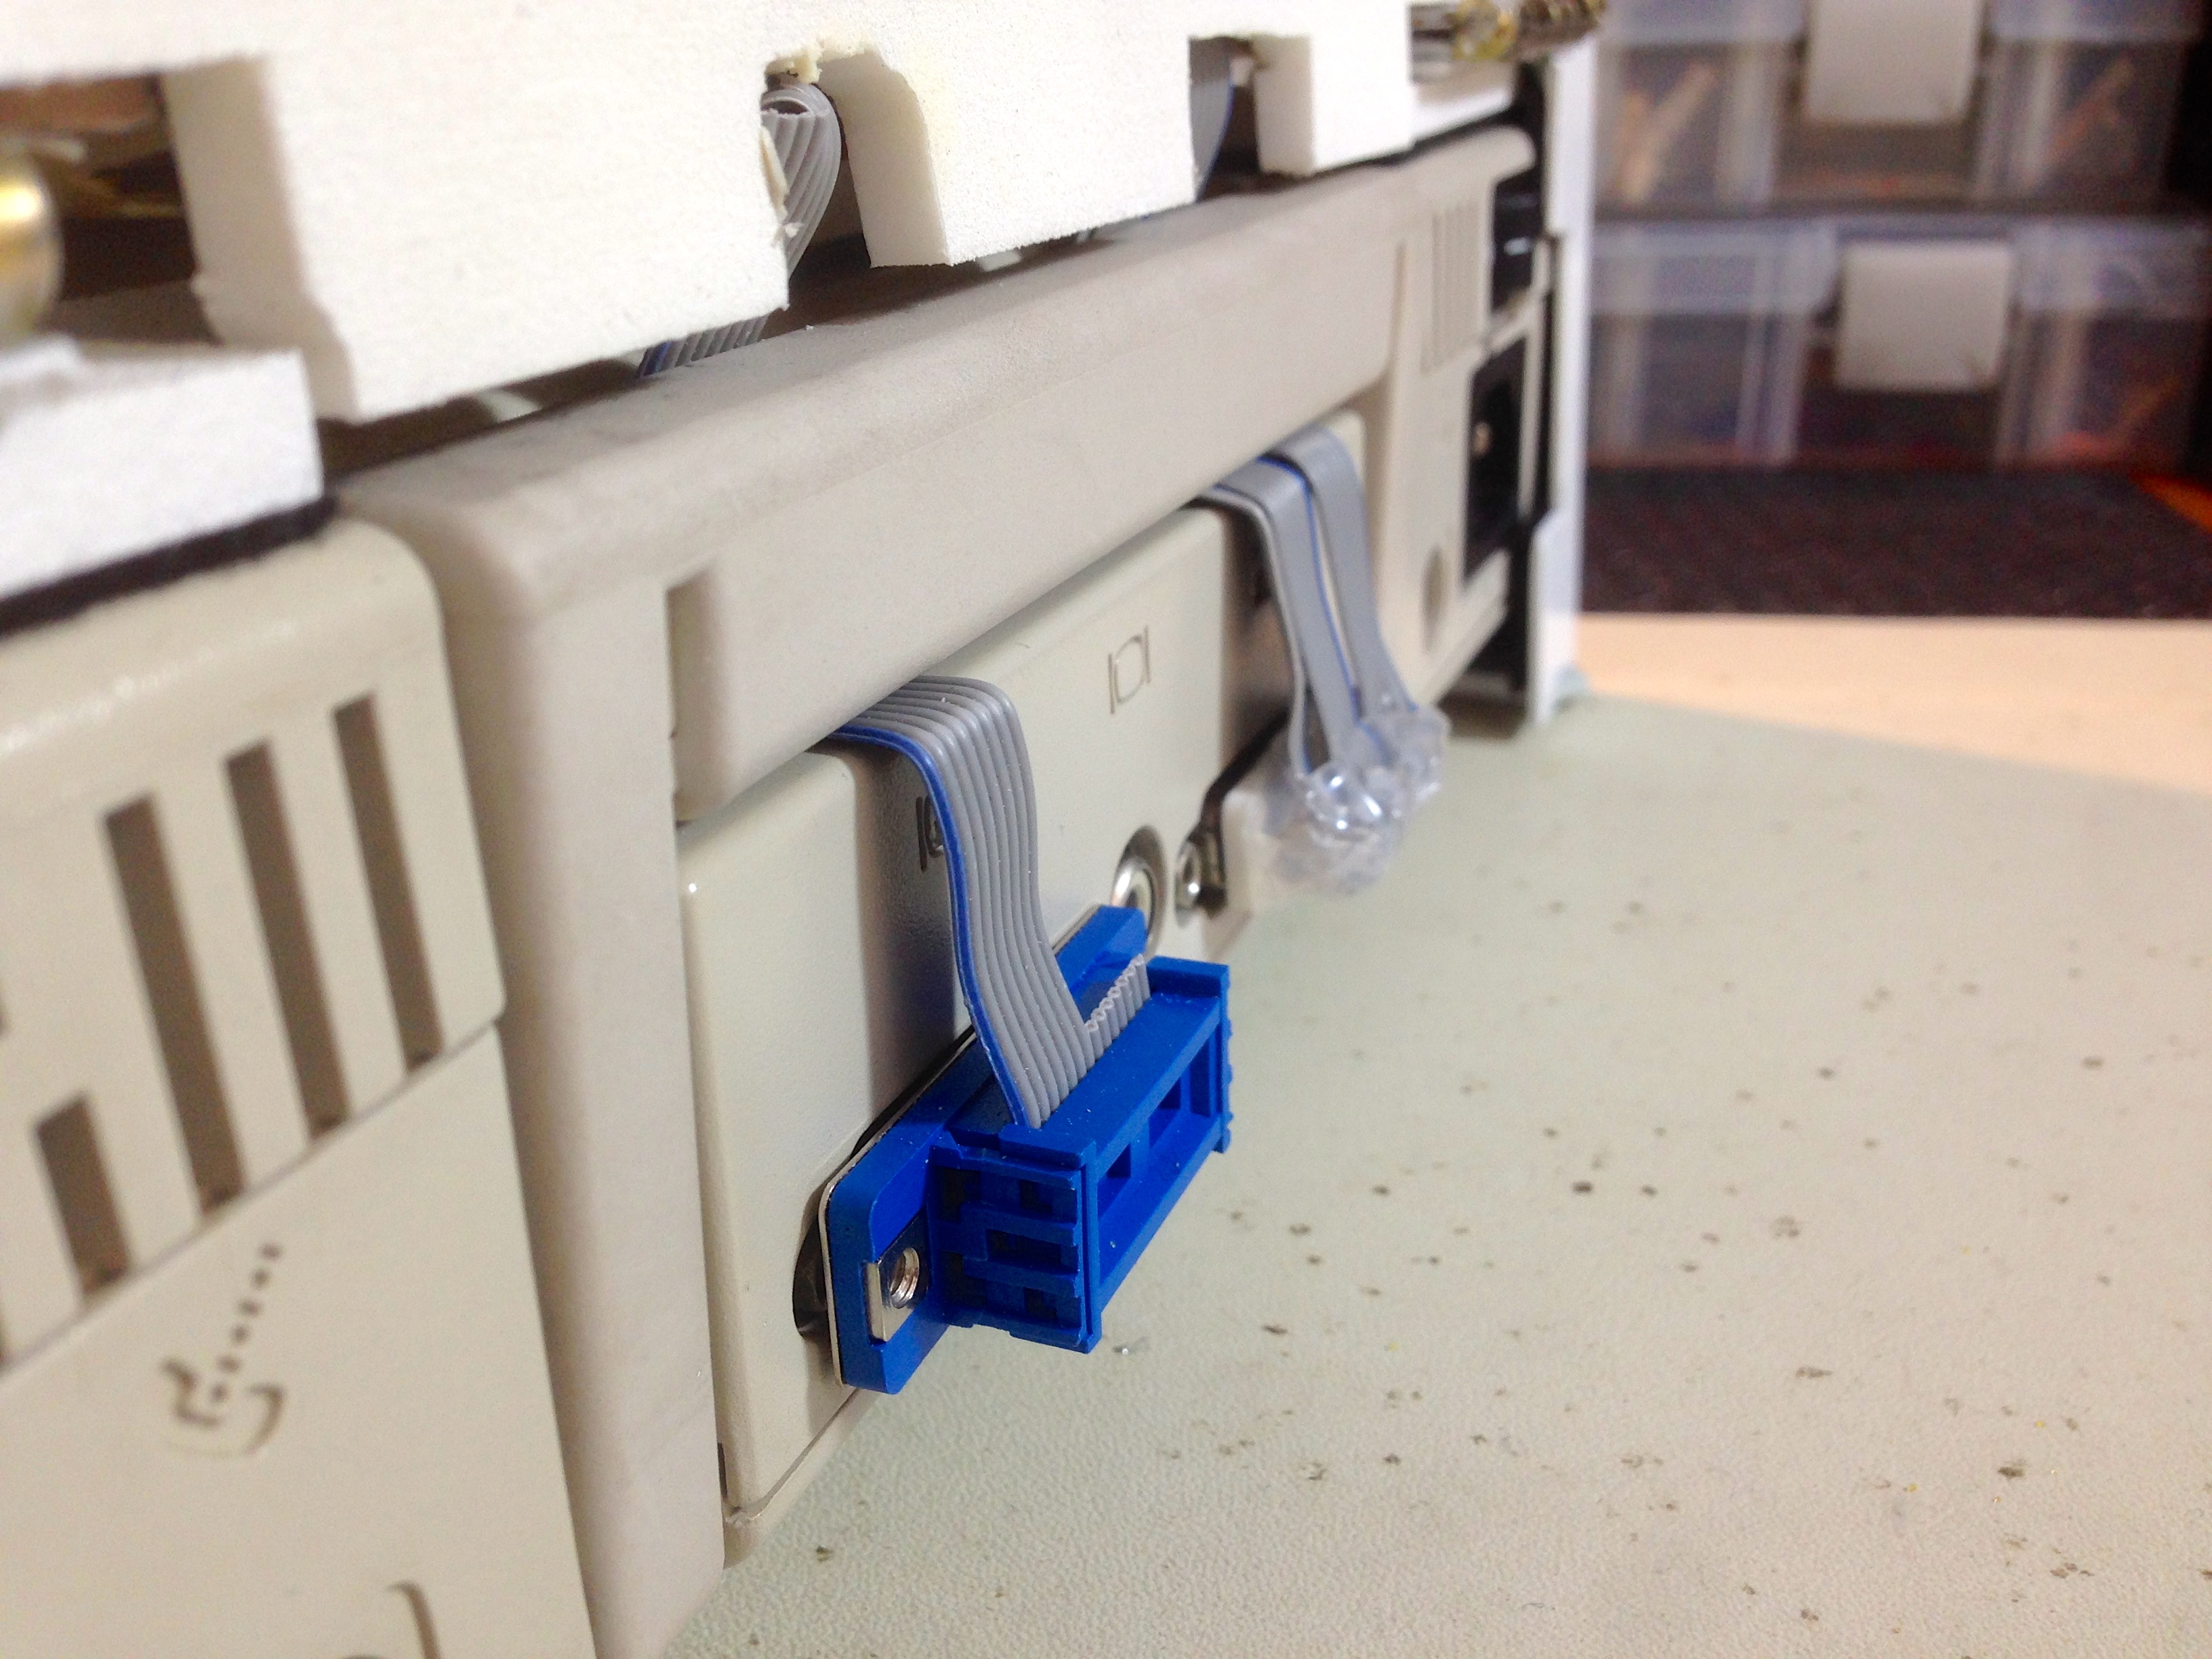
I didn’t really plan for how to integrate the UNISDISK into Teddy Top, so it’s going to get grafted in after the fact. The first challenge is cabling. When used with a IIc, the UNISDISK has a “dongle” of sorts that connects to the SmartPort connector. This dongle provides the external DB-19 connector, adjusts logic levels, and provides switches for controlling whether it is treated as an internal or external drive. This is useful for the original IIc, which normally doesn’t have the ability to boot from an external drive. The IIc Plus already has this ability, so these switches aren’t needed. The dongle has one problem for me, however- it interferes with the carry handle on the IIc.
One of my primary design goals for Teddy Top is not to interfere with the carry handle in any way. This is a major feature of the IIc that Apple themselves seemed to forget when they designed their own LCD panel back in the day.
There is at least some technical justification for this. According the to the documentation for the IIc, the 14MHz clock signal available on the display expansion port must be buffered inside an enclosure within 4 inches of the port. That makes some kind of dongle necessary if you’re using that signal (which their LCD probably does). Still, a dongle the size of two decks of cards seems excessive, even in 1986. I suspect this could have been engineered a little better.
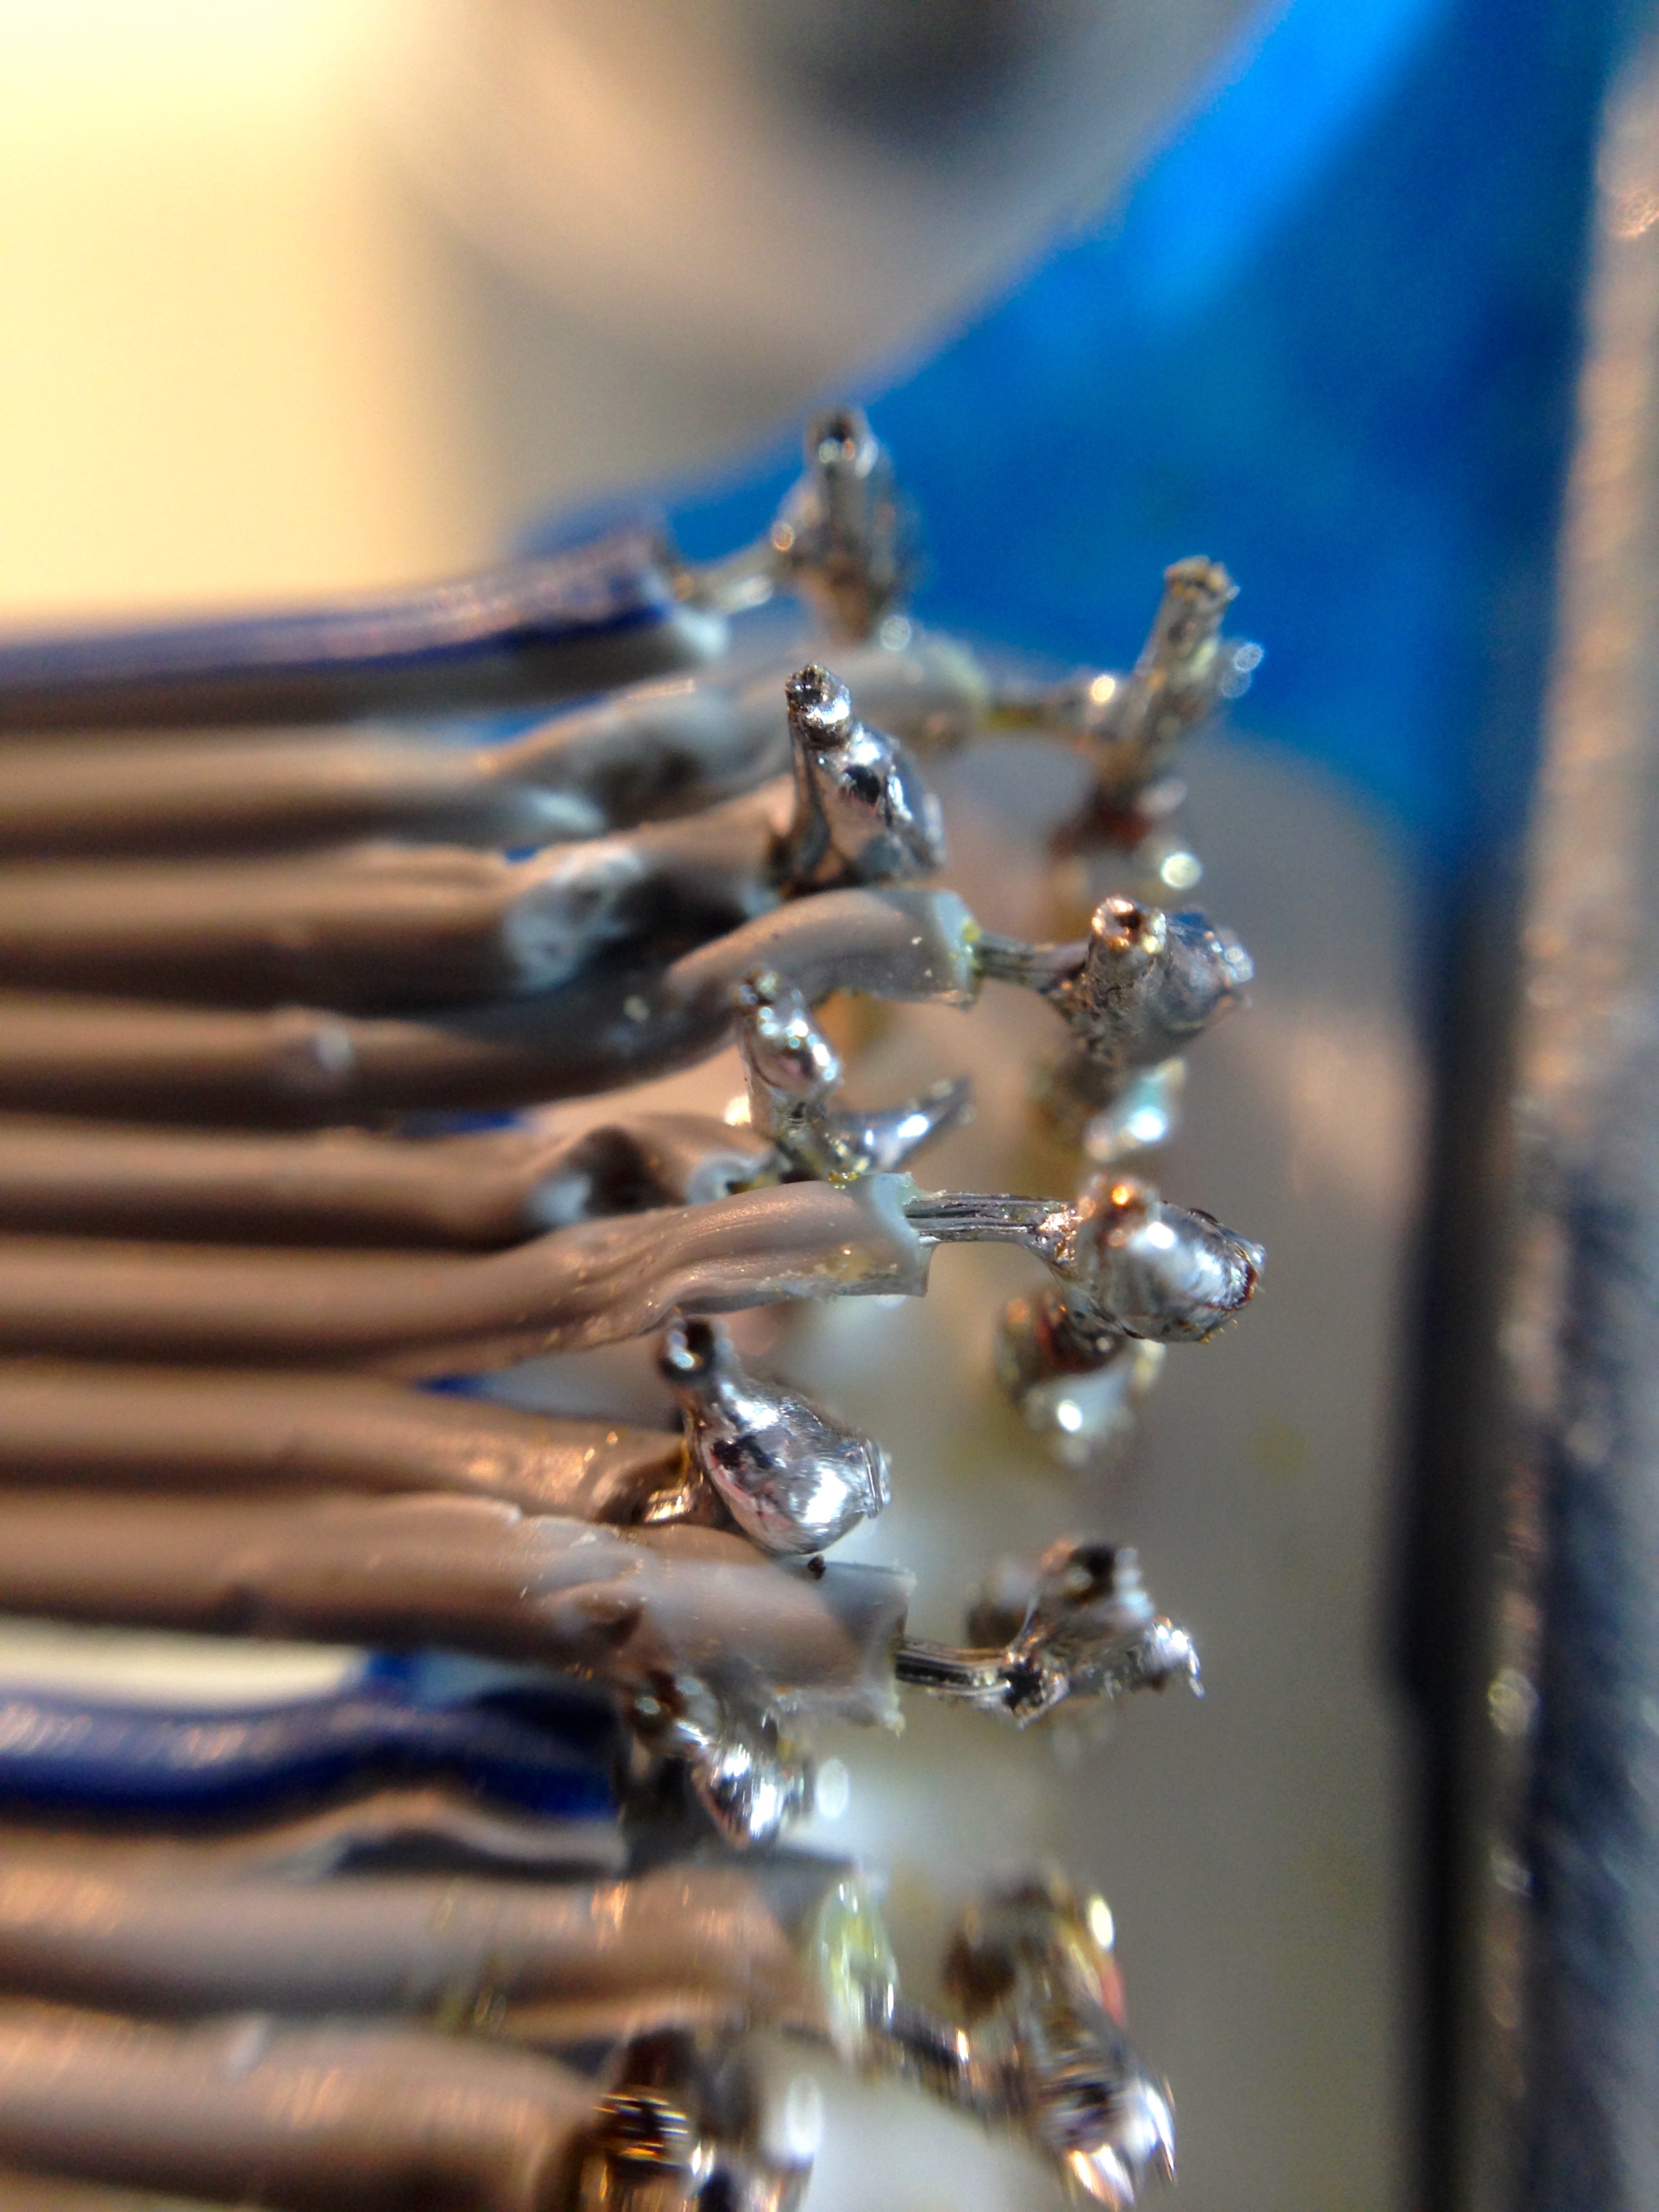
In my case, while I can’t eliminate the UNISDISK’s dongle (it’s still needed for logic level adjustment), I can adapt it by moving it upstream on the cable. All I need to do is remove the DB-19 connector, replace it with a cable, and use my own DB-19 connector on the end of that. Unfortunately, I ran into a snag here. There are often unexpected part-sourcing difficulties with these old computers. DB-style connectors are still in production in all manner of sizes and configurations, so no problem, right? Well, except the DB-19. For whatever reason, nobody uses this size any more, and they are very nearly unobtainium. In fact, Nishida Radio makes his own for this reason. It looks to me as though he is 3D printing them and pressing in the pins. Very clever! You can still buy solder-cup-style DB-19s from a few sources, but these are intended for use in sturdy external cables, so they are very bulky. I wanted to use a low-profile IDC-style like I used on Teddy Top’s display connector. These are no longer available in DB-19 anywhere in the world, as far as I could determine. At one point I thought I had found a supplier in Canada that still had some on the shelf. Turned out it they were mislabeled. The IDC DB-19 connector is lost to the universe, it seems. My next project is a time machine so I can go back and buy some (after killing Hitler, of course).
In the end, I decided to reuse Nishida’s homemade connector. It’s lower profile than the solder-cup style DB-19s you can still buy. Using the Hakko 808, I very very carefully desoldered it from the dongle. The connector is sturdy enough for its intended use, but it’s not bulletproof, and it certainly isn’t intended to be removed and reused this way.

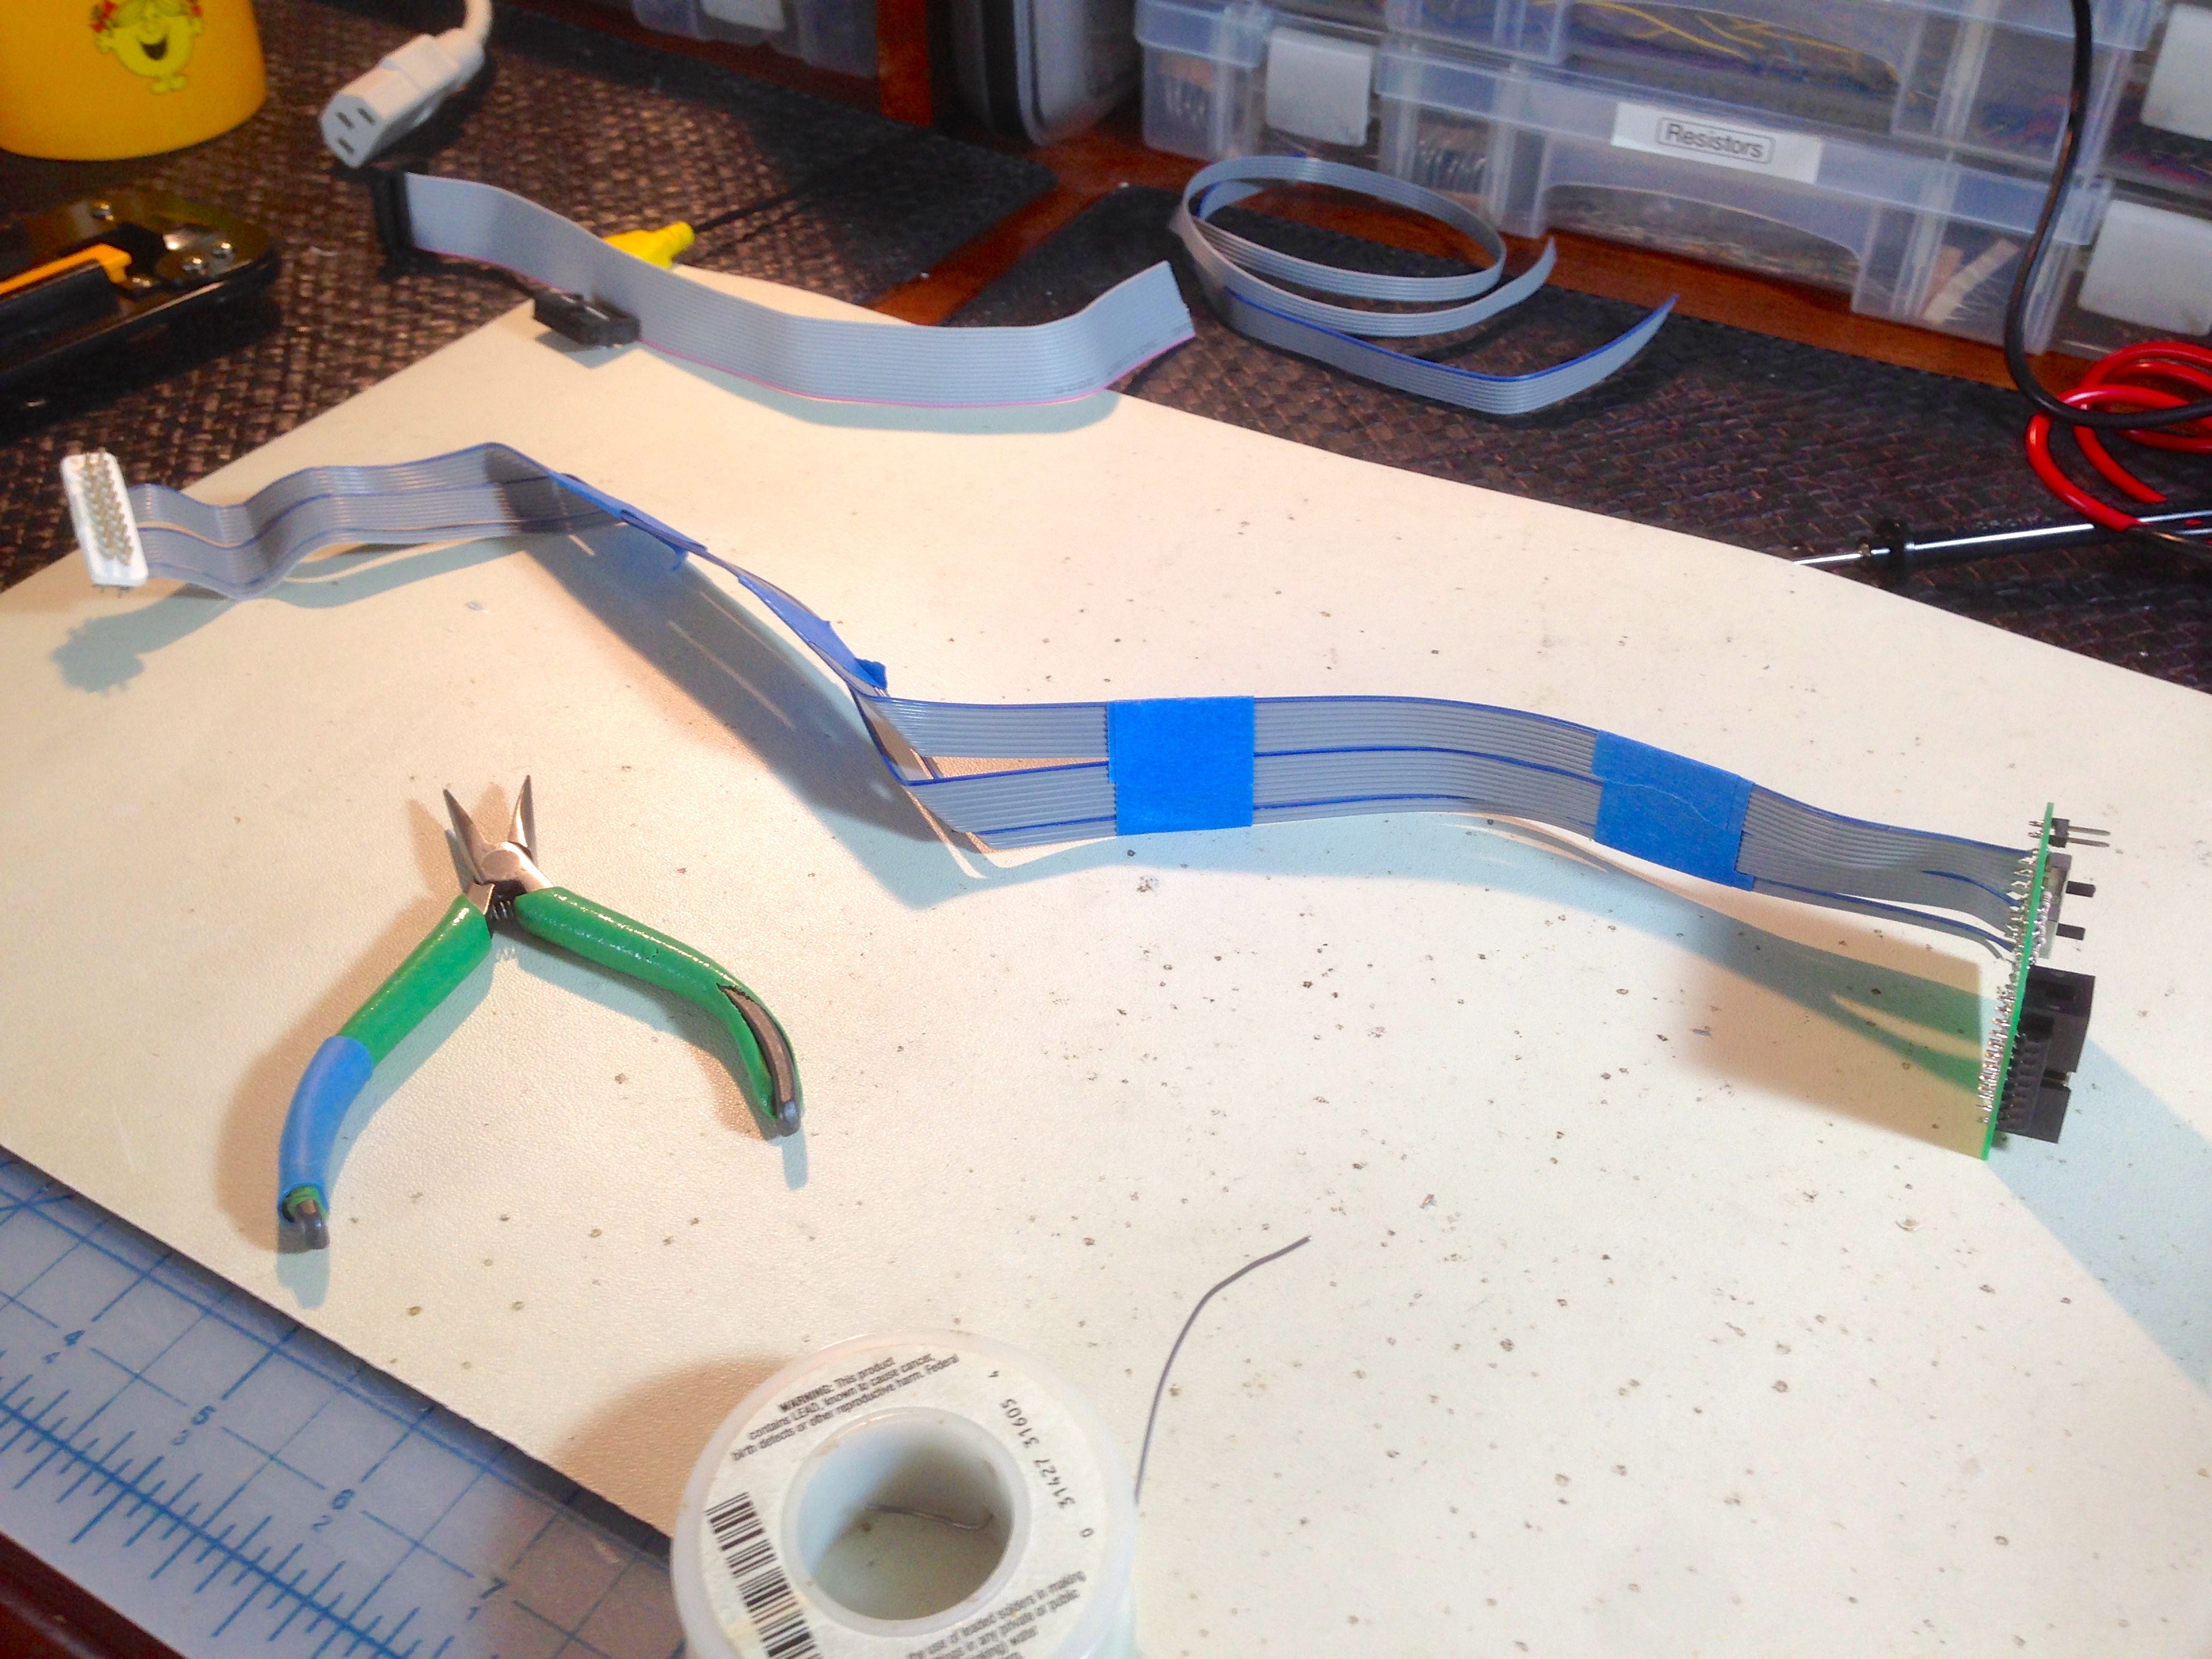
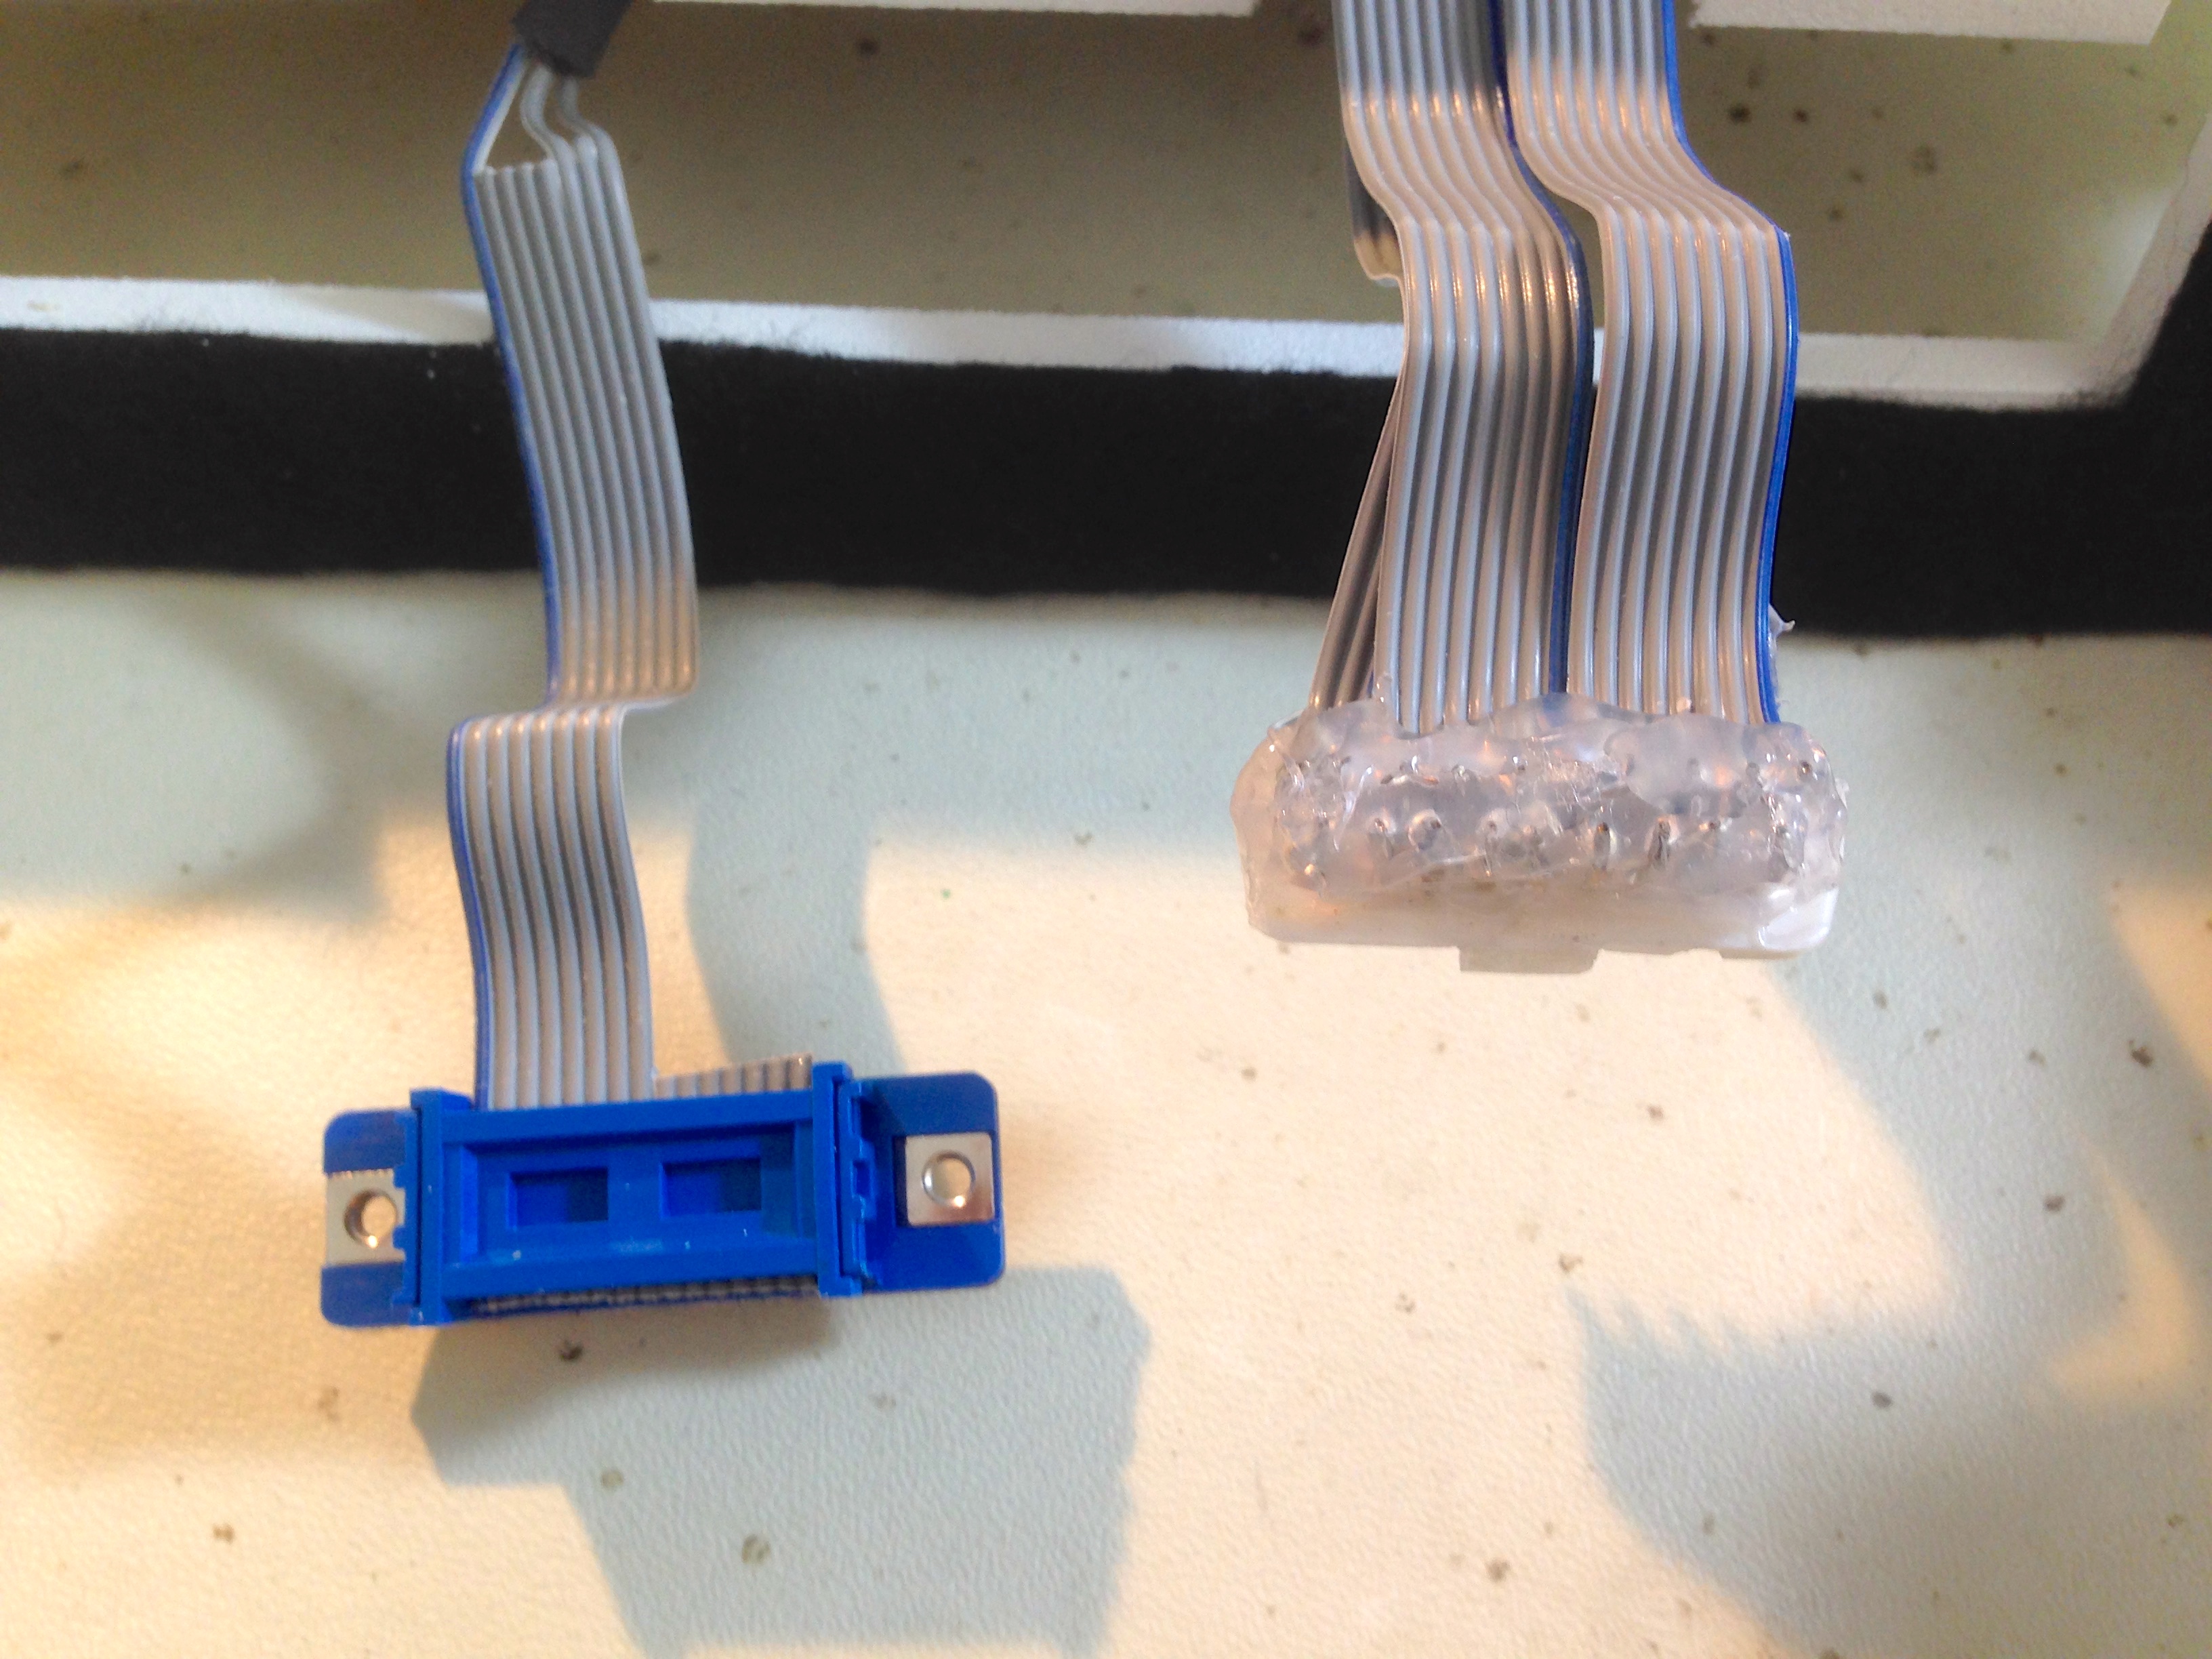
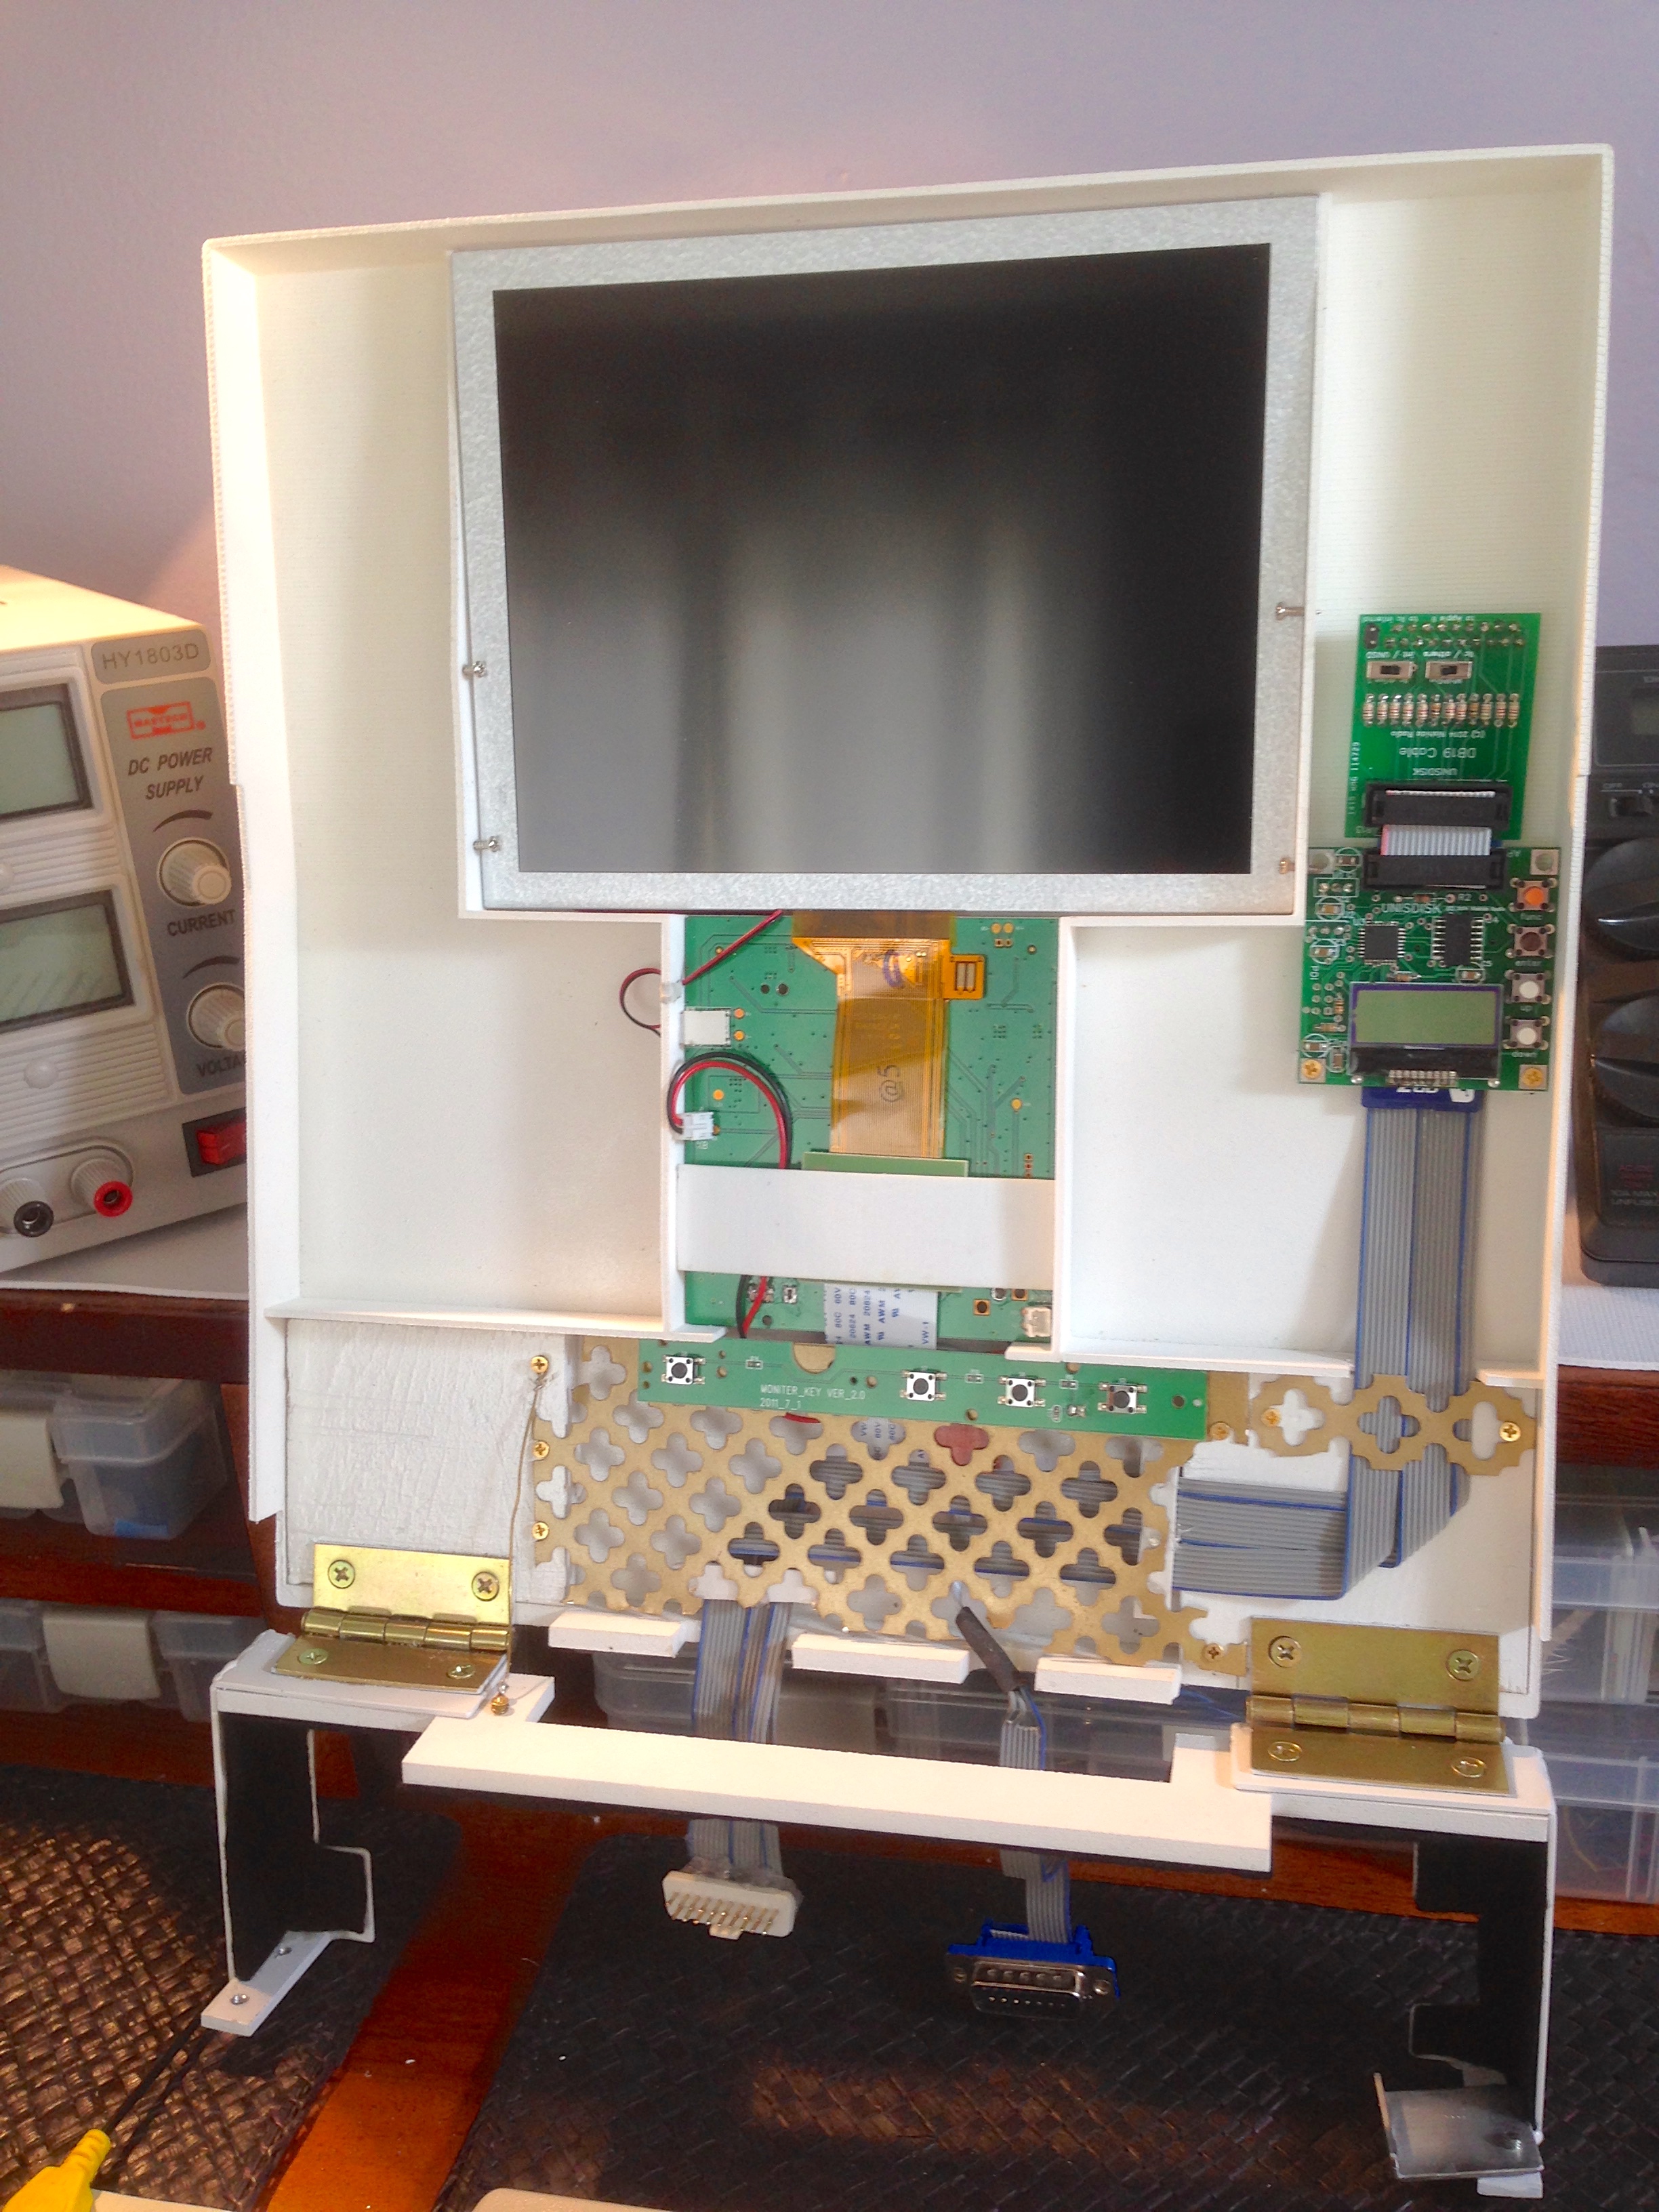
The next challenge was vertical height. I only have 18mm of height inside the deepest part of Teddy Top, and the UNISDISK is a little thicker than that. The first place I needed to optimize was the ribbon connectors between the main device and the dongle. I needed to remake the cable anyway, so this was easy.
Now the moment of truth. Does this all work? Spoiler: yes it does. Here’s a demo of it booting up the machine. If you look closely, you can see the little UNISDISK display showing the virtual track numbers being accessed as the virtual floppy boots. Very cool. It’s a bit trippy watching the machine boot in silence. I almost wish the device made fake disk drive noises.
If you’re wondering why the Lode Runner dudes are running like they’re on cocaine, it’s not because they’re from the ’80s. I booted the game in 4MHz mode, which you would not normally do for gaming.
Now for final mounting. I needed something to contain all the cabling, and the junk pile coughed up this chunk of brass mesh.
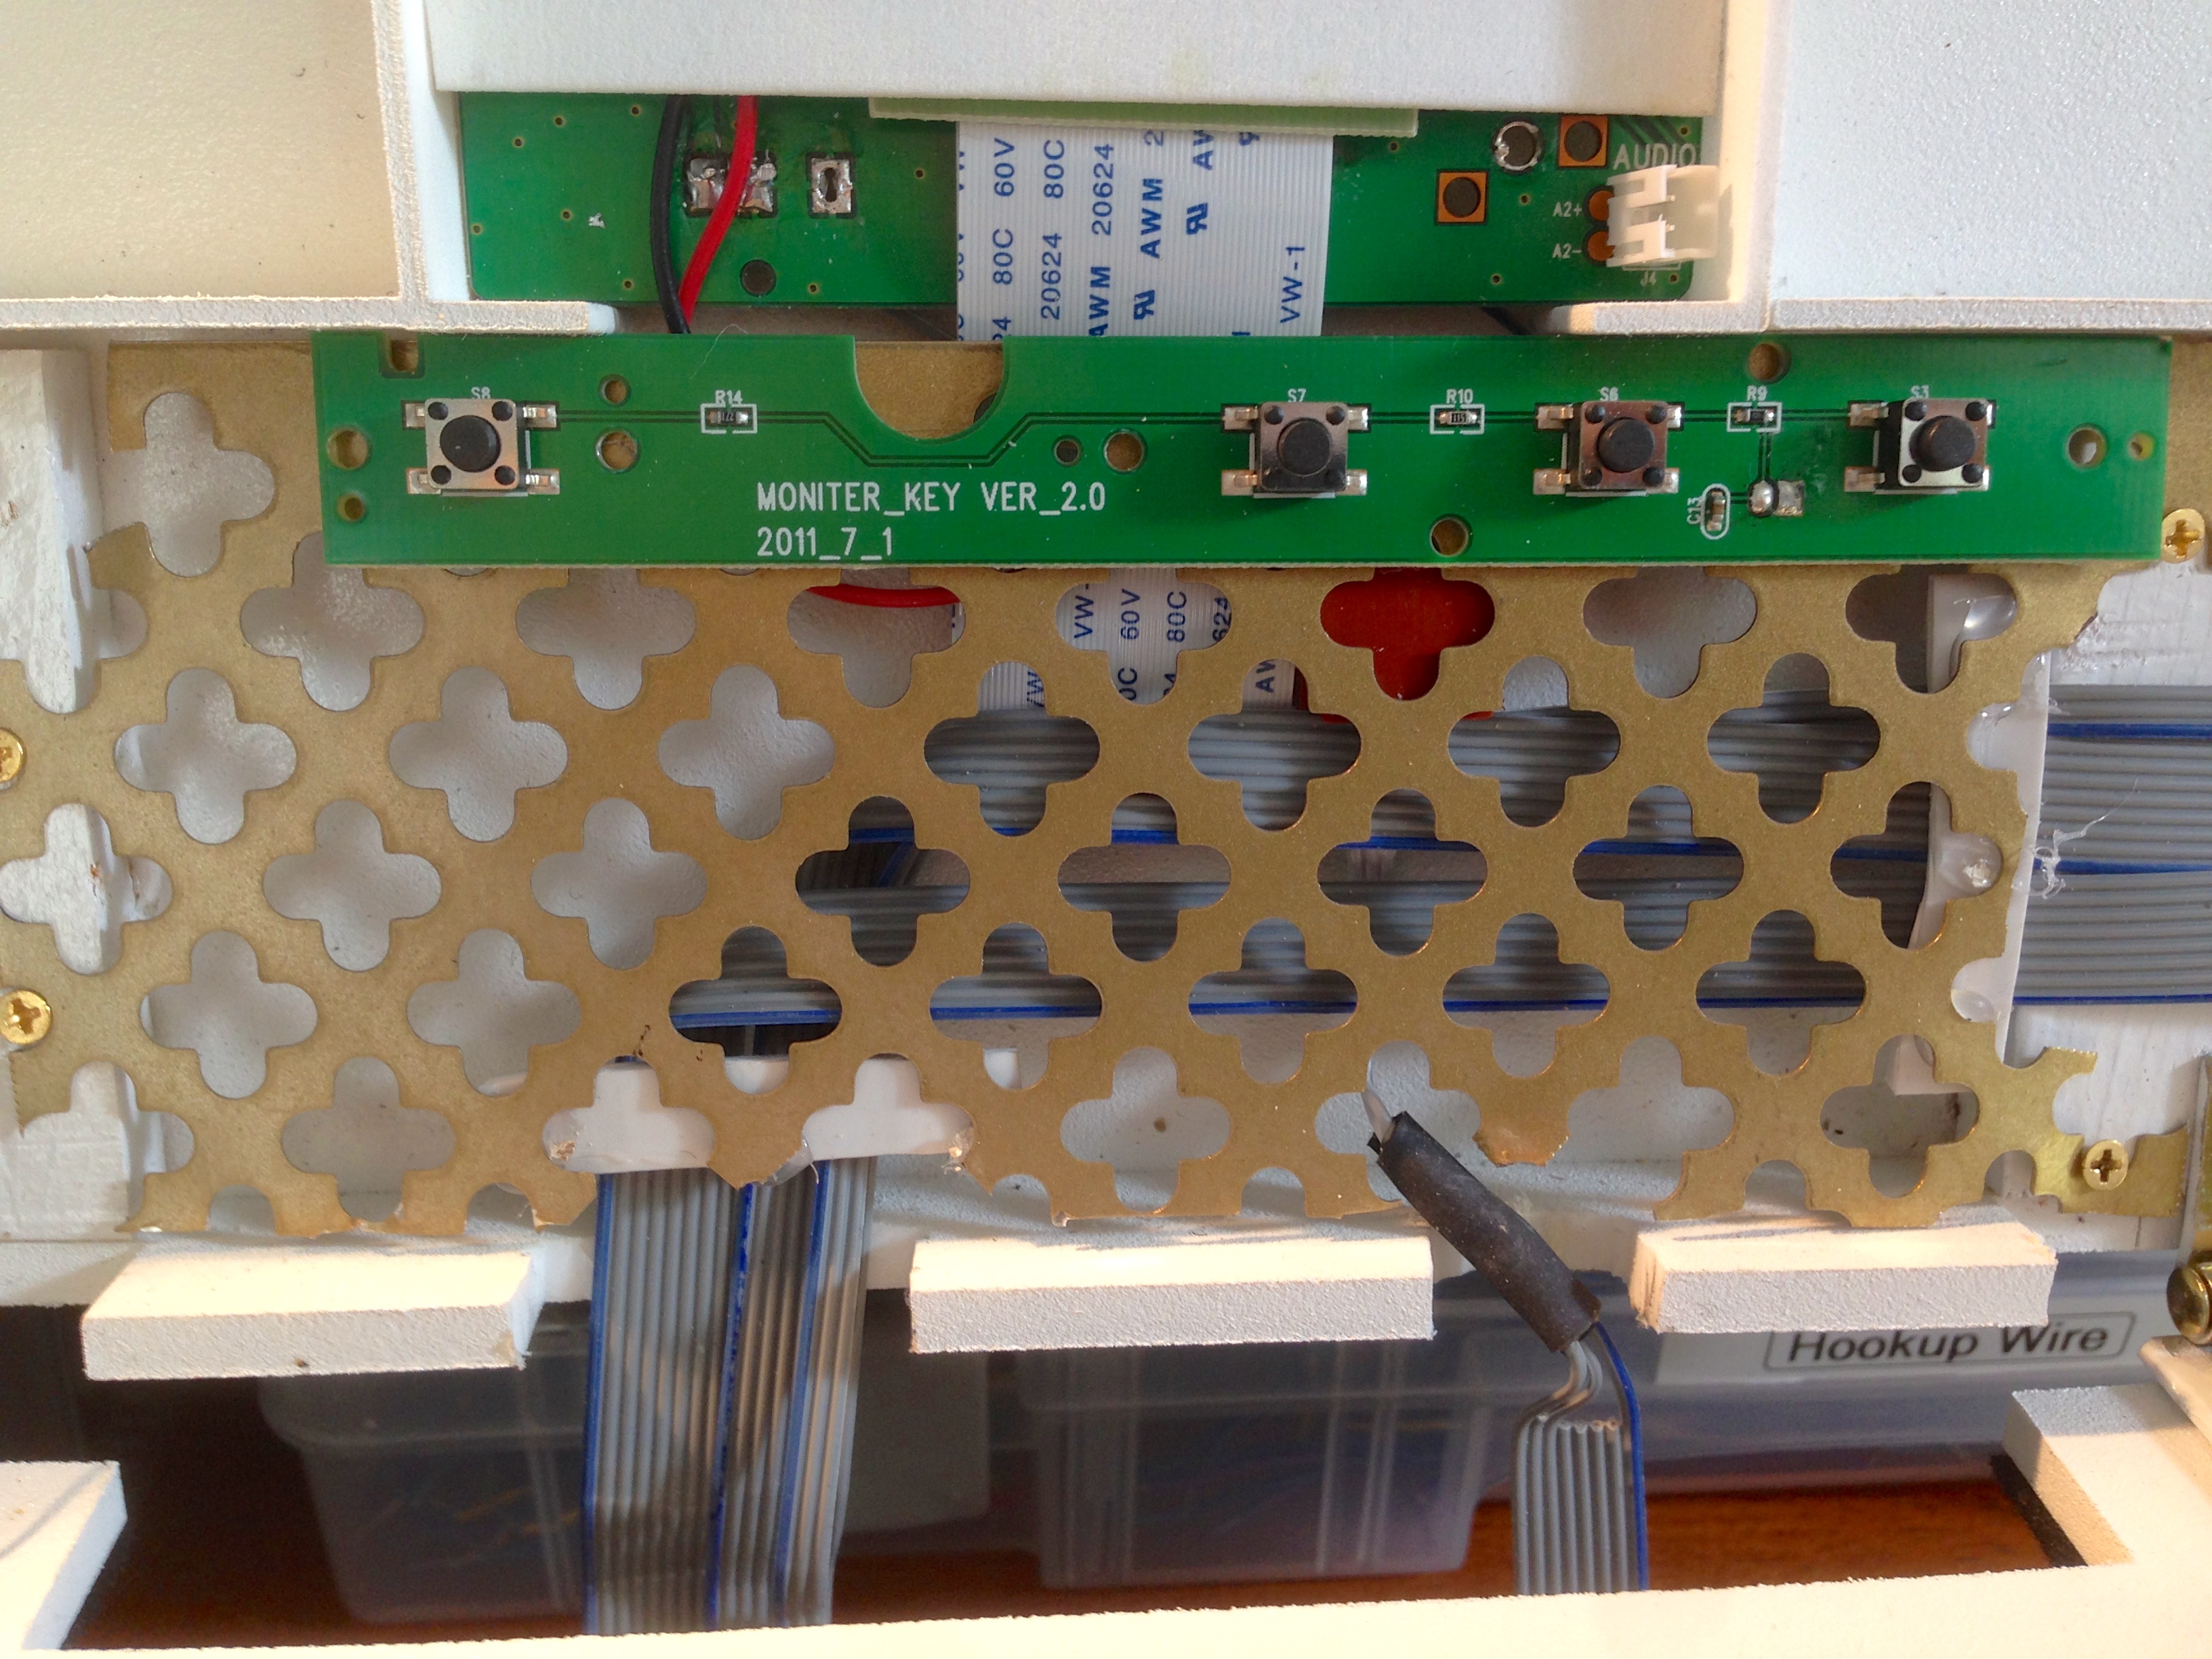
The final mounting position is something of a comprise. I wanted it low down, because Teddy already has a fair amount of weight up at the top. If it gets too top-heavy, the hinges won’t hold position well any more. So, lower is better. However, the SD card reader on the UNISDISK is on the bottom, so it needs to be high enough for clearance to insert and remove the card. These competing forces landed it somewhere in the middle.
I haven’t decided yet if I’m going to further enclose things. A Blondihacks reader described it as “cyberpunk”, and I like that characterization. I suppose the brass could tip the scales towards steampunk, but I like cyberpunk much better. Enclosing things would be pretty complex, as there’s a lot of angles and different depths of cavity involved here. Clearance is also very tight. Once again, 3D printing could be a nice solution, but I’m not prepared to spend that much on it. We’ll see how this shakes out- no firm plan here yet.
We’re not done with Teddy Top yet. Stay tuned for more!
Check out the BMOW blog. He did a post recently saying that he may well have bought the world’s remaining supply of DB19 connectors.
Yah, I’ve seen his post on that. He’s buying the solder-cup style, which actually are still available from a few sources that I found. The IDC style are the ones that lost to the world.
A little bit of foam core might let you experiment with what it might look like enclosed… You already have Ben Heck’s hot glue technique down.
Good idea- I may try that!
Two comments:
1 – is the spacing on the DB-19 connector such that you could use a DB-25 and remove the excess pins?
2 – “permalinks” http://codex.wordpress.org/Using_Permalinks
1) yep, that would be a possibility, but you’d have to really hack up the shield on the connector to shorten it. It was a last resort option that I considered.
2) yes, I am familiar with WP permalinks. Did I do one incorrectly somewhere?
When I’m referring to permalinks, I mean “pretty” permalinks. So this page’s url would be /blondihacks/teddy-top-etc/ instead of /?p=2202
Cool.
I know from some other emulations that fake disk noises can make the whole emulation fidelity so much better. I was skeptical at first, but when I first heard VICE with floppy sounds (the woosh of the rotating floppy, the clicking of the moving heads at various speeds) it was suddenly so much better. Even though the whole thing was probably done with just two different sound samples.
UAE the Amiga Emulator even has the sound of the floppy drive grabbing the hole in the 3,5″ floppy…
My favorite Apple II emulator is Virtual II, and it also has excellent drive noises, including the insertion and removal noises as well. It is definitely cool. Adding such a feature to one of these devices would add a lot of bulk, though. You’d need amplification and a speaker.