A new entry into the Apple II solid state scene.
The Apple II retrocomputing scene has some excellent solid state storage options already, including offerings by Nishida Radio, A2Heaven, R&D Automation, and others. However today I’m going to talk about the newest entry into the field, the Floppy Emu (model B) by Steve Chamberlin of Big Mess O’ Wires fame. Full disclosure- Steve sent me a review unit, but I am going to do my best to be honest about it here.
A bit of background might be in order, in case you’re not familiar with these types of products. One of the biggest problems with retrocomputing is that floppy disks are dying. Nobody makes them any more, and they have a limited lifespan. Since floppy disks are the only way these wonderful old computers have to retrieve data, we need to replace them with something. Solid state storage devices typically store binary images of floppy disks on SD cards (or Compact Flash, USB sticks, etc), and present them to the old computer as though they were really floppy disks mounted in physical drives. These devices emulate all the signals, timing, and idiosyncrasies of floppy disks and drives, such that the retrocomputer is none the wiser. It take clever modern software and hardware to pull this off, but it’s magical when done well.
Even with so many options for solid state storage on the Apple II, there is still no one perfect solution. Each device has its own quirks and limitations. The Floppy Emu is not perfect either, but I will say up front that it is very good. It started life as a floppy emulator for early Macintoshes, but Steve has since added support for pretty much every other computer that uses a DB-19 connector for external storage. That last point is significant. As I have ranted about before, DB-19 connectors are pretty much unobtainium these days. Nobody has manufactured them since the early 1990s, and stocks are dwindling. Before you start posting links in the comments to online retailers who sell them, let me save you the trouble. If you actually order from any of those, you’ll be told they don’t actually have them. I spent a long time trying to acquire some for a project of my own, so trust me when I say you can’t just buy them anymore. Steve has gone above and beyond and cornered the remaining supply (as far as anyone can tell) for his Floppy Emu product, so let’s hope they are going to good homes. Time to find out.
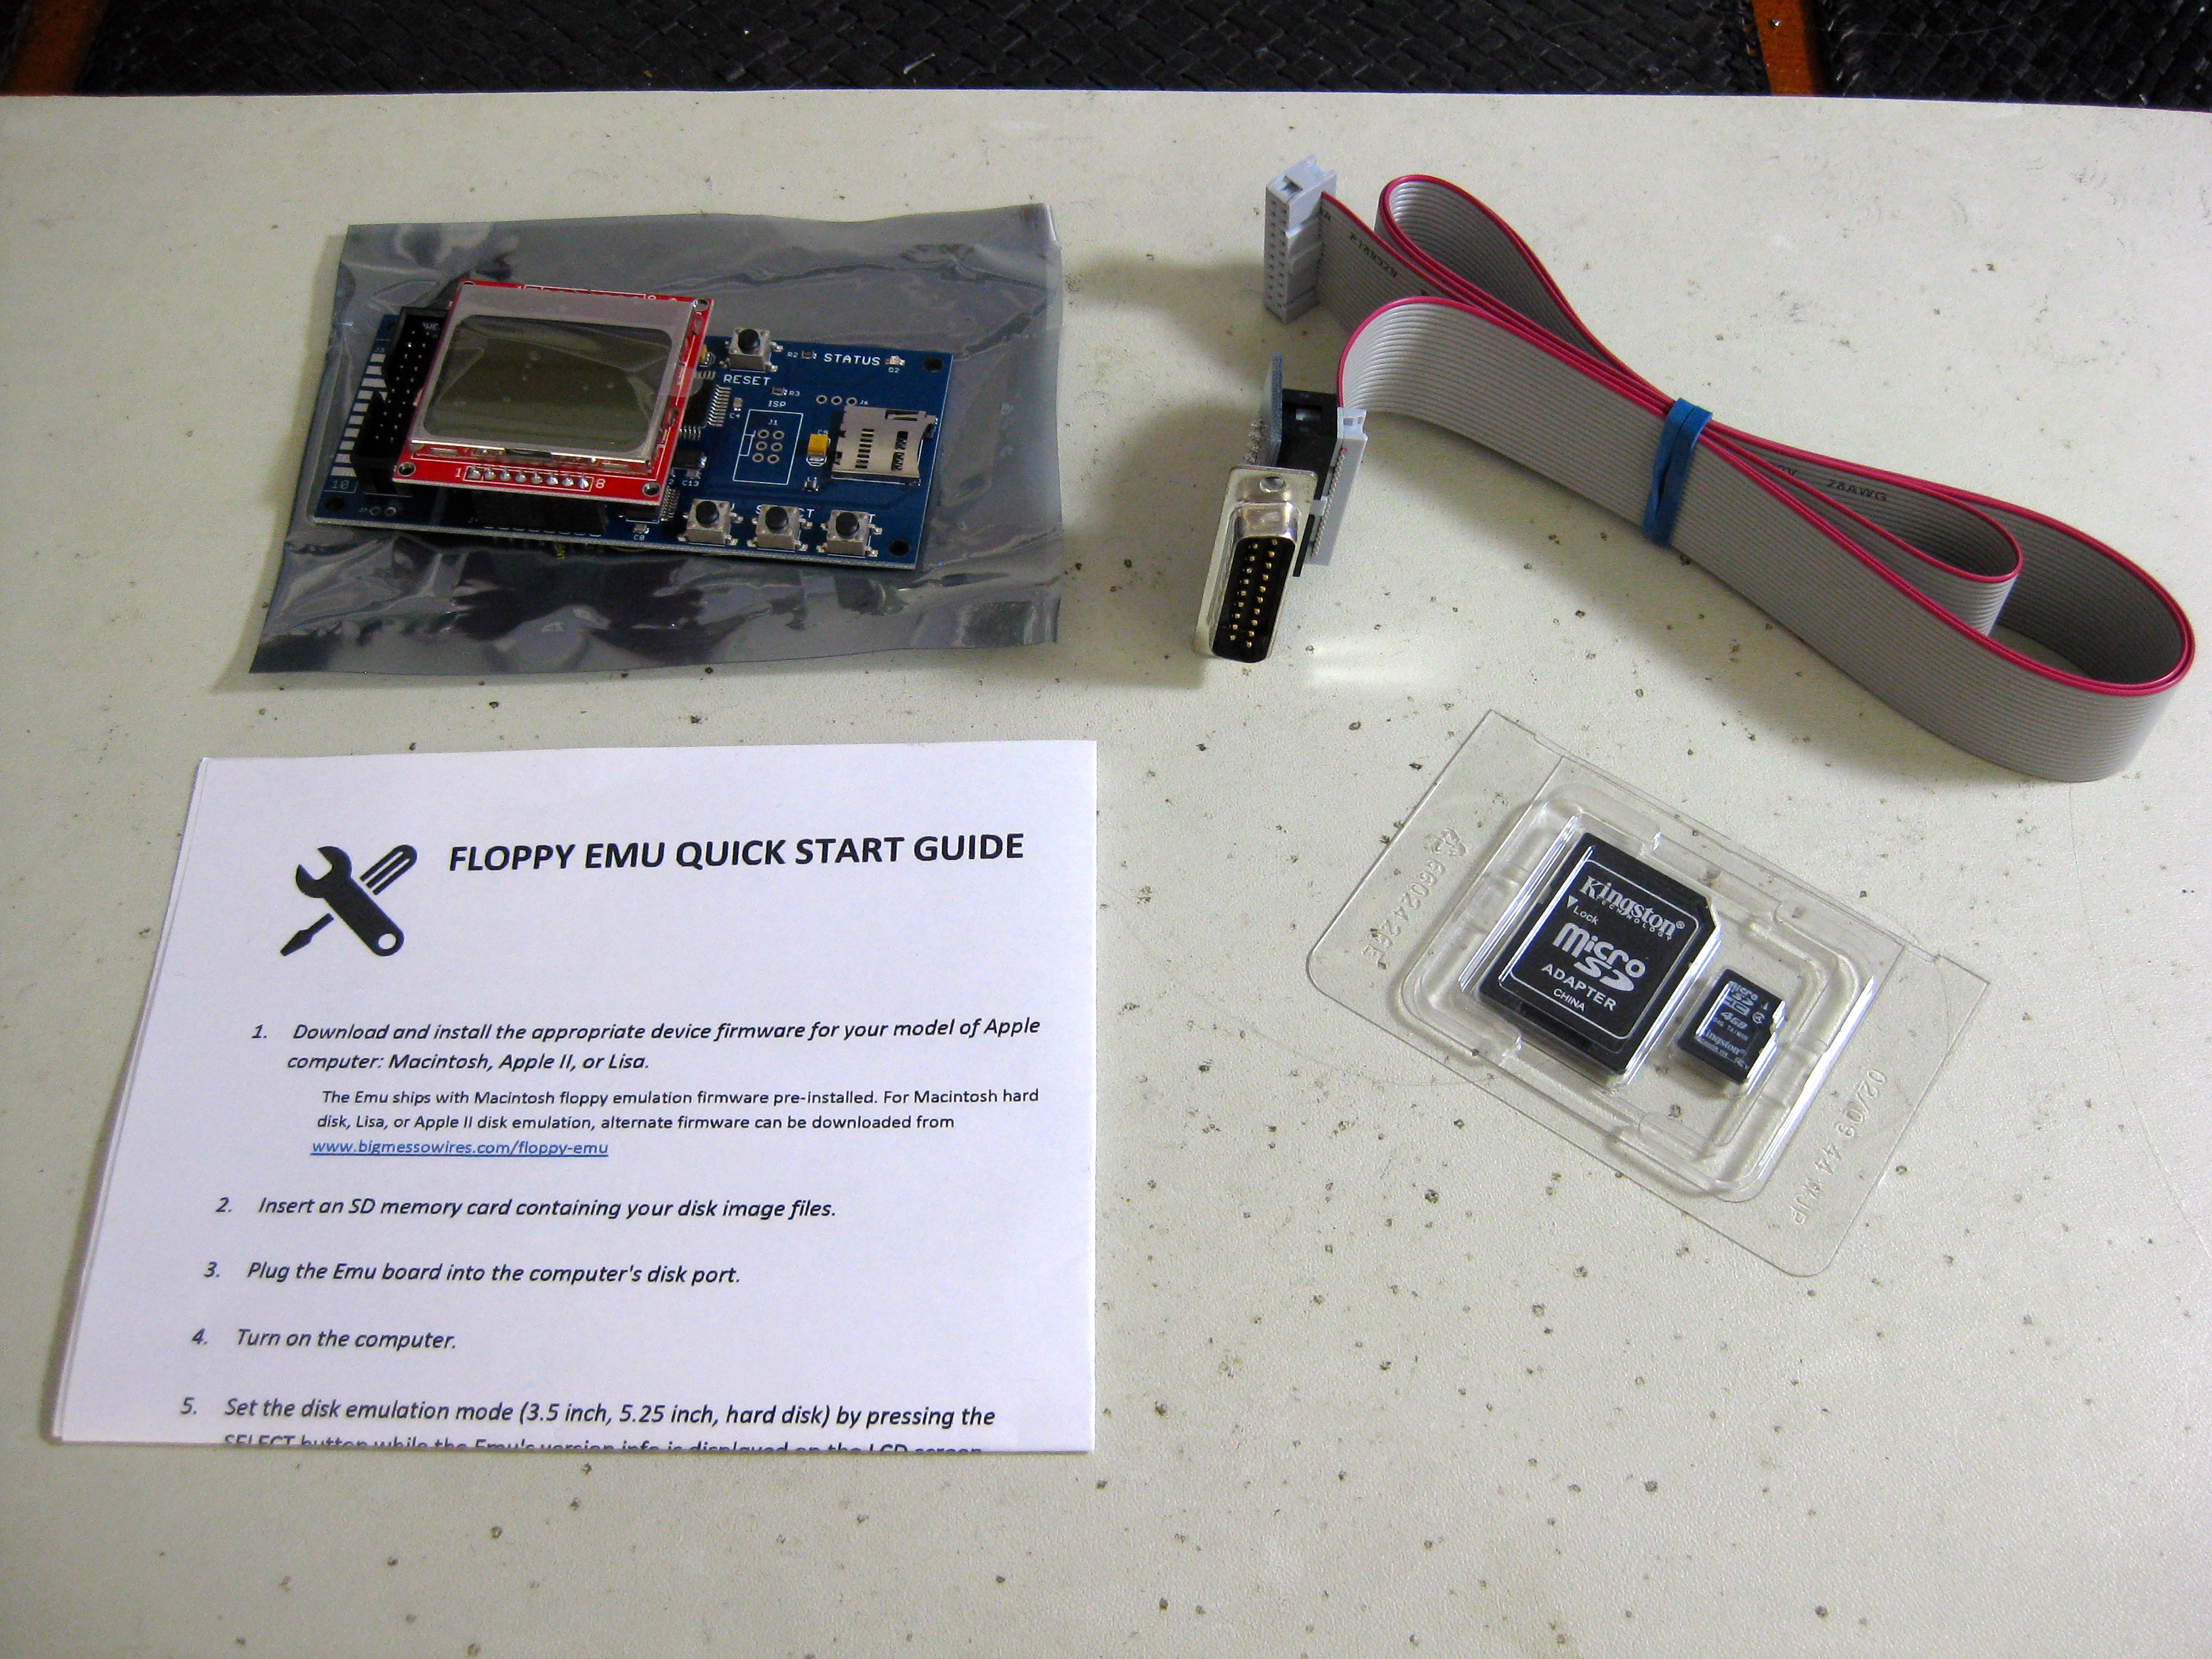
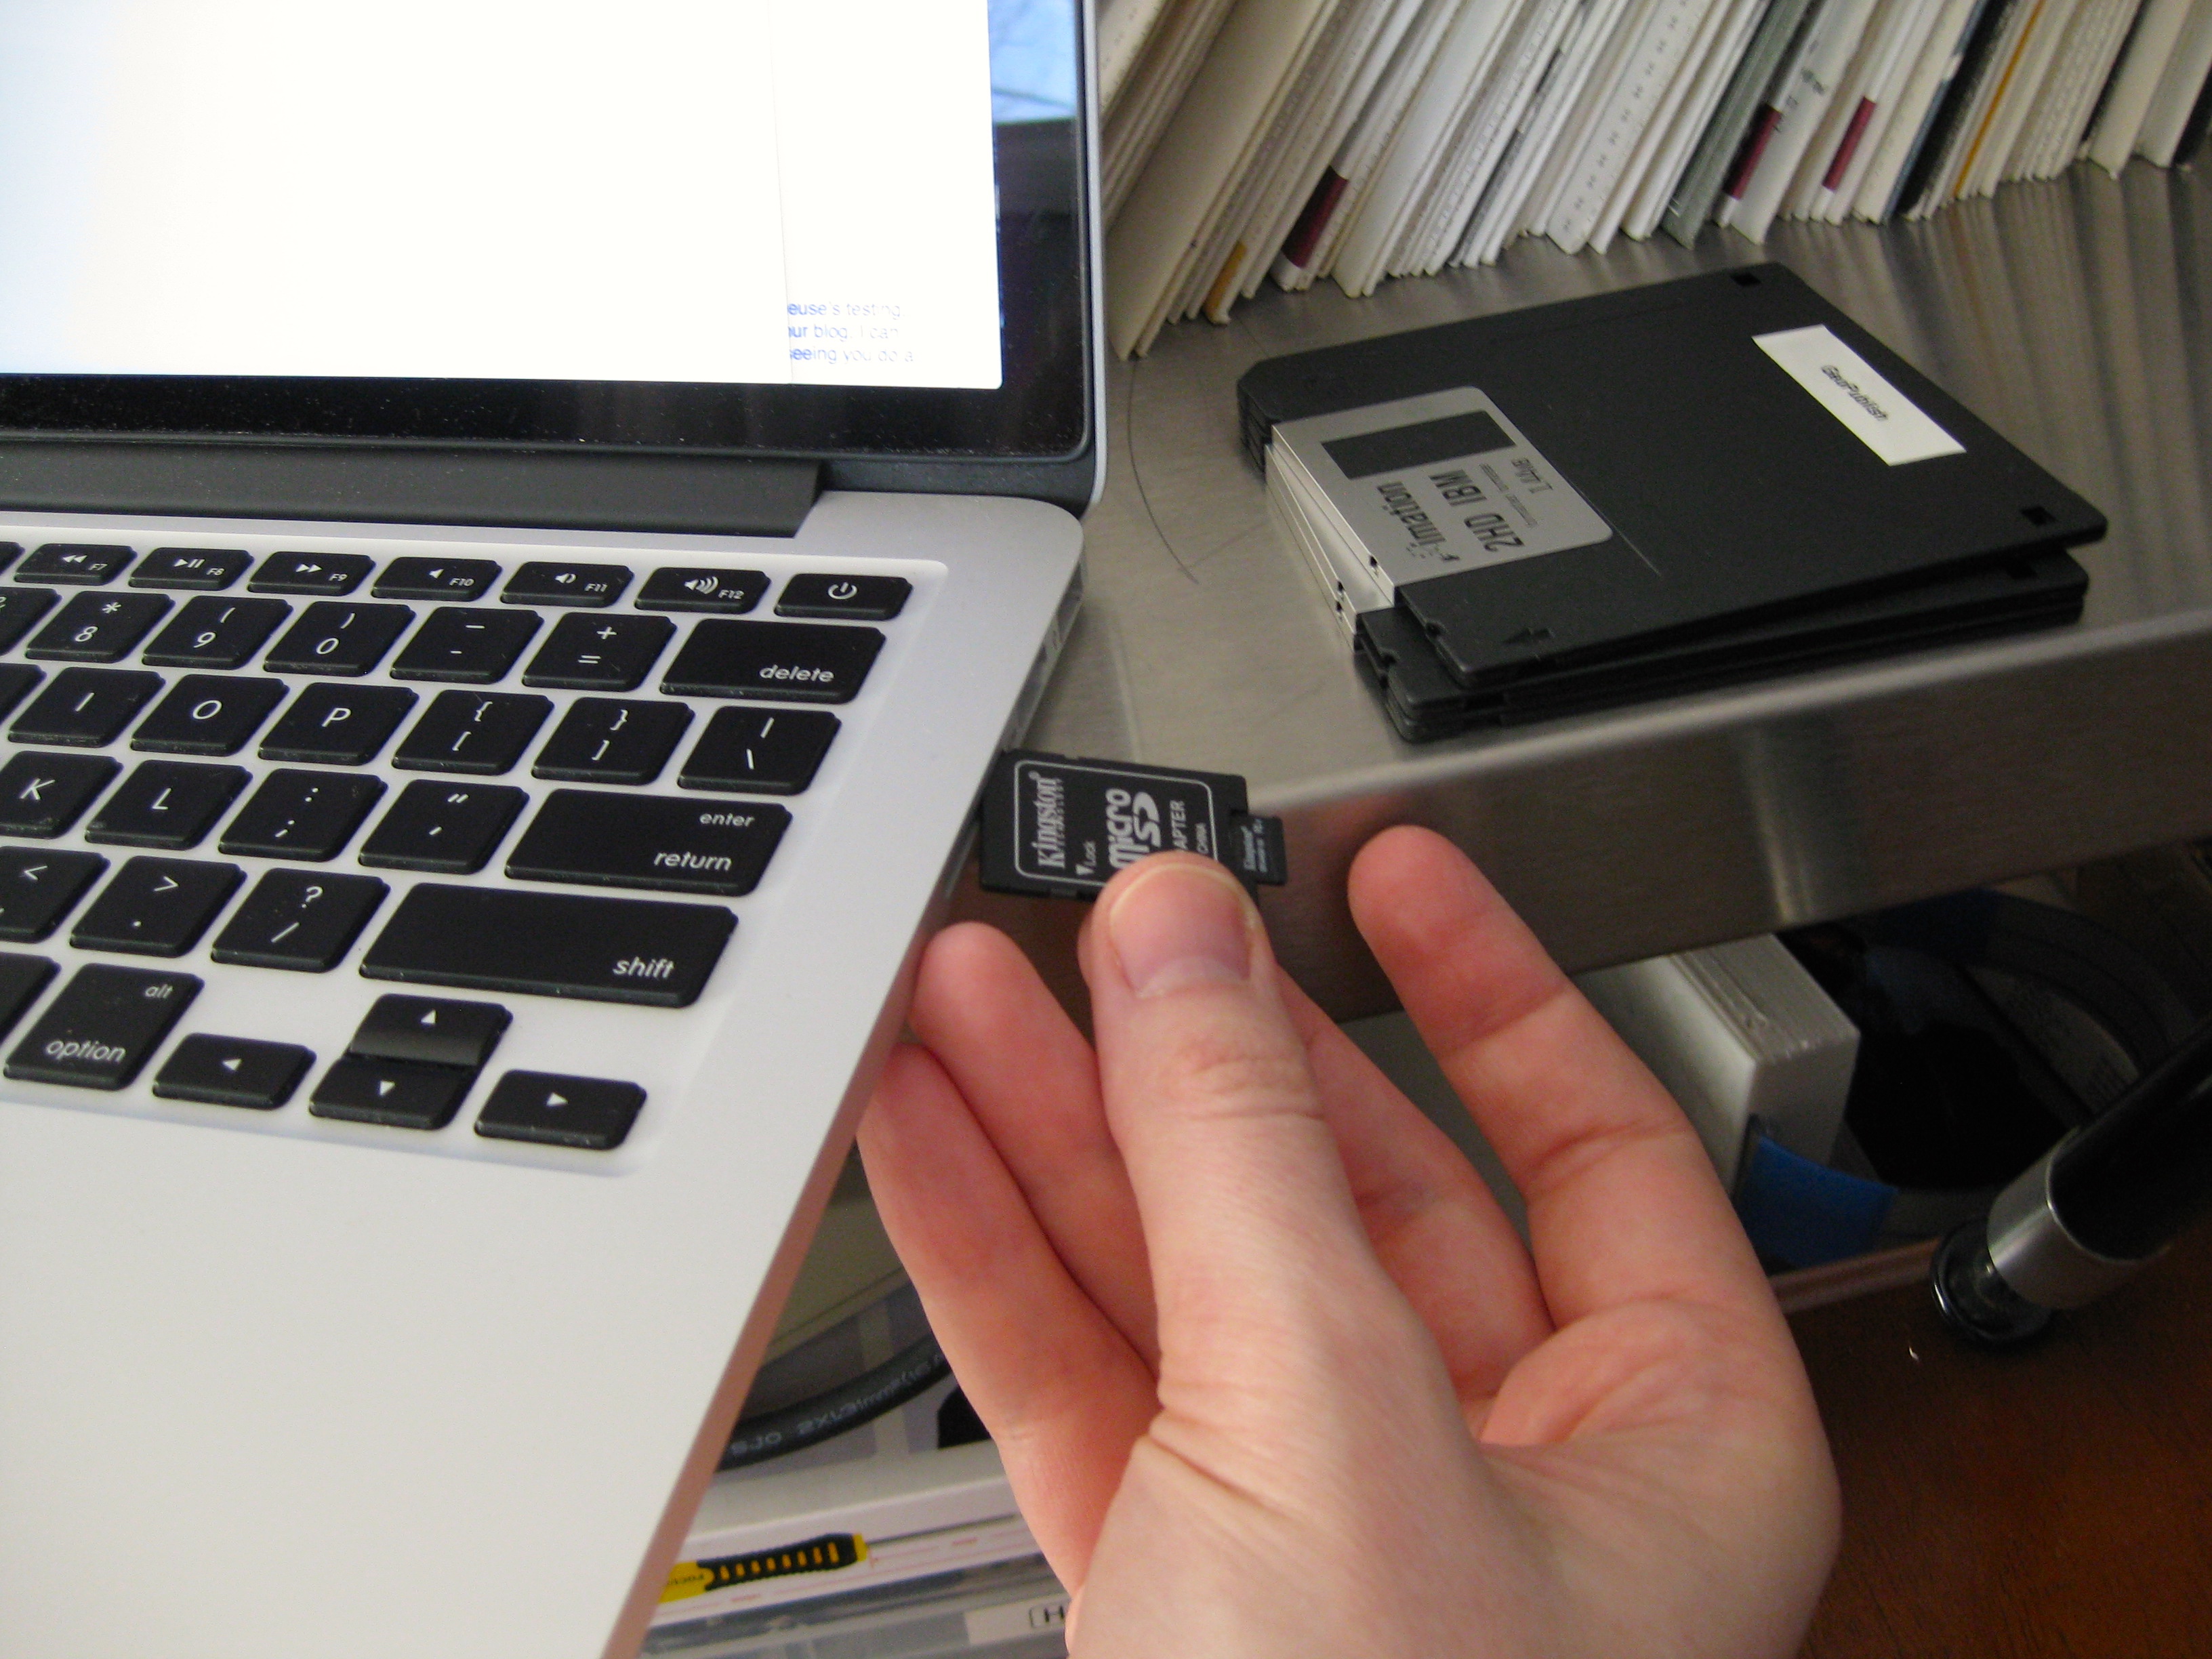
The Floppy Emu uses a micro-SD card, so the inclusion of just such a card and an adapter for SD slots is a very nice touch.
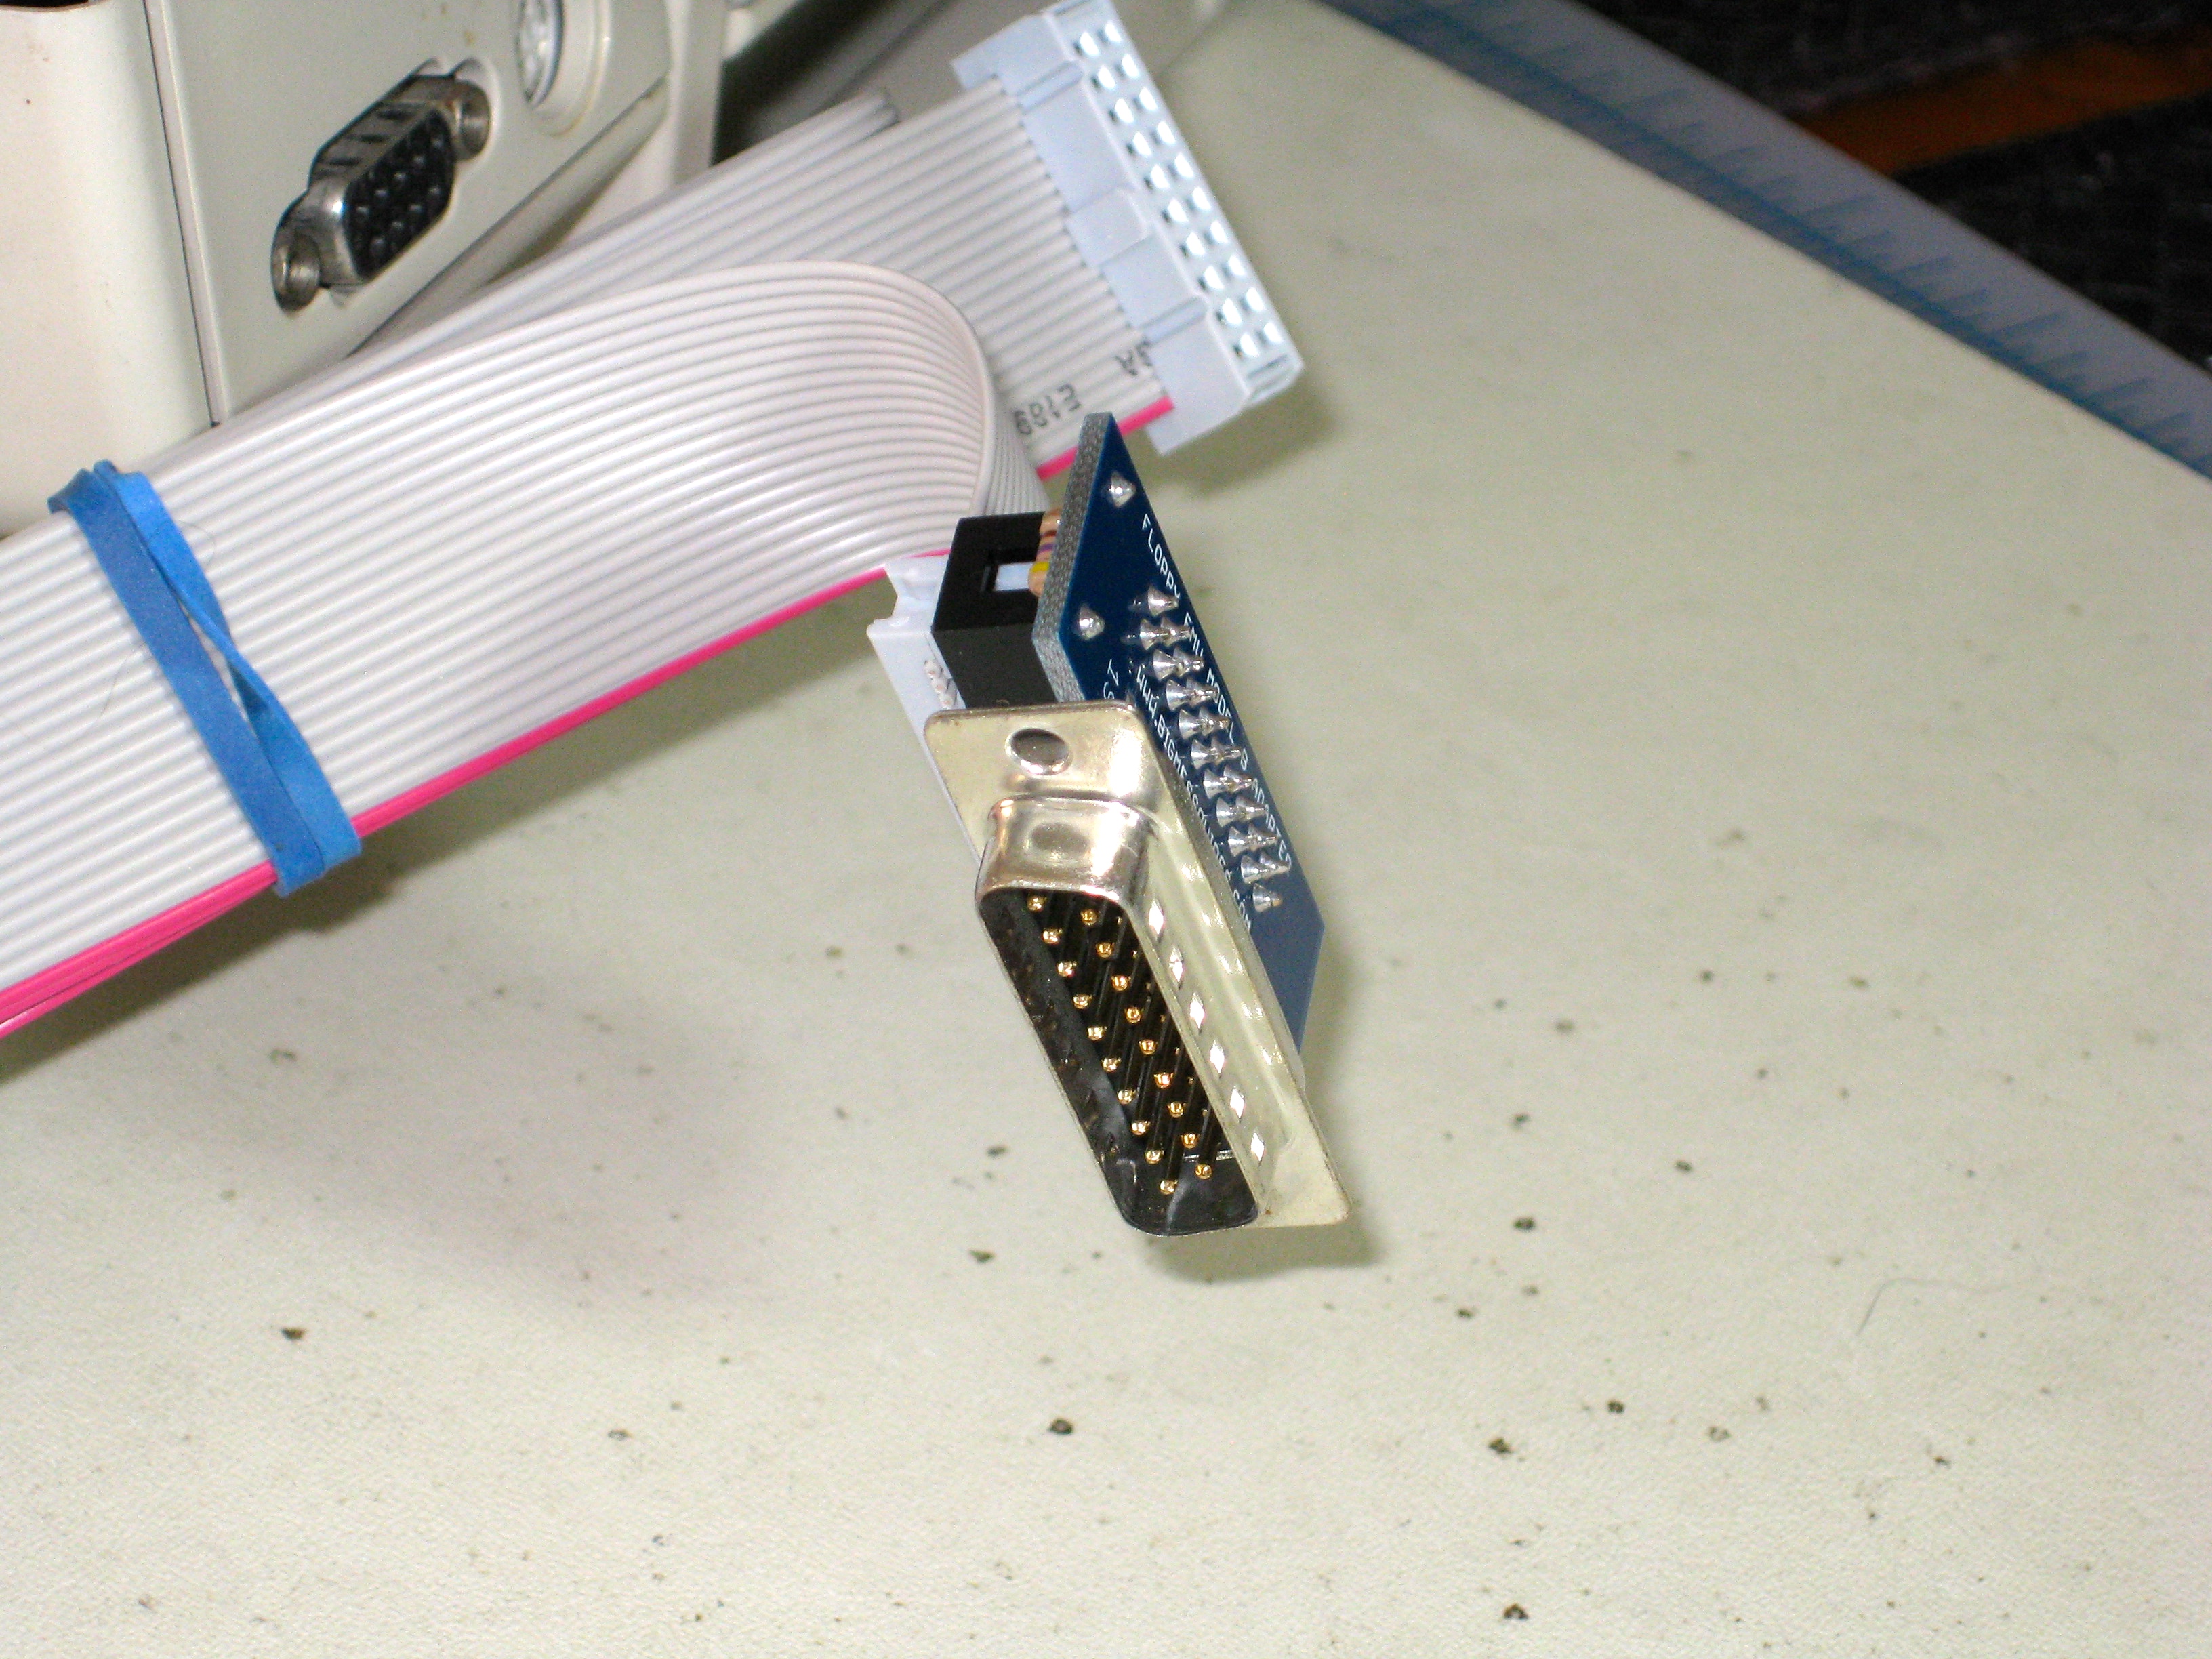
The Floppy Emu works with external drive connectors such as those on the Apple IIc and IIgs, but you can also remove the “adapter” and use it on internal connectors such as a Disk II card in an Apple IIe or II+.
Let’s face it, though- if you’re buying an external floppy emulation solution, you’re probably using it on a IIc or IIc Plus. If you had slots, you’d buy a CFFA 3000, which does everything except trim your toenails (because that would be gross).
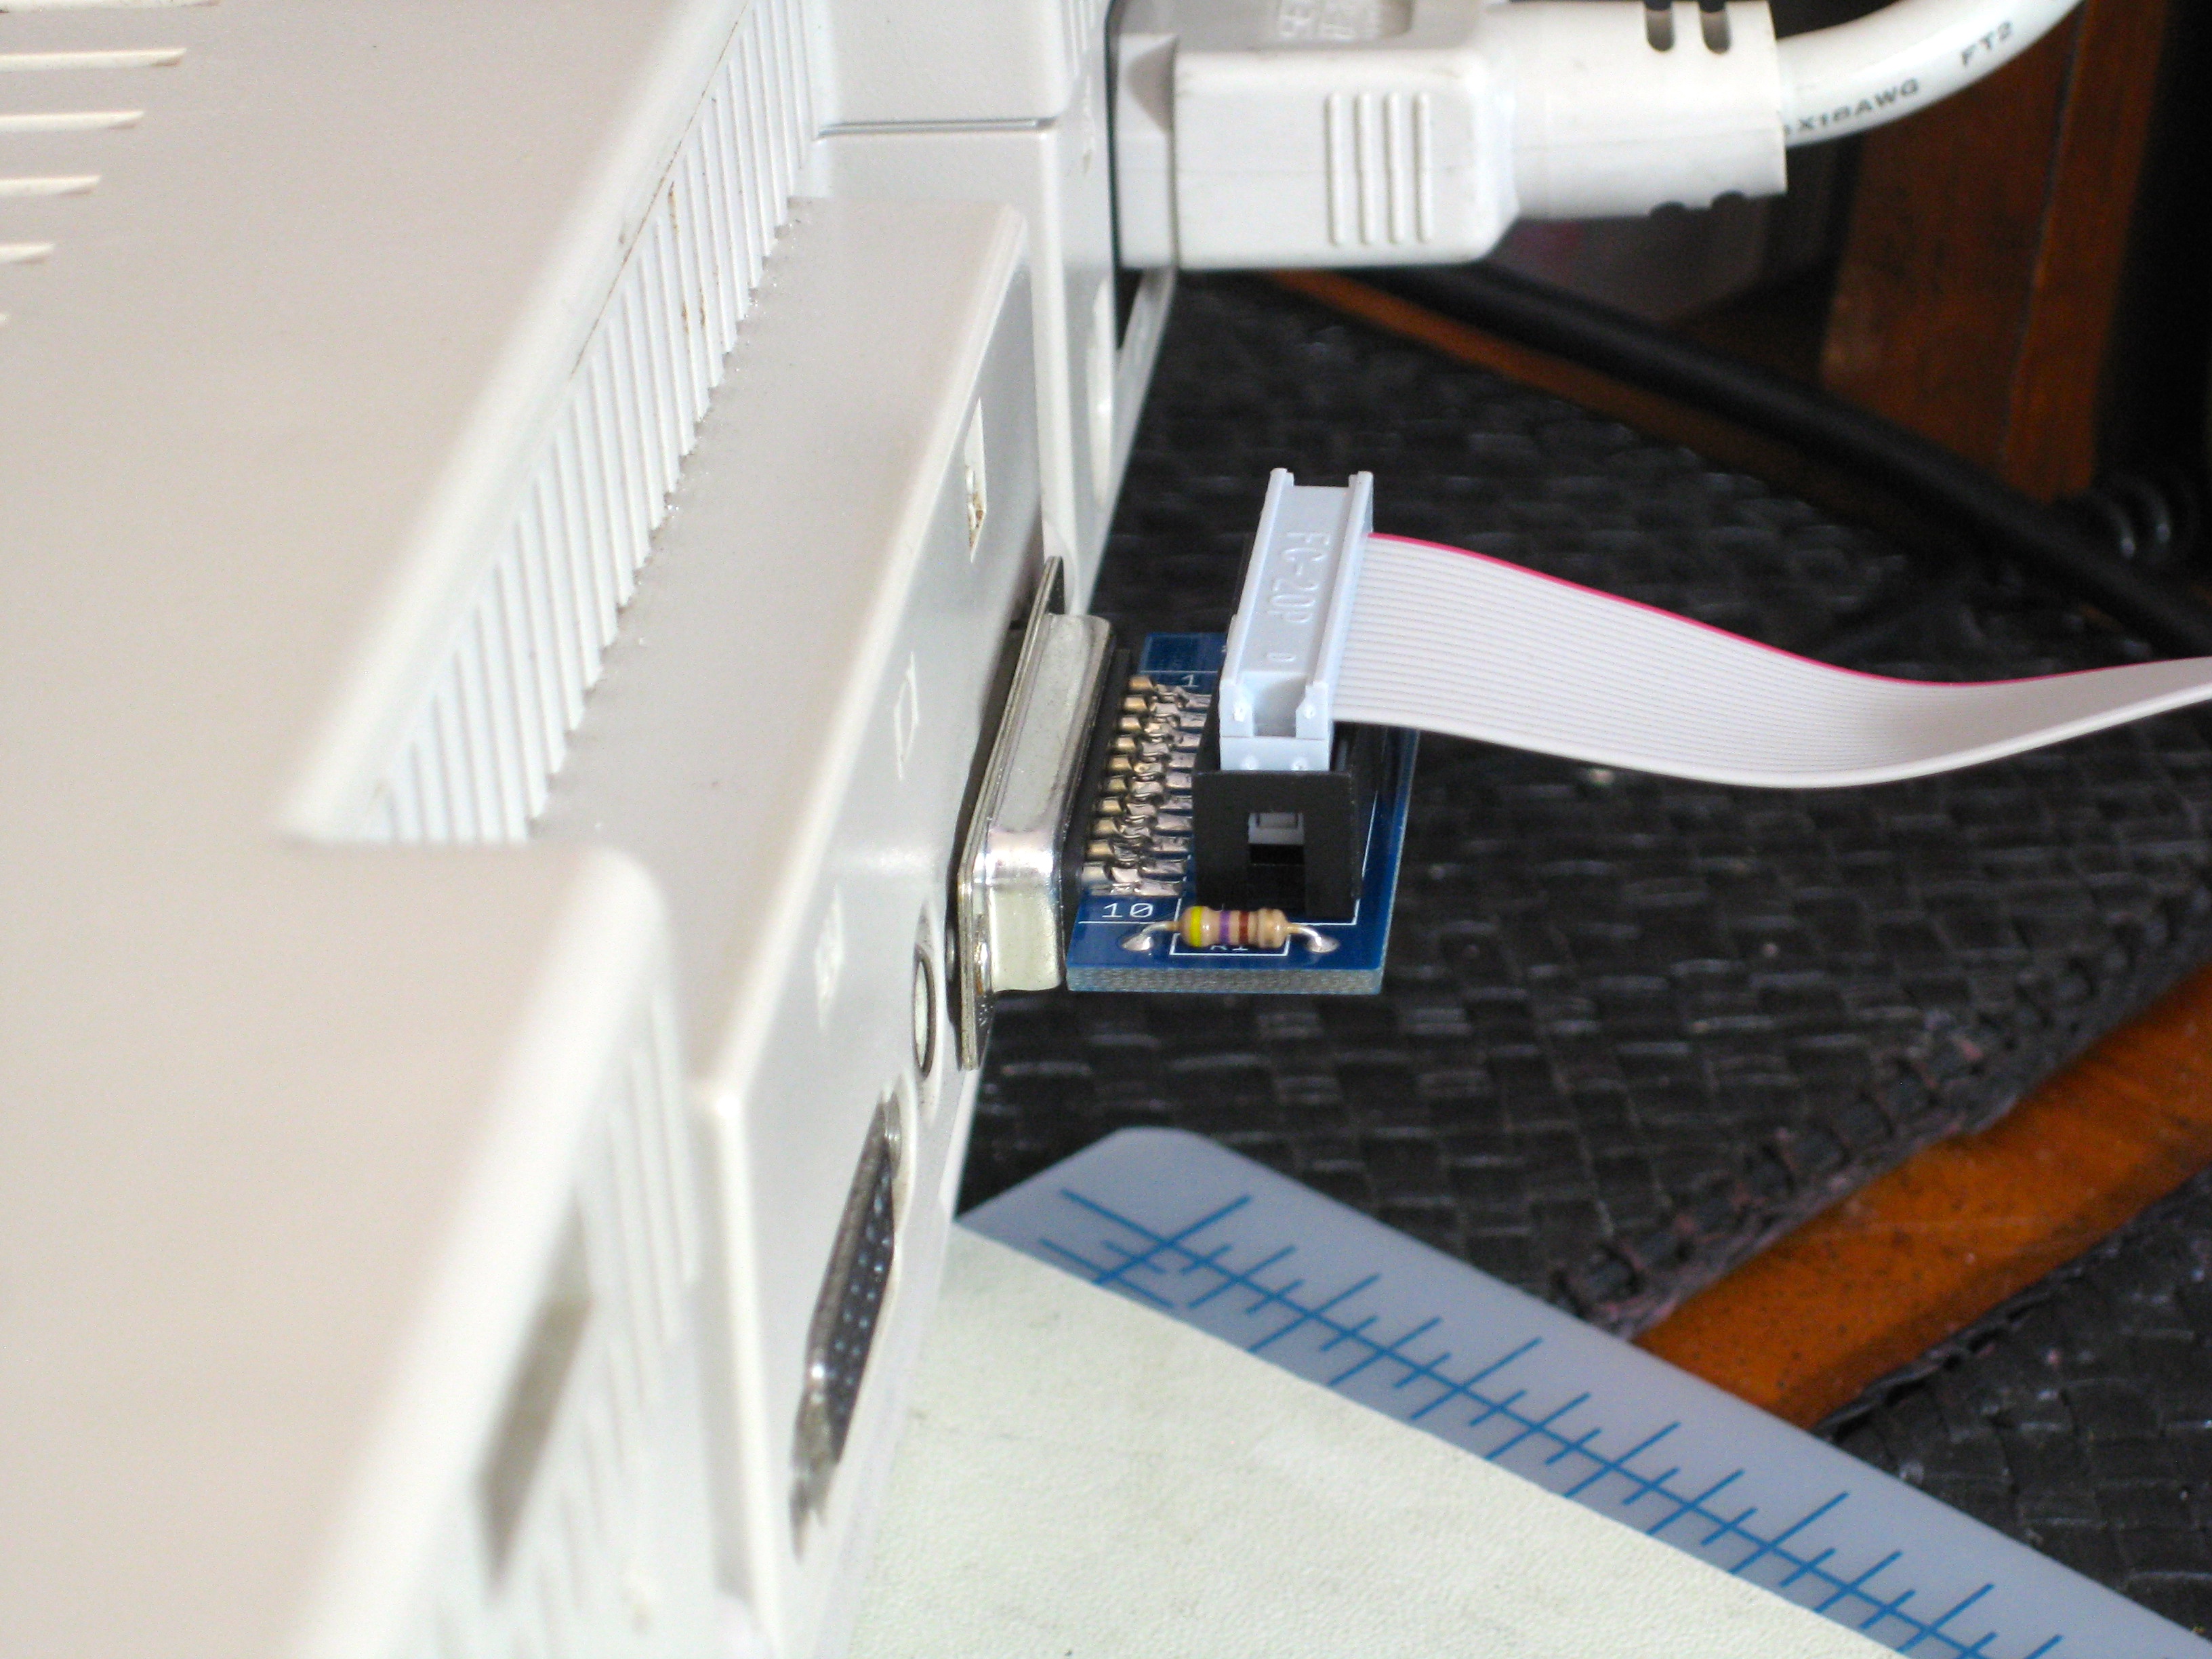
I do kinda wish there was an option to skip that little adapter PCB and have a proper DB-19 cable. That board looks like it is waiting to get snagged on something.
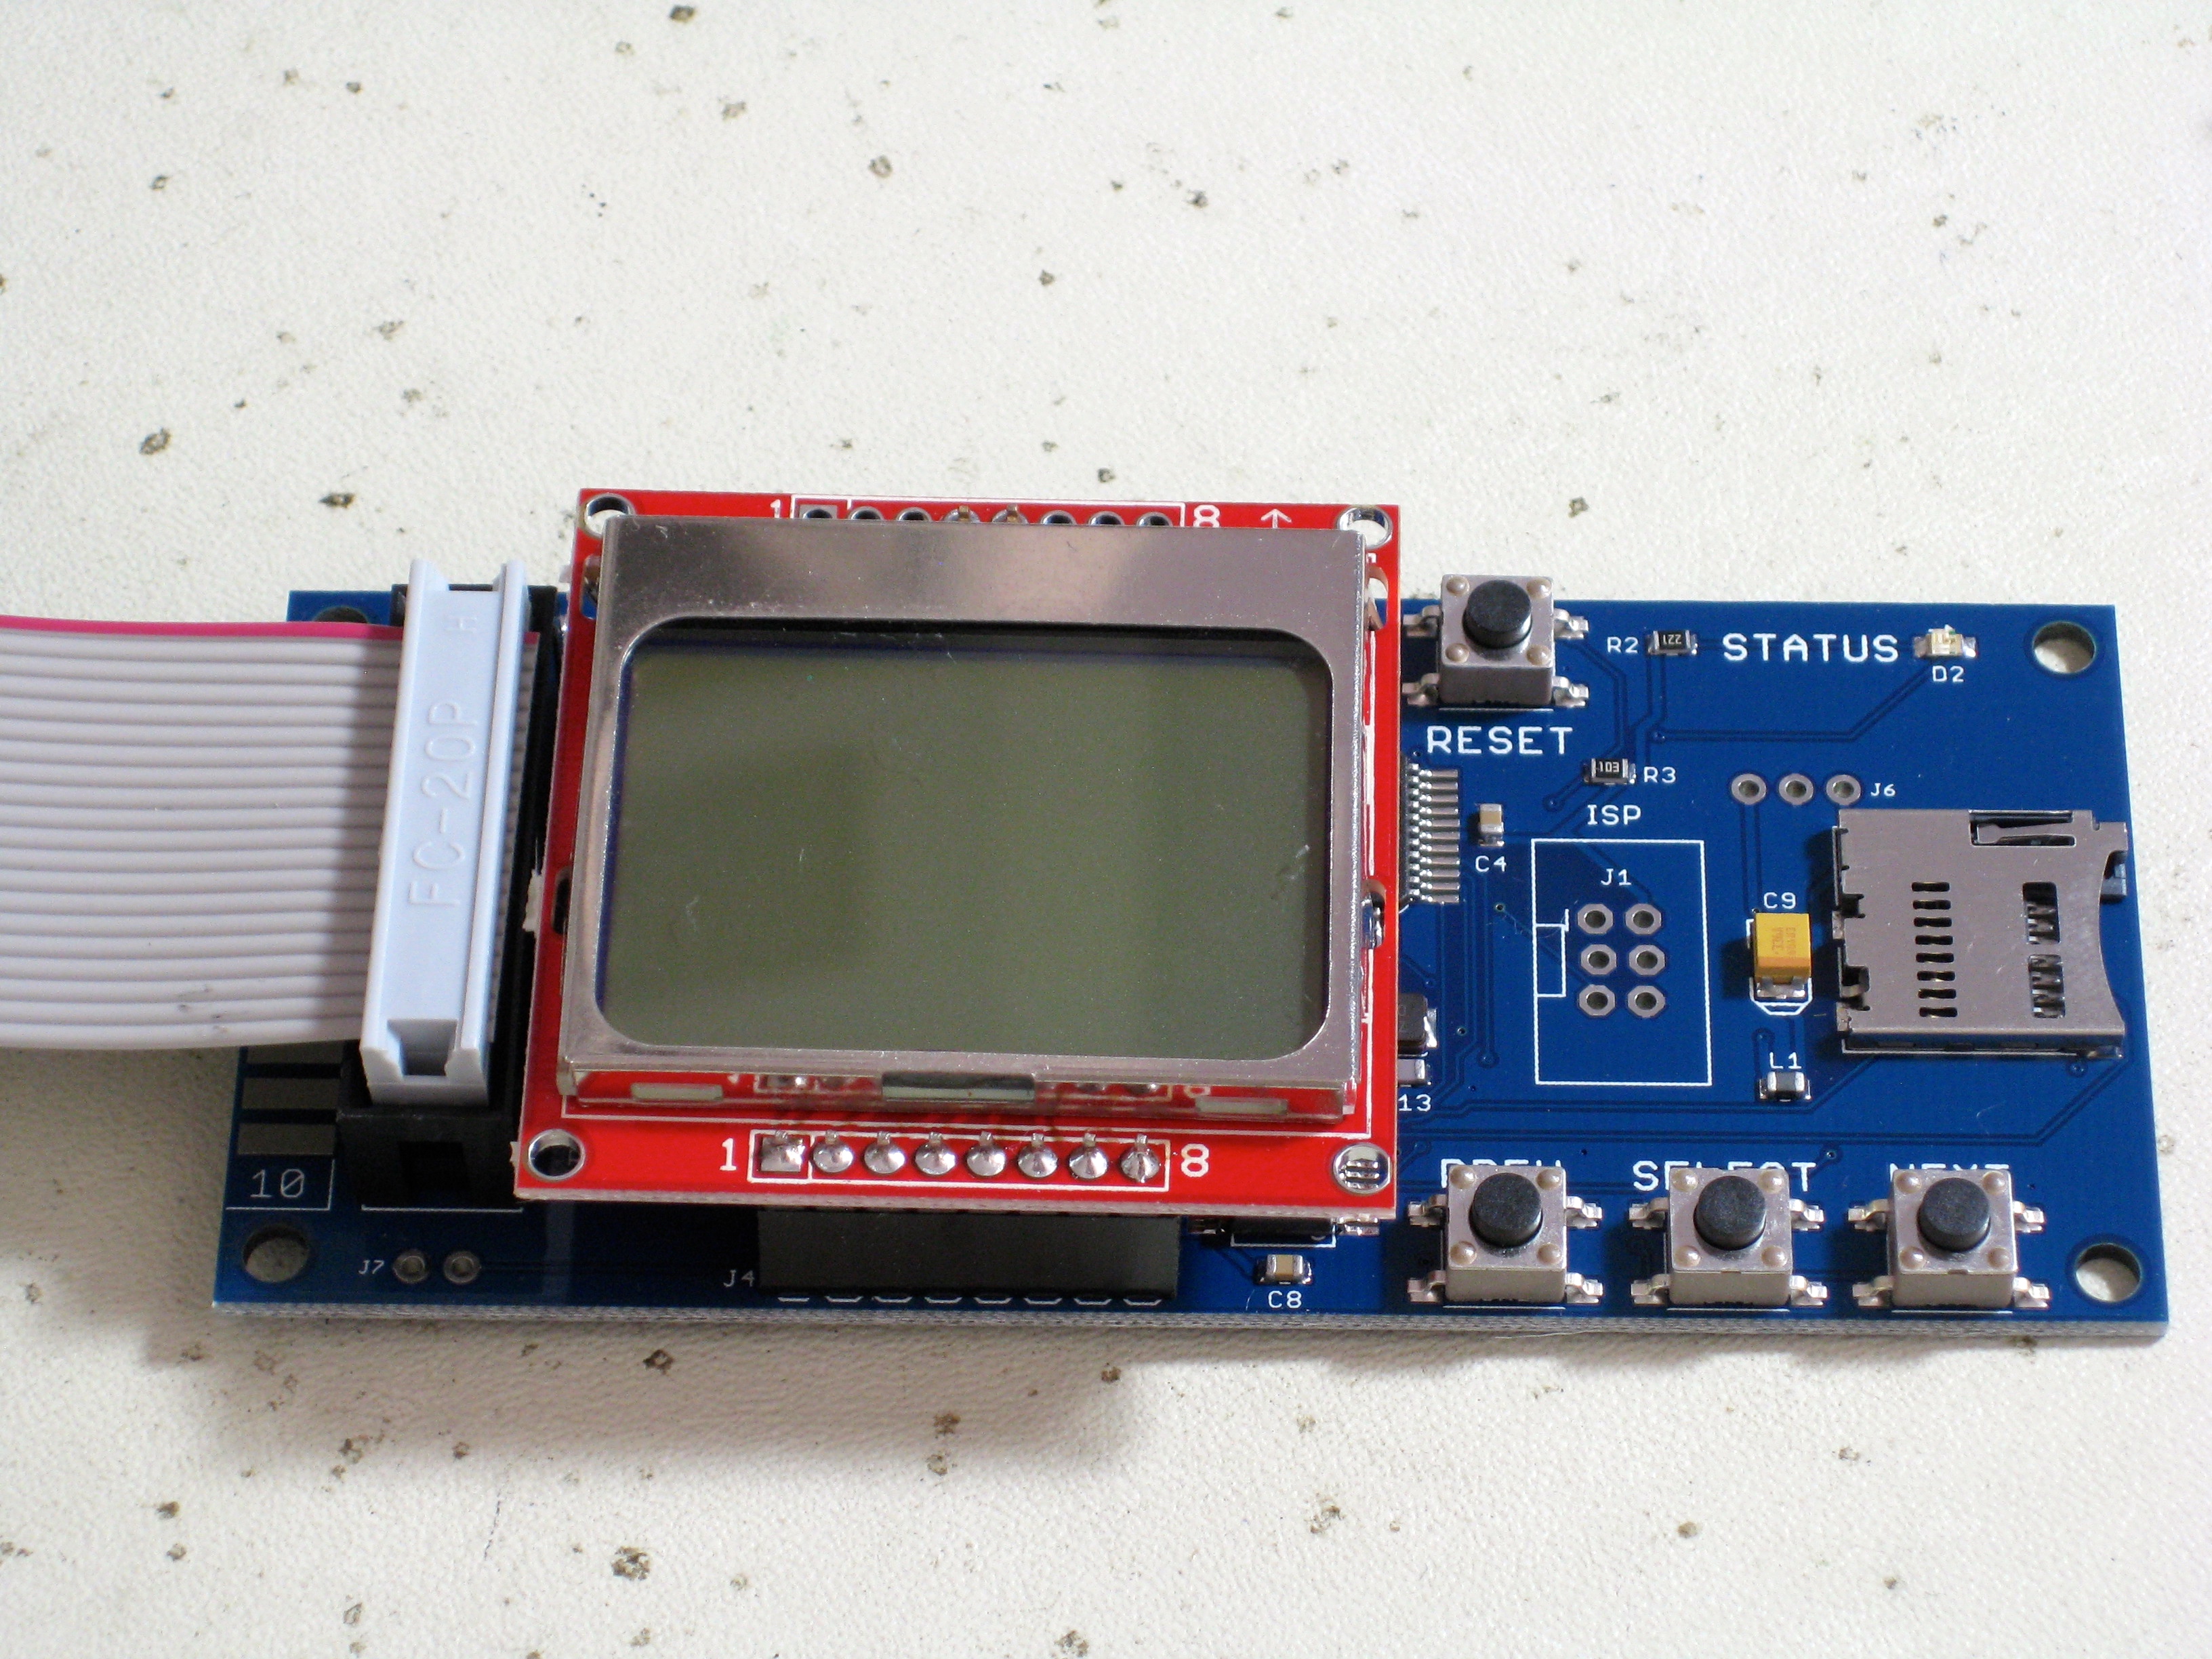
Among solid state options, only one other one has a screen- Nishida Radio’s original UNISDISK. Of course, since then, Nishida Radio has gone to a web interface accessed over wi-fi, so a screen is no longer needed. However, the screen on the Floppy Emu is very nicely implemented, and makes it very convenient to configure and manipulate disk images.
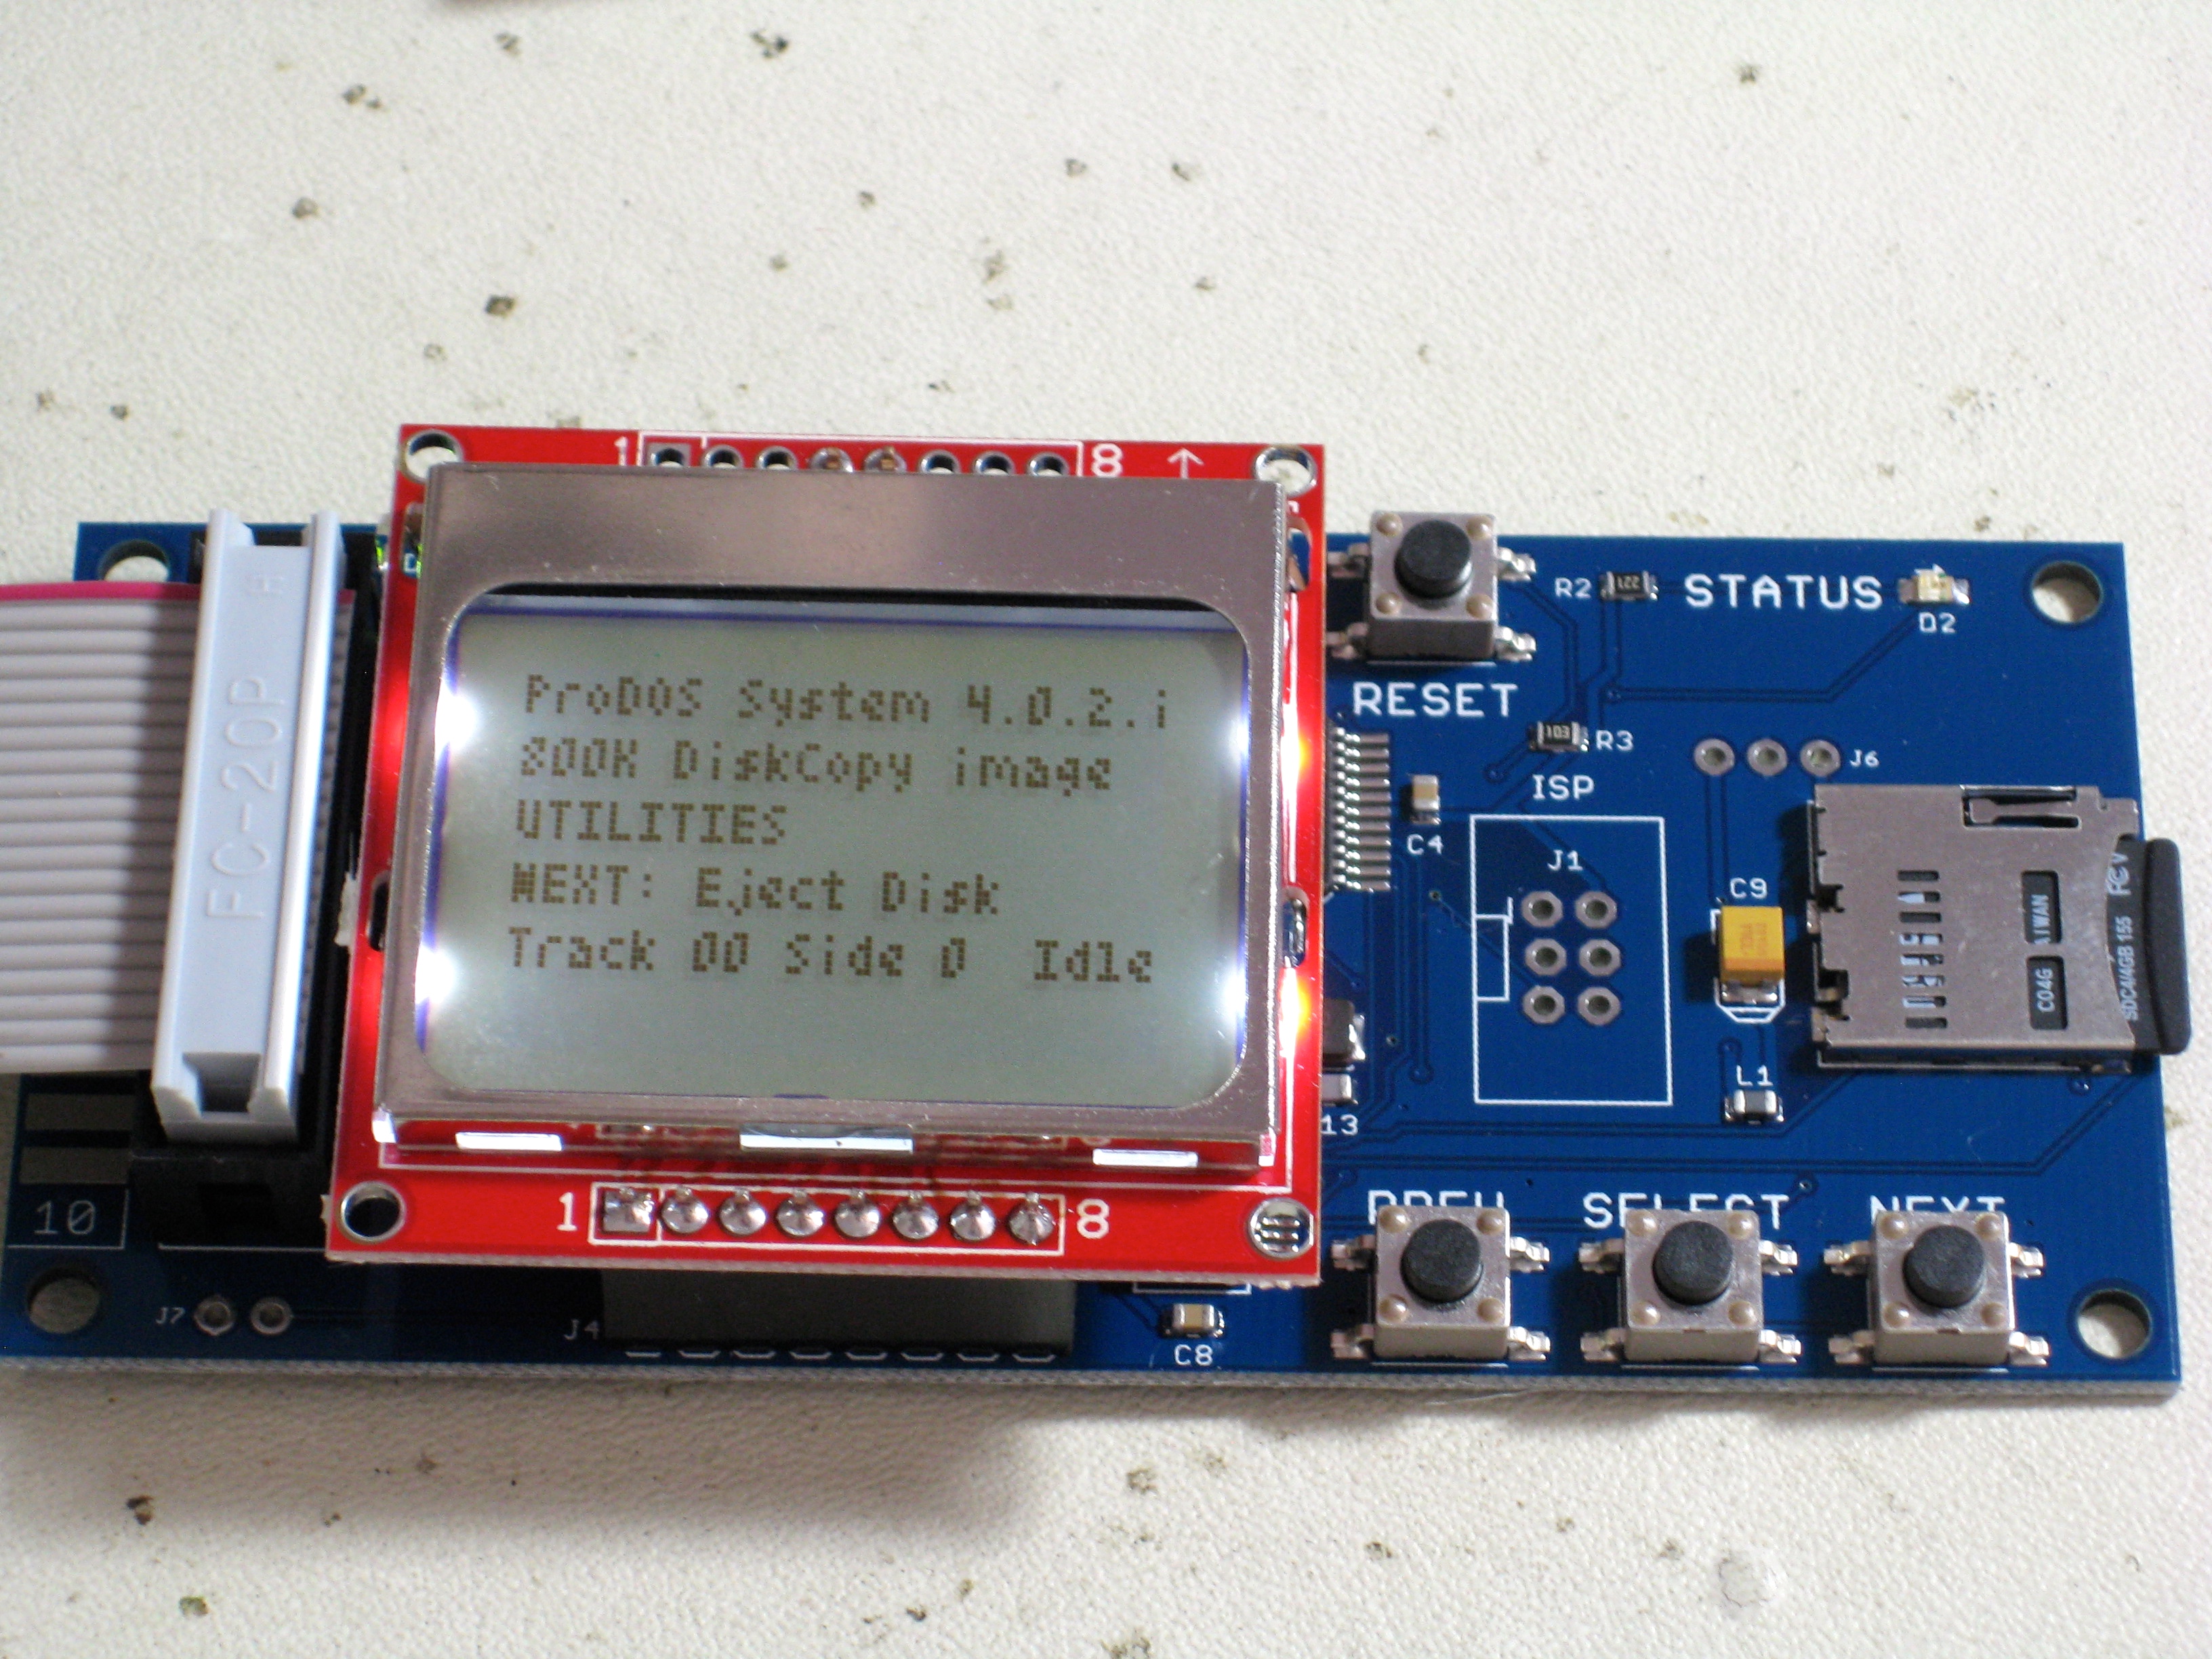
The best part of the Floppy Emu is probably its flexibility. It will emulate 5.25″ drives, 3.5″ drives, and Smart Port devices (such as 32MB hard drives that came along at the very end of the Apple II’s life). It supports virtually (pardon the pun) all known Apple II image formats, including DSK, DO, PO, NIB, and 2MG. I found HDV files also work if renamed to PO. This same device will also work in Macintoshes and Lisas, so this a no-brainer if you are into those old fruits as well. Steve’s latest firmware supports all these machines at once, and also supports the finicky IIc Plus correctly.

The user interface on the Floppy Emu is probably the best of the field. It has nice controls, and the menus make good use of the screen real-estate. Error messages are friendly and helpful, and it’s very easy to navigate through a large collection of disk images. You can even use sub-folders, which is an excellent feature. The up/down buttons auto-repeat for fast navigation, which I really appreciate. Most people forget this when designing hardware-based UIs, and it makes me want to poison bunnies just to watch them die.
It is very easy to switch between mounted disks. You can unmount and remount another image with ease (while the Apple II is running). You can also write to the disk images seamlessly, which is a feature not many of these devices support. The Floppy Emu also has the best documentation (PDF warning) of any of these devices that I have tried. The SD card is hot-swappable, which is very convenient, and usually not possible on floppy emulators.
There are a few pain points however. The first one you’ll notice is that the device does not remember your selected disk image between sessions. Each time you power on the machine, you have to re-select the disk image (which also means digging through your folders from the top again). UNISDISK, for example, remembers your last image selection, which is very handy. If you’re using a SmartPort hard drive, this isn’t a problem, as it will automatically find the first hard drive image and boot it. Only floppy images need to be selected by hand each time.
The second pain point for me is that you can’t use 3.5″ images and 5.25″ images at the same time. You have to set the device into a mode for one or the other, which involves resetting it and digging through some menus.
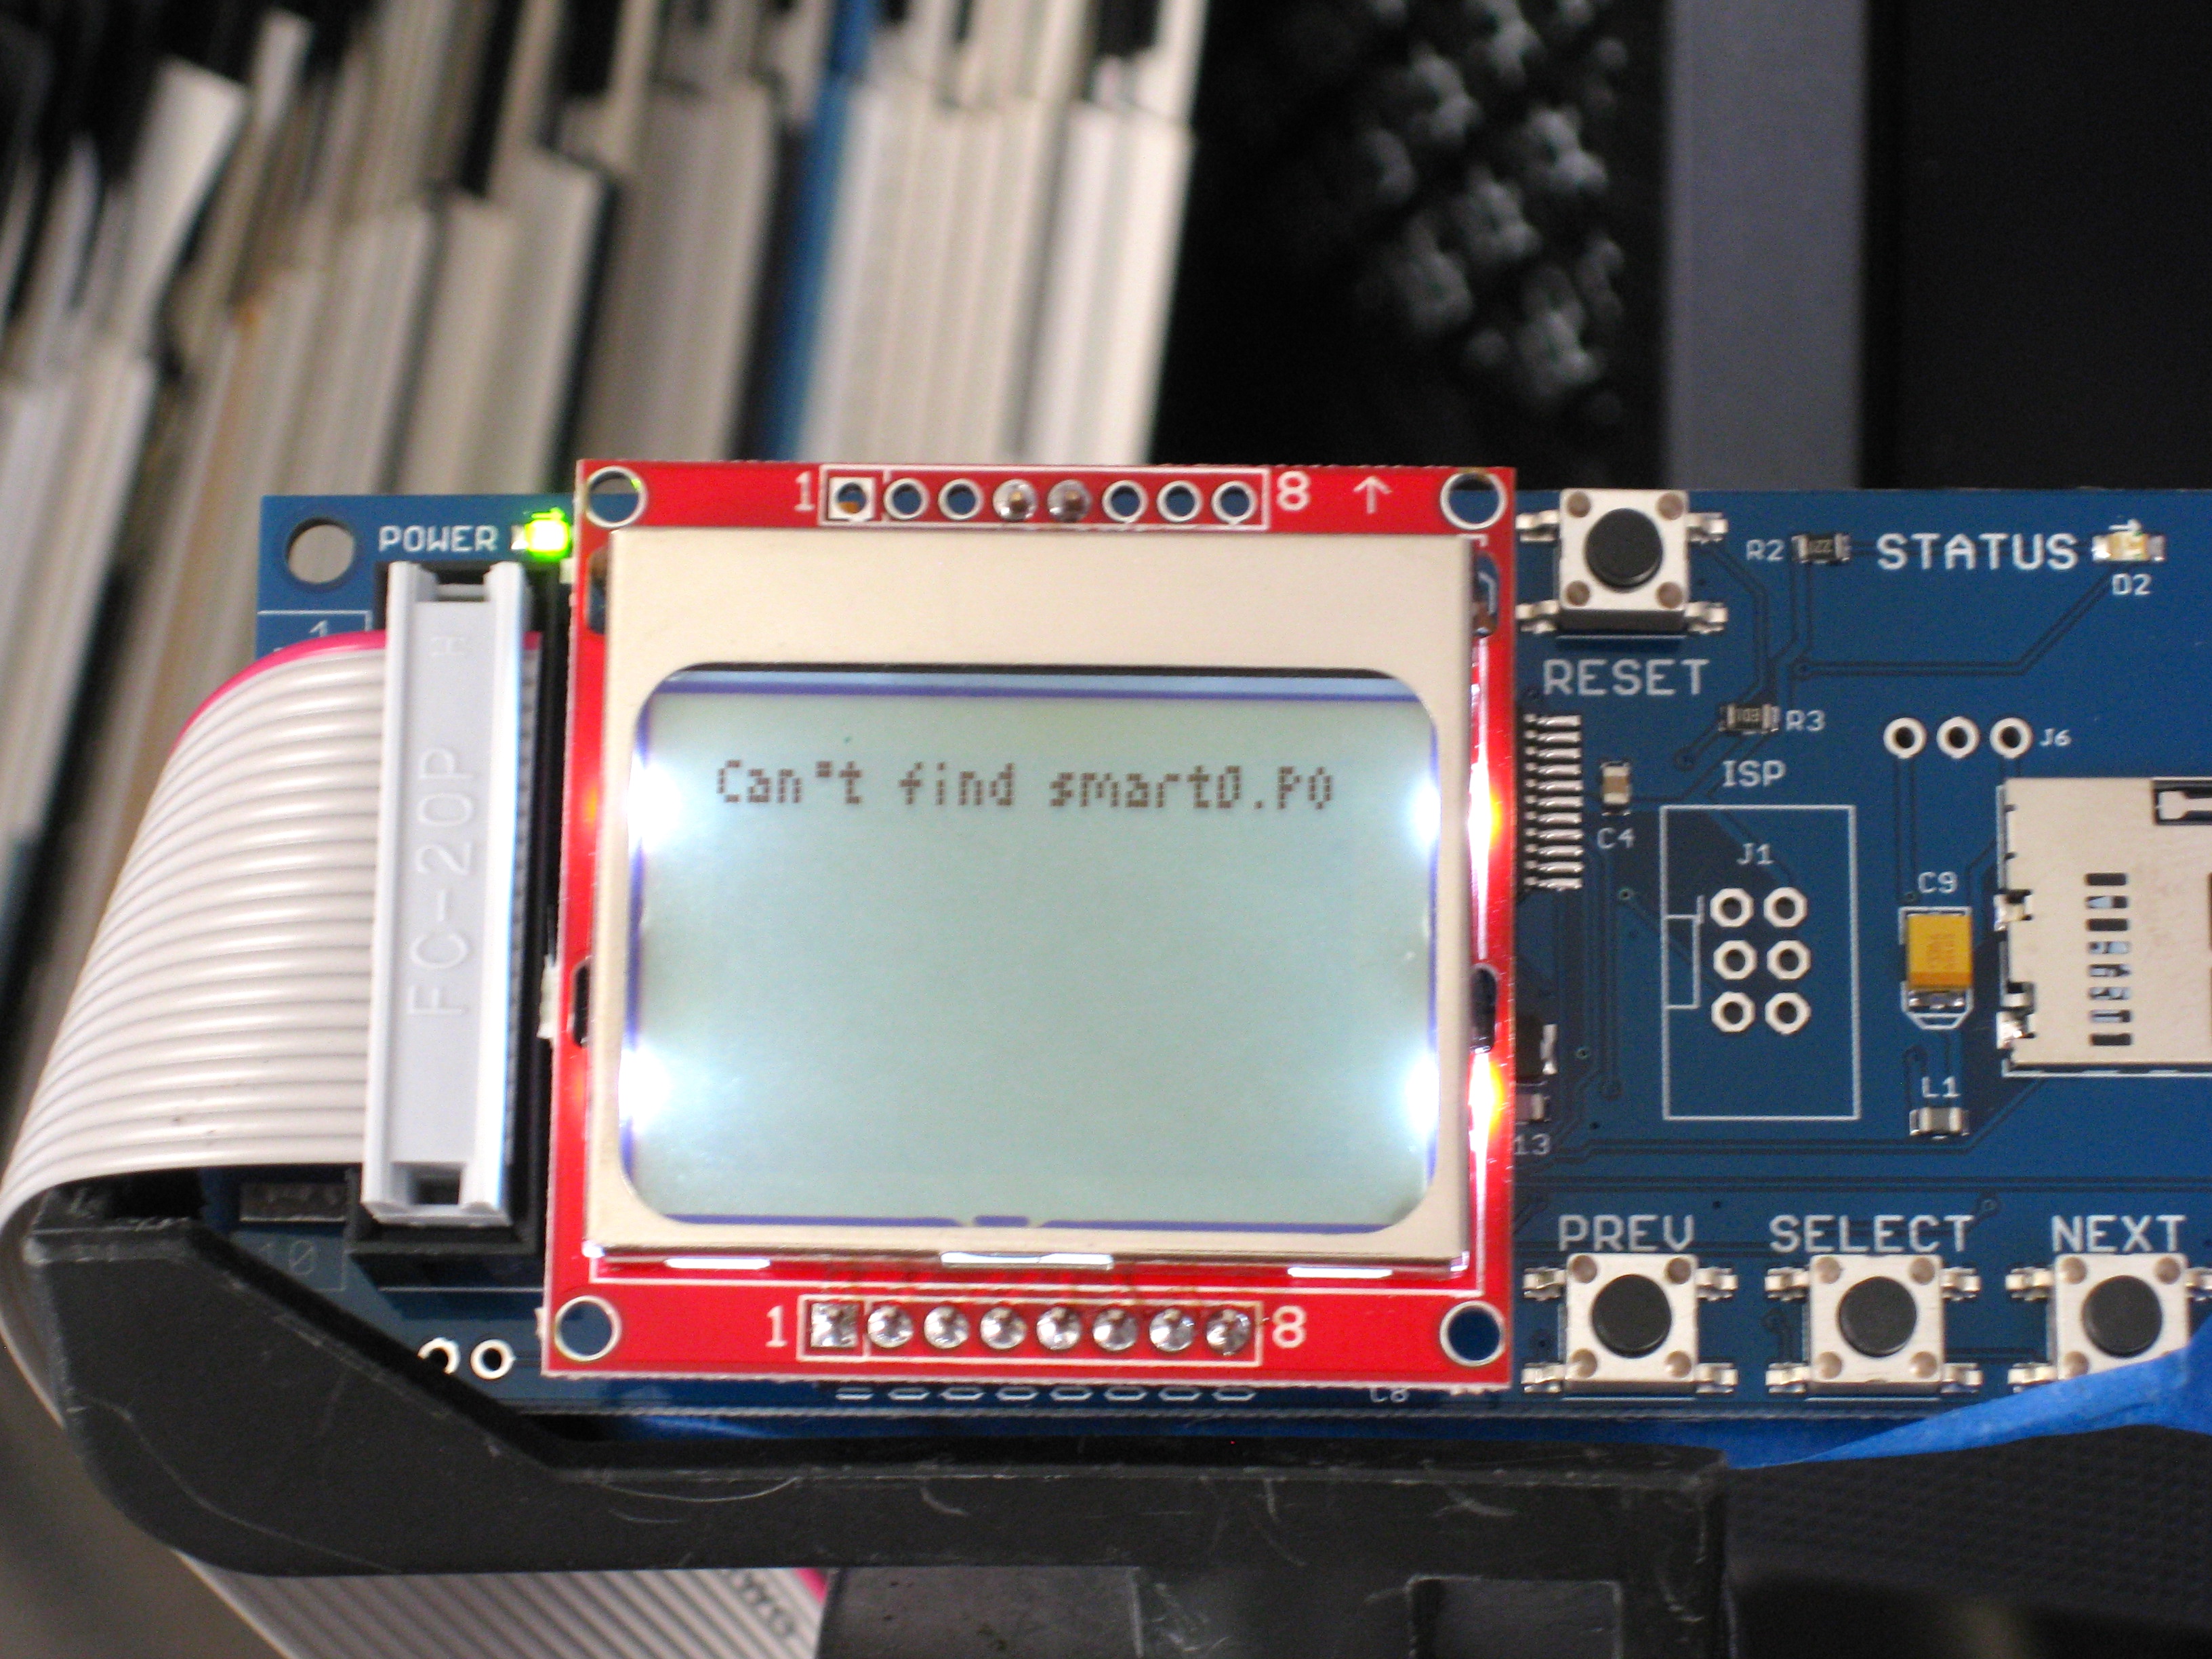
Some other little things to note- it would not boot my 3.5″ GEOS disk images for some reason, and it did hang on me once while booting the 5.25″ version of Spy Hunter. It’s possible that some types of cracks and off-label file systems cause problems for it.
For regular IIc owners, note that it doesn’t have the option to boot from the external drive like the UNISDISK does. Nishida Radio provides a little jumper you can run inside the machine to swap the internal and external drive mappings, which is lovely, because you probably want to boot from your solid state most of the time. The Floppy Emu can be connected as Slot 6 Drive 1 by connecting it internally to the floppy connector on the motherboard, if you’re willing to lose access to your internal floppy drive.
Good news for IIc Plus owners, though- the Floppy Emu works perfectly for all types of disk images, and will boot externally like any other external drive on a IIc Plus.
The last minor point I’ll bring up is firmware upgrading. Nishida Radio really sets the bar here- firmware upgrades are fast and very painless. The firmware on Floppy Emu is upgradeable, but it’s a more convoluted process. That’s a minor point, though, because I wouldn’t expect to do it often. The Floppy Emu is more sophisticated, employing both a CPLD and a microcontroller, so firmware upgrading is bound to be more complex.
Here’s a boot up of the ProDOS System Utilities on 3.5″ on my IIc Plus, connected externally. It’s a nice experience, once you’re through the pain of selecting the image after initial power-up.
Like all current floppy emulators, it is eerily silent. Someday someone will make one that emulates the disk drive sounds, the way Virtual II does. That day will be better than Christmas and Chinese New Year combined.
So that’s the Floppy Emu in a nutshell. I think it’s a great device, and it’ll be my go-to for the foreseeable future, I think. The nice UI and broad disk-image format support make it a winner for me. Hopefully Steve can add retention of the last selected image in a future firmware update. That would make this a no-brainer purchase for any Apple II user.
But wait- this is Blondihacks, so we’re not going to stop there. Like many hobbyist community devices, the Floppy Emu arrives as a bare PCB. You’re on your own to not mangle it during use. I’m always looking for excuses to justify my most ridiculous tool (the 3D printer), so let’s make a case for the Emu. To the calipers!


At this point I made the mistake of upgrading my Cura slicing program. I was a couple of versions behind, and since 3D print quality is largely down to the quality of the slicing software, I thought I should upgrade. It did not occur to me that this would invalidate my very hard-earned printer configuration. I then got to spend a few hours re-configuring my printer. This is one example of why home 3D printing is still a hobby, not a solution. Don’t buy one expecting a machine that magically creates objects when you push a button. It’s more like a machine that magically creates migraines and you have to push thousands of buttons for the privilege.
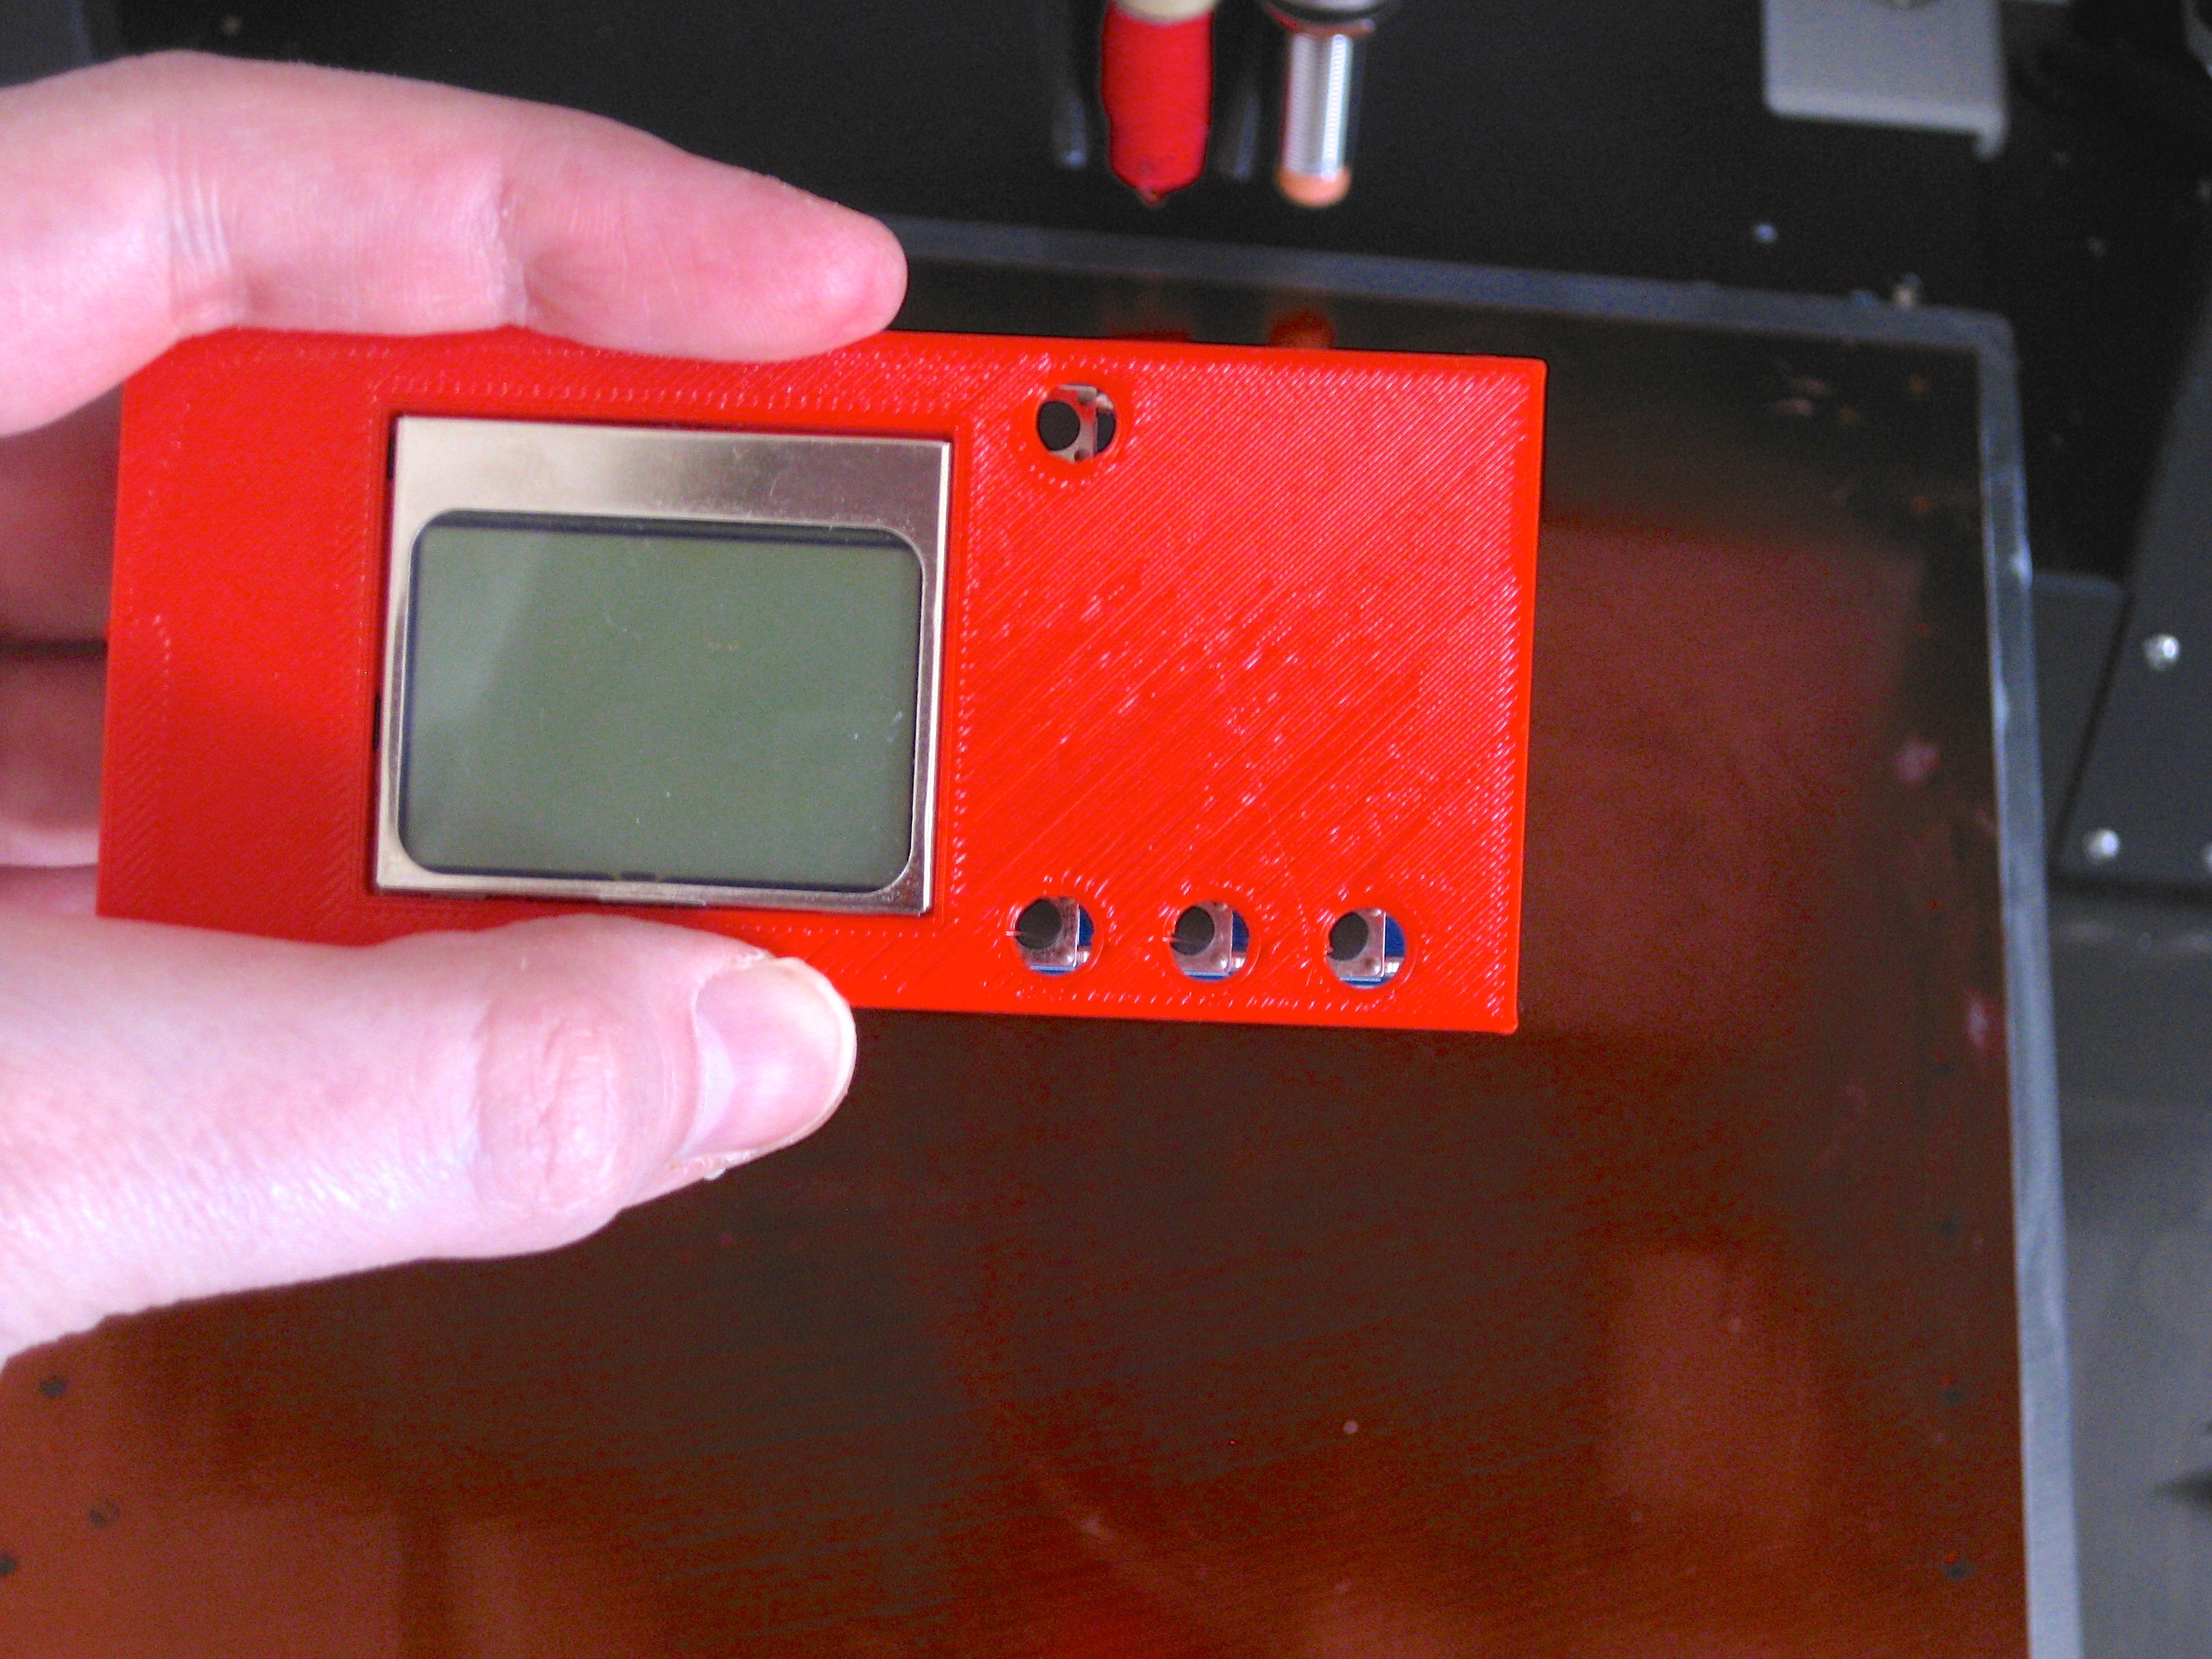
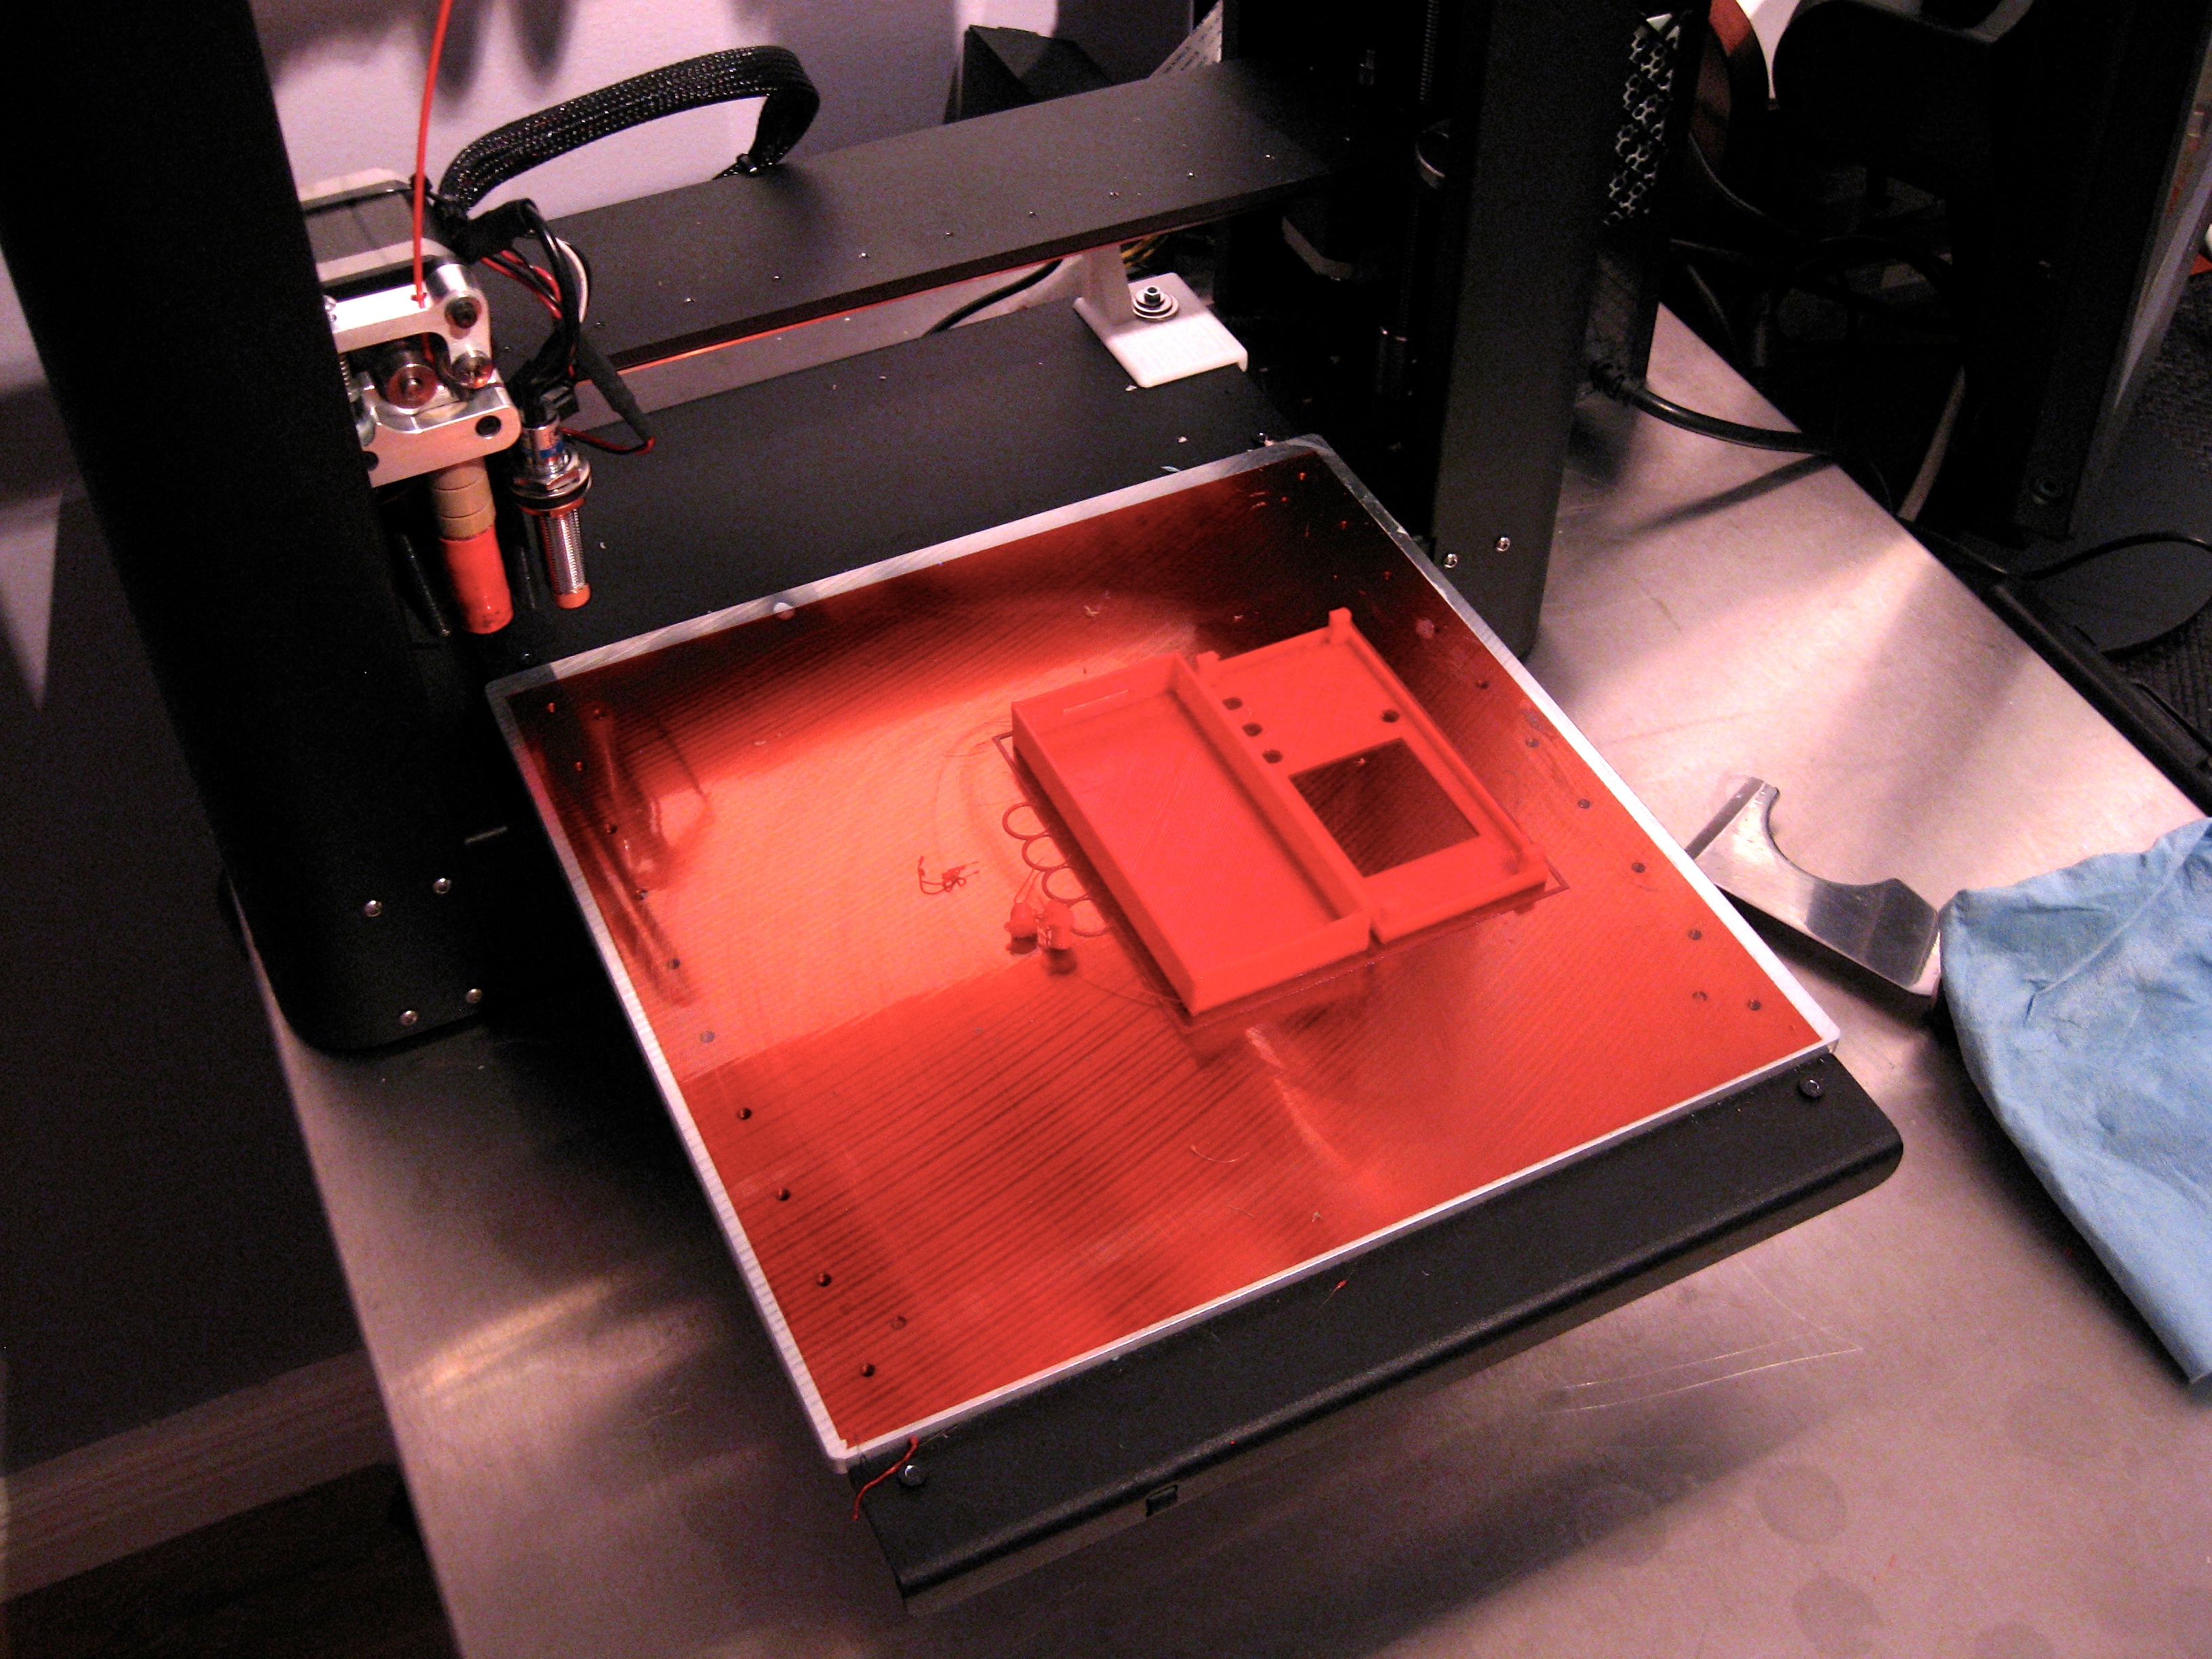
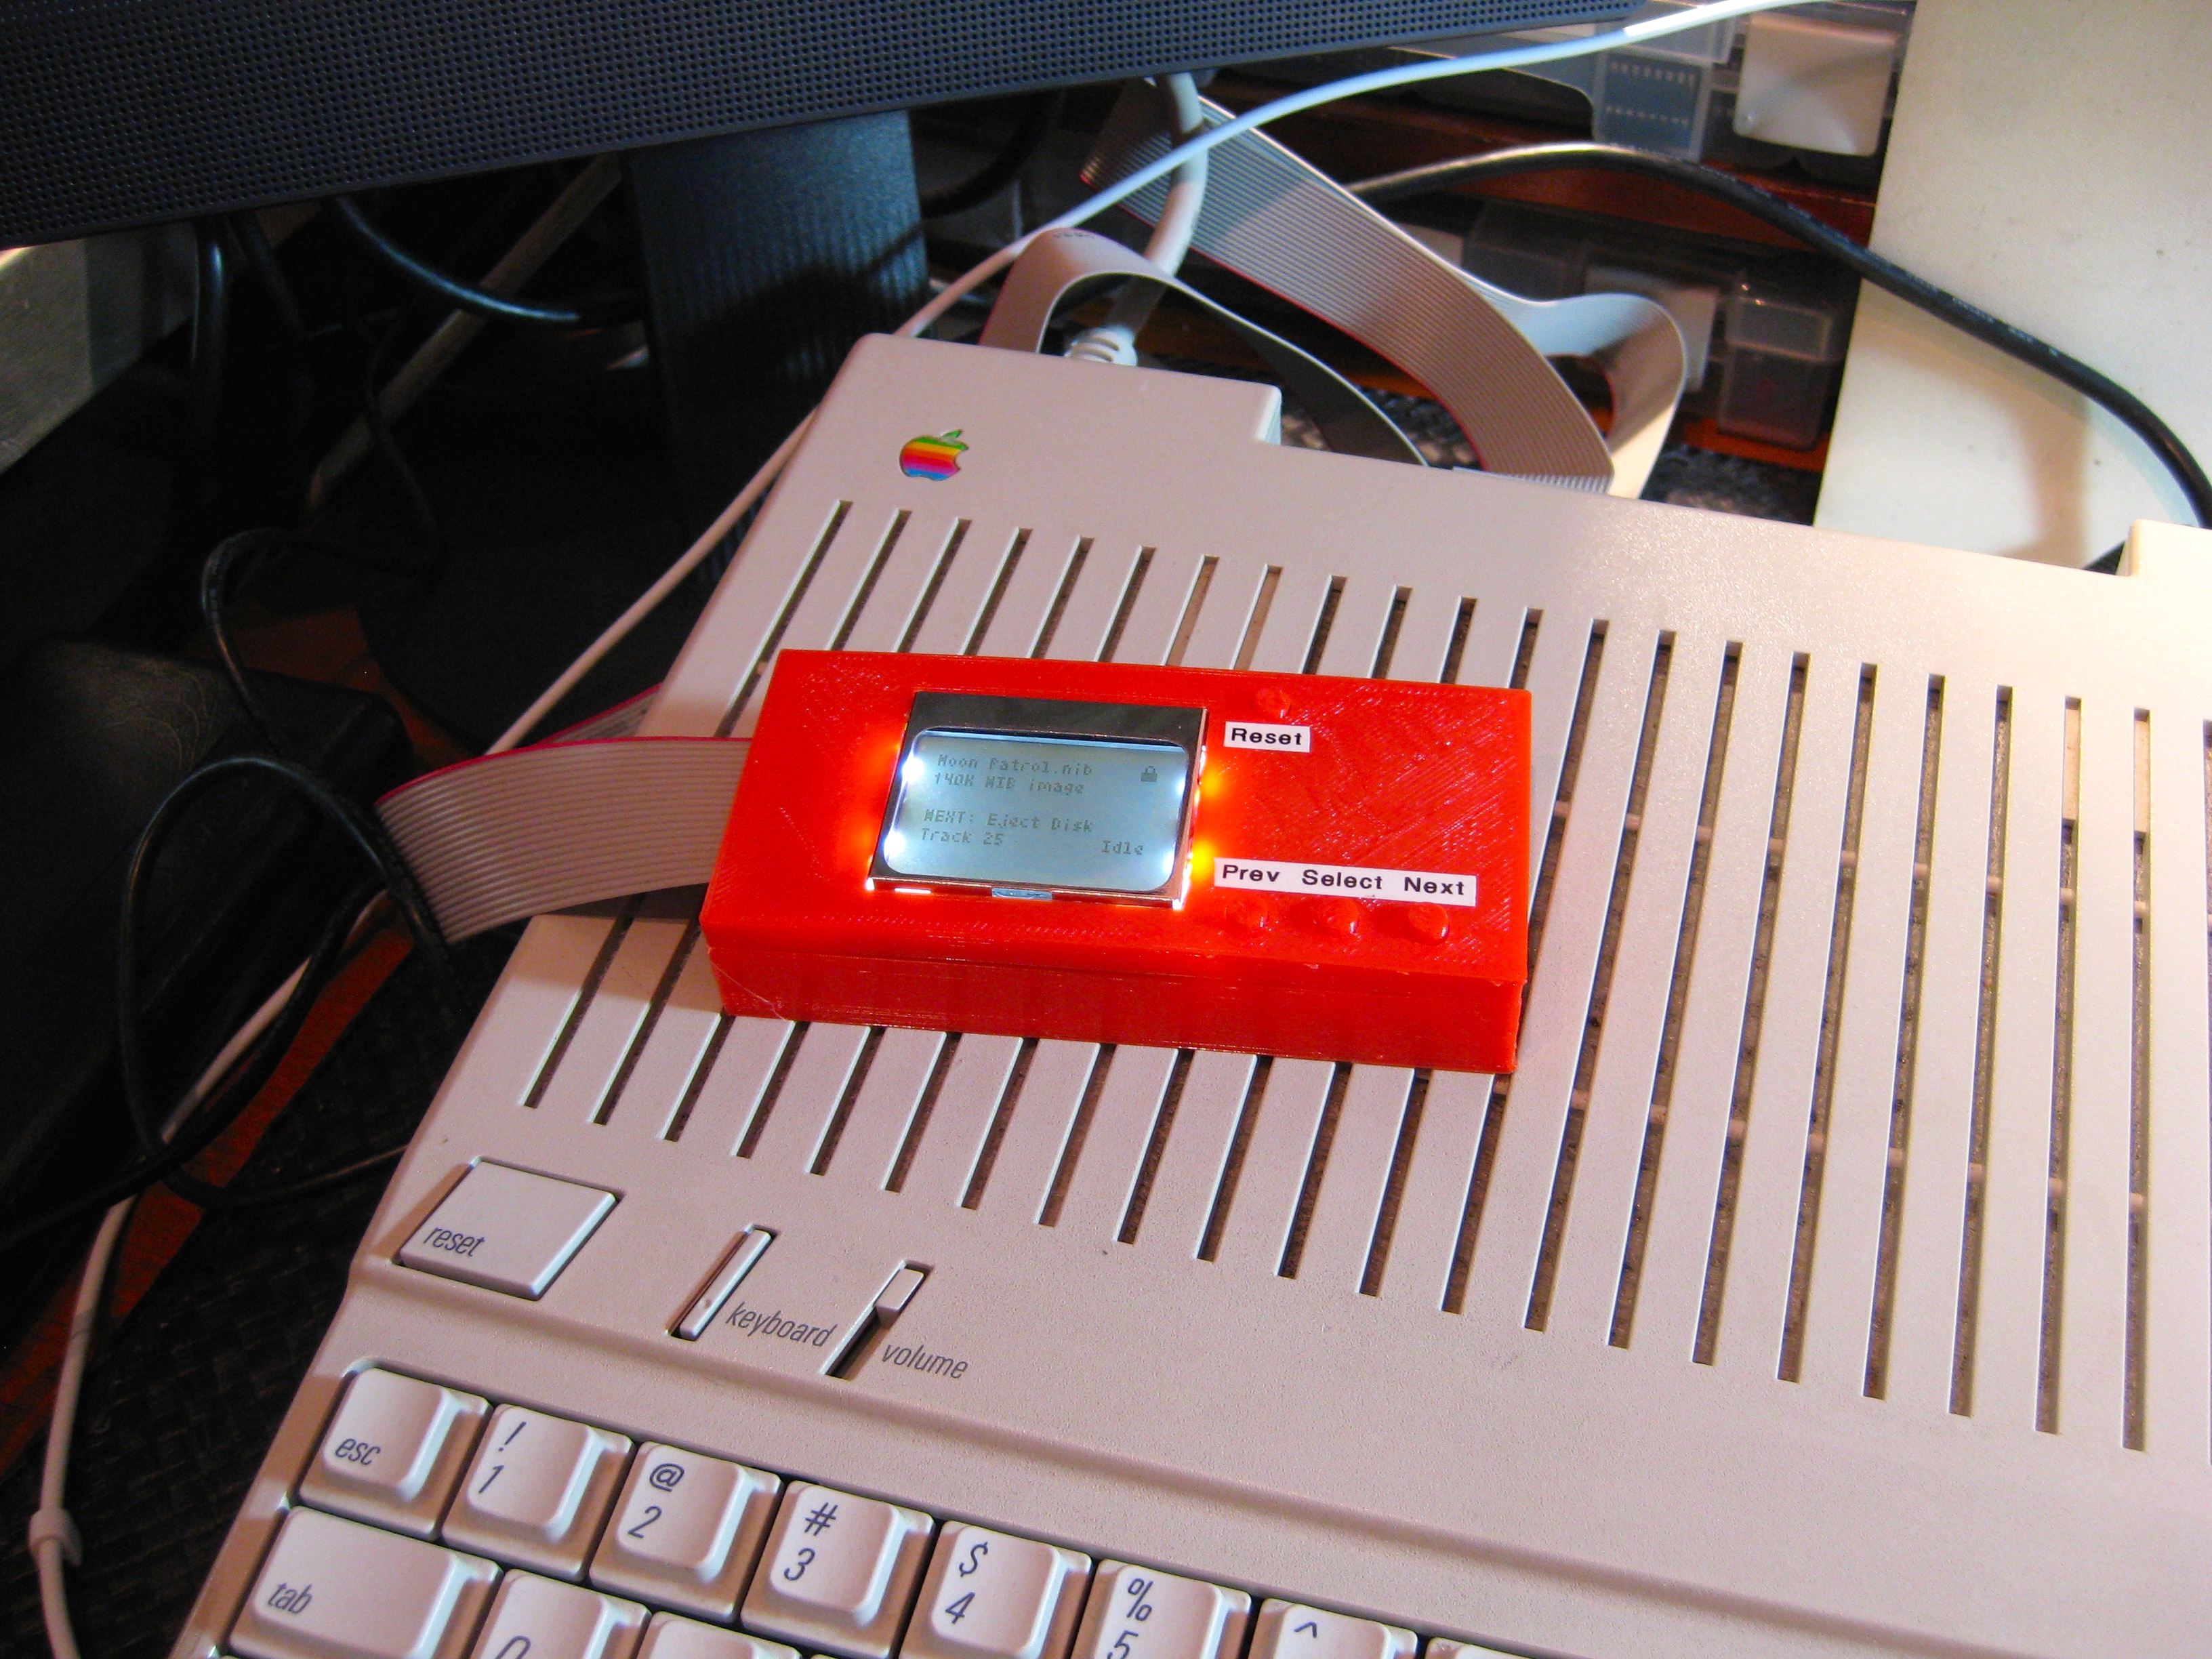
The files for my enclosure are here on Thingiverse if you’d like to 3D print your own.
That’s all for now. Go forth and emulate thy disks, both floppy and hard.
Alright, you asked for it-how *do* you know not to put microSD cards in your eye or swallow them?
I owned three of them. I swallowed one, and put another one in my eye. Now I own one, and I have a lot of weird pains.
Hey Quinn, nice blog, I too could not get GEOS to boot for my IIGS, so I’m not sure if FloppyEMU is recognizing the image type perhaps. Also I beleive the “included” SD card is not included with the for purchase version, I think it is an addon. (mine did not come with a SD card included)
Cheers
Yah, I was surprised that GEOS didn’t boot, since those disks are actually ProDOS-formatted volumes. They just have a different block layout. You can see the files with a ProDOS cat even, but you can’t interact with them. I’m surprised that a device emulating the floppies at a nibble and/or track/sector level wouldn’t work.
In my case, it gets halfway there- ProDOS boots, then shows “BOOTING GEOS” as normal, but it hangs shortly there after- before the desktop comes up.
Nice and timely — I’ve actually been playing around with something similar on my end. Nothing as involved as this project, but I was able to get my //e to boot up from an Arduino Uno. The main limitation there is that the ATmega328P doesn’t have enough RAM to hold a complete track in memory. But I realized that I didn’t need to use a 16 sector track because Apple did. So I just made a single sector/single track image that the Uno continuously streams to the Disk ][ controller card.
I’m toying with the idea of using a Raspberry Pi (perhaps a Pi Zero) for the next round of experiments. You would only need a few GPIO pins to simulate a drive fully (4 phases, read, write, write enable and drive select), which the Pi has plenty of. And the Pi has a built in MicroSD port too.
The more I dig into Woz’s Disk ][ design, the more I appreciate how brilliant it is.
I recently got one myself with the acrylic case he sells. Which has light piping and buttons.
http://wargamedork.blogspot.com/2016/01/retrocomputing-why-bother-machalla-part_29.html
While I like it the LCD screen doesn’t always work right. I dunno if it’s the screen being cheap, a bad solder joint, or what. But since it spends 95% of its time being a hard disk image going through a floppy drive port it isn’t often much of a problem since mine is defaulted to Mac HD mode.