New techniques, new tools, new materials, oh my!
This project builds on all the previous lathe articles in this series in order to make something genuinely special. This will be the final article in this “instructional” series, although it certainly won’t be the last you see of machining around here.
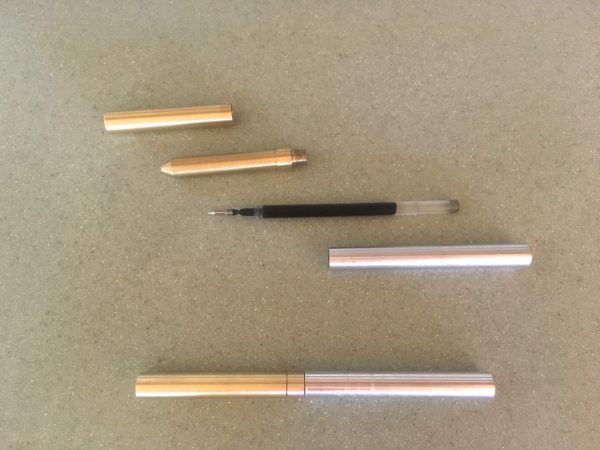
The ink cartridge in this pen is a refill for the TUL brand of pen, which happens to be my favorite. I’ve designed this project around those refills. If you have a favorite pen, design your own project around its internals!
We’re going to need a couple of new tools for this one, beyond what we’ve used in all the previous lather articles:
- Ball bearing live center. This is a tail-stock fixture that supports the work in a way that doesn’t stress the metal with heat or friction. This will be important for this particular project.
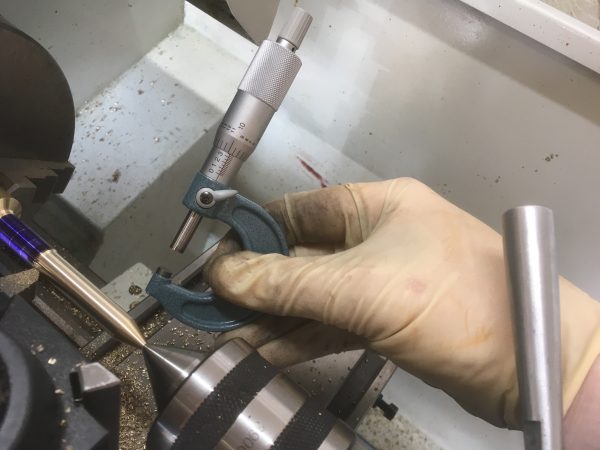
- 0-1″ micrometer. We’ll be doing some truly precision work this time, and our old dial calipers aren’t going to cut it any more. Yes, these are expensive, but spend the extra for a quality brand. It really matters here!
- Files. Any quality set of machinists’ files is fine. We’ll only be using one in this project- a 10″ smooth mill file. You must get handles for these as well. Never use a file without a handle near machine tools.
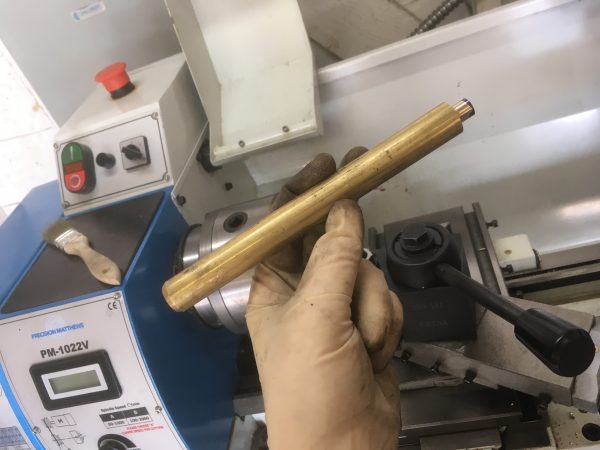
For materials, we’ll be using 10″ of ½” free-machining 360 brass, and 5″ of ½” 6061 aluminum.
Until now, we haven’t had drawings for our machining projects. However, this one is sufficiently intricate that it will be helpful to have one. This was made in Sketchup, so it’s not a proper engineering CAD drawing, but it is precise and it is to scale.
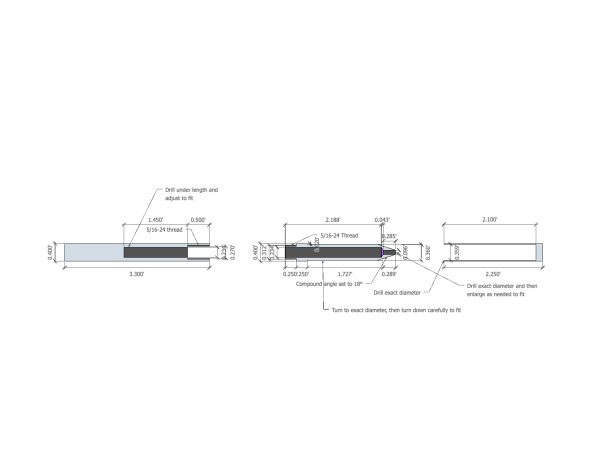
I realize that image isn’t very readable, so here’s the actual drawing, in SketchUp format, or as a PDF.
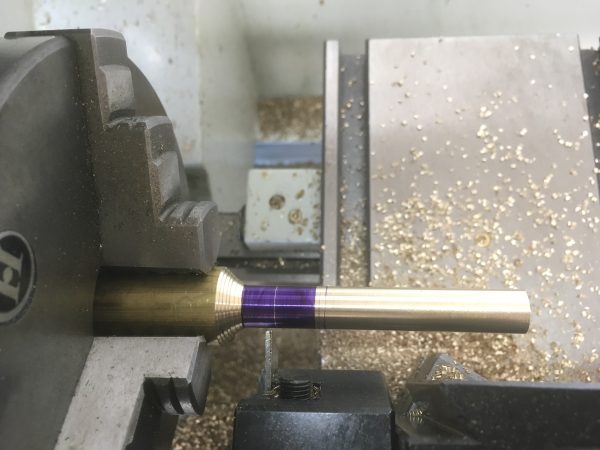
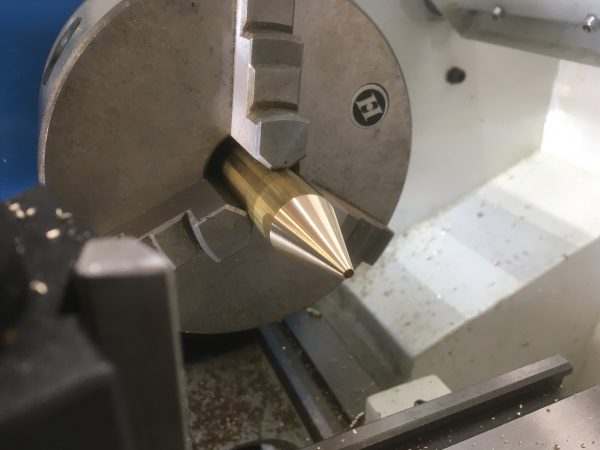
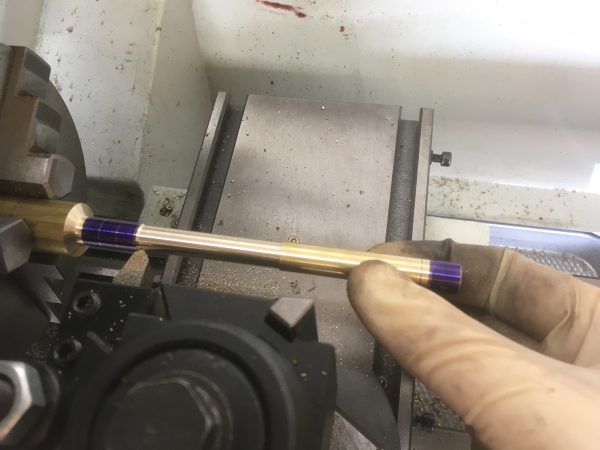
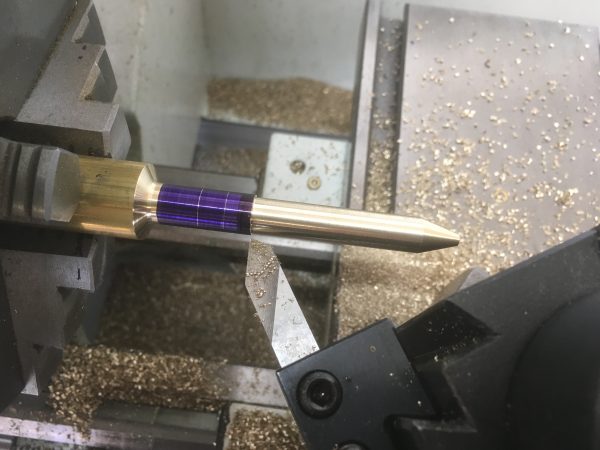
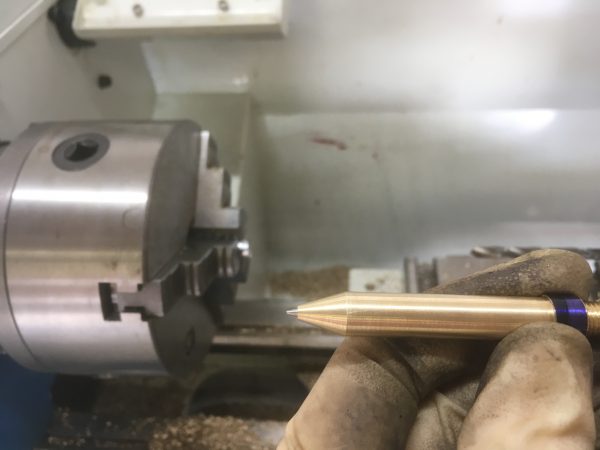
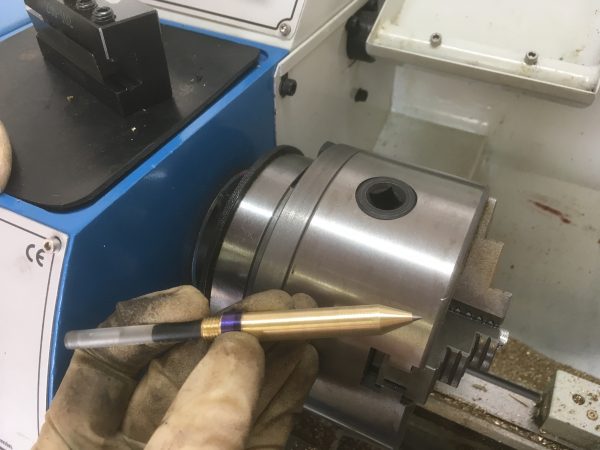
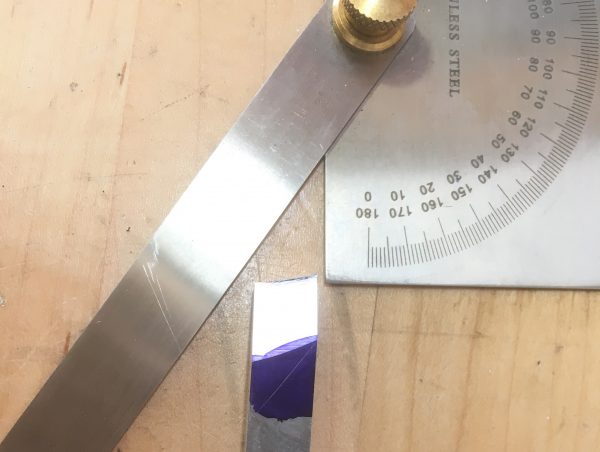
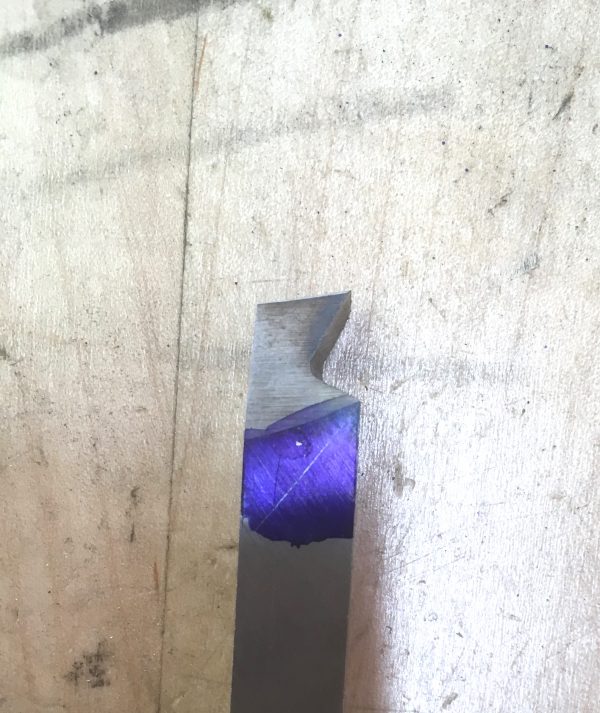
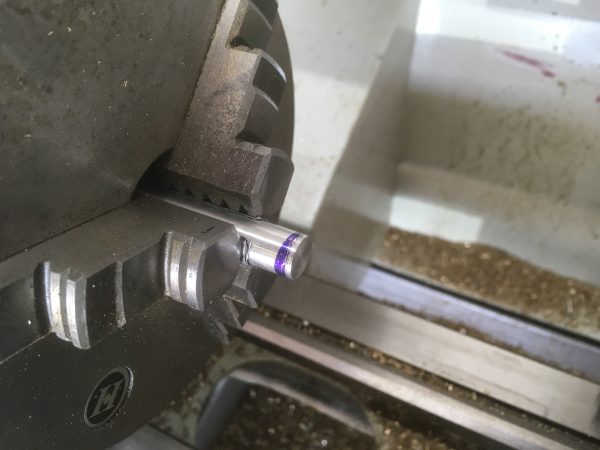
Looking at the front of the pen, you’ll see there are two diameters of holes that meet at a trapezoidal section shown in purple. That trapezoidal section is the precise geometry of the end of a drill (118°), and is calculated so that we can make the transition from the wide body of the ink refill to the narrow point, within the tapered area of the nose. We’ll see how this is done in practice a bit later.
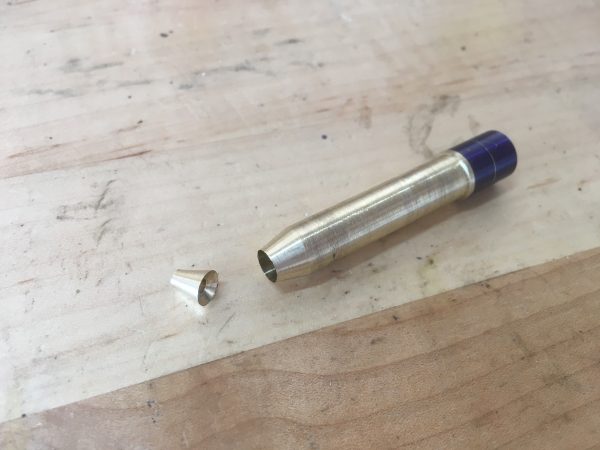
For now, let’s start with the easy part- the cap!
That’s it for the cap. It’s a very straightforward part using the skills you’ve learned so far. Now comes the front of the pen, which is by far the most complex part. The order of operations shown here has been arrived at with some pain, as we’ll see later on. I think this order works well, and gives good results.
That little hole we drilled in the end is to hold the tip of the pen. The 300 thou depth isn’t critical, but it must be over 285 thou.
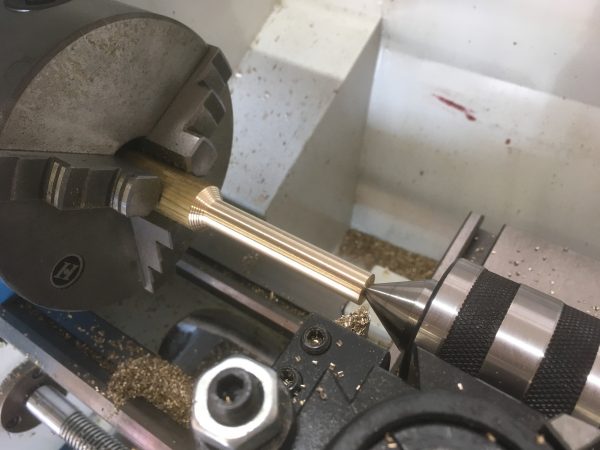
The next step is to taper the nose. It might seem strange to do that so soon, but this is the last chance we’ll have to do it.
Lock the carriage, and using the compound as the lateral feed (and the cross-slide as usual), turn down your 18° taper. It will look a bit comical right now, because our stock is much larger diameter than the pen will be. That’s okay!
Next we’re going to turn down the body to the largest exposed area of the pen, which is a quarter-inch “band” area in the middle (between the cap and aluminum back). This diameter is 400 thou, same as the cap.
Now we need to turn down the area where the cap seats, and this is a very critical dimension. We’re going for a sliding friction fit with a suction action here, which means we need to hit this dimension to within a couple ten-thousandths. That’s probably beyond the precision of your cross-slide (unless you spent a lot more on your machine than me). Recall that the cap’s interior diameter is 359 thou, so we’re aiming for 358.5 thou here. To do that, we’ll turn it down to 360 thou and do the rest by hand.
In order to measure these next few dimensions properly, we need a micrometer. Our loyal friend the caliper just isn’t going to cut it anymore. The caliper is still very useful for getting quick reads on how much material you need to remove in a big operation. When precision really counts, however, get out the micrometer. There’s a proper technique to using one of these, and they aren’t particularly intuitive. I recommend Tubalcain’s excellent video on the topic.
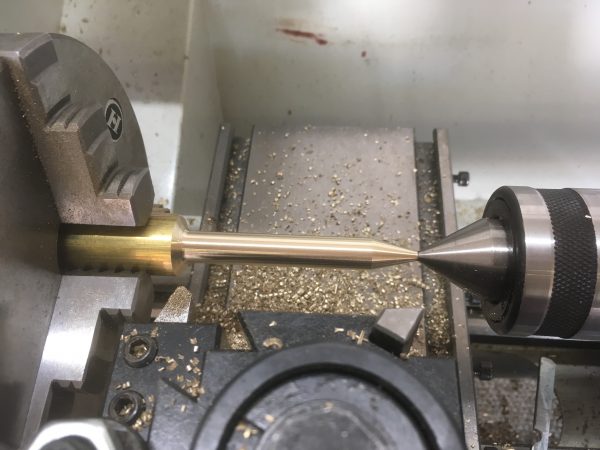
Once you’ve nailed that 360 thou dimension along the length of the cap area, it’s time to finish with a file. Measure your current dimension at three points along the length. If you haven’t precision-leveled your lathe, you may find that it turns a quarter or half-thousandth taper along the 2″ dimension we’re working in here. Normally you likely wouldn’t notice, but that will matter for this dimension. Luckily, we can easily compensate by filing some areas more than others. Never underestimate the power of doing things by hand.
To get down to the 358.5 thou dimension, we’ll use a technique called “lathe filing”. This involves running the lathe at normal turning speed, and applying a file to the work, while sliding your hand forward. It’s hard to describe, but Tom’s Techniques has a great video on the subject.
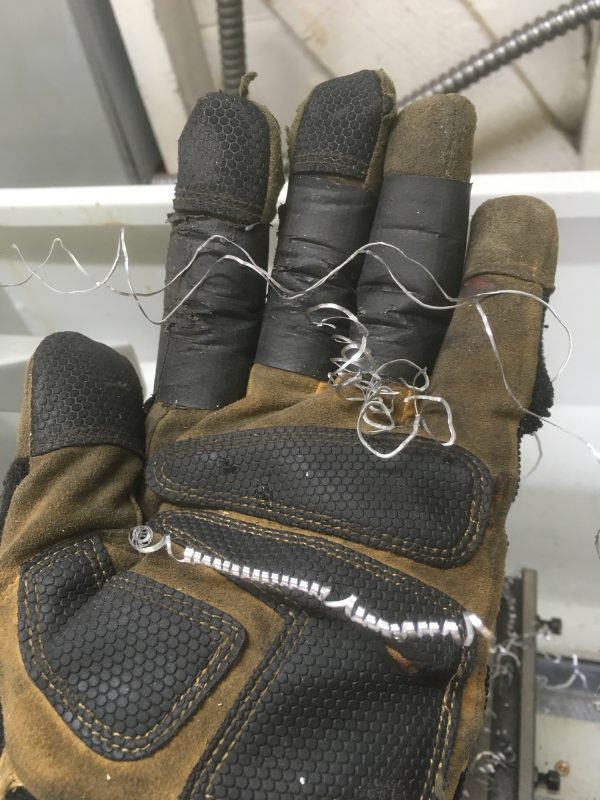
Important safety note- using a file without a handle on a lathe is like riding a bike downhill with a sword pointed at your chest. If you hope to someday do your best Wolverine impression by jamming tool steel up into your meaty arm, by all means remove your file handles and let the lathe do what lathes do.
Before and after each pass with the file, do a test fit with the cap (that’s why we made it first).
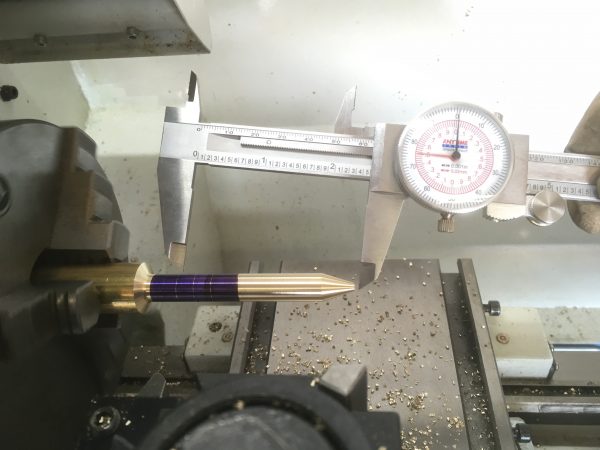
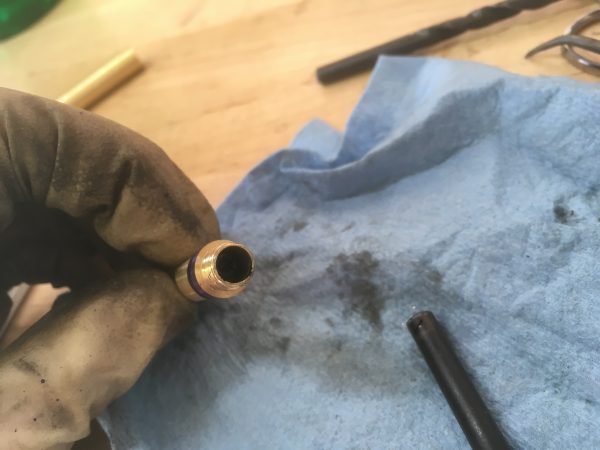
Keep test-fitting and filing until you get a snug sliding fit. It needs to be easy to remove, but sticky enough that it won’t fall off. When you get it just right, you should get a slight vacuum when removing it, with an audible pop (as shown below).
If you overshoot and the cap gets too loose, there is one last resort. The cap interior is 359 thou, as you may recall. Well, there is a 358 thou drill bit called a “T”. Any good index set will have the letter drills, which of course includes T. You can remake the cap from scratch, and drill it out with the T size. That will get you another thousandth back, and you can refit the cap using the above method. This is the only “do-over” you’ll get, though, so better to take your time and do this carefully.
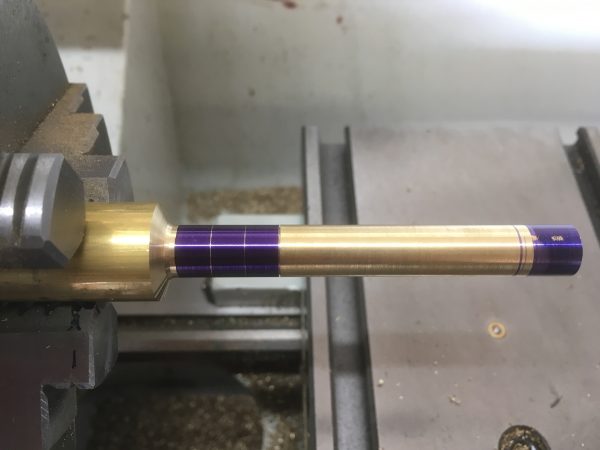
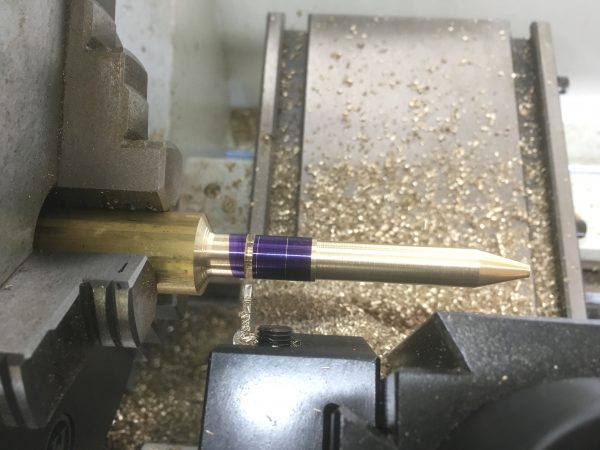
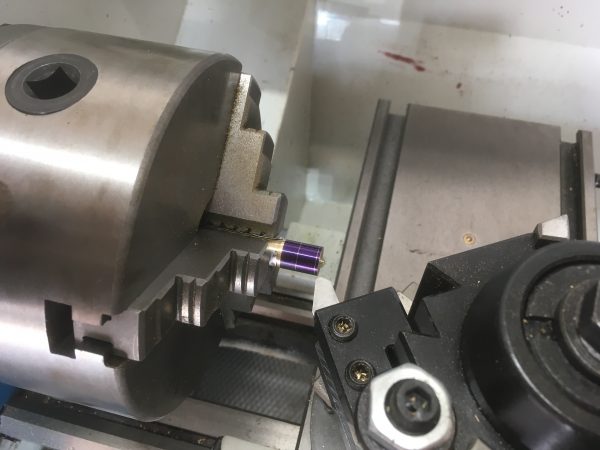
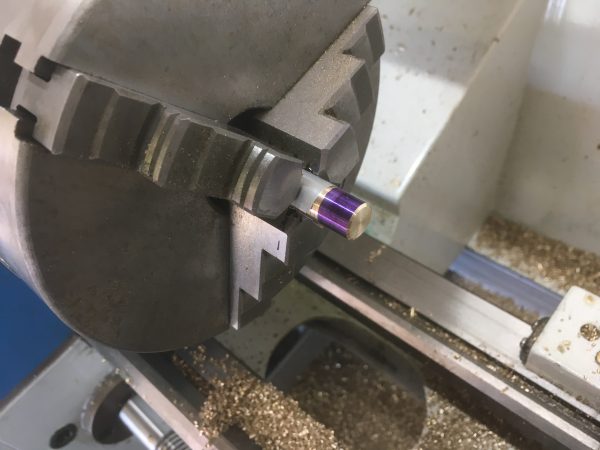
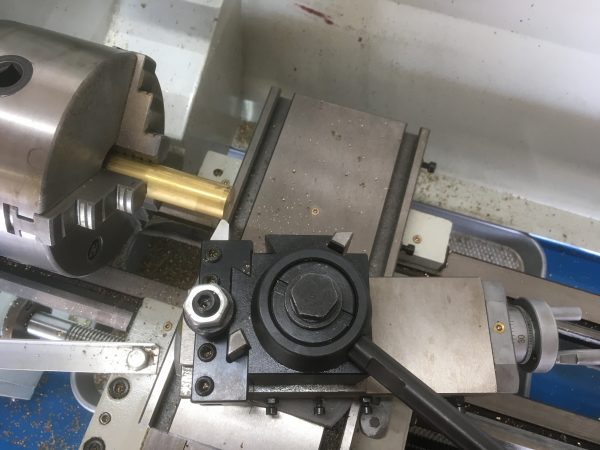
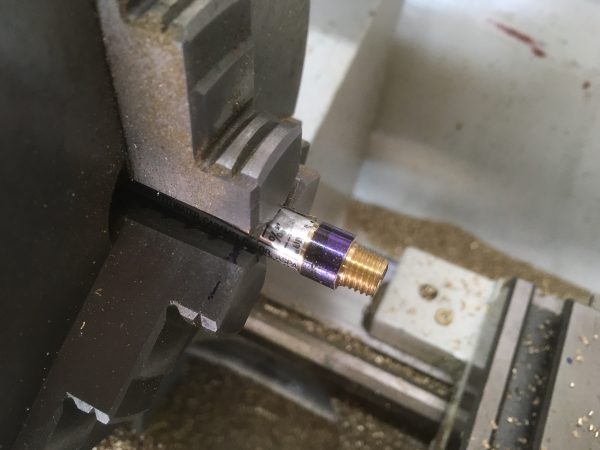
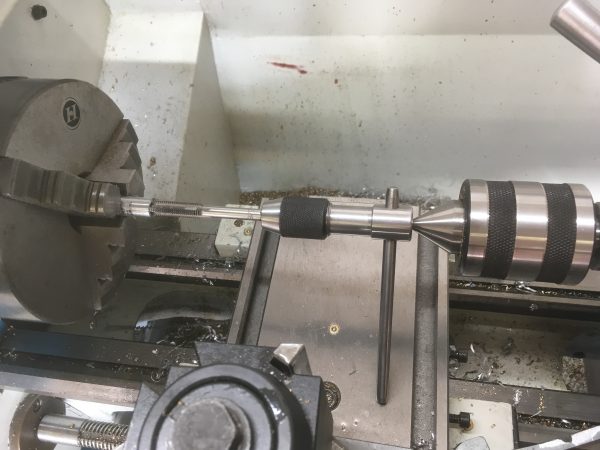
We’re now going to make the threaded area that holds the halves of the pen together. The threads are 5/16-24, which means our nominal thread diameter is 312 thou. Since this is brass, and thus easy to die threads in, we’ll go to exactly 312. A thou or two smaller is okay too.
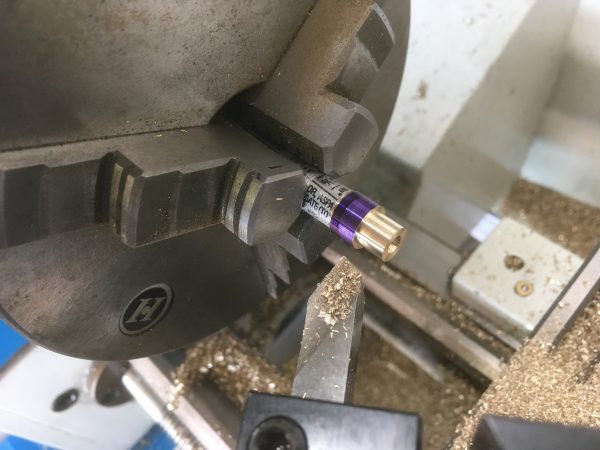
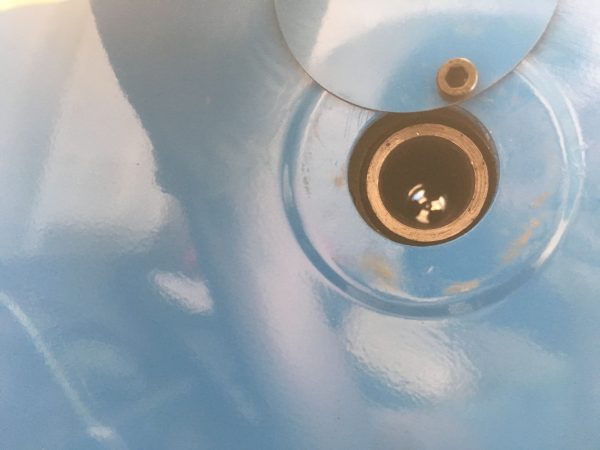
Using a sharp nose tool or a cut-off blade, create an under-cut area right at the shoulder you just made. It doesn’t need to be deep- just a few thou is enough. This will ensure the pen halves seat tightly together.
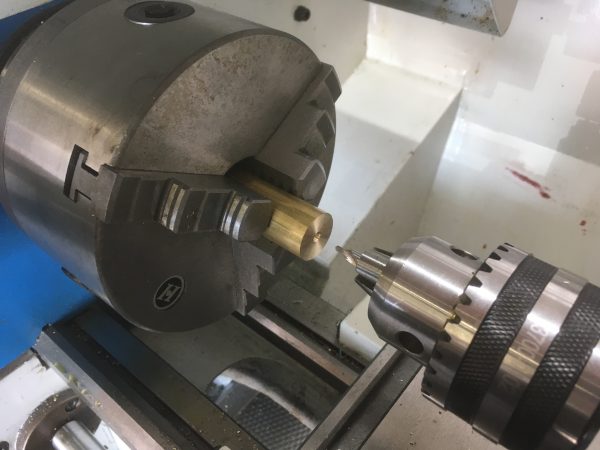
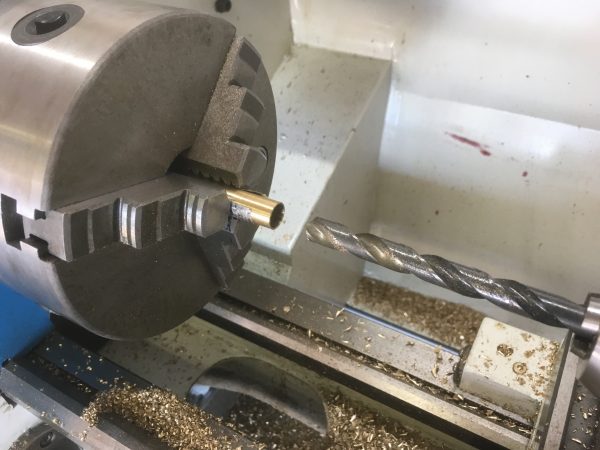
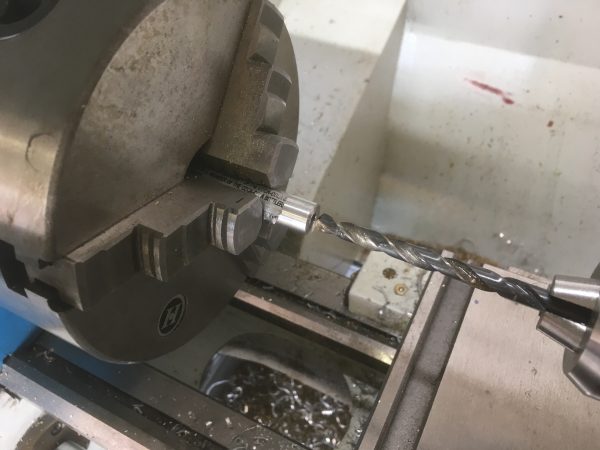
We’re now ready to drill out the main bore on the pen to 234 thou in diameter. This holds the large-diameter portion of the pen refill. The depth of this hole is really critical, so we’re going to do it in stages. Start by drilling to a depth of 2.1″, as shown on the drawing. We need a very precise hole depth, but regular twist drills aren’t actually especially good at this (and frankly a lathe not the best tool for this operation). Instead, we’re going to “sneak up” on the dimension by doing a little at a time until it’s correct.
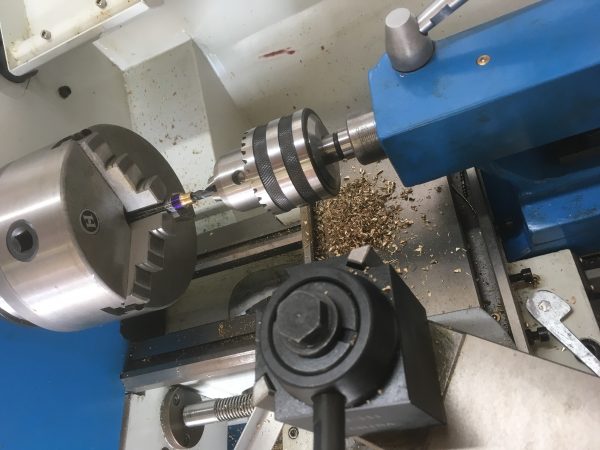
The goal here is to get the large hole to just meet the small hole we drilled at the very beginning. This forms a shoulder upon which the pen refill rests (the purple area in the drawing). The depth of this main bore sets the amount of the pen tip that is exposed out the end of the body. The initial 2.1″ depth should be short of the little hole that we drilled.
If the holes haven’t met, drill 20 thou deeper each time until they do. Then start test-fitting the refill.
Between each pass, you need to remove the piece from the chuck to test-fit the refill. That’s okay, just reset your depth measurements by sliding the drill all the way into the piece until it bottoms out (with the lathe off), zeroing the tailstock hand wheel scale, and locking the tailstock. Then back the drill out a bit, start the machine, and you can drill another 20 thou using the tail stock hand wheel scale. Shut the machine off, unlock the tail stock, slide it out, remove the piece, test fit, and repeat.
The hardest piece, the front, is now out of the way. On to the back! Here there are some new challenges, however. We’re using aluminum, which we haven’t done before in this series. Machining aluminum is like trying to cut a piece of chewing gum with a pointy stick. You can do it, but it’s a frustrating endeavor. The problem is that aluminum is gummy. It sticks to the cutter, it doesn’t like to shear, and the chips won’t break. There are some techniques to mitigate all this, but it’s never a fun material to machine, in my experience.
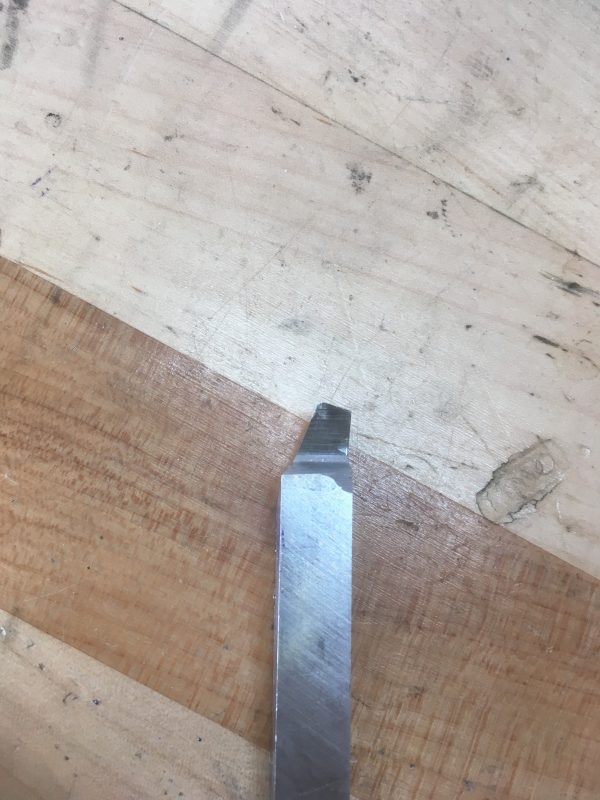
First and foremost, we need a new type of tool bit. Similar to brass, we grind a normal bit except for a different back rake. In fact, aluminum calls for an alarming 35° back rake! That extreme angle is needed to get the material to shear away from the cutter more or less properly.
Next, support with the tailstock and turn the body down to 400 thou.
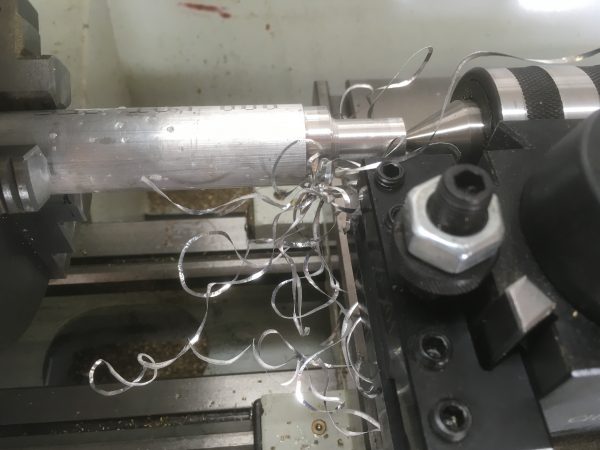
If you get big bird nests like that, you need to tweak some parameters. First and foremost, aluminum loves speed. Crank your lathe up as high as it will go (say, 1000rpm), and run the feed hard. Make sure your tool is sharp. A diamond hone is not a bad idea here, to get it as sharp as possible. At best, you’ll get tight curly strings that stay out of your way. That’s the goal with aluminum- to make it the least annoying it can be.
One other gotcha with aluminum is that it builds up on the cutting tool edge, dulling it. If you’ve been turning for a while, and things are no longer going well, you may have buildup. The best way to prevent buildup is with a light unsulfurized cutting oil, used very liberally. WD-40 works well for this. Don’t be shy with it- you want an even coating on everything you cut. Even with this precaution, you may get some buildup.
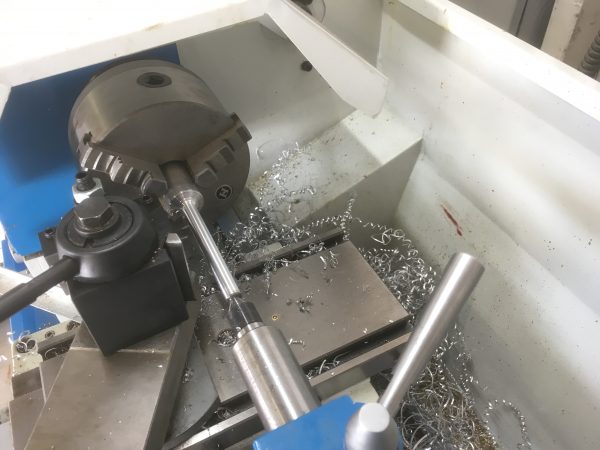
With the outer diameter made, part off the piece, and flip it around in the chuck (protecting it from the jaws with the aluminum can, as usual).
We can now drill out the main body of the back of the pen, using the same 234 thou drill that we did before. Similar to before, this depth is very important, so drill to a nominal 1.9″, then test fit and redrill from there. This depth is critical because it holds the back of the refill so that it doesn’t slide upwards when you push down on the ballpoint. Too deep, and the refill will slide around inside the body. Too shallow, the two halves of the body won’t screw together snugly. Again, go 20 thou at a time, and test-fit until it’s just right.
That’s it! The pen is done. This is a complex project, so don’t feel bad if you make mistakes and have to redo things. In fact, to boost your self-esteem, here are just a few of the mistakes I made while making these pens.

There were lots of missteps and “wasted” work days in this project, but I learned something every time, and I’m much better at running a lathe than when I started! The mistakes are an important part of the process, so it’s critical not to get discouraged, and keep coming back to try again. Anything really worth doing is hard, so failure along the way is guaranteed! The failures just make the end result all the more satisfying.
As I said at the top, this will be my last of these specifically-trying-to-be-instructional lathe articles, unless there’s outcry for more. We’ll be seeing lots more machining used in other projects here, but I feel like this series now achieves the goal of being the starter information that I wish had existed when I was getting into this. If you made it this far, you have enough knowledge and experience to approach the other introductory machining books and videos out there. So go! Make precise things!
“The mistakes are an important part of the process, so it’s critical not to get discouraged, and keep coming back to try again.”
Helloooo 3d printing. 🙂 🙁
I’ve got a Printrbot Plus Metal, just like you, except mine came pre-assembled. (They stopped offering the kits.) I just swapped my Ubis ceramic for an Ubis 13, and oh ho ho, the mistakes I’ve been making. (Though turns out at least some of it may be because of a design flaw in the Ubis 13 that’s fixed by the Ubis 13S.)
I feel your pain. My 3D Printer started doing everything wrong all of a sudden, to where I gave up on it for like six months. It was crashing the head into the bed, breaking filaments, not extruding properly, everything was warping, it was a mess. I just spent a whole weekend recalibrating and setting everything up from scratch, and it’s behaving itself again. 3D printing is not for the faint of heart. It’s a very long way from “appliance” status.
I am not an expert but I have been told, and found this trick useful: While turning aluminium, spray generous amount of alcohol to it. I prefer denatured one, for obvious reasons.. 🙂 When doing so revs do not have to be so high and finished surface is quite good. At least this trick works with carbide inserts.
These big (50mm x 4mm) plates was done with alcohol and about 750 rpm with carbide inserts. One with counter sunk hole is upside down but others are facing the right side up:
https://renerento.files.wordpress.com/2016/07/wp-image-702255453jpg.jpeg
Hey thanks! I’ll give that a try.
I can’t express how thrilled I was to see that you were using this lathe. I’ve been searching for an actual user for a while.
Quick, or many not so quick question. When you flip your work in the lathe I see that you aren’t using the 4 jaw chuck. Obviously it is accurate enough for you but, if you have time, could you talk about why?
Likewise! I actually did a full review of this lathe in AvE’s zine The Vise. That article will likely show up here at some point.
The main reason for cheating and flipping my work in the three jaw is because I can get away with it for the things I show being made here. Of course, when repeatability really matters, as you say, you can’t flip (or even remove) work in a three-jaw and expect concentricity. I’ve avoided the four-jaw in these articles so far, because that’s a whole other learning curve for people. I tried to create an easy and inexpensive zero-to-chips introduction to the lathe that anyone could follow. Four-jaws take a fair bit of practice and require a lot more tooling.
Question for you- it sounds like you have the same model machine as me? Does your tach work well? I checked mine against an external tach and found the built in one to be really inaccurate.
Sorry, I’ve been thinking about this one. It will be my first lathe. I recently bought the small harborfreight mill. It is okay for what I want but it is kind of a toy. For the lathe I have decided to go for the largest size I can fit into the small space I have.
Opinions on what a useful lathe is are all over the place. I’ve followed your blog for quite a while and highly value your real world view of things.
That is weird about the tach, that should be either really close of not working at all. They must be predicting the speed rather than measuring it.
I wonder if they are measuring it at the motor and not accounting correctly for the gearing to the spindle? Is the error always the same percentage of actual?
As for the speed, they do appear to be measuring it correctly. The spindle has white marks on it and there’s a sensor above it. However, it just isn’t reading correctly. I think it’s consistently low by about 20%. My guess is one of the optical registration marks is getting missed, or the sensor is unreliable.
Cool, in that case, you might be interested in this review I wrote of it:
https://ia801502.us.archive.org/15/items/TheViseNo7Final/The_Vise_No_7%20Final.PDF
Thanks for the review, a lot of useful information for the day I I make the decision.
They cut off the last of your rite of disposing of the oil can, I would have like to have finished that. 🙂
Honestly, it’s all there. That last sentence is barely readable.
Also, if you have any questions about this machine, don’t hesitate to ask. Unlike the Harbor Freight mill, this is definitely not a toy. It’s a precision machine capable of beautiful work. I also spoke on the phone to the Precision Mathews people, and found them to be very friendly and helpful indeed.
Enjoy your lathe blog posts. A couple of other resources I’ve found useful, in addition to the ones you’ve mentioned:
Workshop Practice Series – about 30 paperbacks on various aspects of machining and metalworking.
Model Engineers Workshop Manual, George Thomas
Workshop Techniques, George Thomas
Old MIT videos on equipment use on YouTube
US Army and US Navy technical manuals for respective ratings on machining, welding, etc. (free online)
Bunches of references on archive.org in the public domain – much of this tech hasn’t changed since 1920.
Good luck with your new toy. Have fun. Always play safe(ly).
Useful to watch the video of the Russian guy getting pulled through a lathe like an old-time clothes wringer occasionally, just to remind you these machines play for keeps.