Because it seemed like a good idea at the time.
The Apple II line of computers had an amazing run, from 1977 to 1993. In that time, hundreds of thousands of pieces of software were written for it, including many tens of thousands of games. Like any platform, however, the number of truly great games within that range is much smaller. If you ask any former (or current) Apple II user what the best five games on the platform are, there would be variation of course, but one game would be on everyone’s list: Choplifter.
Choplifter was written by Dan Gorlin in 1982, and published by Brøderbund. That date, 1982, is especially noteworthy. The game came out just a few years after the original Apple II did, and it remained one of the best games on the platform for sixteen years. On most platforms, the games get better over time as programmers learn the hardware and get better at squeezing more out of it. Certainly lots of that happened on the Apple II as well. Towards the end of the run, some truly astonishing games like Knights of Legend and Space Rogue came out. These are games that people would not have thought technically possible on the machine in 1977. However in terms of pure fun, Choplifter remained hard to beat for sixteen years, and it was developed so early in the life of the Apple II that good development tools didn’t even exist yet. It’s an amazing piece of work by Dan Gorlin, and it was an honour and a pleasure to pick it apart to see how it works.
What really impressed me is that you can see how much effort he put into tuning the gameplay. The chopper feels really good when you fly for good reason. There is a lot of code doing a lot of little fudging of the physics and it’s clear it was all to make things feel better. As a game developer, I know what smoothness fudging looks like, and the chopper control/physics code is full of it. Furthermore, there are a lot of dynamic tuning mechanisms built in, as you’ll see below. This speaks to Dan having spent a lot of time massaging numbers to make things fun. Dan was not only a great programmer, he was a great game designer. This is why Choplifter is the masterpiece that it is.
The full source is available at https://github.com/blondie7575/ChoplifterReverse . I won’t be going through it line by line here, because it’s been (I think) very thoroughly commented in the code itself. What I’ll do here is talk about the broad strokes of what was interesting, and my process for doing this. The source includes a makefile which will build and run into an identical binary of the original Choplifter. Also note that the source includes a custom ProDOS loader that I wrote to replicate the behaviour of the original in a more modern environment. I did not reverse engineer Dan’s custom floppy format or copy-protected loader. More on this in the Caveats section below.

Why Reverse Engineer It?
The Apple II is still alive and well today, with a large and active retro-enthusiast community around it. Lots of new games are being written for it, and lots of programmers are still interested in it. If you’re a programmer new to the platform who wants to write games for it, however, resources are fewer. There are not a lot of full games with source code online for you to learn from. Looking at the structure and techniques in an existing successful game is one of the best ways to learn to write your own games. I myself have written a couple of Apple II things, but really wanted to see how the pros did it back in the day, so this is for my learning as much as anyone else.
Side Note: I can’t continue without mentioning the big Lode Runner reverse engineering that was done fairly recently also. Amazingly I did not know about this until after I had done mine, but I love the way he did his (as a “literate programming document”). Lode Runner is probably the other game that will be on every single Apple II top five list, so in some ways it’s luck that I chose a different one than he did, not knowing about his project.
Why Choplifter?
Aside from it being a Very Important™ game on the platform, it’s an excellent candidate for reverse engineering for a number of other reasons:
- It’s a single-loading game. Once the game is booted, it never touches the disk again. This was typical of early Apple II games, when they were small enough to fit entirely in RAM. However the Apple II disk drive is very fast, so unlike the Commodore 64, single-load games went away quickly. C64 games did a lot of work to stay single-load since the C64 drive is so slow, but on the Apple II, running back to the disk to load your title screen, menu system, or new levels was no big deal. Reverse engineering a single-load game is vastly easier, though, because it means I can dump the contents of RAM and know I have the full working game. If can I generate source code that compiles to that exact RAM image, I will know it is correct. As you’ll see, that’s precisely what I did.
.
. - It’s a 48k game. Choplifter is so early that it was built to run on the early 48k Apple II and Apple II+ machines. This means it doesn’t use auxiliary memory or language card memory, and the graphics are the much simpler High Res mode (as opposed to the nightmarish Double Hi-Res used in later games). Being a 48k game also means it’s, well, smaller. The smaller the better when you’re faced with deducing the exact purpose of every single byte.
.
. - I’ve never done this before. I have zero experience reverse-engineering Apple II games, so I wanted to give myself the best possible chance for success. An early single-loading hi-res game fits the bill. Choplifter is also a small game in terms of gameplay. There’s only one level, only three enemies, and you can play it to completion in a few minutes (if you’re very good at it, which you won’t be at first). I should say that while I have no experience reverse-engineering Apple II games, I do have decades of experience writing software for the Apple II. Without that, I doubt I could have done this. You need to know the platform backwards and forwards to do this. Or at least that helps a lot.
.
. - It’s one of my favourite games. This matters because that means I know every inch of the gameplay. That turns out to be hugely helpful when reverse-engineering it, because you know what you’re looking for in the code. You know the game will have a routine to animate a waving man because if you’ve played the game a lot, you know that sometimes the little men wave at you and you know roughly how often they do it. That kind of domain-knowledge made all the difference in the world. It would be enormously difficult to reverse engineer a game that you didn’t know anything about gameplay-wise. I should also say that I was a professional game developer for almost thirty years. That was also a huge help because all games have the same basic structure and need the same things, in broad terms. More on this later.
The Tools
While it would be technically possible to do a reverse engineer like this in 1982, I’m really glad I did it in 2024. Here in the Crazy Science Fiction Future, we have unbelievably powerful tools. Because the Apple II is so small compared to modern machines, we can pick it apart with incredibly deluxe tools that virtually eliminate all repetitive tasks, allow you to test nearly any hypothesis with a couple of clicks, and you never have to reboot or repair a corrupted floppy disk. Here are the main tools I used for this job:
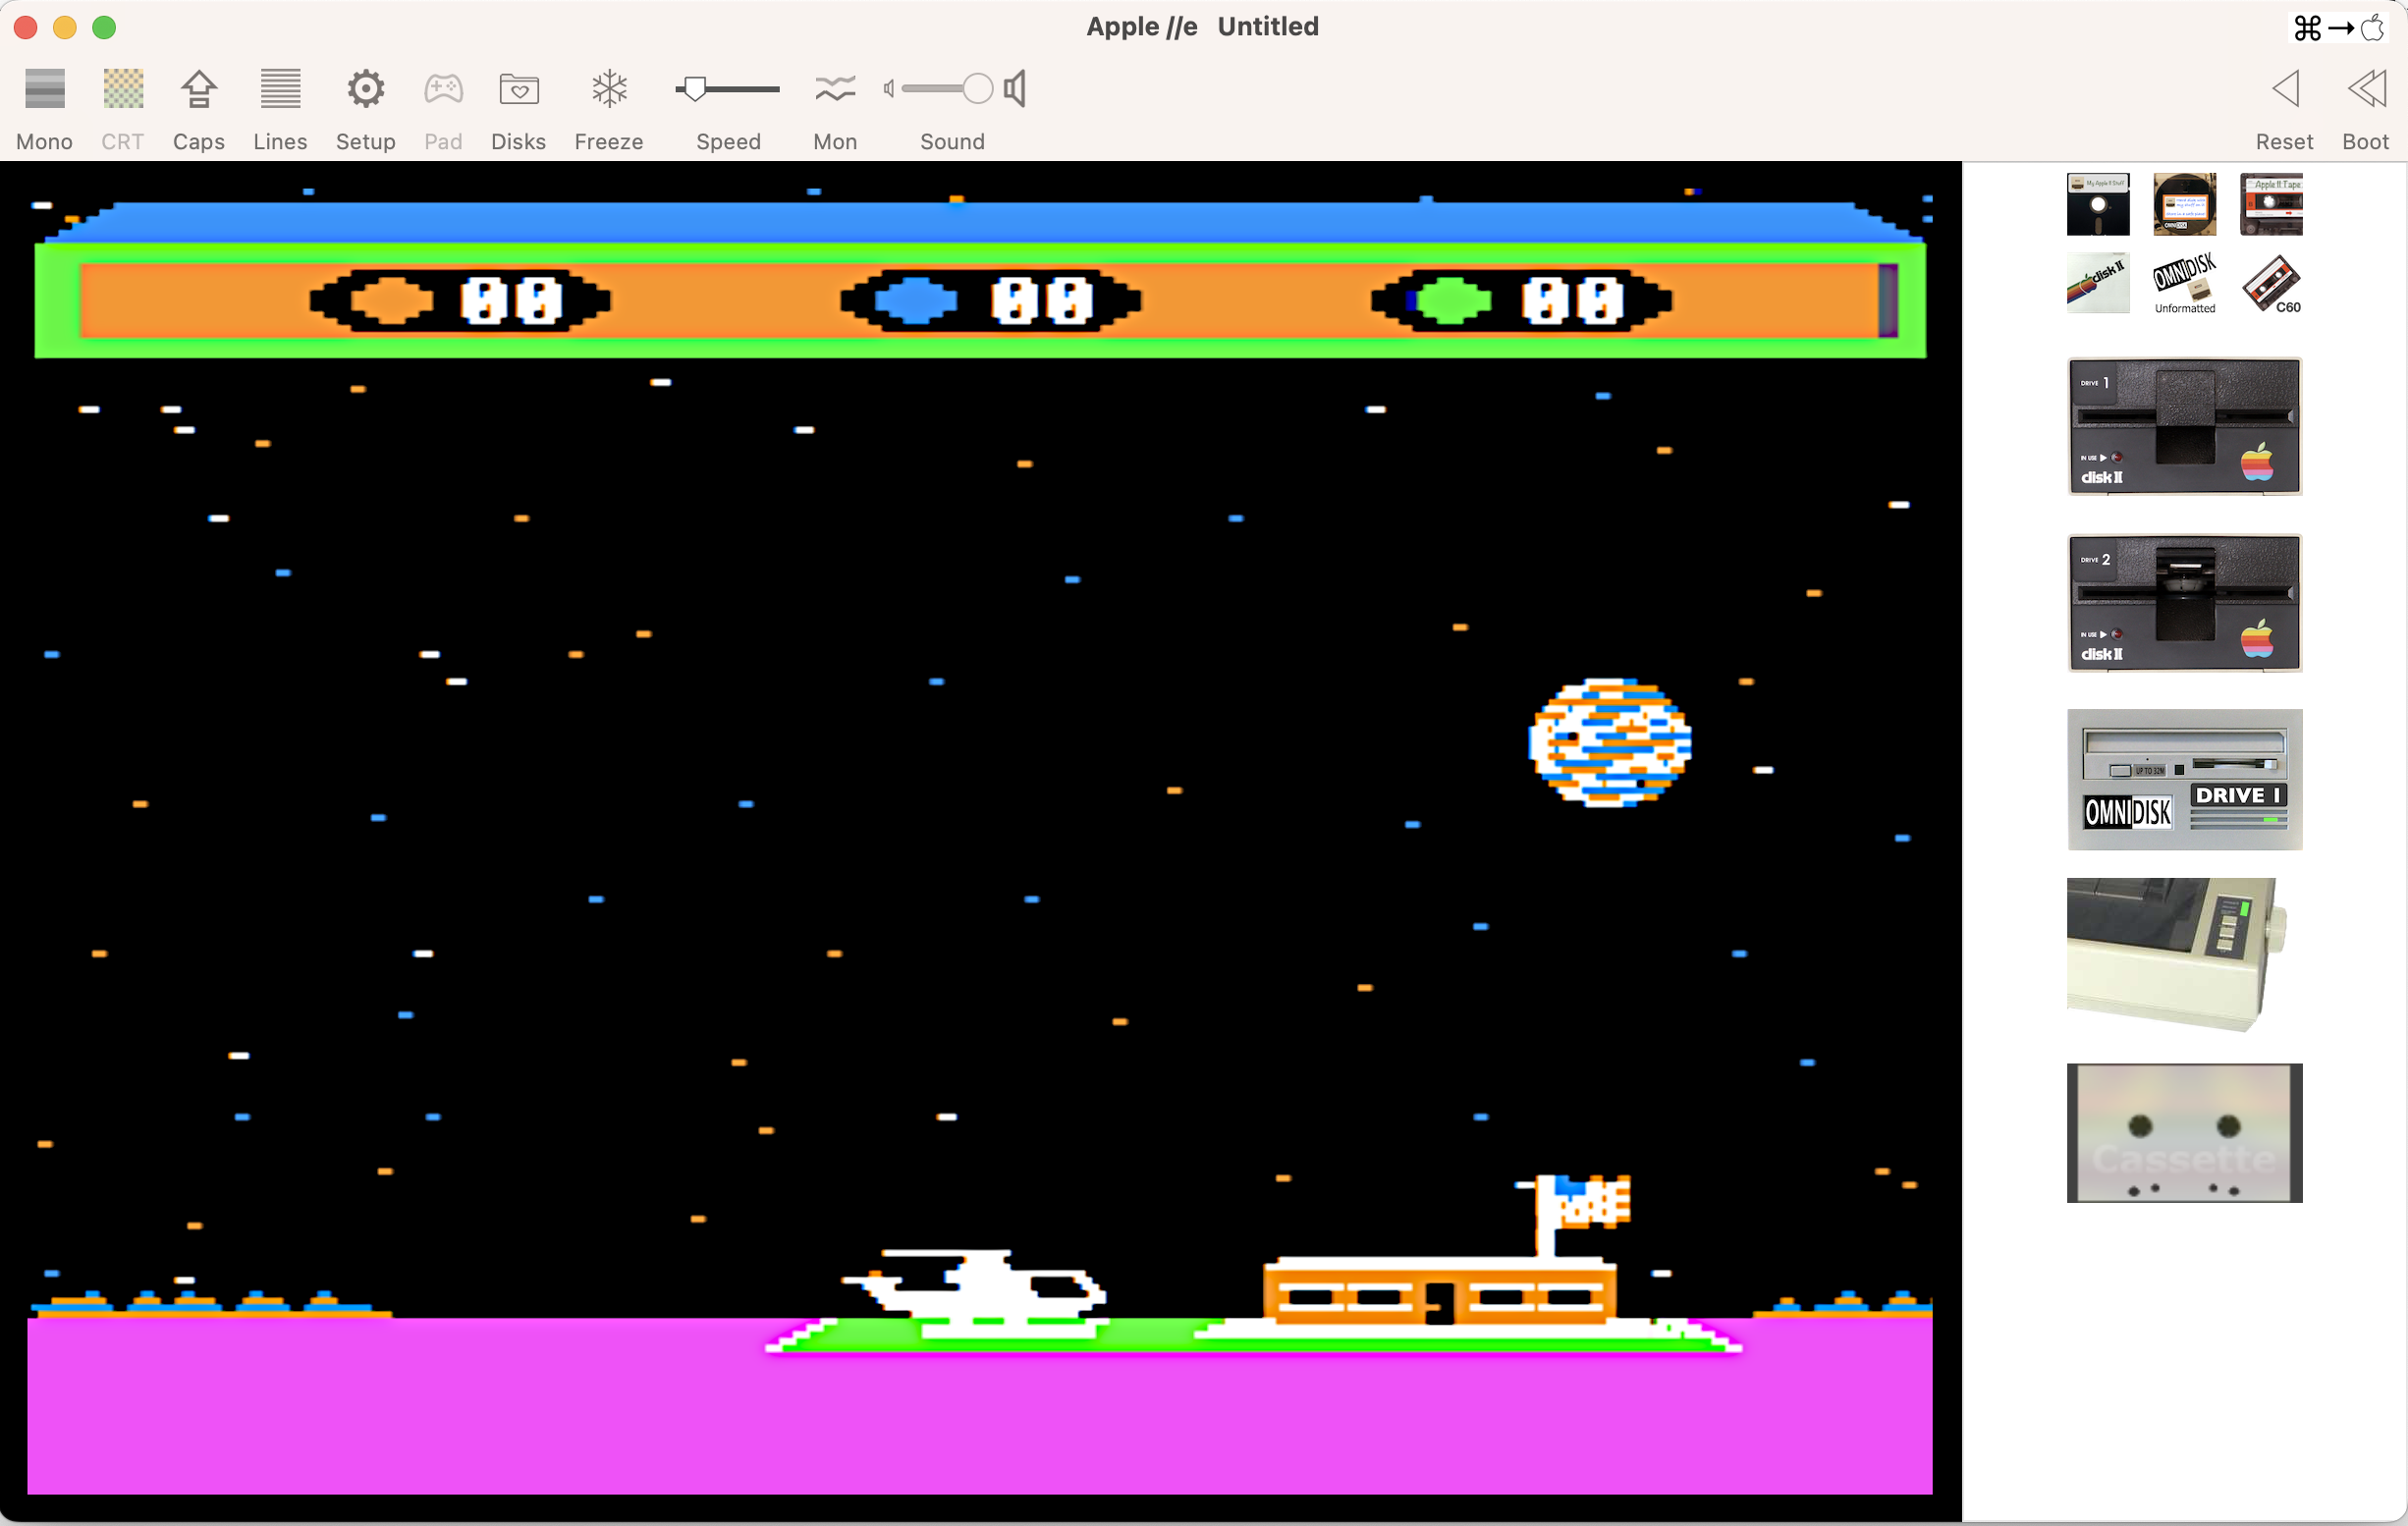
- Virtual II. This is (in my opinion) hands-down the best Apple II emulator. Not only is it seemingly cycle-perfect in every way as an emulator, it also has a whole range of powerful development tools built in. You can view memory, edit memory, dump memory to files, set breakpoints, set watchpoints on memory locations, single step through code, step into and out of subroutines, disassemble code… the list goes on. This is stuff that a developer in 1982 would have killed for. Literally, there would be bodies and all Apple II games would be written from federal prisons. That’s how much better modern tools are. I used just about every debugging/development feature Virtual II has at various times during this effort, and I can honestly say I could not have done this without it. Or at least, I would have given up in frustration without it.


. - HexFiend. One thing you need when dealing with old computers is a good hex editor. They aren’t common anymore because modern development rarely requires it. Lucky for me, Mac OS has a really great one. HexFiend not only lets you open and edit files in hex with all kinds of helpful formatting options, it also allows you to compare binary files (like diff-ing source code, but binary). This made all the difference at the end, as you’ll see.


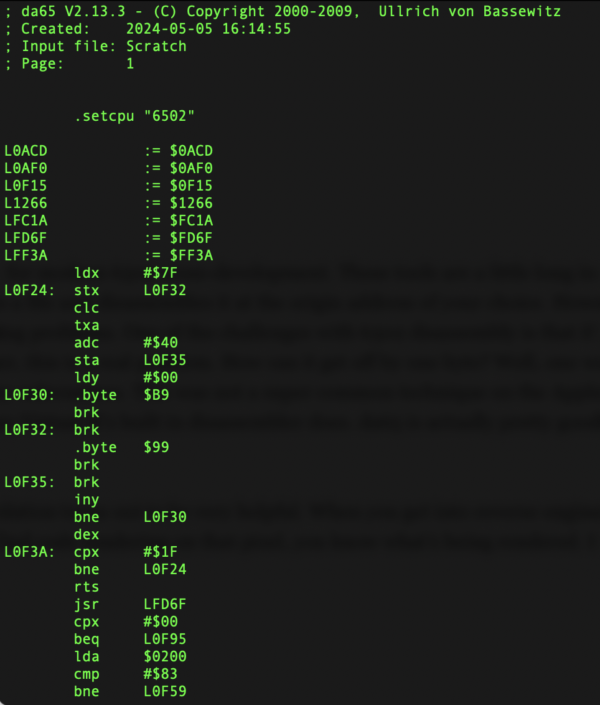
. - da65. Of course, I needed a 6502 disassembler. There are lots out there, but I am partial to the cc65/ca65 toolchain for modern 6502 cross-development. These tools are a little long in the tooth, but I still like them. The disassembler in this package is da65, and it worked great for me. It’s not fancy- it just takes a file and disassembles it at the origin address of your choice. However, it’s quite good at making labels for you (both internal and external) and I found it to be pretty robust at handling tracking problems. One of the challenges with 6502 disassembly is that if your disassembler gets off by one byte, all of a sudden the code is gibberish but it can still look valid (leaving you totally confused). In a reverse-engineer, this is a real problem. How can it get off by one byte? Well, one way is inline parameters for functions. This is where you put data byte constants inline with your 6502 instructions, to be used by subroutines. This was not a super common technique on the Apple II (although ProDOS did it with its Machine Language Interface), but guess what- Choplifter did a lot of it. I still had to help da65 along with this, but it handled this much better than, say Virtual II’s built in disassembler does. da65 is actually pretty good at figuring out that a string of two or three bytes are not real code, whereas Virtual II will steadfastly insist every byte is code.
 I should say that this is really helped along by Choplifter being an Apple II+ game. That means it uses only the NMOS 6502 instruction set, which has a lot more unused opcodes than the later CMOS 65C02 does. Setting da65 to look only for the earlier opcode set really helped it sort out the real code from the junk.
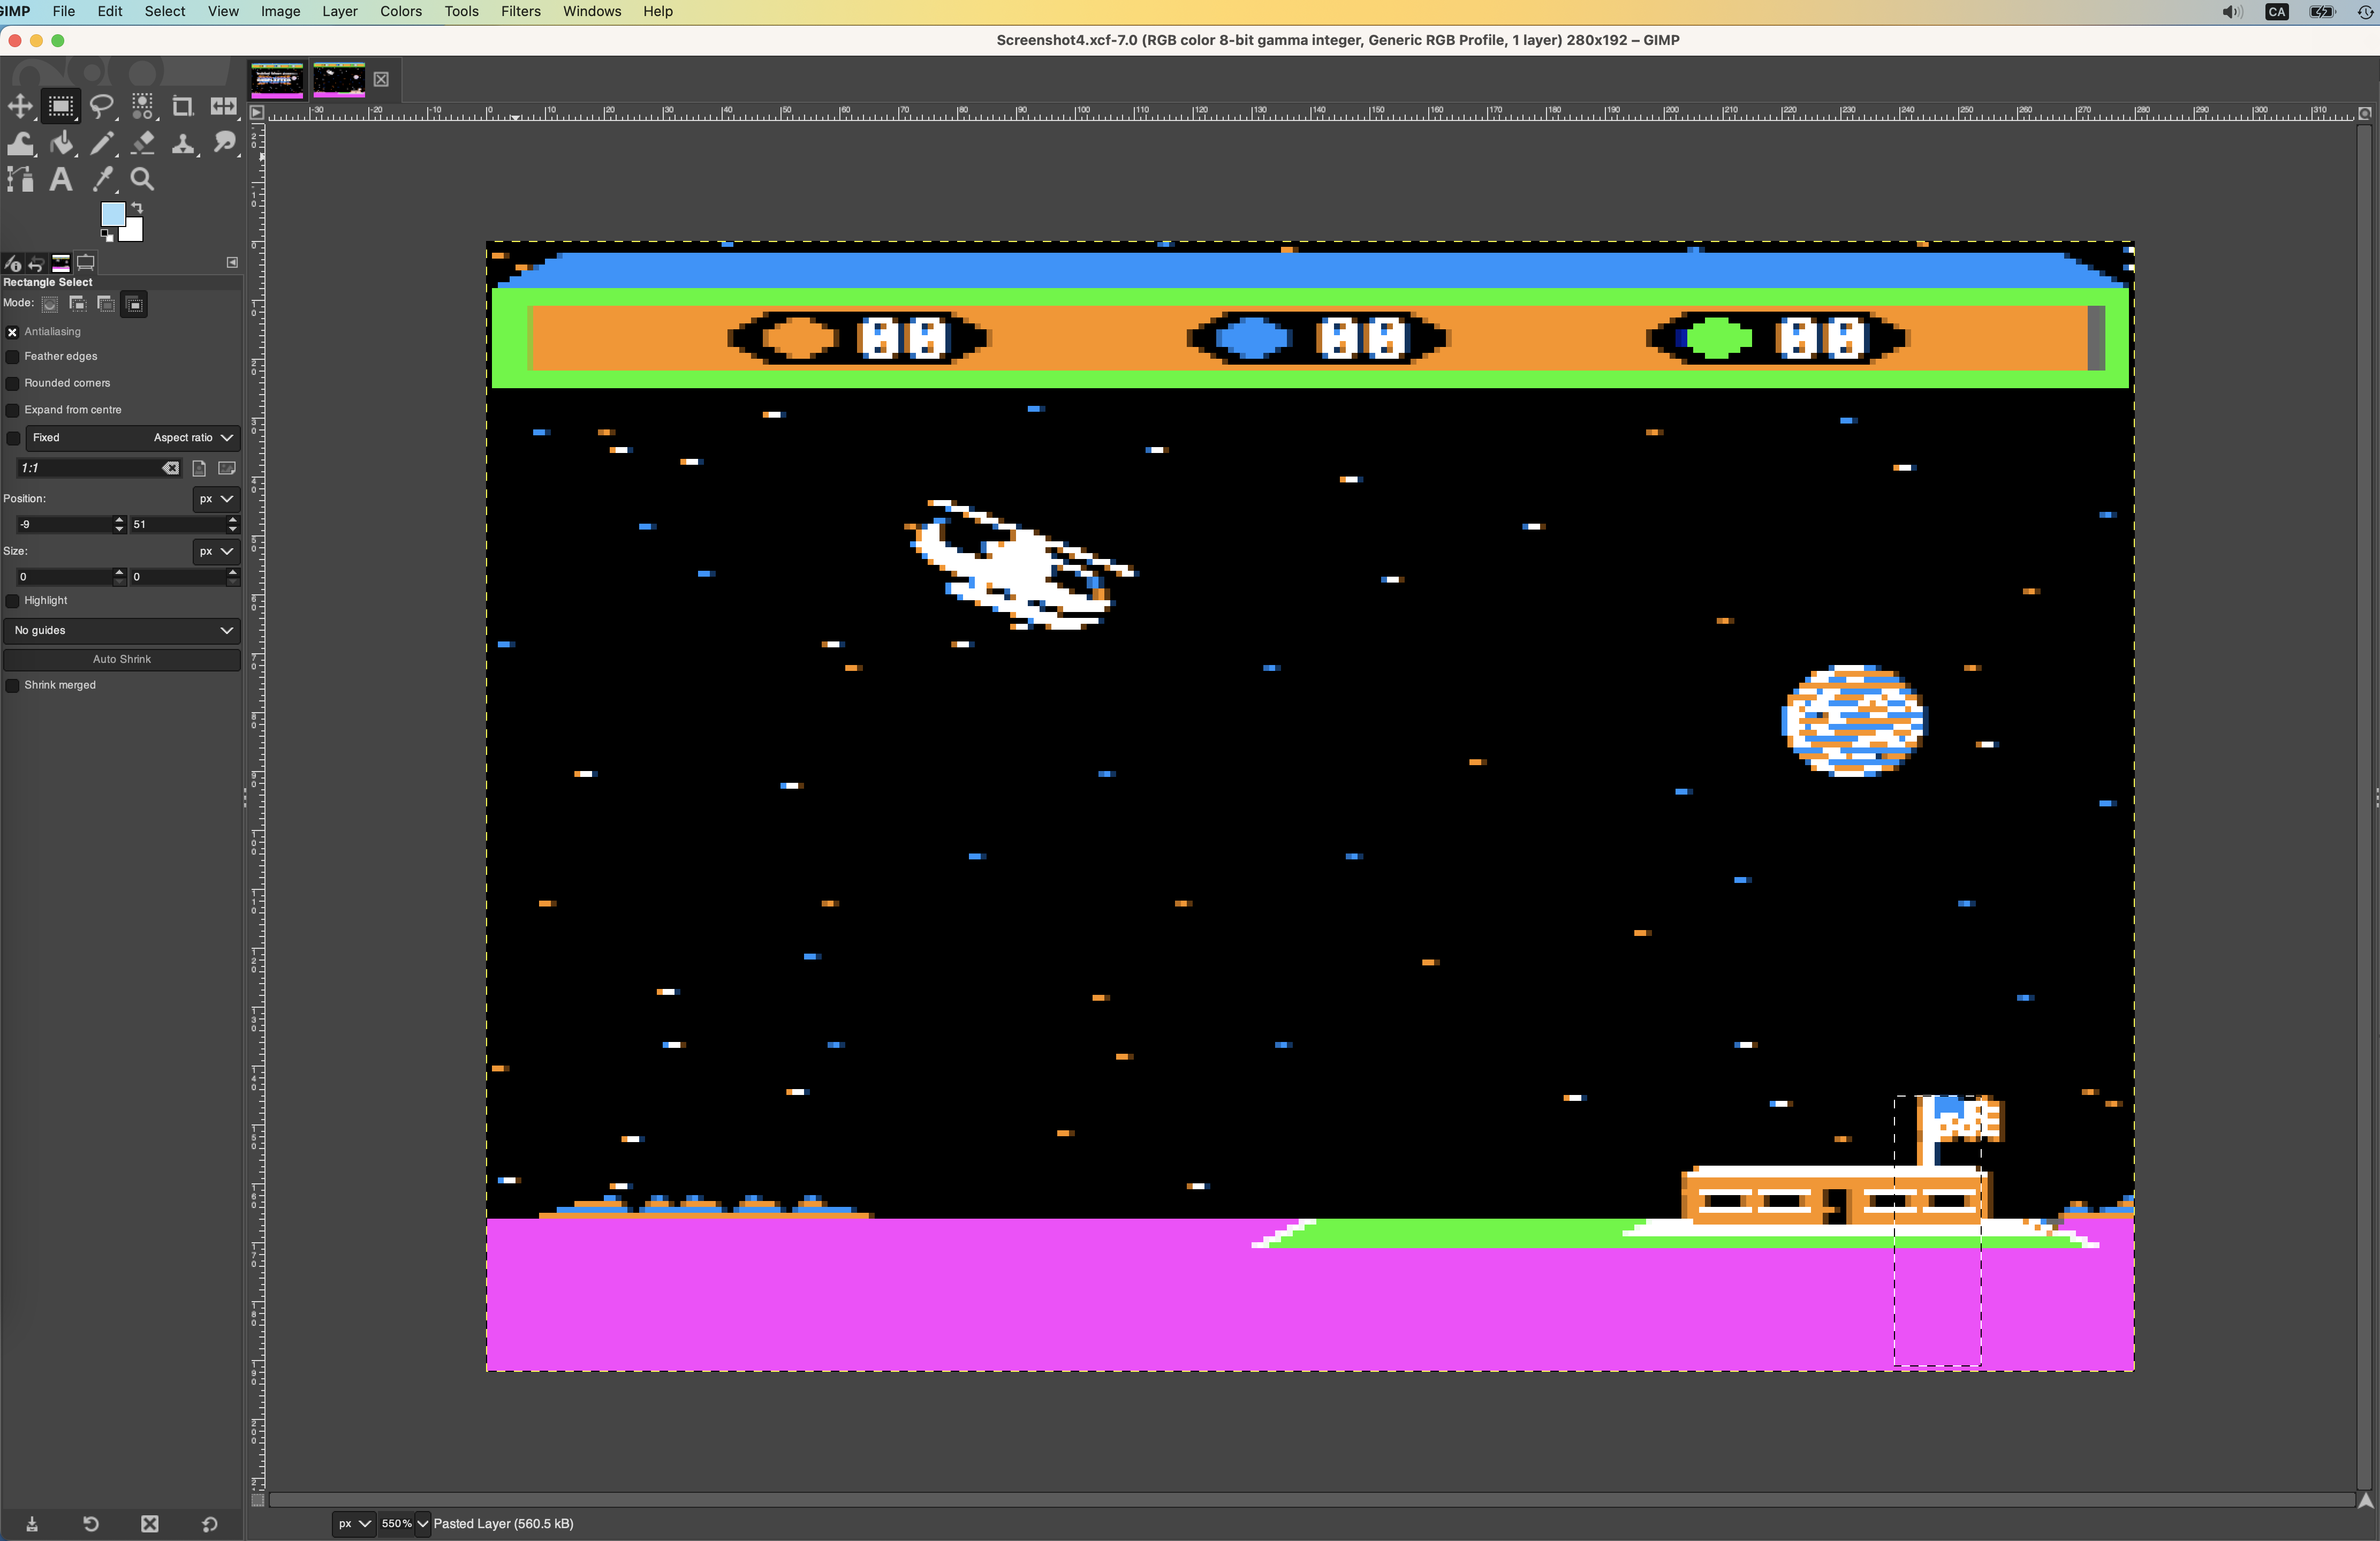
. - GIMP. This might seem like an unexpected choice, but having an image editor that can view images with no interpolation turns out to be very helpful. When you get into reverse engineering rendering code, you can take screenshots and see what pixel various game elements are sitting on. Then when you find code rendering on that pixel, you know what’s being rendered. I spent a lot of time in GIMP, zoomed way in on screenshots from Virtual II, picking apart the pixels.


The Disk Image
The first decision I had to make was, which disk image should I start with? Like any popular game, there are a lot of disk images of Choplifter out there. Most of them are terrible. As on all computers back then, every single Apple II game was cracked and the popular ones were cracked a lot by a lot of people. Many of these cracks are terrible. The crackers would remove parts of the game to put in splash screens containing their bragging, BBS phone numbers, and crudely drawn pixelated breasts. All sorts of other terrible things would be done to games if it made cracking them quicker, or the final game smaller for easier BBS uploading and distribution. Cracking games was about quantity and speed, not quality.
I wanted to reverse engineer the “purest” form of the game I could, but I also didn’t want to deal with a copy-protected binary that was trying to deceive me. Luckily, local hero and personal friend 4am has already solved this problem. He’s what you might call an “ethical cracker”. He re-cracks all these original games (and everything else) in a way that is transparent and preserves the original as intact as possible for archival and historical value. His services are also vital in other ways. In the case of Choplifter, remember it was an early 48k game. When the 64k Apple IIe came out, Choplifter wouldn’t boot on it. The copy protection had silly checks in it designed to foil crackers (specifically looking for cracking EEPROM tools) that made it incompatible with the Apple IIe and later machines. Brøderbund did patch this problem in a later release, but none of the disk images you’ll find in the wild are this patched version. This is just one of many issues that 4am fixes in his cracks. Thus, for me, the decision was easy- I started with The 4am Crack of Choplifter.
The Process
Where do you even start with this? Honestly, I didn’t know either. There’s a few different approaches a person might use, but all have flaws:
- Top Down. Disassemble the entire binary all at once, and try to make sense of the result. You’ll quickly find this gets you nowhere, because most of the binary is not code. There is graphics data, huge data tables, unused space, etc. With the aforementioned weaknesses of disassemblers, you won’t get far with this at all.
. - Bottom Up. Set a break point where the floppy drive starts reading sector 0, and start stepping through code, figuring out what it does as you go along. This is called Boot Tracing and is how crackers did their thing. If you need to know how copy protection works and how the game brings itself up, this is really the only way. This might also work for some folks for reverse engineering the entire game (after you crack it, just keep going!) but I knew it wouldn’t work for me. It was too much to try and deduce at once. Too many unknowns to start with. At the end of the day, reverse engineering is a massive deduction puzzle. It’s like doing a million sudokus. You need to deduce what every single byte in the binary does, which you figure out by eliminating all the things that byte is not doing. It’s about eliminating unknowns. Thus while boot tracing your way to the entire game is certainly possible, you’re starting with nearly infinite unknowns. I wanted to eliminate as many unknowns upfront as I could. To that end, I landed on:
. - Middle Out. Remember what I said about knowing the machine? Like many early computers, the Apple II leans heavily on its ROM. There is a fixed set of ROM addresses that contain utility routines used by software. Furthermore, the 6502 is a memory-mapped I/O chip, so there’s also a large list of magic memory addresses for talking to the hardware. Remember there is no operating system, APIs, or libraries here. These games sit directly on the hardware. In effect, the ROM and memory map combine to form a fixed API that we can exploit. This means, for example, you can find the routine that reads the keyboard simply by looking for code that touches the keyboard buffer in the memory map. This is in fact exactly how I started.
The Beginning
The very first piece of code that I reversed was the keyboard handler. Choplifter doesn’t have a lot of keyboard use (it requires a joystick for gameplay) but it allows you to hit a key to start the game, and has a few options for toggling sound, etc. That means the game has a keyboard handler, and that means the game is touching memory address $C000 which is the keyboard strobe in the Apple II. To check for and read for any key being down, you must LDA $C000. That means somewhere in Choplifter is the binary sequence AD 00 C0. That binary sequence will be in the keyboard handler. That’s our in. That’s our foot in the door. That’s our picking of the lock. That’s our… okay I’m running out of metaphors here, but you get it.
Of course it’s possible there is more than one routine reading the keyboard strobe and there may be more than one input handler, but you have to start somewhere and start with some assumptions. I assumed the first AD 00 C0 sequence I found was the main keyboard handler and went from there.
From this point on, it was routine-by-routine. The other big thing you have working in your favour in an effort like this is that this code was written by a human. A fellow programmer. A comrade in arms. Outside of the copy protection code, they are not trying to trick you or mislead you in any way. They have written code that is logical to them and will be reasonably well organized. In particular, it will be broken down into subroutines. That’s the basic structure that drove me. Once I had my foot in with the keyboard strobe, I expanded my disassembly above and below that until I had what looked like a single subroutine. Finding the end is easy because there will be an RTS. Finding the start is trickier, so I assumed for now that the LDA $C000 would be the first thing in the routine. Sometimes you can verify this by looking upwards, because the end of the previous routine ought to be right above this one, so there will be an RTS there as well. However with Dan that was a dangerous assumption. Dan very much liked to use space between his routines to store local variables and such for the routines above. Thus the bytes above you may or may not be code. However assuming the LDA $C000 was the first line turned out to be correct anyway and I had my very first routine.
; Checks for any form of button input (keyboard or joystick buttons).
; Returns carry set if something was detected. For keyboard, we do some
; processing of that input as well. Cheat keys will be checked, etc
checkButtonInput: ; $0d92
    lda $C000 ; Check any key
    cmp #$80
    bcs keyPushed
    lda $C061 ; Button 0
    cmp #$80
    bcs joystickPushed
    lda $C062 ; Button 1
    cmp #$80
    bcs joystickPushed
    clc ; Nothing pushed - clear carry and return
    rts
A few things to note here. First is that I have noted the memory address where I found this routine in RAM. It was immensely helpful to keep track of this, because it means I can replace calls to this routine with my labels in the source code as I find them. Furthermore, it allows me to know when I have holes between routines, or when routines jump into the middle of each other (which happens in Apple II code more than you’d like). It also means that in my final compiled binary, I can verify everything is in the right place. I could often find bugs simply by comparing my memory address notes to where the assembler put the final code in the list output of the build process. If they didn’t line up, then I was missing bytes somewhere, I had missed a global variable somewhere, or I had a routine that wasn’t disassembled correctly.
Now comes the “middle out” part of the process. I start by going down from here. If there are any JSRs in this code, I would go to those areas of memory and disassemble them. From here on, knowing the boundaries of each routine is easy because I know the entry point (from the JSR) and I know the end point (the next RTS I find). Of course, some routines have more than one RTS, but for Dan’s programming style that was thankfully not very common and I could work those out as I went. He mostly shared my belief in avoiding early-out conditions in subroutines.
Once I had found all the routines working downward from the current point, then I would simply advance to the next routine after my current “top” and disassemble that one. This might sound like boot tracing from here on and it kinda was, which is why I switched gears a bit. After reversing a few routines linearly following input in memory, I was piling up unknowns because those new routines lack the context of the code calling them. As you disassemble code, there will be a lot of things you can’t know at first. In an Apple II game, there are two big ones. Global variables, and the zero page.
The Big Unknowns
At the end of the day, all the code you encounter is either reading memory, writing memory, or branching (with occasional light math). As established above, the branching is actually pretty easy to unwind. As you go along, it gets easier because you find jumps and JSRs to addresses for which you have already disassembled that routine. The memory thing is much more difficult.
The first type of memory to sort out is global data. As is typical of Apple II software, various global data is stashed wherever was handy. Fortunately Dan was pretty organized about this. Local variables needed by a particular function were stored at the bottom of that function. This would be things like loop counters, animation frame counters, caches to save and restore values, etc. For truly global data like game state, Dan had an area of memory where he put all that stuff together. Interestingly, he also used global data for all his gameplay tuning. These are things like the size of the world, the maximum number of enemies, the positions of the buildings, etc. None of this ever changes (and this data is all initialized by the loader) but it isn’t hardcoded. This likely made development easier for Dan, as he could tweak things easily for making the game better, and could move things around for debugging as needed.
The second big category is zero page. If you’re not familiar with the 6502, it’s essentially a RISC architecture. It has a small instruction set, operating on a very small number of registers. However, the 6502 has something special called the Zero Page. This is literally page $0000 in memory and it gives you 256 scratch values that you can use like registers. They are not quite as fast as registers, but much faster than normal memory. The design intent was to use these zero page locations as 256 registers. In normal Apple II development, you don’t actually get to use them much. The majority of the zero page is reserved for use by ProDOS (or DOS 3.3) and AppleSoft BASIC. However for a game booted directly from floppy, neither of those exist. The entire zero page is yours for the taking. Dan takes full advantage of this, and Choplifter makes heavy use of the zero page. Nearly every byte in it is used. Thus, figuring out the purpose of all 256 zero page locations was critical to this project.
All of these memory deductions were handled the same way. The first time they are encountered, I simply made a note of the memory location and gave it a generic name, like STATE_701F for globals or ZP_A5 for zero page. Later, when I figured out what it was, I had an easy unique identifier to search-and-replace with a better name. At first glance then, a lot of code makes no sense at all because it’s just loading, storing, adding, and otherwise shuffling zero page and global memory locations of unknown purpose. However, eventually you come across code that is unambiguous.
The first example of this that I found was the sound code. Much like the keyboard strobe, the speaker in the Apple II is a magic memory location ($C030) so any code that touches that is a sound playing routine. I found a handful of sound playing routines and every one of them had the same bit of logic at the top:
    bit $72f6
    bpl routineEnd
...
routineEnd:
    rts
In other words, if the high bit of $72f6 is not set, skip this entire routine (which again, plays sound). What does that look like to you, then? Probably a preference for whether sound is enabled, right? It could also be a check to make sure only one sound at a time is playing, but sound preference is a good guess. This was further reinforced when I found a preference for inverting each joystick axis right below that in memory. Again, this is written by a human who is trying to be organized, and it’s likely Dan grouped the player preferences together in memory.
This example gives you the gist of how it all goes. I would find a little detail, form a hypothesis about what that was, then gradually reinforce or disprove that hypothesis as I went. Mostly the hypotheses get confirmed (as did the sound preference when I found a keyboard command that sets it). Occasionally I did have some hypotheses that were wrong as well, which tends to happen later in the process. This is much more mind-blowing than the confirmations, because you can operate for a long time with an incorrect hypothesis.
For example, I had found a series of memory locations that appeared to be tracking state for horizontal shifting of bitmaps. There is code in the game for shifting bitmaps vertically, because this effect is used when the chopper sinks into the ground during a crash, and for the animated titles. It looked to me like there was code for horizontal shifting that never got used, as though Dan had intended for the shifting code to be more general. I operated for weeks on that assumption, naming various related memory locations for this “unused horizontal shifting feature”. Eventually though, you get to a place where the assumptions just don’t add up. I started to see more and more functions using this “horizontal shift” state in ways that didn’t make any sense. The vague unease that your hypothesis is wrong builds and builds until you can’t deny it anymore. However until you have a better hypothesis, what can you do? You hang on to the old one until a better one comes along. Then all of a sudden, quite near the end of this entire reverse-engineer, I had accumulated enough little counter-clues that my lizard brain snapped it into focus. My “horizontal shift” code was clipping code. It was clipping sprites and images to the edges of the screen during scrolling (which looks a lot like horizontal shifting, algorithmically). A big disconfirmation like this is always mind blowing because all of a sudden, fifty other things in the code that you were confused about all snap into place.
The whole process was like this. Little victories like the sound preference would come daily, and occasionally huge victories like the clipping system would come. It was an addictive process overall. I couldn’t stop until it was done and I always ended a session feeling like I had accomplished something.
The Main Loop
I said above that I reversed methods mostly linearly starting from the keyboard input routine, but that became difficult pretty quickly. I switched gears then and tried something else that resulted in much more progress, but still in a “middle out” way. As a game developer, you know that every game has a main loop. That loop will alternate between updating things and rendering things. It will also track time, play sounds, simulate physics, etc. The contents will vary somewhat, but the broad strokes will be there and such a main loop will always exist. It finally occurred to me that because of the power of Virtual II, the main loop is easy to find. With the game running, I simply hit Break in the debugger. Presto, I’m either in the main loop, or something called by the main loop. I then Stepped Out climbing back up the call stack until I was at the top and that’s almost certainly the main loop. I did indeed find a big loop and proceeded to disassemble it from there. I now had a new “top” and could resume the drilling down approach that I started with above.
The Hard Parts
There were a couple of sections that were especially difficult to unravel. The first was what I call the Entity Table. This is a linked list stored in an array that holds the state for every game object.
This is where experience as a game developer really comes into play. As a game developer, you know something like this must be in the game. All games have game objects, and all games have some sort of management and allocation scheme for them. It could be a table, a list, a tree, a database, striding arrays, or various other things. But there absolutely will be a game object structure. This structure typically contains position, velocity, animation frame, heading, etc for each object. A game object will be the player, but also every bullet, every enemy, every hostage on the ground, and so on.
It was probably mid-way through the process before I started to see signs of what the game object system in Choplifter might be. I was seeing a lot of usage of zero page location $7A throughout the game logic code, so I knew that location was important and probably related to game object management. The breakthrough came when I found a method called off the main loop every frame that was iterating through something using $7A as an index into a big mysterious table, then calling a method from a function pointer table based on a field in that big table. As a game developer, this looks an awful lot like an entity (game object) update loop. The “update” function pointers are a form of subclassing in modern terms. It meant $7A was a “current entity” marker and it was one of those “blow it wide open” moments. Because $7A was used in so many places, I now knew a lot more about a huge number of routines. In a flurry of activity, dozens of routines snapped into place. Just knowing what $7A was unlocked collision detection, physics routines, parallax scrolling, animation, game object memory management, and more. It was huge.
Another really challenging section to figure was the sprite geometry and layering system. Old 2D games all handle rendering a bit differently. Because these machines are too slow to simply redraw the whole screen every frame, you have to have clever ways to figure out exactly what and how to redraw things. Every game does this differently because the ideal solution is often game-specific. What Choplifter does is keep a big table of everything that moves and it erases those things each frame. As new objects that move are created and deleted, they are added to this table. The game has a separate “sprite geometry” table that knows how big each object is at worst-case rotation (because some sprites in Choplifter can rotate). The “erase sprite” code is a clever bit of 6502 math to figure out how much of the sprite has sky behind it and how much has ground behind it. It then renders black (sky) and/or pink (ground) rectangles to erase the sprite.
There is no saving or restoring of sprite backgrounds in Choplifter. Sprites are always erased with solid colour(s). The stars are redrawn every frame, so if a star is erased it will get redrawn anyway. Same for the moon, which by the way is a compiled sprite. It’s a static object that never moves or changes, so it’s a rare perfect case for sprite compiling on the 8-bit Apple II. Sprite overlaps are handled with the classic Painter’s Algorithm. The game objects all have a depth value assigned to them, and the game keeps the game object list sorted by depth. Sprites are then drawn back to front after being erased. Simple, classic, and effective.
The Techniques
In addition to basic deduction from context as given in examples above, a number of other techniques were used to determine what a piece of code is doing. Here are the most useful methods that I used:
- Stubbing out a routine and seeing what breaks. This simply means replacing the first byte of a subroutine with $60 (RTS). This is done in the running game within Virtual II. Then sit back and see what changes! For example, I found the main scrolling routine this way because I suspected where it might be. I stubbed that out, and the game played normally except the map didn’t scroll. Of course, oftentimes the game just crashes or blows up in crazy ways that aren’t informative, but it’s often very helpful. Another good example is rendering- if you find a function that is rendering stuff, but don’t know what, simply stub it out and see what disappears! I confirmed most of the rendering code this way.
. - Changing memory contents and see what happens. This was especially useful for figuring out what global variables and zero page locations are for. For example, I found the globals that hold the position of the security fence by changing those values and seeing the fence move on the next frame! This is also great for finding boundaries in collision detection, various physics and control parameters, etc. Of course this does not work on data that changes frequently (like more than once every dozen frames or so) because you won’t have enough time to see the effects before the game overwrites it again. However it’s still really powerful.
. - Making code do something else. A good example of this was identifying all the sprites in the game. The first rendering function that I found was for the Brøderbund logo on the title screen. That code had what appeared to be a pointer to a sprite in it. Near that pointer’s destination in memory, I found what looked like many tables of very similar looking pointers. So with the game running in Virtual II, I changed the Brøderbund logo pointer to all those other pointers one by one. I identified every single sprite and image in the game this way (and made some very silly looking scrapbooked title screens in the process). Another good example of this is moving branches around. I suspected, for example, a block of code was doing collision detection with the helicopter, so I added a JMP within the chopper update routine to skip over that code. Again, this is all done in Virtual II’s memory editor while the game is running. After doing that, the chopper could now fly through everything! This sort of hypothesis-testing then sets off another explosion of new information. Once I know for sure that that a block is doing collision detection, then I can deduce which memory areas are storing bounding boxes, velocities, etc. Every new piece of information snowballs.
. - Breakpoints. Good old fashioned breakpoints! I learned a lot about many routines simply by stepping through them and seeing what’s in memory and what they are changing. This was also helpful towards the end for debugging areas where my reverse engineer was incorrect.
. - Watchpoints. This is a very powerful feature of Virtual II, and one of those tools that I probably could not have lived without. Particularly for figuring out zero page locations, it was immensely helpful to be able to set a watch and see when the data changes (and who changed it). For example, if I suspected a particular value was storing chopper Y position, I could put the chopper on the ground, set a watchpoint, then take off. If I’m right, then the watchpoint trips the moment the chopper begins to lift off the ground. Furthermore, I now likely know which routine is handing flight dynamics because that’s the code that will be modifying it!
The Flaws
I hate to call them flaws, because this is a great game that does everything it needs to perfectly. I also hate to criticize another programmer’s work because I certainly could not have written this game, and Dan was working on a new platform that very little was known about at the time. That said, there are definitely substantial technical improvements that can be made to this game, with the benefit of hindsight.
In the rendering system, Choplifter does a lot more erasing and redrawing than it needs to. Most of the objects move in consistent horizontal ways across solid backgrounds. For example, the tanks rumble along horizontally on the pink ground at a slow speed. There’s no need to ever erase these. Simply redraw them over top of themselves with a small pink border on either side. Since they move slowly, this will erase as they go. Same for the hostages and aliens.
Furthermore, the rendering is almost all pixel accurate. If you’re an Apple II programmer, you know how extraordinary this is. It’s out of scope here to explain the intricacies of the crazy Apple II video memory layout, but the gist is that it has seven pixels per byte (phase-shifted in every second byte because fuck you that’s why) and thus involves a lot of dividing by seven if you want to place specific pixels in specific places. Game programmers typically work around this by byte-aligning artwork whenever possible, and having seven copies of every sprite pre-aligned with each of the seven pixels in a byte. Choplifter does none of this. Even the animated title cards, which are static rectangles, are not byte-aligned. They are rendered pixel-aligned with arbitrary-width image data. All sprites are meticulously rendered pixel-accurate from a single image, at render time. No pre-calculating of shifts or even table-looking-up of shifted patterns is done. He “does the math” on every row of sprite pixels, every time.
Again, lest this sound like criticism of Dan, bear in mind that he then went on to write Airheart, generally regarded as the fastest and most sophisticated rendering engine ever built on the Apple II. Suffice it to say, he took what he learned writing Choplifter and got very very good at this stuff. I also want to emphasize again that Choplifter renders beautifully and does not need to be faster than it is. His rendering code does the job with no problem, so it is by definition correct.
The Jump Tables
Choplifter really, really likes jump tables. Nearly every single subroutine is piped through a jump table. There are a couple of huge ones, and some smaller ones scattered throughout. Jump tables have many excellent uses, most notably because they give you a layer of vectored indirection so you can change what code is doing on the fly. What’s interesting about Choplifter’s jump tables is that they are actually costing performance for no runtime benefit. Dan never modifies any of those vectors. However the indirection is always there– nearly every subroutine call in the entire game is paying an extra long jump cost every time. I believe this was a development tool for Dan, and I think it tells us something about his development process. Because this game is so early in the life of the Apple II, really good development tools didn’t exist yet. Dan was probably working from a very basic assembler, a homemade linker (or none at all) and none of the code was relocatable even at assembly time. In this kind of environment, jump tables are a very useful development tool because they give you a handle to call things while still making it easy to move code around as functions grow and shift. If you don’t have a multi-pass macro assembler managing all your labels and a linker shuffling all your code into place for you, then jump tables are a way to do all this by hand without losing your mind. It’s also telling that all the jump tables are at round numbers in memory. There’s one at $1000, one at $6000, one at $7000, one at $8000, and one at $9000. No linker or assembler labeling system would do that. A human did that. A human named Dan.
One of the neatest things about this process is how much I feel I learned about Dan while doing it. Or at least, Dan in 1982. For example, I believe he must be a classic math and computer graphics guy. A really notable thing about Choplifter is that the coordinate space is left-handed. The Y axis is zero at the bottom of the screen and 191 at the top. This the opposite of basically all 2D games (and the opposite of the hardware). This is just the kind of thing that classically trained math people do, because in math Y is zero at the bottom. I had this argument back in the day with many a math person who were new to computers. They all thought it was dumb that Y was 0 at the top of the screen, whereas for us hacks who came at this from computing principles, it made perfect sense. The CRT scans top to bottom, and video memory is thus sampled top to bottom, so of course Y=0 at the top because the memory addresses are lowest there. Dan reverses this with a look up table for video memory rows (which is actually a free flip because the crazy Apple II video system requires such a lookup table to linearize video memory anyway). The other reason I believe he is a classically trained math and/or computer graphics guy is because of how he approached sprite rendering. He tackled every problem the way a computer graphics person does- pixel accurate rendering, texture mapped scanline conversion for rotation, realtime flipping of sprites, realtime division-by-seven for shifting, etc. A pure game programmer, on the other hand, looks at every single one of those problems and says “table”. You’d have a table for all the math, and a pre-calculated sprite for all the transforms. Choplifter does very little of the latter and a metric crap-ton of the former. This really surprised me, since I wouldn’t have thought you could get a game to be as fast and smooth as Choplifter is while doing everything the expensive way.
Back to the jump tables for a moment, one amusing (and very human thing) is that they are used inconsistently. There are a number of routines that are in the jump tables, but only called through the jump table about half the time. Sometimes they are called directly. Some of them are always called directly despite being in the jump table. Perhaps they were added to the tables later and Dan didn’t back-port the changes, or perhaps he got lazy about calling through the tables late in development when he knew they weren’t going to move anymore. I can’t say for sure, but it’s a very human and very programmer thing to do.
The Inline Parameters
Something we take for granted in modern computing is passing parameters to functions. When compilers came along, smart people agreed that the way to handle this is stack frames. All the parameters and local variables for your function all live on the stack in a standard format, and the compiler handles this magically for you. Modern CPUs even have hardware support for this concept. The 68000, for example, has special registers and opcodes devoted entirely to managing stack frames. Early assembly-language development, however, has none of this. In fact, there is no obvious way to pass parameters to your functions at all. There aren’t enough registers to use those, except for trivial cases. Pushing everything on to the stack is clumsy and crash-prone with a stack as small as the 6502’s. You can use global data, and many games do. You can use zero page, and many games do this as well. However, there is one other way that is equal parts sneaky, clever, hacky, and maddening- inline data. Choplifter mostly uses zero page for passing data between routines, but it does also use quite a bit of inline data. Here’s an example:
    jsr jumpSetSpriteAnimPtr ; $0880
        .word $a0f0          ; Set animation graphic pointer to Choplifter logo
If you’re an assembly programmer, that should look very very strange to you. In fact, you may be wondering how that doesn’t crash. The CPU will execute that JSR, then return to… two garbage bytes that are a pointer sitting right in the code stream. Maybe those two pointer bytes will form valid opcodes, but probably not. Either way, you don’t want them executed as code which is what should happen. So why doesn’t it?
Inside that routine jumpSetSpriteAnimPtr is a little helper routine that does a lot of stack jiggery-pokery. Once inside the routine, our return address is sitting on the stack because the CPU put it there. The routine we are in can pull that address off the stack, then use it to find that spot in memory that we jumped from where our pointer parameter is sitting. We can now read these parameters, store them somewhere, then modify the return address to land after those inline data bytes, put that modified return address back on the stack, and the CPU will magically skip over those data bytes none the wiser. It’s a tricky system to implement, but it makes for quite clean code. You can take this one step further and use self-modifying code to alter those inline bytes before the JSR so those parameters don’t have to be assembly-time constants. Choplifter does some of this as well. Overall it’s about as clean a parameter-passing technique as you can get on an 8-bit CPU with a tiny stack. However, it makes disassembling that code very tricky because you have these subroutines all over the place that have garbage bytes inline with them. That really screws with disassemblers and until you figure out what the format of those bytes is and how many there are for every routine that does this, it can be a real mess. This was probably the biggest pure hassle I had with this project. Constantly dealing with the disassembly mess created by these parameters was a pain in the ass.
The Bugs
Every single piece of software in history has shipped with bugs. I fully expected to find some in this process. What’s amazing is, perhaps, how few I found. In fact, I believe there is only one. The full details are documented in the source code, but I found a bug in the linked list initialization routine for the master entity table. There’s an off-by-one error in the ID counter, combined with a mis-write of the list terminator. Instead of null-terminating the end of the list, it null-terminates about 2/3rds of the way through. Right in the middle of a record, in fact. The entity table has a lot of extra space in it, so this never became an issue. However, I believe Dan was looking for this bug and never found it. There are multiple “assertions” throughout the entity management code. This takes the form of “if an entity ID or count is weird, beep a bunch of times and crash”. You’ll see this documented by me in the code. Furthermore, there is a count limit of four on each enemy type. That in itself isn’t unusual. However, in several totally unnecessary places during the enemy spawning logic, the code checks for enemy count and bails out early if it is reached. This only needs to be done once, but Dan does it in many many places. As a software engineer, this smells very much to me like desperate safeguards. I think he had bugs where he was somehow getting five jets spawned (the limit is four) and he couldn’t figure out how. I believe he was chasing that linked list initialization bug, never quite found it, so he put in all the safeguards so he could ship the game. This is all speculation of course, but I believe the evidence in the code supports this hypothesis. Again, all the details are in the code itself, so take a look at see what you think.
The Dead Code
Every piece of software also ships with dead code in it. There are always routines that you thought you’d need and didn’t, ideas that didn’t work out, tools used for debugging, etc. Apple II games don’t tend to have much of this stuff because space is too precious, but there is some in Choplifter.
Most notably is a complex sprite rotation routine. Choplifter does a lot of “tilting” of sprites. That is to say, Dan simulates rotation by shifting pixels around. This is used, for example, when flying sideways with the helicopter facing the camera. The chopper “leans” into the direction of travel. You might think there would be multiple sprites to render each angle, but no, Dan does this procedurally. What’s interesting is that it looks like he tried to take this even farther. There is a very complex sprite rotation routine that basically boils down to texture mapping. He’s written what looks to me like a scan-line converter for a software polygon rasterizer in a 3D engine. I know because I have written my share of those. It looks to me like Dan had intended to use this for rotating the helicopter when flying sideways. In the end, he did what you would expect- there is a separate sprite for each sideways rotation angle of the helicopter. His attempt at a subset-of-texture-mapping is impressive though, and would have allowed all the helicopter rendering to be done with a single sprite.
There are a couple of other little routines here and there that went unused. I have marked them all “dead code” in the source.
The Secret Features
It’s not uncommon to find shipped Apple II games with debugging tools or cheats used by the developer still in them. Choplifter has lots of those. The best one is Ctrl-L followed by a number (0-7). This sets the difficulty of the enemies. After each trip back to base, the game increases your “level” making enemies come faster and with more types. If the game gets too hard, you can set the level back down! This is no doubt a debugging tool so that Dan could test the harder levels without having to play through the entire game over and over.
The most striking thing, though, was that I found strong evidence that the game had vertical scrolling at some point. Choplifter is famously a horizontal scrolling game, which was very cool at the time. It’s not super common on the Apple II because the machine doesn’t have the horsepower to move enough pixels to scroll. However Choplifter limits the design and the visuals just enough to create convincing parallax scrolling with minimal horsepower. What was amazing though is that all throughout all the code that handles scrolling and clipping, vertical parameters are supported. There is even tuning for the vertical scrolling boundaries of the screen, and the worldspace/screenspace coordinate conversion all handles vertical scrolling. It’s well worth experimenting with this to see if this feature can be reactivated, but as of this writing I have not yet tried this.
The Debugging
When this reverse engineer was done, I had to make it run and make it work. This was, amazingly, quite easy. It only took a couple of days to get it fully debugged. Why? Because I had a working binary to compare to. This was like programming with a time machine. I had a version of the game from the future that showed me what my broken one was supposed to look like. My debugging was done almost entirely by doing binary compares of my compiled image and the image I had started with. Anywhere they were different was probably a bug in mine. From there all I had to do was compare my source to the disassembly in Virtual II to see why mine was wrong. 90% of the bugs were copy-paste errors, code being misaligned because I’d gotten a jump address wrong, that sort of thing. Of course when comparing binaries, I had to skip over global variables (who’s value would depend on the exact moment the dump was captured) and self-modifying code (of which there is some, but not a lot in Choplifter). Otherwise all the static areas of the code should be binary-identical. If not, mine is wrong.
There was one other class of bugs, which goes back to that global tuning data that I talked about. Dan’s custom sector 0 floppy loader initialized all those tuning values to various constants. They don’t change during gameplay, but they have to be set correctly. Debugging these was a matter of seeing which variables affect whatever in the game was misbehaving, then pausing the working game and seeing what value was there in memory. Since these never change, it doesn’t matter when you break into the game to check them. Rather than initialize these in my replacement loader (see below on that point), I have hard-coded the initial values of those memory areas in my source code.
The Caveats
As alluded to above, I did not reverse engineer Dan’s loader. It was much easier for me to work with only what the game puts in RAM. That is the entire game minus the loader. I also didn’t want to deal with custom disk images and the copy protection. For that reason, I wrote my own loader based on ProDOS that loads the game into the same places in memory as Dan’s does. You’ll notice two primary artifacts from this change:
- The game does not show the title screen while loading the way Dan does. Dan’s loader throws up a splash screen that is a screenshot taken from the self-playing demo. This screenshot is somewhere in his loader and I didn’t pull it out to replicate the behaviour in my loader.
. - On first launch, during the self-playing demo, the score HUD at the top is blank. This is because, amusingly, Dan does not render those scores until you play the first game. They are only there because they were part of the screenshot rendered by the loader. This is perhaps technically a bug and maybe Dan never noticed because there’s no way to tell, but it doesn’t affect anything anyway. The HUD is (by design) not updated during the self-playing demo so the numbers don’t change regardless.
The Conclusion
That’s it! This was an amazing journey for me and I had a ton of fun doing this. I banged it out in about eight weeks of nights and some weekends. That’s much more intense than I intended to go on this, but the process was frankly addictive. Every time I deduced a new piece from other pieces, it was a shot of adrenalin and endorphin. It was non-stop “a-ha” moments and the feeling of cracking a giant code was amazing. However I am also now deeply, cellularly exhausted and never want to do this again. Please enjoy!