Minor growing pains.
Veronica has developed a minor problem. She’s outgrown her backplane! When I started this project, I thought a fair bit about how big I should make the backplane. I settled on four slots for a number of reasons:
- It seemed about right, since I planned for a CPU board, memory board, graphics, and I/O. Four boards.
- It was the most that would fit comfortably on one PCB in the free version of Eagle.
- At that early stage, I wasn’t honestly sure how far I’d get with this project anyway
Well, reason #1 turned out to be woefully incorrect, because I’ve been getting much less on each PCB than I intended. Veronica’s entire design is largely based on making units that will fit within one PCB in the limited free version of Eagle. This isn’t just a case of being too cheap to buy the full Eagle (though that’s also true 🙂 ). The 4″x4″ board limit is also a good size for home etching. Larger boards need a lot more chemicals, bigger containers, a larger vice to hold while soldering, more reach from the drill press- more everything.
Case in point- I had planned to put RAM and ROM on one board to share address decode logic and such. However, I needed to build the EEPROM programmer in with the ROM, and I made the (probably silly) decision to use smaller (let’s call them “nostalgic-sized”) RAM chips. Using a single fat modern RAM chip felt like cheating, and this is supposed to be a computer in the spirit of the 1980s. Having to use lots of small RAM chips was a big factor in the design and board layout of 1980s home computers, and I wanted to have that experience. All these factors compounded to where I was forced to split RAM and ROM on to their own boards.
Reason #2 is still valid- I want to keep the system boards fairly small, both because they’re easier to work with, and because my enclosure is now committed to this form factor. However, the backplane will have to be larger than one 4″ x 4″ board. Luckily, we can get around this problem, as you’ll see.
Reason #3 is a good problem to have, I suppose. I’m arguably further along with Veronica than I ever thought I would get. Of course, I dreamed of going “all the way” to a full blown computer, but deep down, I didn’t know if I’d really get within striking distance of that. I’m not there yet, but I’m certainly seeing light at the end of the tunnel.
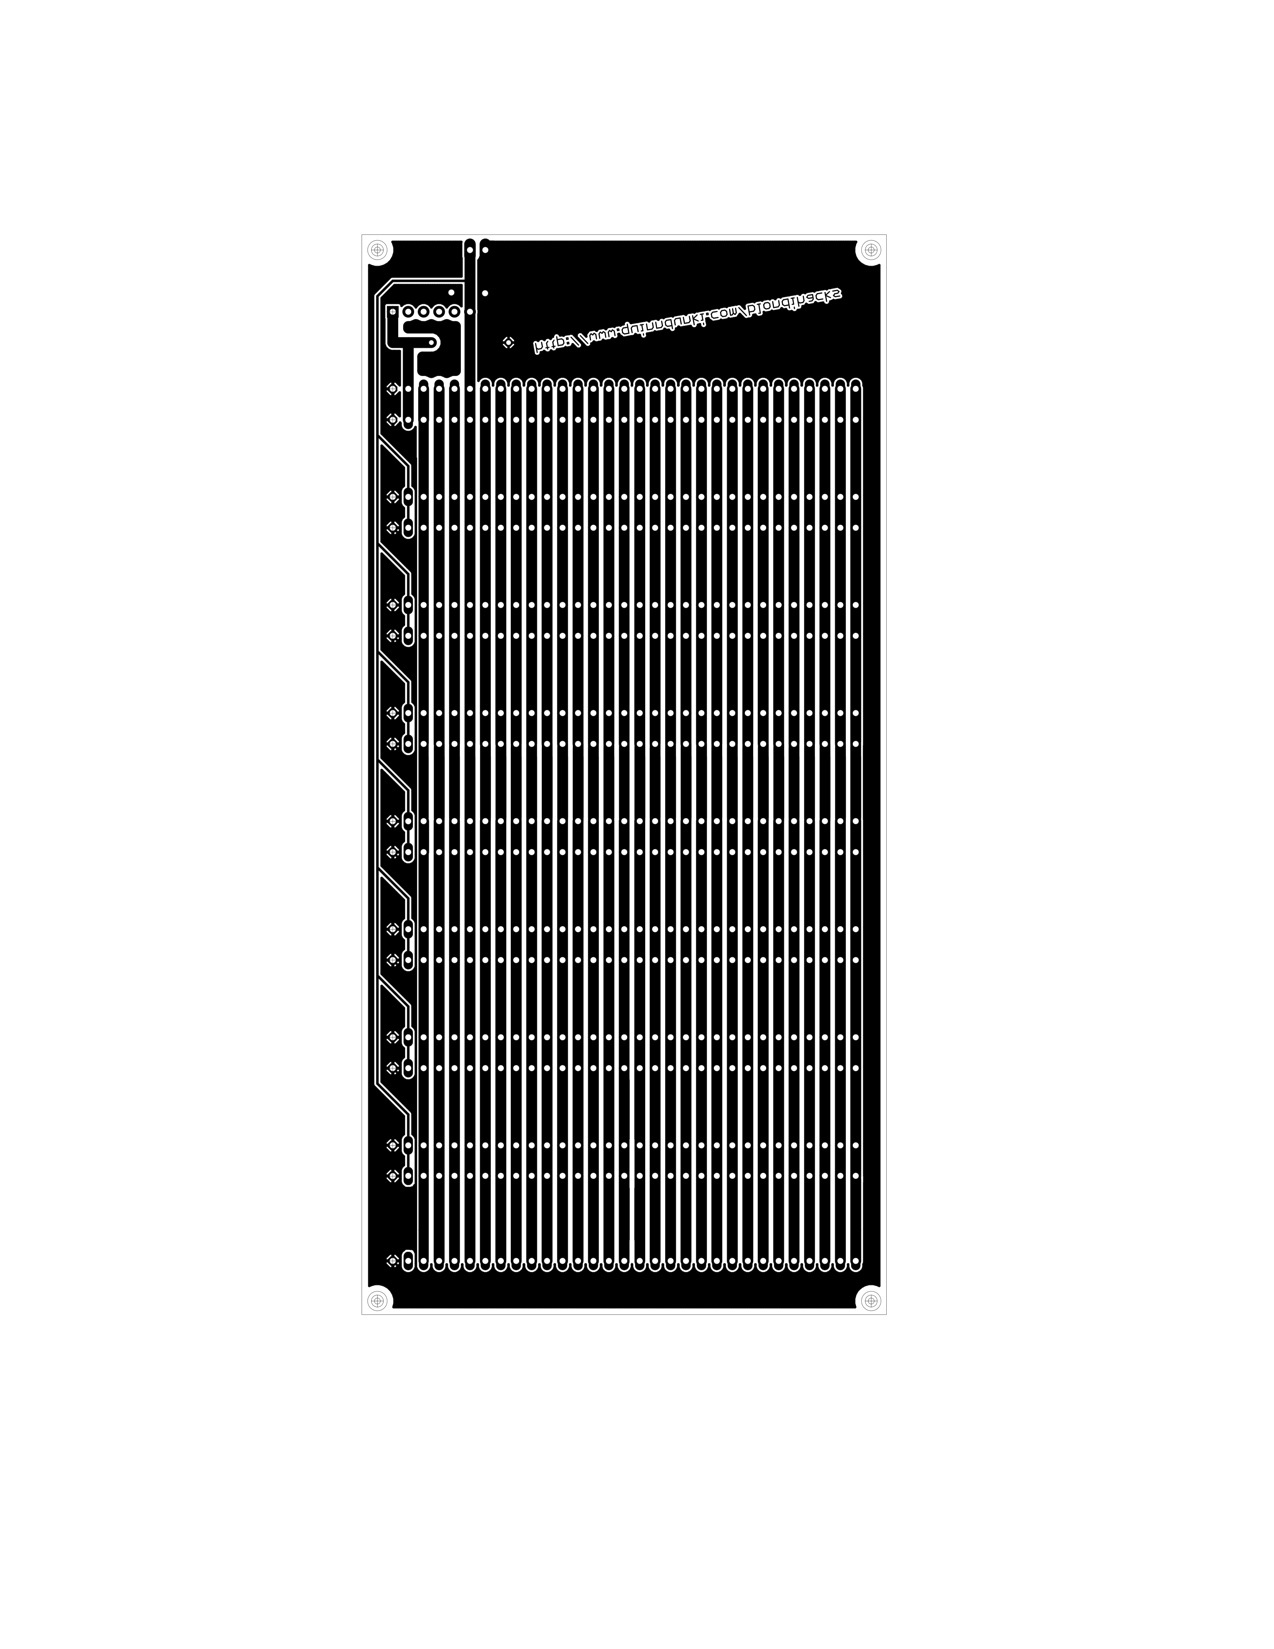
Luckily, my initial decision to go with a modular design on Veronica is paying off, and I can quite easily build a new backplane. All I really needed to do is take my initial backplane design and double the width of it. I can’t do that in the Free version of Eagle, but luckily the backplane is such a simple “circuit” that I can do the work entirely in Photoshop (or Gimp or other image editor). I took the original etching mask from my backplane, loaded it into Gimp, and simply copy-pasted the whole slot section. Then I went in and fixed up all the joints and edges with various pixel-pushing tools. While I was there, I fattened up the traces from the original, and simplified the control lines a bit. I had visions of an active backplane that negotiated communication between slots for DMA and such, but that seems like a silly unnecessary diversion now. So, here’s the result of my Gimping:
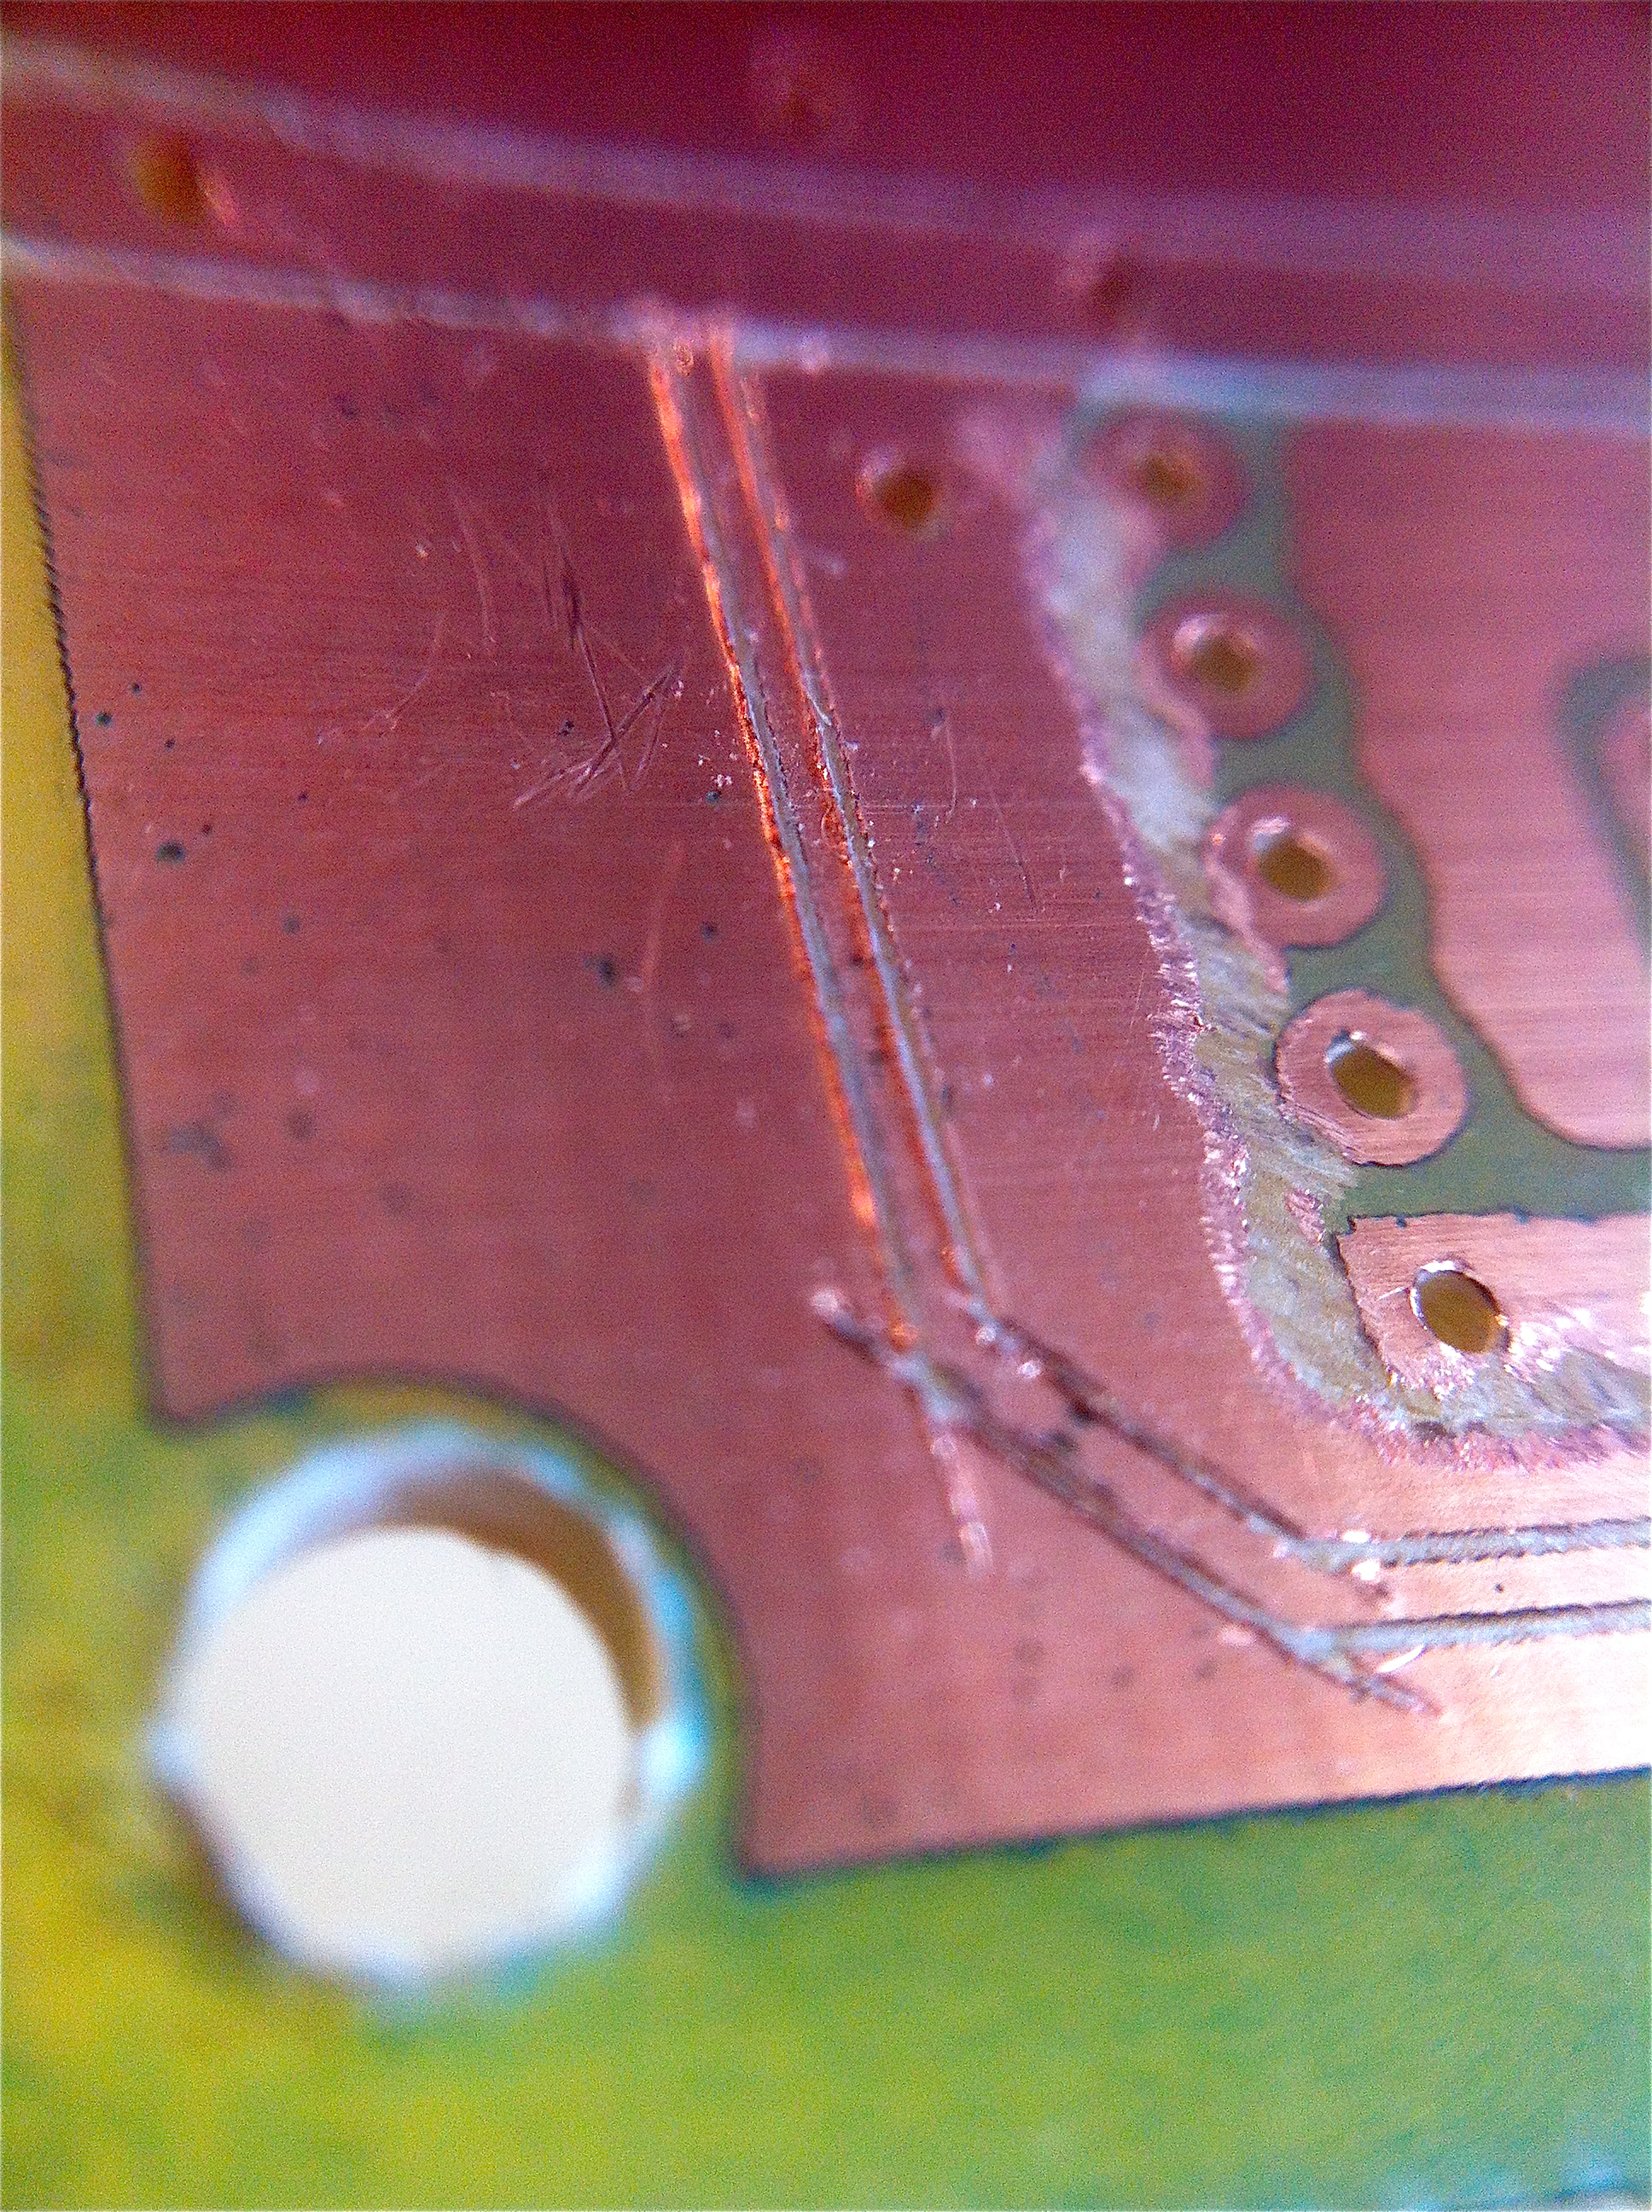
Unfortunately, what should have been a quick side project turned into a much larger one, because I got a bit careless with the etching. As you may recall, I always print two copies of the mask and double them up to make sure they’re dark enough for the UV exposure. It’s something I do as a precaution, but I’ve never actually verified that it’s necessary. In any case, that practice bit me here, because in my haste I knocked the masks out of alignment slightly, and ended up with a mess in one corner and down one side. It was fixable, but took quite a bit of Dremel and knife work. It was debatable whether it would be quicker to fix it or etch a new one. I think it was quicker to fix it, but just barely.
So, I think in the future I’ll drop the pretense of doubling up the masks until I’m sure it has value to do so. A single mask is much easier to align, and eliminates a big source of error.
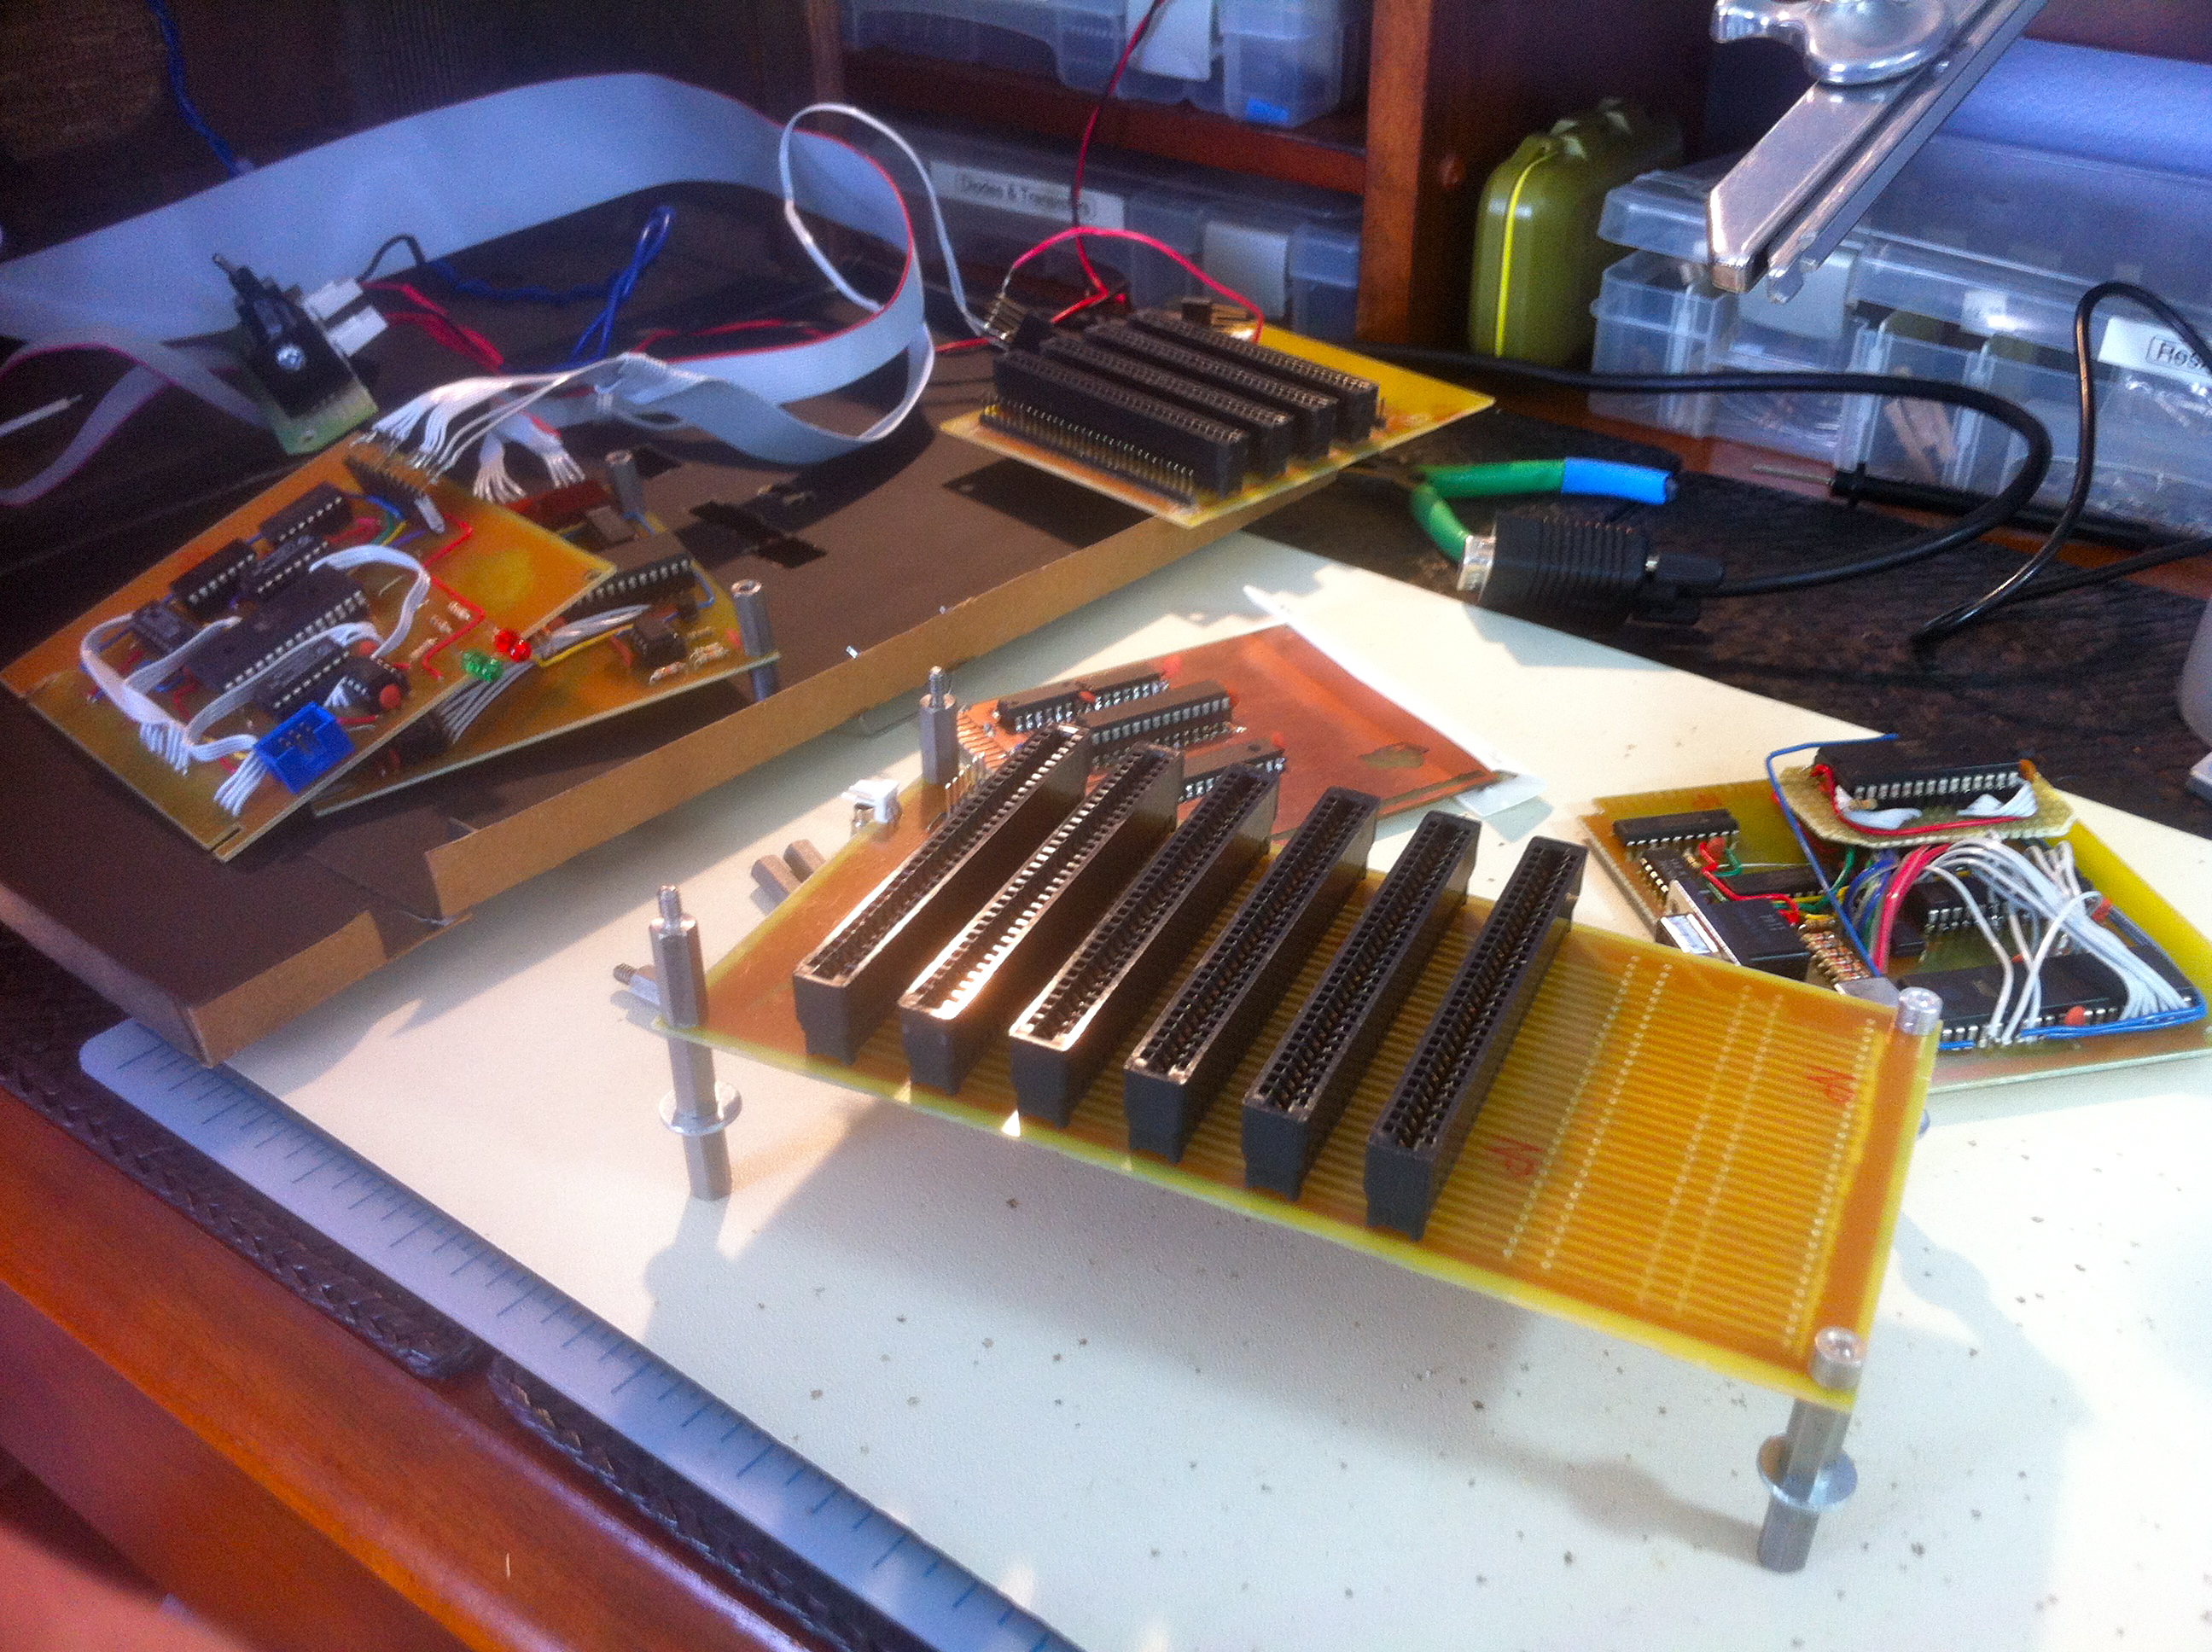
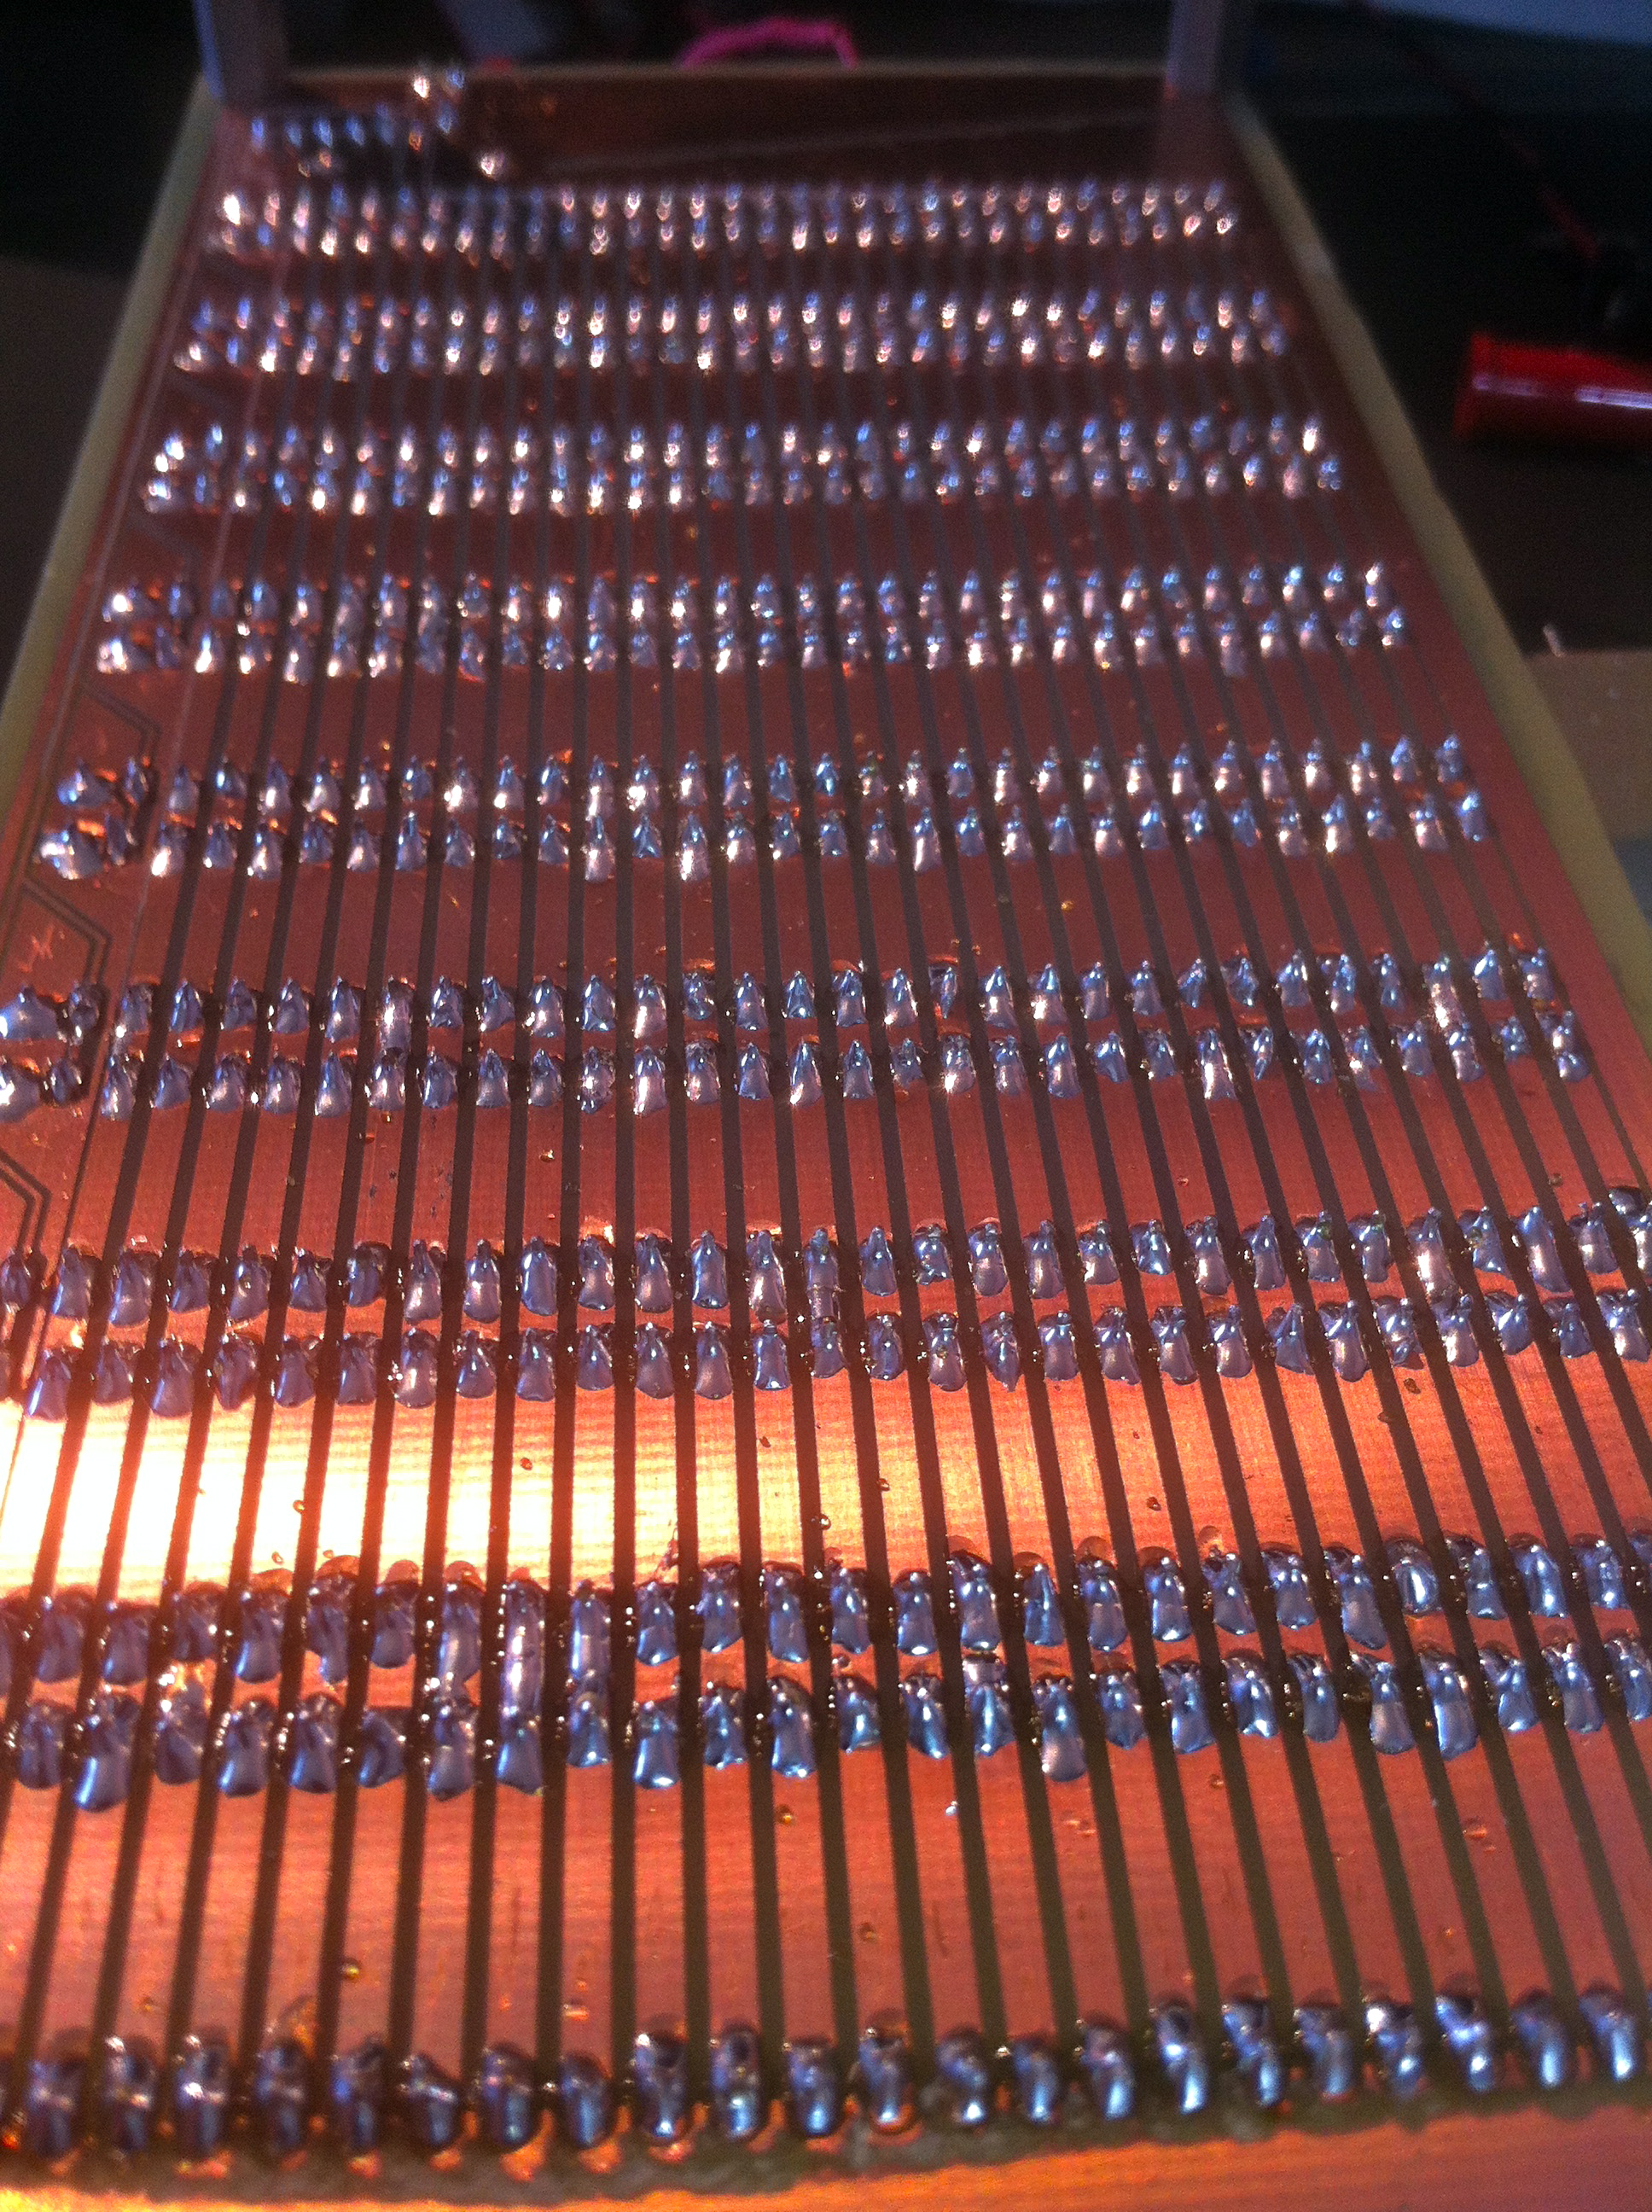
After all that, though, I did end up with acres of new real estate.


Once again, Veronica is past a minor stumbling block, and ready to move forward. Or is she? More trouble may be afoot. Stay tuned to find out.
You missed 3 holes.
Did I win nothing?
Or, did I get it wrong and win something?
Yes. 😉
Wow, that is a lot of soldering haha.
Congratulations for your machine! I’ve been reading your site, especially the posts about Veronica. I’m building a computador with a Z80, but it is still in the breadboard; maybe someday it will be like Veronica 😀
Keep on your good work with all this stuff.
Greetings from Brazil!
PS: I saw just 3 holes that you have missed!
I guess you can always build future boards using some SMT parts now that you’ve got the double sided thing licked. Your etching precision looks good enough for the larger SMT packages at least (tsop etc) That will stuff more goodies on a board. Hand soldering SMT isn’t too bad (but get yourself a magnifier!)
Now let’s see what goodies get placed in the new slots.
Hand soldering SMT is fine if you have a solder mask. If you’re doing the boards yourself, it’s less fun. Lower densities like SOIC aren’t so bad. I wouldn’t want to attempt anything higher (even with a solder mask, QFP tries my patience).
But there are disadvantages: no more sneaking tracks between pins. Pretty much every signal will have to be taken to the other side of the board, and that means a lot of vias. And a lot of vias on a home-brew board is a lot of not fun.
I’d stick with through-hole. It’s more retro anyway.
Also: please, please, please, Quinn. The next board you etch, don’t double the transparencies. Try it with one. If it doesn’t work, you’ve only wasted one board. If it does (which it will), you’ll wish you’d done it from the start.
Quinn,
Congratulations on getting the backplane finished (and as usual with persistence). I’ll use your lessons learnt to solve a similar problem with a PDP/8e that needs an extra backplane extension. When an 8k memory core board set takes 3 slots… you always need more slots.
Thanks for sharing!
Reported for the Brazilian crowd:
http://www.retrocomputaria.com.br/plus/?p=4681
I don’t think you’ll need to Google Translate the article to find out the reason for that last image, will you?
Haha, cool. Google Translate actually a decent job on that, so I think I got the gist of it. Gotta love Scrooge McDuck.
Just checked the translation. These things are getting frighteningly accurate.
(What about a friendly wave to the fans in the comment section there, hm?)
^^^ I just realized that was the blog-persons equivalent of asking for an autograph.
JCCyC, that was priceless!!! 😀
Quinn, I have no words about this project. Simply amazing!
Greetz from Brazil!
Hey Quinn,
Really enjoyed reading about Veronica.
If you’re looking to make (even slightly) larger boards than you can with the free Eagle, take a look at the open source “PCB” software: http://pcb.geda-project.org/index.html
Like all such programs, takes a bit of learning but I’ve got excellent results. No connection, just a very satisfied user.
Martin
Something I just thought: computer buses should have a name. I suggest calling it Riverdale. Shouldn’t be too hard to figure out why.
Or maybe Weatherbee, but maybe that’s better for the bus arbitration controller.
Hey, don’t you want to try Kicad? I was using Eagle for a while, but for bigger boards I’ve decided to try it. It’s not more puny than Eagle and sometimes even better.