Getting a cardio machine back on its feet.
Count yourselves lucky that I got the worst joke of this entire post out of the way right there in the subtitle. You’re welcome.
A quick sidebar- I’d like to give a big thanks to all my Patreon patrons. You are the kind, generous women and men that keep this site going for everyone to enjoy. If you’d like to add yourself to those noble ranks, here’s a fancy link just for you:
Tell all your friends to go there too. Otherwise I will buy something you love from eBay and smash it right in front of you. Don’t make me do it!
For this article, my elliptical cardio machine makes a reappearance. You may remember this machine from articles such as this one and this one. Much like the toothbrush, it’s a bit of a recurring celebrity here on Blondihacks. For absolutely no good reason, I am determined to keep this thing alive. Yes, I could replace it for about $200. However, I must ask you- where is the fun in that? Ahem. Moving along.
This time around, it’s (weirdly) the feet on the machine that have failed. I’ve kept this thing in steady operation for 13 years now, and it’s been interesting seeing the what the next weak point is going to be. As I repair things, I try to make them stronger and better than they were, so the next point of failure is generally further and further down the MTBF rabbit hole. Amazingly, the spinning, electrically adjustable, magnetic resistance system has yet to complain even a little. You would expect the weak point to be the most complex component, and certainly anything with moving parts. That was the case with the rollers, for certain, but I’m surprised the magnetic system is still whirring along. I have no idea what’s in there or how it works, but perhaps someday it too will fail and I’ll find out.
The machine is mostly steel tubing construction, which is inexpensive and strong. The base of the machine is a single horizontal tube at the front, with plastic feet stuck in the ends. These feet are actually a pretty nice design. They elevate the machine slightly so that it’s not sitting on the tubing (which might not perfectly true, so the machine would wobble), and they incorporate wheels. Exercise machines are heavy and awkward, so having a way to move them around is extremely helpful. In this case, there are elevated, offset-mounted wheels on the front of the feet. You can tip the machine forward, and it will lift itself up on to these wheels. One person can easily move it around the house. A great design!
Great design though it may be, plastic is still plastic, and there’s a lot being asked of these feet. Rhythmically shifting lateral loads will make anything fail eventually, and in this case it took 13 years.
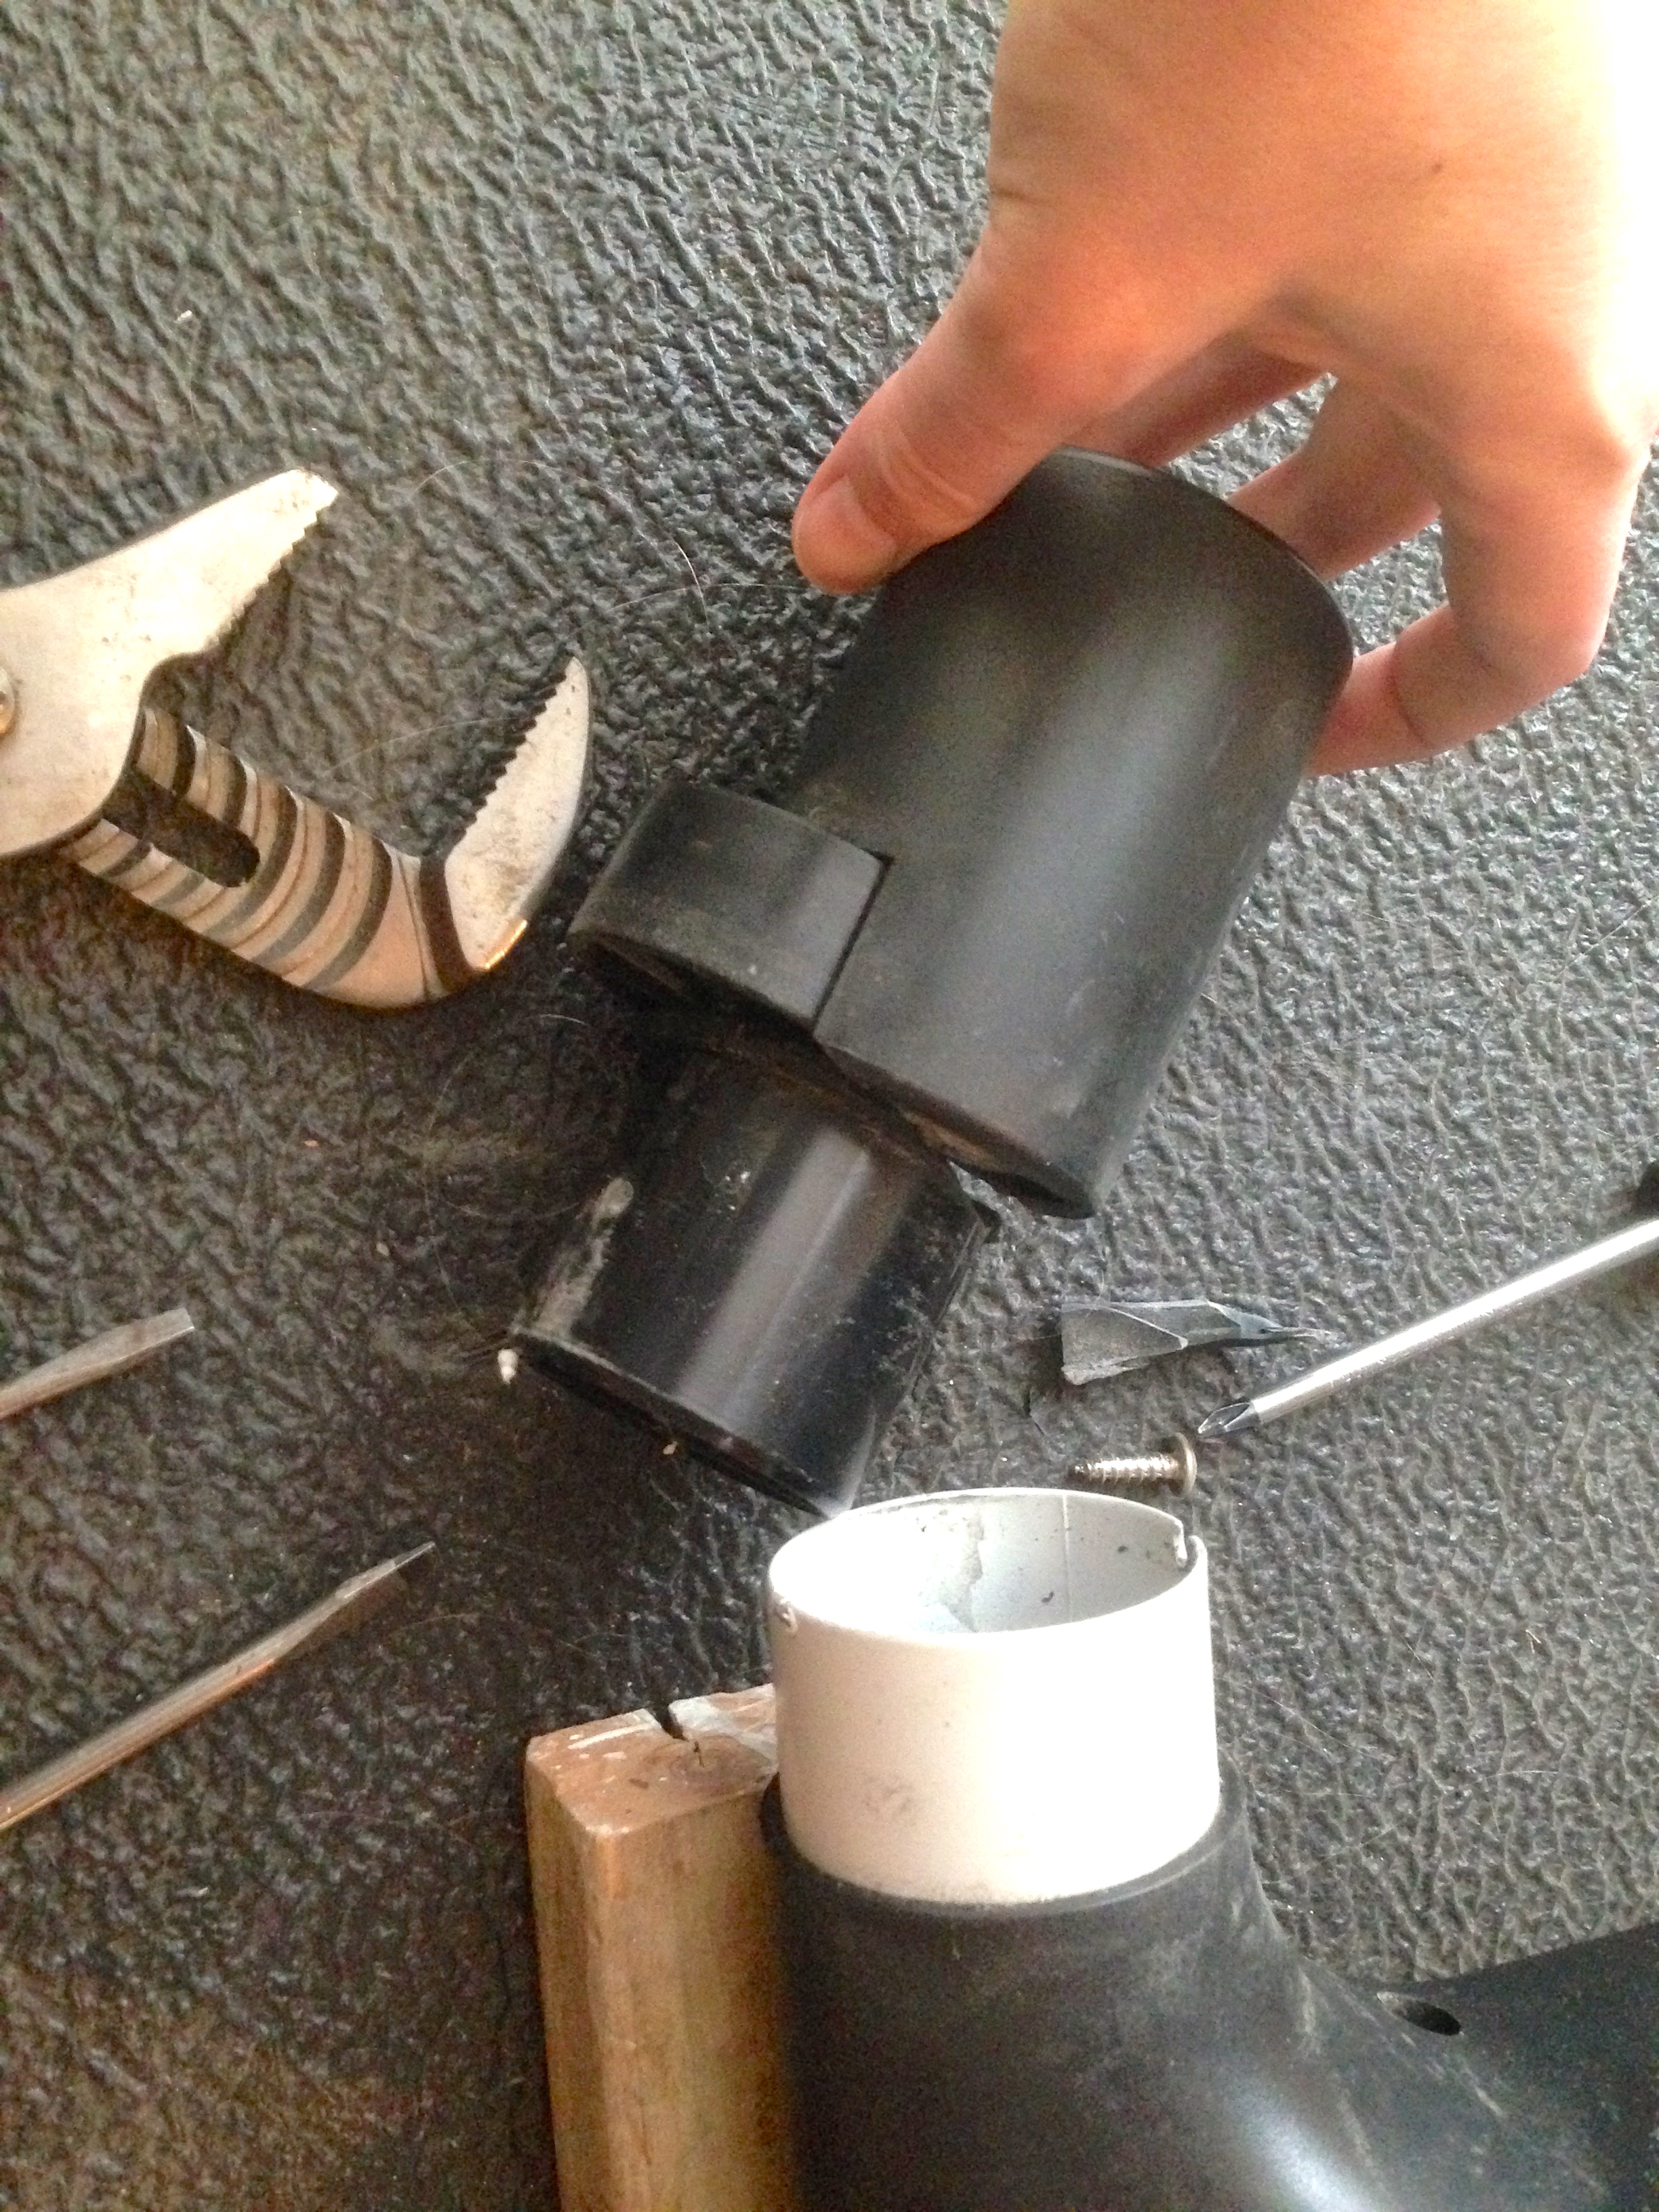
Since the mounting point is the inside of a tube, and the original feet were plastic, my first stop was every hacker’s favorite aisle at Home Depot- plumbing. I needed a 2.25″ OD… something… and ABS pipe happens to come in exactly that dimension. I grabbed some short pieces and a couple of end caps, cemented it all together, and slid it right into the machine. This worked great! …For about a day and a half.

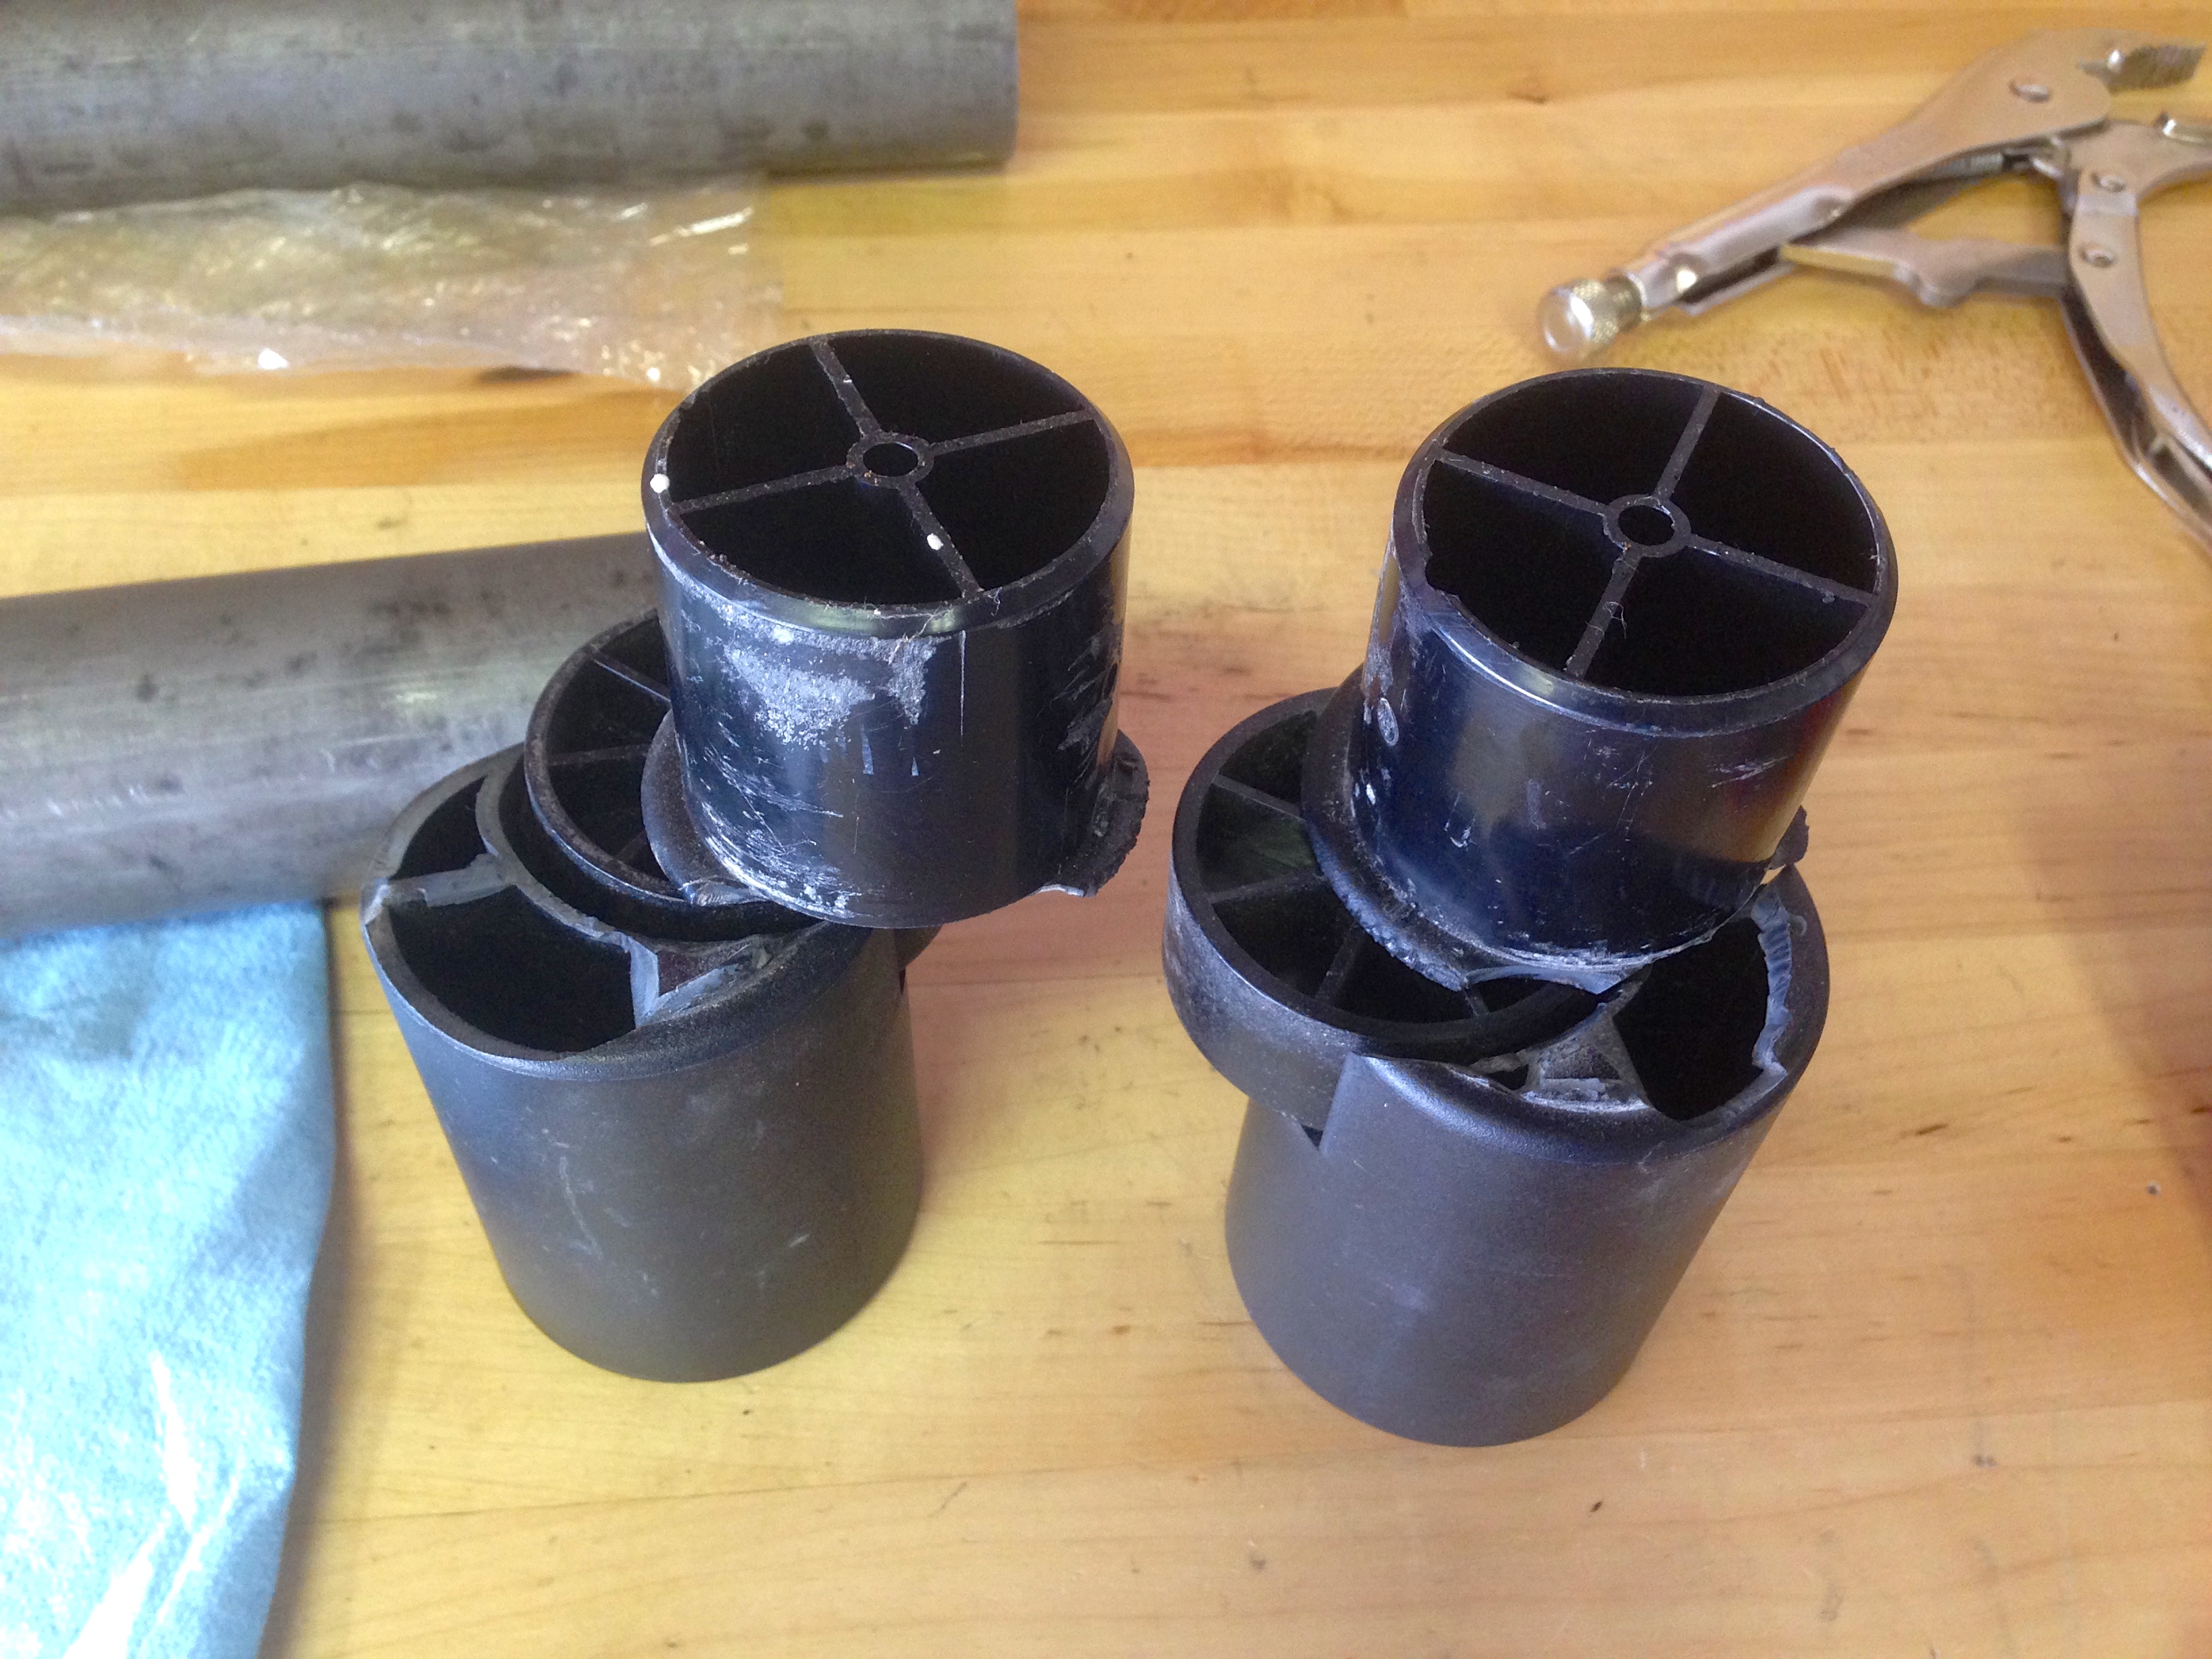
ABS pipe is remarkably strong stuff. However, remember what I said about rhythmic lateral loads? They will destroy everything sooner or later. In this case, sooner. Much sooner. This gave me new respect for those OEM plastic feet that lasted 13 years. The factory plastic didn’t seem especially robust, but it did have a complex internal bracing structure, instead of being a hollow tube. Engineering is a thing for a reason, folks.
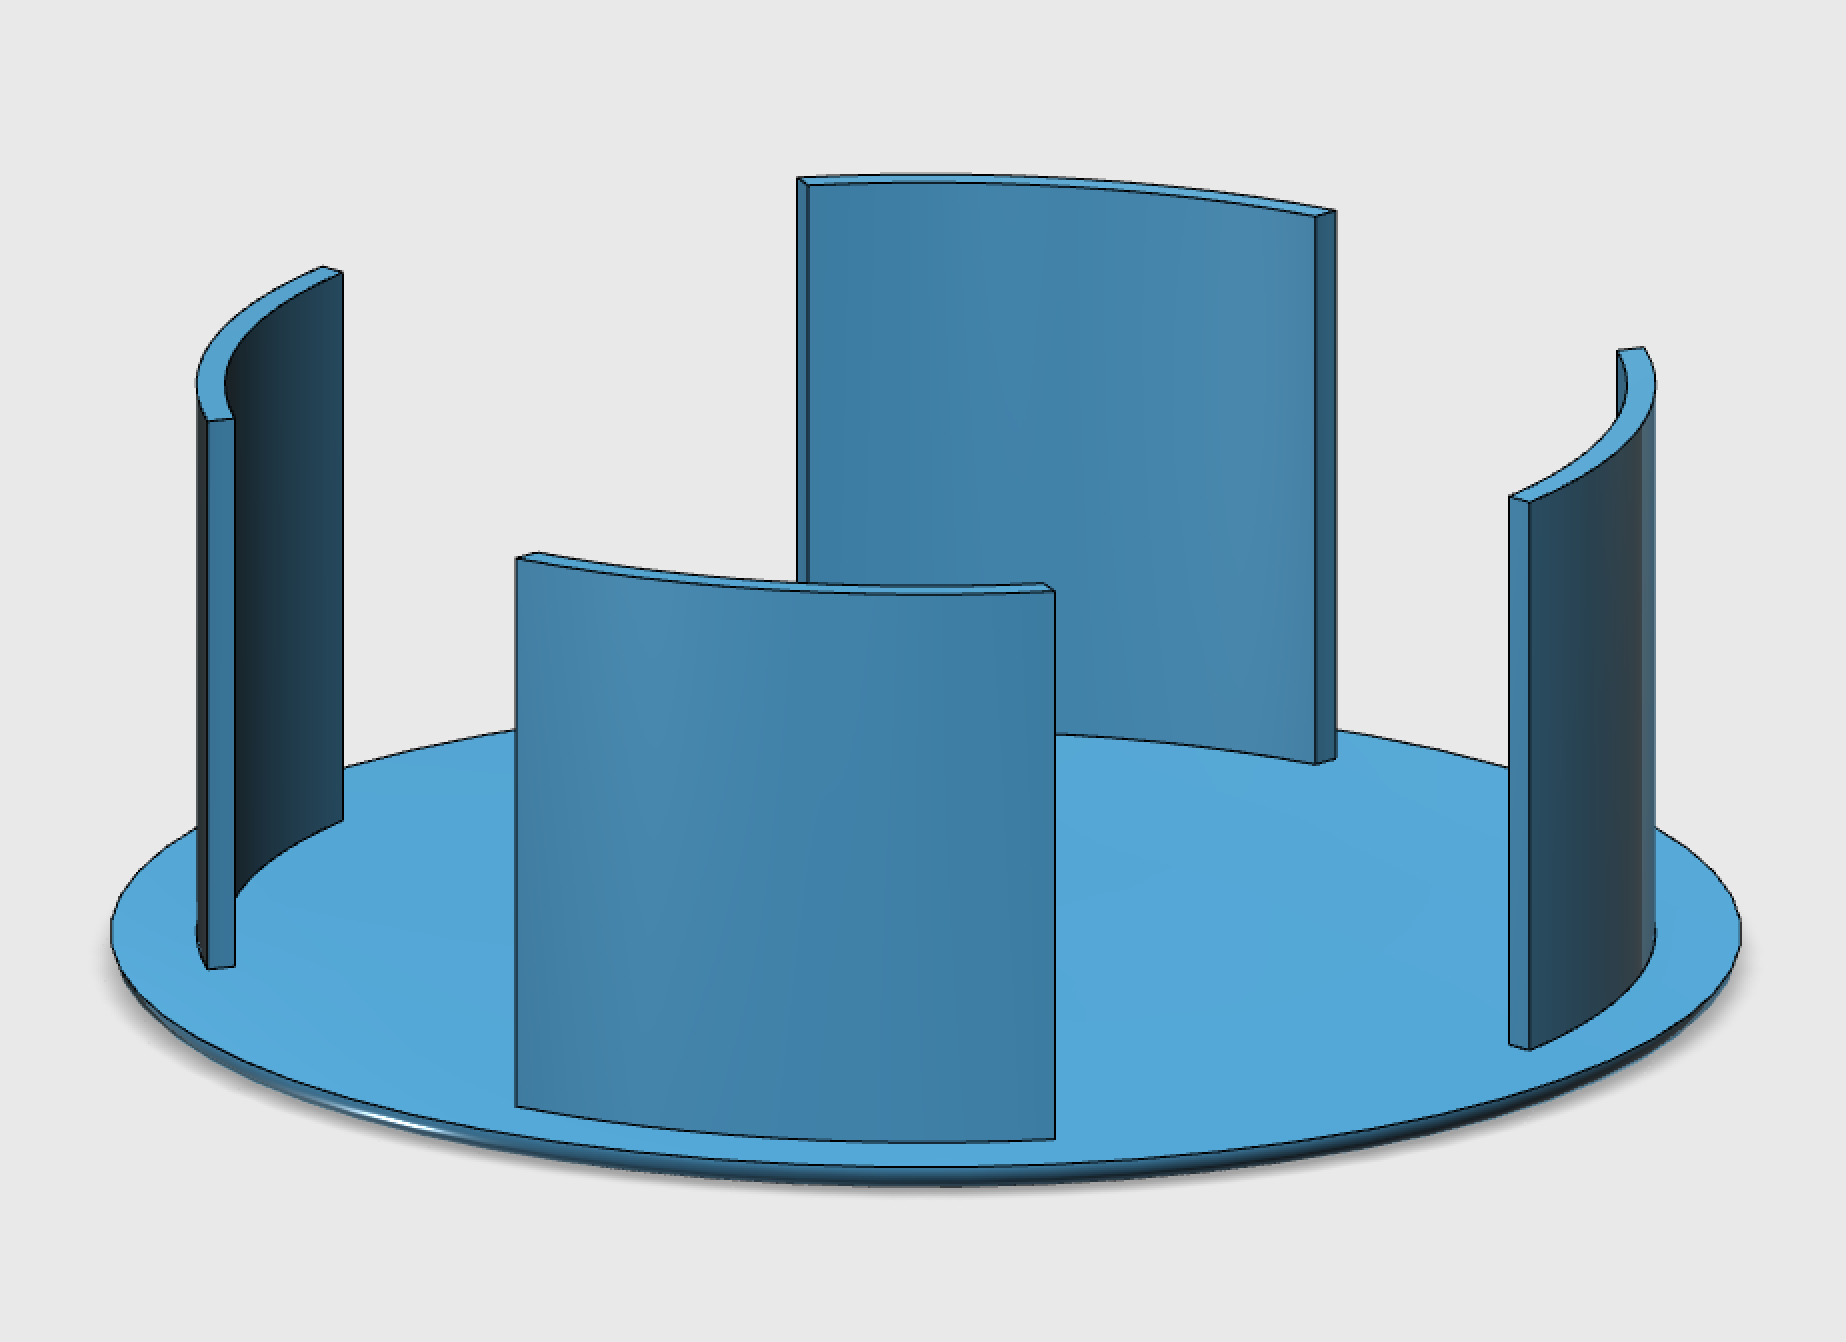
As is tradition here on Blondihacks, when the first solution failed, the next step was to way, way overreact. I said to myself, “Self, let’s make these feet from steel”. Lots and lots of steel. The feet are basically cylinders with a thick part at the ends, and wheels inset on the front. That’s not a particularly complex structure, so I can recreate that.

All I needed was 2.25″ OD metal tubing. In case you’re unaware, in the world of metal stock, “tube” is structural, and “pipe” is functional. For that reason, tubing is accurate in outside diameter, and piping is accurate in inside diameter. Keep that in mind if you’re trying to find round stock for a specific application. My local hardware stores didn’t happen to have that exact dimension, but I have found onlinemetals.com is a great site for small orders of specific pieces like this. They have a great interface for finding exactly what you need, and you can order random-length scraps inexpensively. Shipping is not as bad as you’d expect, either. Of course, any local metal supplier or fabrication shop will also have a scraps or remnants pile that they’ll happily sell/give you stuff from. However, that does require speaking to other human beings. Human contact is rarely a popular option here at Blondihacks.
When ordering, make sure to triple-check your dimensions. I apparently missed a zero on my wall thickness measurement. Steel tubing is very strong, and it doesn’t take much material at all to hold weight. The cardio machine itself is made of 2mm-wall tubing. It looks like cardstock, but doesn’t even blink at having a 150lb primate sweating profusely on top of it.
I accidentally ordered 160mil-wall tubing, which is about 4mm. For perspective, that is heavier than the tubing used in race car roll cages. Whoops.

I decided to reuse the plastic wheels from the original feet. They were in perfect condition, and were clearly strong enough for the occasional use-case of moving the machine around the house for cleaning or whatever. The wheels were held into the factory plastic feet with a peened-over metal pin. It was a simple matter to drill that pin out and extract the wheels.
I cut a slot in the tubing to clearance the wheels, and made some L-brackets out of a scrap of angle iron to mount them. The tubing needed a fair amount of love with the grinder on the outside to fit inside the tubing of the machine. As I mentioned earlier, tubing does not have a precise inner diameter, and often there is a weld seam inside. Ideally, you would use a lathe to turn down the OD of the tubing by half a mil or so, to make a nice light friction fit. In lieu of such fancy tools, a grinder and some elbow grease (and a lot of vacuuming afterwards) does the job.
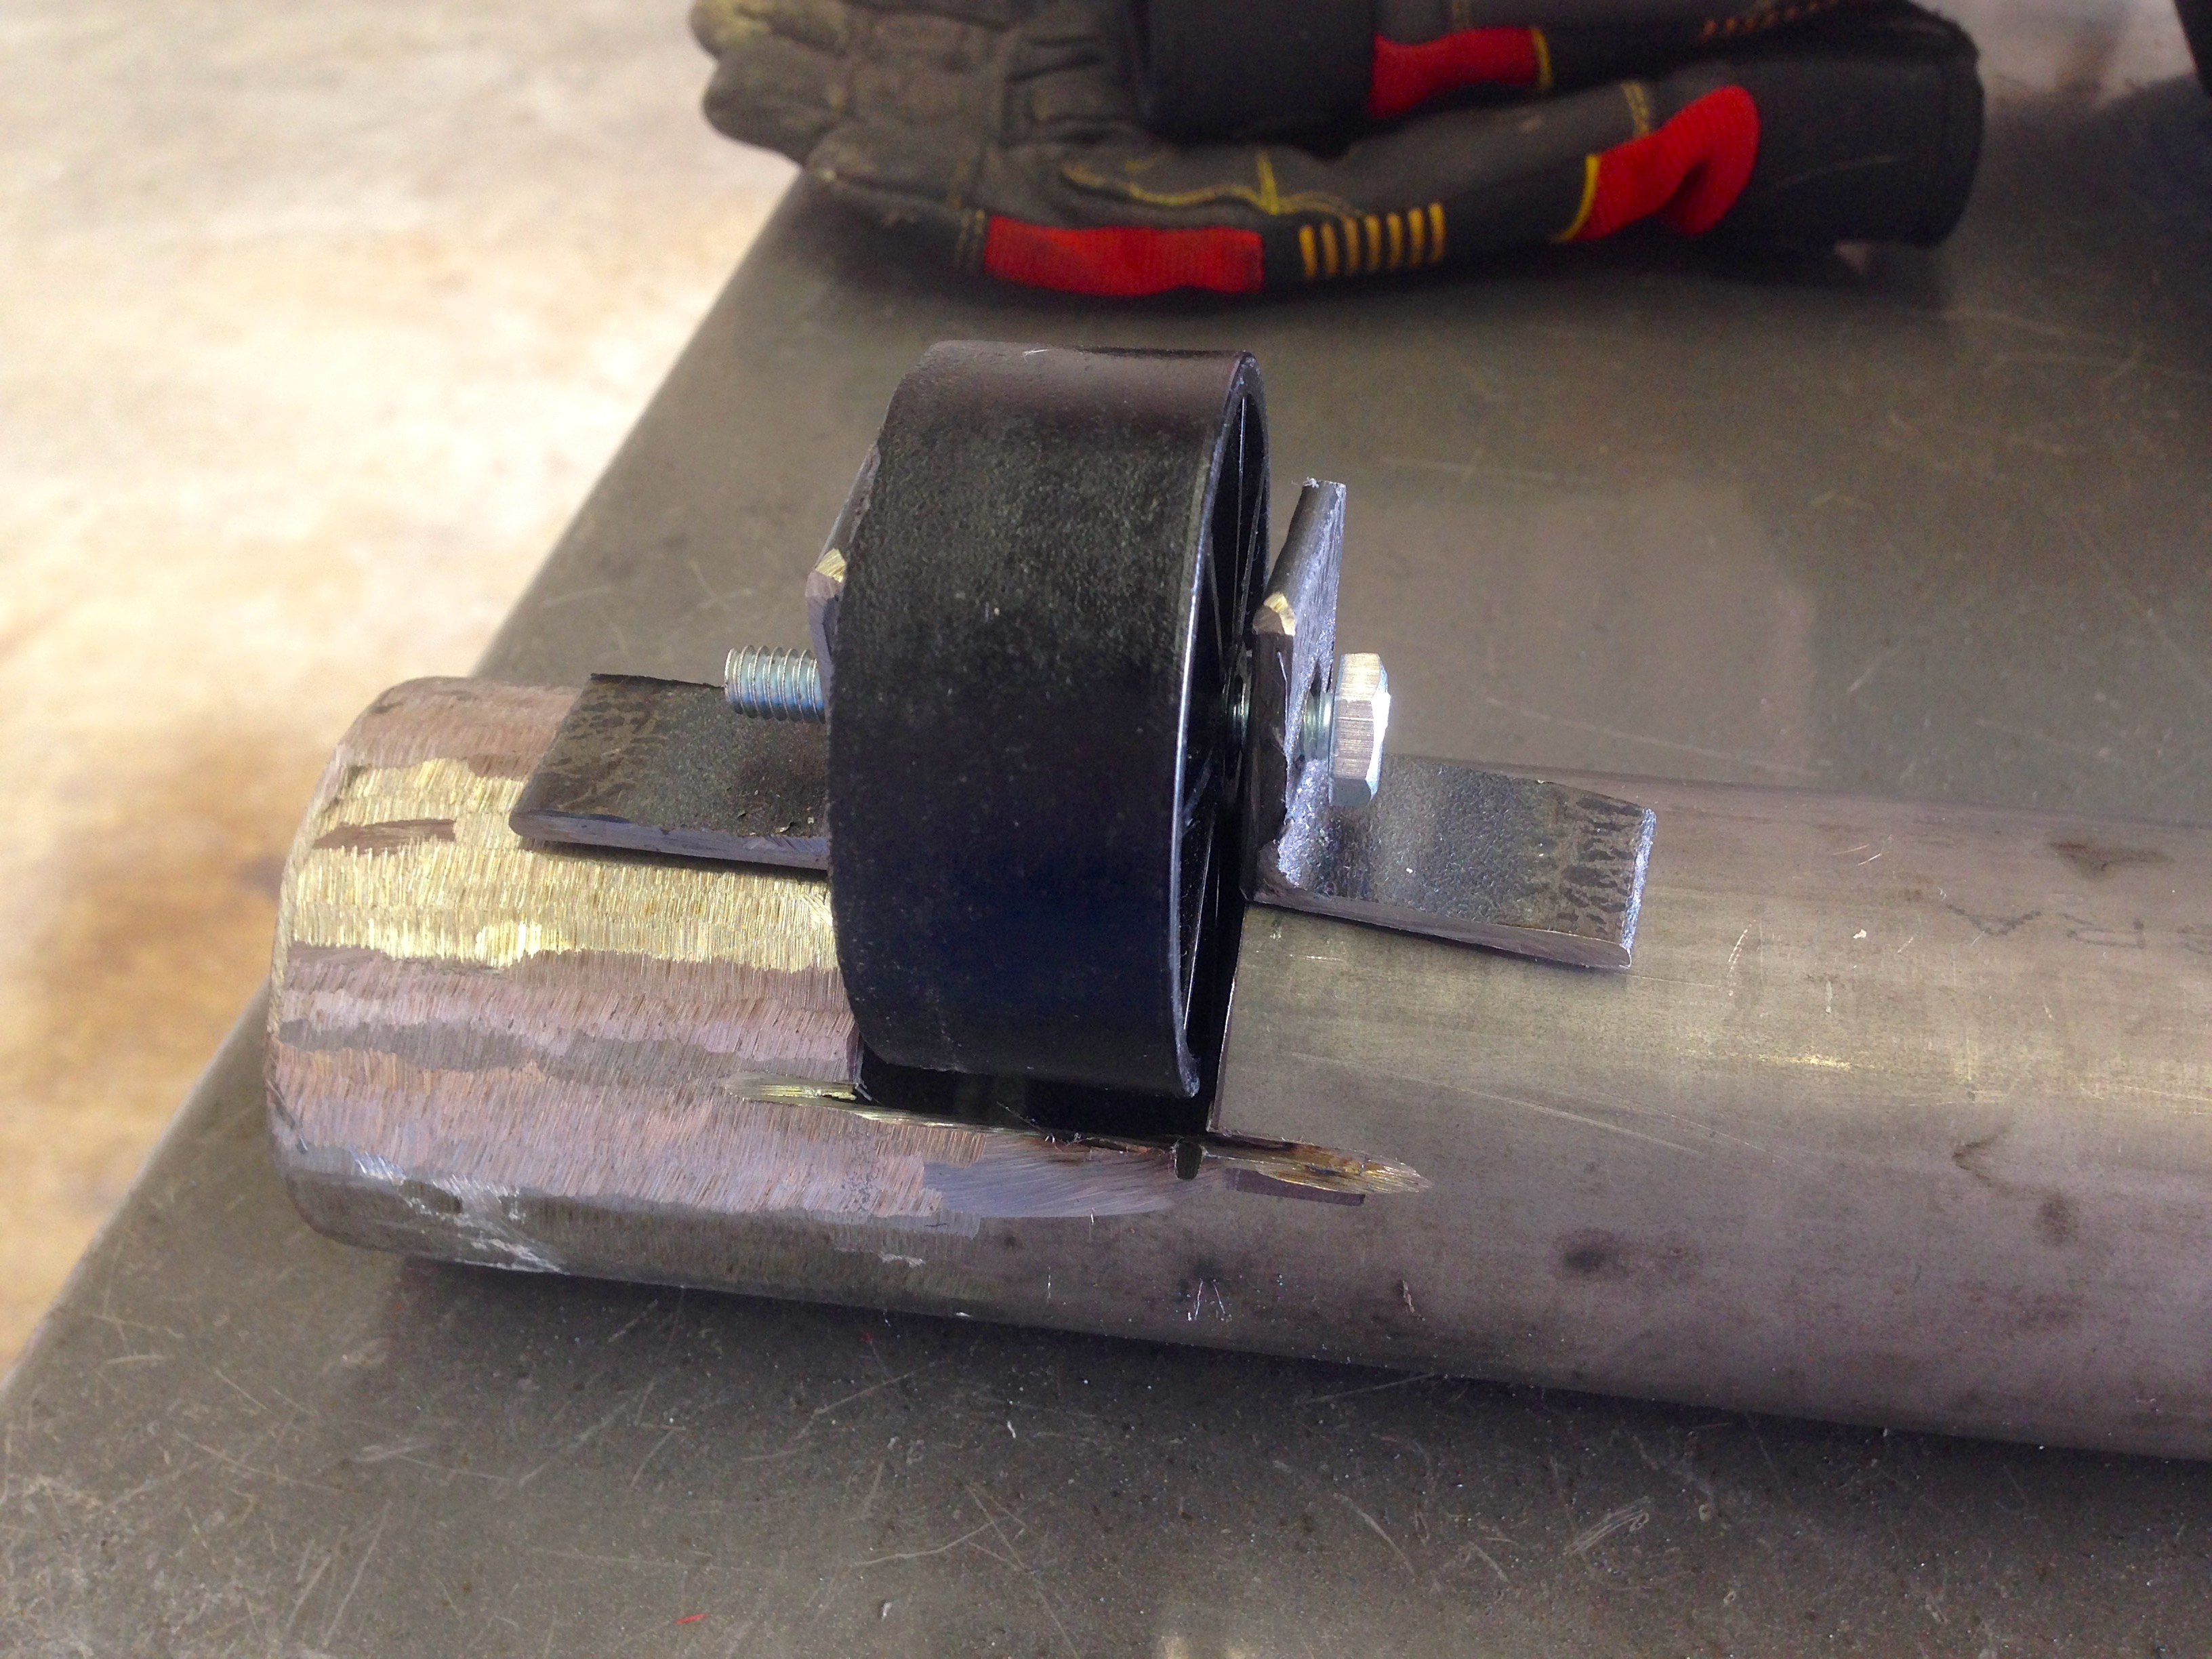
I am a lousy welder, so I won’t offend you with any close ups of my work. Welding is a lot like race car driving- anyone can do it poorly, but enough to get by. Doing it well takes training, talent, and many years of practice. That said, everyone should definitely try welding. And race car driving, for that matter. Just go for it!
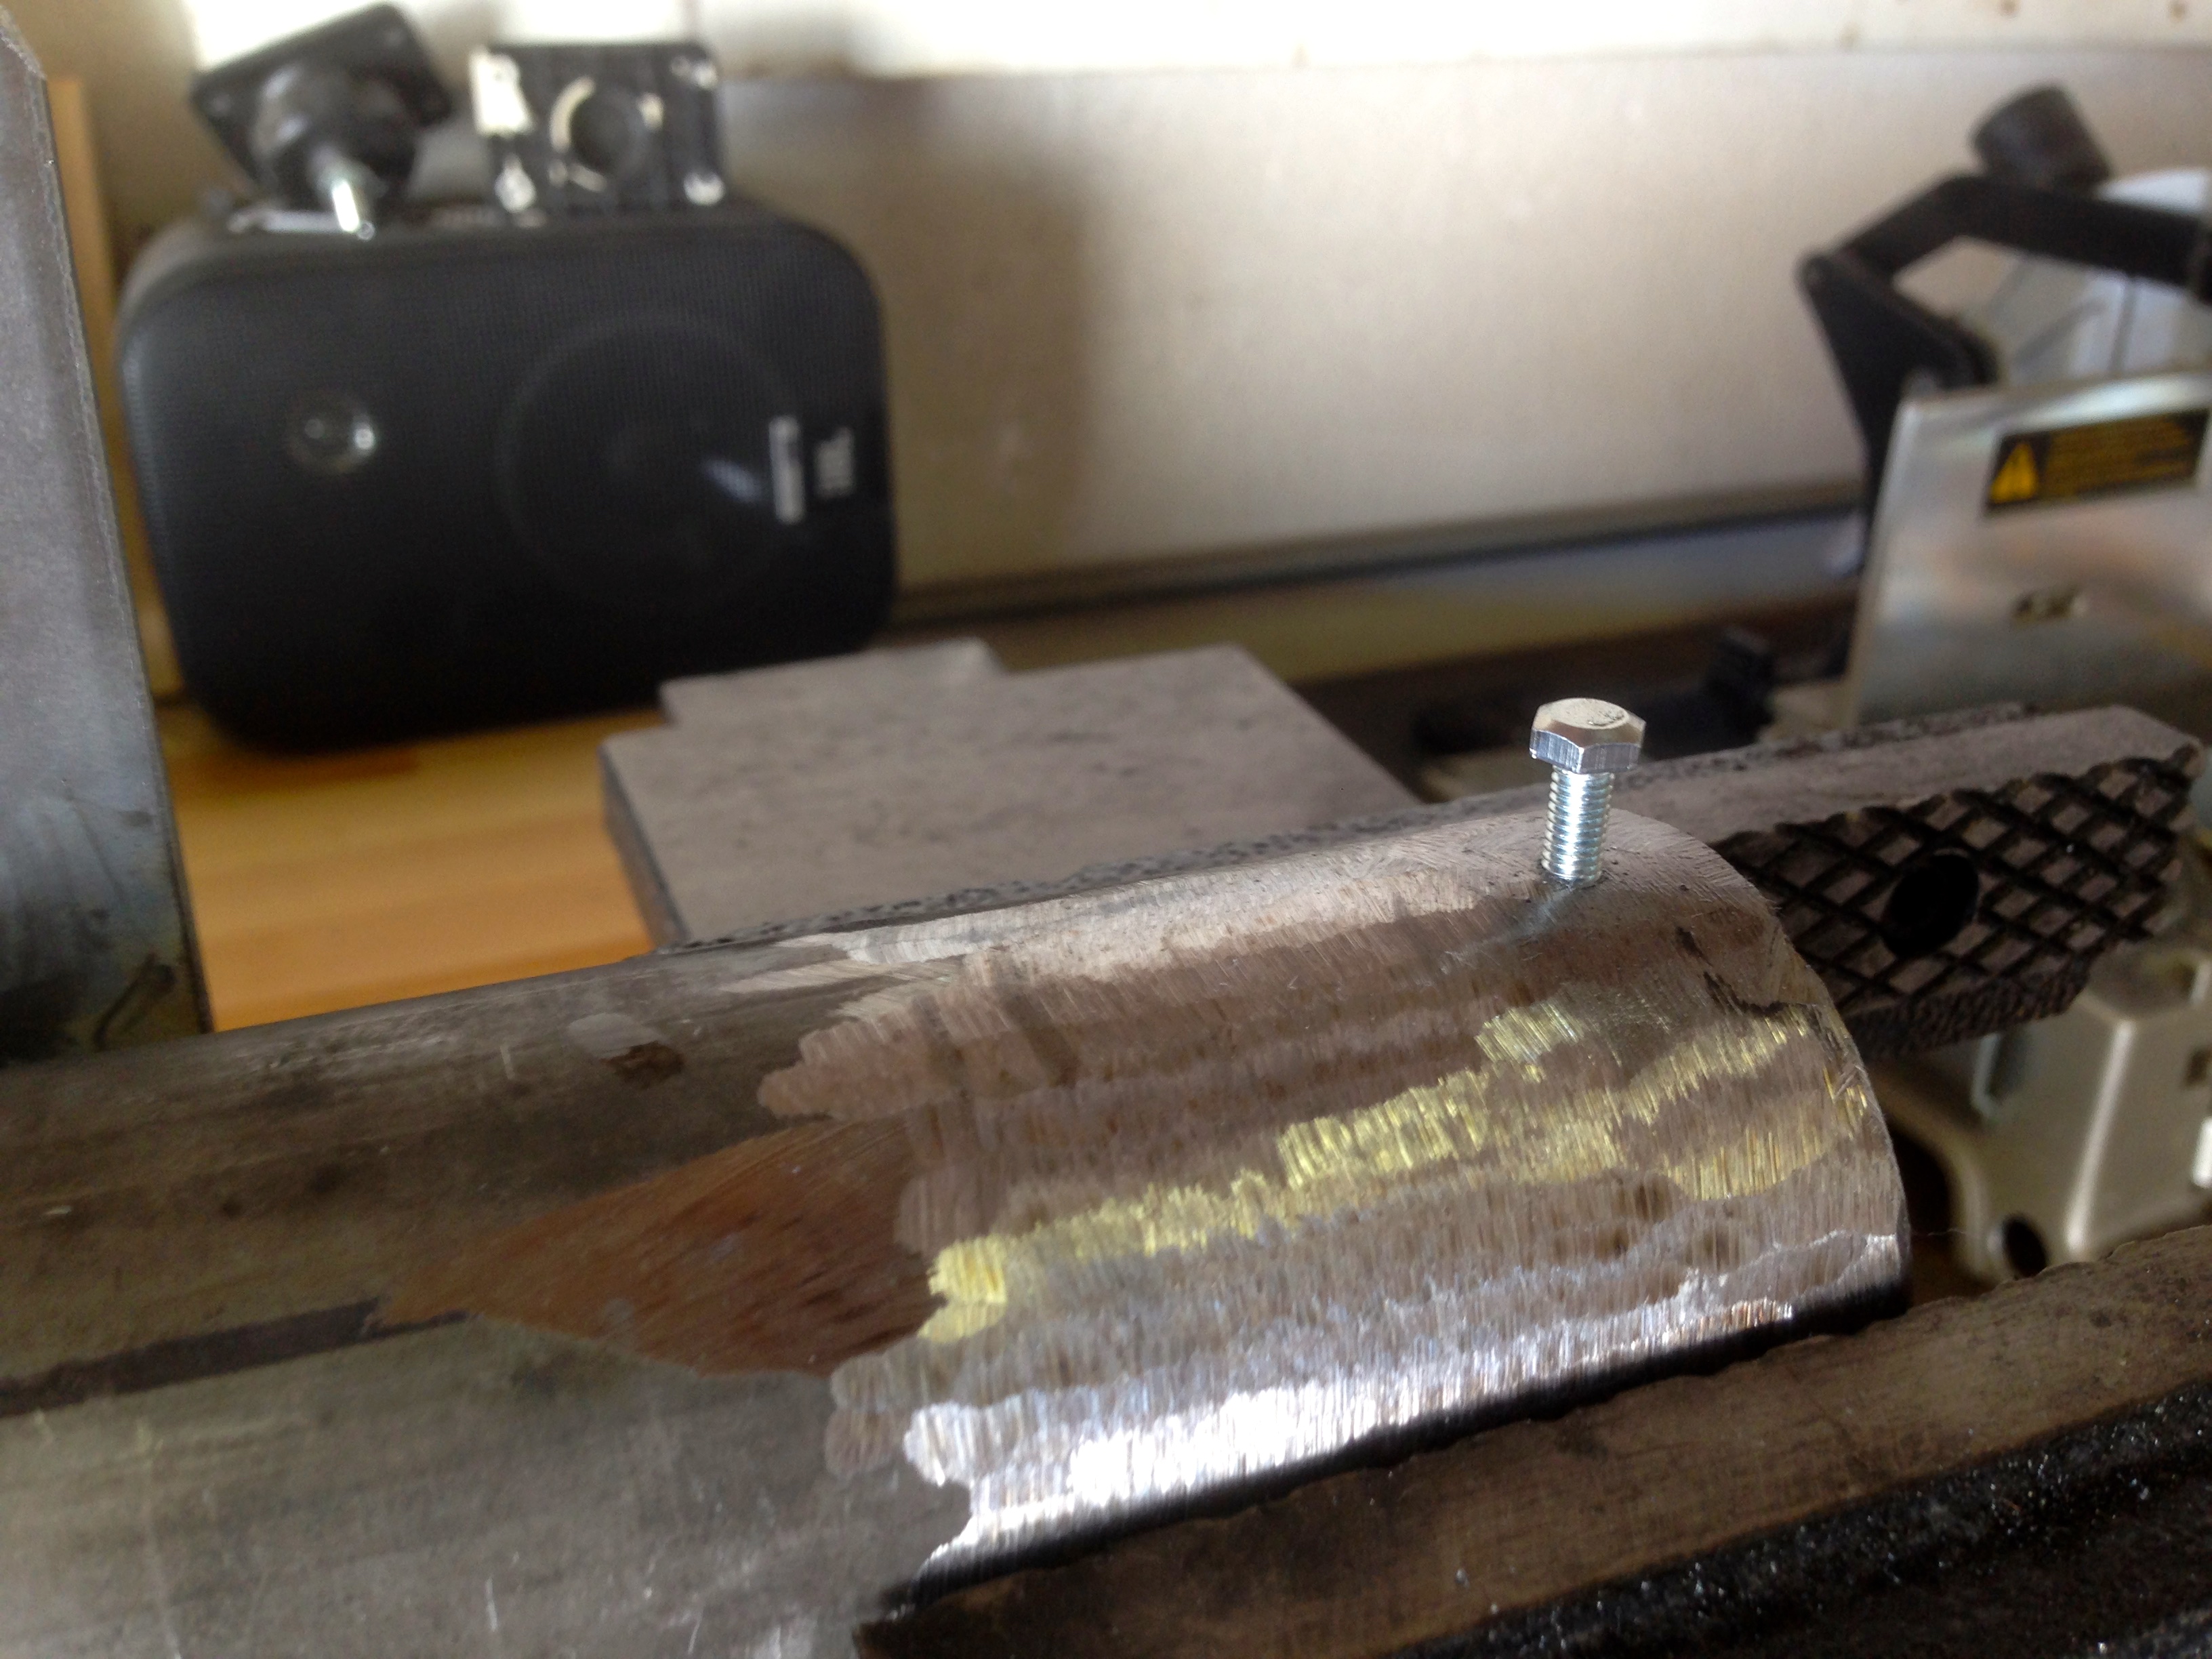
As you can see in the above mock-up, I’ll be using the lazy-hackers’ axle- a bolt with a double-nut on the end. Bolts are not really meant for this type of load, but for occasional use on plastic wheels, they are way way more than sufficient.
I also added some rearward-facing plates to the bottom of the tubing. This serves to increase the contact patch of the feet, and helps distribute the weight on the floor. They stick out backwards only, so that the machine can still be tilted forward on to the wheels for relocation.
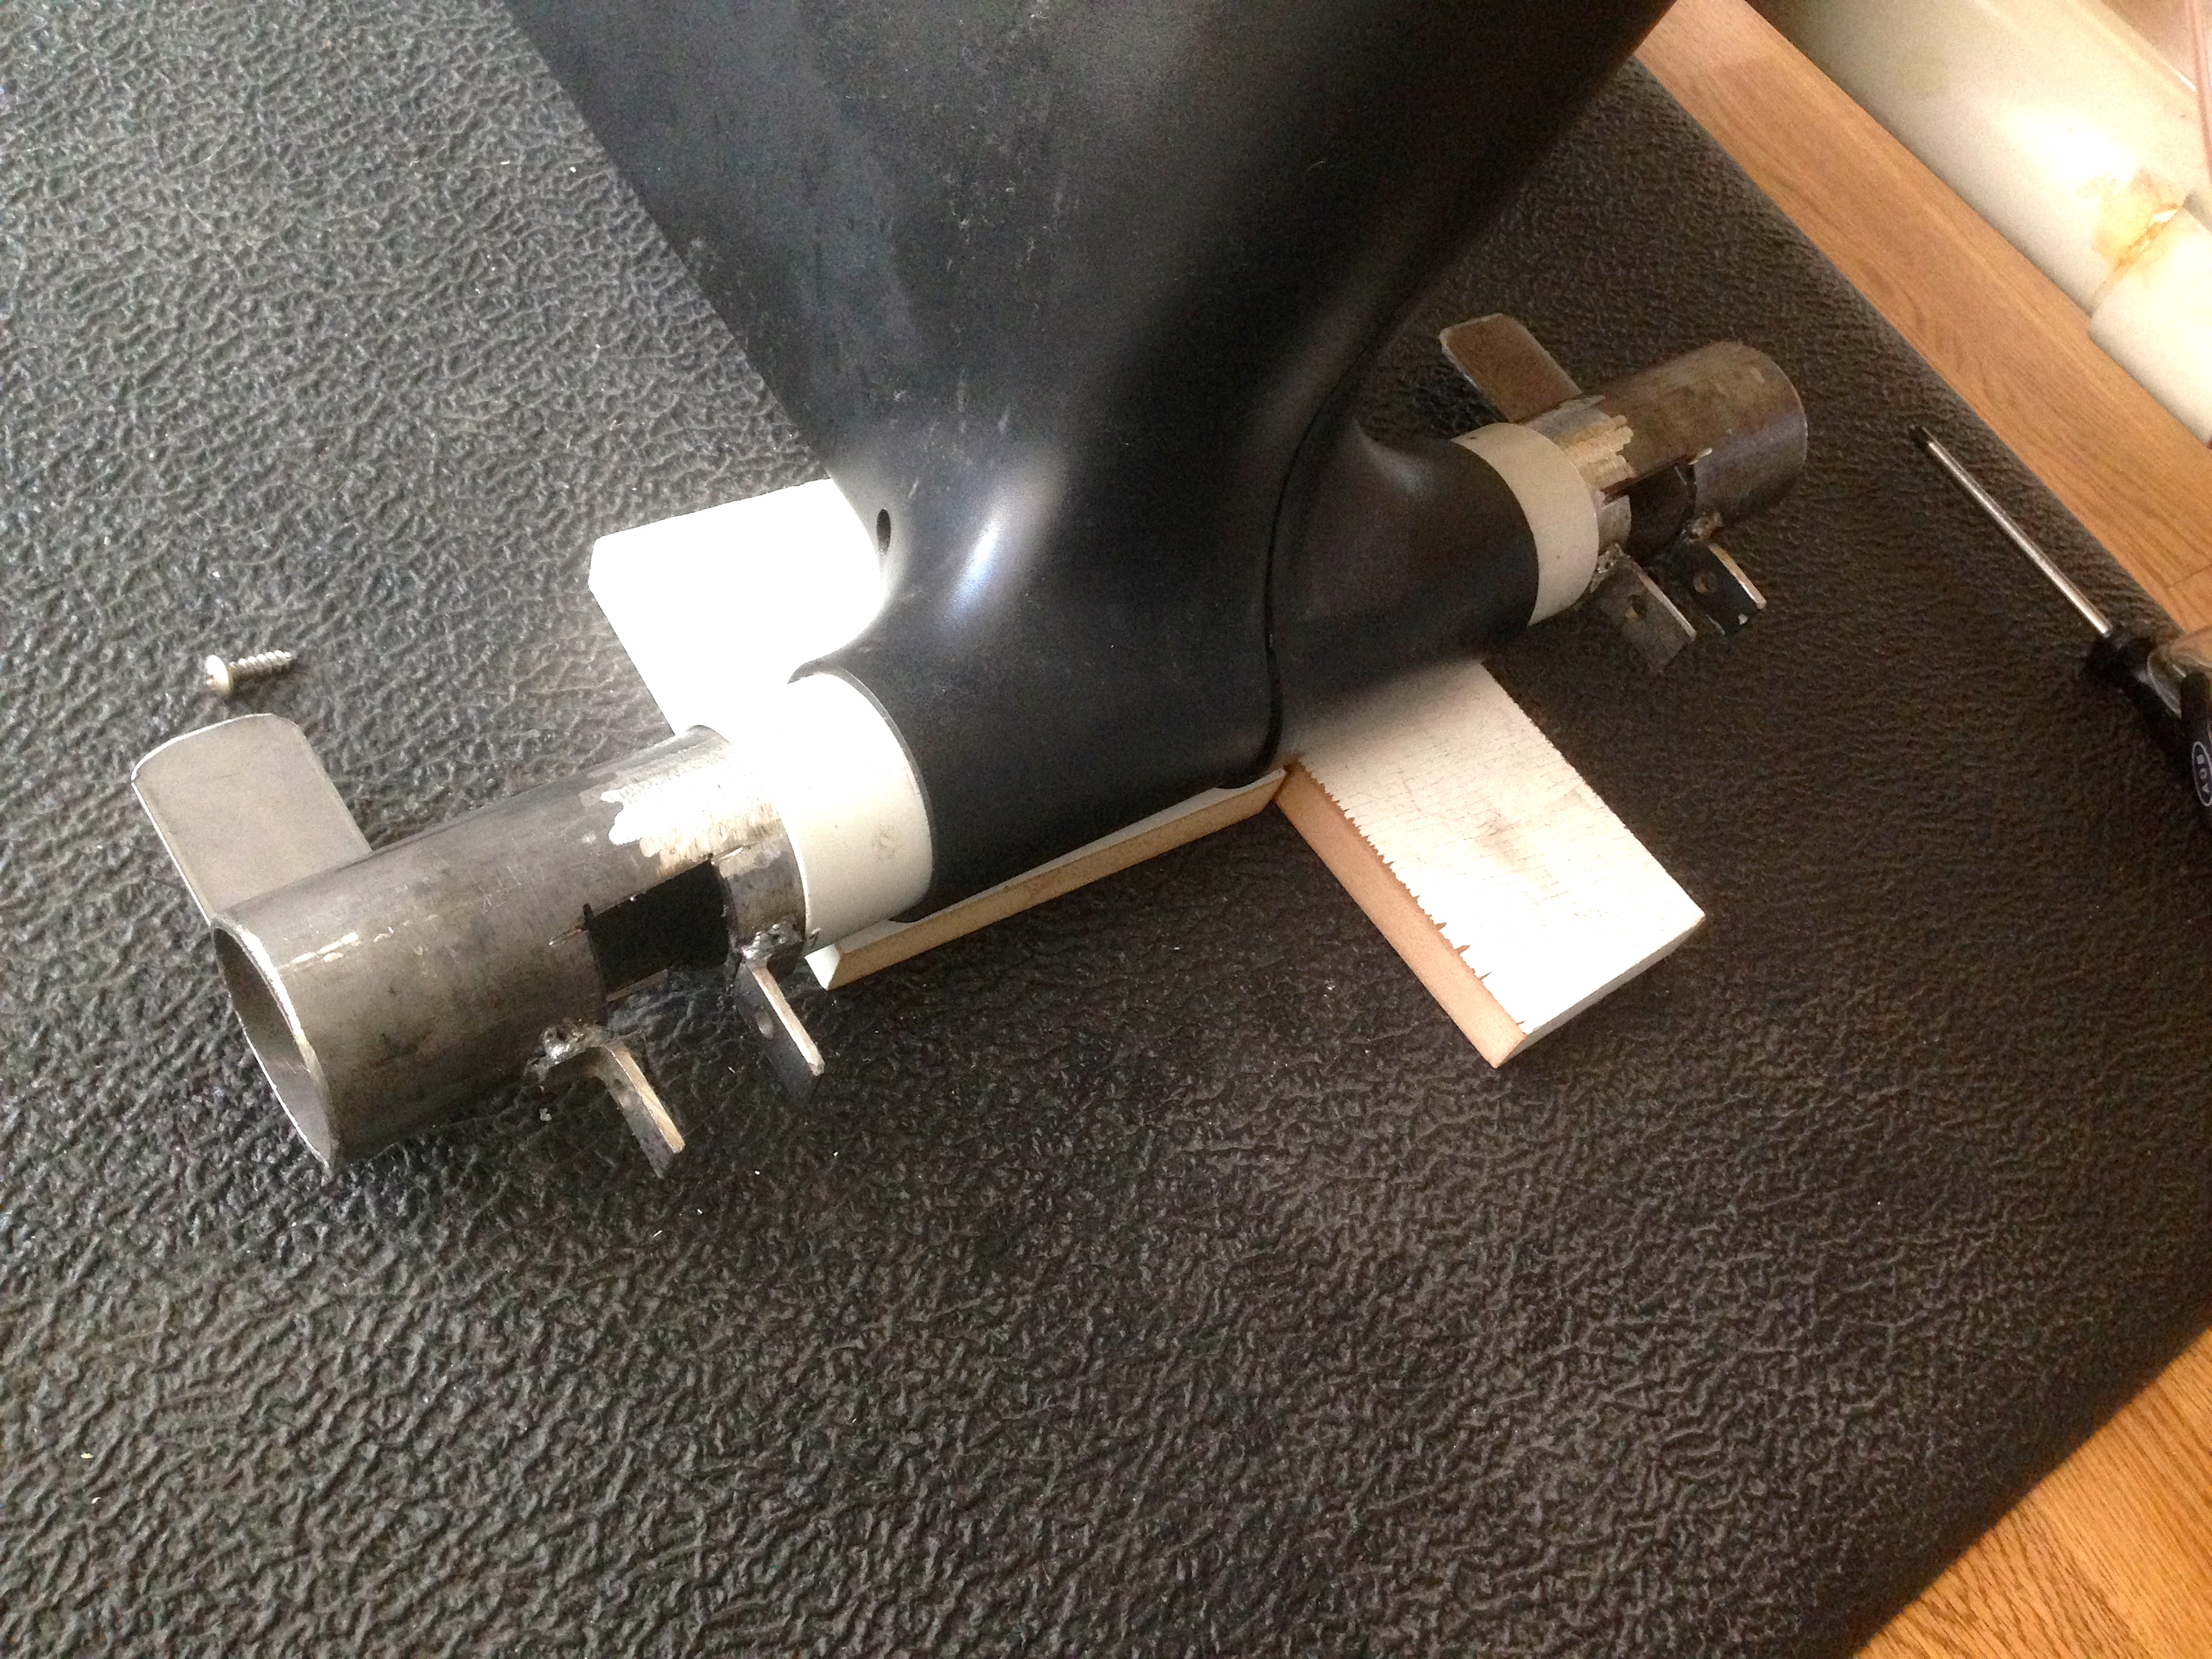
One last detail- the feet need something to prevent them from spinning in the tubes they mount to. The original plastic feet had a simple self-tapping screw put in from the side of the tubing on the machine. I leveraged this same method, but since we’re working in structural steel now, a tapped bolt-hole is more appropriate.
With confidence this was all going to work, it was time to dress things up. As the saying goes, grinders and paint make me the welder I ain’t.
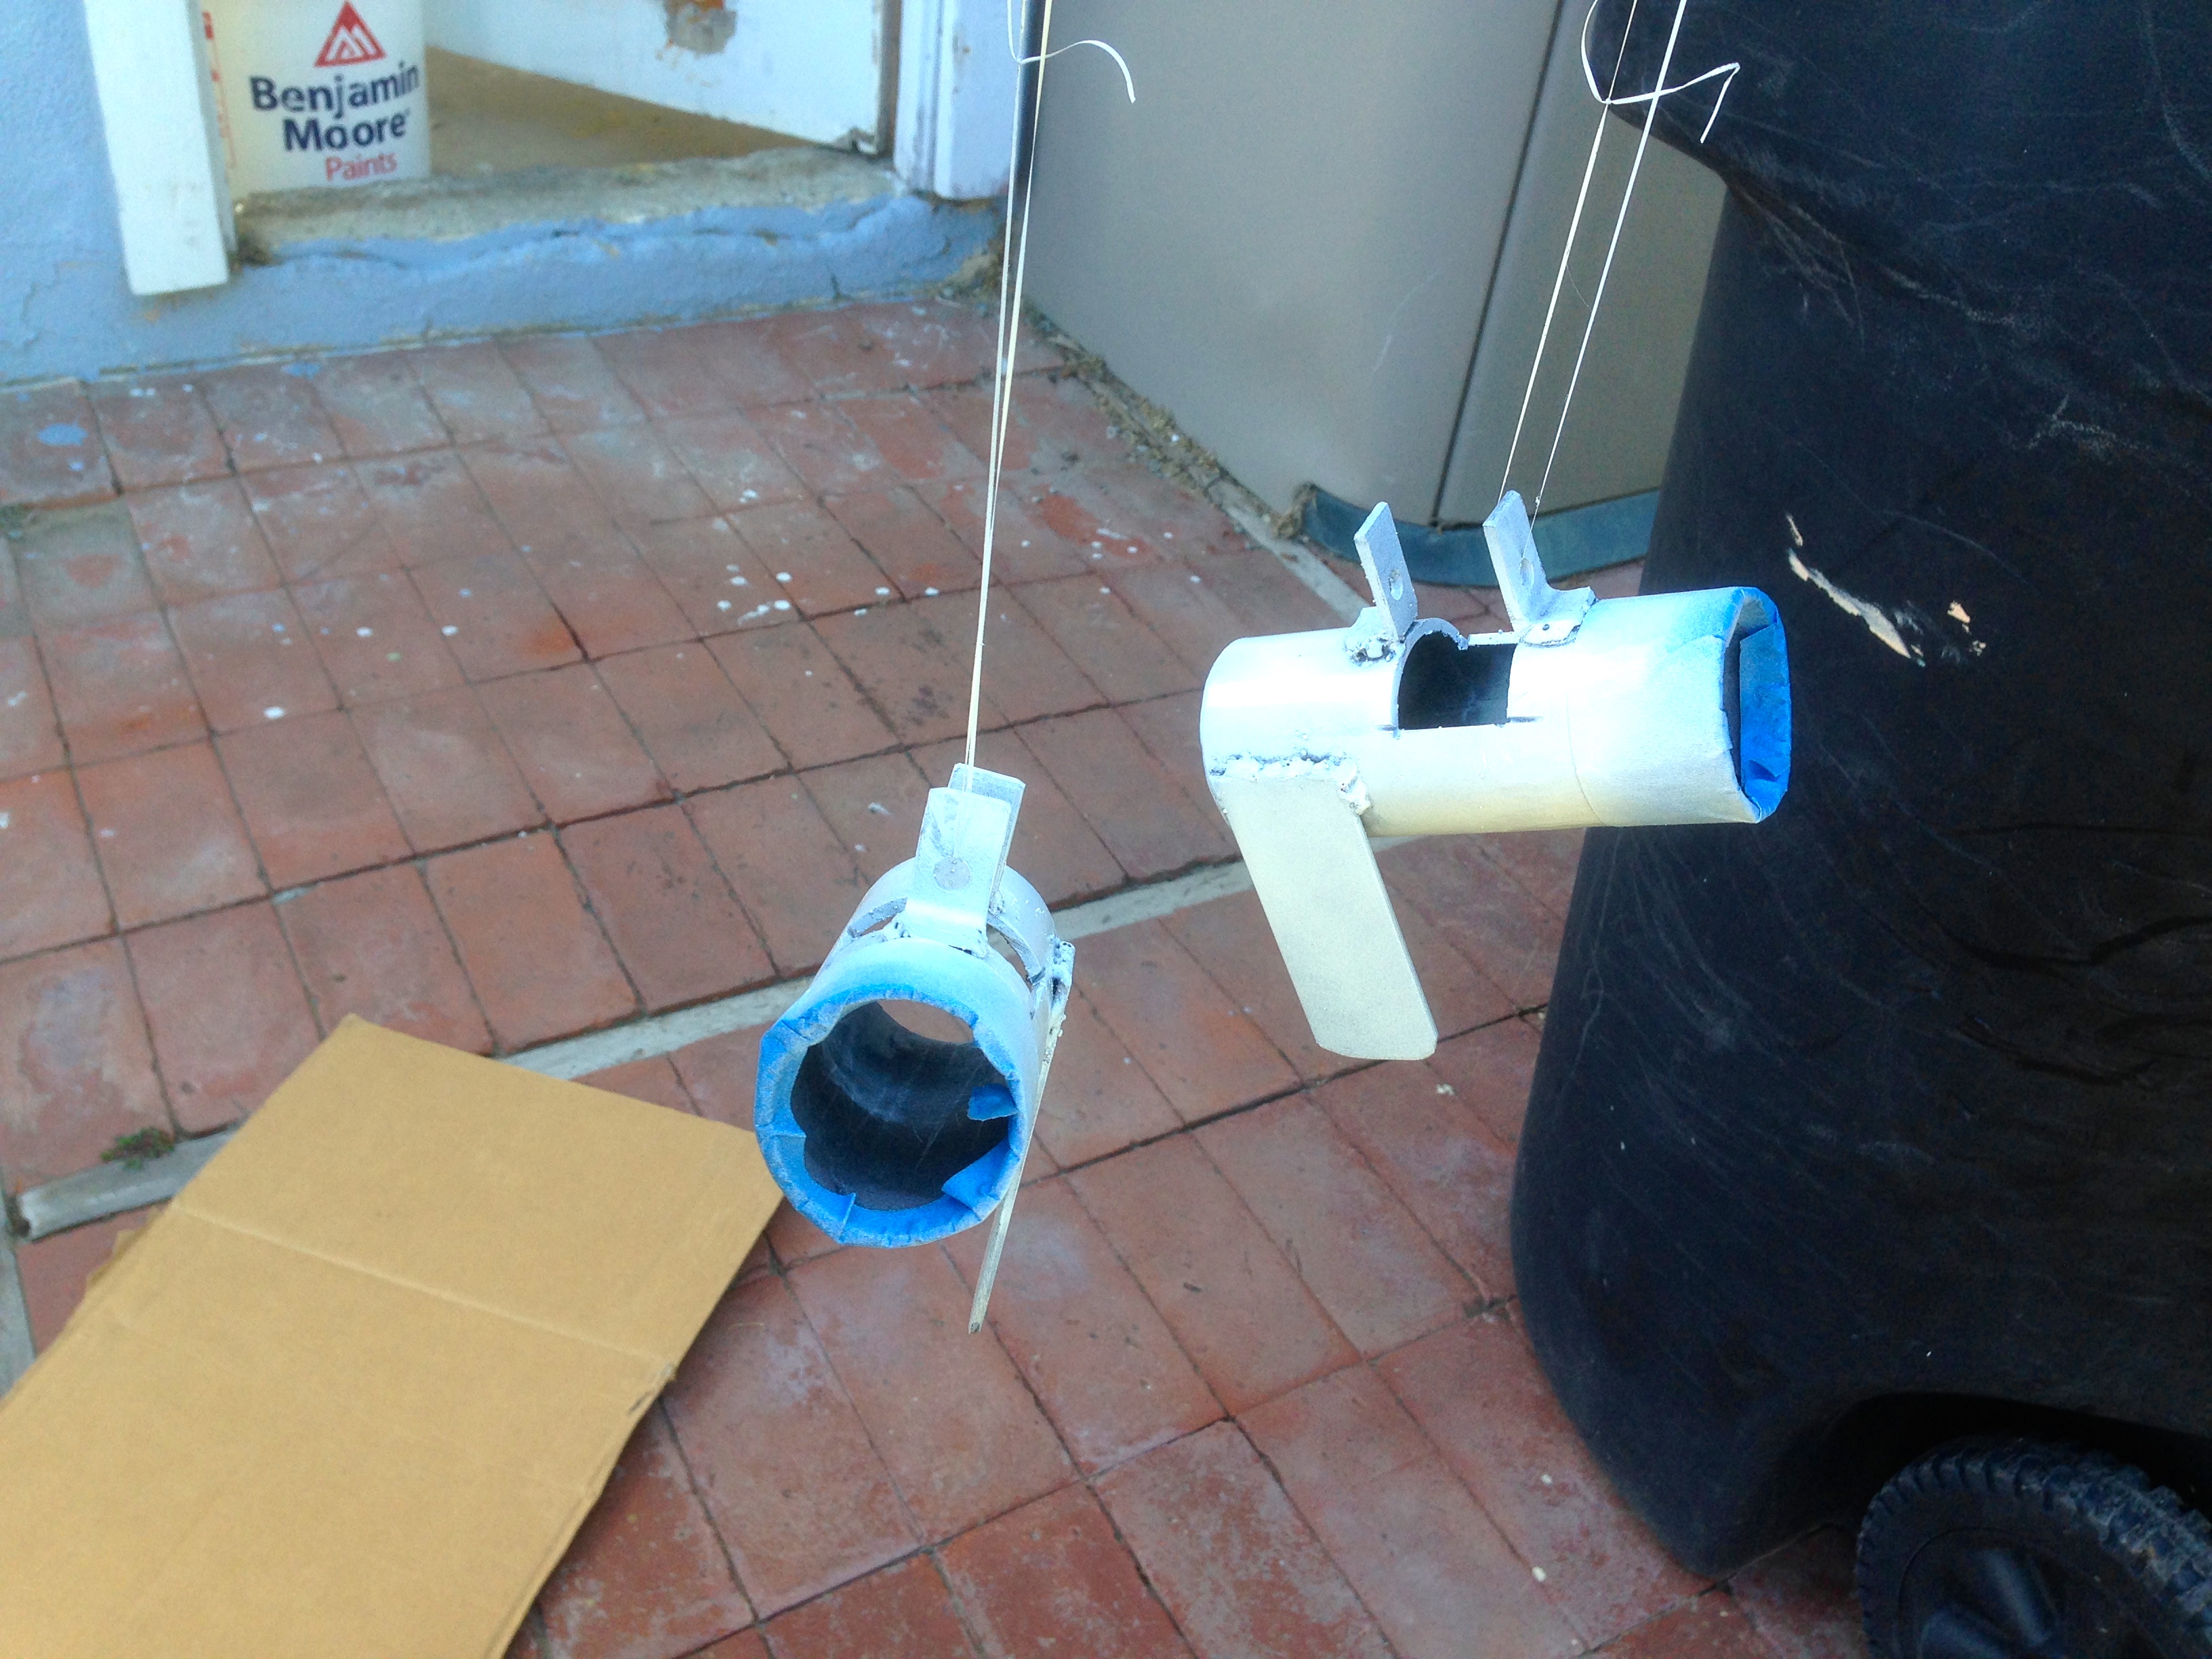
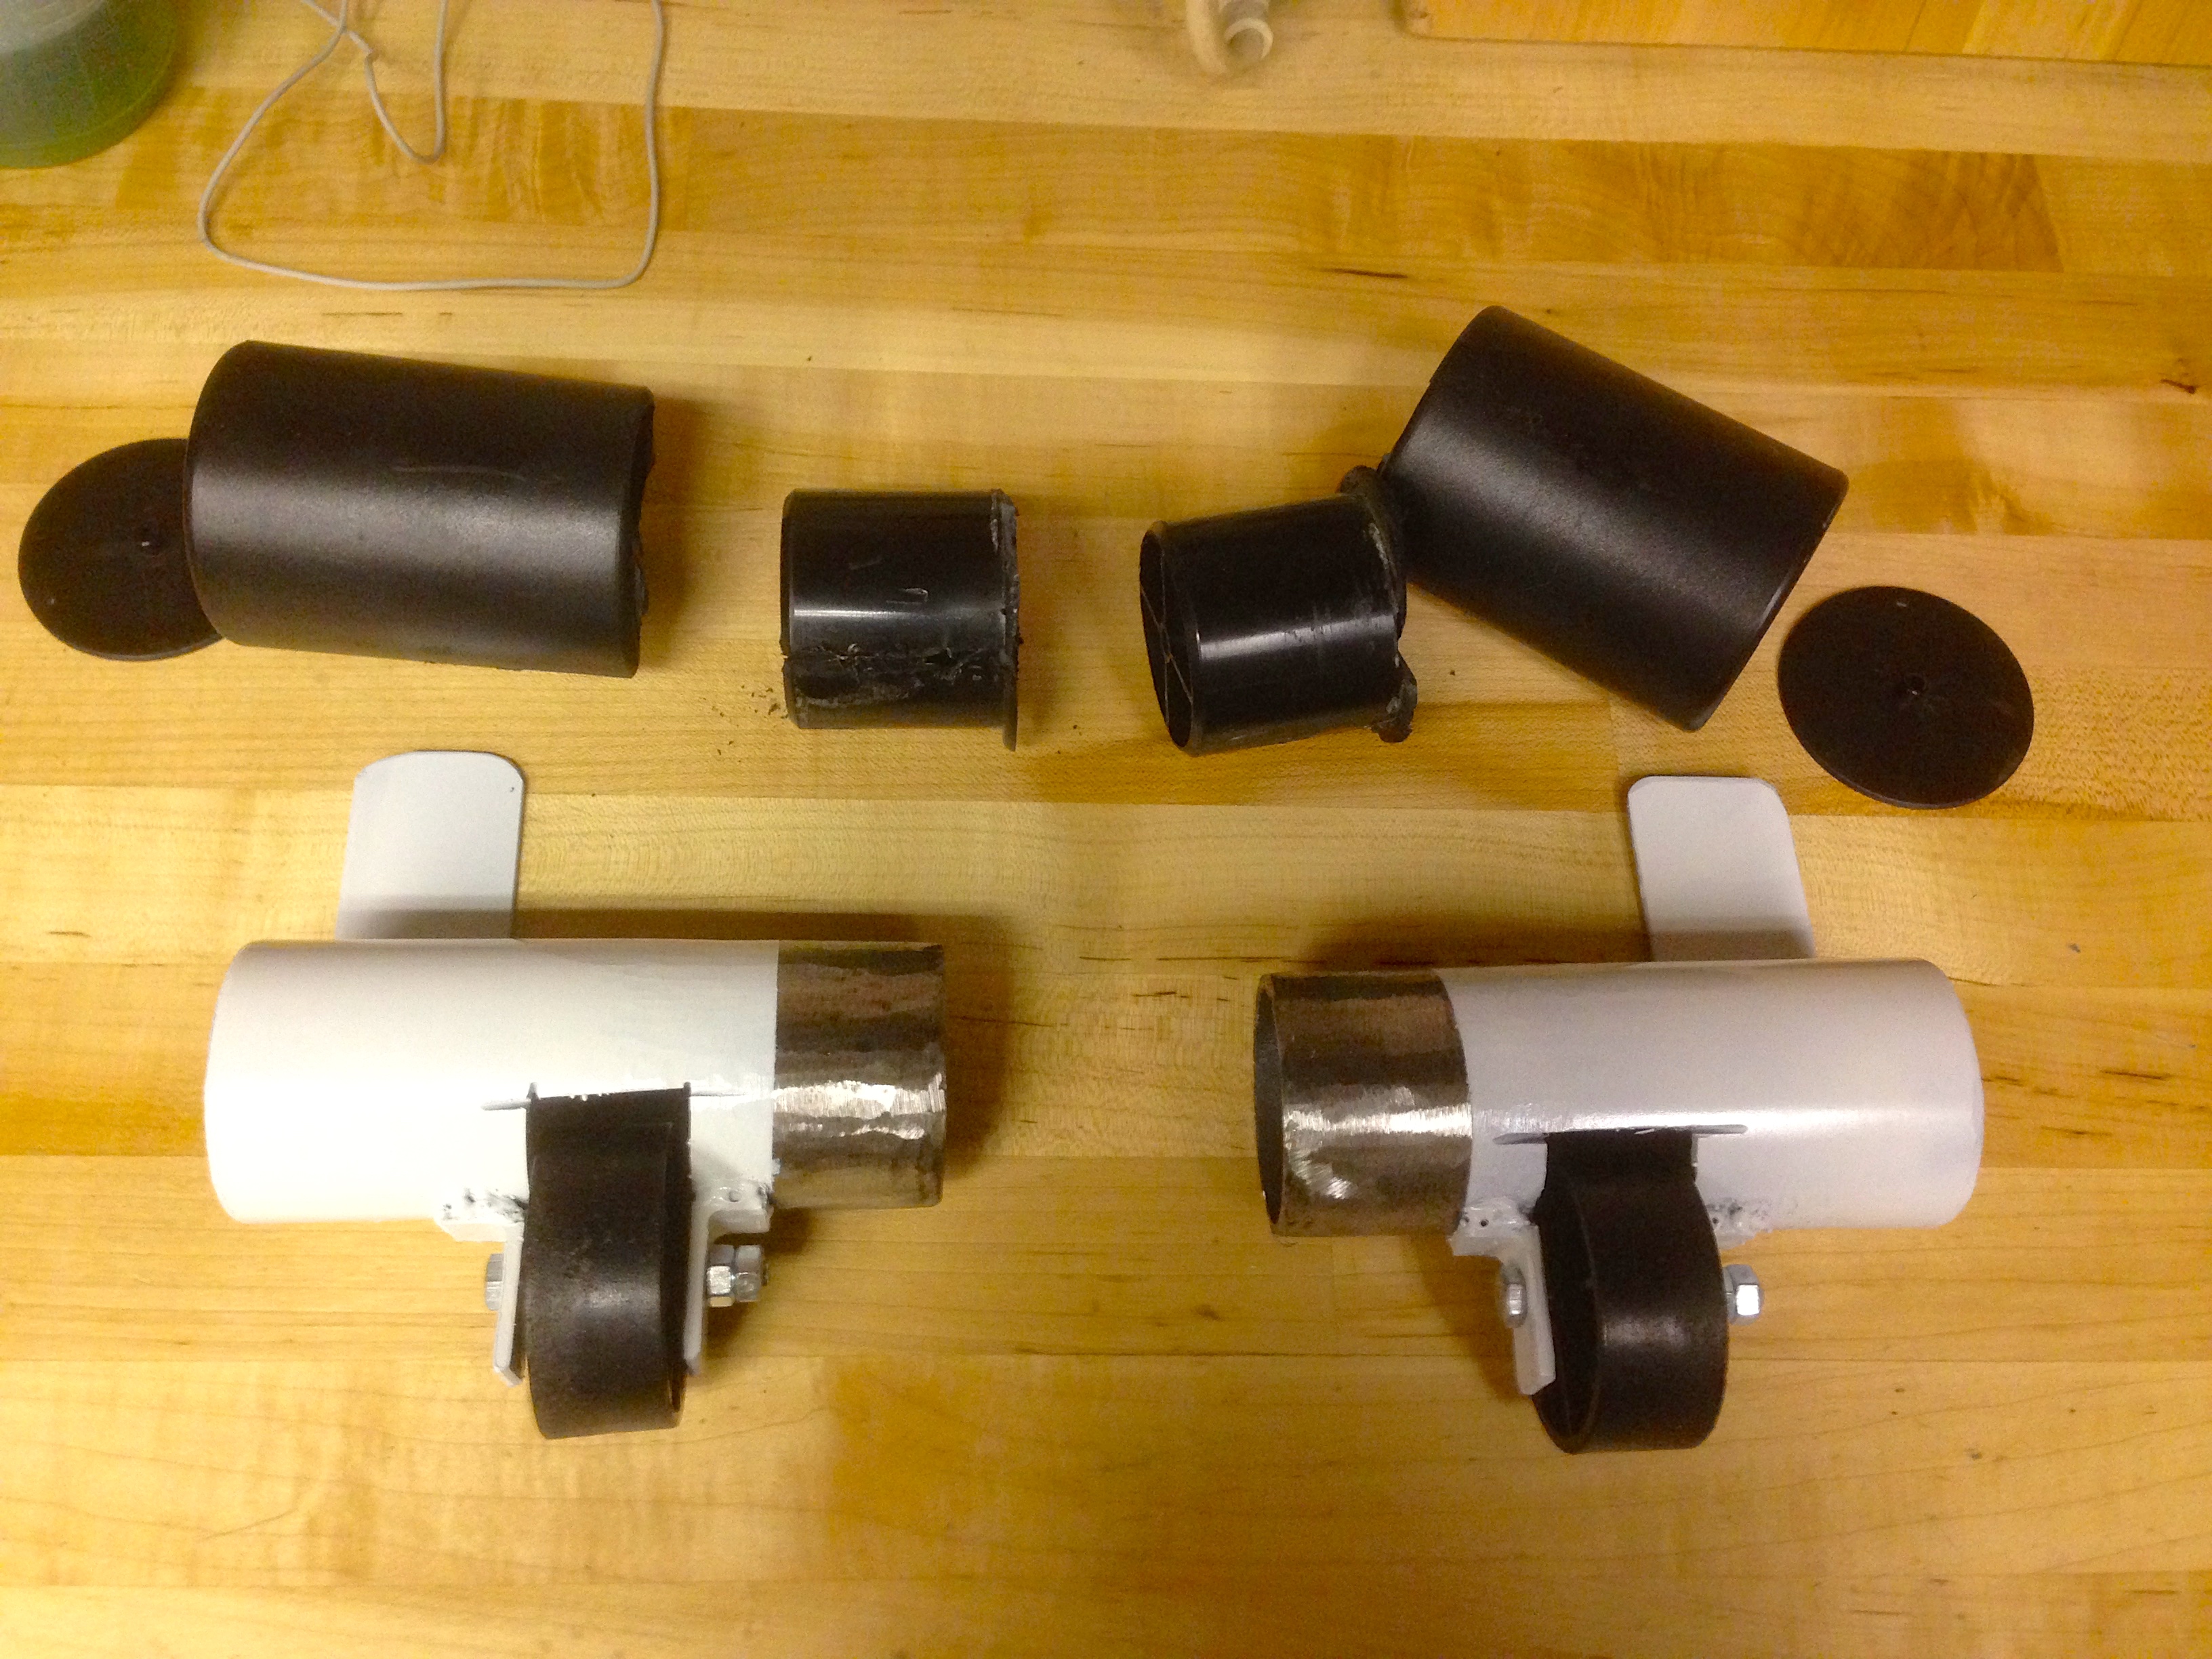
The last bit of polish was to plug the end caps of the tubular (and groovy) feet. I opted to 3D-print some plastic caps- something that I’m very thrilled to be able to do. The 3D printer is really finding a niche in my projects, and I’m slowly becoming a believer in the technology.
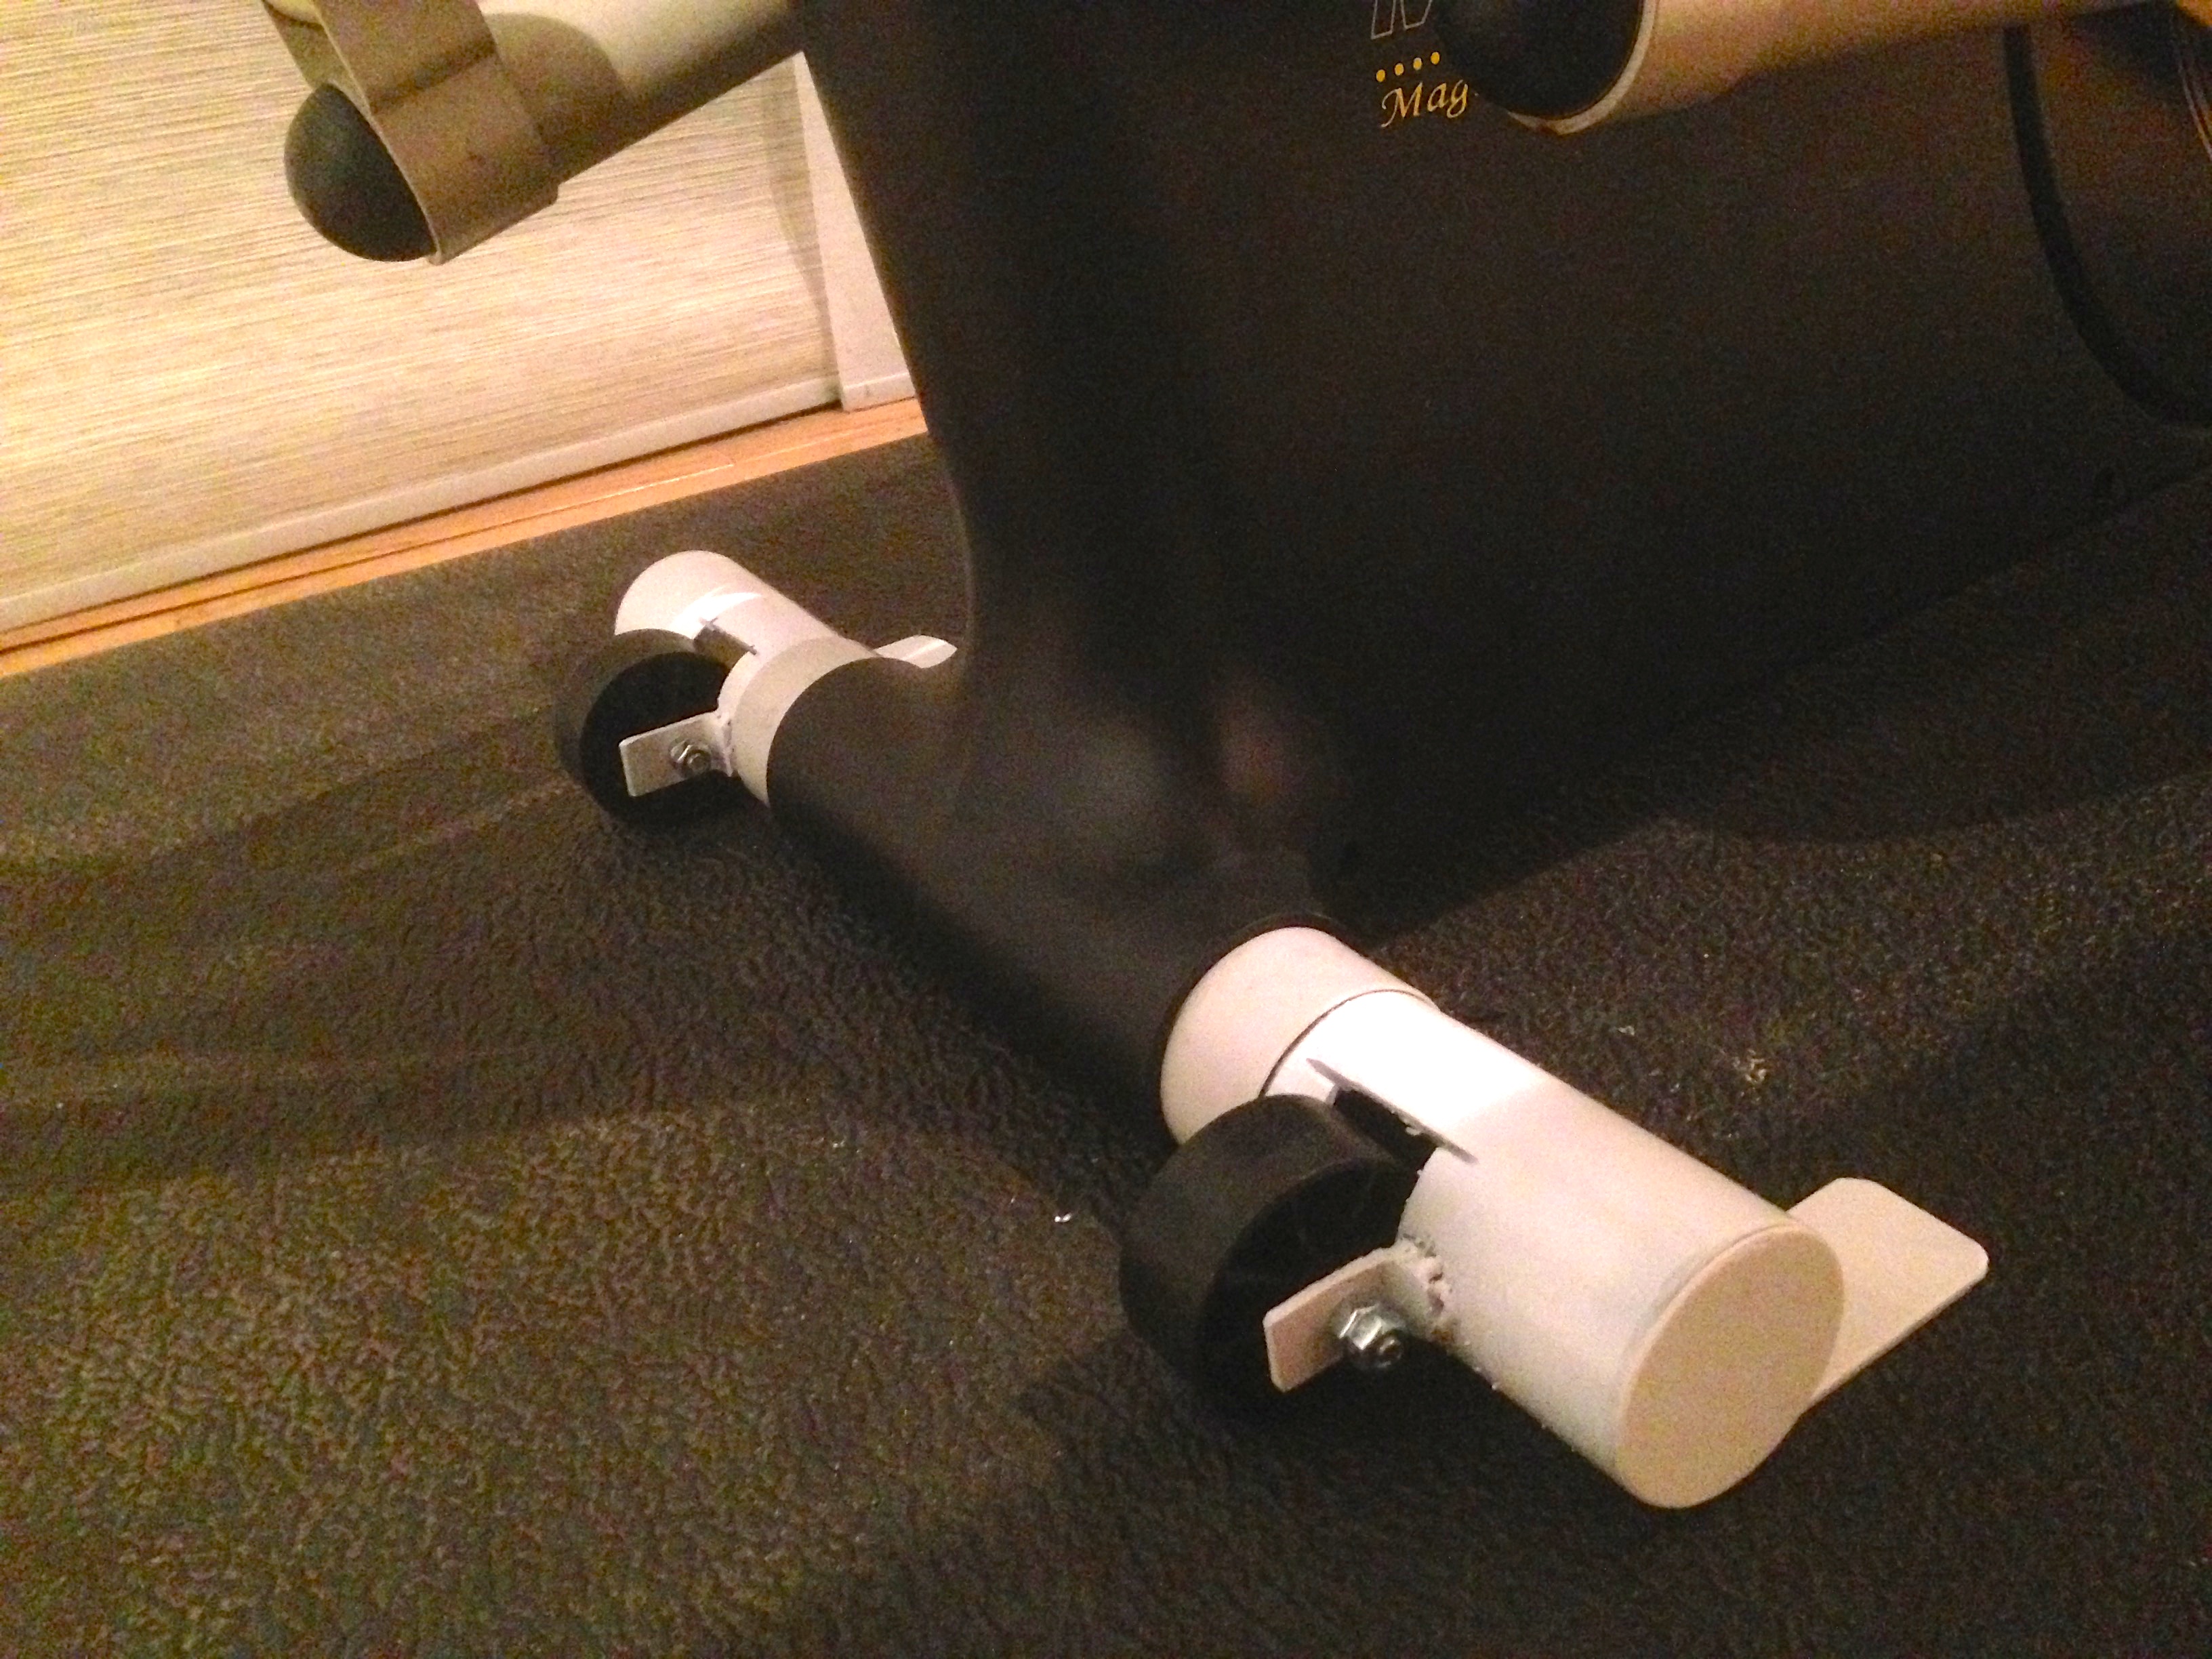
Result! These new feet will surely outlive the rest of the machine. And the house the machine is in. And probably the neighborhood the house is in. Suffice it to say, these are no longer the weak link in the system.
As for the name “elliptifeet”, well, you know who you are.
Are the rollers still going? Did you ever consider longboard wheels?
Yep! The Aggressive rollerblade wheels are still doing great. Since that blog post about the rollers, I have replaced the bushing that the rollers mount on. I was originally using the half-width bushing pairs from the original machine, but they caused a lateral stress on the wheels and was squeaking and snagging. Each pair of roller blade wheels is now mounted on a single piece of pipe that fits over the crank shaft, with a layer of grease in between. Works great, and is showing no signs of wear.
God, there’s just something about a woman in a welding helmet! Okay, I’m sorry.
God, there’s just something about a woman in a welding helmet! Okay, I’m sorry.
It just makes you wonder why things aren’t built to last anymore. We just fill up landfills with the stuff that others can’t/won’t fix. Grrr.
Well thanks for taken the road less travelled… Again.