Another project tool followed me home.
If you do a lot of metalworking, you very quickly get tired of making cuts. Your choices are, generally, a hand hacksaw, or a cutting wheel on a grinder. The hacksaw works okay for light tubing and such, but you’ll be sad trying to do anything heavy that way. The angle grinder with a cutting wheel is pretty fast, but it’s very noisy, and it’s pretty much impossible to make a square cut. It also makes a hell of a mess. You know all those “sparks” that fly off a grinder? Those are actually particles of metal, and you will find them as a black dust that covers everything in a 10′ radius of whatever you are grinding. Luckily, there are nicer options for cutting steel. One of the nicest is a horizontal metal-cutting bandsaw. These are rather expensive toys if you get any kind of decently-sized one, or a good quality one. Luckily, in this era of globalization, we can buy a small crappy one for very little money, and spend some time making it pretty good.
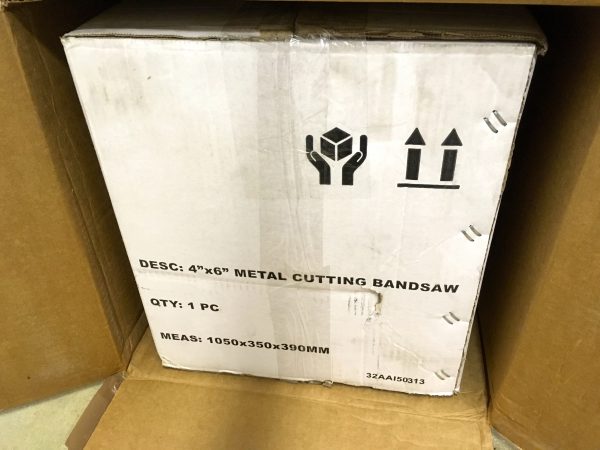
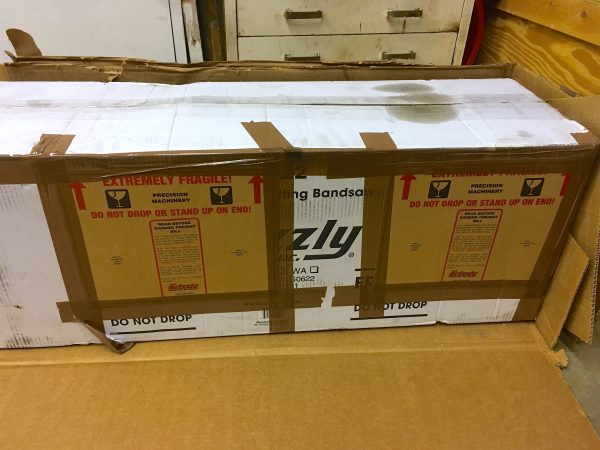
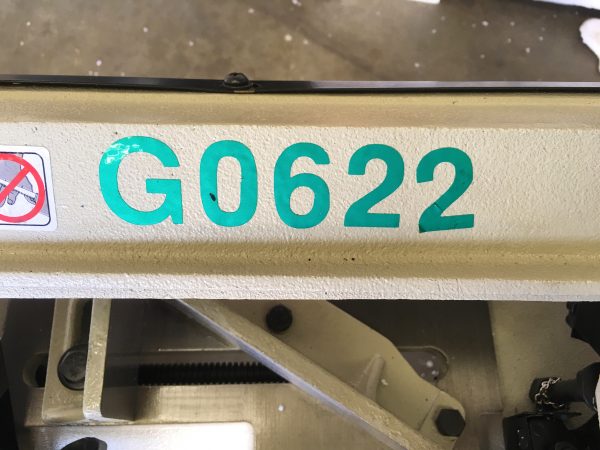
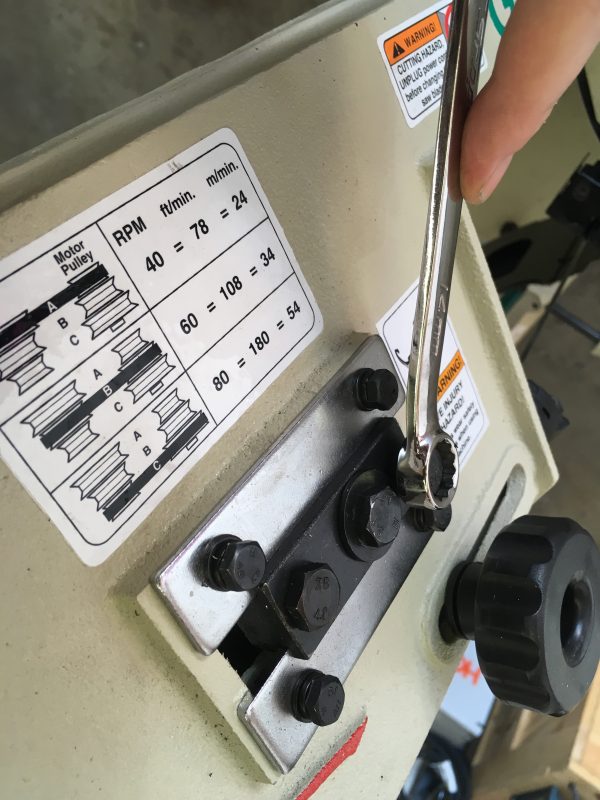
You might consider this part 2 of my series on the industry of built-to-a-price-point tool rebranding. We saw a bit of this earlier with the drill press, but it’s even more pronounced here. Metal bandsaws are rated by the largest cross-section of stock they can cut. Generally speaking, the smallest one you can buy is 4×6. This size is so popular for hobbyists that you find rebranded versions of this same model all over the place. Much like the drill press, this exact saw is sold everywhere as Harbor Freight, Northern, Fox, Jet, Sieg, Central, etc. They’re all the same budget machine from some factory in Asia, repainted and with different stickers slapped on it. In this case, much like my drill press, I opted for Grizzly Industrial’s version. They paint it green and call it the G0622. I like their customer support, they write nice English manuals, and sometimes their stuff is even on Amazon.
Unlike the drill press, I ordered this saw direct from Grizzly. They don’t have the nice Scheduled Delivery service for freight items that Amazon has, so this was a bit inconvenient. The freight company didn’t show up for their first appointment, and on the second one, they arrived, but the box had not been treated well at all. This was probably only partially the shipper’s fault, as we’ll see.
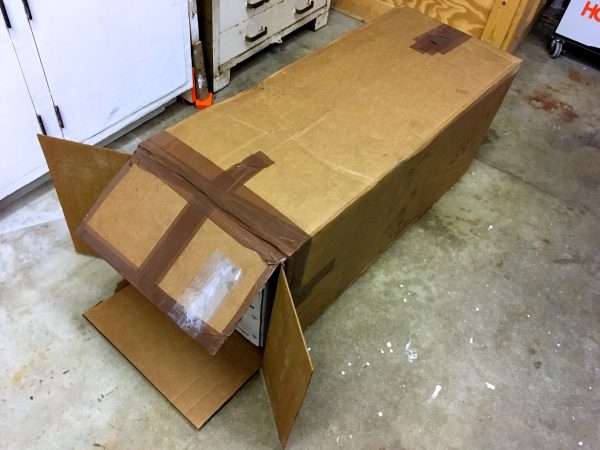
When the truck driver opened the door, I was dismayed to see the box standing on end, and one corner was smooshed in a distressing way. I opted to take my chances with it and accept the delivery anyway. Luckily it turned out okay. I reasoned that the critical part of the saw is the cast iron body, and that was surely fine. Everything else can be fixed.
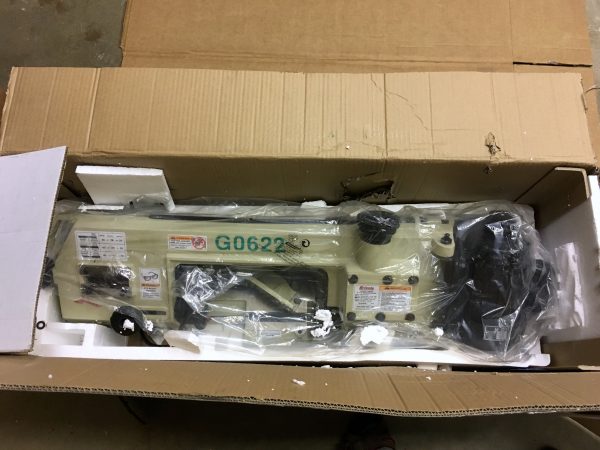
The inner packing material was destroyed and the motor mount was bent, but otherwise the saw seems fine. Let’s put it together!
As I said on the drill press article, you should manage your expectations when receiving a budget tool like this by freight. The packaging will not be sufficient, and it will not be handled well. Expect some damage, and accept that it’s part of the deal for something that offers so much potential value.
That word “value” is key here. I’ve griped a lot already about how poorly put together this saw is, but the fact is, it is very very inexpensive. It’s a lot of tool for the money, and if you can spare some time and ingenuity to tune it up, you get something that will perform very well (as we’ll see). Just understand that you’re buying a small project, not a plug-and-play power tool. Manage your expectations, and you will enjoy the purchase.
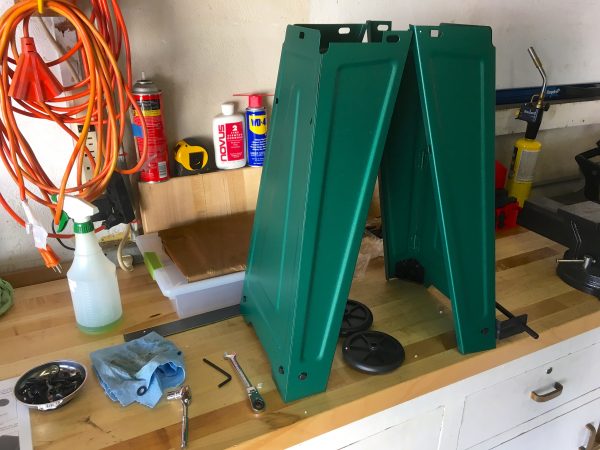
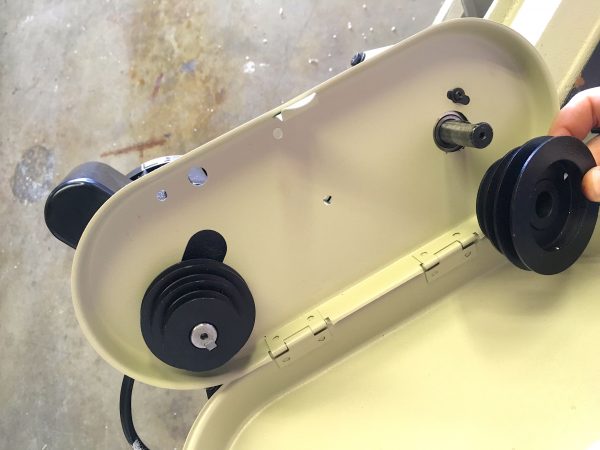
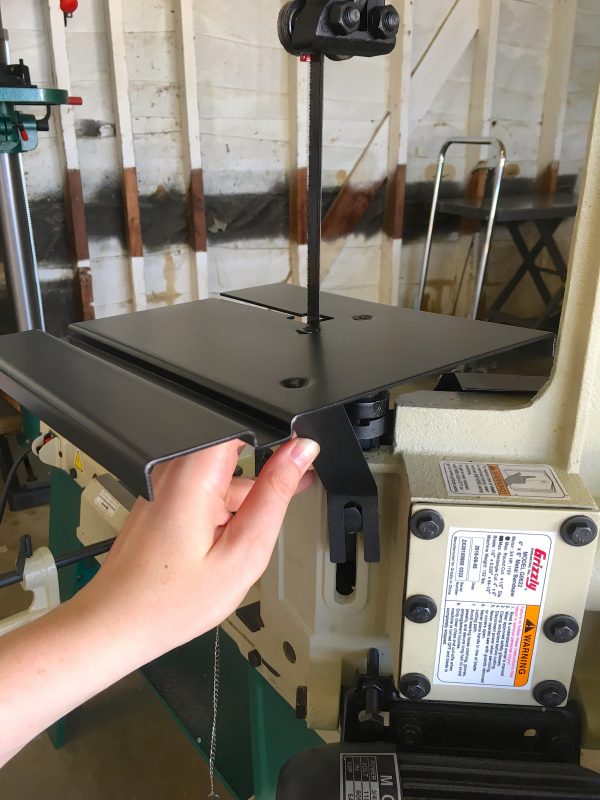
The first step in assembly is the base. It’s an origami stamped sheet-metal contraption just barely sturdy enough for the job of keeping this 120lb saw three feet above the floor. Don’t expect anything else from it.
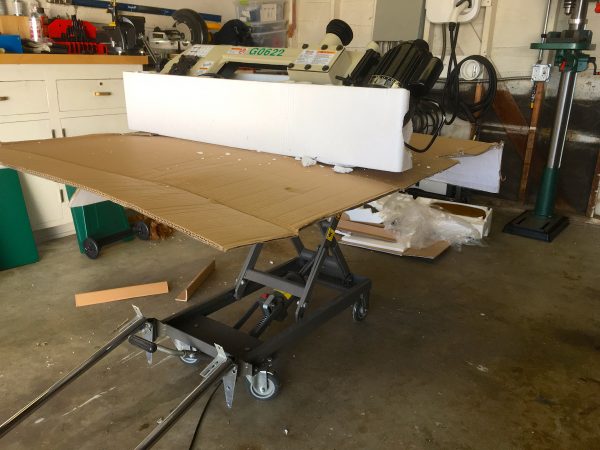
The next bit of assembly is the trickiest. You need to lift the saw up and attach both legs at the same time (yes- at the same time). As mentioned, the saw is about 120lbs, so be careful with this. Doing it by hand would take three people. If you have a shop crane, you could hang it from that. A block and tackle could be used, if you have sturdy rafters overhead.
In my case, I made use of one of the most surprisingly useful things I have ever bought. It’s a hydraulic lift cart from Harbor Freight. I bought it for moving my pinball machine. Pinball machine lifts are a fancy specialty tool, but this cheap hydraulic cart can be easily modified to do the same job with some gate hinges on the handle to make it low enough to get under the machine. Since then, however, I find myself using this cart in almost every project around the shop. You’ve seen this cart in the background of many of my photos, but I don’t think I’ve ever talked about how useful it is. I use it as an extra work surface, as a height-adjustable saw horse, as a welding table, as a dolly for moving heavy things, and now, as an assembly jig for a bandsaw.
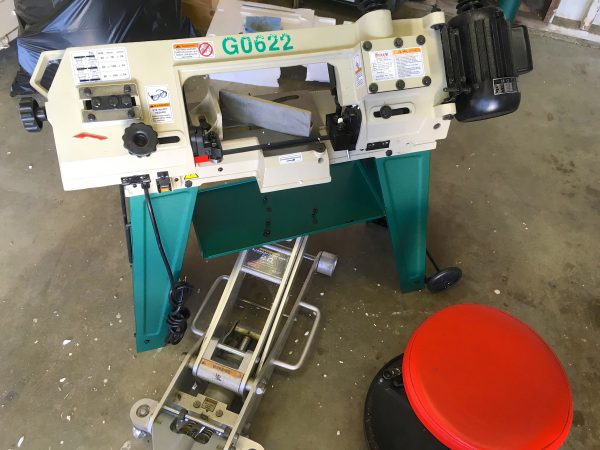
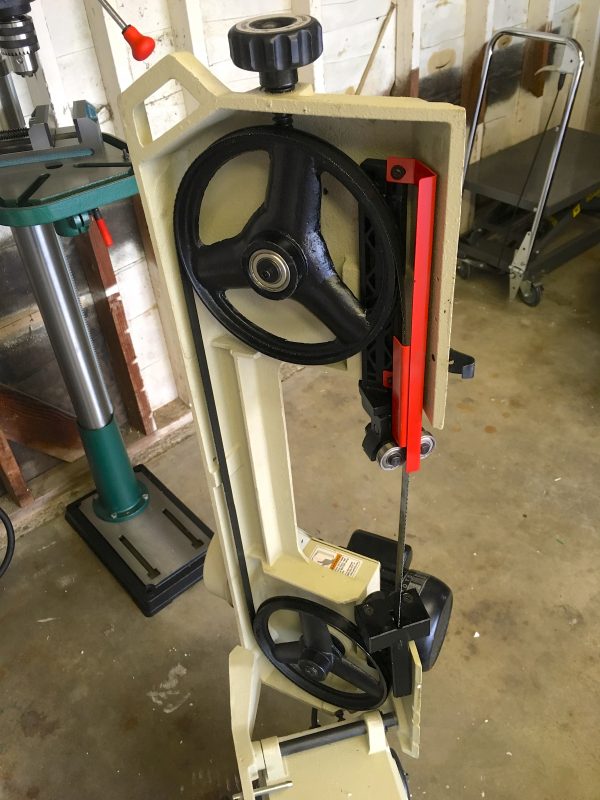
At this point it is a bandsaw, at least in theory. Depending on how lucky you got, it will need more or less tuning and adjustment from this point. The instructions optimistically state that the machine is “factory adjusted and ready to go”. I found that to be rather comically distant from something resembling truth. Still, the tuning process is very educational, and by the time I got it running well, I felt very knowledgeable indeed on this machine.
This is a good time to bust out the brake cleaner and clean the cosmoline off all the unpainted surfaces, as I explained in the drill press article. Then, as before, spray things with Boeshield (or your protectant of choice) so nothing rusts. I also cleaned and relubricated the lead screw on the vise. It was very stiff and clunky, but a little love made it run smoothly.
The front blade guide has a big adjustment knob for moving it back and forth. I recommend sliding it all the way forward. You want as little of the blade floating in space as possible. The closer you can get the guide bearings to the work, the more precise your cut will be.
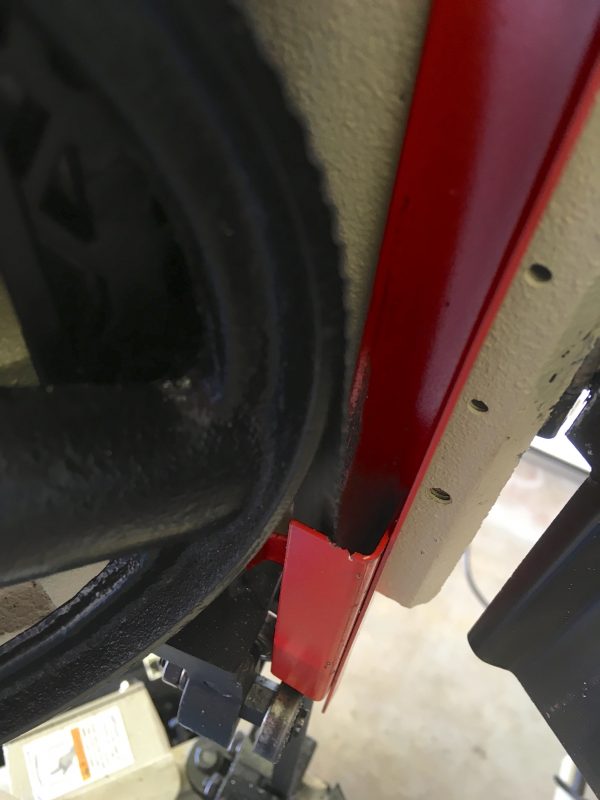
There are a number of other minor adjustments you should do. Make sure all the blade guards and other sheet metal bits are clear of the vise and body of the saw through the whole range of motion. I found I had to bend and tweak a number of things, and I needed to set the saw’s depth-stop bolt. As it came from the factory, the saw was bouncing off the sheet-metal blade cover at full depth, instead of coming to rest on the big bolt intended for the purpose.
The final and most difficult adjustment is blade tracking. Once again, the manual helpfully suggests the tracking has been “precisely calibrated at the factory and does not need adjustment”. My saw would not run for more than 30 seconds at a time without the blade flying off the drive wheels and making a very exciting noise inside the head of the machine. I politely beg to differ on their assessment of the factory calibration of the tracking.
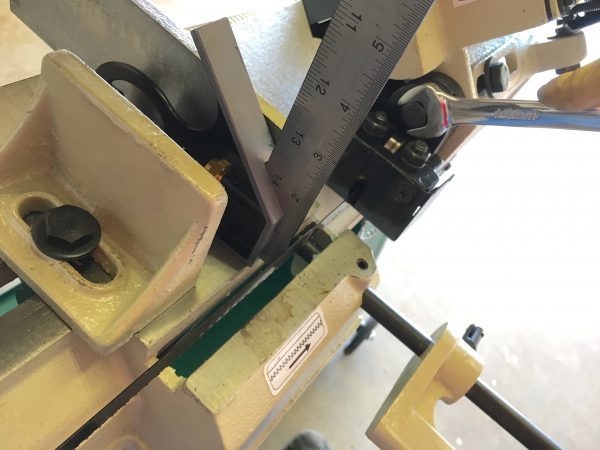
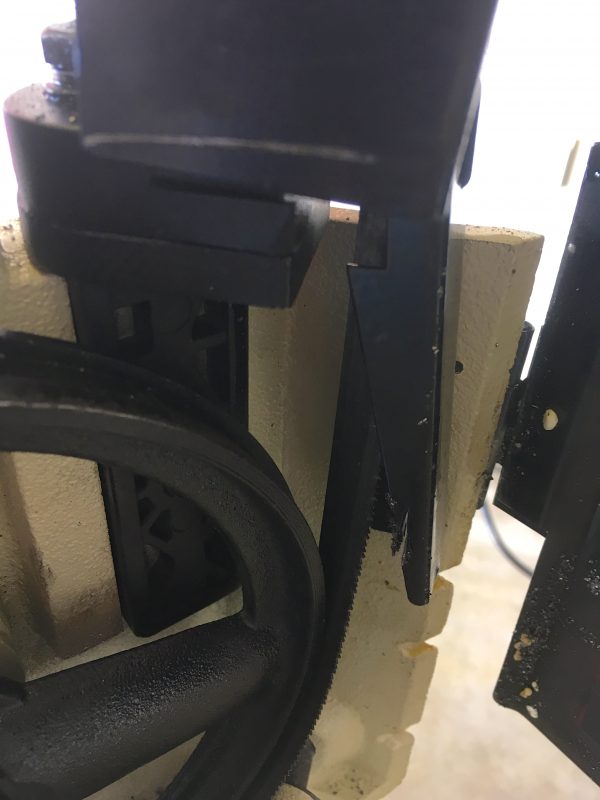
What is blade tracking, you might be wondering? Well, band saws are a flexible saw blade wrapped around two flat pulleys. There is nothing holding the blade in place on those pulleys, really. There’s a shoulder on the back to help a bit, but mainly the saw relies on the pulleys being square and well aligned to each other to keep the blade in place. The “tracking” adjustment allows you to set a tilt angle on one of the two wheels to correct any flaws in alignment. The trick is, this process is pretty unintuitive and takes a lot of trial and error.
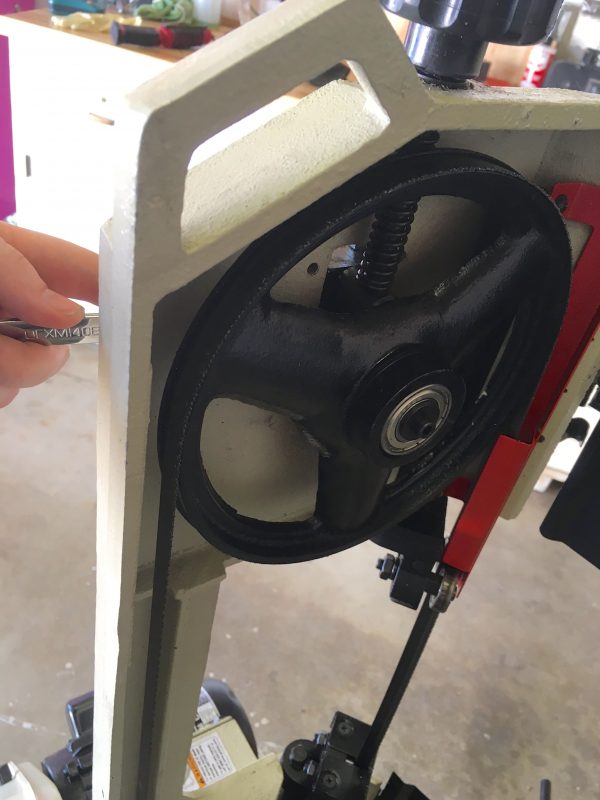
The trick to adjusting blade tracking is to make small moves. Determine whether the blade is running too close to the inner shoulder of the drive wheel, or too far. Adjust the tilt by a quarter or half turn on the tilt bolt and try again. Adjust it until the blade stays in place after running the saw for any length of time.
I spent several hours trying to get my tracking to be perfect. The trap I fell into was that I expected to be able to get the blade to run close to the shoulder on both wheels, and stay there. That’s only possible if the whole drive mechanism is well made, and the drive wheels have low run-out and are close to true round. None of those adjectives can be applied here. I finally realized that the blade just wants to ride half-off the lower pulley, and that’s fine. It has run that way for many hours through many projects, and it’s just how this machine is. Yours may vary. I did a fair amount of research on how to set the tracking on this thing, and mostly what I found are a lot of forum threads where people are saying “yup, the tracking is garbage- get used to it”.
The bottom line is that it doesn’t seem to matter much. If the blade stays in place, it will cut fine, and that’s what counts.
With tracking settled, you can adjust the blade tension. The manual has a bunch of advice on this, but honestly I found “as tight as I can physically make it with my bare hands” was perfect.
There is also a large adjustable spring that controls the descent of the blade into the material (the feed rate). As you make recall from the drill press, when in doubt, more pressure and less speed is the rule of thumb with steel. The feed rate adjustment on this saw appears to be mostly decorative, honestly. I have it loosened as far as it will go, which should be the maximum feed rate, but there’s no noticeable difference in blade pressure on the work.
Another nice feature of the saw is the auto-shut off. When the cut is complete, the saw shuts itself off by bottoming out on the power switch. As you might have predicted by now, this… didn’t work at all. It required substantial adjustment and a bit of reengineering before it did what it was supposed to.
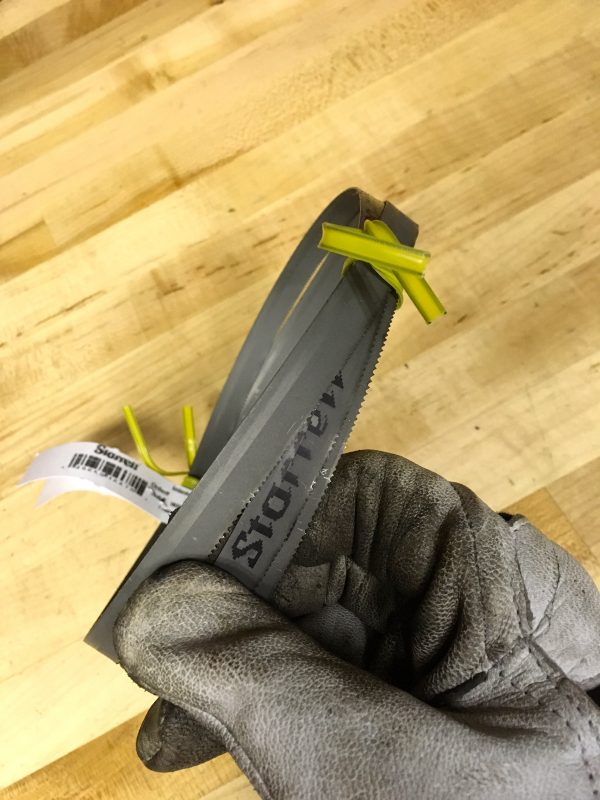
Once the machine is running and cutting well, the final tuning investment you may wish to make is a better blade. If you’ve read this far, you may (not) be shocked to hear that the included blade is not particularly good. It’s a low-end carbon steel blade, and it works fine for getting the machine going and learning how to use it. At some point though, you will want to invest in a quality bi-metal blade from Starrett or another reputable brand. This is definitely worth the investment. The saw performs much better with a good blade. That said, make all your mistakes on the cheap blade. Make a few projects, mess with the tracking, and learn all the quirks of the saw. Then upgrade the blade when you’re comfortable and want it to cut smoother and faster.
Okay, so that was quite a bit of setup and tuning. Was it worth it?
To wrap this up, a couple of safety notes are in order. First, be careful with bandsaw blades. They are essentially big razor-edged springs, and they have an amazing ability to lash out and bite you with no warning. Wear eye protection, gloves, and long sleeves when handling these blades. I have a couple of scars on my arms from messing with the tracking and other adjustments on this saw. When unpacking a new blade, it will be coiled in on itself. The box has instructions for how to uncoil it without Texas Chainsaw Massacring your face and arms in the process.
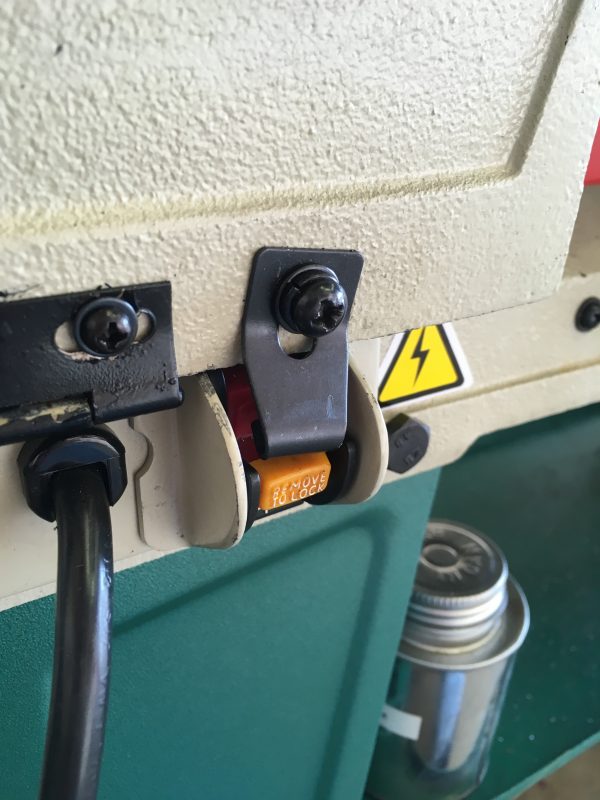
Lastly, lock the saw in the lower position before moving it. This is unintuitive, and you won’t think it is needed. However, when the saw is lifted by the handle, the head is very close to the over-balance point of the base (even when down). If you lift up on the handle to move it, the saw head will flip up and the whole machine will fall over without warning, doing a lot of damage to the saw and whatever it hits. There is a retainer pin that locks the head in place in the down position, and this is one safety feature you should definitely use. As for all the other guards and such, well, you’re an adult and you can make your own choices about which ones to keep. Some seem like a good idea, others are just in the way. Your mileage may vary.
Overall, I’m very happy with this thing. It took work to get it to perform well, but the price is insanely good, and the whole package represents a lot of value. Understand what you’re buying, and you will like it too.
Another good write up. Most of it applies to tuning up a bandsaw intended for wood as well, and this is a lot clearer than the one I followed for that saw.
Thanks.
Marvelous, just marvelous! Now I’m going to have to out and buy one for myself.
This is my favorite part: “My saw would not run for more than 30 seconds at a time without the blade flying off the drive wheels and making a very exciting noise inside the head of the machine.” “Exciting” is very apt, but *far* removed from any word that would actually come to my mind in those circumstances.
Indeed- “exciting” is a Blondihacks code word for “crapping my pants and lunging for the power cord”. Not necessarily in that order.
LOL. I wish I could use code words*. That’s so cool! I just noticed your avatar is some kind of secret agent type, so you’re really nailing the motif.
*I mean, “in a timely/spontaneous/organic way.” It’s a lot like winking.
Quinn,
Great write-up as always…
I think you ignored the lowly circular chop saw as a metal cutting alternative. It’s sort of the big brother of the angle grinder (and just as loud) but more portable than a bandsaw.
For non straight cutting, I lust after one of those electric plasma cutters.
Cheers,
Crawford
There are a few options I didn’t cover, including chop saws, circular saws, abrasive saws, portable bandsaws, plasma, etc. My opening is aimed at the typical hobbyist who probably has none of those and is wondering what to get, hence “one of the nicest options is…”
Yep, yep. Fair enough. Sorry I guess that sounded critical.
Anyway, you proved once again the the final step in manufacturing a tool is setup and tuning, and that can make all the difference in the world. Good tips on that as well as the safety. Bandsaws really sing if you get them right.
Great write up – a horizontal bandsaw has been on the list of possible things to get for ages now, but I unfortunately don’t have the space at the moment!
Incidentally, my approved trick to uncoiling bandsaw blades is to throw the blade in one direction and run smartly in the other. Usually works 😉
Yes, about locking it to move – Do this carefully.
As you mentioned the saw WILL spring up, and tip over (as did mine) and do damage.
In my case three fingers were crushed at the pivot point, and a sharp corner punctured my thigh.
Other than that, it is a great tool.
I use mine to cut large pieces requiring a long throat.
For smaller pieces, I mount a carbide cutoff wheel to my woodworking miter saw, and chop away.
Wow, I’m really sorry to hear that! A good reminder to my readers that these tools are dangerous and need to be respected. Things like that can happen to any of us.
I have the same basic bandsaw, and have had it for about 17 years. The one thing I will add is to get a good, fairly large magnet. Put it in a zip lock bag, and stick it on the base, close to the cutting action. It will do a pretty good job of catching the metal filings from the cut. Turn the zip lock inside out, hold it over the trash can, remove the magnet, filings in the trash, not on the floor.
Hey- great idea! Thanks for sharing!