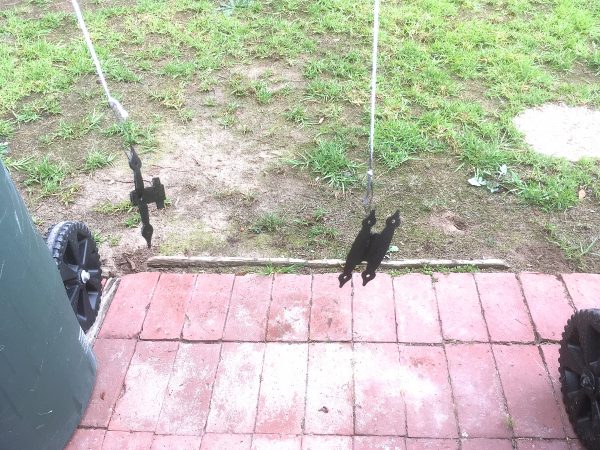
New Love For An Old Door.
Well, we had some fun with all the steam shenanigans in the shop recently, but it’s time for something a bit different. A friend recently bought an old 1920s house full of lovely old 1920s things. One of those things is the front door, complete with original one-hundred-year-old hardware. Instead of a glass peephole as we might see on a modern door, this front door has a Twinkie-sized opening cut in it, and there’s a Kit-Kat-sized “hatch” covering it. This little door-on-a-door has its own latch and hinge hardware. Time has not been especially kind to it, however. The original hinge is broken and bent beyond all function, and the original finish is in sorry shape from decades of careless painters. I was given the task of breathing new life into this little hatch, so let’s see what we can do! This was a great opportunity to try out some new products and techniques. I made mistakes and learned a lot, which is just the sort of project I like.
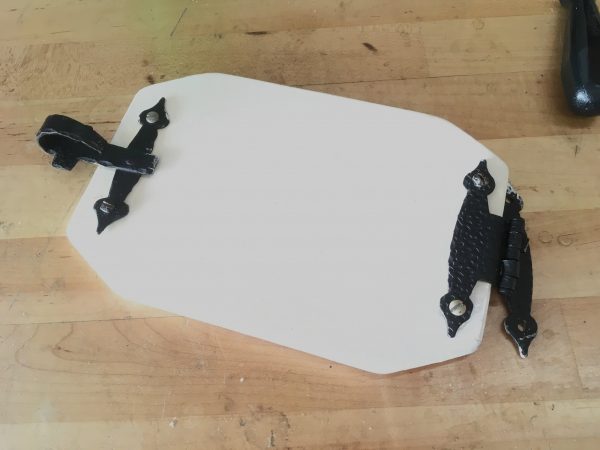
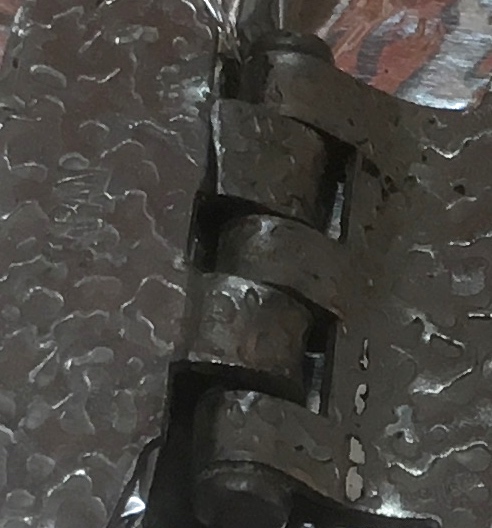
I started by taking everything apart. The paint on the wooden hatch door itself was fine, and matched the door in the house, so no action would be taken there. The primary focus is on the hinge, and making it be, well, a hinge again. It’s really more of a keychain at the moment.
I wanted to start by removing the paint, so we can see what we’re dealing with. Paint removal has historically been a deeply unpleasant process, but I had heard good things about Citristrip and decided to give it a try.
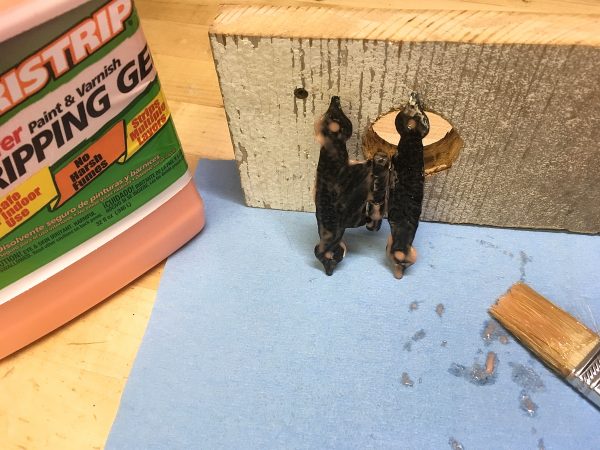
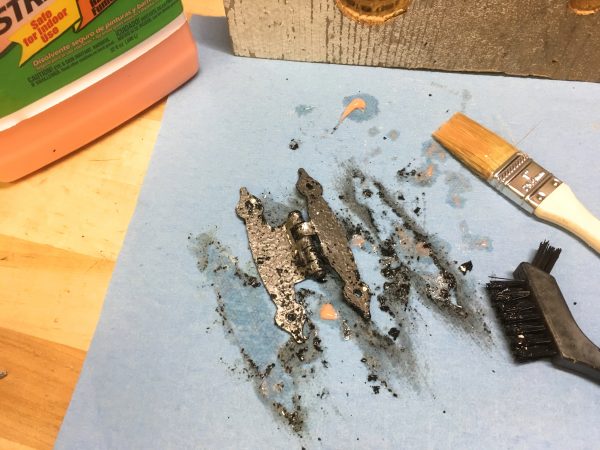
Well, colour me impressed. Not only was Citristrip pleasant to use, it worked very well. After sitting for 20 minutes, decades of paint just fell right off.
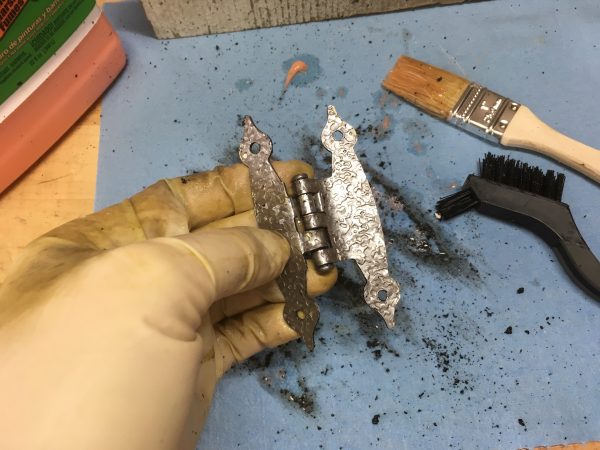
Now we get to the crux of the problem. This hinge is badly bent, and one of the two tabs holding the hinge barrel to one of the sides is broken. The damage was sufficiently extensive that I considered trying to source a replacement. However, there’s a funny calculus with broken stuff that makes really far gone things better candidates to work on. If something is just a little broken, you worry about making it worse by attempting a repair. However, if something is so toast that it should probably be replaced, well suddenly you have nothing to lose and all sorts of crazy repair attempts are on the table. It’s quite liberating, really.
I spent some quality time with pliers, forceps, the vise, a hammer, and various other means to gently coax it back into shape. This was done carefully because the metal is old, and too much cold working could break it. I tried to straighten it just to the point where it was functional, without getting greedy.
That left me with the broken tab to fix. This is critical, because with that piece broken, it wasn’t a functional hinge.
The metal is much too thin to weld, and any sort of glue wasn’t going to hold up in the real world. This seemed like a good candidate for silver soldering. Silver soldering is a colloquial term for a process in the brazing family. Metal joining is sort of a continuum from soldering to brazing to welding, and there are a lot of gray areas in between. One way to draw distinctions is that welding melts the source metal while adding additional metal of the same type. Brazing only adds filler metal, and usually of a different type. The filler metal is propagated by capillary action. Soldering is similar, but doesn’t rely on capillary action (much) to flow the filler. Soldering and welding are good at filling gaps, whereas brazing requires very closely fitted parts. Welding and brazing are high temperature processes, while soldering is a very low temperature process. Brazing can join dissimilar metals, whereas welding generally cannot. So you can see how all these processes have their place.
Anyways, all that to say that what we’re doing here is a form of brazing, but people generally don’t think of it that way. Silver soldering is a common process in plumbing, jewelry-making, and other places where a very strong joint is needed between thin (and possibly dissimilar) metals.
For silver soldering, we use a filler metal that is an alloy of silver, copper, zinc, and tin. The proportions vary somewhat by application and brand, but the silver is the main ingredient. That makes it expensive, but luckily we don’t need much. The flux used is a thick white paste, generally composed of sodium borate (an old-timey cleaner called borax), and potassium carbonate. It’s a very alkaline compound, and serves to clean and prevent oxidation in the metals during the braze. The flux also creates the capillary action we need, which is the key point here- anywhere you put flux, silver solder will go. Apply it carefully!
It’s swell that I did all that reading on Wikipedia so I sound like I know what I’m doing, but the fact is I had never done this before. I’m sad to say silver soldering is a fabrication skill I hadn’t yet acquired. I was excited to try it though, and watched many YouTube videos on the subject. I decided I had better practice before attempting the real piece, so I grabbed some brass scrap off the junk pile, laid out some fire bricks, and gave it a shot.
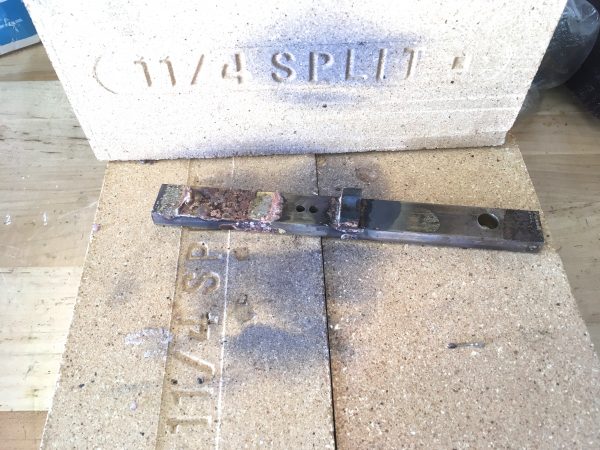
Start with very clean parts. The basic process is that you carefully apply flux to the area that you want the silver solder to go, then heat the work up to a high temperature. You’ll see the flux go through a couple of stages and experience tells you when it’s ready. When the work is hot enough, you apply solder, and it will melt and wick into the areas where you had applied flux. You can also cut small pieces of silver solder and place them in the area of the join ahead of time. Sometimes this is easier. Heat until the solder disappears into the joint.
Finally, allow it to cool naturally in the air. For heating, I used a Map-Pro gas torch, which works well. Real MAPP gas no longer exists (as of 2010), but this stuff is an okay substitute when you need something hotter than propane but don’t need to go all the way to oxy/acetylene. You do need quite a lot of heat for this process. For brass, the parts need to be starting to show red color. Much like electrical soldering, the parts must melt the solder, not your heat source. This means it pays to keep your parts small if you can. If the parts are different sizes, focus the heat more on the larger part so that it doesn’t act as a heat sink for the smaller one.
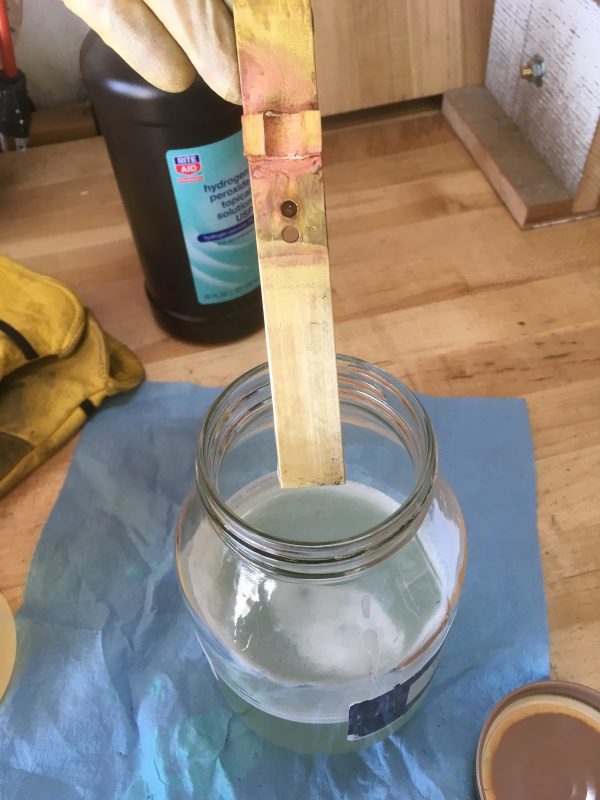
Now, back to that mess. How do we clean it up? The final step in silver soldering is some kind of “pickling”. This refers to soaking the parts in an acid solution. Some people use vinegar and let it sit for a very long time, but if your time is valuable you use a dedicated pickling solution composed of something like sulphuric acid and sodium bisulfate. This combination can be purchased as a powder you mix with water. Once mixed, the solution can be kept in a glass jar and reused for a long time.
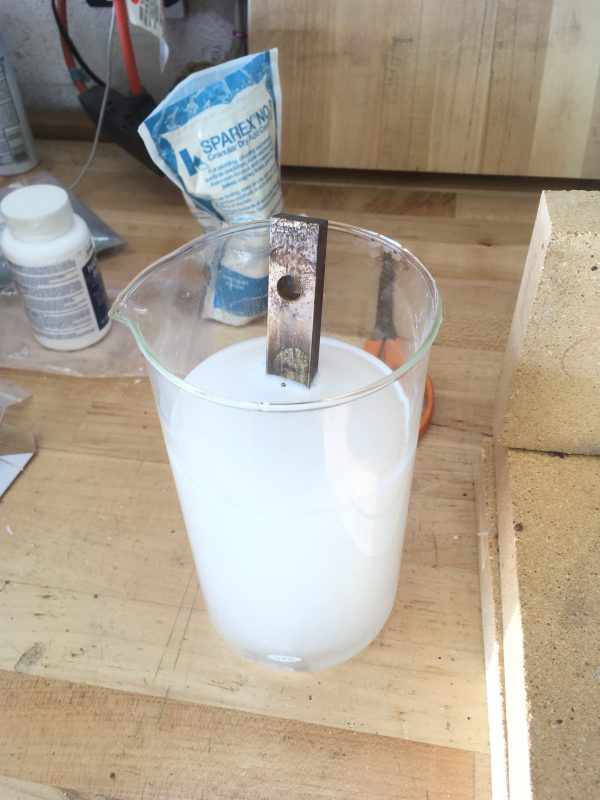
This is the point where I learned my first Valuable Lesson™ about silver soldering. Keep ferrous metals away from your pickling solution!
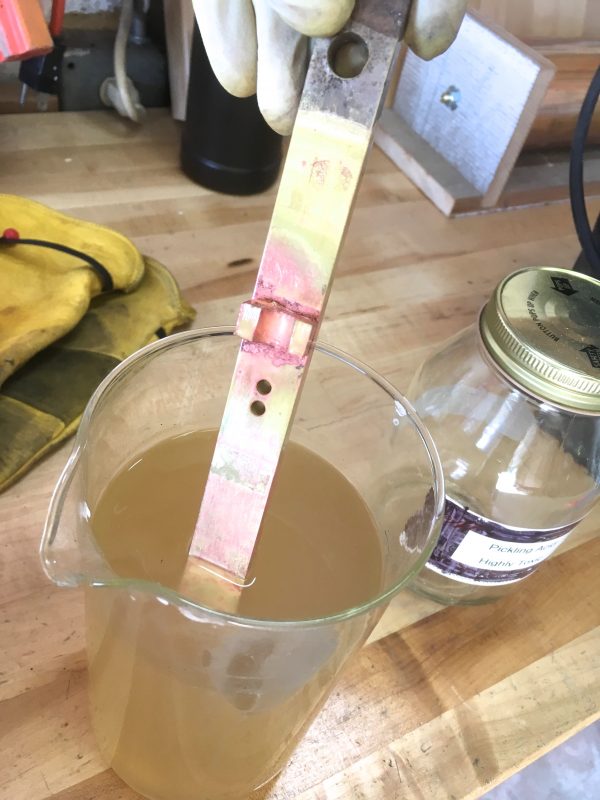
This pink coloring you see is copper. There are two common sources of this. The first is sometimes called “fire stain”, and is the result of copper being drawn out of the brass due to overheating during the soldering. This is generally a very thin layer easily buffed off with some Scotch Brite. What I had here was much deeper and I couldn’t remove it. This is caused by contamination of the pickling solution itself with iron. How did that happen? Well, I needed something to stir the acid mixture whilst I was preparing it. What was handy? A scrap of 1/8″ steel bar stock! Perfect, I thought! Luckily, this contamination will precipitate out over time and the pickling solution is not ruined forever.
What to do with my pink test bar, though? Jewelry people suggest adding some hydrogen peroxide to the pickling bath. Apparently this catalyzes the reaction, and can remove some of the copper deposits. The hydrogen peroxide doesn’t last long in the mixture, though. It reacts out within a few minutes, at which point the pickling acid returns to its normal non-supercharged state. You may be thinking that using a mix of hydrogen peroxide and acid to remove copper sounds familiar. You would be correct- this is the same brew used to etch circuit boards. Science!
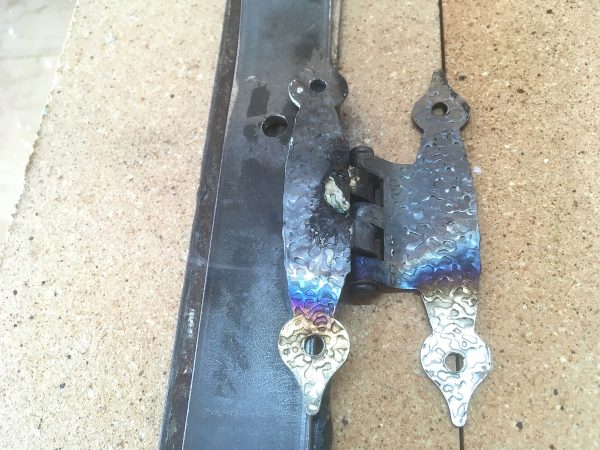
While the resulting joint wasn’t pretty, I was very impressed with how strong it was. I knew silver soldering was sturdy, but I didn’t realize quite how strong it can be. I placed the brass nubbin shown above in my big 6″ bench vise and tried to twist it off using the long piece of brass as leverage. I couldn’t do it! The brass nubbin deformed, but the joint held. Quite impressive.
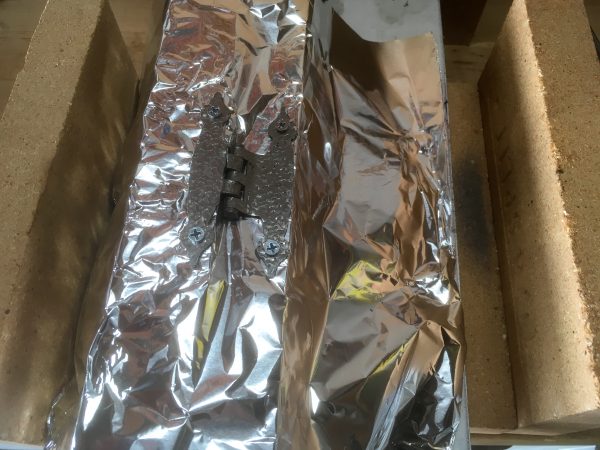
After a couple more practice runs, I felt like I was getting the hang of silver soldering, and it was time to try my hinge. One of the things I learned is that you need to have a way to hold the parts in place, because the wind from the torch blows things around. This hinge needs to be in just the right position to make sure the two halves are parallel and it will function well. The trick is that the hinge can’t lie flat. One half has to sit higher than the other, because the hinge wraps around the thickness of the hatch to attach to the main door. Remember that brazing is really poor at filling gaps. The resulting joint is very strong, but only microns-thick. This means that our joint has to be held very precisely where we want it.
I thought I would get all clever and rig up a thing to hold the thing for the thing. I whipped up a jig from wood scrap and screwed the hinge halves to it to guarantee their position no matter what wrath the windy gods of Map-Pro might inflict upon them.
Of course, wood is not a good thing to point a 3700ºF torch at, so I protected it with some foil. I then patted myself on the back for the brilliance of this setup and how it would hold the hinge in place while soldering. What this setup actually did was teach me some physics. You see, it turns out that 3700ºF is hot. Like, really, really hot. No- seriously. It’s super hot. That’s a temperature sufficiently outside the realm of standard human experience that all my intuitions about it were, shall we say- quite incorrect.
Meanwhile… WHOOOSH
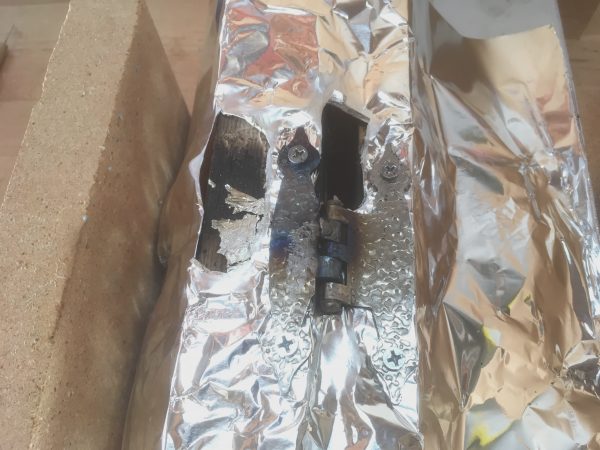
That idea was clearly far too clever to work, so instead I just arranged the part on some scrap metal and hoped it didn’t move around too much. That turned out to work just fine. I was very glad I had practiced this process first, because among other things it taught me to be very careful with the flux. Had I gotten any into the hinge barrel itself and fused that with the solder, the whole project would likely be ruined.
Then, as before, a quick trip to the pickling bath.

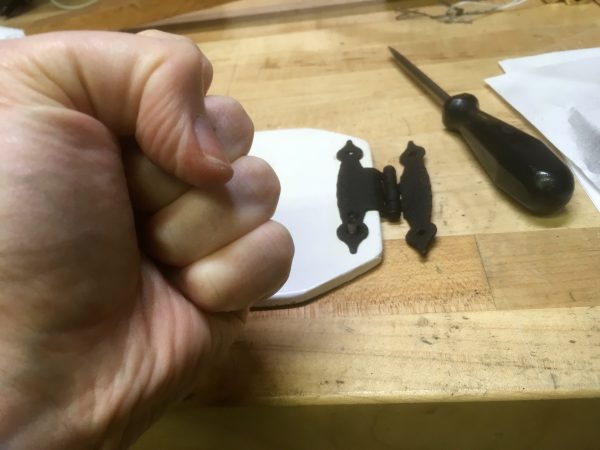
We were ready for paint! The rest of the hardware on the door in the house is flat black, so I went the same way here.
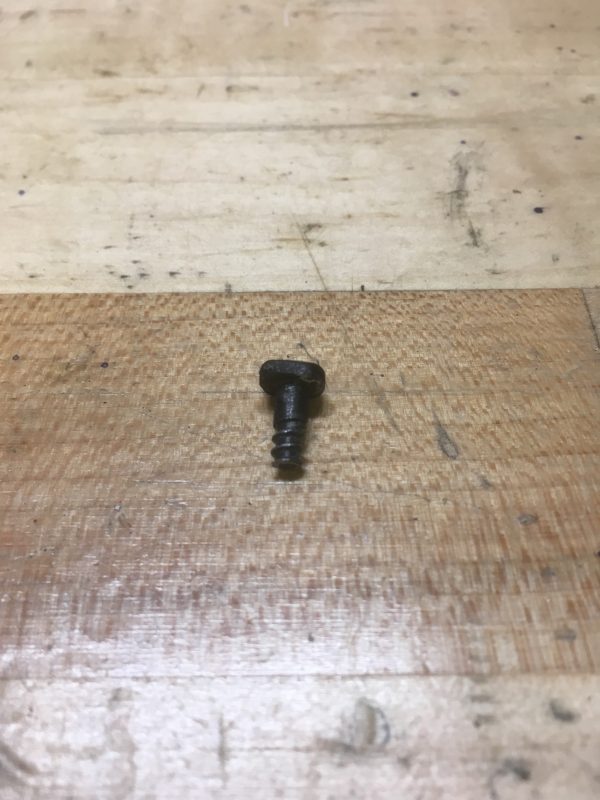
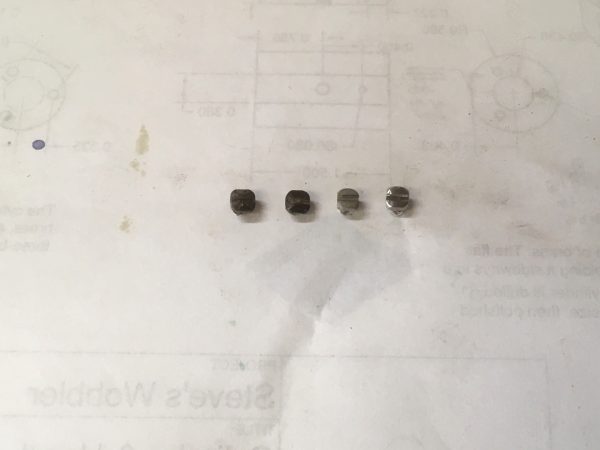
At this point, I realized the screws were not all original. Two of them were, but the other two were modern mismatched replacements. I felt I could do better than that.
I didn’t fancy my chances of finding anything like that in a modern hardware aisle, but I thought I could make something that would match, at least at a glance. To the junk pile!
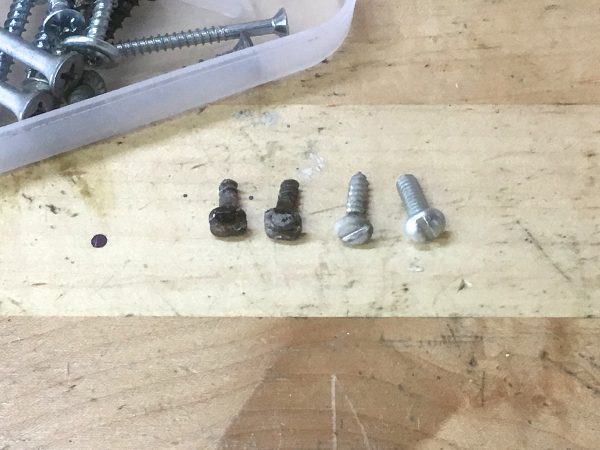
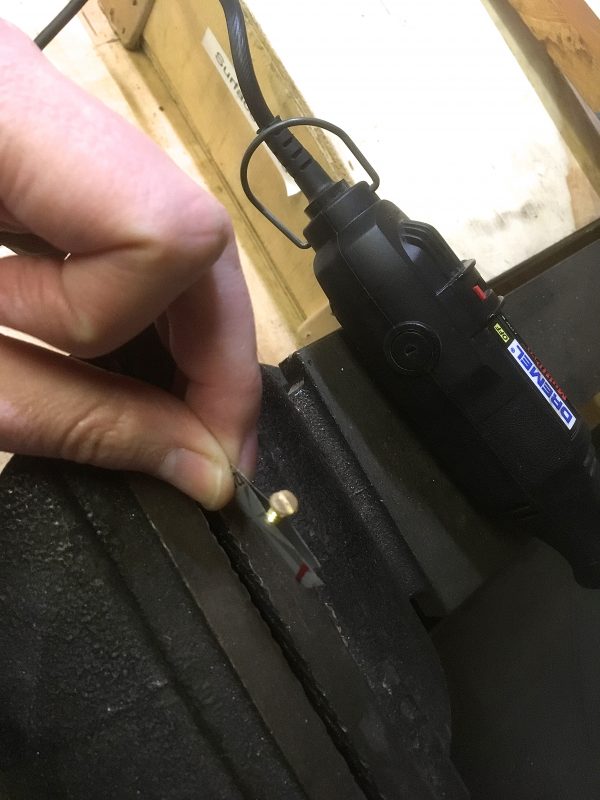
To match their appearance, I used a dremel to grind the heads square, shorten them to length, and flatten the tops. I also deepened the slots slightly, since flattening the tops made them shallow.
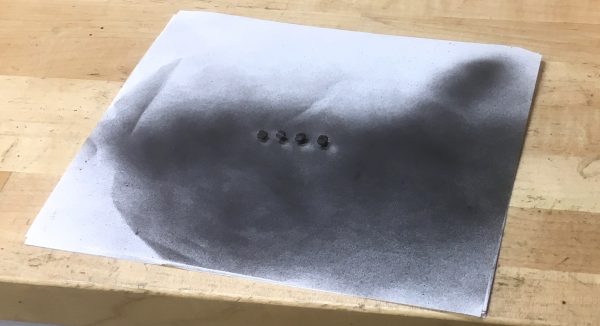
At this point I encountered a flaw in my plan to avoid a trip to the hardware store.
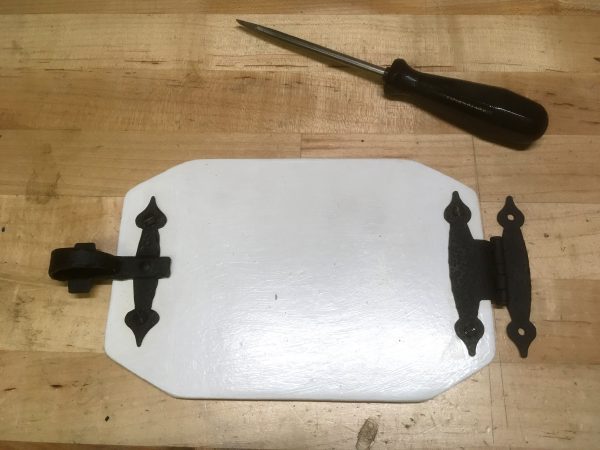

You may notice in that final photo that there is some other very interesting door hardware there. Rumour has it that some of that may need refurbishing as well, so don’t be surprised if it makes an appearance in these pages sometime soon.
That’s all for now. Thanks as always for reading, and special thanks to my Patreon supporters for being a higher form of life than everyone else. That’s right, I said it.
Wait- come back, everyone!
Awwww…
The foil over the wood picture made me LOL before I even got to the text, since I knew exactly what was coming, right down to the fun blue-white flash =)
My personal “torches are surprisingly hot” story: after a bit of Heating Shit Up For Actual Legitimate Reasons™, I kept monkeying around with the torch. The first thing I tried was melting pennies. I learned a fun fact that day: the boiling temperature of zinc is below the melting point of copper. So it turns out, that, if you’re careful, you wind up with little cuprous balloons full of boiling Welding Shivers, which then pop and spew out all over the floor (thankfully a few inches from your RX-8’s tire).
The things one doesn’t ever quite learn in a soft-hands desk jockey job, y’know?
In olden days, prior to 1984 I think, pennies were like 90% Copper zinc alloy, and did not balloon. Been a while since I put torch to cents.
Haha, yes, very true!
This was a fun article. Now as for the issue of work hardening, can’t you just use your map-pro torch to bring the entire thing upto some lowish temp (yellow? Red?) and then let it slowly return down to room temp to reduce the stresses?
Also, why not remove the hinge pin while doing this repair, esp since you could then find a slightly bigger nail to use an an anvil to help you bend and re-shape the broken part?
Please keep posting, it’s great watching all you do, I’ve learned alot. And I’m in awe of how neat you keep your work areas… mine are just disasters.
Those are great questions! It’s hard to know what would and wouldn’t work in a case like this, but my analysis basically went like this:
1) The metal is very thin, and I was concerned about heating the whole thing up too much or too many times. It also needed a lot of manipulation, and trying to do that while keeping it at plastic temperature (cherry red) would have been really difficult. I likely would have ended up defacto cold-working it anyway since it would be so difficult to hold it at temperature during the process, and thus the heating would just serve to make me clumsier at what I needed to do (because I’d be handling it with tongs and pliers).
2) I considered removing the pin, but it was peened in and would have to be cut out. I felt I could straighten the hinge sufficiently without cutting the old pin out, and thus it could remain as original and unmolested as possible.
The overall goal was to mess with it as little as possible to get it back in good service. The whole thing is sufficiently old and delicate that I erred on the side of not gorilla-handling it at every decision point.
When it came time to address the screw problem, for a second there, I thought that you were going to go machine the replacement screws on the lathe. That would, of course, been way overkill a solution, but would have been fun to read about nonetheless.
Oh, I thought about it, believe me.
That hinge looks like it was replaced in the 1950’s
It looks like it was a cabinet door hinge that was straightened out a bit. They are almost always bent from years of holding up doors.
Just compare the shape of the points on the latch with those on the hinge; they are far more pointy on the latch. There is also the pattern of the metal, it looks like it was just cut out of a sheet stock that already had that pattern on it.
I would have considered making a new one using old blacksmithing techniques.
And the mismatched screws on the latch, which ‘match’ the screw pattern on the hinge, sorta. That patterned hinge may actually be from the 1980’s, as I remember fixing some cabinet doors’ hinges with ones that looked like that. The current equivalent look like trash, so the repair was a good decision, as well as a good read.
If I plead retirement income levels, can I be spared from being a lower form of life?