An easy method to get started.
High Speed Steel is wonderful stuff. With all the talk these days about carbide insert tooling, and online sellers practically giving away brazed carbide tools, it’s easy to forget why High Speed Steel has been the staple of machining for 107 years. HSS is cheap like borscht, easy to grind, infinitely reusable, and takes thermal abuse like a champ. In a few minutes, you can make any custom special purpose tool you want.
Grinding HSS tool bits is an area of machining that seems very intimidating. There are a lot of videos on the subject, and lots of diagrams online of all the zillion angles you have to somehow create. Most instructional videos assume a high amount of freehand skill with a grinder, and the whole process seems unapproachable. I’m going to present a very simple method here to get started making your own basic turning/facing tools. The learning curve is gentle, and the resulting bits make nice finishes. If you’ve been following my lathe series, you’ve made a few projects by now using the store-bought bits, but now it’s time to learn to make your own. Keep in mind this process is actually quite forgiving. Anything you grind from HSS will cut steel on your lathe. It’s just a question of how well. Like sharpening a pencil, you can always grind your bits down a little more to sharpen them or get a better shape.
You may be resisting learning this because of the availability of carbide tooling, but HSS bits are still the most flexible and easiest to use for a hobbyist with a bench-top machine. As I’ve said in the past, carbide tooling has minimum speeds and cut depths needed to work well, and in general, hobbyist machines don’t have the horsepower for it. Besides, there’s a real joy in turning a nice piece using a tool bit you made yourself.
For some background on the overall process, I like these videos by Tubalcain and Tom’s Techniques. I think my method is easier to learn, but watching those videos may give you some context. If you’re interested in the actual physics of how cutting bits work (and you are), This Old Tony has a really terrific video where he walks you through why every angle exists. Tony also has an awesome video on why you want to avoid those cheap brazed carbide tool sets that are everywhere.
First things first, you will need a bench grinder! You don’t have to get too fancy here. An 8″ is nice because it’s easier to get flat faces, but a 6″ will also work fine. You want aluminum oxide wheels. The white ones are nice because it’s easy to see when they are loaded up and need dressing, but the gray ones are fine too. You will want finer grits than typically come with the machine. They usually come with something like 36 grit and 60 grit. For HSS tool bit grinding, I like 60 and 120. You will also need a container of water to dunk in. Some grinders or grinder stands include one. Make sure the grinder comes with a dressing tool, or buy one if not. Dressing is the act of removing a thin layer off the grinding wheel, to expose fresh grit. This is usually done with a diamond surface of some sort, and results in you picking sand out of your teeth for a week. Close your mouth while dressing a grinder wheel.
One important feature you want to look for is an angle-adjustable tool rest that wraps around the wheels. Most machines have this, but make sure. This is the key to my process. On some cheaper grinders, the tool rests are not angle-adjustable.
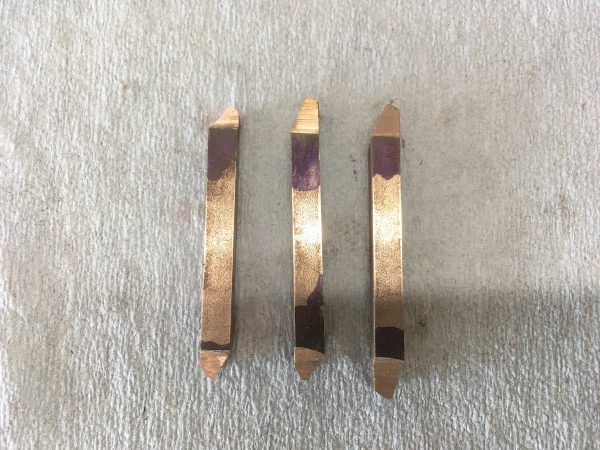
For practice, get some mild-steel square stock similar in size to the tool bits you want to grind. Mild steel grinds quickly and makes it easy to learn. I recommend cutting three pieces, and practicing on each end. By the time you have made six ends, you will be competent enough for the real HSS stock.
When grinding the mild steel, it will overheat and turn blue. This is normally a problem, but it doesn’t matter here because we won’t be using these for anything. The real HSS can take the heat, so you don’t have to worry about overheating it. You will dunk the piece frequently while grinding, but that’s to save your hands, not the steel. You really can’t overheat HSS doing this. In fact, that’s what High Speed Steel is- it’s steel that can cut at high speed (relative to earlier technologies) because it can take the heat (literally).
Let’s get started!
First, set up your bench grinder. As I said, you want 60 grit and 120 grit aluminum oxide wheels. Grinders make a cloud of fine grit in a five foot radius, so operate it away from your machine tools (and your coffee, for that matter). The grit of grinding is bad for precision machinery (and your mouth).
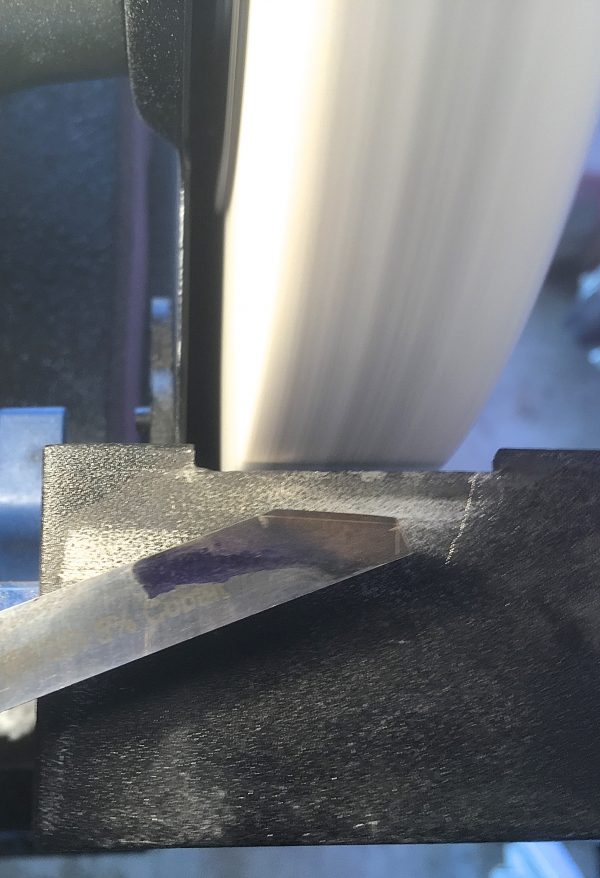
Set your tool rests down 10°, so that the inside angle between the face of the wheel and the top surface is 100°. This trick will eliminate the need to think in compound angles, which hurt my primitive primate brain.
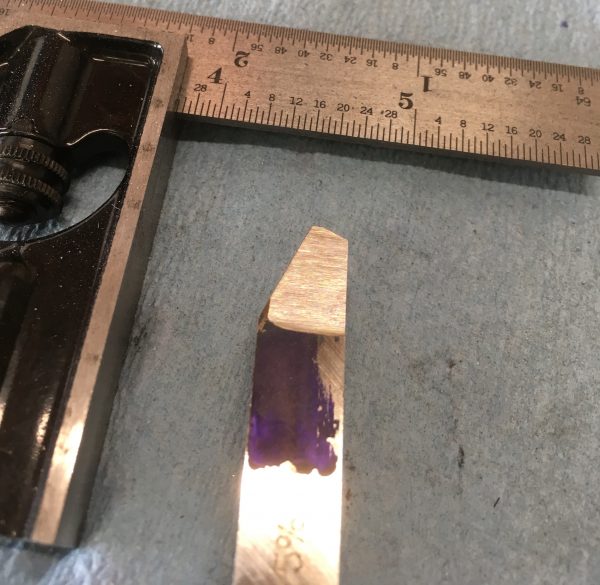
Time to grind a tool bit. Here’s my process for a basic right-hand turning/facing tool, explained in pictures.

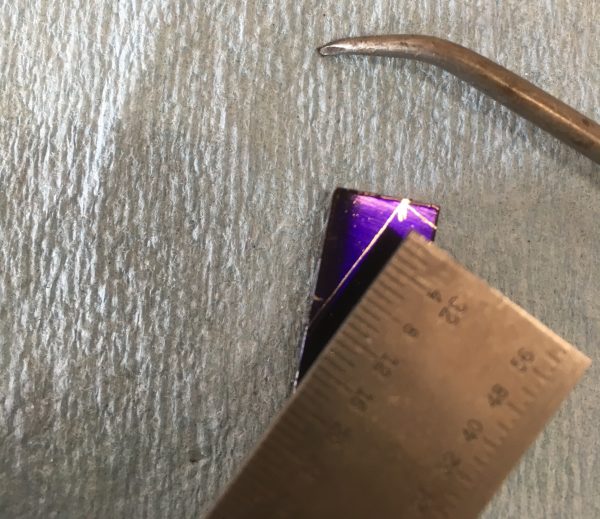
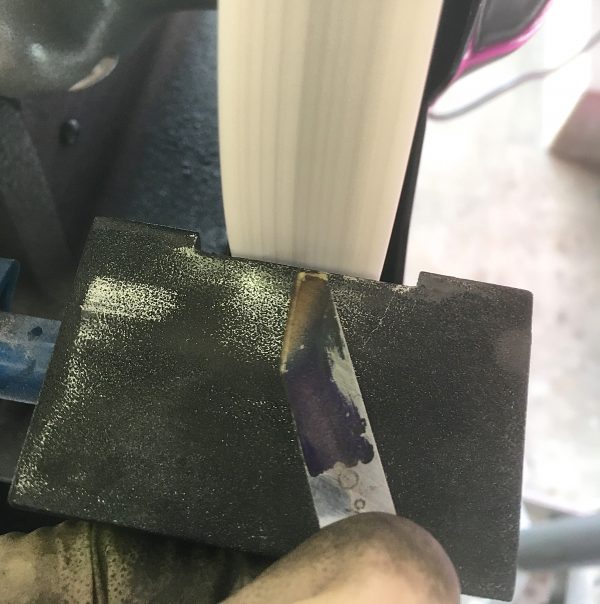
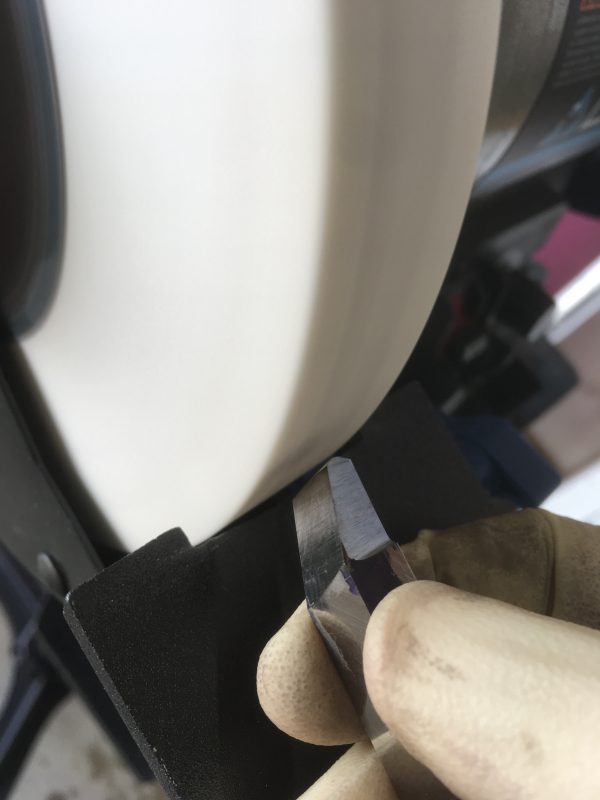
Using the 60-grit wheel, grind the long edge first. Hold it flat against the tool rest (which, remember, is at a 10° downward angle) and slide it smoothly back and forth across the entire wheel. When it gets hot enough to burn your fingers, dunk it in the water and continue. The more dead the nerves in your fingers are, the faster this will go. How long you can go between dunks is the measure of true grit. See? I just made a grinder pun. How often does a writer get to do that?
As you go along, dress the wheel any time it gets loaded up with dark grit. The grinding will slow down the further you go, because the material is getting wider. Patience and nerve heat-death are machinist virtues. I wear a heavy glove on the hand holding the tip near the wheel. This increases the time between dunks quite a bit, making the process go quicker.
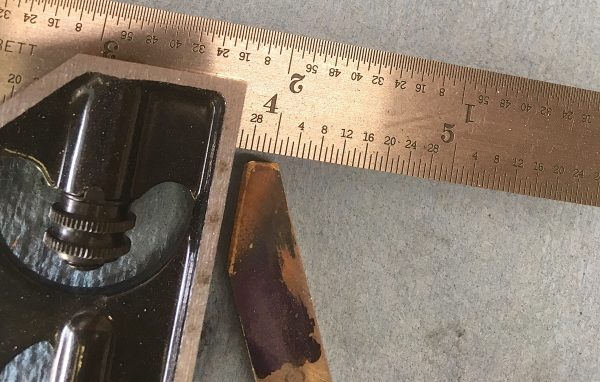
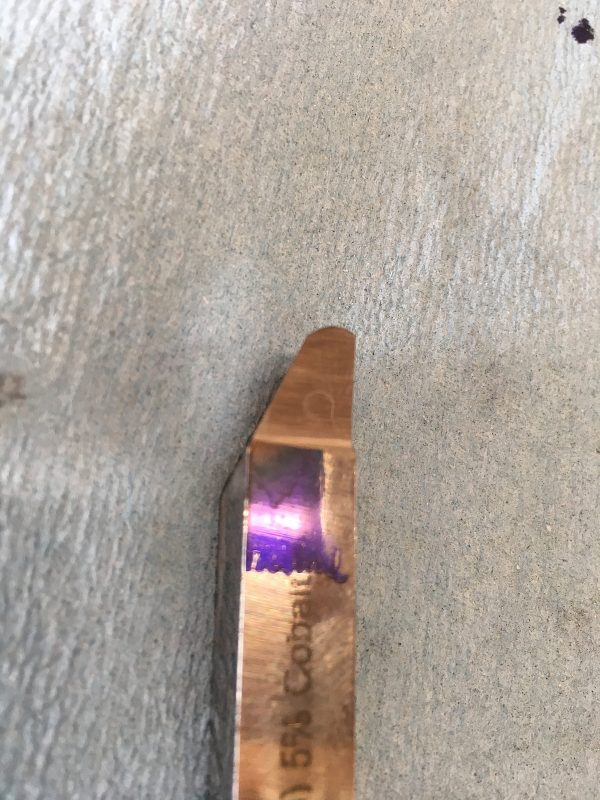
Those are the two main angles. Because of the 10° tool rest angle, something magical has happened. We have created the approach angle, the front clearance angle, the front relief angle, and the approach relief angle, all with two simple grinding operations (and without understanding what all those words mean).
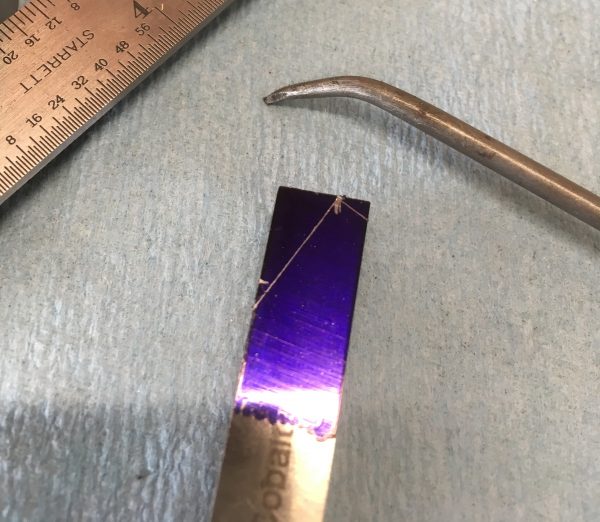
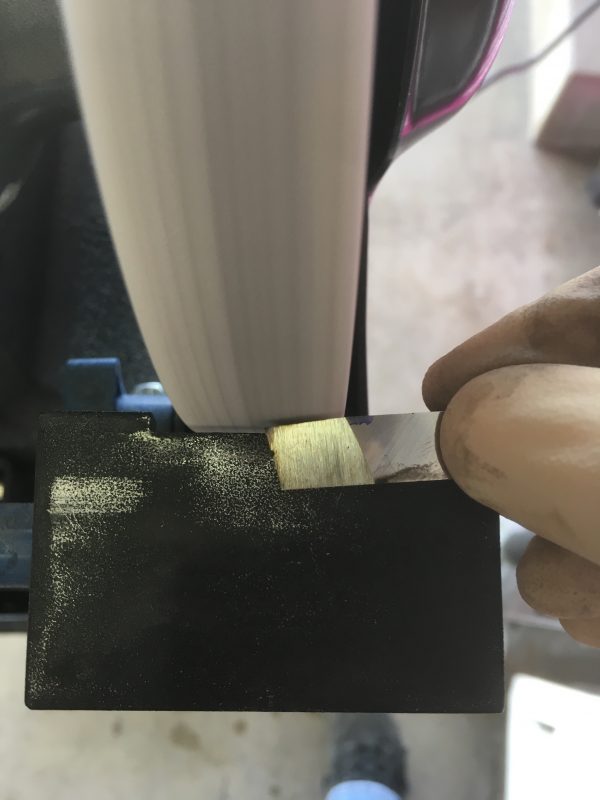
The last two angles we need are the side and back rakes. There’s some skill here, but not much. Since this is a right-hand turning tool, the cutting edge is on the right when the tip is facing you. Place the cutting edge side of the bit down on the tool rest.
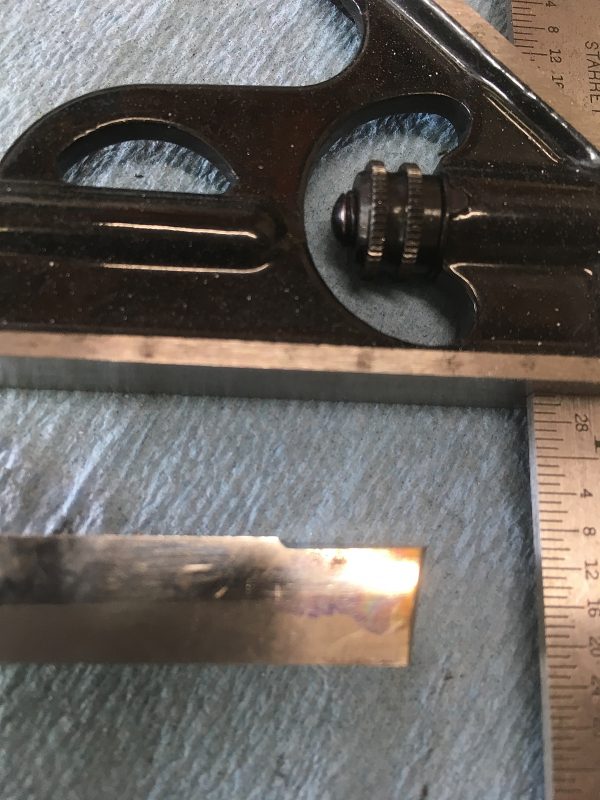
If you want really nice surface finishes, at the expense of being able to get into tight corners, the last operation is to put a nose radius on the tool. This part needs to be done freehand, and I recommend the 120-grit wheel so that you don’t take off too much too fast. This is the part requiring the most skill in my process, but it’s also pretty forgiving.
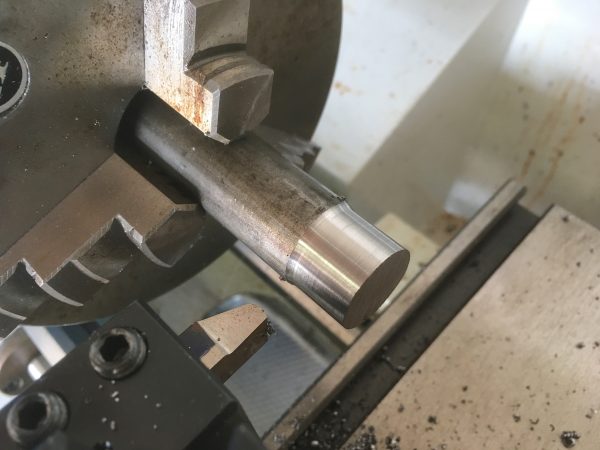
Make sure to double-check the tool height any time you grind a bit. It probably changed! I like to keep one tool holder dedicated to each most common bit, because the tool holder “saves the setting” on the height for you. One more reason why I made the quick change tool post a “requirement” in my first lathe article. Without it, you will go crazy trying to set tool heights all the time.
That’s all there is to it. I hope you’ll give grinding your own bits a try. It’s inexpensive, rewarding, and really not that difficult once you have a basic method like this to build on. This will become an essential skill, as we’re going to be getting into more advanced techniques (and different metals), all of which will require different toolbits.
Q,
Building tools for your tools? Can you do that?
Of course you can: a) a You’re Quinn, and b) You understand recursion!
Nice article, very informative.
-C