A second fun project to amaze your friends.
We’re going to build on the basic skills from the steel ring project, such as tool setup, facing, drilling, and turning. I’ll assume you’re familiar with everything from that post, and I won’t be re-explaining much. It’s time to take all those techniques up a notch!
In un-blondihacks fashion, I’m going to show the final result first. I think it will be easier to understand all the steps if you can see what we’re actually aiming for. What I like about this project is that it’s easy for a beginner to make, but the end result is something that is both fun and only achievable with machining. The “magic” in the magic tube is that the seam of the cap disappears when it’s closed. The fit is so precise that there’s no shadow line or visible gap. The tube could be used to store all sorts of little things, such as sewing needles, pins, mechanical pencil leads, secret notes, that sort of thing. Let’s see how it works:
One of the interesting skills you develop in machining is figuring out an order for your operations. There isn’t always a best order, but there are always a lot of bad ones. This time around, I made a diagram to help work it out:
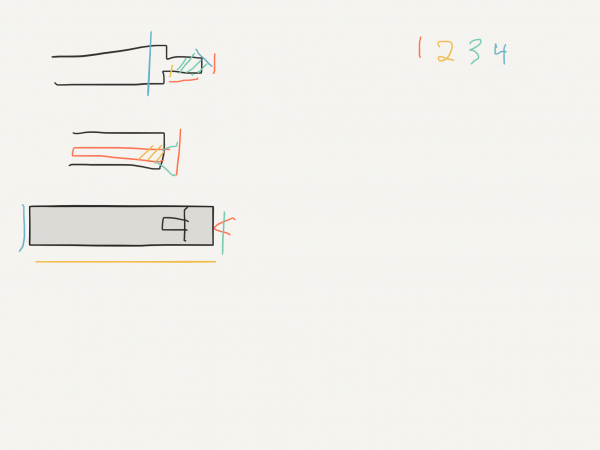
The overall outer diameter will be 500 thou, and the length will be 3.5″. The interior space is 375 thou in diameter, and 3″ deep. This is a convenient size for our purposes. As you’ve probably guessed, it’s time to acquire more tooling (you knew this day was coming). Until now, we’ve worked with the very basics covered in my first lathe post. We’re now going to add:
- A 3/8-24 (3/8″ fine-thread) taper tap
- A 3/8-24 die
- Tap wrench with centering dimple
- Die wrench with centering dimple or open-backed holder
- A cutoff blade
- Layout dye
- Machinist’s square
To begin, start with stock around 3/4″ in diameter (as before). I recommend a piece about 7″ long. You want to start with plenty, because it’s amazing how much extra the chuck eats up. Better to have excess then to get near the end of your project and find you have no way to hold on to it. Chuck your stock and face the end. We’re then going to use the layout dye to mark a line. To apply dye to the stock, run the lathe at the lowest speed (30-50rpm) and apply the brush to the piece, until you have a thin layer all over. Allow it to dry completely. Waiting for layout dye to dry is among the longest few seconds of your life. It’s comparable to watching that “…” indicator when people are typing in chat apps.
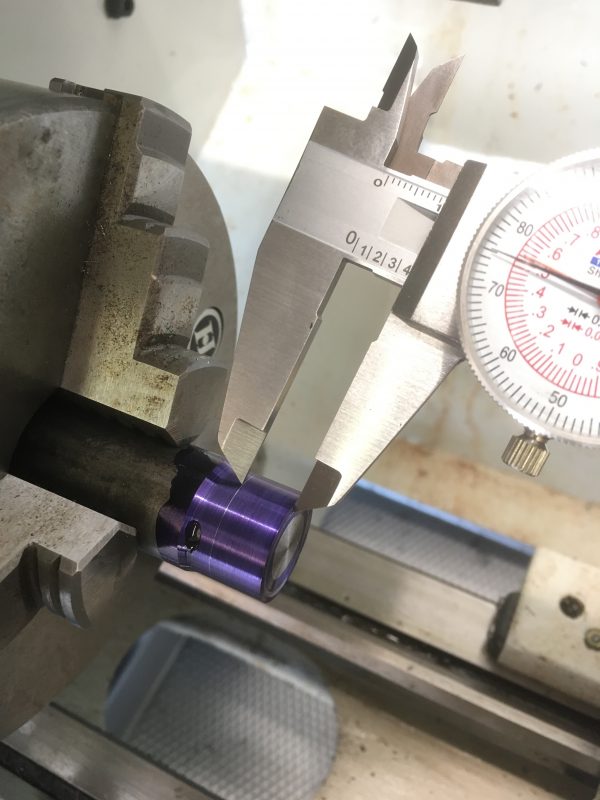
The line we just marked is the shoulder of the threaded cap (where it steps outward from the threaded stub). This is our first new skill- turning to a shoulder. To do this, we need a particular kind of turning tool- one with an 85° included angle. Let’s take a look.
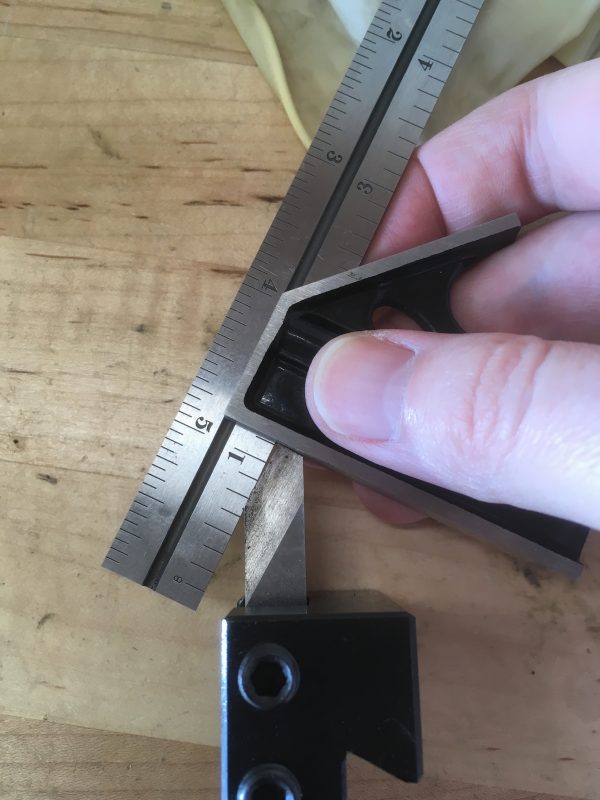
If you have a bench grinder, use that to take 5° off that angle. If not, 80-grit sandpaper can be used as well. In a pinch, I have done this with an angle-grinder held in a vice. Be careful with this method, as angle grinders spin very very fast, and are thus very aggressive at removing material. A power sander of any sort would also work. If nothing else, an oil stone would be worth a shot. That might be the slowest method, but we have very little material to remove here.
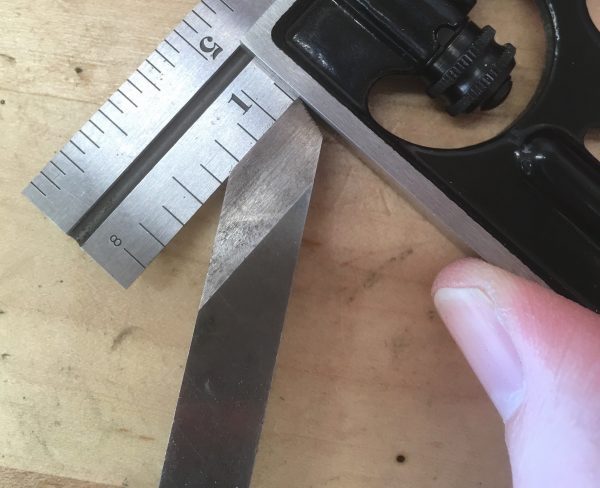
The tool post setup is different for turning to a shoulder as well. Instead of squaring up the tool post, as we would normally do, we need to rotate it such that the sides of the tool bit won’t rub on either surface.
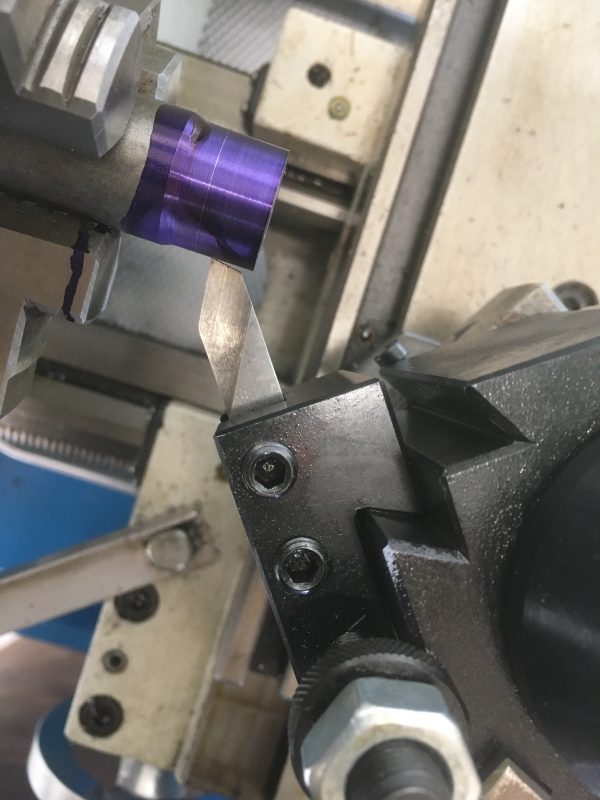
Once set up, the turning is like normal, except that on each pass you’re going to stop at your layout line.
Since we’re creating a stub that’s going to be threaded to 3/8″, our target dimension is theoretically 375 thou. However, in the real world, you want it a little smaller than that. There’s a tradeoff here. The closer to 375 thou your stock is, the more precisely your screw will fit together. However, it also gets much harder to cut with the die. At exactly 375 thou, you probably can’t cut those threads by hand. I recommend starting with 5 thou under.
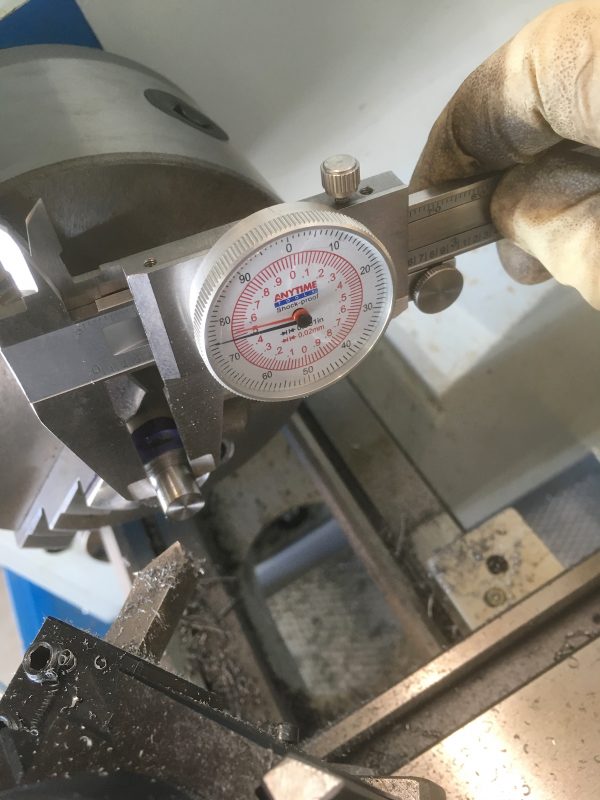
Once the stub is turned down, we need to clean up the shoulder. Without touching the orientation of the tool, we can simply do a normal facing operation on the exposed area of the shoulder.
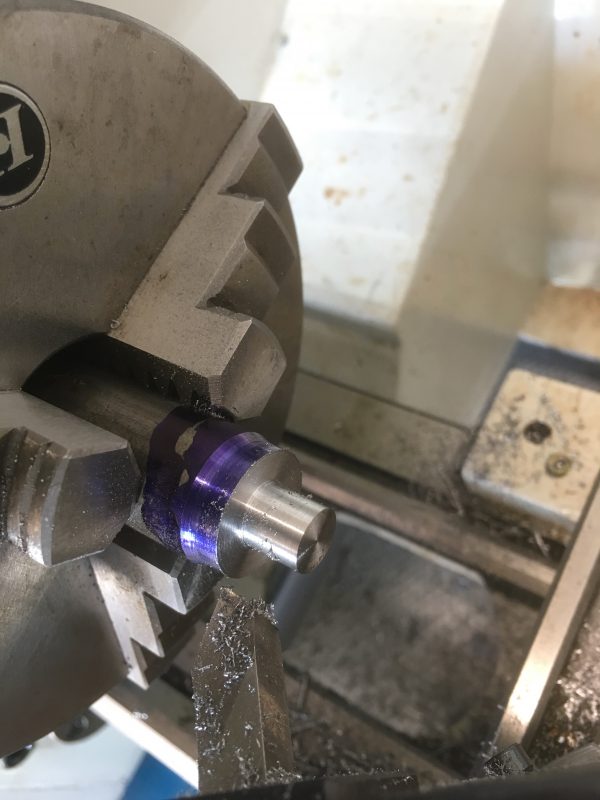
In the photo above, it may appear that I have achieved an inside angle of exactly 90° on that shoulder. That’s not really possible- there will always be a small fillet there. How much of a fillet will depend on the shape of the nose on your tool bit. Don’t worry, we’ll be compensating for this fillet later.
Our next operation is another new skill- cutting with a die on the lathe. You may have used taps and dies before, but doing it on the lathe allows us to use the machine’s precision to our advantage. By putting a dead center in the tail stock, and fitting it into the back of the die wrench, we get a very very straight thread cutting. Much more precise than you could do by hand.
Make sure you start with the flared side of the die. Our stub is close to nominal thread diameter, so it will difficult to start the die if you use the flush-cut side.
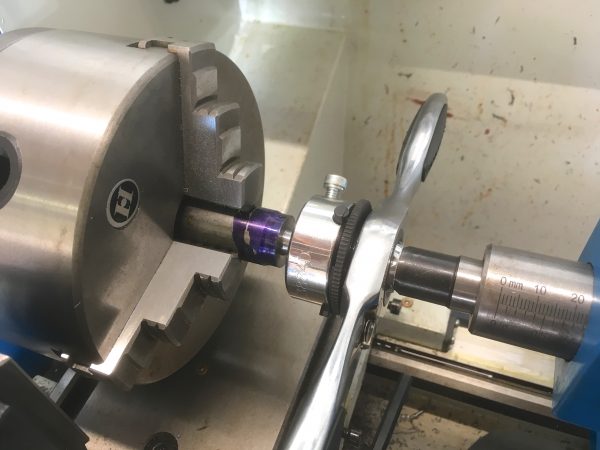
We’re cutting threads by hand here, not under power. There are methods to do this under power, but that’s beyond the scope of this post. All we’re doing is using the lathe to keep our wrench perfectly aligned. Allow the die handle to rest on the machine so it can’t turn. Then use one hand to turn the chuck by hand, and the other to advance the tailstock slowly to keep light pressure on the back of the die. When you get near the shoulder, back out and flip the die over to the flush side, so you can cut as close to the shoulder as possible.
If you can’t get the die started, or it’s too hard to turn, set up for turning again and take a couple of thou off the diameter of the stub. The final diameter that works depends on your hand strength, the quality of the dies, the size of your chuck, etc.
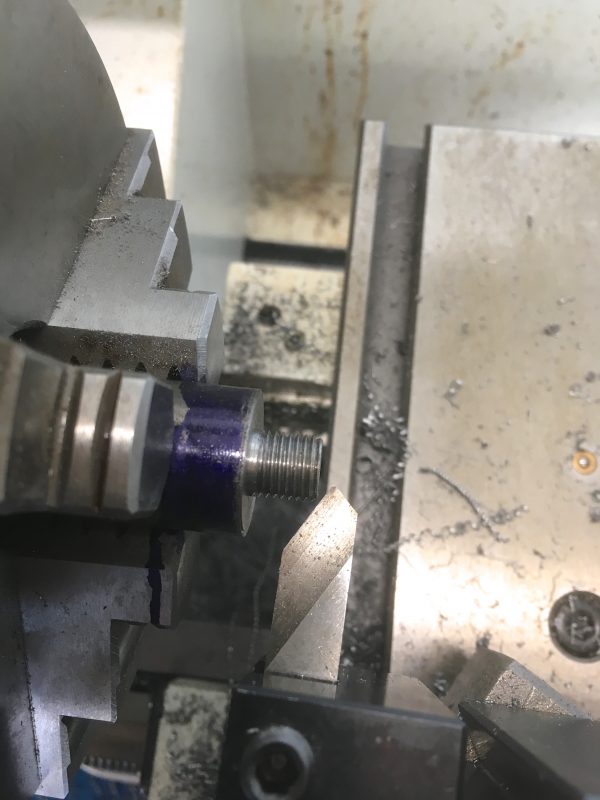
Now it’s time to part off this “cap” part. This will be our first “real” parting operation, so take the time to set it up properly. Get your cut-off blade set up in its special holder.
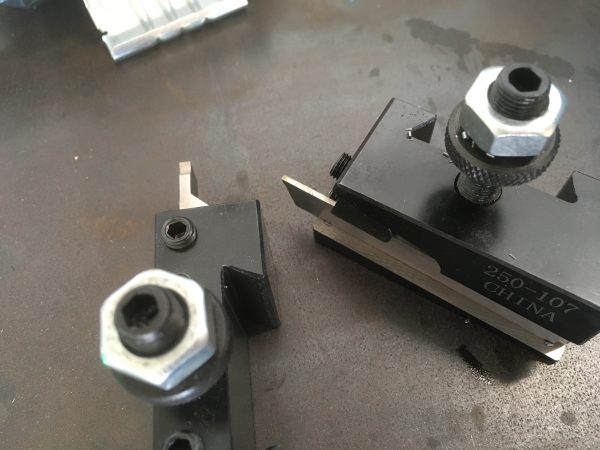
Parting successfully is all about one thing- rigidity. Everything must be tight, locked down, and as close together as you can get it. This also usually means working close to the chuck, so don’t forget to spin it by hand before applying power to verify clearances.
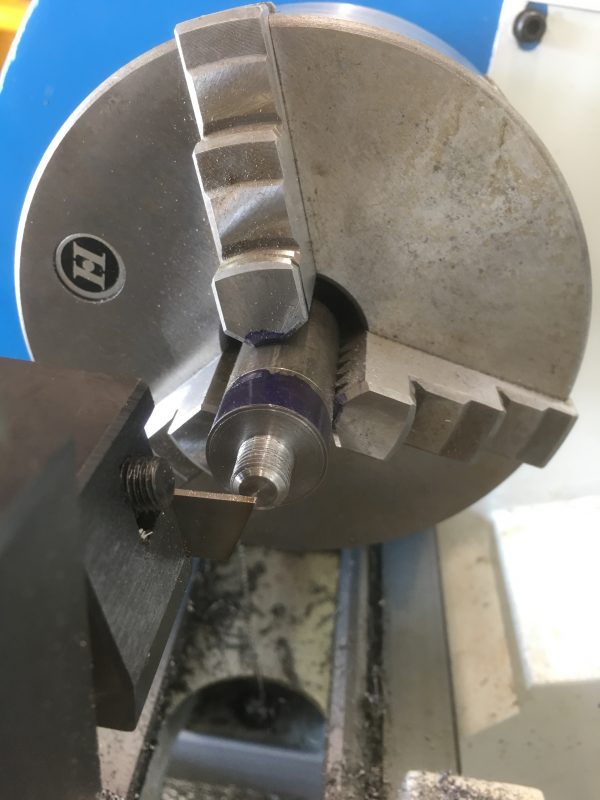
Once the extension is set, verify that the tip of the blade is dead-nuts on center with the tail stock. Then make sure that the tool post is dead-nuts square to the work, using the tail stock ram as a reference (as described last time). With everything tight and square, we can line up for our cut. Scribe a line 500 thou up from the shoulder of the cap. That will be a nice-feeling size.
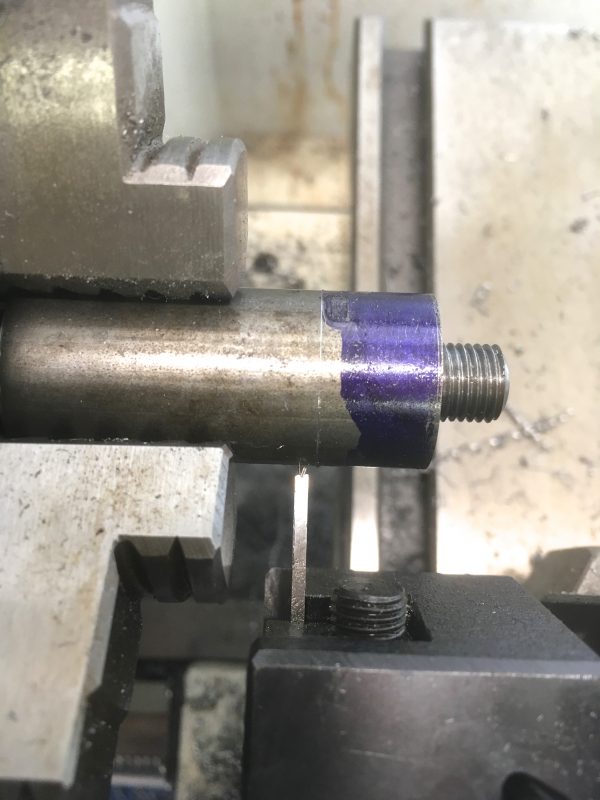
Once you’re lined up, lock the carriage, and apply lots of cutting fluid to the area. As you cut, apply more fluid regularly. The cutter is rubbing on both sides of the material as well as cutting, so the fluid has a lot of work to do. Use a spindle speed a bit lower than you would for turning, and then ease that cutter in! You’ll know it’s working because it will make flat ribbon-like chips that look different than any other type of operation. It will probably also squawk and complain a bit.
A quick safety note- a full face shield is a requirement for this operation. Cut-off blades work really well, but if they get snagged, they can shatter very dramatically. I have done this, and it’s no picnic if all you’re wearing are Home Depot shop glasses. Full. Face. Shield. There, I said it.
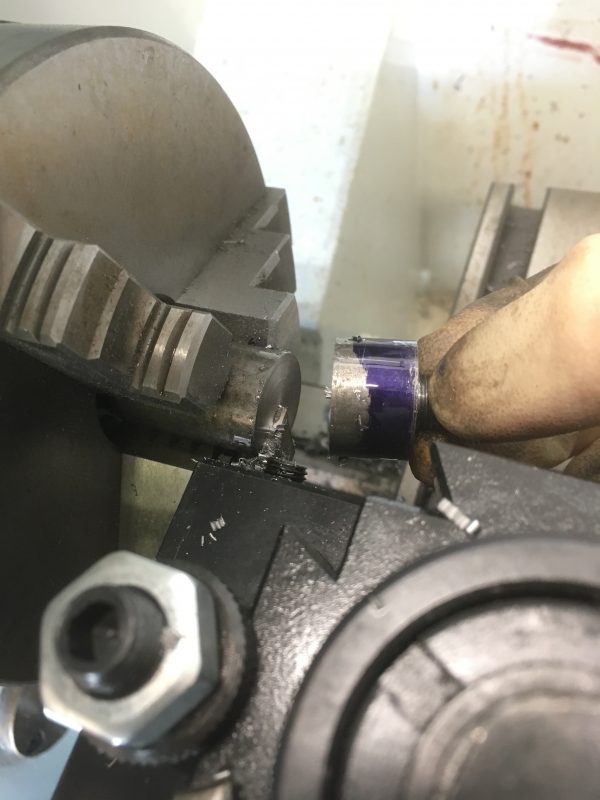
The cutoff blade will leave a little nubbin on the piece in your chuck. They always do, because the material fails before the blade gets all the way in. Face this newly-cut end, and center-drill it. This face is our other mating surface for the cap, so take the time to get a really nice finish here as well.
Now we can drill the hole that forms the interior of the tube. The question is- what size? Well, the opening will be tapped to 3/8″ for our screw-on cap, and any machinist’s handbook tells us the correct drill size for that is a Q. Yes, I said “Q”. Remember when I told you to buy a nice full index of drills? This is why. For reasons I do not understand, machinist drills have multiple competing standards for nomenclature. One of those standards is the “letter” drills. A Q drill is 332 thou, for some reason.
This operation will be an extension of our drilling skills, because we’re going very deep here. Drilling deep means we need to periodically pull the drill out to clear the chips. Reapplying cutting fluid periodically is also wise. You’ll feel when the chips need clearing, but 100-200 thou of travel is a good guideline for each “peck” when using smaller drills like this.
There’s more, though- we actually need to go deeper than the travel on our tailstock. My tailstock ram has 2.5″ of travel on a good day, and we need 3″ of depth. It can be done! Start by setting up to drill normally, and make sure the tail stock is collapsed all the way to maximize distance on the first pass. We’ll go 2″ at first.
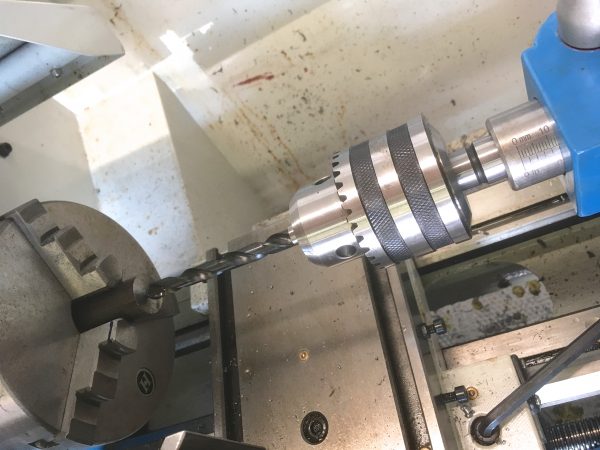
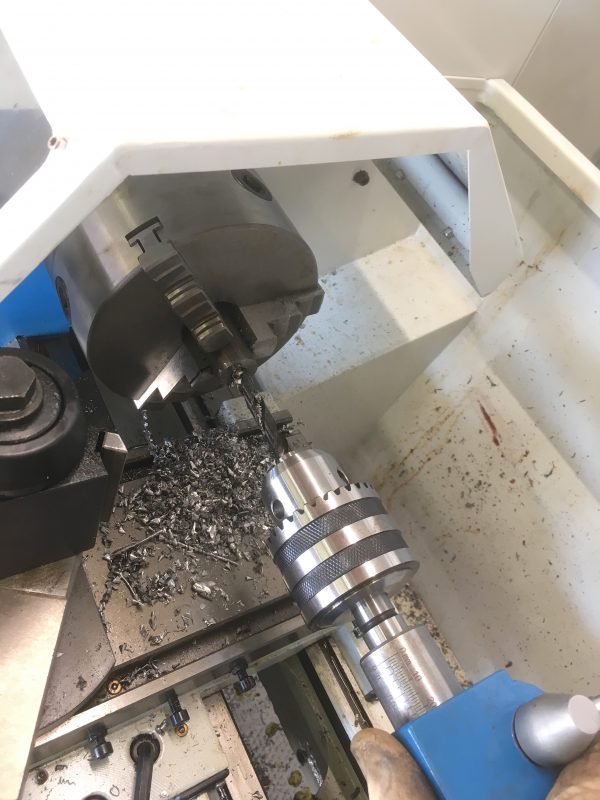
Once the first 2″ is done, collapse the tailstock ram again, and slide the bit all the way into the hole (with the lathe off). With the drill bottomed out, lock the tailstock, start the lathe, and crank the bit in 100 thou. When chips need clearing, shut the lathe off. Then unlock the tailstock, and without touching the tailstock ram, slide the whole tailstock out to clear chips. Then push the tailstock back in, and we’re back to where we were. The tailstock ram still tracks our progress as long as we only slide the tailstock itself outwards between pecks. Turn the lathe back on, and drill another 100 thou. Keep doing this for the final inch we need on our hole. This method isn’t exactly precise, because the act of removing and reseating the tailstock may not get the end of the drill in exactly the same place. Another way to do this is to mark the tailstock’s position on the ways with some blue tape so you can get it back in the same place after clearing chips.
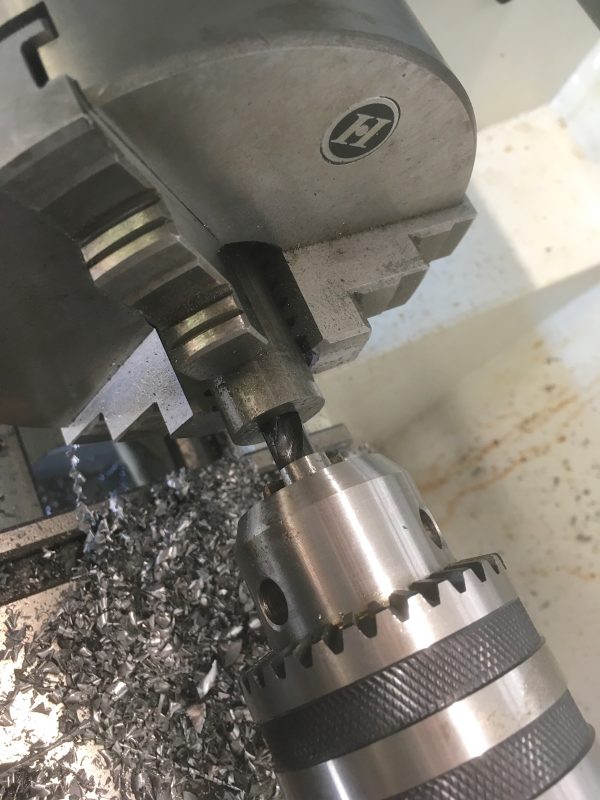
With our deep hole drilled, we can now tap the threads for the cap. The setup for this is very similar to the die wrench operation we did earlier. Make sure you get tap wrenches with the centering dimple in the back. Not all of them have this.
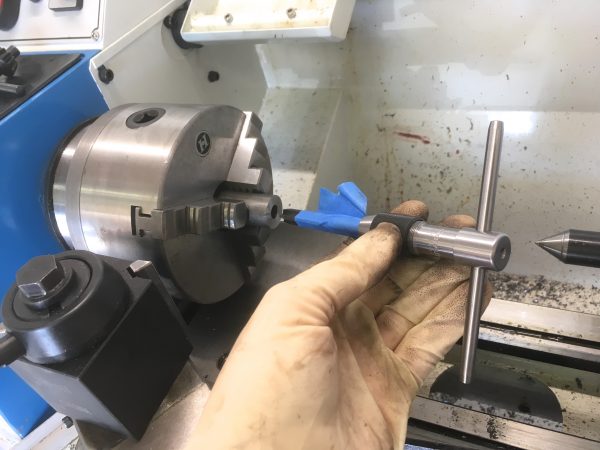
When tapping, make sure to back out regularly to break and clear chips. This is just like doing it freehand. All we’re doing is using the lathe to align everything. Lathes are really good at aligning stuff. It’s kinda their superpower.
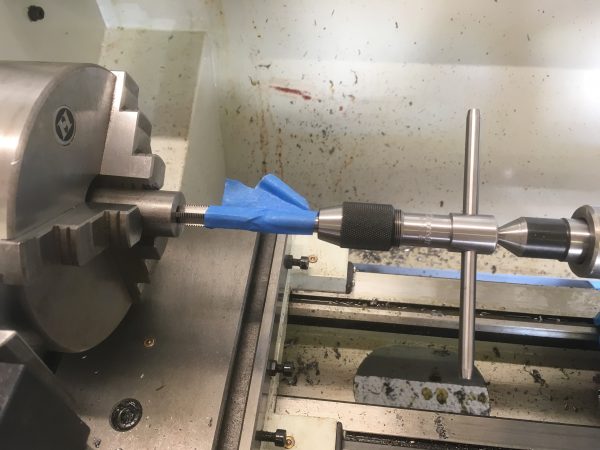
After cutting the threads, run the tap in and out a few times with your fingers to clear all the chips.
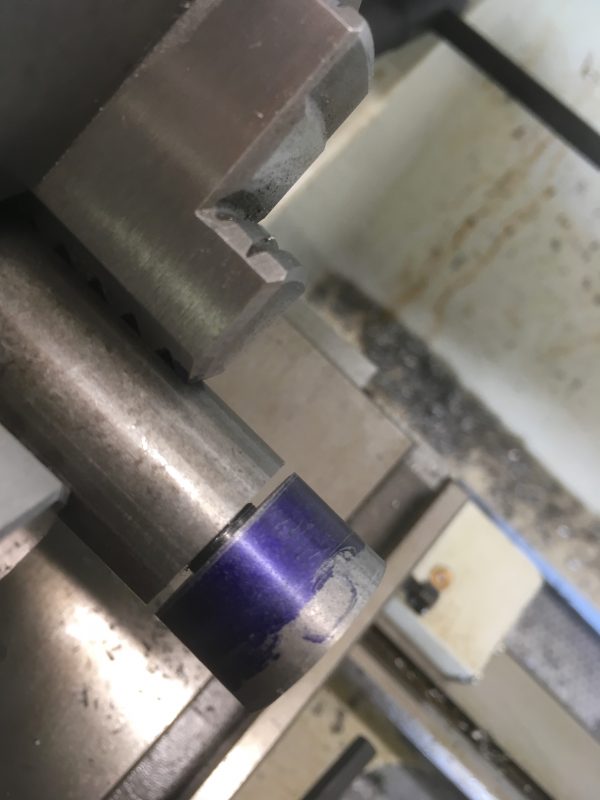
There are two basic methods of making clearance for a shouldered thread like this. The first is undercutting. When turning the stub, you would use a parting tool or similar to make a narrower section right along the shoulder. This eliminates the fillet.
We’re going to do the other method here- clearancing the mating surface with a chamfer. To do so, grab your budget-conscious chamfer tool – AKA, a big-ass drill bit.
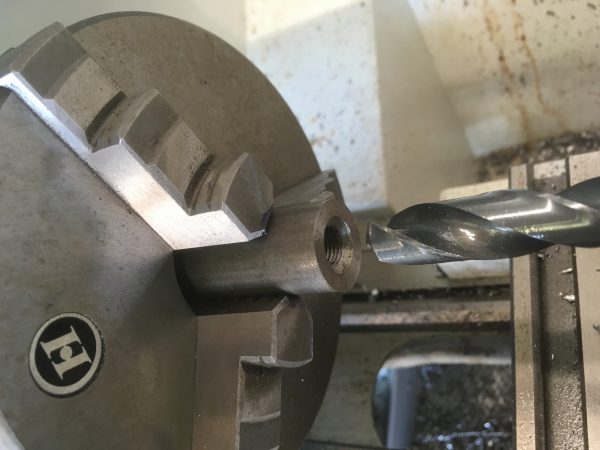
Now you should be able to screw the cap all the way in, resulting in no visible seam.
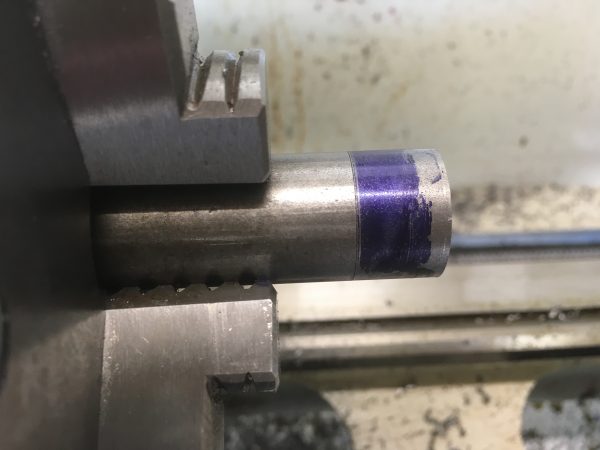
Now for the clever bit of this project- we’re going to turn down the body of the tube and the cap at the same time. This way we guarantee they are exactly the same dimension, and thus our magic effect is maintained. This works because we made a right-hand thread, so the cutting force when turning is clockwise. This acts in the tightening direction on the cap, so it stays put.
Before the next step, center-drill the cap. Not too deep, as we’ll need to face this off later.
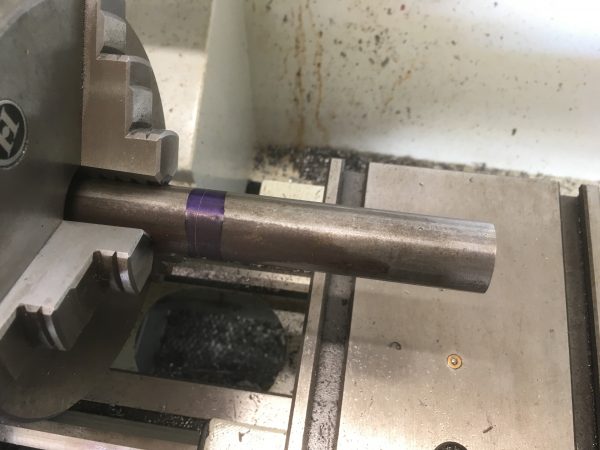
You may recall I said never to work too far away from the chuck. This is definitely too far away from the chuck. How do we turn down this entire tube? By using the tailstock to support the far end. This is why we center-drilled the cap.
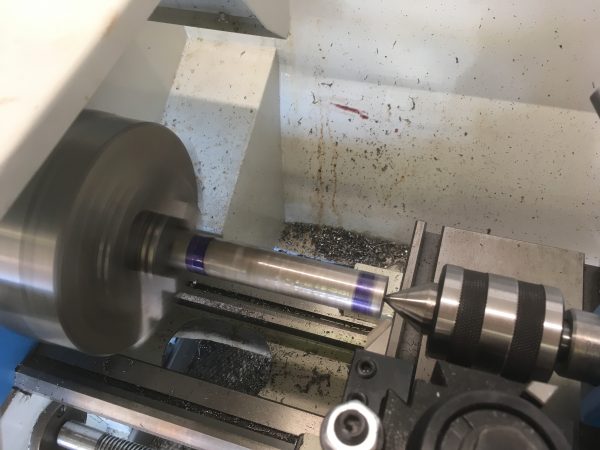
Make sure you leave enough stock sticking out that you can turn a few hundred thou past your layout line. We need room to part this off later.
This turning operation is both long and deep. We need to go down to 500 thou along a 4″ length. This is a good time to learn your power feed if you haven’t tried that yet. Consult your manual for the controls on your machine. Practice with no stock in the machine so you can get a feel for the direction and feed speeds on the gear box. When power feeding, keep your hand on the clutch so you can disengage when you get close to your line, and finish by hand. This eliminates the risk of crashing into a shoulder (or worse, the chuck) under power. Here’s power feed in action:
Note that for a long turning operation, things will get hot. Use cutting fluid on each pass. This fluid will burn off, taking heat with it. This will also make a lot of smoke. I wear a respirator for operations like this, because my lungs need to last me a few years yet.
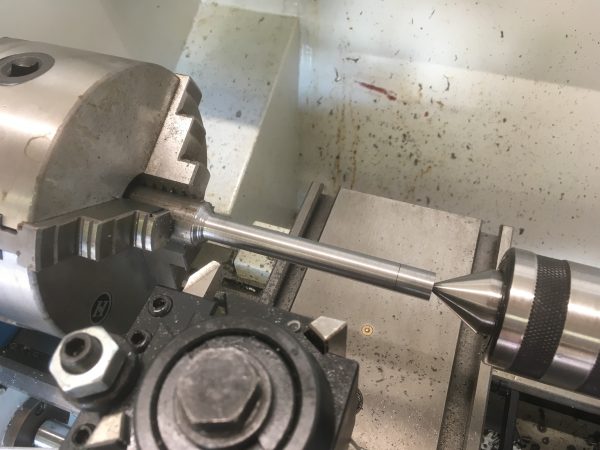
If everything went well, you will not see the dividing line between the cap and the body. In the photo above, you can see it. If this happens to you, we can try to correct it a bit later. For now, know that we did something imprecisely, and that’s why this happened. I’ve made this project three times, and I still don’t nail it every time. Don’t be afraid to throw away parts and remake them. That’s going to happen when learning! Think of it as another opportunity to get better at this.
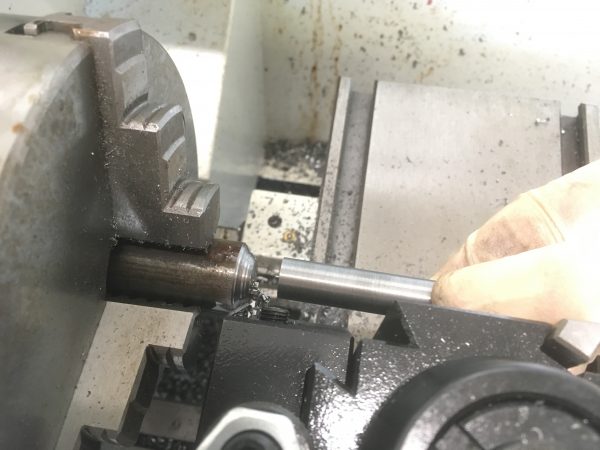
We now need to clean up both ends of the tube and face them down to the proper dimension. However, we don’t want to put the piece in the chuck, because the jaws will damage our nice finish. This is our next new skill- how to chuck finished pieces. The trick is to cut up an old soda can. I recommend washing it first.
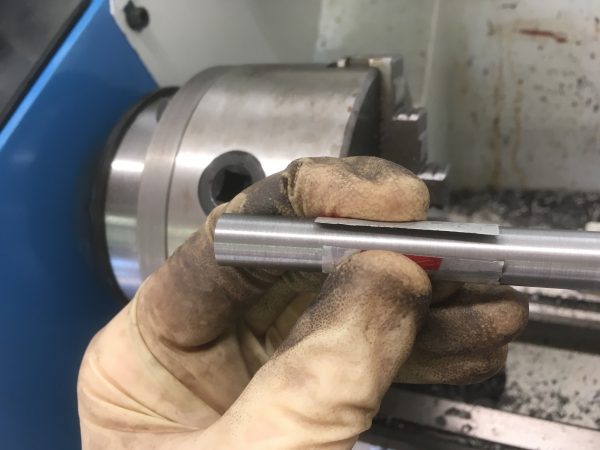
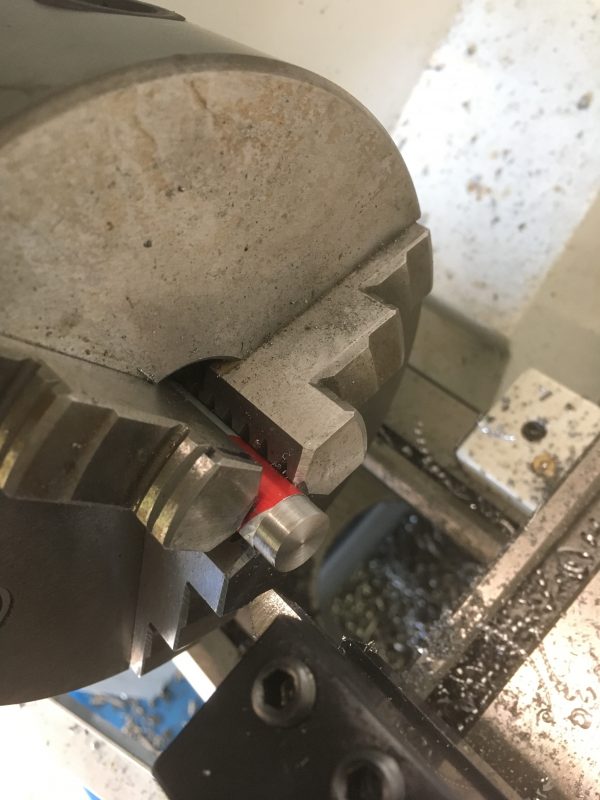
Use this holding technique to face both ends of the tube (with cap and body still screwed together). You’ll need to keep facing off the cap until the dimple we made for the tailstock is gone. One thing to note about facing the cap- clamp it such that the jaws are holding it and the body (through the aluminum, of course). Otherwise the cap will want to spin off when you reach the center of the facing cut.
The last thing you can do is use the edge of the facing tool to break the sharp corners off the top and bottom. Don’t do a full chamfer like we did with the stub on the cap. We’re just removing the sharp edge.
At this point, the piece is done. If you didn’t get the magic no-seam closing effect, you have a few things you can try to fix it:
- Face the open top of the body again. That surface may not be perfect.
- Face the shoulder on the cap again. Chucking the small cap back in the chuck is tricky, but it can be done. Make sure to use the aluminum.
- Undercut the fillet on the cap. If all else fails, you can carefully use the cutoff tool to remove material at the base of the stub, right along the shoulder of the cap. You don’t need to go deep. Just a few thou is enough.
- Make the cap again. Odds are the cap is the problem, because it has the most places for something to go wrong.
If all else fails, make the whole piece again, and try for tighter tolerances on your threads. The fit of the cap won’t be seamless if the tolerances on the threads aren’t close. Try to die-cut the threads with the stub being closer to the nominal diameter than you did before.
Once you’re happy with the tube, you should clean it out. Blow any chips out with compressed air (away from your face, please). You can then spray some cleaner in there (Simple Green works well) to get the oil and grit out.
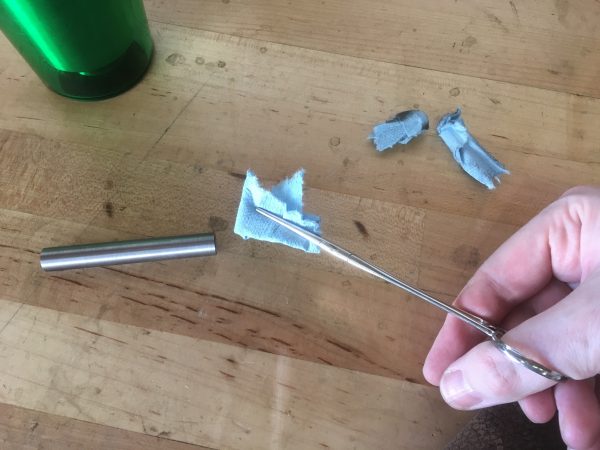
That’s it! I hope you enjoyed this project, and let me know if you try it out. I tried to come up with something interesting and fun to make that would build on our skills from the steel ring. The next project will hopefully expand your skills even further, so stay tuned!
Possible typo: “Allow it to try completely.”
Feel free to delete this.
Thanks! I appreciate people catching typos.
I’m curious as to what sort of oil or lubricant you use that looks reddish on the splash guard?
…
That IS oil right?
Right??
(Counts fingers) Yup, it’s oil.
I use Tap Magic, but the really red mark you might be referring to is a scratch in the paint. The red oxide primer is showing through. The way it was packed in the crate, the splash guard got pretty dinged up.
I really enjoy your the content of your site, writing style , and of course, Sprocket the cat. But please don’t wear gloves when working around rotating machinery like the lathe and grinder – bad things can happen to perfectly good digits! No ties, long sleeves, or long hair (not tied back) either!
I appreciate your thoughts- these are important issues.
If you’re a regular reader, you’ll know I cover safety extensively here. I’ve talked at length about the dangers of gloves, long hair, and long sleeves around machine tools. Latex gloves are considered safe around spinning machinery, because they tear off and can’t pull your hands in. I have personally had this happen with a Dremel- the glove simply vanishes from your hand.
Wearing heavy work gloves with grinders is considered the safer option, because they will protect your hands from any chunks that come off the wheel or the part, and grinders cannot snag. Furthermore, grinders are very hard on fingers when you get a bit too close or the wheel jumps on you. Work gloves are ablative armor for your skin, and an important safety feature for using a grinder.